1. Introduction
 Kemal Enver
There have been incredible advances in the area of computer graphics over the past thirty years. Graphics hardware is ever more powerful, and developer tooling has advanced. Working with Metal gives us access to amazing tooling that allows us to debug and visualise what’s happening under the hood.
The changes that have contributed to the evolution and improvement of graphics APIs have also left a huge gap in accessibility to the technology. It's difficult to know where to start the learning journey for this fascinating area of computing. Although APIs have become more complex, the core mathematical concepts, particularly in the field of linear algebra, will always remain relevant — no matter what tools and APIs you use.
This series of articles will provide a brief overview of where we have come from, where we are now, and how to get going in a pragmatic way so you’re ready to learn more advanced concepts and techniques when you need to.
Over the course of the series, I will explain how to build a 3D renderer in Swift and Metal in a way that makes it simple to understand. Along the way I’ll cover the core principles required to create this renderer, including how to use the Metal API, and the mathematics that drive 3D rendering. I’ll also provide references to further reading for when you’re ready to explore further.
A summary of defunct rendering APIs
My first experience with rendering was with OpenGL while I was studying at university around 2002. I had further exposure to this technology while working at a game studio, and CAD (Computer Aided Design) business.
In the early ’90s the first APIs were emerging that allowed consumer graphics hardware to be programmed. Up to this point only some machines, such as games consoles, had dedicated hardware for graphics—but many applications used the CPU to do the necessary calculations and drawing manually.
OpenGL from the Khronos group was one of these first APIs — technically it was a specification for an API. It was (and still is) a multi-platform, low-level graphics API, originally based on a proprietary API from SGI. By using OpenGL a developer could target any graphics card with an OpenGL driver that conformed to the specification (or even perform software rendering on a CPU). There were other competing APIs emerging around this time such as DirectX that only worked on Microsoft Windows systems (a bit like how Metal is only available on Apple’s platforms). This overview will cover the general capabilities and approaches available to developers in those early days by focusing on OpenGL.
In its infancy OpenGL was built around a state machine model. As a developer you would write code that set states, drew things to the screen, and then reset states. This style of developing was called Immediate Mode and was straightforward to understand.
void drawTriangle() {
  glBegin(GL_TRIANGLES); // Start rendering triangles
    glColor3f(1.0f, 0.0f, 0.0f); // Set the color to red
    glVertex2f(0.0f,1.0f); // Add the first point of the triangle
    glColor3f(0.0f, 1.0f, 0.0f); // Set the color to green
    glVertex2f(1.0f, -0.5f); // Add the second point of the triangle
    glColor3f(0.0f, 0.0f, 1.0f); // Set the color to blue
    glVertex2f(-1.0f, -0.5f); // Add the third point of the triangle
  glEnd(); // State is sent to the GPU, and a color interpolated triangle is rendered to the screen.
}
Drawing a coloured triangle using OpenGL immediate mode. This is easy to understand but very inefficient due to having to call a function for every vertex and its attributes.

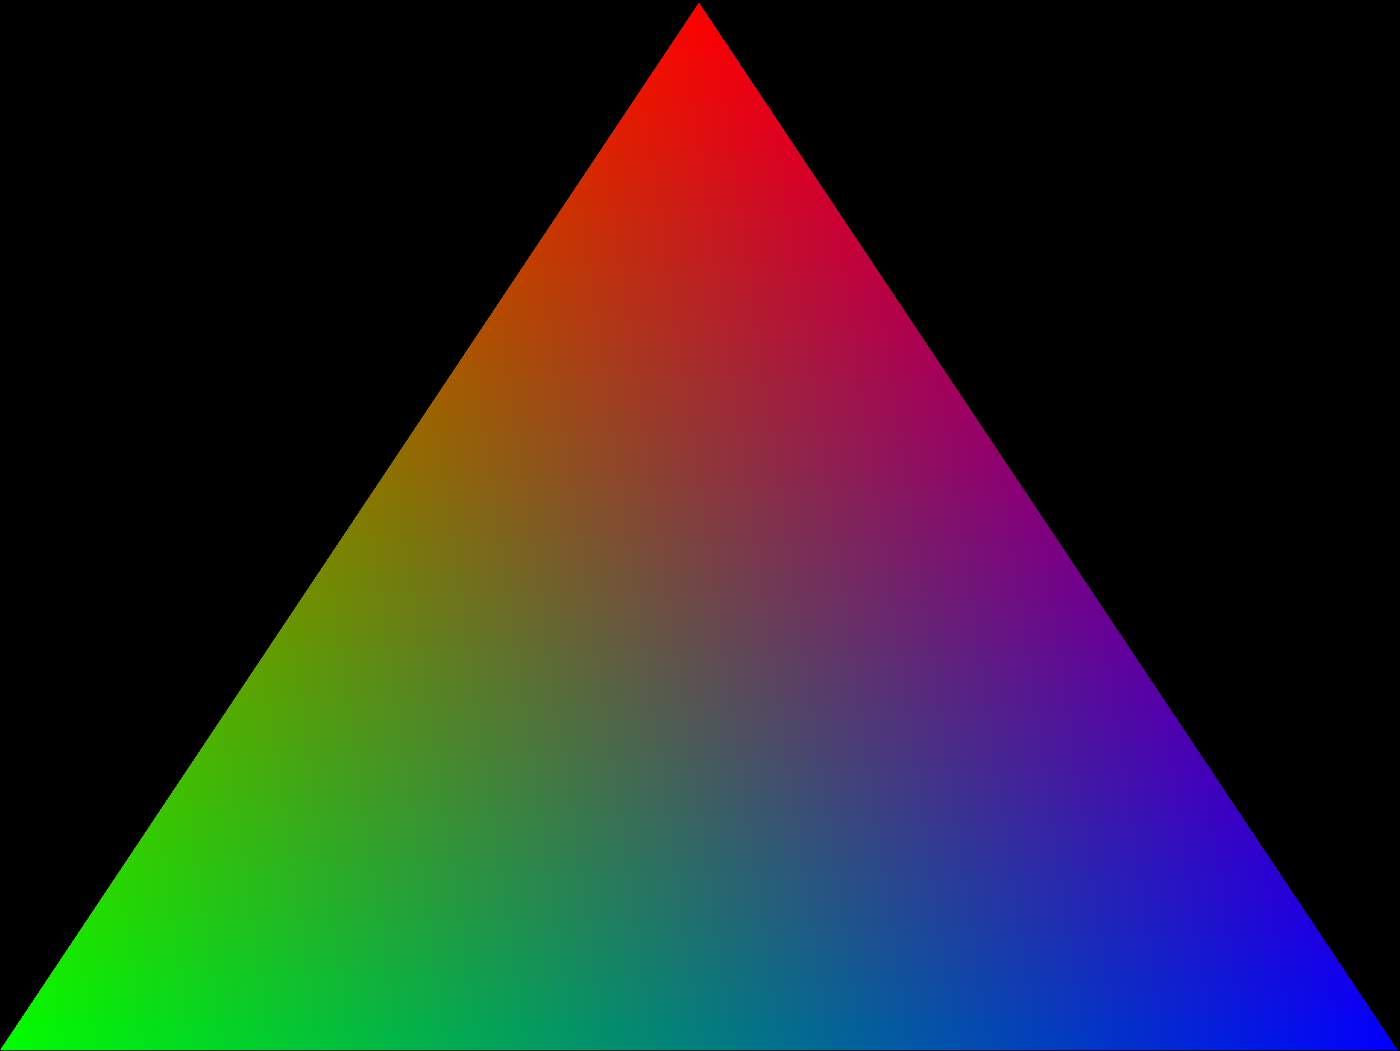
Hello Triangle - The OpenGL code above produces something similar to this. This particular triangle was rendered using Metal on an iPad.
Sending commands to the graphics card in this way is synchronous and repetitive —which has serious consequences on performance. In this environment the hardware is often idle, waiting for the application to set all the required states and send data.
To get around these limitations OpenGL needed to be enhanced. These enhancements were collectively dubbed retained mode. It’s worth noting that retained mode is a collection of APIs rather than an official term. It’s better to think of it as ‘not immediate mode’.
One of the goals of these enhancements was to minimise the number of functions that needed to be called, and to minimise data copying. In immediate mode rendering, every vertex required a function call. For a large 3D model there may be thousands of vertices that need to be looped over, eventually becoming a serious bottleneck. Below is a brief explanation of some things that changed in subsequent OpenGL specifications — don’t worry, you don’t need to understand the details, only that things evolved to solve problems as they arose.
The first enhancement to address bottlenecks was called a vertex attribute array. Instead of calling a function many times for a set of vertices, a pointer was set to a chunk of memory that held all the data. This was an improvement, but still had a drawback —the application code could change the data in the array at any time. This meant OpenGL had to keep its own copy of the data, requiring an expensive operation every draw call.
void drawVertexArray() {
  glEnableClientState(GL_VERTEX_ARRAY);
  glVertexPointer(3, GL_FLOAT, 0, vertices.data());
  glDrawArrays(GL_TRIANGLES, 0, vertices.length());
}
An example of setting a vertex array pointer and drawing the vertices.
The next evolution came with VBOs (Vertex Buffer Objects). These allowed OpenGL to represent changes in data, rather than having to recopy every draw.
There have been more enhancements since, which have further resolved some of the early deficiencies.
Recent versions of OpenGL no longer support immediate mode and every enhancement since the first version has reduced inefficiency by putting more control in the hands of developers. Although a lot of things have been improved, the API has grown more complex, with more boilerplate required. On the positive side many more things can be accomplished, and in far more efficient ways. A modern API like Metal doesn’t carry forward all of the legacy issues that affect older APIs such as OpenGL, and has been designed to work in an efficient way from its inception.
Should you learn Metal?
If you’re interested in this series you’re likely feeling a bit overwhelmed by all of the technology and jargon that surrounds 3D graphics. In the section above I mentioned a bunch of things which may have sounded confusing.
Before you begin, consider whether something as low level as Metal is the right tool for the job.
If you’re interested in creating a game, starting with Metal is a bad idea. You should consider learning a dedicated game engine such as Unreal, Unity, SceneKit, RealityKit (for VR), or Godot. These tools will allow you to render graphics, but will also provide you with other things such as physics engines (to handle collisions), UI components for drawing menus, sound APIs for music and sound effects, networking libraries for multiplayer games, and a multitude of other benefits. The feature set of the renderers in these tools is likely to be many times greater than what an individual could expect to create on their own — especially a beginner.
Given the above, there are still some great reasons to learn how to write your own renderer! If you’re writing something where the graphic style is unique, writing your own renderer will undoubtedly give you more control. If the number of renderer features you need is fairly small, you can feasibly build your own — adding more features as required. By doing this you have the entire world’s worth of literature and research to fall back on and take advantage of.
Writing your own renderer is a great learning experience. The Metal API and others like it such as Vulkan and DirectX bring you close to the hardware and teach you a lot about how things work. By persisting you’ll also become intimately familiar with geometry and linear algebra. Even if you decide to use a game engine such as Unity, having an understanding of the rendering process will serve you well.
What’s next?
This series will consist of about 20 posts over the course of a year. My aim is to assume no knowledge of 3D graphics and to make everything as clear as I can. This technology starts with a steep learning curve — but by writing your own renderer and typing out the code (possibly multiple times), the material will stick and you will make progress.
After each post I’ll encourage you to read any references and play around with what has been covered.
In the next post I’ll be walking through how to set up a Mac environment to begin developing your renderer. At the end of that post you’ll understand the render process at a high level, and where you as a developer fit in.
Follow me on Twitter for future updates: @kemalenver
Glossary
Below are some brief descriptions of the terms used in the article.
- Vertex plural vertices.
A point in space. i.e. (x,y) or (x,y,z). 3D models are made up of many vertices.
Further Reading
Apple’s homepage for information regarding Metal.
https://developer.apple.com/metal/Khronos Group legacy OpenGL information.
https://www.khronos.org/opengl/wiki/Legacy_OpenGLUnity Game Engine.
https://unity.com/Unreal Game Engine.
https://www.unrealengine.com/Godot Game Engine.
https://godotengine.org/SceneKit — Apple’s built in game engine that uses Metal. https://developer.apple.com/scenekit/
Subscribe to my newsletter
Read articles from Kemal Enver directly inside your inbox. Subscribe to the newsletter, and don't miss out.
Written by
