How to deploy a high-availability web application us AWS CloudFormation
 Oluwatobi Solomon
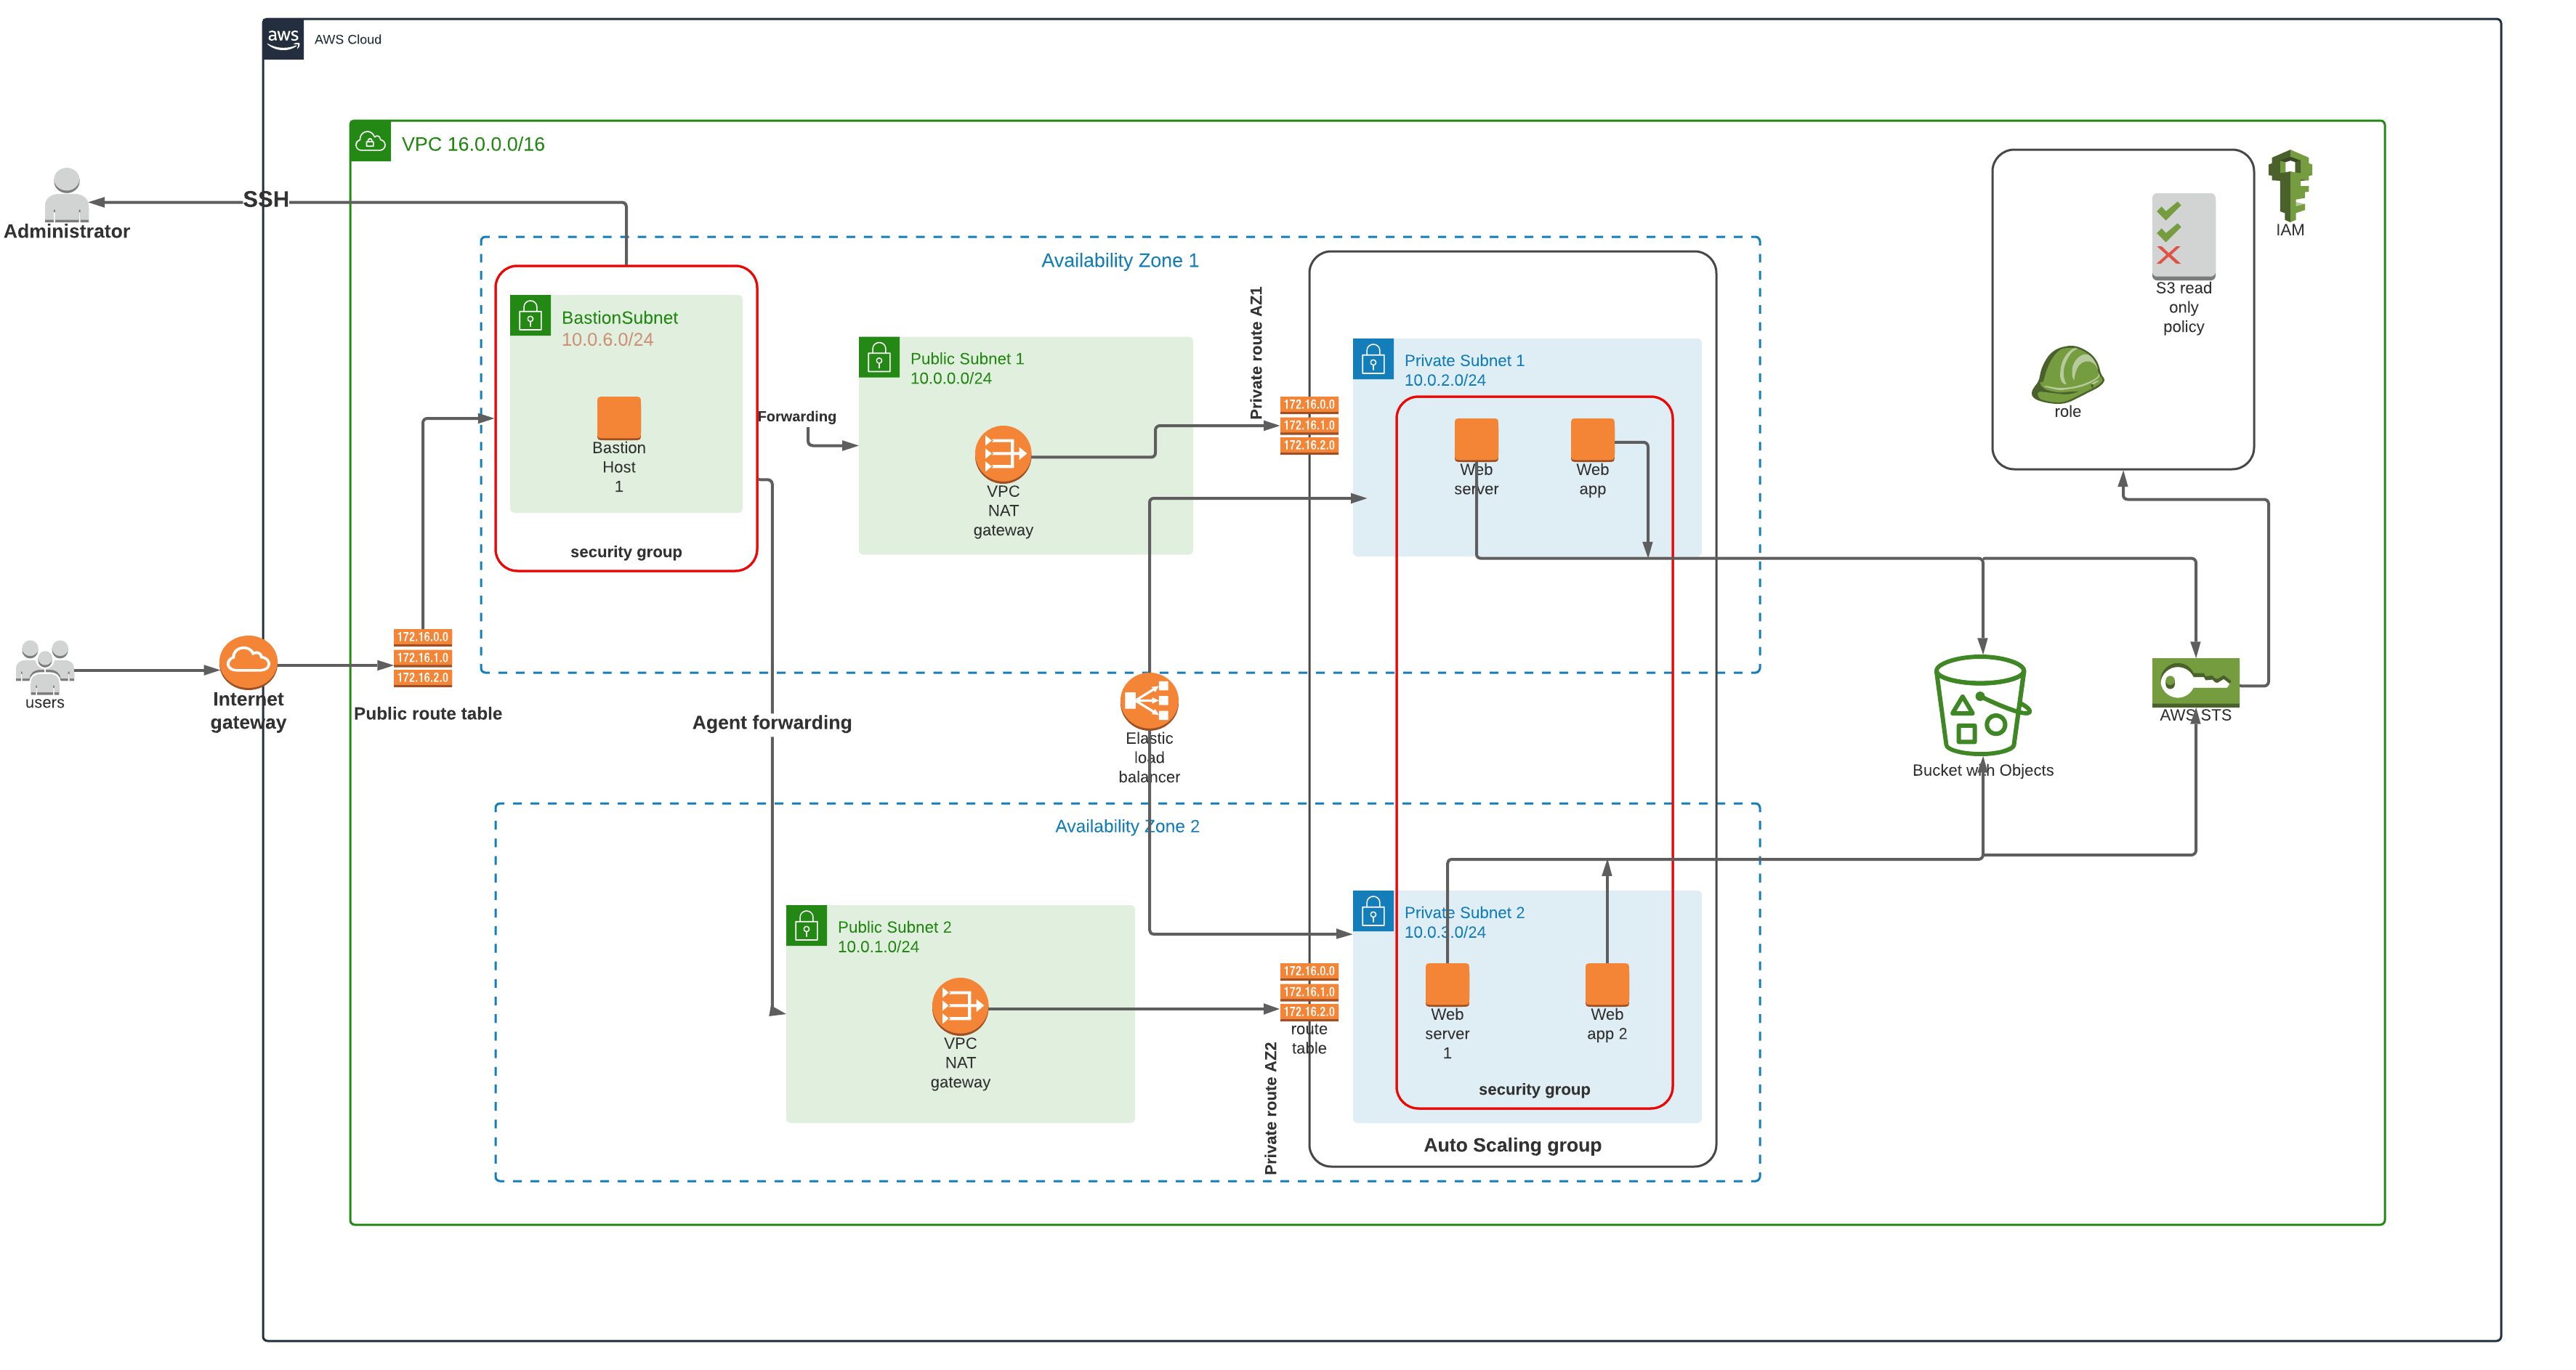
So before we start, you may be asking what is cloudformation, why cloudformation, and what are other tools similar to cloudformation. Don't stress it as all will be covered in this article.
What is CloudFormation
- AWS CloudFormation is a service that helps you model and set up your AWS resources so that you can spend less time managing those resources and more time focusing on your applications that run in AWS. So why cloudormation? AWS CloudFormation can quickly validate values for AWS-specific parameter types before creating your stack. Also, if you use the CloudFormation console, CloudFormation shows a drop-down list of valid values, so you don't have to look up or memorize the correct VPC IDs or key pair names. Alternative to cloudformation includes Ansible, chef, terraform, and any other infrastructure as code tools.
Requirement for High-Availability deployment
- AWS console account
- AWS CLI
- Text Editor e.g. Vscode.
Step 1:
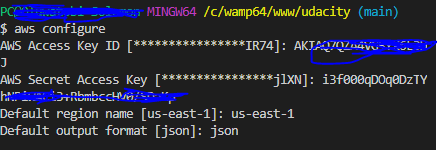
- Configure AWS on your text editor (Vscode) with the secret and access created under the IAM user section. enter the command AWS configure and supply the keys, region, and, file-type as shown below.
$ aws configure
AWS Access Key ID [****************IR74]: Enter you access key
AWS Secret Access Key [****************jlXN]: Enter your secret key
Default region name [us-east-1]: Enter you region
Default output format [json]: json
Step 2
- Identify your network resources (VPC, internet gateway, elastic IP, route table, public and private subnet, nat gateway and others)
- declare the parameters in a newnet.json file as shown below
- declare your resources in a newnet1.yml file as shown below
[
  {
      "ParameterKey": "EnvironmentName",
      "ParameterValue": "UdagramProjects"
  },
    {
      "ParameterKey": "VpcCIDR",
      "ParameterValue": "10.0.0.0/16"
  },
    {
      "ParameterKey": "PublicSubnet1CIDR",
      "ParameterValue": "10.0.0.0/24"
  },
  {
      "ParameterKey": "PublicSubnet2CIDR",
      "ParameterValue": "10.0.1.0/24"
  },
  {
      "ParameterKey": "PrivateSubnet1CIDR",
      "ParameterValue": "10.0.2.0/24"
  },
  {
      "ParameterKey": "PrivateSubnet2CIDR",
      "ParameterValue": "10.0.3.0/24"
  }
]
Description: |
  Udacity Project 2 - Network stack

Parameters:
  EnvironmentName:
    Description: An environment name that will be prefixed to resource names
    Type: String
    Default: xxx
  VpcCIDR:
    Description: Please enter the IP Range (CIDR notation) for this VPC
    Type: String
    Default: 10.0.0.0/16
  PublicSubnet1CIDR:
    Description: Please enter the IP range (CIDR notation) for the public subnet in AZ1
    Type: String
    Default: 10.0.0.0/24
  PublicSubnet2CIDR:
    Description: Please enter the IP range (CIDR notation) for the public subnet in AZ1
    Type: String
    Default: 10.0.1.0/24
  PrivateSubnet1CIDR:
    Description: Please enter the IP range (CIDR notation) for the public subnet in AZ1
    Type: String
    Default: 10.0.2.0/24
  PrivateSubnet2CIDR:
    Description: Please enter the IP range (CIDR notation) for the public subnet in AZ1
    Type: String
    Default: 10.0.3.0/24

Resources:
  # NETWORK RESOURCES
  VPC:
    Type: AWS::EC2::VPC
    Properties:
      CidrBlock: !Ref VpcCIDR
      EnableDnsHostnames: true
      Tags:
        - Key: Name
          Value: !Ref EnvironmentName
  InternetGateway:
    Type: AWS::EC2::InternetGateway
    Properties:
      Tags:
        - Key: Name
          Value: !Ref EnvironmentName
  InternetGatewayAttachment:
    Type: AWS::EC2::VPCGatewayAttachment
    Properties:
      InternetGatewayId: !Ref InternetGateway
      VpcId: !Ref VPC
  PrivateSubnet1:
    Type: AWS::EC2::Subnet
    Properties:
      VpcId: !Ref VPC
      AvailabilityZone: !Select [0, !GetAZs '']
      CidrBlock: !Ref PrivateSubnet1CIDR
      MapPublicIpOnLaunch: false
      Tags:
        - Key: Name
          Value: !Sub ${EnvironmentName} Private Subnet (AZ1)
  PrivateSubnet2:
    Type: AWS::EC2::Subnet
    Properties:
      VpcId: !Ref VPC
      AvailabilityZone: !Select [1, !GetAZs '']
      CidrBlock: !Ref PrivateSubnet2CIDR
      MapPublicIpOnLaunch: false
      Tags:
        - Key: Name
          Value: !Sub ${EnvironmentName} Private Subnet (AZ2)
  PublicSubnet1:
    Type: AWS::EC2::Subnet
    Properties:
      VpcId: !Ref VPC
      AvailabilityZone: !Select [0, !GetAZs '']
      CidrBlock: !Ref PublicSubnet1CIDR
      MapPublicIpOnLaunch: true
      Tags:
        - Key: Name
          Value: !Sub ${EnvironmentName} Public Subnet (AZ1)
  PublicSubnet2:
    Type: AWS::EC2::Subnet
    Properties:
      VpcId: !Ref VPC
      AvailabilityZone: !Select [1, !GetAZs '']
      CidrBlock: !Ref PublicSubnet2CIDR
      MapPublicIpOnLaunch: true
      Tags:
        - Key: Name
          Value: !Sub ${EnvironmentName} Public Subnet (AZ2)
  NatGateway1EIP:
    Type: AWS::EC2::EIP
    DependsOn: InternetGatewayAttachment
    Properties:
      Domain: vpc
  NatGateway2EIP:
    Type: AWS::EC2::EIP
    DependsOn: InternetGatewayAttachment
    Properties:
      Domain: vpc
  NatGateway1:
    Type: AWS::EC2::NatGateway
    Properties:
      AllocationId: !GetAtt NatGateway1EIP.AllocationId
      SubnetId: !Ref PublicSubnet1
  NatGateway2:
    Type: AWS::EC2::NatGateway
    Properties:
      AllocationId: !GetAtt NatGateway2EIP.AllocationId
      SubnetId: !Ref PublicSubnet2
  PublicRouteTable:
    Type: AWS::EC2::RouteTable
    Properties:
      VpcId: !Ref VPC
      Tags:
        - Key: Name
          Value: !Sub ${EnvironmentName} Public Routes
  PrivateRouteTable1:
    Type: AWS::EC2::RouteTable
    Properties:
      VpcId: !Ref VPC
      Tags:
        - Key: Name
          Value: !Sub ${EnvironmentName} Public Route (AZ1)
  PrivateRouteTable2:
    Type: AWS::EC2::RouteTable
    Properties:
      VpcId: !Ref VPC
      Tags:
        - Key: Name
          Value: !Sub ${EnvironmentName} Private Route (AZ2)
  DefaultPublicRoute:
    Type: AWS::EC2::Route
    DependsOn: InternetGatewayAttachment
    Properties:
      RouteTableId: !Ref PublicRouteTable
      DestinationCidrBlock: 0.0.0.0/0
      GatewayId: !Ref InternetGateway
  DefaultPrivateRoute1:
    Type: AWS::EC2::Route
    Properties:
      RouteTableId: !Ref PrivateRouteTable1
      DestinationCidrBlock: 0.0.0.0/0
      NatGatewayId: !Ref NatGateway1
  DefaultPrivateRoute2:
    Type: AWS::EC2::Route
    Properties:
      RouteTableId: !Ref PrivateRouteTable2
      DestinationCidrBlock: 0.0.0.0/0
      NatGatewayId: !Ref NatGateway2
  PublicSubnet1RouteTableAssociation:
    Type: AWS::EC2::SubnetRouteTableAssociation
    Properties:
      RouteTableId: !Ref PublicRouteTable
      SubnetId: !Ref PublicSubnet1
  PublicSubnet2RouteTableAssociation:
    Type: AWS::EC2::SubnetRouteTableAssociation
    Properties:
      RouteTableId: !Ref PublicRouteTable
      SubnetId: !Ref PublicSubnet2
  PrivateSubnet1RouteTableAssociation:
    Type: AWS::EC2::SubnetRouteTableAssociation
    Properties:
      RouteTableId: !Ref PrivateRouteTable1
      SubnetId: !Ref PrivateSubnet1
  PrivateSubnet2RouteTableAssociation:
    Type: AWS::EC2::SubnetRouteTableAssociation
    Properties:
      RouteTableId: !Ref PrivateRouteTable2
      SubnetId: !Ref PrivateSubnet2

Outputs:
  VPC:
    Description: A reference to the created VPC
    Value: !Ref VPC
    Export:
      Name: !Sub ${EnvironmentName}-VPCID
  PublicSubnets:
    Description: A list of all public subnets
    Value: !Join [',', [!Ref PublicSubnet1, !Ref PublicSubnet2]]
    Export:
      Name: !Sub ${EnvironmentName}-PUB-NETS
  PrivateSubnets:
    Description: A list of all public subnets
    Value: !Join [',', [!Ref PrivateSubnet1, !Ref PrivateSubnet2]]
    Export:
      Name: !Sub ${EnvironmentName}-PRIV-NETS
  VPCPublicRouteTable:
    Description: Public Routing
    Value: !Ref PublicRouteTable
    Export:
      Name: !Sub ${EnvironmentName}-PUB-RT
  VPCPrivateRouteTable1:
    Description: Private Routing AZ1
    Value: !Ref PrivateRouteTable1
    Export:
      Name: !Sub ${EnvironmentName}-PRI1-RT
  VPCPrivateRouteTable2:
    Description: Private Routing AZ2
    Value: !Ref PrivateRouteTable2
    Export:
      Name: !Sub ${EnvironmentName}-PRI2-RT
  PublicSubnet1:
    Description: A ref to the public subnet in AZ1
    Value: !Ref PublicSubnet1
    Export:
      Name: !Sub ${EnvironmentName}-PUB1-SN
  BastionSubnet:
    Description: A ref to the bastion subnet in AZ1
    Value: !Ref PublicSubnet1
    Export:
      Name: !Sub ${EnvironmentName}-BAST-SN
  PublicSubnet2:
    Description: A ref to the public subnet in AZ2
    Value: !Ref PublicSubnet2
    Export:
      Name: !Sub ${EnvironmentName}-PUB2-SN
  PrivateSubnet1:
    Description: A ref to the private subnet in AZ1
    Value: !Ref PrivateSubnet1
    Export:
      Name: !Sub ${EnvironmentName}-PRI1-SN
  PrivateSubnet2:
    Description: A ref to the private subnet in AZ2
    Value: !Ref PrivateSubnet2
    Export:
      Name: !Sub ${EnvironmentName}-PRI2-SN
Copy the above resources code into the newnet1.yml file and save.
Step 3:
- create two shell files, create.sh, and update.sh respectively. The is to further automate the running of our cloudformation scripts by just calling the shell document to run the task
- Copy the code below in create.sh file and save.
aws cloudformation create-stack --stack-name $1 --template-body file://$2 --parameters file://$3 --capabilities "CAPABILITY_IAM" "CAPABILITY_NAMED_IAM" --region=us-east-1 - Copy the code below in update.sh file and save.
aws cloudformation update-stack --stack-name $1 --template-body file://$2 --parameters file://$3 --capabilities "CAPABILITY_IAM" "CAPABILITY_NAMED_IAM" --region=us-east-1 - Open your terminal and change the directory (cd) to your scripts directory before running the code below to avoid a not found error.
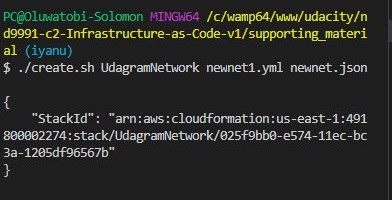
if it executes correctly it displays the stack ID and auto-create on the cloudfromation GUI and simultaneously creates all the network resources declared in the newnet1.yml file./create.sh UdagramNetwork newnet1.yml newnet.json
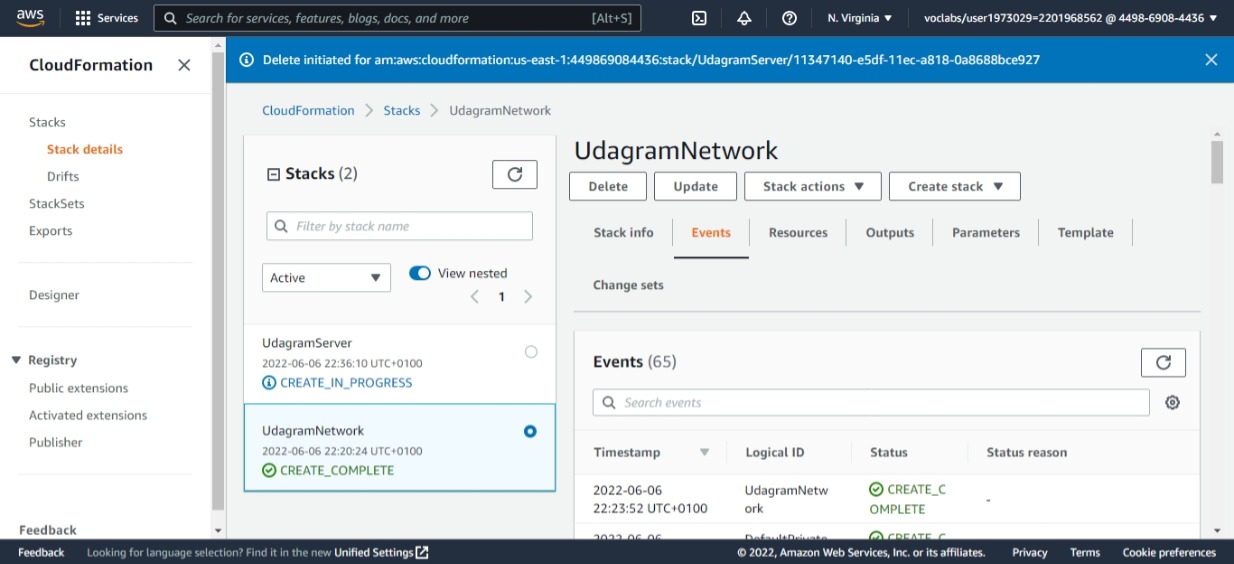
Once this is successful, your network resources as shown below should now be available on your AWS portal
 This shows an overview of the network infrastructure
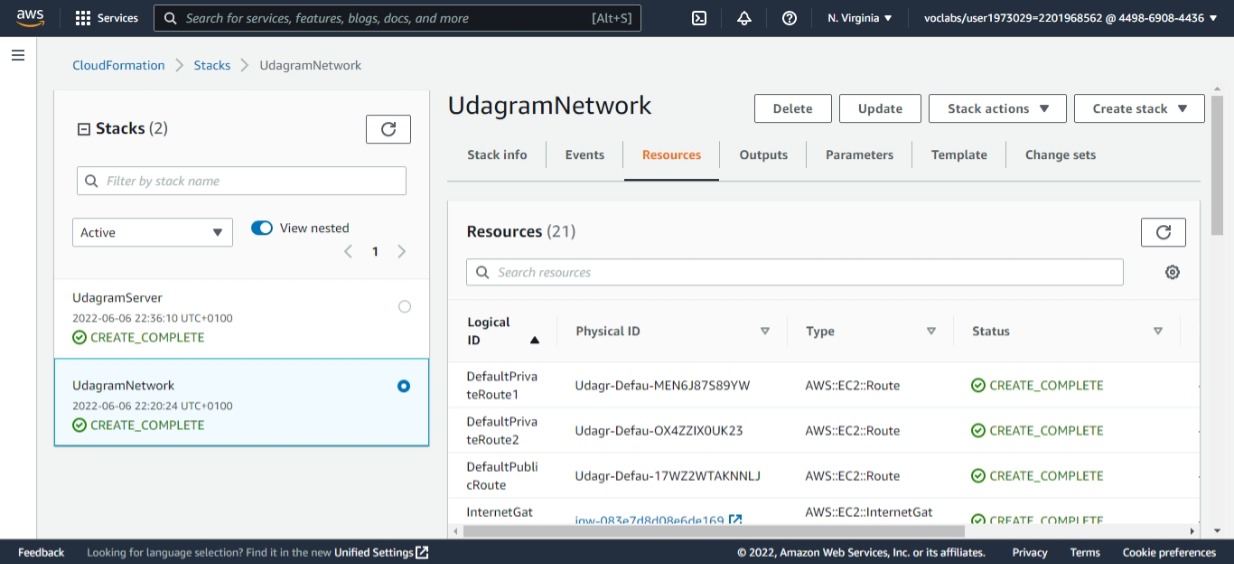 This shows the network resources provisioned (21 Resources)
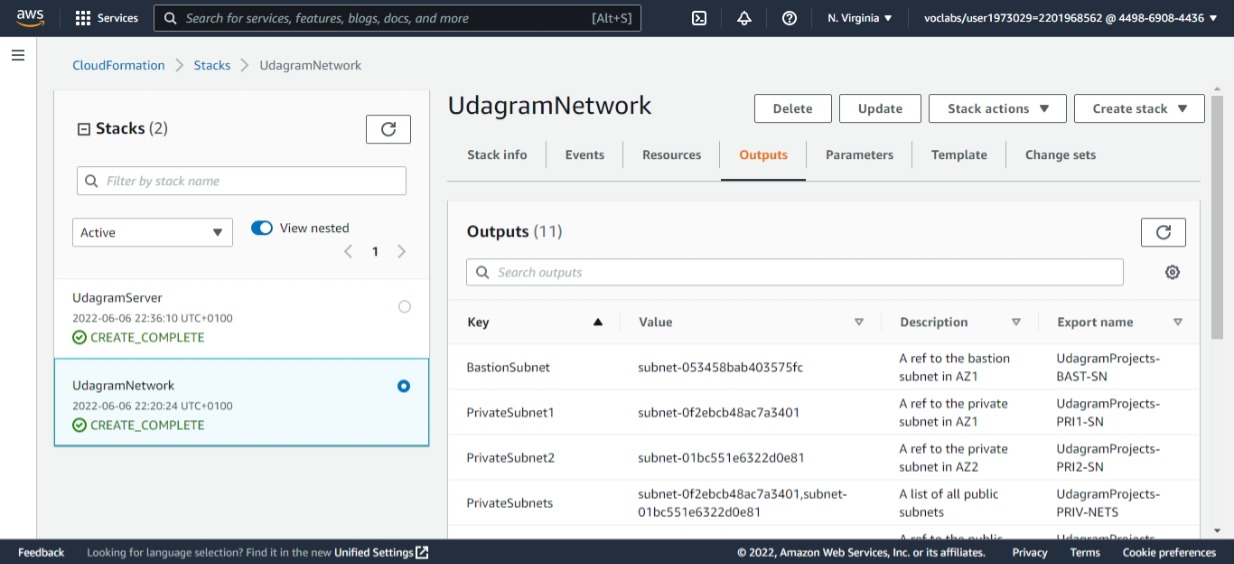 This shows the output of the network resources provisioned
Step 5 Now let us created a bucket for our website and upload the zip file of our high-end app (udagram) to our bucket
- firstly, let's create a bucket with the name
aws s3 mb s3://udagram-0676982224131 --region "us-east-1"- aws – Command to invoke AWS Client
- S3 – Denotes the service where the operation to be performed
- mb – Make bucket command to denote the make bucket operation
- S3://udagram-0676982224131– S3 URI, desired bucket name to be created
- region – keyword to specify on which region the bucket needs to be created us-east-1 – the region name
-Now that our udagram-0676982224131 bucket has been created, let us upload the zip file of our web app to our bucket
aws s3 cp --recursive c:/wamp64/udacity/src.zip s3://udagram-0676982224131/ --region "us-east-1"
Recursive means it will copy the contents of the directories and if the source directory has the subdirectories, then it will be copied too.
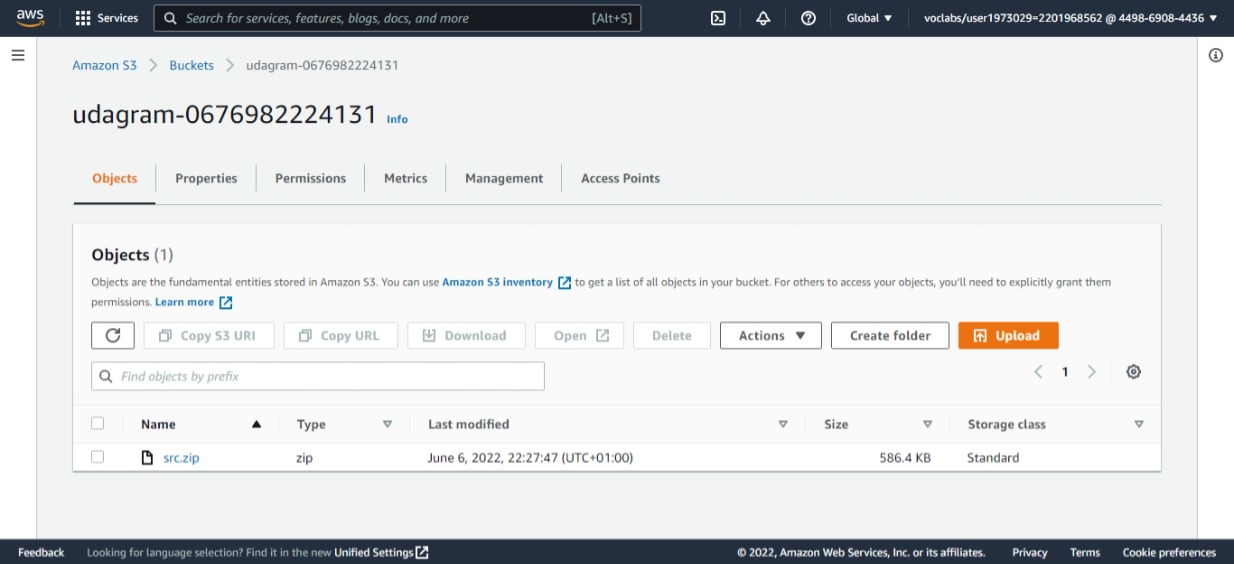 Web file copied successfully
Step 6
- Identify your server resources (load-balancer, target groups, bastion server, EC2 instances, s3 bucket, load-balancer listener, and others)
- declare the parameters in a newser.json file as shown below
declare your resources in a newser1.yml file as shown below
[
  {
      "ParameterKey": "EnvironmentName",
      "ParameterValue": "UdagramProjects"
  },

    {
      "ParameterKey": "AMIToUse",
      "ParameterValue": "ami-005de95e8ff495156"
  }
]
Copy the above parameters into the newser.json file and save.
Description: |
  Oluwatobi Solomon Udacity Project 2 | 2022

Parameters:
  #Parameters needed for Udagram project
  EnvironmentName:
    Description: An environment name that will be prefixed to resource names
    Type: String
    Default: xxx
  # S3BucketName:
  #   Description: >
  #     A globally unique S3 bucket name.
  #     Please upload the src.zip to the bucket after creating this stack.
  #   Type: String
  #   Default: udagram-0676982224131
  # KeyPair:
  #   Description: The keypair to use for your instances
  #   Type: String
  #   Default: keypair
  AMIToUse:
    Description: The AMI to use for your instances (I am working in us-west-2)
    Type: String
    Default: ami-005de95e8ff495156

Resources:
  # SERVER RESOURCES
  LoadBalancerSecGroups:
    Type: AWS::EC2::SecurityGroup
    Properties:
      GroupDescription: Allow http traffic to and from load balancer
      VpcId:
        Fn::ImportValue: !Sub '${EnvironmentName}-VPCID'
      SecurityGroupIngress:
        - IpProtocol: tcp
          FromPort: 80
          ToPort: 80
          CidrIp: 0.0.0.0/0
      SecurityGroupEgress:
        - IpProtocol: tcp
          FromPort: 80
          ToPort: 80
          CidrIp: 0.0.0.0/0
  WebServerSecGroups:
    Type: AWS::EC2::SecurityGroup
    Properties:
      GroupDescription: Allow http and ssh to our load balancer
      VpcId:
        Fn::ImportValue: !Sub '${EnvironmentName}-VPCID'
      SecurityGroupIngress:
        - IpProtocol: tcp
          FromPort: 80
          ToPort: 80
          CidrIp: 0.0.0.0/0
        - IpProtocol: tcp
          FromPort: 22
          ToPort: 22
          CidrIp: 0.0.0.0/0 # change to your IP later
      SecurityGroupEgress:
        - IpProtocol: tcp
          FromPort: 0
          ToPort: 65535
          CidrIp: 0.0.0.0/0
  # S3Buckets:
  #   Type: AWS::S3::Bucket
  #   Properties:
  #     AccessControl: PublicRead
  #     BucketName: !Ref S3BucketName
  #     MetricsConfigurations:
  #       - Id: EntireBucket
  #     WebsiteConfiguration:
  #       IndexDocument: index.html
  #       ErrorDocument: error.html
  WebAppLaunchConfigs:
    Type: AWS::AutoScaling::LaunchConfiguration
    Properties:
      UserData:
        Fn::Base64: !Sub |
          #!/bin/bash
          apt-get update -y
          apt-get install unzip awscli -y
          apt-get install apache2 -y
          systemctl start apache2.service
          cd /var/www/html
          aws s3 cp s3://udagram-0676982224131/src.zip .
          unzip -o src.zip
      ImageId: !Ref AMIToUse
     # KeyName: !Ref KeyPair
      IamInstanceProfile: !Ref ProfileWithRolesForOurApps
      SecurityGroups:
        - Ref: WebServerSecGroups
      InstanceType: t3.medium
      BlockDeviceMappings:
        - DeviceName: '/dev/sdk'
          Ebs:
            VolumeSize: '10'
  WebAppGroups:
    Type: AWS::AutoScaling::AutoScalingGroup
    Properties:
      VPCZoneIdentifier:
        - Fn::ImportValue: !Sub '${EnvironmentName}-PRIV-NETS'
      LaunchConfigurationName:
        Ref: WebAppLaunchConfigs
      MinSize: '4'
      MaxSize: '5'
      TargetGroupARNs:
        - Ref: WebAppTargetGroups
  WebAppTargetGroups:
    Type: AWS::ElasticLoadBalancingV2::TargetGroup
    Properties:
      HealthCheckIntervalSeconds: 10
      HealthCheckPath: /
      HealthCheckProtocol: HTTP
      HealthCheckTimeoutSeconds: 8
      HealthyThresholdCount: 2
      Port: 80
      Protocol: HTTP
      UnhealthyThresholdCount: 5
      VpcId:
        Fn::ImportValue: !Sub '${EnvironmentName}-VPCID'
  WebAppLBs:
    Type: AWS::ElasticLoadBalancingV2::LoadBalancer
    Properties:
      SecurityGroups:
        - Ref: LoadBalancerSecGroups
      Subnets:
        - Fn::ImportValue: !Sub '${EnvironmentName}-PUB1-SN'
        - Fn::ImportValue: !Sub '${EnvironmentName}-PUB2-SN'
  Listeners:
    Type: AWS::ElasticLoadBalancingV2::Listener
    Properties:
      DefaultActions:
        - Type: forward
          TargetGroupArn:
            Ref: WebAppTargetGroups
      LoadBalancerArn:
        Ref: WebAppLBs
      Port: 80
      Protocol: HTTP
  ALBListenerRules:
    Type: AWS::ElasticLoadBalancingV2::ListenerRule
    Properties:
      Actions:
        - Type: forward
          TargetGroupArn: !Ref 'WebAppTargetGroups'
      Conditions:
        - Field: path-pattern
          Values: [/]
      ListenerArn: !Ref 'Listeners'
      Priority: 1
  BastionServers:
    Type: AWS::EC2::Instance
    Properties:
      ImageId: !Ref AMIToUse
    #  KeyName: !Ref KeyPair
      InstanceType: t3.medium
      Tags:
        - Key: Name
          Value: Bastion Server
      NetworkInterfaces:
        - AssociatePublicIpAddress: true
          DeviceIndex: 0
          GroupSet:
            - Ref: WebServerSecGroups
          SubnetId:
            Fn::ImportValue:
              Fn::Sub: '${EnvironmentName}-BAST-SN'
      UserData:
        Fn::Base64: |
          #!/bin/bash
          apt-get update -y
          apt-get install unzip awscli -y
          apt-get install apache2 -y
          systemctl start apache2.service
  S3ReadOnlyEC2s:
    Type: AWS::IAM::Role
    Properties:
      RoleName: !Sub ${EnvironmentName}-Role
      AssumeRolePolicyDocument:
        Version: '2012-10-17'
        Statement:
          - Effect: Allow
            Principal:
              Service:
                - ec2.amazonaws.com
            Action:
              - sts:AssumeRole
      Path: '/'
  RolePolicy:
    Type: AWS::IAM::Policy
    Properties:
      PolicyName: AmazonS3ReadOnlyAccess
      PolicyDocument:
        Version: '2012-10-17'
        Statement:
          - Effect: Allow
            Action:
              - s3:Put*
              - s3:Get*
              - s3:List*
            Resource:
              - arn:aws:s3:::udagram-0676982224131/
              - arn:aws:s3:::udagram-0676982224131/*
      Roles:
        - Ref: S3ReadOnlyEC2s
  ProfileWithRolesForOurApps:
    Type: AWS::IAM::InstanceProfile
    Properties:
      Path: '/'
      Roles:
        - Ref: S3ReadOnlyEC2s

Outputs:
  WebAppLoadBalancerDNSNames:
    Description: DNS name or Public URL of the Load Balancer
    Value: !Join ['', ['http://', !GetAtt WebAppLBs.DNSName]]
    Export:
      Name: !Sub ${EnvironmentName}-LB-DNSName
Copy the above resources into the newnet1.yml file and save.
Step 7 Now is the time to set up our Server infrastructure using cloudformation.
- Open your terminal and change the directory (cd) to your scripts directory before running the code below to avoid a not found error.
if it executes correctly it displays the stack ID and auto-create on the cloudfromation GUI and simultaneously creates all the server resources declared in the newser1.yml file./create.sh UdagramServer newser1.yml newser.json
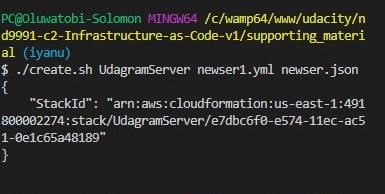
Once this is successful, your server resources as shown below should now be available on your AWS portal
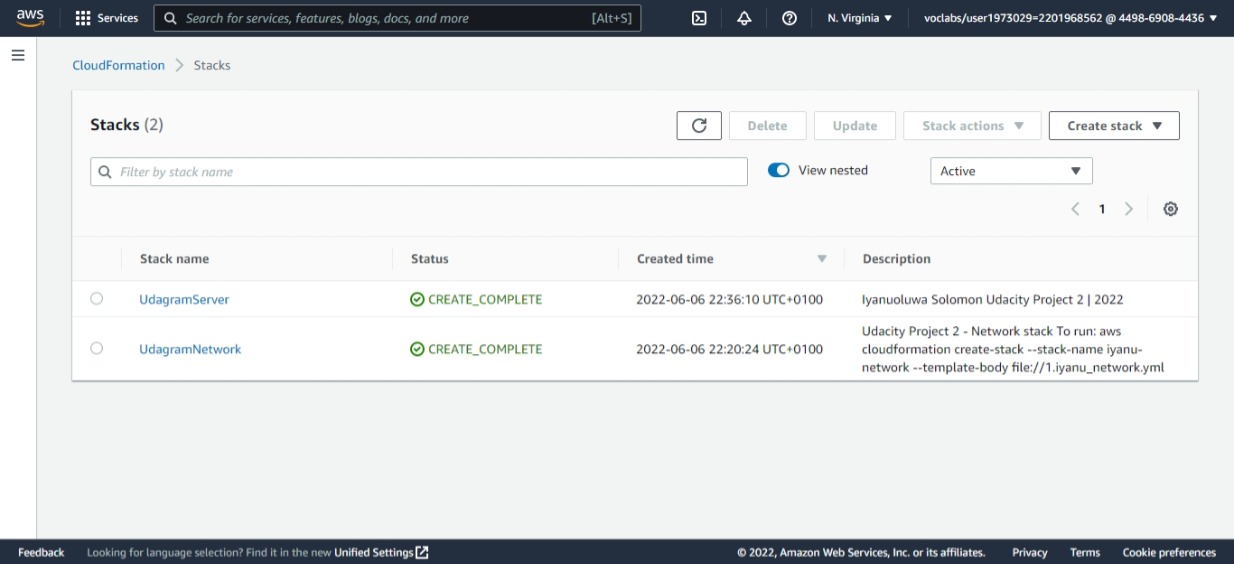 This shows the successful states of the stack created i.e. UdagramNetwork and UdagramServer
Below are server resources created upon the successful execution of the UdagramServer
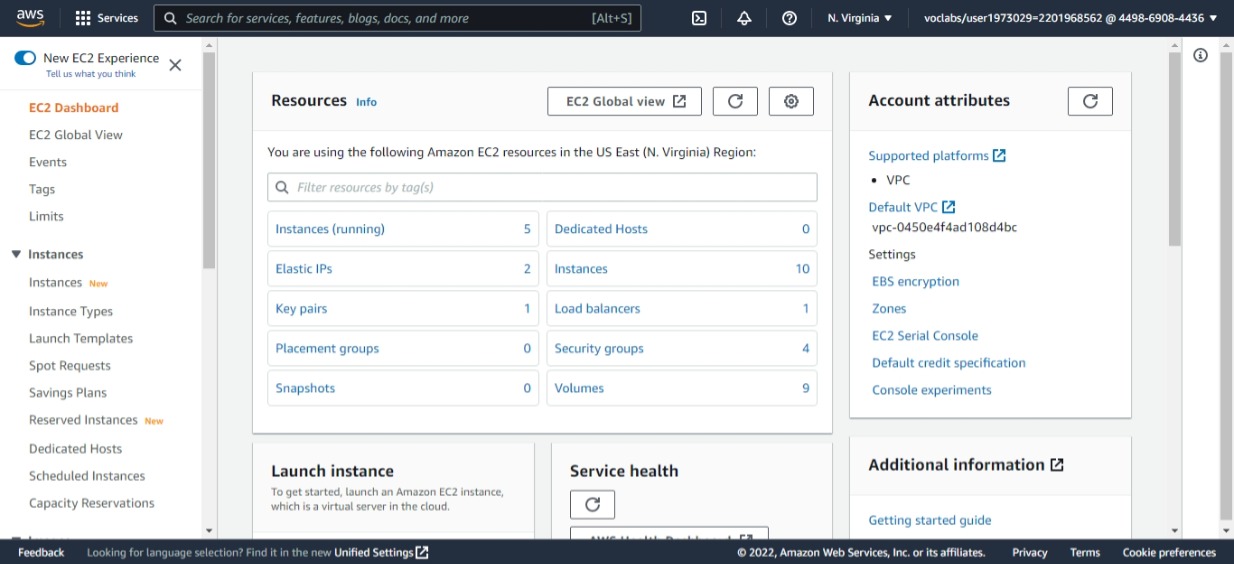 This shows the EC2 resources created
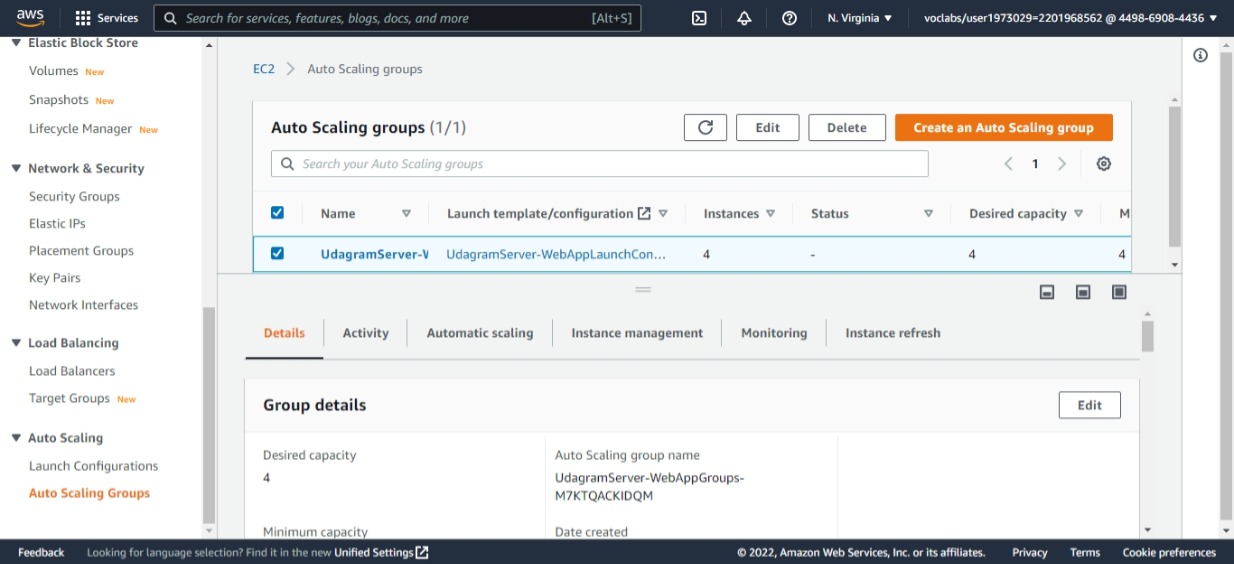 Udagram auto-scaling group created
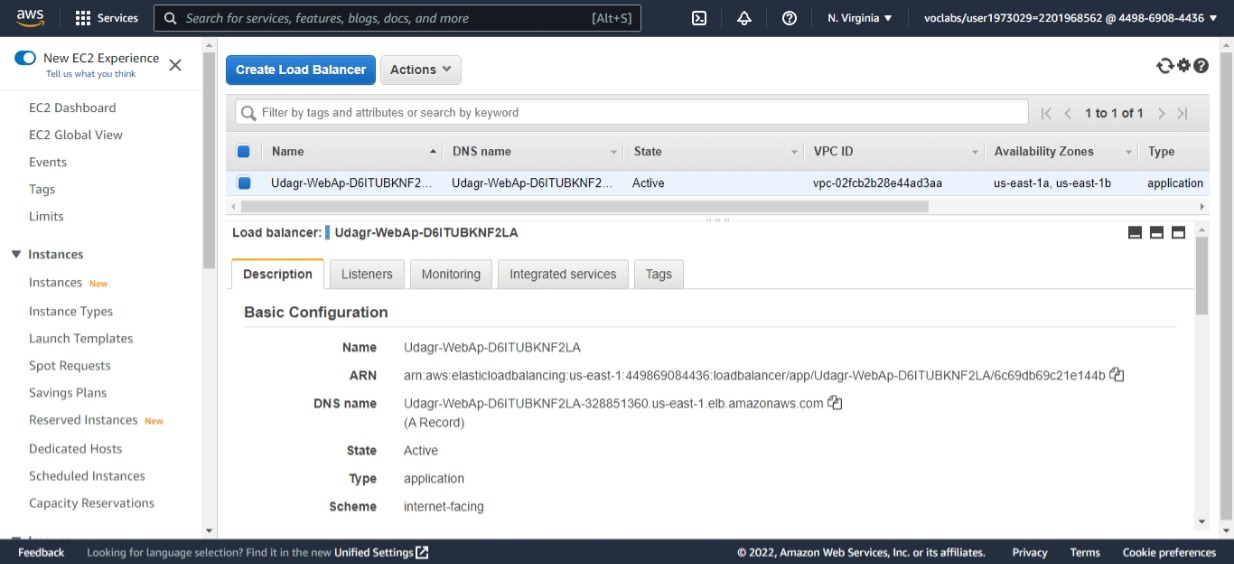 Udagram Load-balancer created
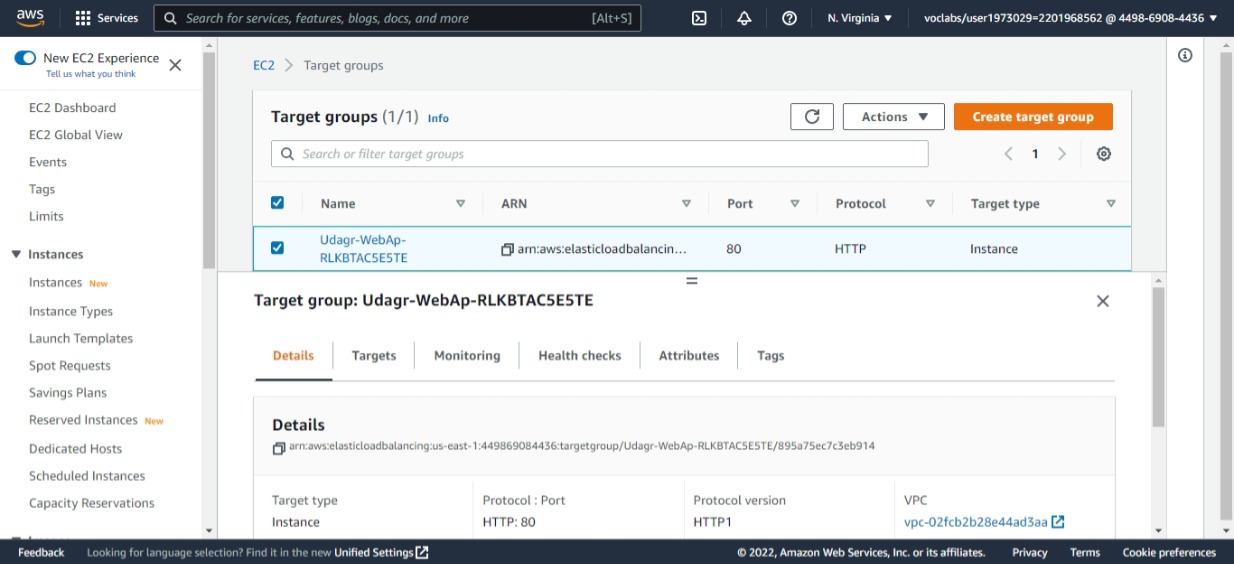 Udagram Target Group created
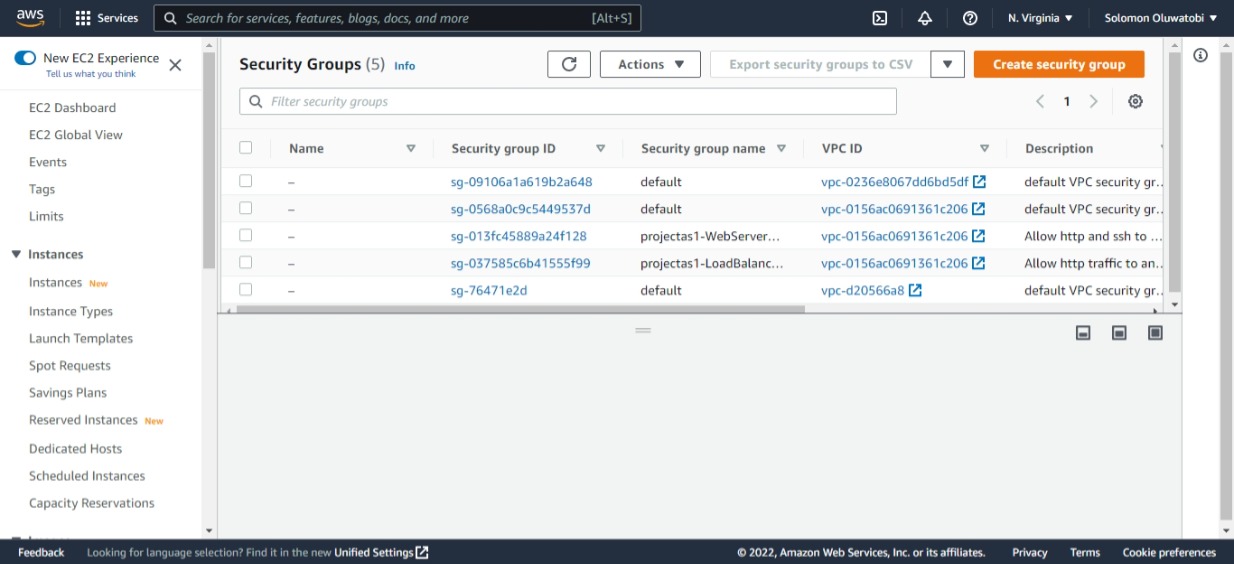 Udagram security group created
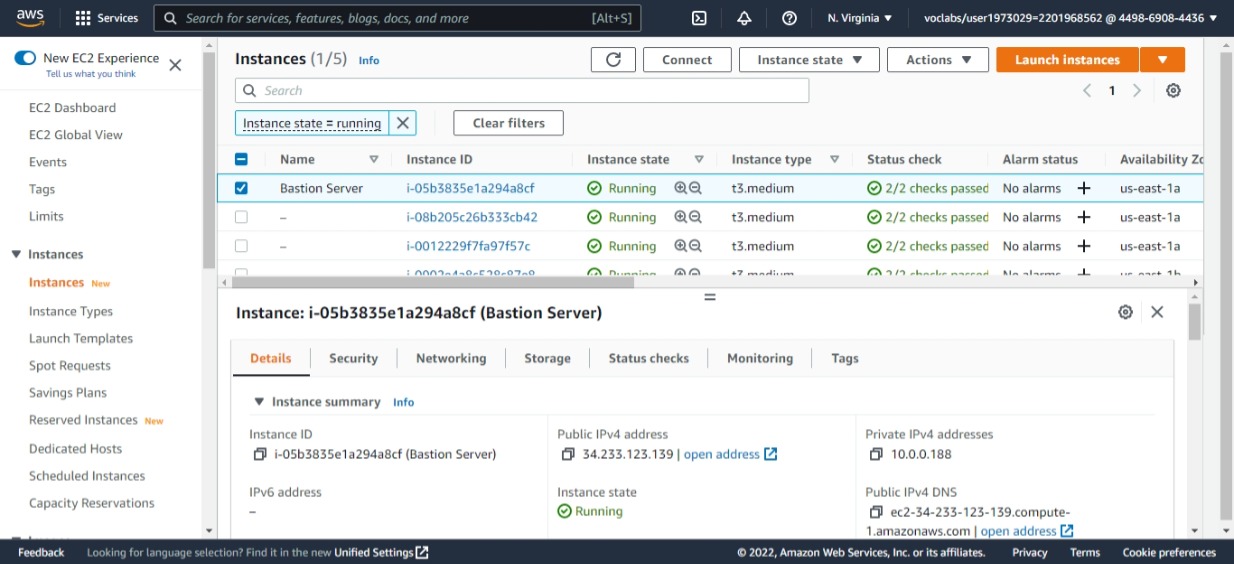 Udagram instances created including the bastion server
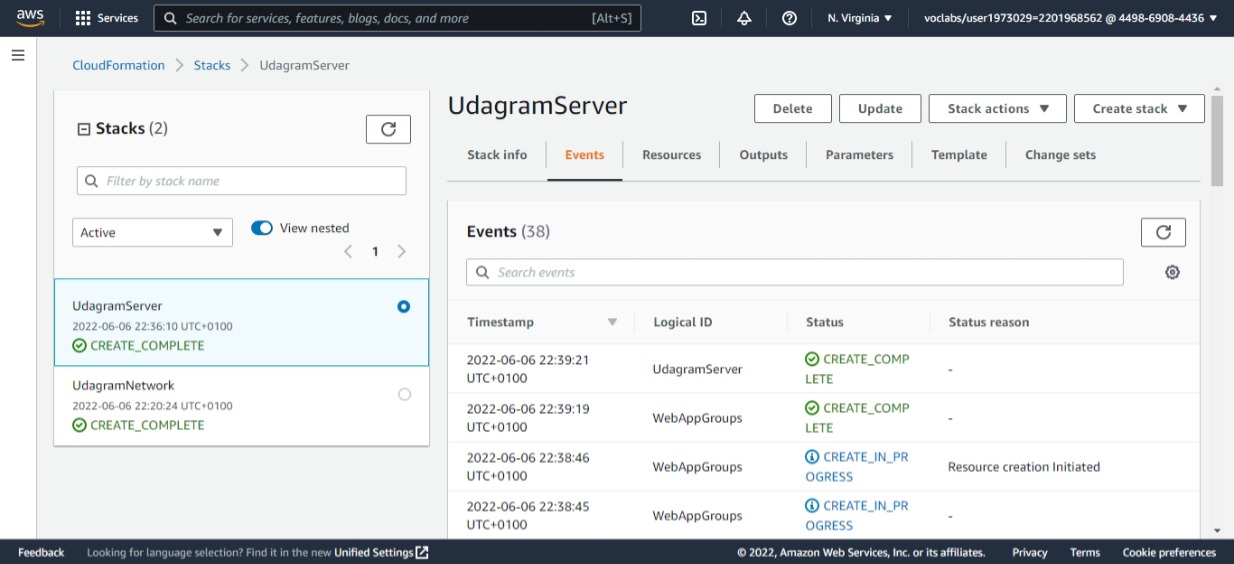 Udagram server events created
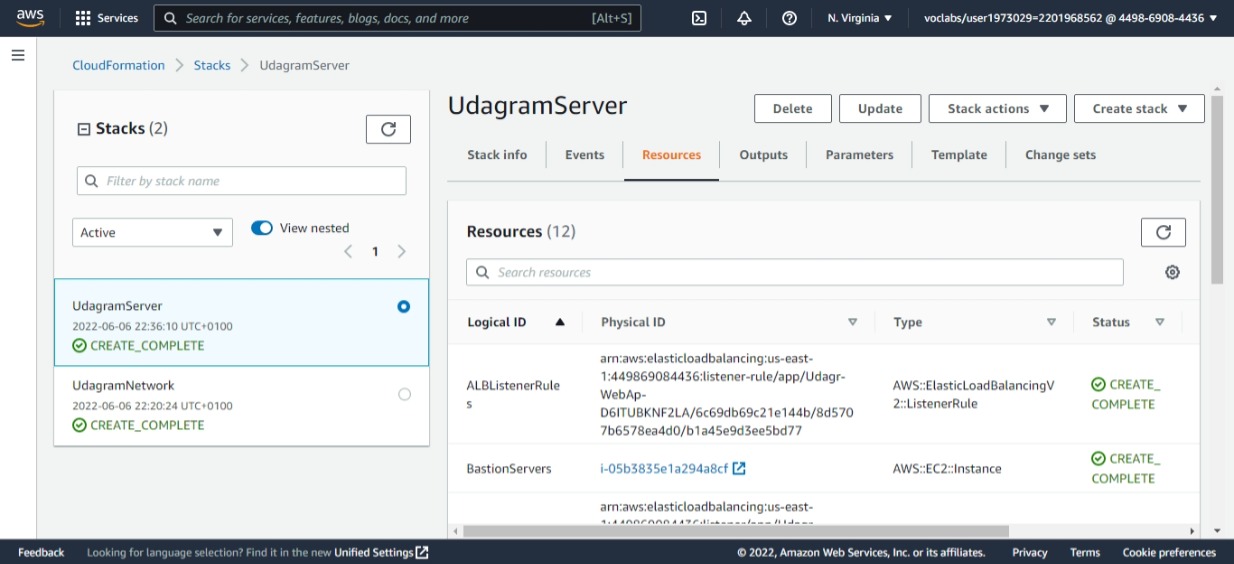 Udagram server resources created (12 Resources)
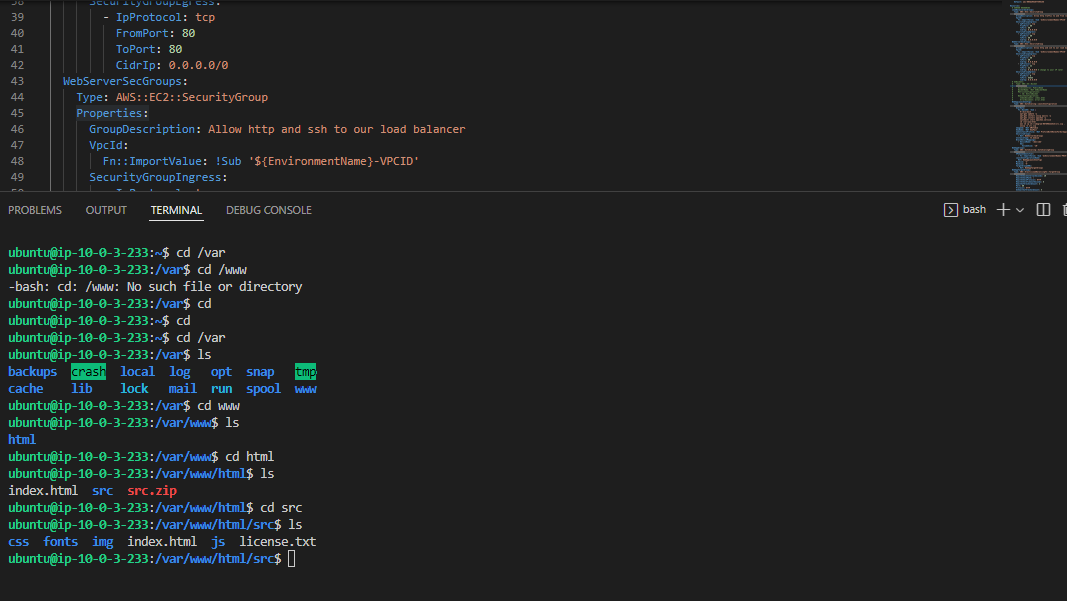
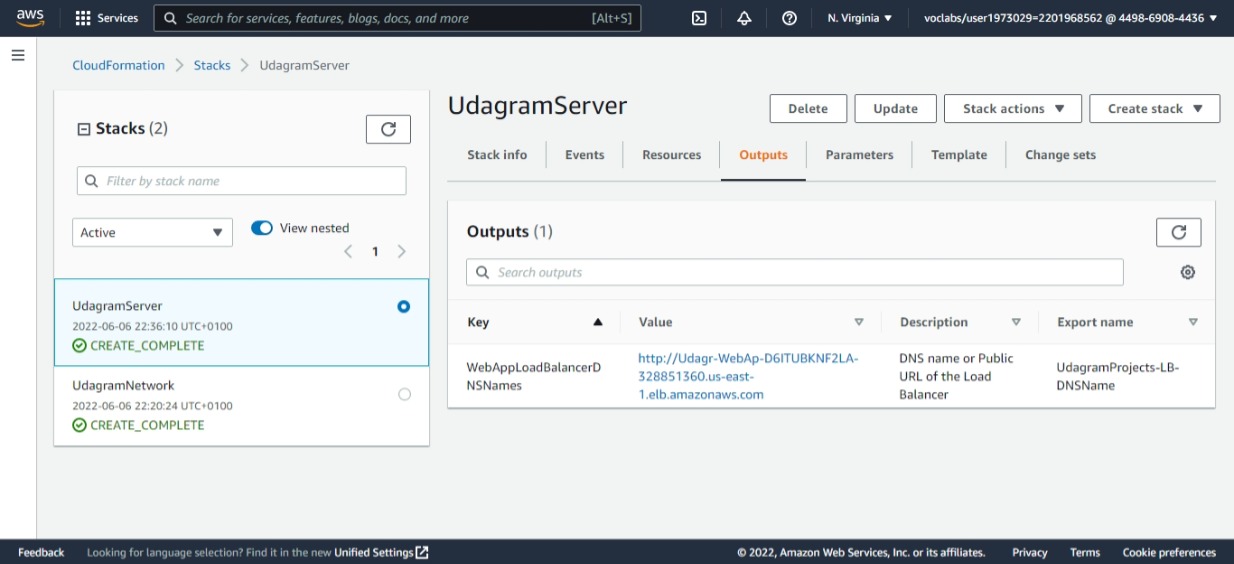 Udagram server output created
If all the above is what you see, then you have successfully deployed your high-availability web application through cloudformation.
 HURRAY! OUR APPLICATION IS LIVE
Subscribe to my newsletter
Read articles from Oluwatobi Solomon directly inside your inbox. Subscribe to the newsletter, and don't miss out.
Written by
