Create a simple timeline in Nativescript-Vue
 Nandee Scripts
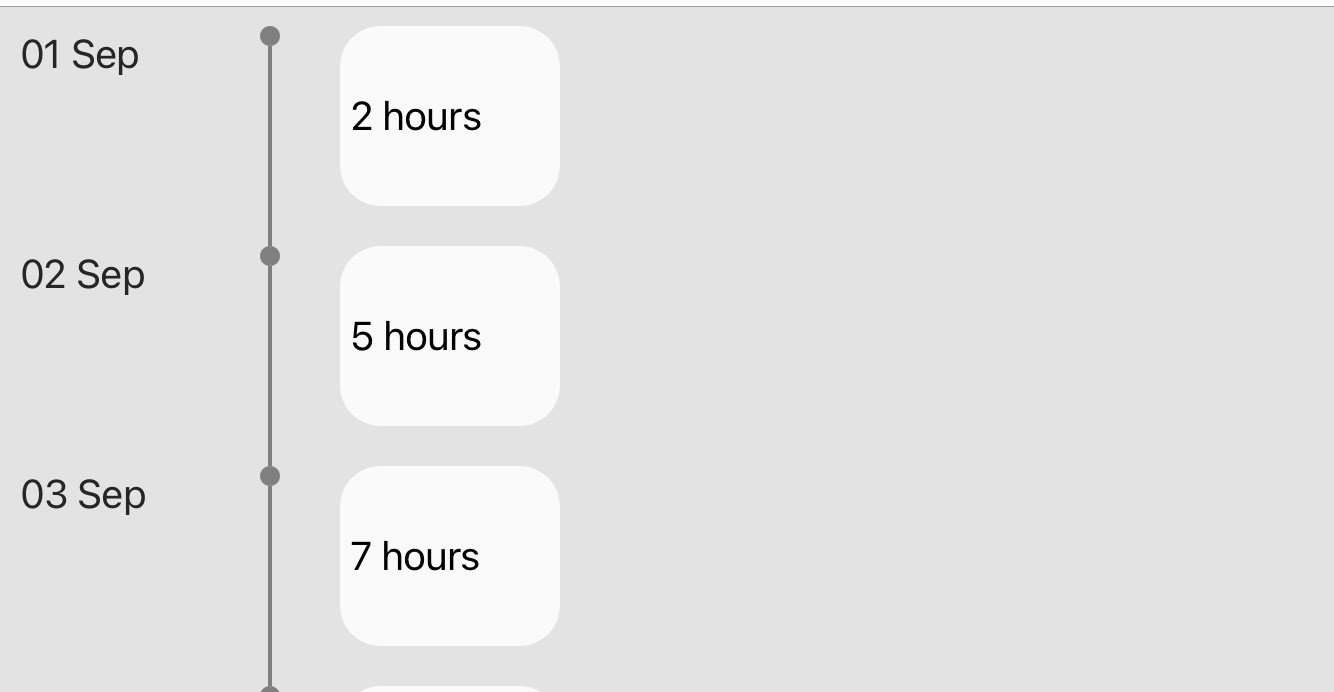
This post will look at how to create a simple vertical timeline in a Nativescript-Vue app, similar to the one possible in Framework7.
As an example, let’s say you want to create an app for a cleaning services company. The company sends its employees to clean different houses/buildings during the day and the employee has to use the app to check-in and check out at every house he/she cleans so that the company tracks the amount of time the employee spends at a place. One of the views (screens) of the app will have to show an employee’s total time(in hours) spent cleaning on each day of a particular month. That's what we create in this tutorial.
Let’s get started. Create the Nativescript-Vue app by running the following command in the Terminal:
ns create my-timeline --vue
Suppose we want to show the data for September 2020 whose snippet is listed below:
export  const SEPTEMBER = [
    {
        "date": "01 Sep",
        "hours": 2
    },
    {
        "date": "02 Sep",
        "hours": 5
    },
    {
        "date": "03 Sep",
        "hours": 7
    },
    {
        "date": "04 Sep",
        "hours": 5
    }
]
The following code is how to display the data in a timeline component:
<template>
    <Page>
        <ActionBar title="Home" />
        <ScrollView>
            <StackLayout padding="10" backgroundColor="#e3e3e3">
                <GridLayout columns="100,50,120" class="home-panel"
                    v-for="(item,index) in sepData" :key="index"
                    @tap="onItemTap($event,index)">
                    <!-- DATE -->
                    <Label col="0" textWrap="true" :text="item.date"
                        verticalAlignment="top" />
                    <!-- DIVIDER -->
                    <GridLayout col="1" rows="10,100">
                        <!-- point -->
                        <ContentView row="0" width="10" height="10"
                            backgroundColor="#808080" borderRadius="50"
                            verticalAlignment="bottom" />
                            <!-- connector -->
                        <ContentView v-show="index!=(sepData.length-1)"
                            row="1" width="2" height="110"
                            backgroundColor="#808080" />
                    </GridLayout>
                    <!-- DURATION -->
                    <Label v-show="item.hours" col="2" class="hours">
                        <FormattedString>
                            <Span :text="item.hours"></Span>
                            <Span text=" hours" />
                        </FormattedString>
                    </Label>
                </GridLayout>
            </StackLayout>
        </ScrollView>
    </Page>
</template>

<script>
    import {
        SEPTEMBER
    } from "./data";
    export default {
        data() {
            return {
                sepData: SEPTEMBER
            };
        },
        methods: {
            onItemTap(args, indx) {
                alert(`Item tapped: ${indx}`);
            }
        }
    };
</script>

<style scoped>
    .home-panel {
        font-size: 20;
    }

    .hours {
        background-color: #fafafa;
        padding: 5;
        margin-bottom: 20;
        margin-left: 10;
        color: #000;
        border-radius: 20%
    }
</style>
In this example we used <ContentView> elements to create the divider, but we could have used an empty <Label> (or any other element) element instead.
That’s it. To create a timeline specific to your needs, you just have to tweak the styling attributes in VerticalTimeline.vue. In Nativescript Core , you use element in place of Vuejs’s v-for directive.
Appendix:
- Find the repo for the code used in this article here.
Subscribe to my newsletter
Read articles from Nandee Scripts directly inside your inbox. Subscribe to the newsletter, and don't miss out.
Written by
