How to run API automated tests with Newman on CircleCI.
 Mike Mwanje
Postman is a great tool not only for building, but also for testing APIs. In this post, we shall look at how to use Newman, Postman’s command-line collection runner, to run automated tests for an API in a CI/CD pipeline running on CicleCI. Whereas there may be various tools and libraries to test APIs built in a specific language, automation testing with Newman cuts across and thus the steps followed herein can be followed to test an API developed in any programming language. That stated, we shall use a Node.js API in this post.
Tutorial
Setting up
Before we start, make sure you have the newman cli installed on your computer. If you do not have it yet, install it globally by simply running
$ npm install -g newman
Fork and clone this repository which has the API we shall be using and change directory into the created folder. Run the commands below to do so.to install it globally.
$ git clone https://github.com/123MwanjeMike/node-express-realworld-example-app.git
$ cd node-express-realworld-example-app/
Switch to the 00--tutorialStart branch.
$ git checkout 00--tutorialStart
Install the dependencies with a package manager(npm, yarn) of your choice. In my case, I’ll be using yarn all throughout.
$ yarn install
Run the start script to confirm that everything is working fine. Ps: You need to have MongoDB installed on your machine. If you don’t have it, head over here to install it or jump right to Importing collection and environment.
$ yarn start
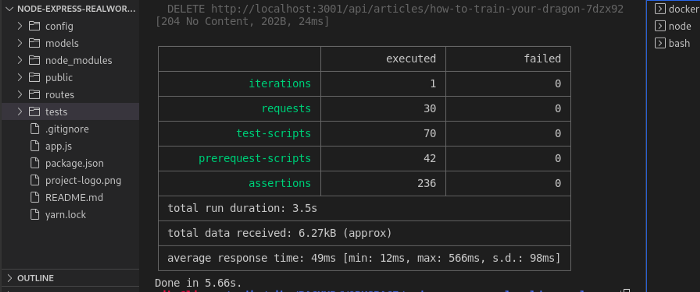
Open another terminal and run the test script
$ yarn test
Importing collection and environment
Now let’s head over to Postman to get our hands dirty. We need to have our collection in Postman and its environment as well. So, open your postman Workspace and click the Import button. You can either import from the test folder of your cloned repository or from your forked repository(00--tutorialStart branch) on GitHub.
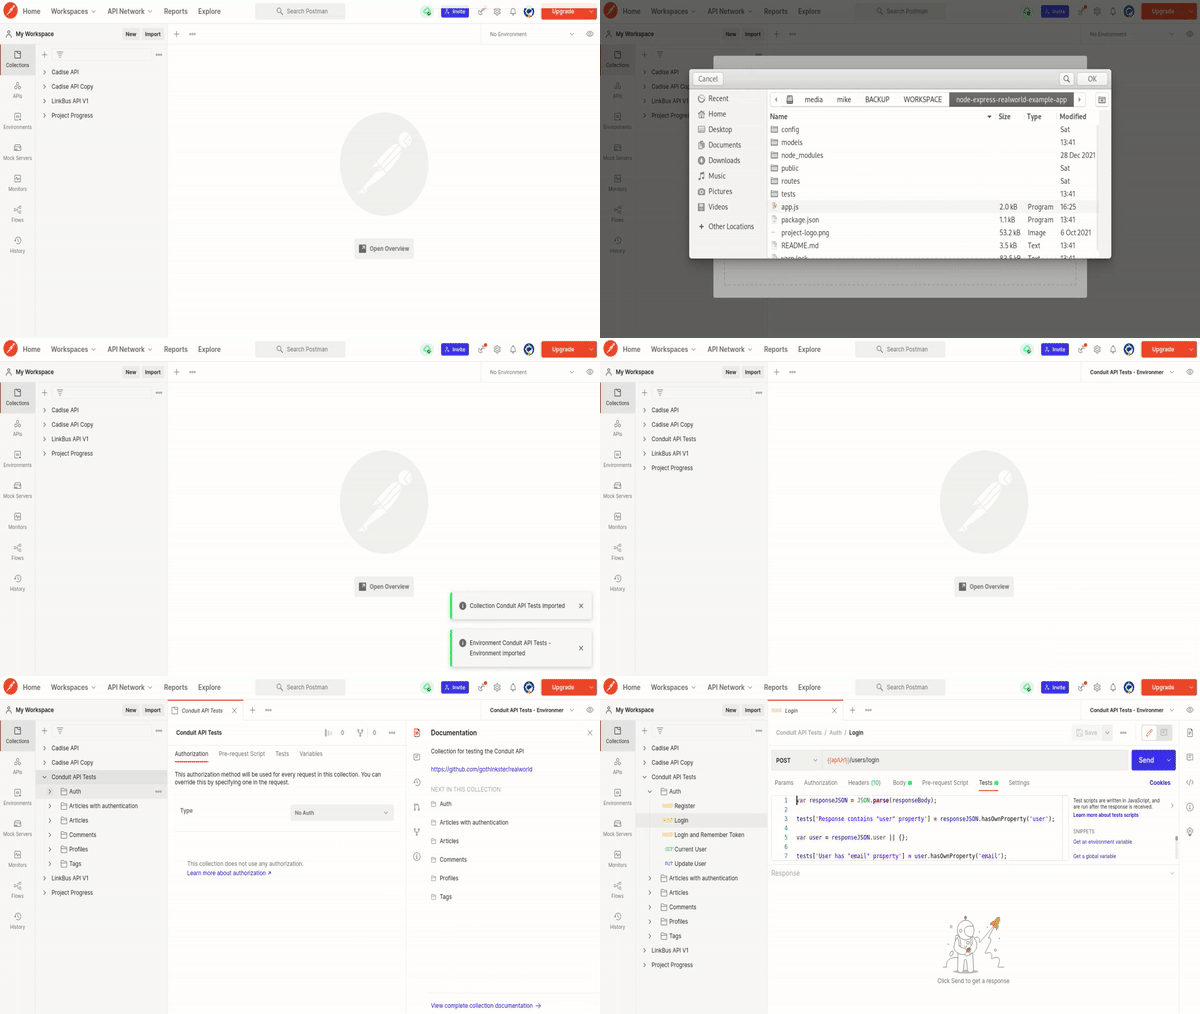
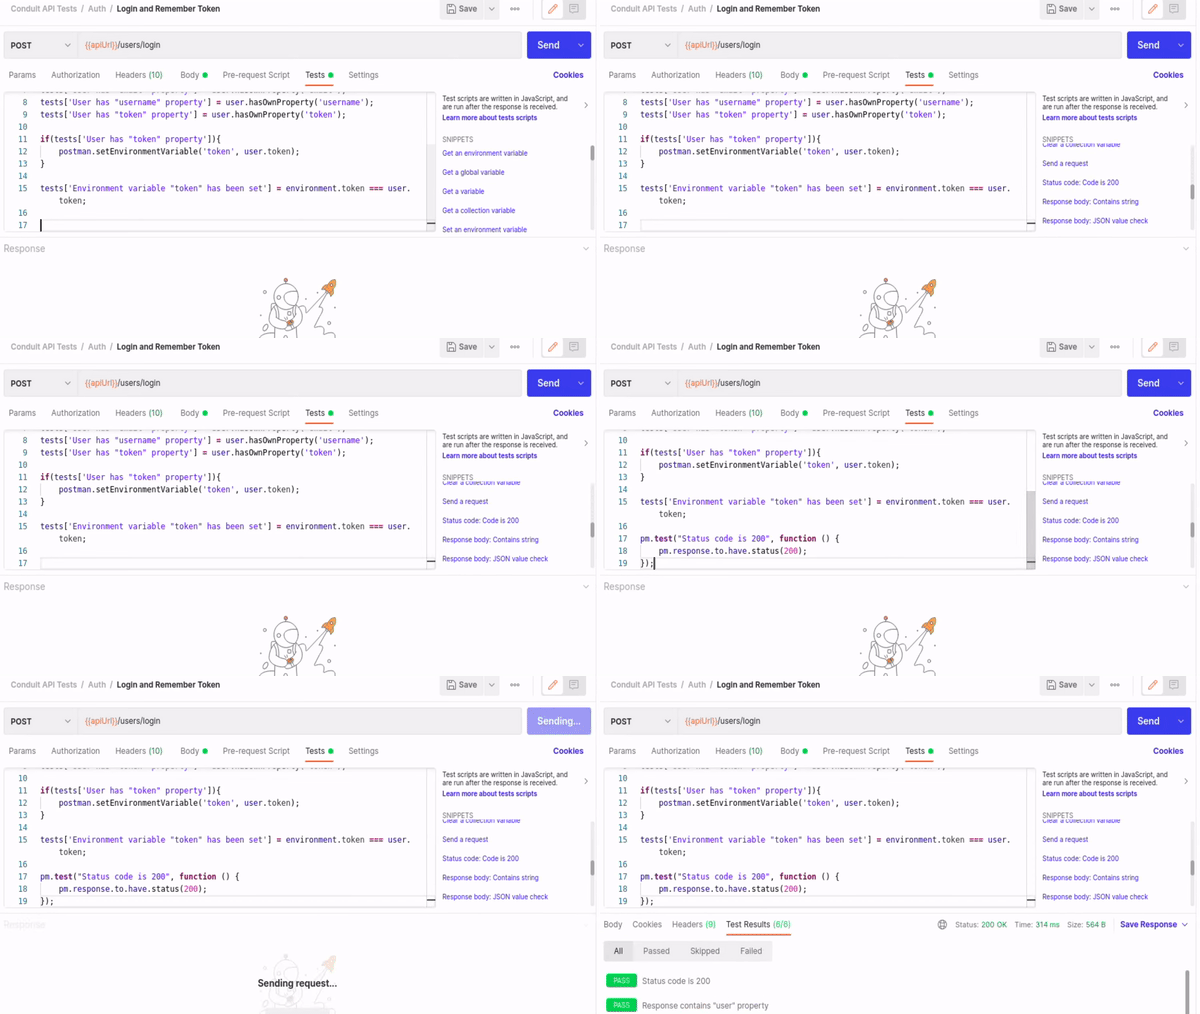
With the import complete, set the environment to Conduit API Tests — Environment. We can add one more test of our own. So head over to Auth/Login and Remember Token in the Conduit API Tests collection, select the Tests tab, and add a test to check that the response status code is 200 from the SNIPPETS on the right. Send the request.
Integrating with CircleCI
We shall now integrate our API in Postman with CircleCI. This way, we shall also be able to trigger and view test builds from within Postman. So, head over to APIs and click ‘+’ to create a new API.
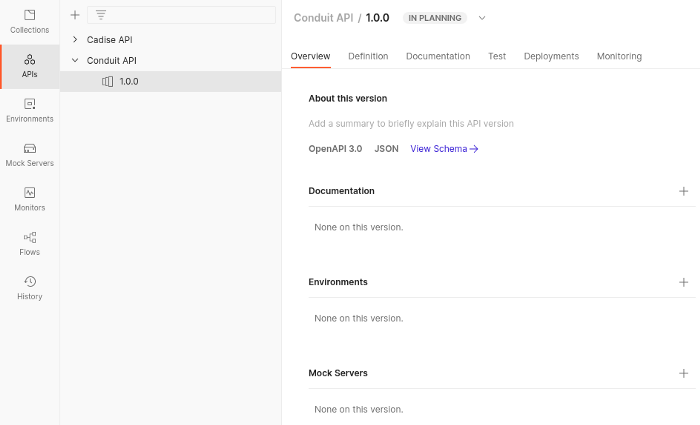
Head over to the Test tab and click Add Test Suite. Select Add existing test, then select Conduit API Tests
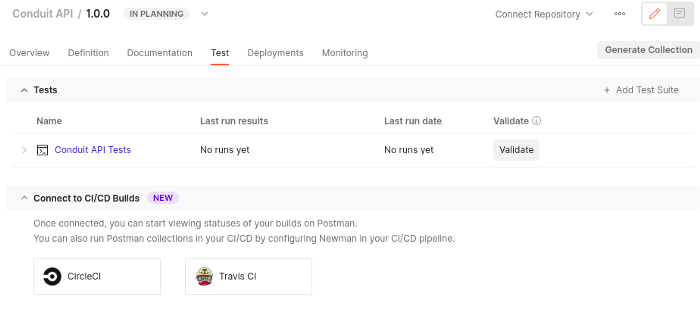
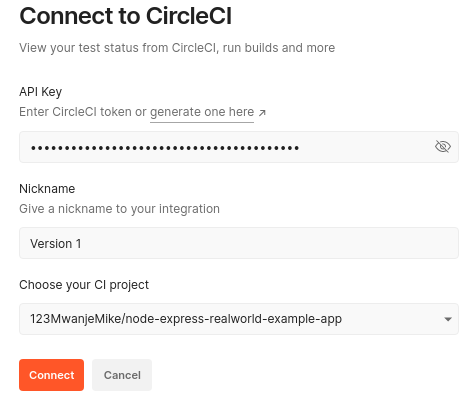
Still at the same page, under Connect to CI/CD Builds, select CircleCI. You’ll be presented with a screen such as below.
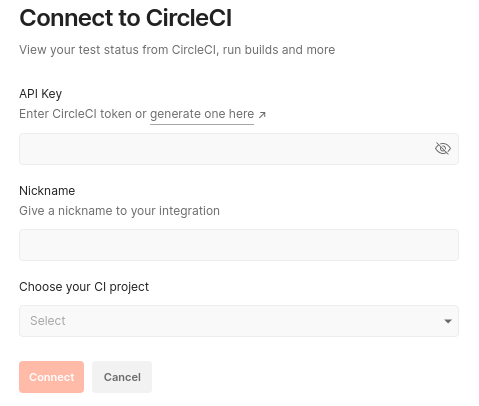
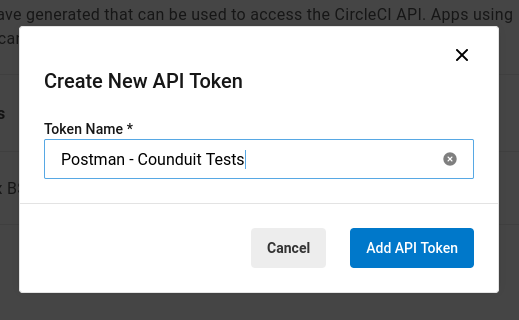
We need to generate an API key for this integration on CircleCI. So click here to go to your CircleCI User Settings page, Personal Access Tokens section from where you’ll create one. Copy the API token you have added and paste it in the API Key input on the Postman screen above.
Enter a Nickname and select the CI Project to run the tests. It’s very likely your forked project is not on that list yet. You want to go back to your CircleCI dashboard and Set Up Project for it to reflect on Postman. It’s okay for the first build to fail.
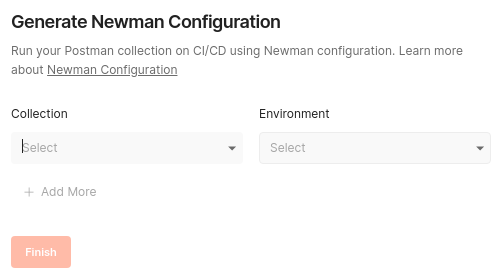
Next we shall generate a Newman configuration that we shall place in our .circleci/config.yml file in the project repository. Click Configure Newman in the top right corner.
For our environment, we need to create a mock server so that we don’t run our requests against any real data. So click Mock Servers on the Postman left menu and click ‘+’ to create one. Choose the Select an existing collection option.
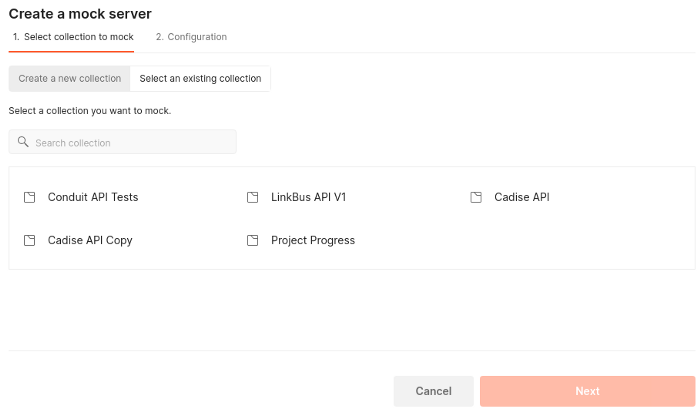
Select the Conduit API Tests collection. You’ll proceed to the Configuration screen as below.
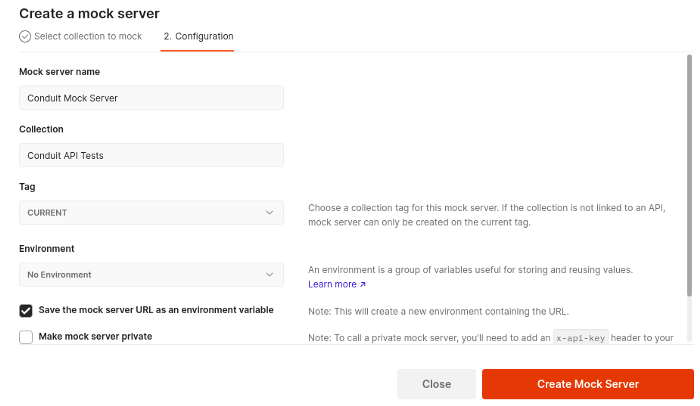
Click the Create Mock Server button and copy the Mock URL provided.
Go to Environments to update the apiUrl variable for the Conduit API Tests — Environment. Set its INITIAL VALUE to the Mock URL you copied and save the changes.

With everything now set, we can head back to generate our Newman configuration. Set the collection to Conduit APT Tests and environment to Conduit APT Tests -Environment
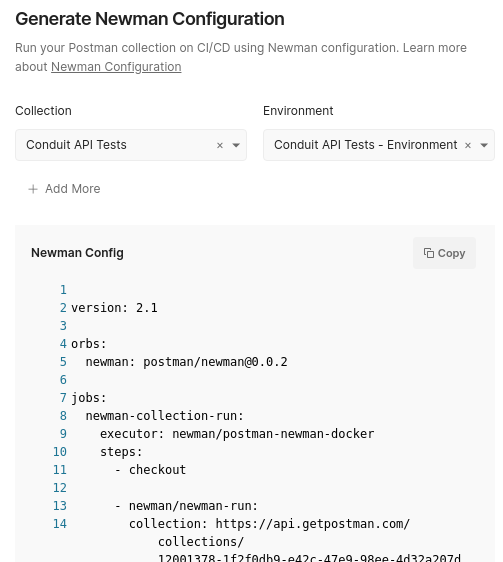
Copy the generated configuration. We shall add it to .circleci/config.yml in our code base. So create the file in the project directory with the commands below.
$ mkdir .circleci
$ touch .circleci/config.yml
Paste the copied configuration in the created file. Create a workflow at the bottom to run your job. The workflow should be similar to that below.
workflows:
  test-workflow:
    jobs:
      - newman-collection-run
Your entire .circleci/config.yml file should look like that below. Take special care of the indention newman/newman-run step(lines 13 –15) to avoid indention related errors.
{% gist https://gist.github.com/123MwanjeMike/b796ba84486c114706889ff14cb76dbc file=config.yml %}
We are almost done. However, as you might have noticed, we have two instances of $POSTMAN_API_KEY (lines 14 and 15) in our .circleci/config.yml file and these must be substituted with an actual value on CircleCI. To create a Postman API Key, head over here and click Generate API Key. Copy the key and go to the project settings on CircleCI. Add an environment variable called POSTMAN_API_KEY and paste the Postman API Key in the value box.
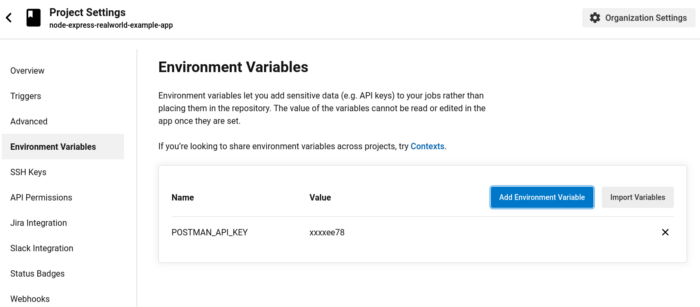
While still on CircleCI, go to the Organization Settings > Security > Orb Security Settings, and select Yes to allow use of third-party orbs. This is because in our CircleCI configuration, we use newman: postman/newman@0.0.2 on line 5 which is not a default CircleCI orb.
Commit and push the changes to GitHub
$ git add .circleci/config.yml
$ git commit -m "add circleci config"
$ git push origin
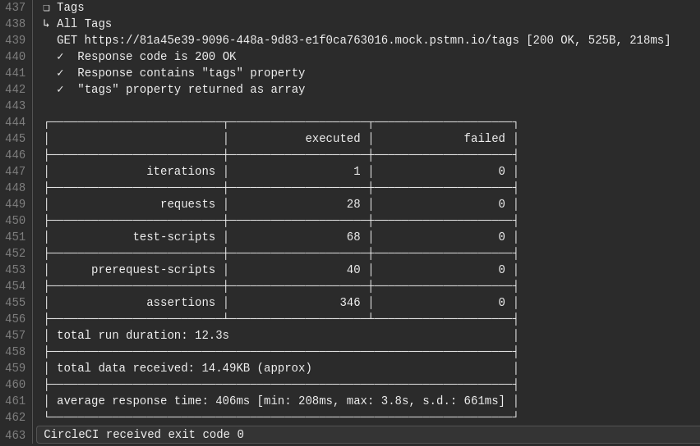
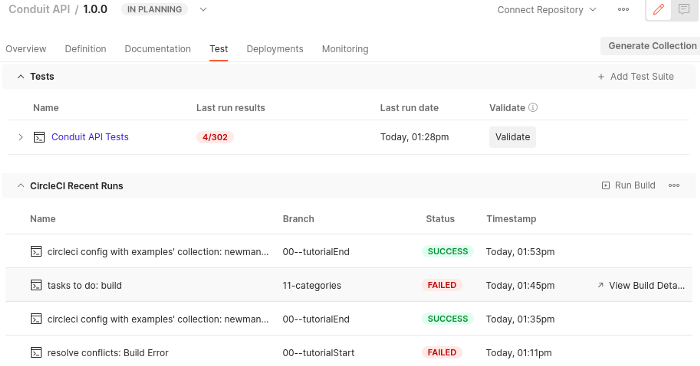
Yeeey! All our tests passed. We can also view our build history on Postman.
Conclusion
As you too have seen, testing your API with Postman is quite basic and you do not need to install any other testing packages into your project like mocha, jest, chai-http for automated testing. All you need is some basic understanding of JavaScript to write test cases on Postman.
I hope you enjoyed this post and wouldn't hesitate to leave me a heart or comment.
Happy coding!
Further reading
Subscribe to my newsletter
Read articles from Mike Mwanje directly inside your inbox. Subscribe to the newsletter, and don't miss out.
Written by
