Handling User Authentication in Power Pages with Azure AD B2C
 Favour Adeshina
Hi there, in this article, I'm excited to share my knowledge on how to use Microsoft Azure AD B2C as an authentication provider in Power Pages.
Let's get right into it!
Azure AD B2C as an Authentication Service
What is Authentication? This simply refers to the process of verifying the identity of a user or system before allowing access to resources or functionalities within the application. It ensures that the user or system attempting to access the application is who or what it claims to be. Authentication is a crucial component of security in software development, as it prevents unauthorized access and protects sensitive information.
Authentication mechanisms typically involve the use of credentials such as usernames, passwords, security tokens, biometric data, or digital certificates.
Azure Active Directory Business-to-Customer (Azure AD B2C) is an identity management service of Microsoft Azure that enables custom control of how your customers sign up, sign in, and manage their profiles when using your iOS, Android, single-page applications, and other applications.
Azure AD B2C is a separate service from Microsoft Entra (formerly Azure AD). It is built on the same technology as Azure AD but for a different purpose.
Azure AD B2C provides a highly customizable user experience to suit and blend with your brand seamlessly. Allowing you to customize every page when a user signs up, signs in, and modifies their profile information, providing a native look and feel that follows your web, mobile, and other applications.
Power Pages
Power Pages is a Microsoft Power Platform component that lets you create, host, and manage modern external-facing websites with low code. Whether you're a low-code maker or a professional developer, Power Pages empowers you to rapidly design, configure, and publish websites that work across web browsers and devices.
For more context on Power Pages check out my previous article: Power Pages - Building Without Boundaries
Using Azure AD B2C in Power Pages
Power Pages supports authentication processes and provides various authentication providers to handle authentication of which Azure Active Directory B2C stands as one of the providers available for you to set up authentication for your web page.
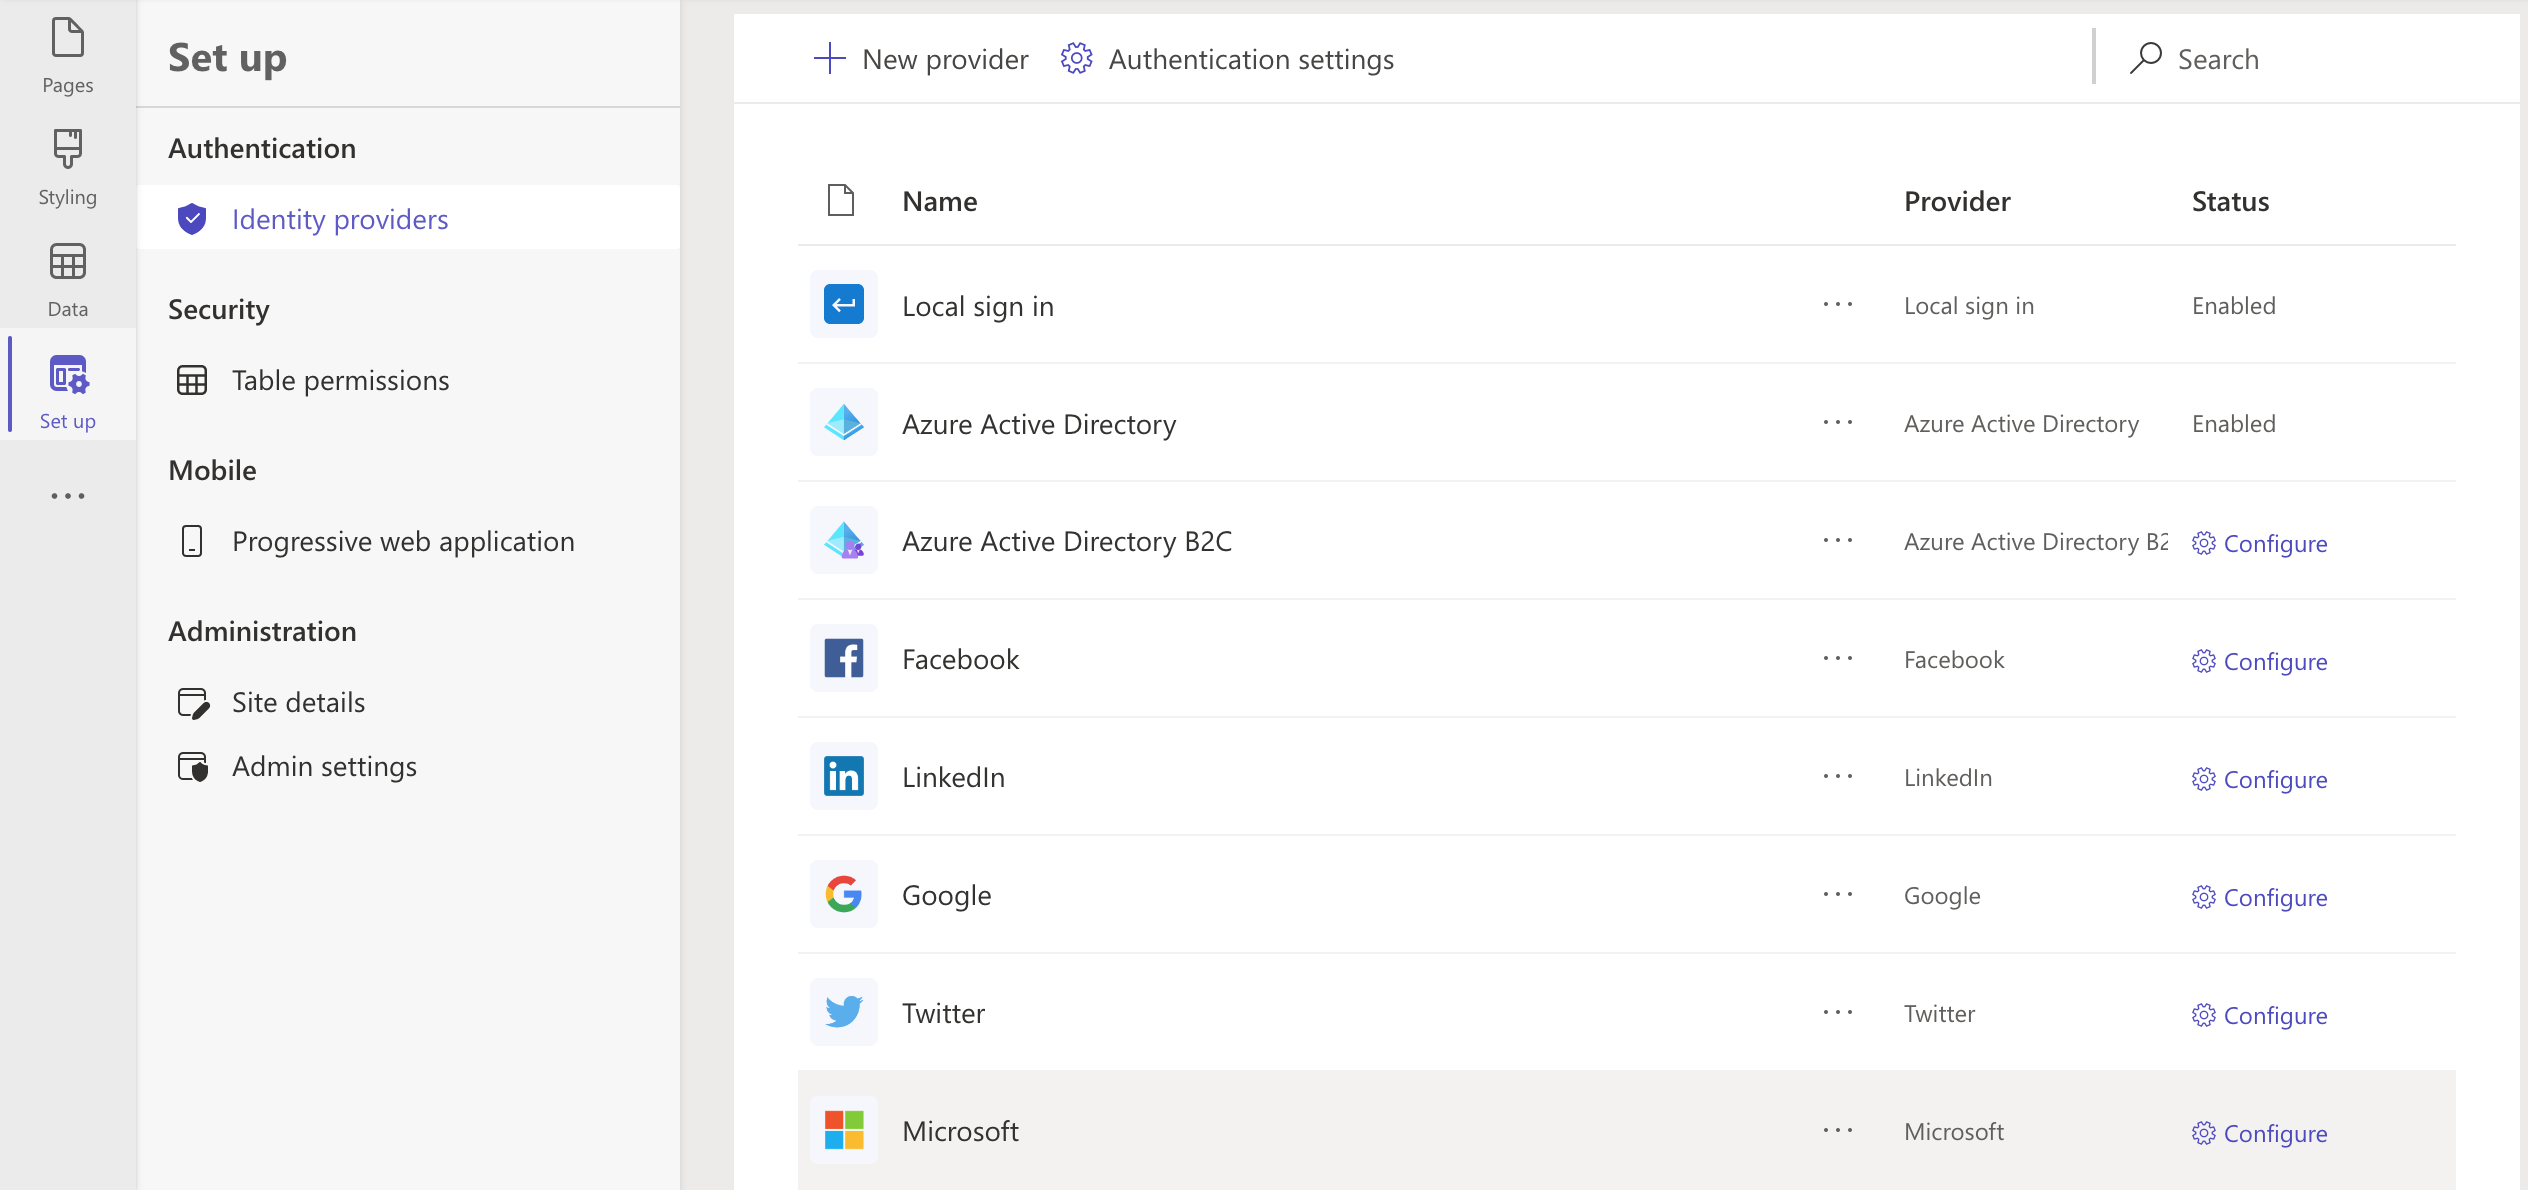
With this, you can provide and set up several authentication providers on your website.
Now, let us see how to set up Azure AD B2C to handle our authentication needs for our web pages while building with Microsoft Power Pages.
Requirements
To duly follow this tutorial you need to have set up an Azure account with an Azure subscription. If you don't have one, create a free account before you begin.
You need to also create a site on Power Pages.
Once you have all requirements set up, the next step would be to create an Azure Active Directory B2C tenant on the Microsoft Azure Portal.
However, for the sake of brevity, our focus is on setting up Azure AD B2C in Power Pages after creating an Azure Active Directory B2C tenant.
Follow this tutorial, to Create an Azure Active Directory B2C tenant.
If you followed the tutorial carefully, you should have successfully created your Azure Active Directory B2C tenant.
Next Step: After creating an Azure AD B2C tenant, we will now proceed to register a web application in Azure AD B2C.
In other to connect with Azure AD B2C on your created web page, you would be required to register a web application.
Let's follow these steps to get this done:
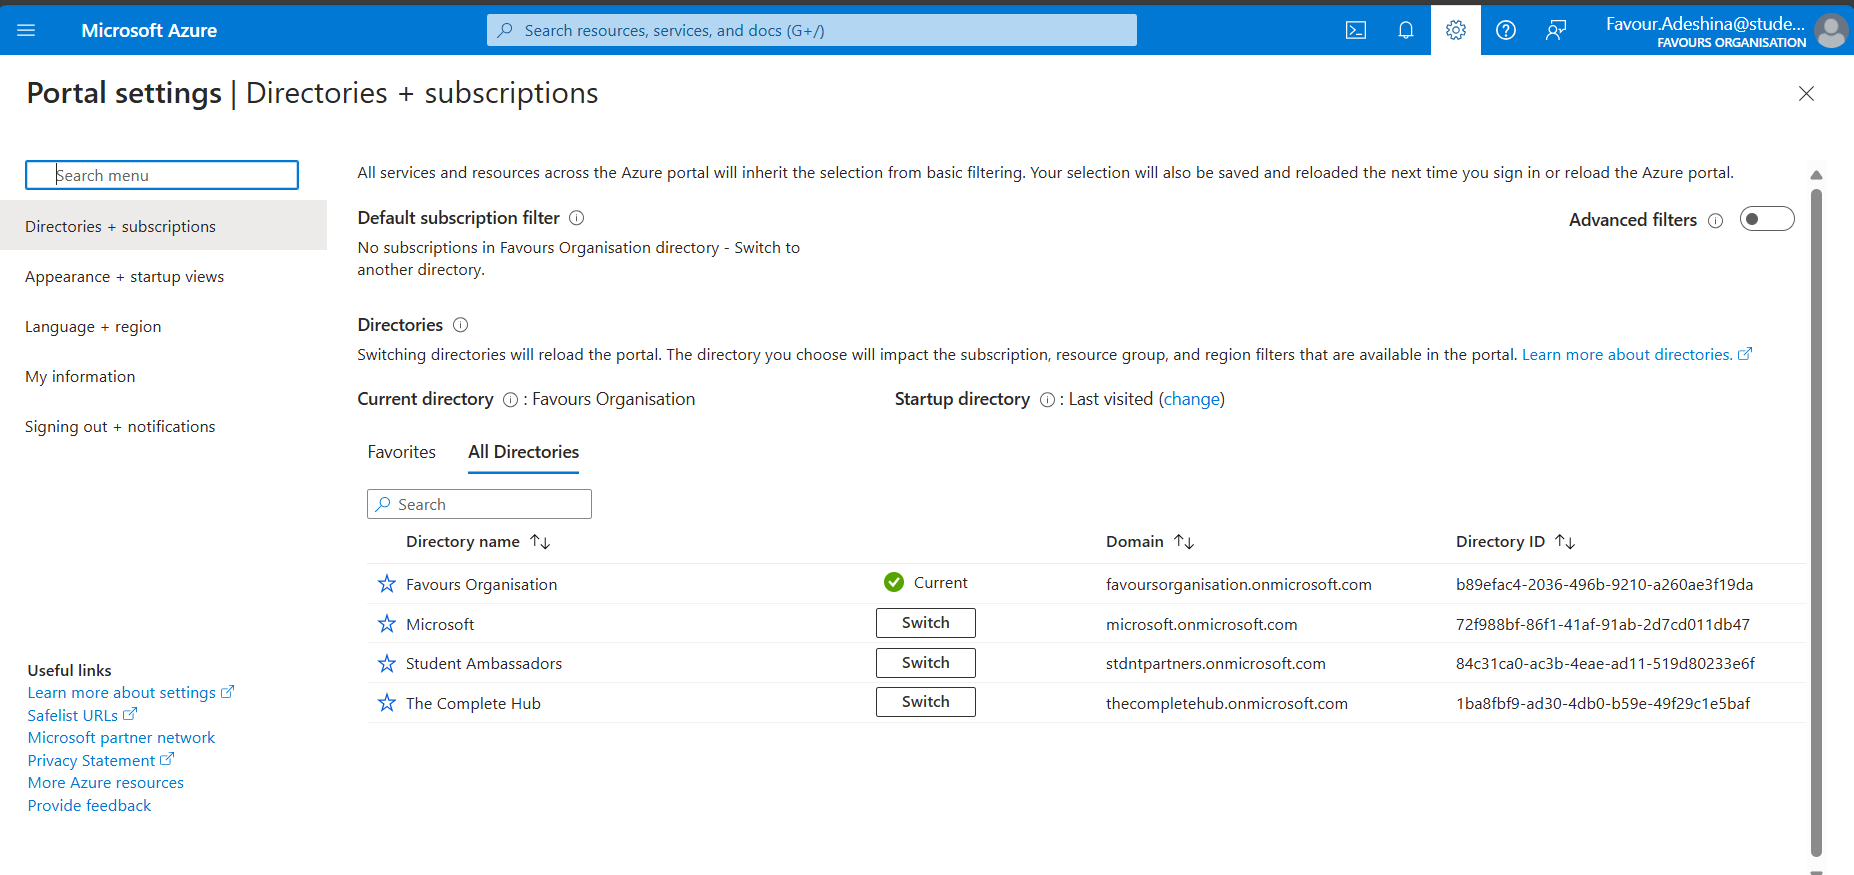
Sign in to the Azure portal, and ensure you switch to your Azure AD B2C tenant from the Directories + Subscriptions menu, that is if you have access to multiple tenants. Just as I have here
In Azure portal, navigate to Azure AD B2C

Select App registrations, and then select New registration

Go ahead to register your new application, and enter a Name for the application, this can be any name you choose to call your application. Under Supported account types, select Accounts in any identity provider or organizational directory (for authenticating users with user flows).
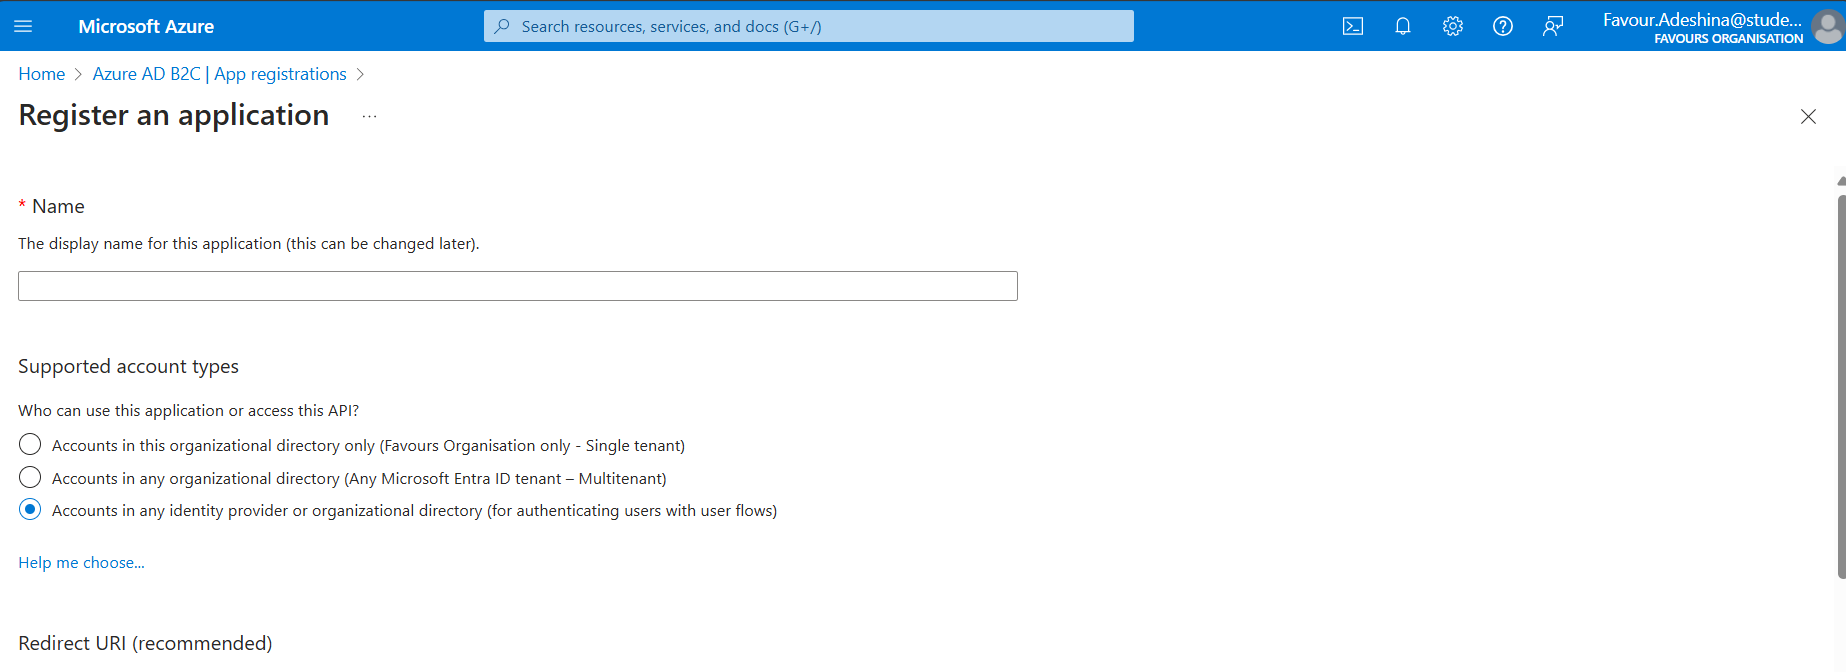
The next step would be providing the Redirect URI which we will get from Power Pages. So we would head over now to Power Pages.
Sign in to Power Pages and create a new site with Copilot by describing the site you want or starting with a template or from a blank site. This may take a while so you might just have to wait for a few minutes.
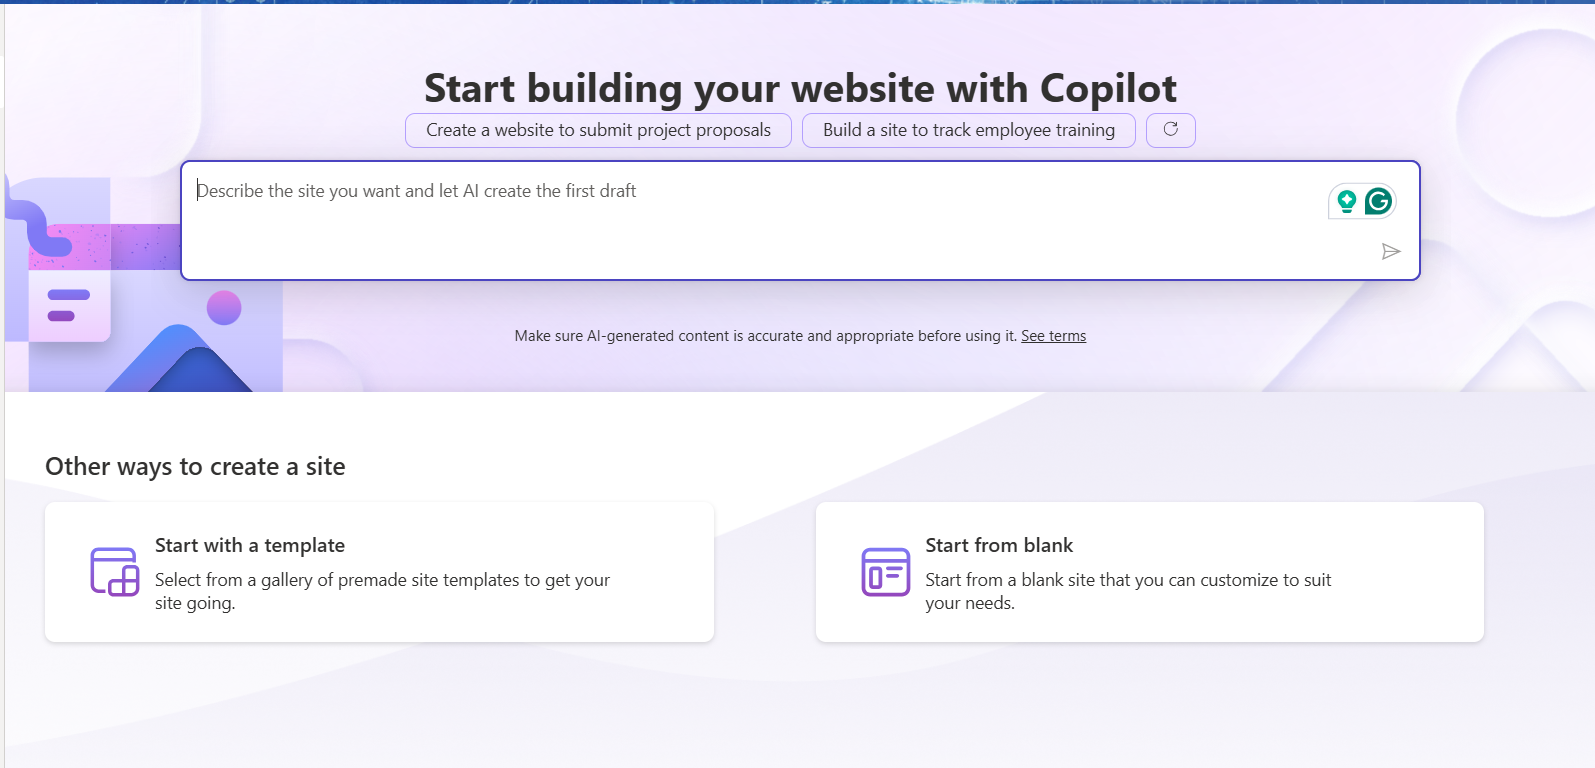
Note: You can't create sites in a default environment, so you are required to create a developer environment to be able to create a new site. Click on the button as shown in the image below.

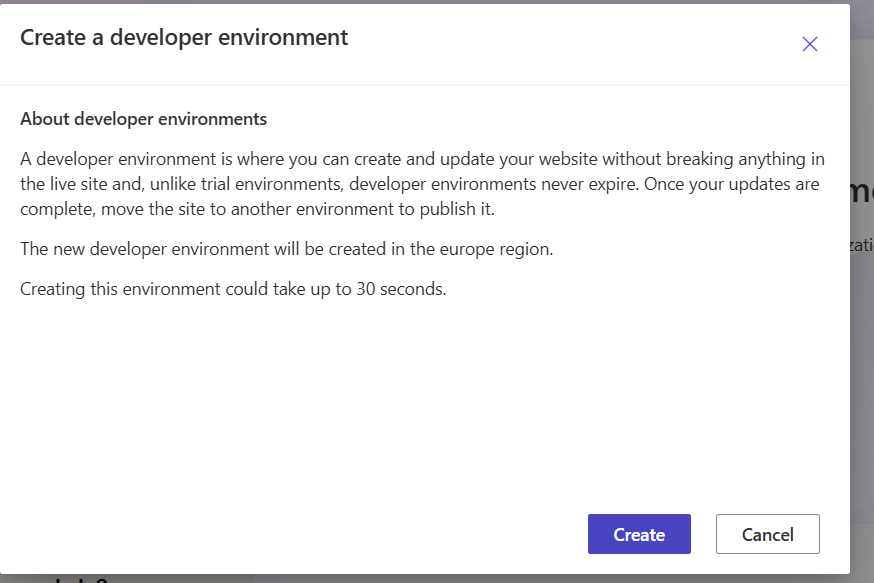
Go ahead and hit the create button to have your new developer environment. After which create a new site.
After creating your site, click the edit button.


set up Azure AD B2C authentication on our web page created on Power Pages.
Kindly follow this tutorial: Register a web application in Azure Active Directory B2C
If you successfully followed the docs properly, you should have your web application registered in Azure Active Directory B2C.
Following the screenshot below, you should have your registered web application:

The next thing to do is to set up user flows and custom policies. Let us follow this tutorial/documentation: Create User flows and custom policies in Azure Active Directory B2C
After following the previous tutorial in the link above, (kindly get back to it, before you proceed with this step), let us head back to Identity Configuration Page in Power Pages, to complete our Configuration settings.
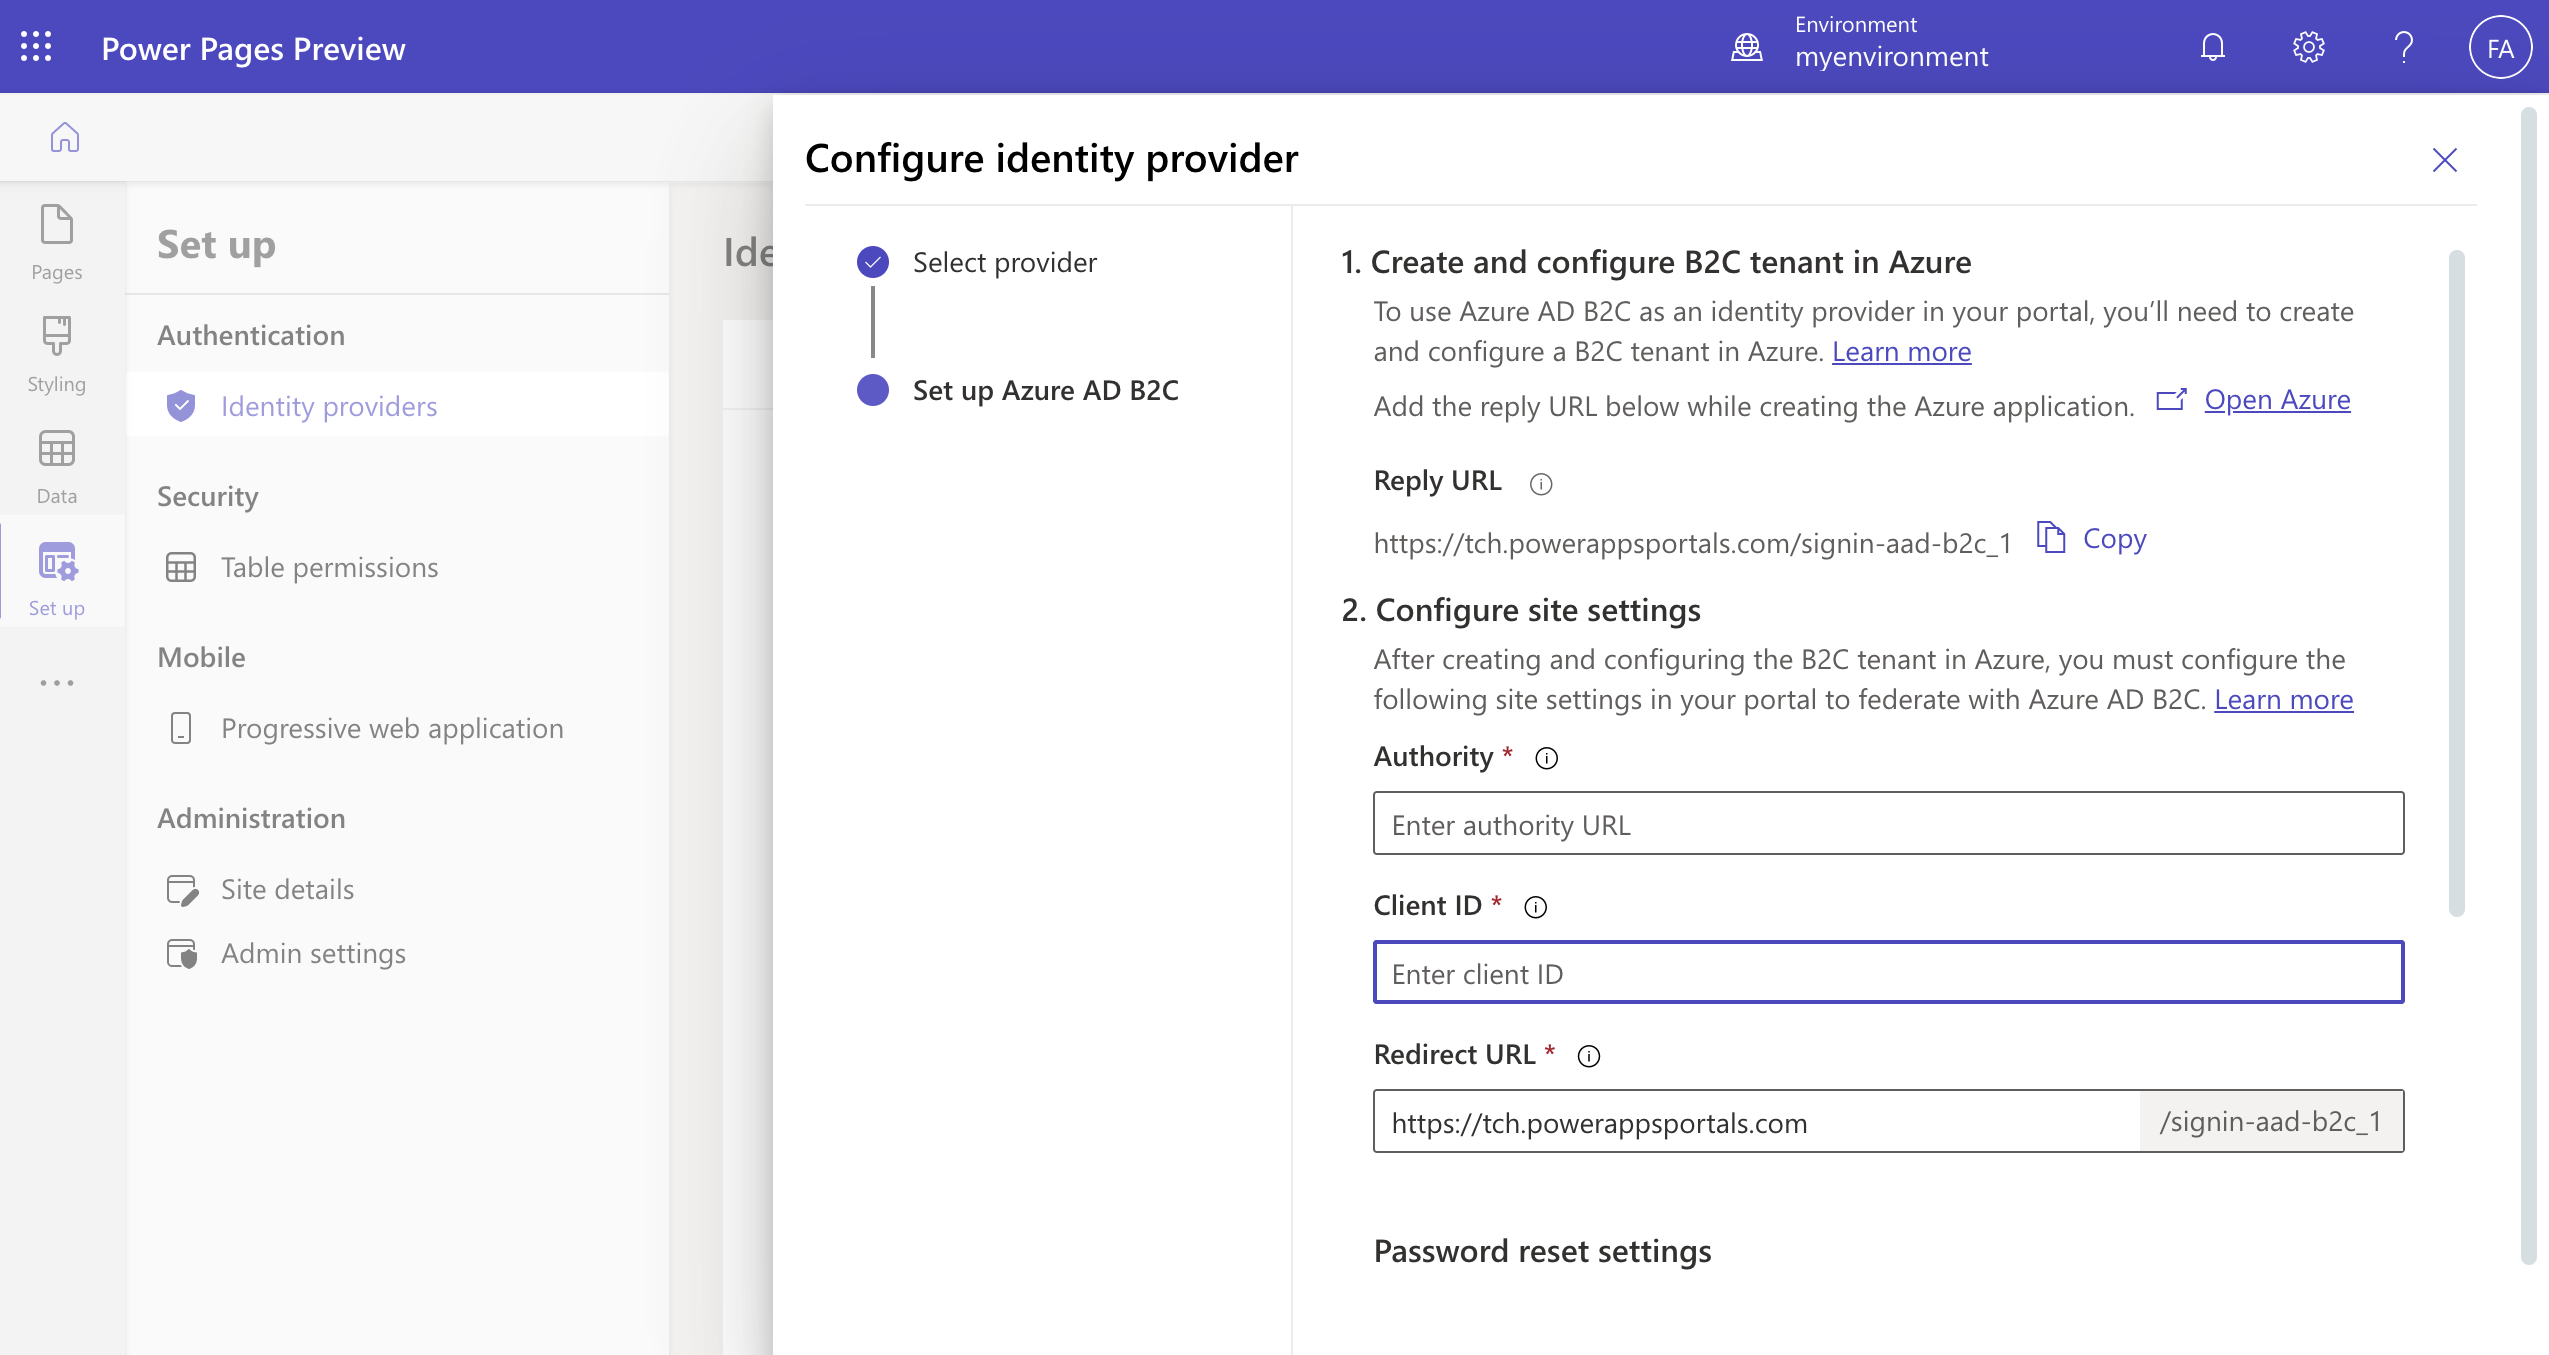
**A few things to note, while configuring your Identity Configuration page in Power Pages: **
Authority: This is the issuer URL defined in the metadata of the sign-up & sign-in policy user flow
Client ID: The ID associated with the application created in Azure Active Directory B2C tenant to be used with the portal.
Redirect URL: This is the location where Azure AD B2C will send an authentication response. Enter the portal URL. You only need to change the redirect URI if you're using a custom domain name.
Kindly follow this tutorial/documentation to complete the Configuration settings on Power Pages: Configure the Azure Active Directory B2C provider manually.
Hit the confirm button to save and apply the settings applied.

Now test your application.
Congratulations you have successfully set up and configured Azure AD B2C in Microsoft Power Pages.
Announcement
I am building a community of Power Platform enthusiasts/developers, if you are interested, especially if you are in Ado-Ekiti, Ekiti State Nigeria, then please join us Power Platform User Group Ado-Ekiti.
The first annual Power Platform Conference sponsored by Microsoft and Power Platform Conference is coming to Orlando for an amazing in-person event on September 18-22. Join us for special keynotes, sessions, breakouts, and more—all dedicated to Microsoft Power Platform products: Power Automate, Power Apps, Power BI, Power Pages, and Power Virtual Agents, register for this with my unique code: MPPCADEKUGMicrosoft Power Platform Conference
Kindly follow me on Twitter and make a Tweet, tagging me, if you learned something in this article. Twitter
Lastly, kindly subscribe to my newsletter and await my first exciting newsletter for all my subscribers.
Thank You
Check out the docs for more information on Azure Active Directory B2C.
Subscribe to my newsletter
Read articles from Favour Adeshina directly inside your inbox. Subscribe to the newsletter, and don't miss out.
Written by
