Reversing complex jumptables in Binary Ninja
 Sam Russell
I've recently started reversing some of the Tigress obfuscator challenges, and I decided to use this to test out some of the functionality in Binary Ninja. One of the keys to reversing a virtualization obfuscator is identifying the control loop where the binary code is interpreted and executed by the various VM handlers.
If we open the first binary (challenge-0) in Binary Ninja and scroll down a bit we can find the loop itself by eyeballing the code:
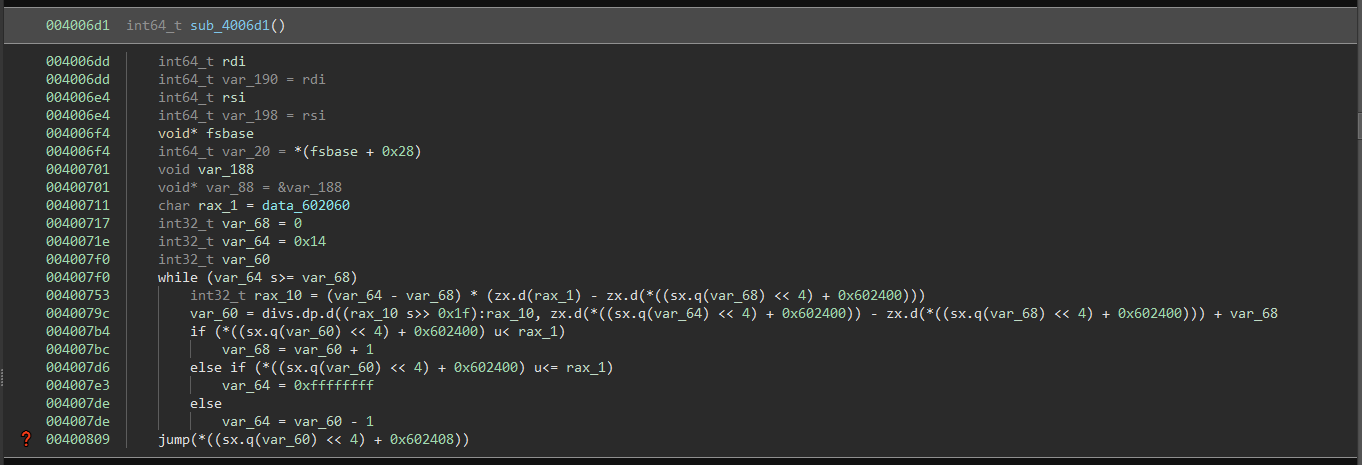
For this article, we'll focus on that final jump statement with the big red question mark next to it.
Reversing the structures
If we double-click on the 0x602408 pointer we get taken to a block of data that looks very structured:

It looks like these are grouped as 2x QWORDs, giving us 21 structures in total. We're most interested in the second QWORD in each structure, as this looks to be the pointer to the VM handler. If we go to the start of one of these (0x602400) and right click, we can right click and select "Create Structure..." or just use the S key to accomplish this.
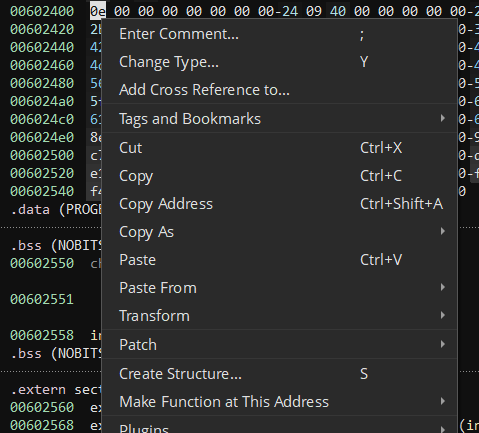
We'll call it handler_entry and make it 0x10 bytes. If we double click on the name of our new struct it'll open in the types window:

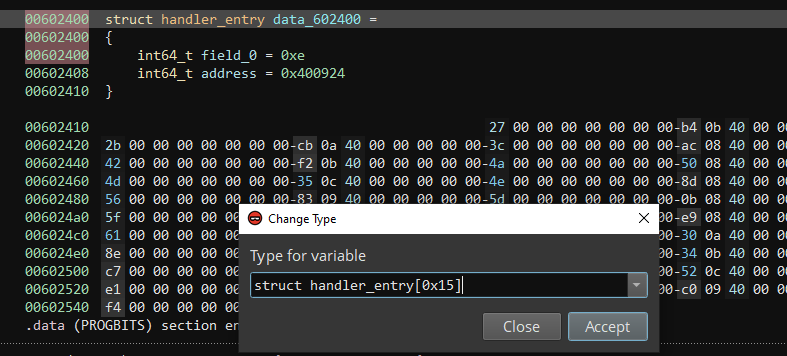
The struct docs say we can set the fields to 8 byte fields with the 8 key, so we'll create 2 QWORD fields, the first we can leave as field_0, and we'll rename the second to address. We can also create the other 20 structs by clicking on the original struct at 00602400 and pressing the Y key, and defining this memory as struct handler[0x15] or struct handler[21]
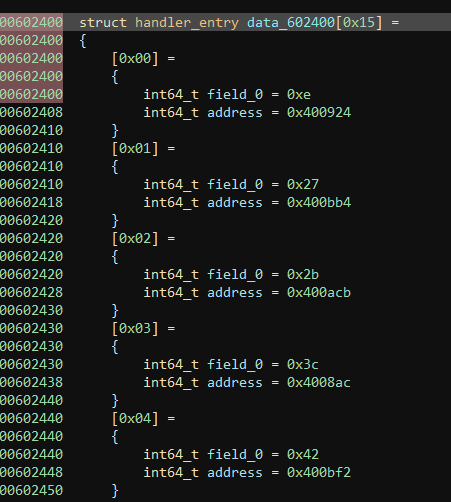
This updates the whole block of memory to be structs, and we can eyeball it to see that there are indeed 21 VM handlers.
Resolving the jump table
We still have ugly jump table from before, so we need to do a couple more things before this works. If we go to the medium level IL we see it looks like this:

So rax_30 is the actual offset (code << 4 == code * 0x10 and we know the struct size is 0x10), and then rax_31 is the base + the offset. We can click on rax_31, press the Y key to change the type, and change it from void* rax_31 to struct handler_entry* rax_31. Press enter and now Binary Ninja recognizes the +8 as actually just looking at the address member of the struct

Here's where things get a little tricky. I couldn't find a way to do this through the UI, but I did find this article which shows how to set the range of data inputs and have Binary Ninja build a jump table from there.
Click on line 64 @ 00400805 in the Medium Level IL view, then press Ctrl+backtick (or select Python Console from the View menu), and we'll define using the set_user_var_value API call. We want to set the range of possible values for rax_32, so we select this with rax32 = current_mlil[64].operands[0]. We're defining this at 0x400805 so we'll set this as the second parameter, and the third param is the complicated part. We can manually go through the addresses of the VM handlers, but that's annoying for 21 handlers, and horrendous for 200 or more like a lot of obfuscators use.
We want to access the array of struct handler_entry at 0x602400 so we can get this with current_view.get_data_var_at(0x602400). We get an iterable object where we can access each entry at any offset, for example:
>>> struct_array = current_view.get_data_var_at(0x602400).value
>>> struct_array[0]
{'field_0': 14, 'address': 4196644}
>>> struct_array[0]['address']
4196644
>>> hex(struct_array[0]['address'])
'0x400924'
If you're familiar with list comprehension in python it's a one-liner to get a list of all the addresses of the VM handlers, and we'll put these into a PossibleValueSet
>>> vm_handlers = PossibleValueSet.in_set_of_values([x['address'] for x in struct_array])
>>> vm_handlers
<in set([0x40080b, 0x400850, 0x40088d, 0x4008ac, 0x4008e9, 0x400924, 0x400961, 0x400983, 0x4009c0, 0x4009d1, 0x400a30, 0x400a52, 0x400a8d, 0x400acb, 0x400b10, 0x400b34, 0x400b77, 0x400bb4, 0x400bf2, 0x400c35, 0x400c52])>
Now we just need to put it all together, and define that rax_32 at line 0x00400805 can only point to one of those 21 VM handlers:
rax32 = current_mlil[64].operands[0]
vm_handlers = PossibleValueSet.in_set_of_values([x['address'] for x in struct_array])
current_function.set_user_var_value(rax32, 0x00400805 , vm_handlers)
After executing this we see the Medium Level IL window has changed:

If we go back to High Level IL or to Pseudo C and change from Linear to Graph view we now have a normal switch-case statement that loops back on itself, and a graph of all the VM handlers:
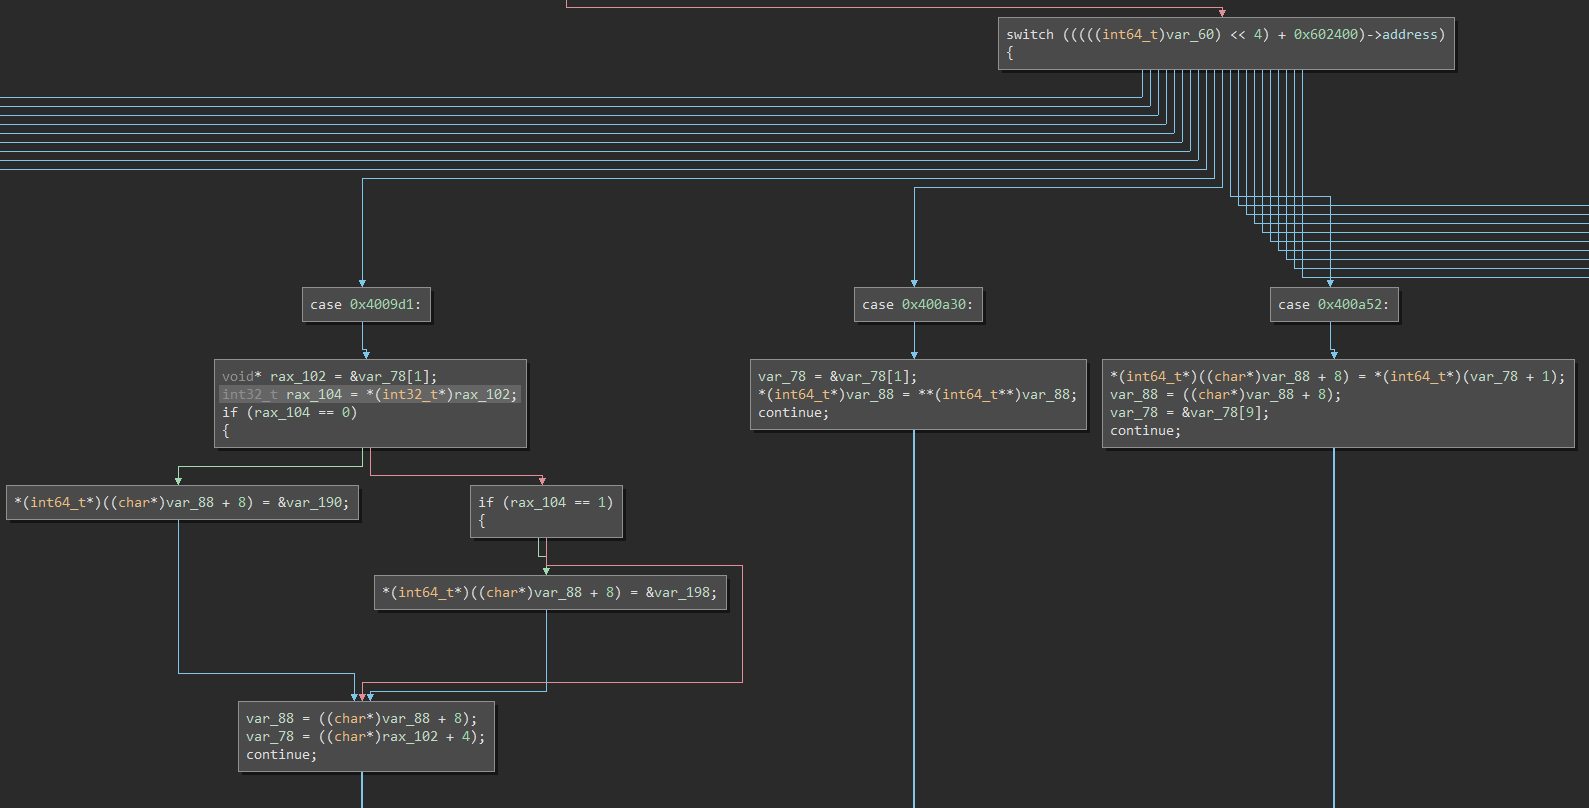
And we're done!
Next steps:
- Classifying the VM handlers
- Reversing the chunk of code at the start of the loop that decodes the opcodes
- Lifting the VM bytecode into some sort of IL
- Reversing the IL to crack the obfuscator
Subscribe to my newsletter
Read articles from Sam Russell directly inside your inbox. Subscribe to the newsletter, and don't miss out.
Written by
