CSS Selectors
 Manash Chauhan
Hi there, in this article I have discussed about the different types of CSS selectors. If you are new to CSS and struggles around different type of ways in which you can select HTML elements then give this article a try!
CSS Selectors
CSS selectors help us to target particular element or group of elements to which you want to style. CSS selectors selects HTML element based on its id, class or attribute.
Different types of CSS selectors are:
Universal Selector
Element Selector
ID Selector
Class Selector
Group Selector
Combinators
Universal Selector
It is used to select all elements on the page.
Syntax:
*{ /*style you want to give*/ }
Eg.
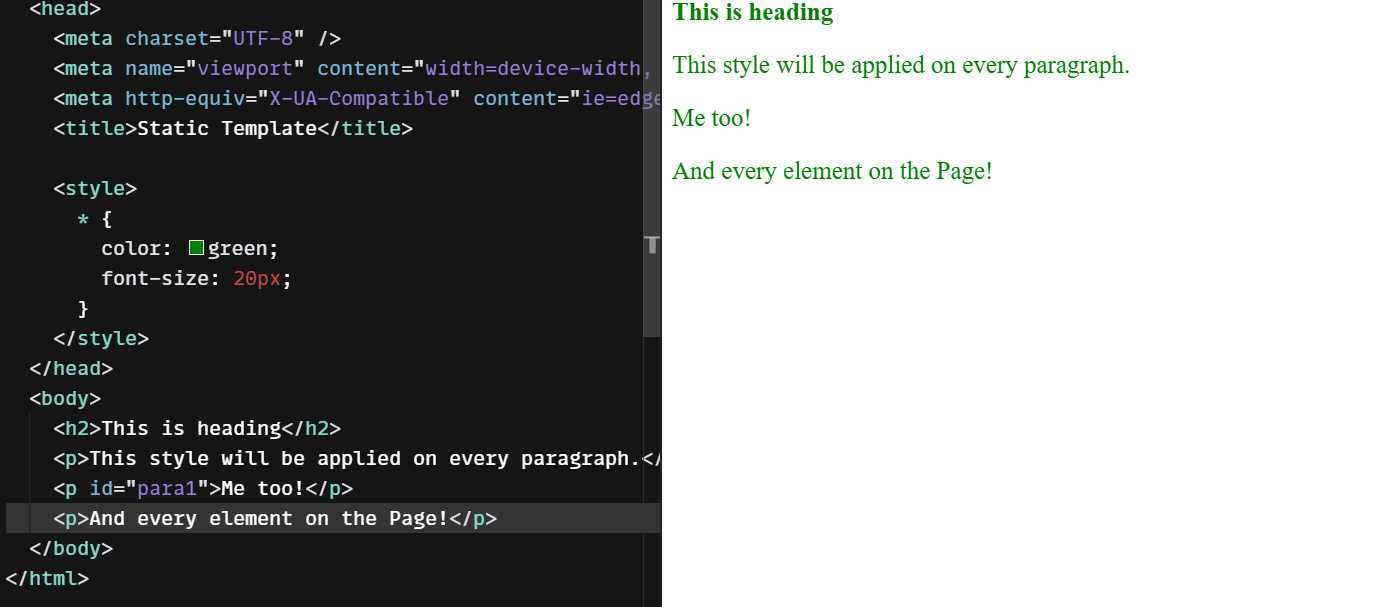
Below example shows the use of universal selector. In this we have given green color and font-size as 20px and as we can see in the output it gets applied to all the elements.
Element Selector
This CSS selector selects element based on its name.
Syntax:
elementName{ /*style you want to give*/ }
Eg.
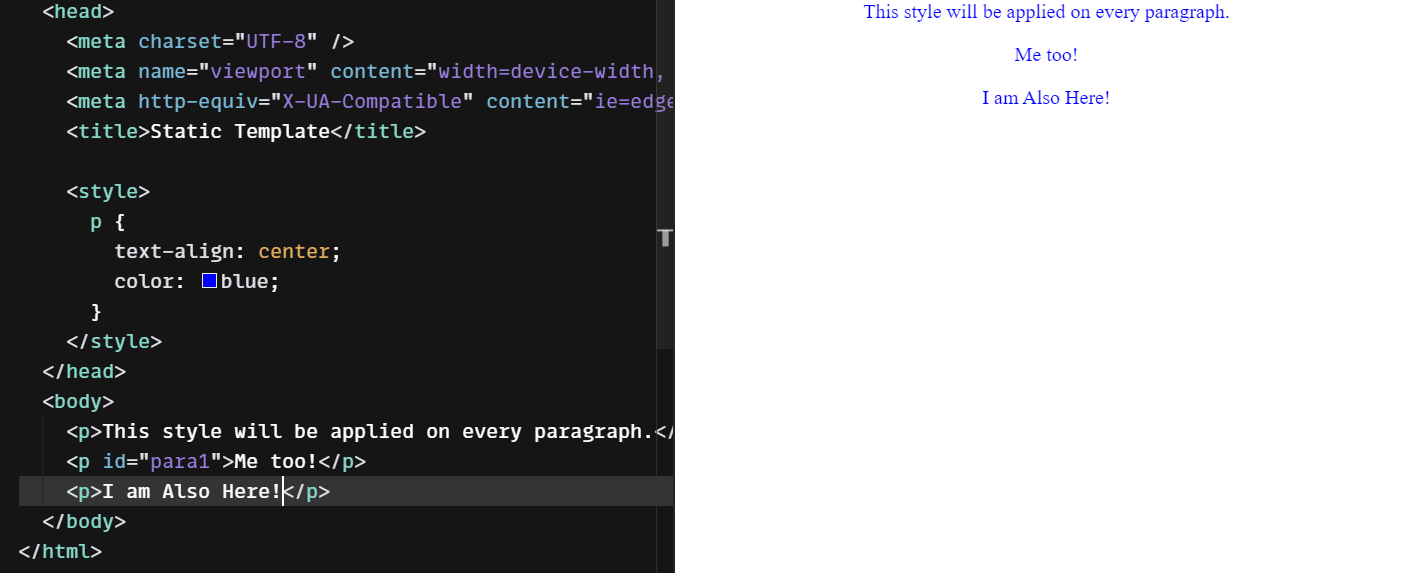
This below snippet shows how to select and style all paragraph in the html document. It selects all the available paragraph elements, align them to the center and colors them as blue.
ID Selector
This selector is used to select elements based on its id and style that element particularly. In CSS we use #(pound) symbol followed by ID name for specifying that we need to select element by id.
Syntax:
#IDName{ /*style you want to give*/ }
Eg.
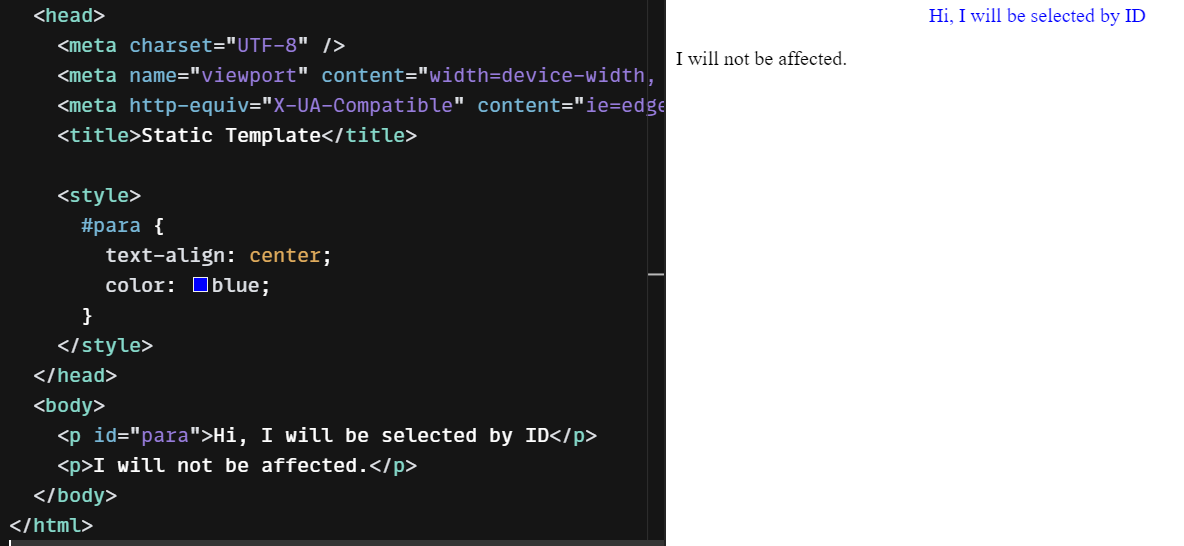
In this HTML document we have two paragraph elements and on one we have set id attribute as para, and we are selecting that paragraph using its id and applying CSS properties to it. Note the < p > with id="para" only gets styled other one remain as it is!
Class Selector
It selects HTML elements based on the class attribute. To select elements by class use .(dot) character and then class name.
Syntax:
.className{ /*style you want to give*/ }
Eg.
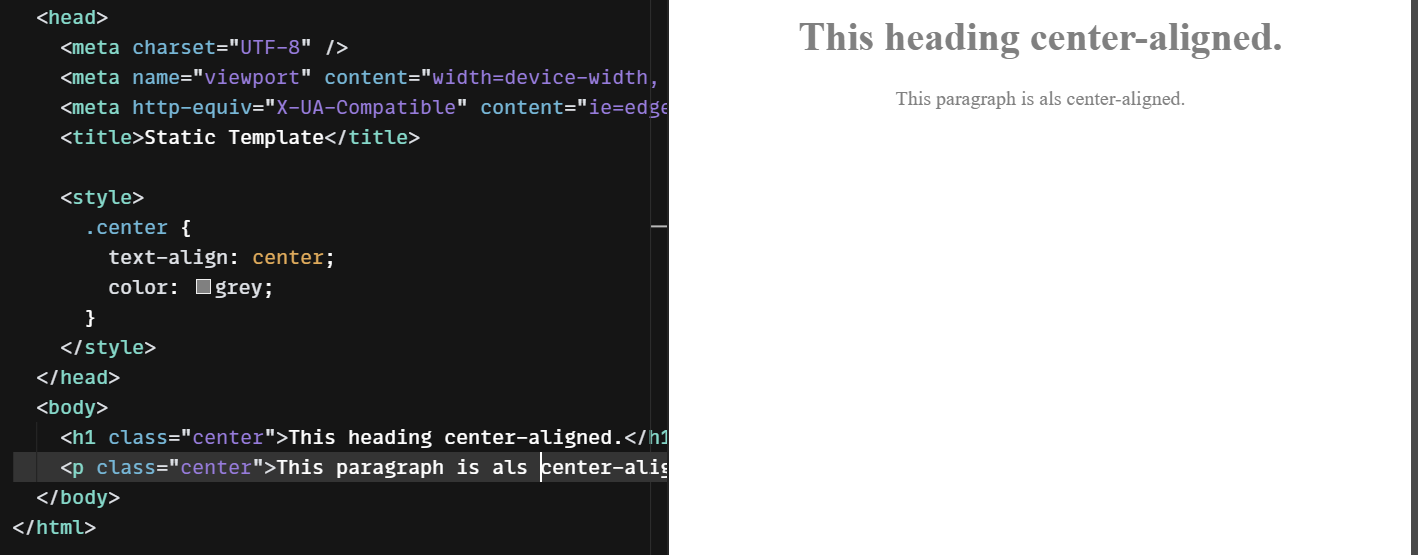
Below example shows how you can use class selector and style the elements who have same class in one go!
Group Selector
Grouping selectors helps to select all elements that you want to give same styling properties, this helps in reducing the code as you don't have to select each element one-by-one and give the same style. Commas(,) are used to separate each element selector while grouping.
Syntax:
Selector1,Selector1,Selector3,....,Selector_n{ /*style you want to give*/ }
Eg.
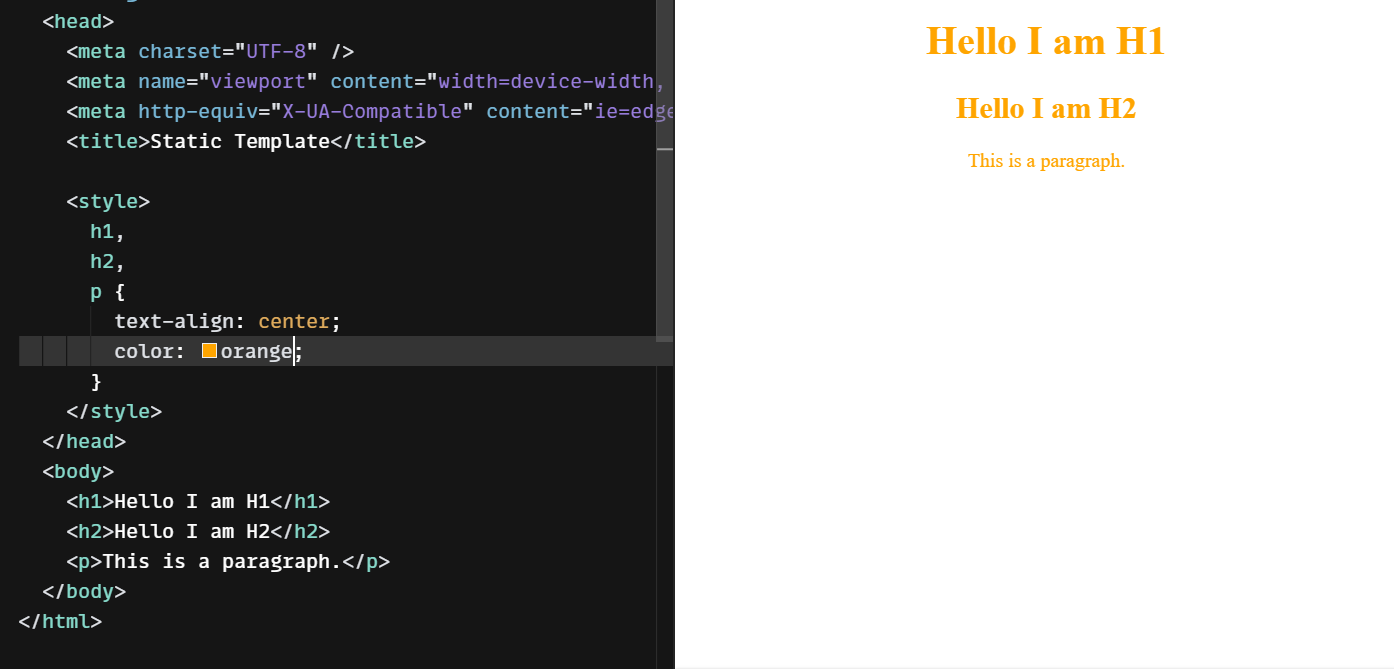
In this we have selected h1, h2 and paragraph and given all of them a same style.
Combinators
Combinators describes relationship between two or more selectors.
There are mainly 4 types of combinators :-
Descendant selector (space)
Adjacent sibling selector (+)
Child selector (>)
General sibling selector (~)
Descendant selector
It uses the space as the separator between the elements. This selector is used to select all the child elements of a particular element and style them. It combines two selectors in which the first selector represents an ancestor (parent, parent's parent, etc.), and the second selector represents descendants (child). The elements matched by the second selector are selected if they have an ancestor element that matches the first selector.
Syntax:
element1 element2{ /*style you want to give*/ }
Eg.
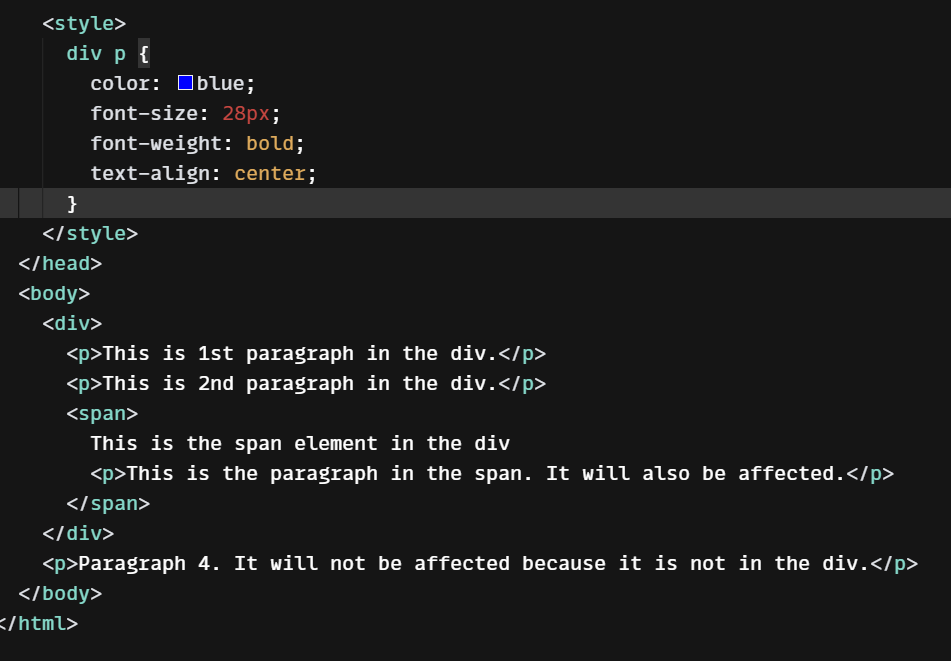
In this example we have selected all the < p > elements that are inside a div and styled them. Note that it can be direct or indirect child.
Output
Adjacent sibling selector
It uses the plus (+) sign as the separator between the elements. It matches the second element only when the element immediately follows the first element, and both of them are the children of the same parent.
Syntax
element + element {
/*style you want to give*/
}
Eg.
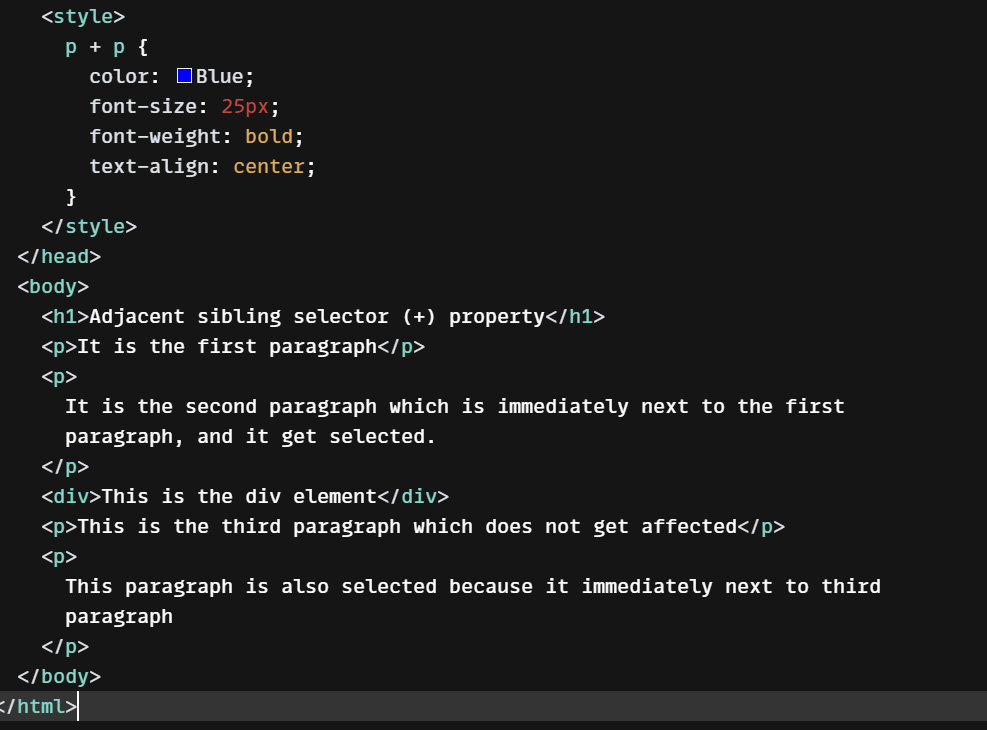
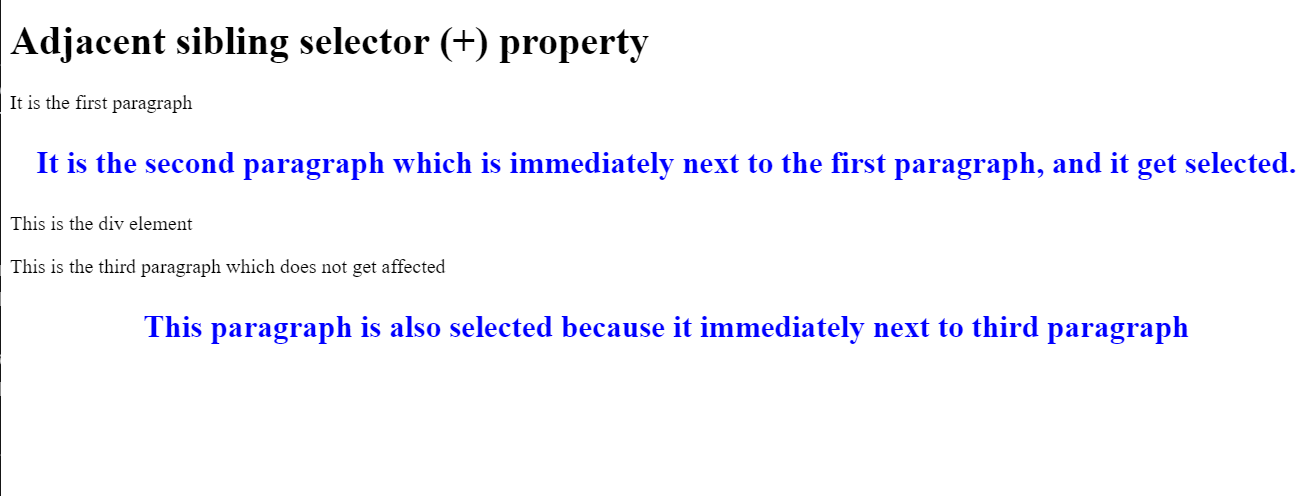
In this example we have selected < p > element those come immediately next to other
< p >. In this only the second < p > will get the particular style.
Output
Child selector
It uses the greater than (>) sign as the separator between the elements. It selects the direct descendant(child) of the parent.
Syntax
element > element {
/*style you want to give*/
}
Eg.
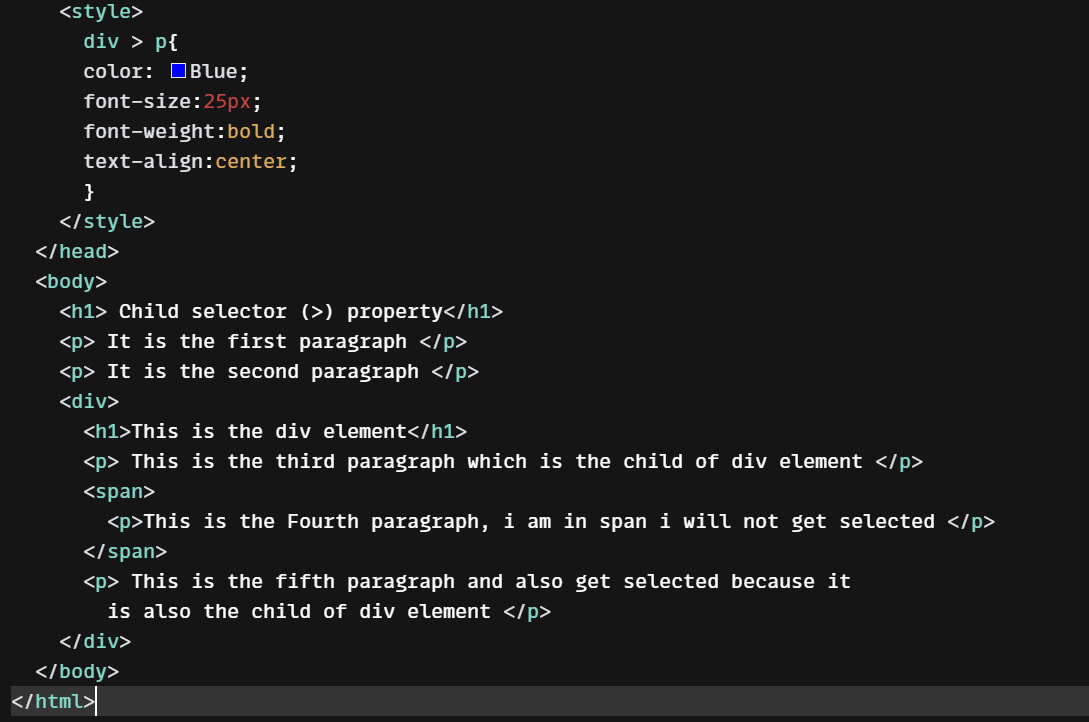
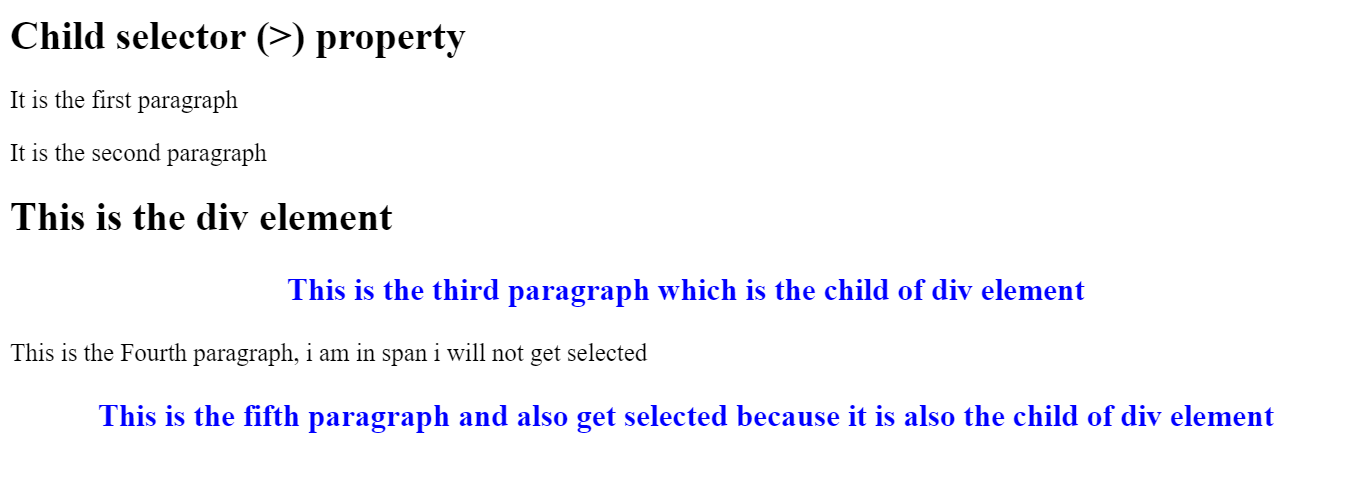
In this example we have selected all the < p > elements that are direct child of div. The main difference between child selector and descendant selector is that child selector only select elements that are direct child which is not the case in descendant selector.
Output
General Sibling Selector
It uses the tilde (~) sign as the separator between the elements. It selects the elements that follow the elements of first selector, and both of them are the direct children of the same parent. It is useful when we have to select the siblings of an element even if they are not adjacent directly.
Syntax
element ~ element {
/*style you want to give*/
}
Eg.
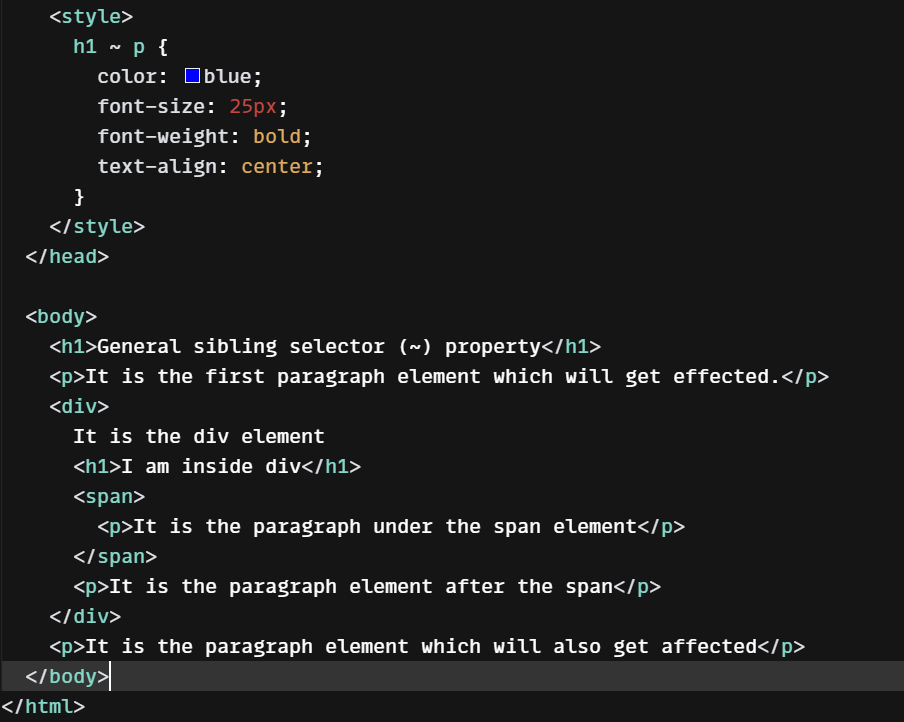
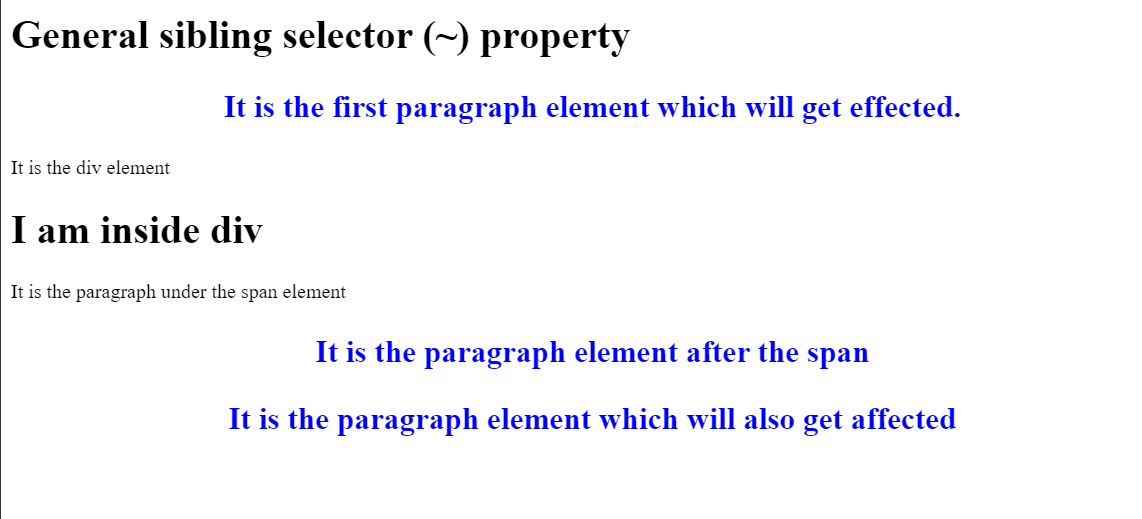
In this example we have targeted all the < p > elements that are siblings of < h1 > and which share direct parent with < h1 >. In this the < p > which is inside < span > will get targeted as its direct parent is < span > and inside < span > it does not have any < h1 > sibling.
Output
That's all from this article I hope some of your doubt get resolved from this article, will catch you up in the next one, till then keep grinding! Thank You.
Subscribe to my newsletter
Read articles from Manash Chauhan directly inside your inbox. Subscribe to the newsletter, and don't miss out.
Written by

