Guide to Remix IDE: First step in Smart Contract Development
 Subroto Kumar
If you're new to Blockchain Development, Remix IDE can be an amazing tool in Web3 and dApps development that enables you to skip time-consuming backend coding and still deploy excellent Smart contracts and Decentralised Applications.
Hey, forks! This is Subroto Kumar, and in this article, I'll explain the following:
- What is Ethereum remix IDE
- How to use Ethereum remix IDE to write smart contracts.
- How to deploy your smart contract on the Remix VM environment.
What is an Ethereum Remix IDE?
Remix is a browser-based compiler and IDE that enables users to build Ethereum contracts with the Solidity language and debug transactions.
To learn more about Remix-Project, see: https://remix-project.org
Getting started with Remix IDE
Layout
Firstly, head to the Remix-ide website.
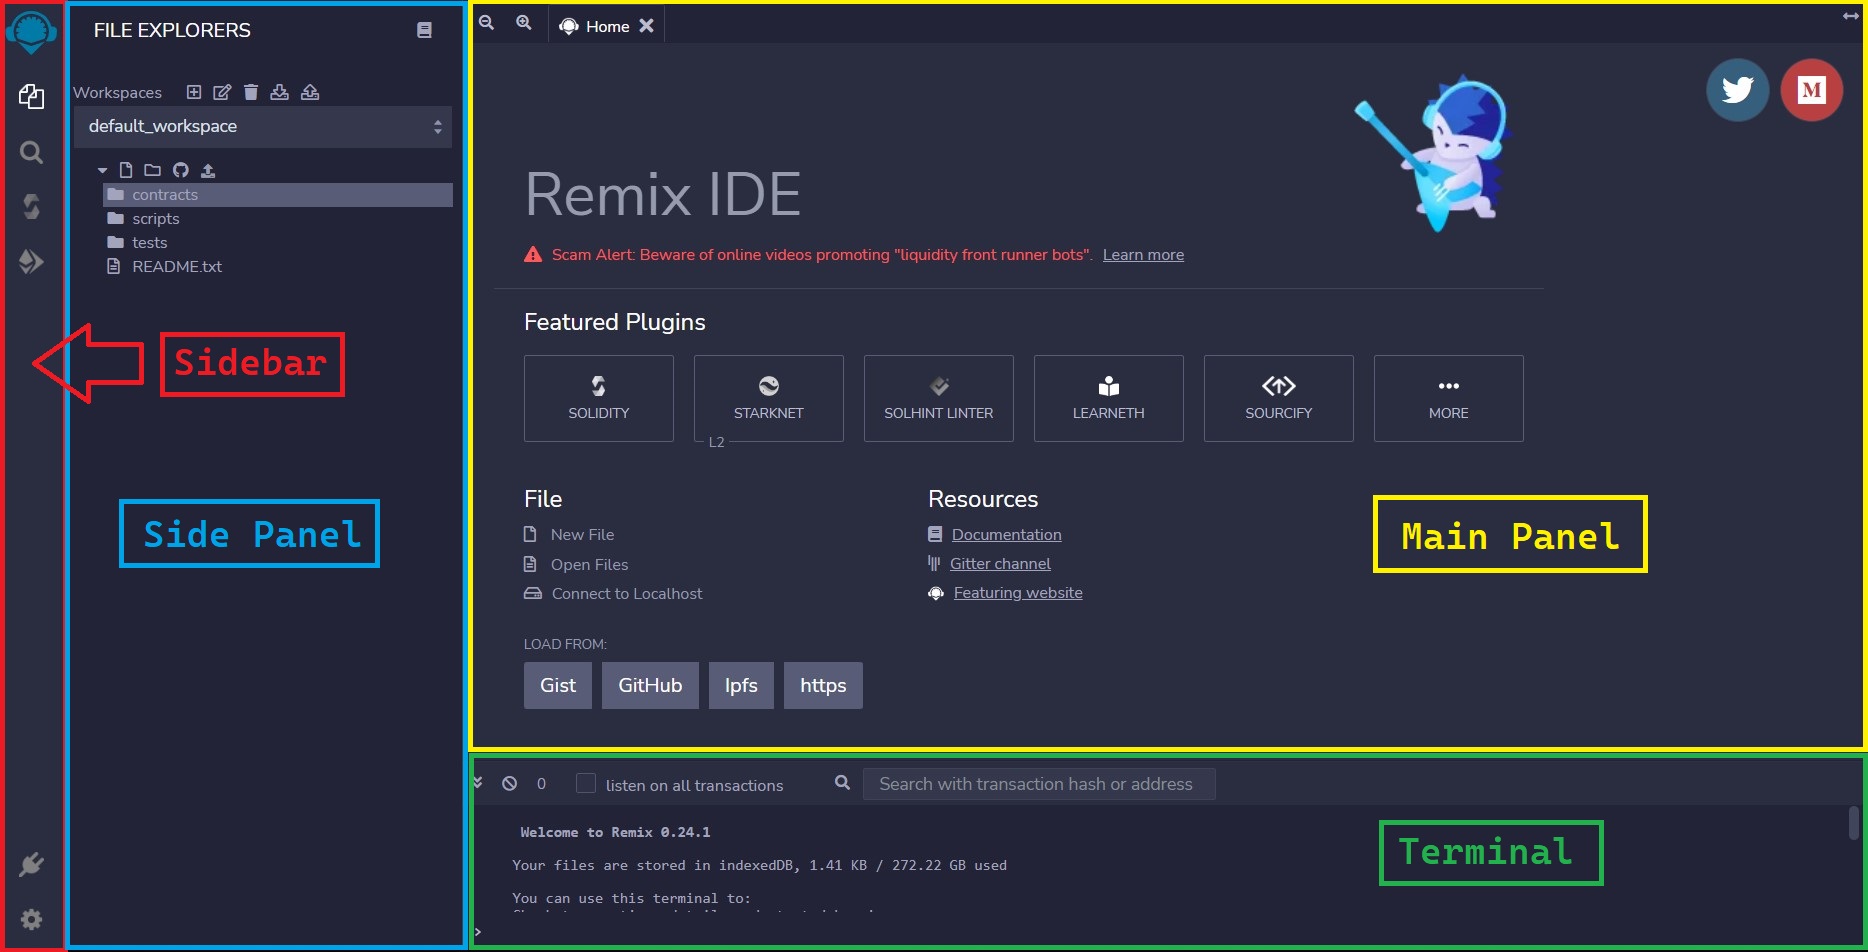
This is the main layout of Remix-ide, consisting of:
Sidebar/Taskbar- It typically shows which programs are currently running and allows quick access to different programs and plugins. When you load remix - the side-panel show these Six icons by default:
- File Explorer
The File Explorer is for managing workspaces and files.
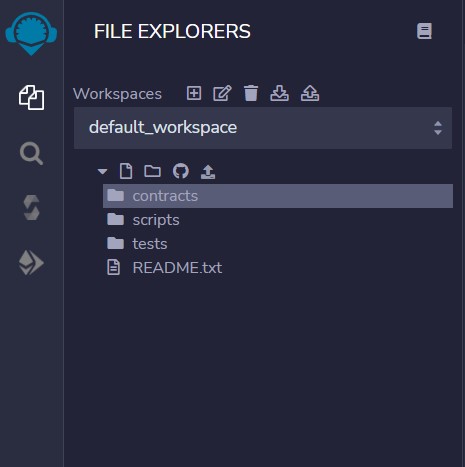
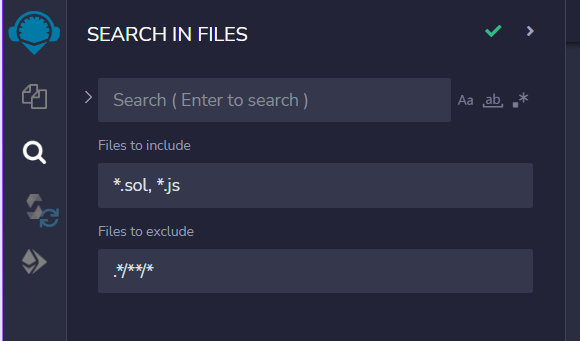
- Search In File Menu
- Solidity Compiler
It allows you change the solc compiler version and provide all the basic to advantage configuration options for compiling the solidity file.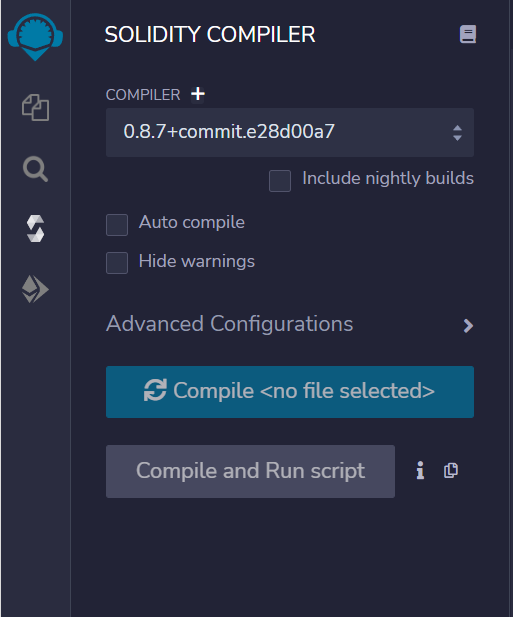
- Deploy and Run Transaction
This is the most vital module of Remix-ide that allows you to deploy and run your smart contracts and send transactions to the current environment.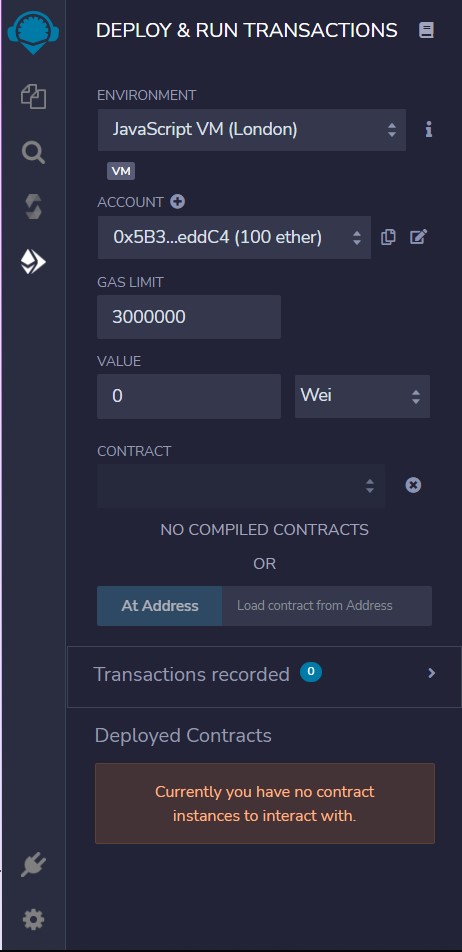
- Plugin Manager
To ease your development experience, Remix come with Plugin Manager that helps in controlling and integrating many useful plugins & other tools made by Remix team in your project. - Settings
- File Explorer
The File Explorer is for managing workspaces and files.
Side Panel - Option selected in the sidebar menu is displayed as GUI in side panel.
- Main Panel - It's main purpose is to provide space for editing your files.
- Terminal - where you will see the results of your interactions with the GUIs. Also, you can run scripts here.
Writing your first contract
To write your first smart contract click on File Manager in sidebar at top-left corner of screen.
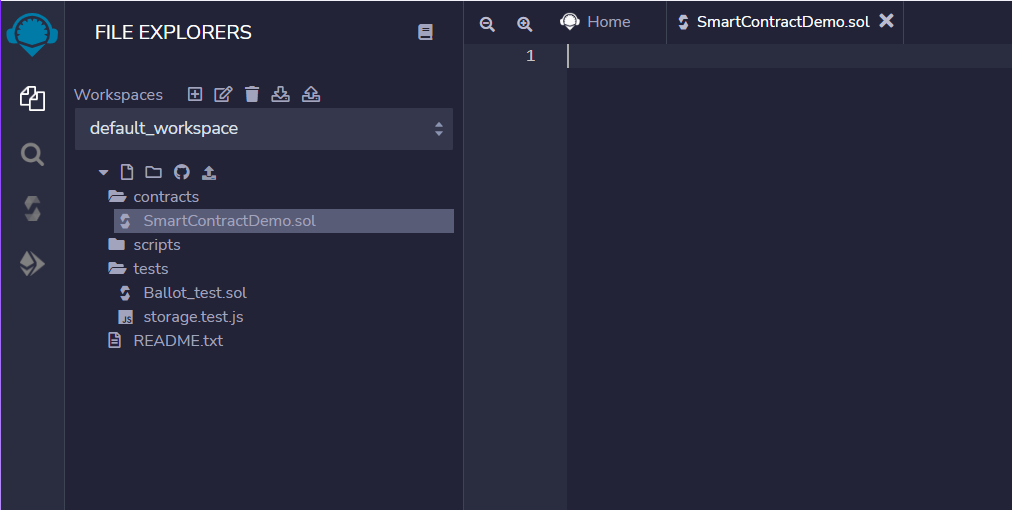 This is the basic file structure of smart contract project in remix. This shows current workspace that contains
 contractsfolder inside which we are going to put all our solidity files.Open the
contractsfolder and and delete all the exist solidity file inside it. Now create a new file by:
Right-clicking oncontractfolder >> selectNew File>> Enter the file nameNoteContract.sol
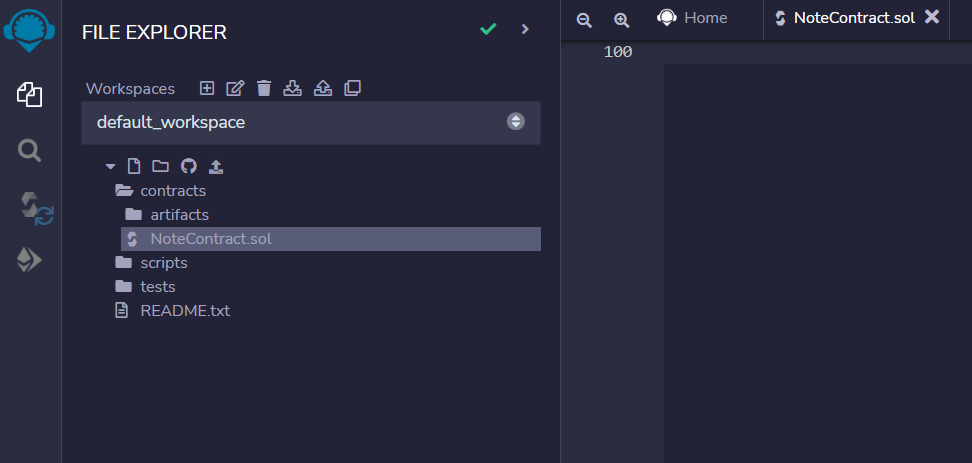
Now to write your first smart contract you need to define
SPDX-License-Identifierat the top. This is needed in all every smart contract to identify the type of license used in developed contracts, packages or Dapps. To do so, simple put a// SPDX-License-Identifier: <License-name>comment at the top like in code given below:// SPDX-License-Identifier: MITPragma Solidity version: It enable certain compiler features or checks and ensure that specified solidity compiler version must be used for compiling the our solidity code.pragma solidity 0.6.0;
Now we shall head to most import part of smart contract which to write all its variable and function inside contract body. For this example, I'm going to write a simple Note Taking Contract.
// SPDX-License-Identifier: MIT
pragma solidity ^0.6.0;

contract NoteContract {
    uint256 public noteCount = 0;

    struct Note {
        uint256 id;
        string title;
        string description;
    }

    mapping(uint256 => Note) public notes;

    function createNote(string memory _title, string memory _description)
        public
    {
        notes[noteCount] = Note(noteCount, _title, _description);
        noteCount++;
    }

    function deleteNote(uint256 _id) public {
        delete notes[_id];
        if(noteCount>0 && noteCount>_id) noteCount--;
    }
}
Compiling your smart contract
After completing the smart contract, click on Solidity Compiler Menu from the sidebar an then press Compile NoteContract.sol button.
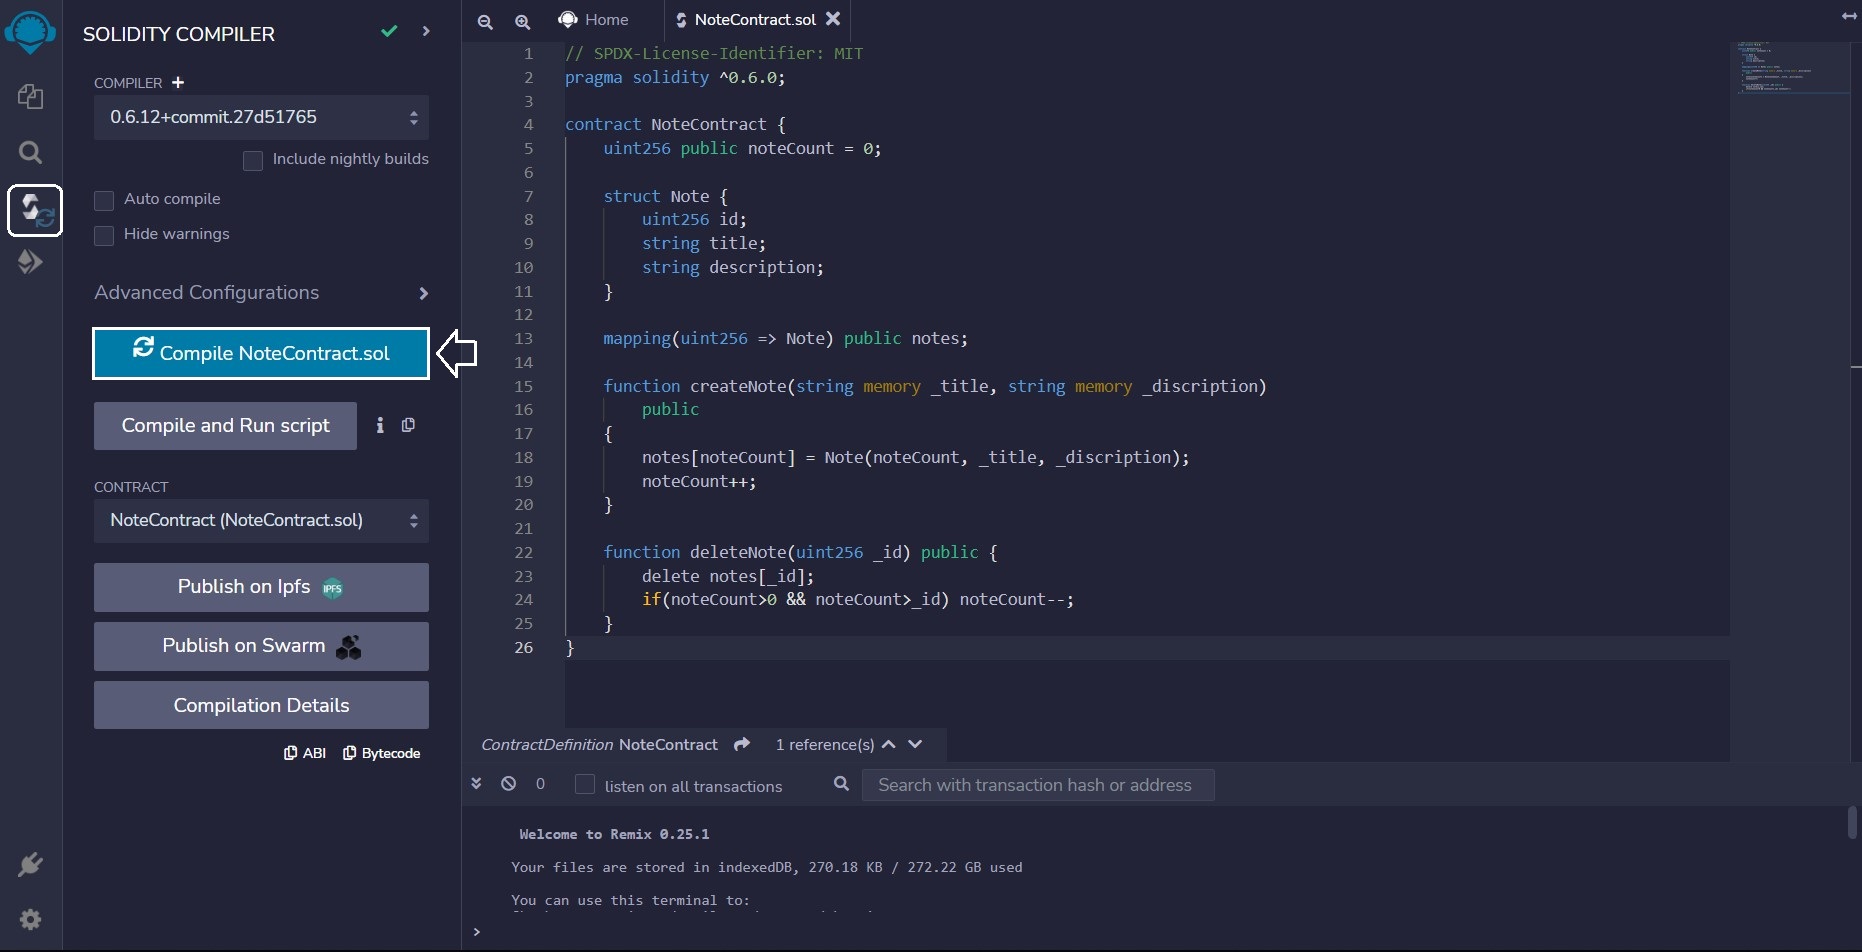
Deploy and Run Transaction Module Overview
Now, open the Deploy and Run Transaction menu from the sidebar
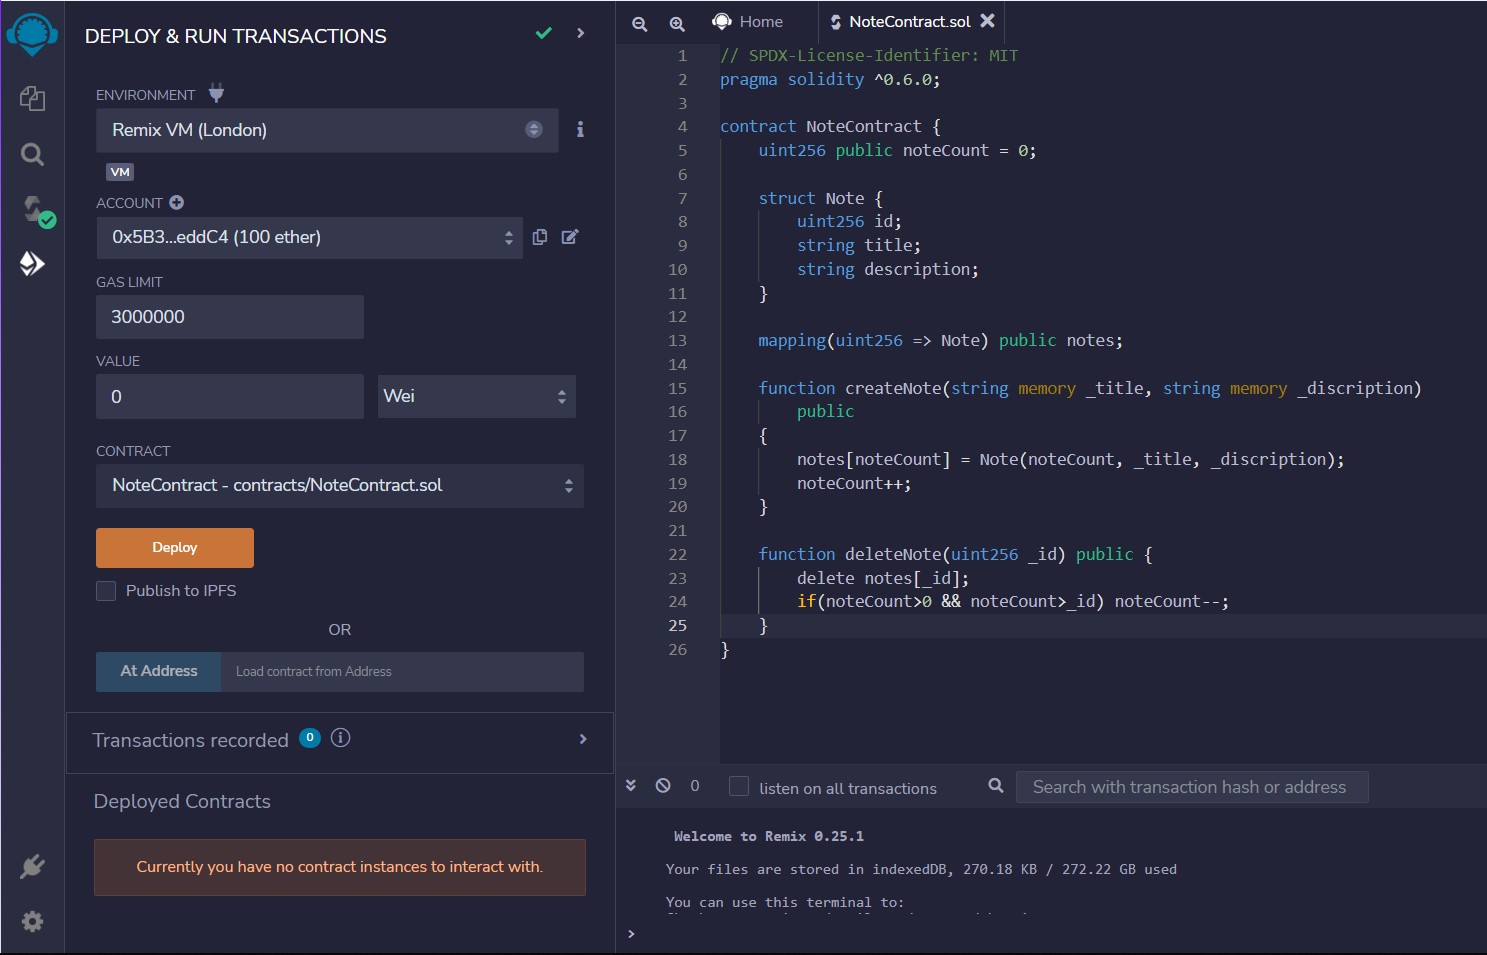
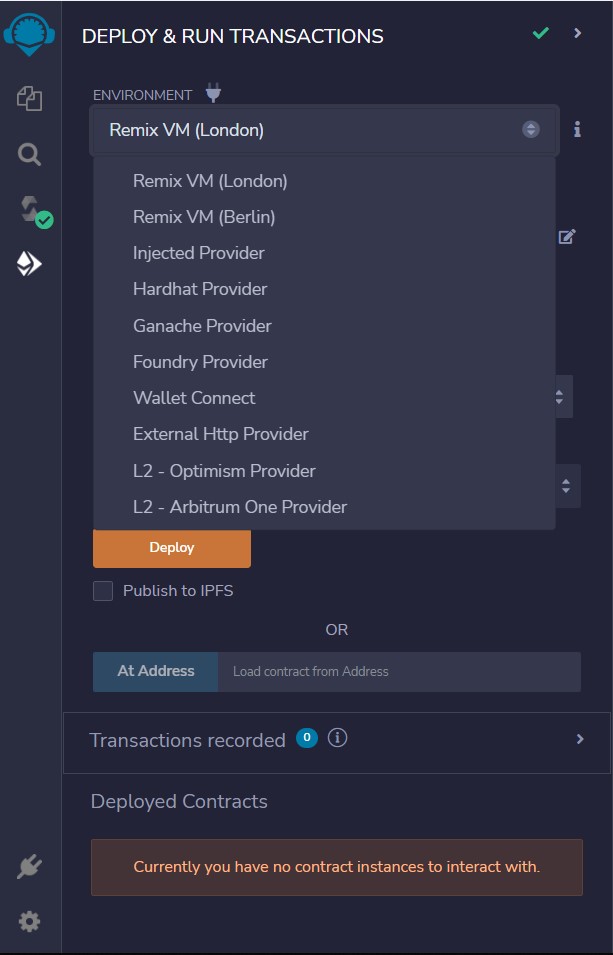
ENVIRONMENT
- Remix VM: For connecting to a Remix's own isolated computing environment blockchain in the browser.
- Injected Provider: For connecting Remix to an injected web3 provider such as Metamask.
- Hardhat Provider: For connecting Remix to a local Hardhat test chain.
- Ganache Provider: For connecting Remix to a local Truffle Ganache test chain.
- Foundry Provider: For connecting Remix to a local Foundry Anvil test chain.
- WalletConnect: For using the WalletConnect allowing you to approve transactions on a mobile device.
- External HTTP Provider: It will connect to a remote node by providing the URL to the selected provider.
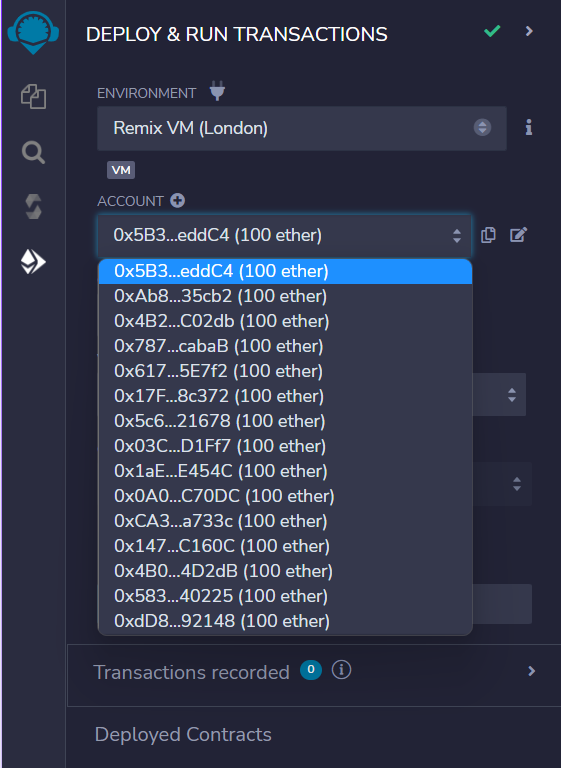
ACCOUNT
This displays the list of accounts Hash addresses associated with the current environment and their associated balances. On the Remix VM, you have a choice of 15 accounts. If using Injected Web3 with MetaMask, you need to change the account in MetaMask.
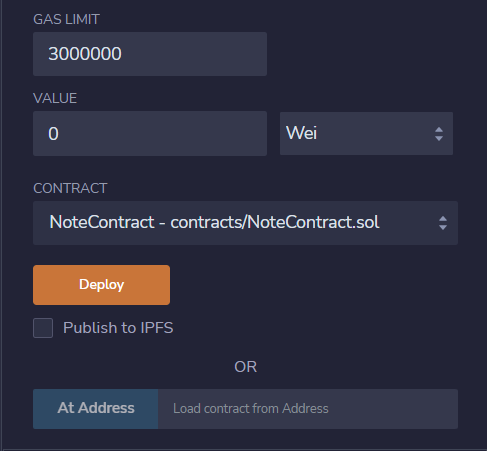
 GAS LIMIT
This sets the maximum amount of gas that will be allowed for all the transactions created in Remix.
VALUE
This sets the amount of ETH, WEI, GWEI etc that is sent to a contract or a payable function.
CONTRACT
This displays all the compiled contracts in your workspace and sets the particular smart contract that will be going to deployed in the selected environment.
Deploying and Running Transaction
To deploy your contract:
- Come back to Deploy & Run Menu.
- Configure the preferred option and press Deploy button.
Bravo! You have successfully deployed your first smart contract.
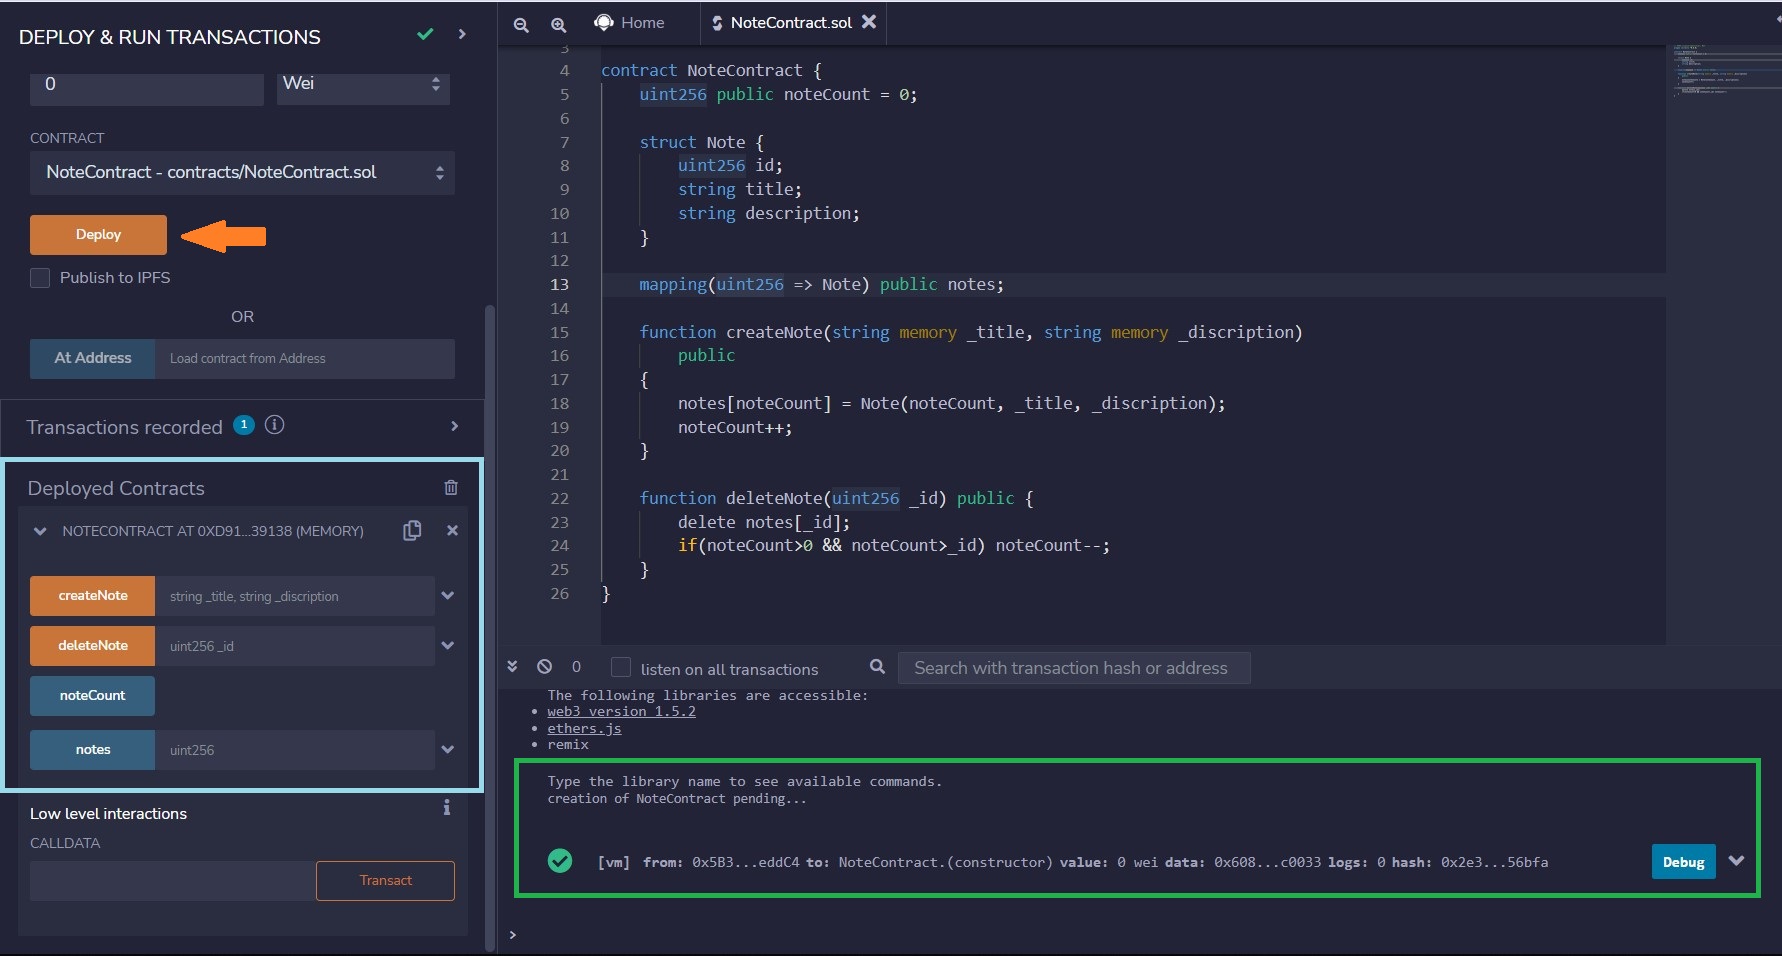
DEPLOYED CONTRACTS
Once the contract is deployed, Click the sideways caret in Deployed Contract section in the Run tab to interact with through autogenerated UI of the deployed contract. The deployed contract appears in its collapsed form.
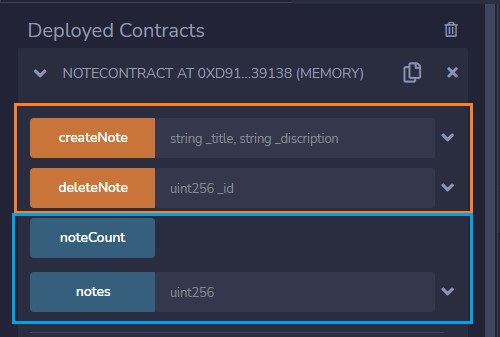
Here, the functions buttons can have different color buttons
- Blue colour represent
Pure and View Function - Orange colour represent
Not payable function - Red colour represent
payable function
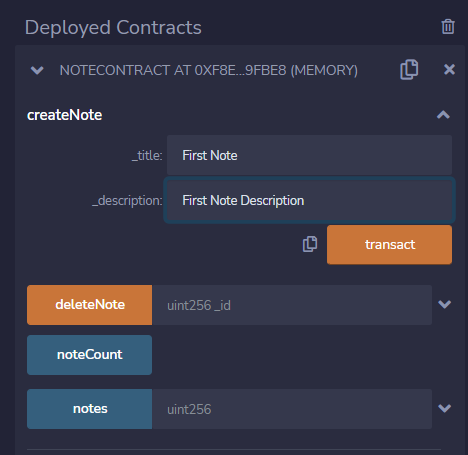
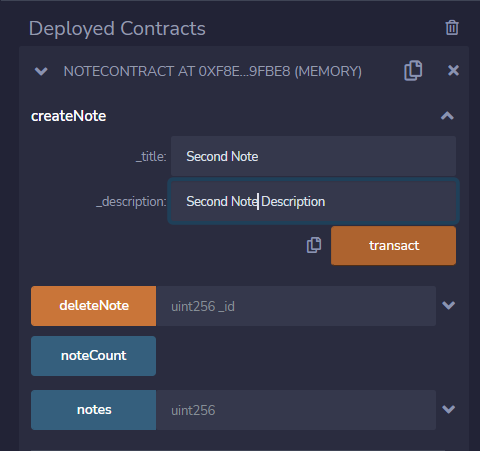
Now let me demonstrate by how to interest with the UI to run transaction.
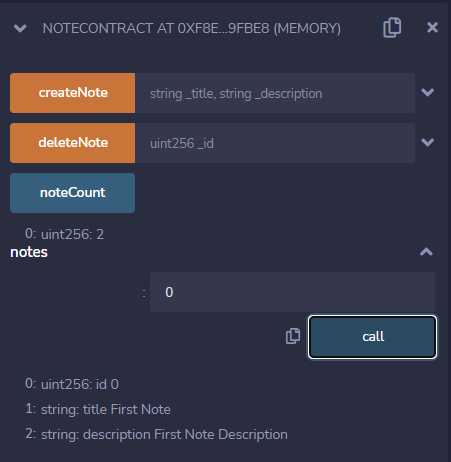
- Adding two Notes by calling
createNotefunction
- Getting
noteCountandNoteat index 0
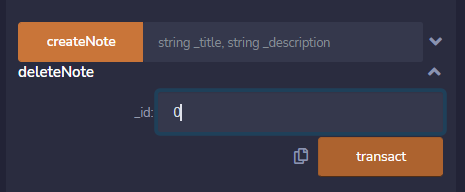
- Then delete note at
index 0by using callingdeleteNotefunction
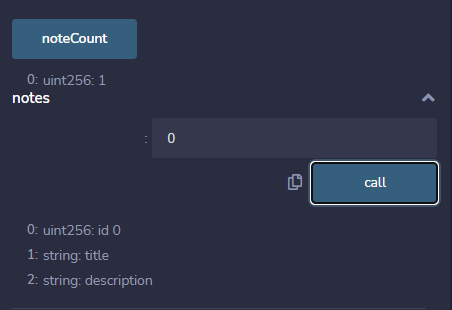
- Finally, again calling
noteCountandNoteat index 0
You will see the results of your interactions every time we call function with the GUI’s (except for pure and view functions) in the terminal.
Documentation:
Solidity : https://docs.soliditylang.org/en/latest/
Remix-ide: https://remix-ide.readthedocs.io/en/latest/index.html
I hope you have found this article helpful. Thank you for reading!
CONNECT WITH ME
https://bio.link/subroto
Support:
Subscribe to my newsletter
Read articles from Subroto Kumar directly inside your inbox. Subscribe to the newsletter, and don't miss out.
Written by

Subroto Kumar
Subroto Kumar
Seasoned software engineer with expertise extends across requirement definition and application implementation with diverse range of programming languages and technologies. I can effortlessly dance between the front-end and back-end realms, crafting digital experiences that seamlessly blend functionality with killer aesthetics.
