Make Errors User-Friendly with React Error Boundaries
 Thisura Thenuka
What are Error Boundaries ?
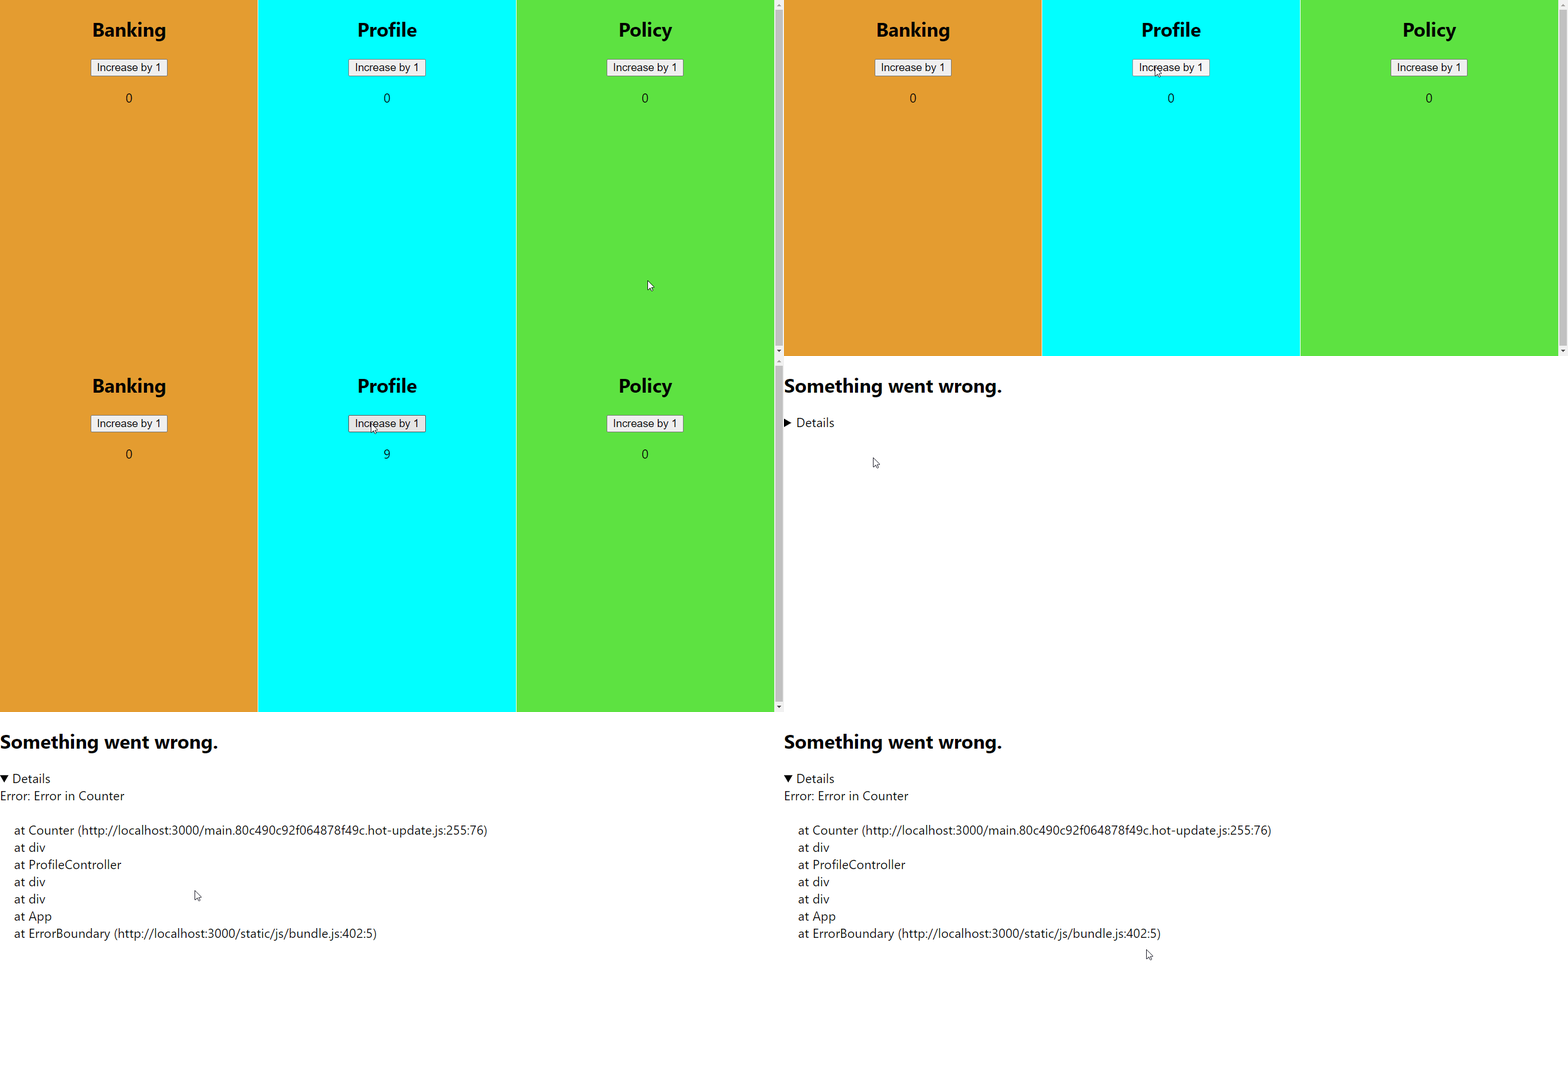
React Error Boundaries are used to show a user-friendly UI to users when unexpected JavaScript errors occur.
A JavaScript error in a part of the UI usually renders a white screen and crashes the entire app. React Version 16 introduced a solution to this issue with the new “Error Boundary” concept.
How can I implement Error Boundaries ?
You can implement React Error Boundaries in your React app in 2 simple steps
- Create an error boundary component
- Wrap error-prone component with error boundary component
Creating Error Boundary Component
A class component becomes an error boundary if it defines either (or both) of the lifecycle methods
static getDerivedStateFromError()orcomponentDidCatch(). Usestatic getDerivedStateFromError()to render a fallback UI after an error has been thrown. UsecomponentDidCatch()to log error information. (https://reactjs.org/docs/error-boundaries.html)
Here is the example error boundary component provided in the React documentation.
import React from "react";

class ErrorBoundary extends React.Component {
    constructor(props) {
      super(props);
      this.state = { error: null, errorInfo: null };
    }

    componentDidCatch(error, errorInfo) {
      // Catch errors in any components below and re-render with error message
      this.setState({
        error: error,
        errorInfo: errorInfo
      })
      // You can also log error messages to an error reporting service here
    }

    render() {
      if (this.state.errorInfo) {
        // Error path
        return (
          <div>
            <h2>Something went wrong.</h2>
            <details style={{ whiteSpace: 'pre-wrap' }}>
              {this.state.error && this.state.error.toString()}
              <br />
              {this.state.errorInfo.componentStack}
            </details>
          </div>
        );
      }
      // Normally, just render children
      return this.props.children;
    }
  }

export default ErrorBoundary;
You can create your own error boundary with a fancier UI according to your use case.
Wrapping with Error Boundary
There are two ways you could wrap components with the error boundary
- You can wrap the top-level component
- You can wrap individual components
Wrapping Top-Level Component
<ErrorBoundary>
    <App/>
</ErrorBoundary>

Wrapping Individual Components
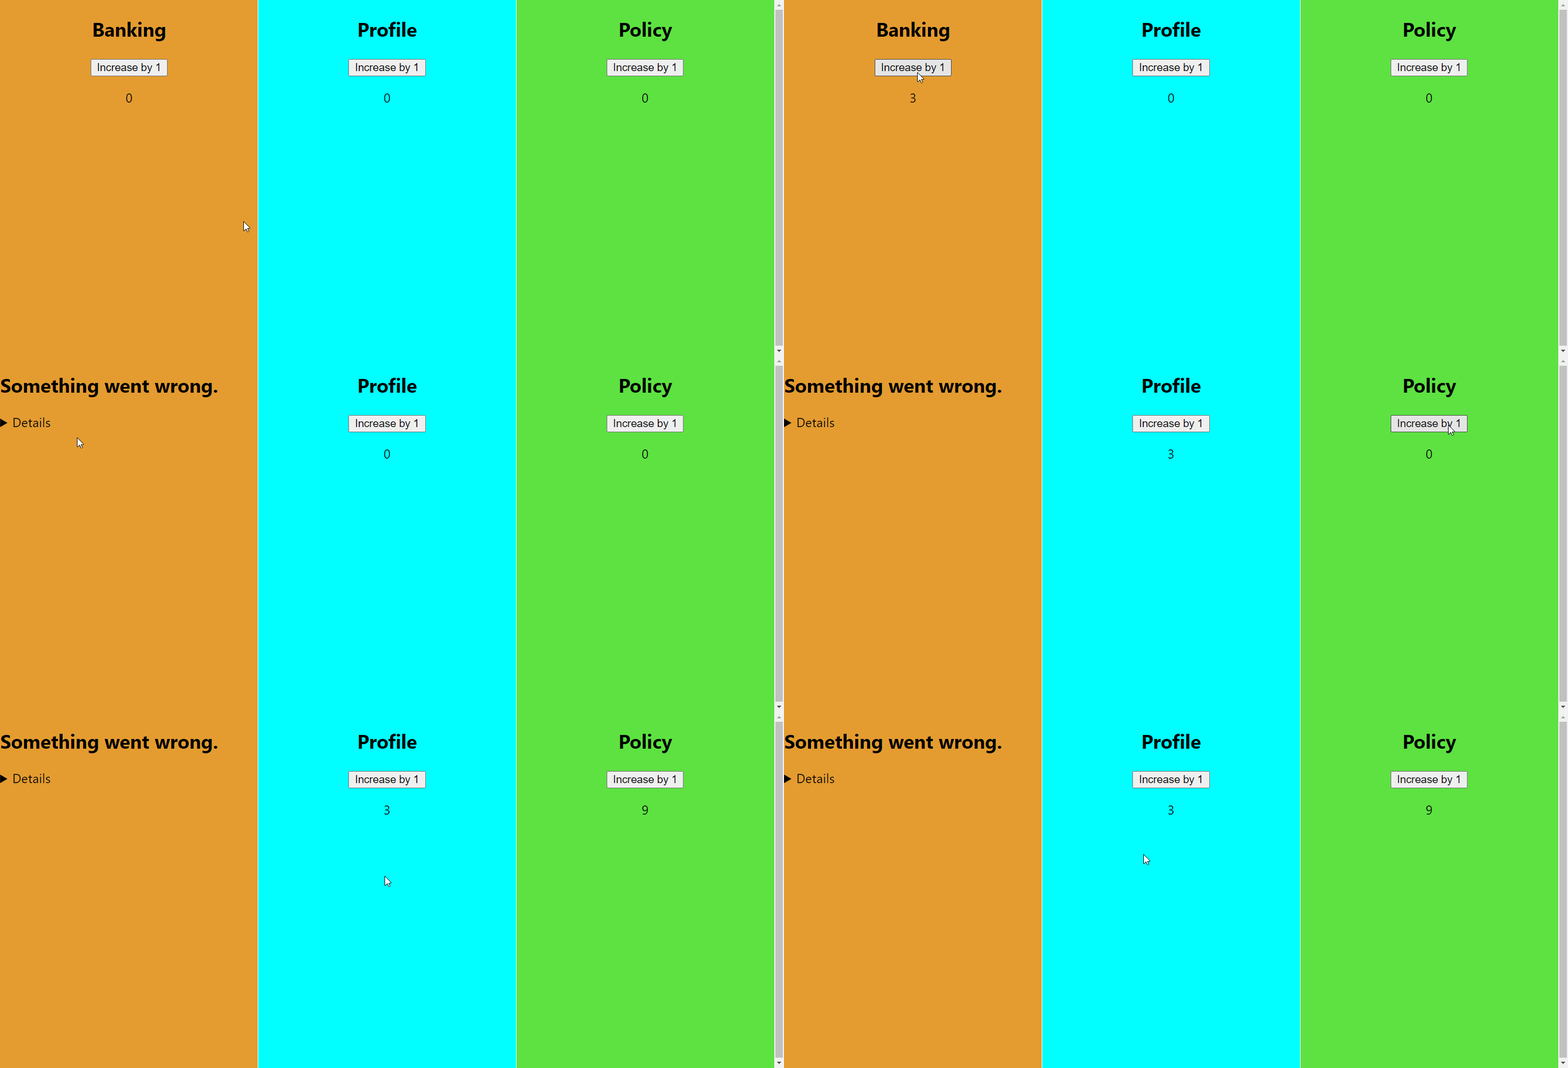
This approach would be ideal if your app has multiple different isolated sections.
<ErrorBoundary>
    <BankingController/>
</ErrorBoundary>
<ErrorBoundary>
    <ProfileController/>
</ErrorBoundary>
<ErrorBoundary>
    <PolicyController/>
</ErrorBoundary>
An error occurred in BankingController would not stop user from using the PolicyController or ProfileController.

So, Is my React app “white screen”-free now?
Well, React error boundaries can catch all errors except for the following :
- Event Handlers
- Asynchronous code
- Server Side Rendering
- Errors thrown in the error boundary itself
But you can always make use of regular JavaScript try/catch blocks whenever needed.
As of React 16, errors that were not caught by any error boundary will result in unmounting of the whole React component tree
Conclusion
React error boundaries provide a way for developers to make our apps more user-friendly. In my opinion, every React app should make use of React error boundaries and it makes a drastic difference in the user experience.
Thank you for taking the time to read my article. Hope you enjoyed it. If you learned something new, make sure to drop a like and share the article with your fellow developers.
Subscribe to my newsletter
Read articles from Thisura Thenuka directly inside your inbox. Subscribe to the newsletter, and don't miss out.
Written by

Thisura Thenuka
Thisura Thenuka
I'm a full-stack developer from Sri Lanka. I love to learn new things and write about them