Store data in google sheets using Laravel
 ashok gurung
Introduction
As a developer sometimes we need to share or access the data in google sheets for business purposes and for those who don't need a user account of the system to access specific data. In this tutorial, you can see a step-by-step process to store data in Google Sheets in a simple way.
Prerequisite
- Already configured Laravel Application
- Google account
Setup Google Project
Before installing the Laravel package let’s set up a Google project for the google sheet API.
Steps to setup google sheet API
- Sign the google and go to developers console
- Create a new project if necessary
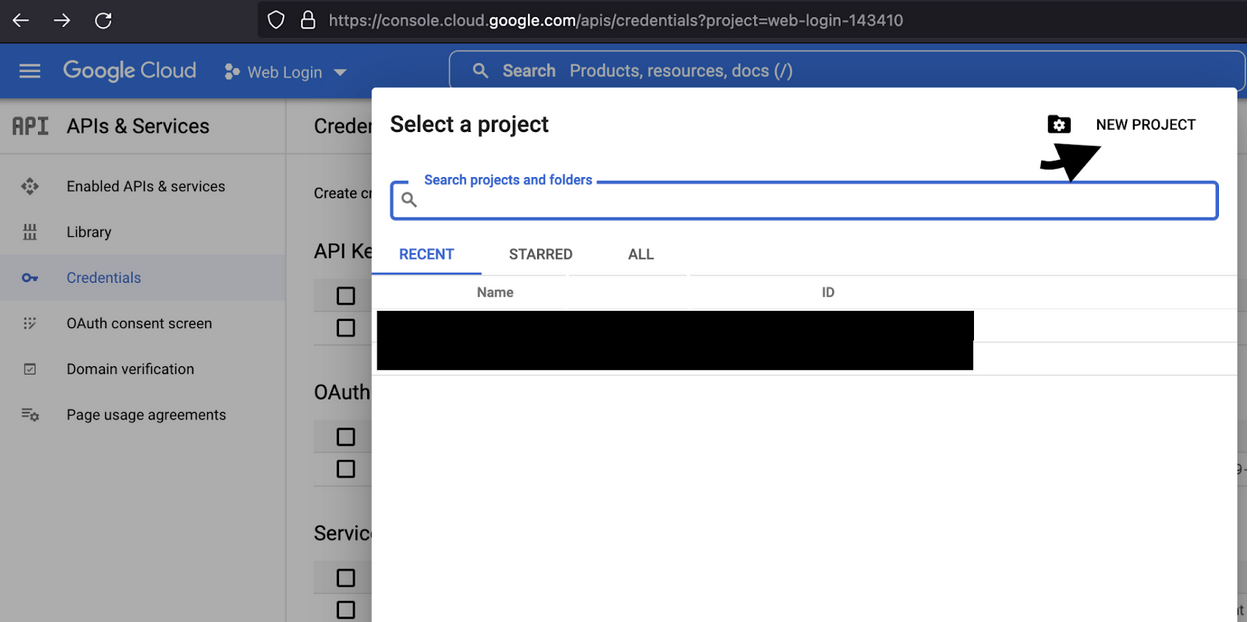
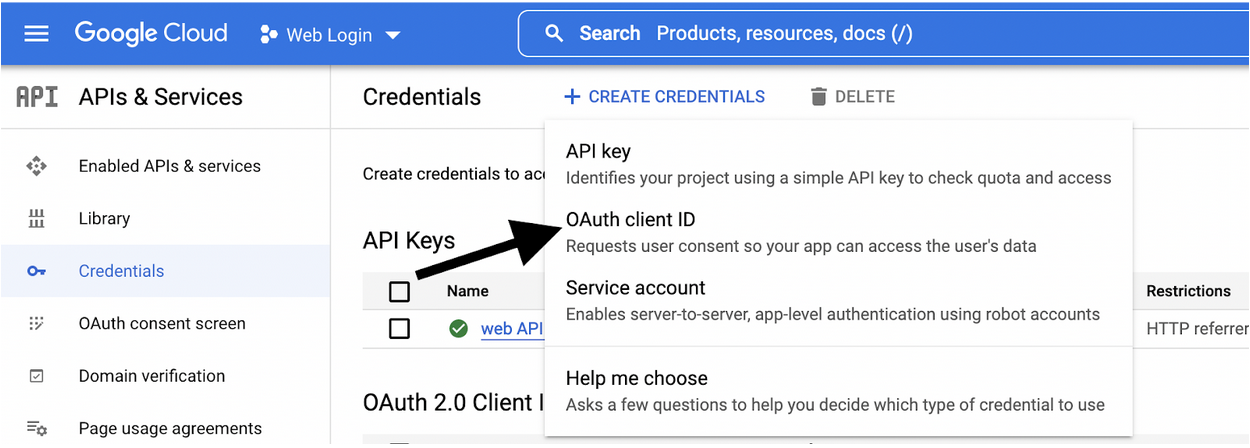
- After creating the project click the create credentials and select OAuth Client ID
- While creating OAuth client ID select Web application add name and redirect URIs.
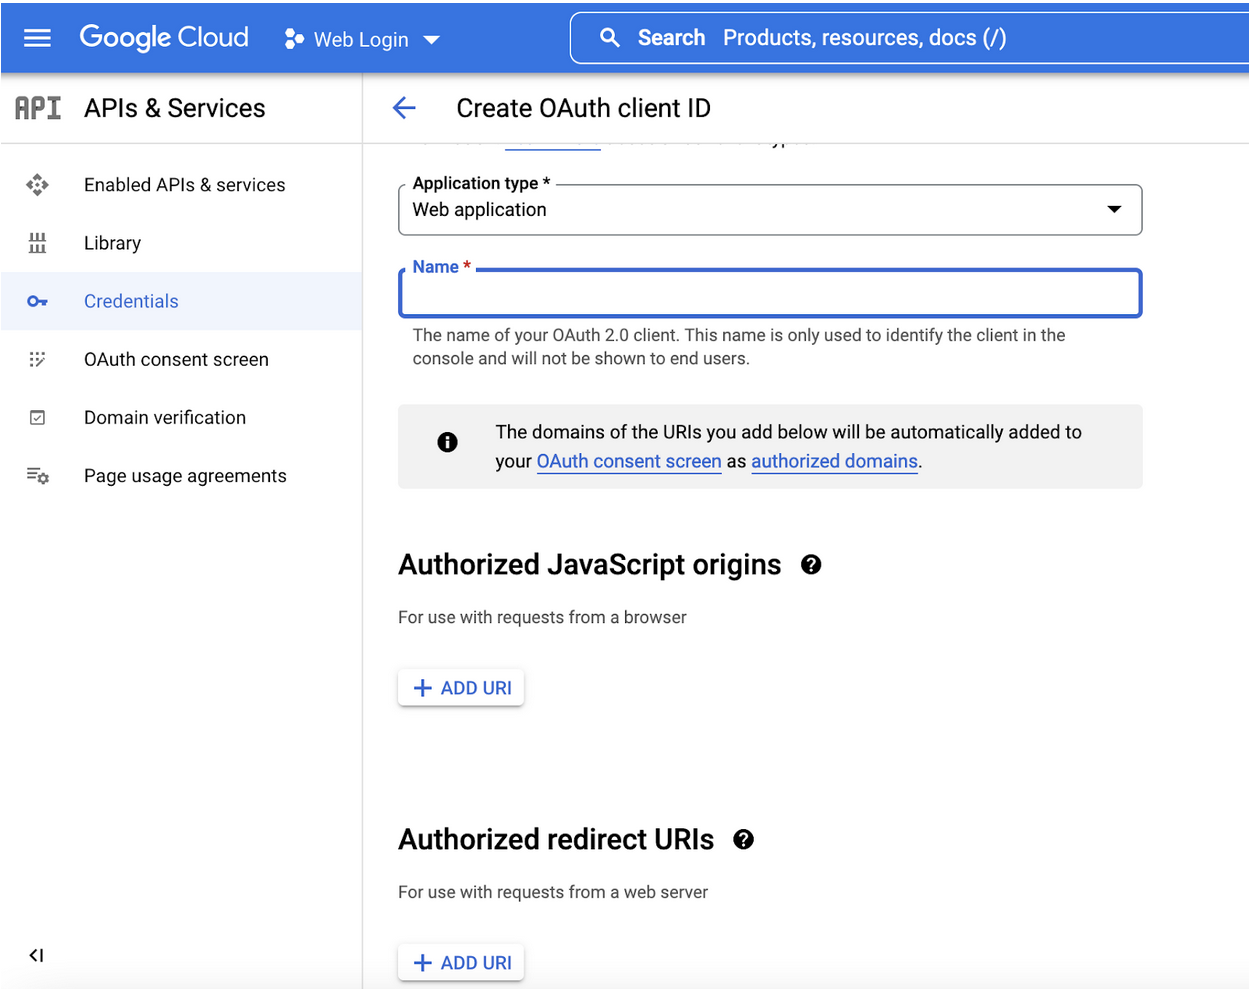
Note: Redirect URL can be either your development URL i.e. localhost or production URL which will be used to redirect users back to your application after google authentication.
- Create a service account

From the "manage accounts", section create a new service account if necessary
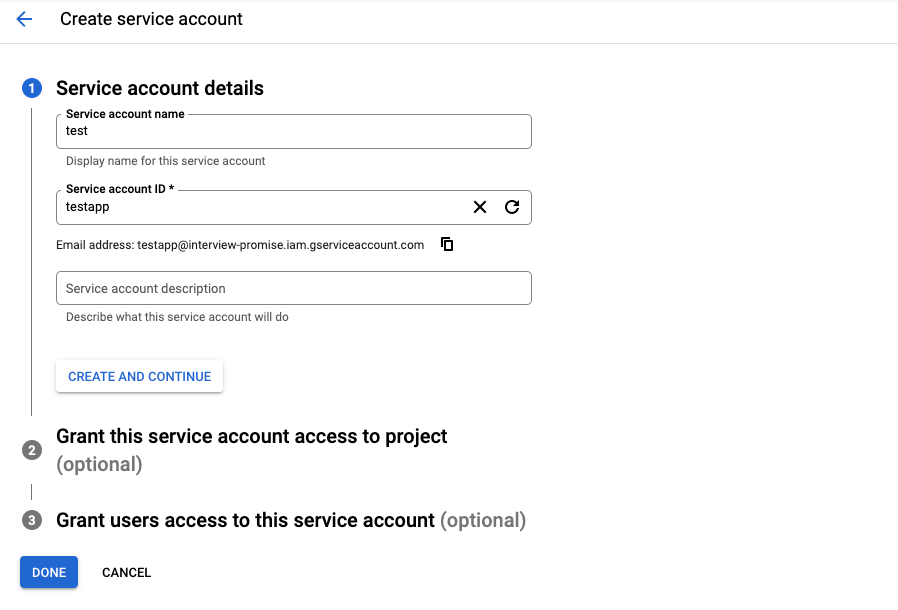
After creating a service account, we need to generate a key by clicking an already generated service account email. Navigate to keys tabs, and create a new private key for adding data in sheets.

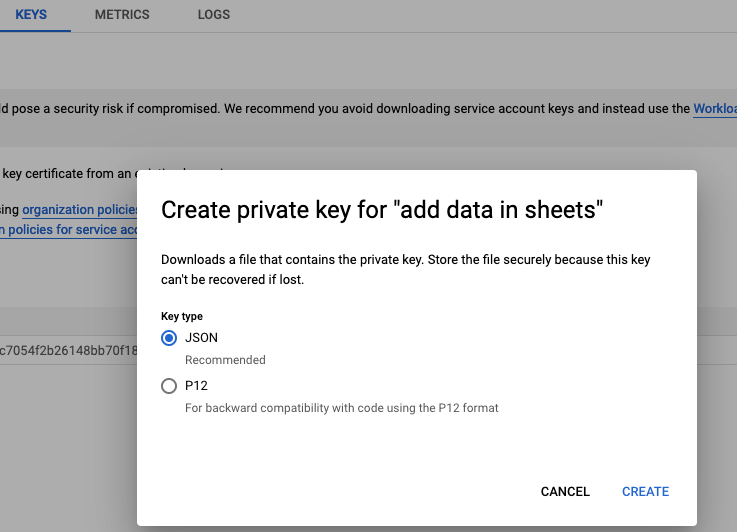
After creating the key, save the JSON file in your project storage folder and rename it to credentials.json

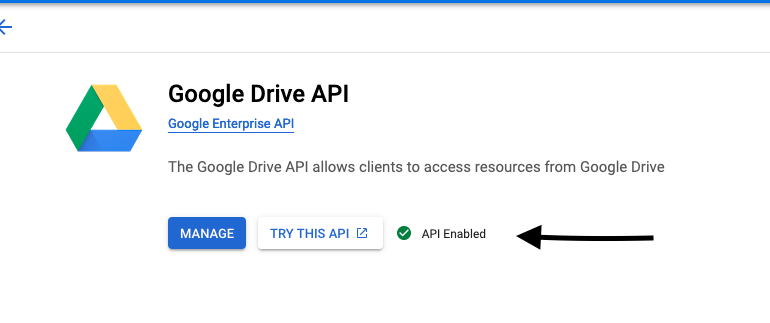
- Now we need to enable Google Sheets API and Google Drive API from the dashboard.
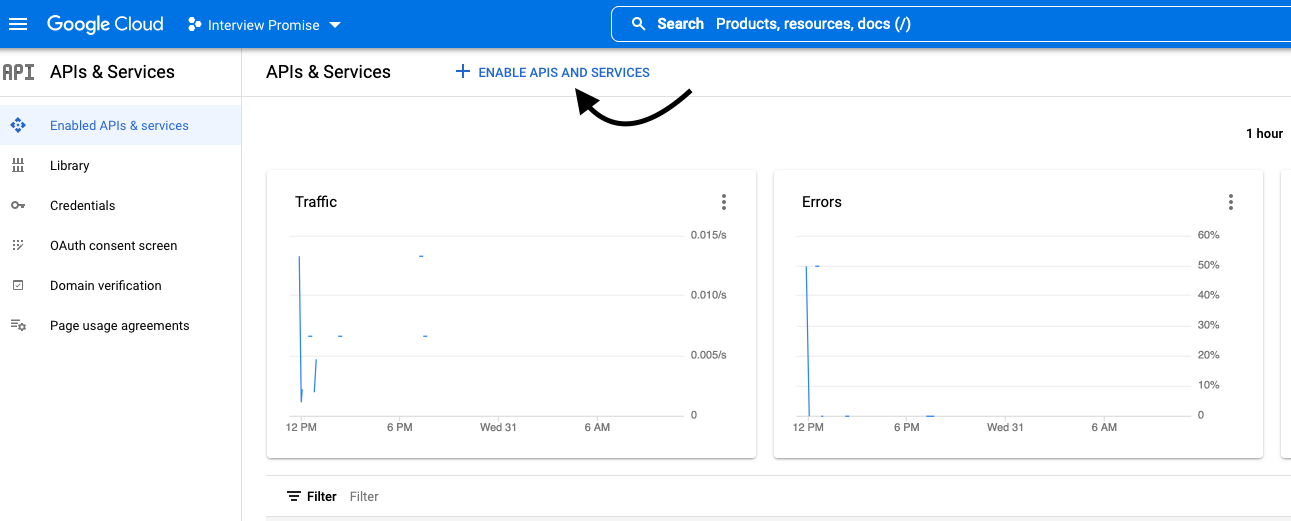
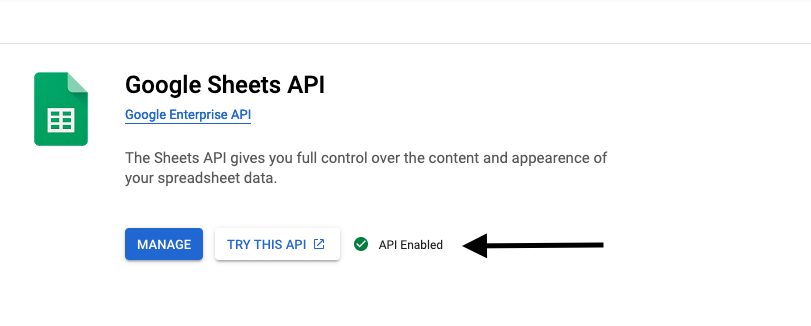
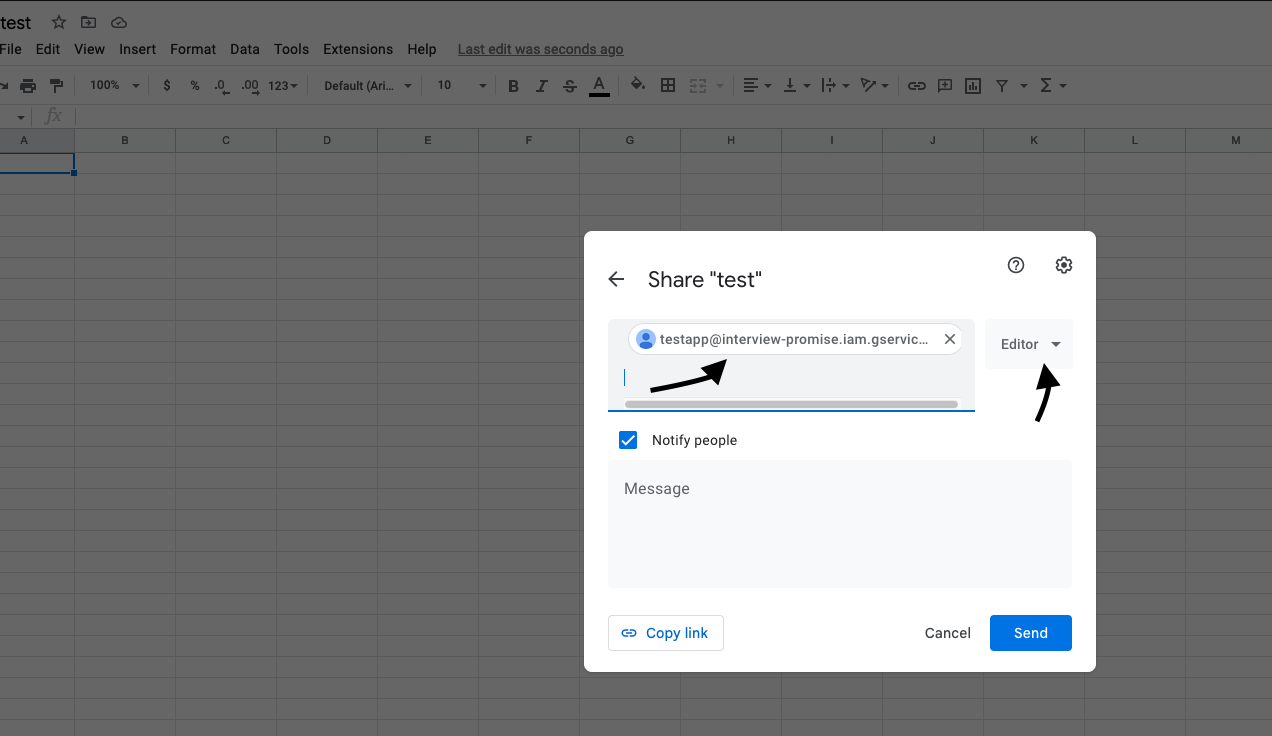
- Set editor permissions in the google sheet
Copy the service email id from the developer console and go to google sheets and share this email with the editor role

Installing dependencies in Laravel
Now we have finished the setup for the google account
Install the package in our Laravel Application
We need to install the package by following the command
$ composer require revolution/laravel-google-sheets
After successfully installing publish the package which will create google.php file inside your config directory
php artisan vendor:publish --provider="PulkitJalan\Google\GoogleServiceProvider" --tag="config"
Open the google.php and update the scopes and add additional config for the google client
<?php

return [
    /*
    |----------------------------------------------------------------------------
    | Google application name
    |----------------------------------------------------------------------------
    */
    'application_name' => env('GOOGLE_APPLICATION_NAME', ''),

    /*
    |----------------------------------------------------------------------------
    | Google OAuth 2.0 access
    |----------------------------------------------------------------------------
    |
    | Keys for OAuth 2.0 access, see the API console at
    | https://developers.google.com/console
    |
    */
    'client_id' => env('GOOGLE_CLIENT_ID', ''),
    'client_secret' => env('GOOGLE_CLIENT_SECRET', ''),
    'redirect_uri' => env('GOOGLE_REDIRECT', ''),
    'scopes' => [\Google\Service\Sheets::DRIVE, \Google\Service\Sheets::SPREADSHEETS],
    'access_type' => 'online',
    'approval_prompt' => 'auto',

    /*
    |----------------------------------------------------------------------------
    | Google developer key
    |----------------------------------------------------------------------------
    |
    | Simple API access key, also from the API console. Ensure you get
    | a Server key, and not a Browser key.
    |
    */
    'developer_key' => env('GOOGLE_DEVELOPER_KEY', ''),

    /*
    |----------------------------------------------------------------------------
    | Google service account
    |----------------------------------------------------------------------------
    |
    | Set the credentials JSON's location to use assert credentials, otherwise
    | app engine or compute engine will be used.
    |
    */
    'service' => [
        /*
        | Enable service account auth or not.
        */
        'enable' => env('GOOGLE_SERVICE_ENABLED', false),

        /*
         * Path to service account json file. You can also pass the credentials as an array
         * instead of a file path.
         */
        'file' => env('GOOGLE_SERVICE_ACCOUNT_JSON_LOCATION', storage_path('credentials.json')),
    ],

    /*
    |----------------------------------------------------------------------------
    | Additional config for the Google Client
    |----------------------------------------------------------------------------
    |
    | Set any additional config variables supported by the Google Client
    | Details can be found here:
    | https://github.com/google/google-api-php-client/blob/master/src/Google/Client.php
    |
    | NOTE: If client id is specified here, it will get over written by the one above.
    |
    */
    'config' => [],

    'post_spreadsheet_id' => env('POST_SPREADSHEET_ID'),
];
Configure the env file with the required credentials information from your google project
GOOGLE_APPLICATION_NAME=
GOOGLE_CLIENT_ID=
GOOGLE_CLIENT_SECRET=
GOOGLE_REDIRECT=
GOOGLE_DEVELOPER_KEY=
GOOGLE_SERVICE_ENABLED=true
GOOGLE_SERVICE_ACCOUNT_JSON_LOCATION=../storage/credentials.json
POST_SPREADSHEET_ID=
Now the application is ready to generate the sheet in google. At first, create a test method inside any test controllers with necessary routes and add read, and write logic according to the business needs. Here I have created a test method and dynamically generate sheet names and write array data in that specific sheet.
<?php

namespace App\Http\Controllers\Admin;

use App\Http\Controllers\BaseController;
use Carbon\Carbon;
use Revolution\Google\Sheets\Facades\Sheets;

class GoogleSpreedSheetController extends BaseController
{
   public function __construct()
   {
   }

   public function index()
   {
       /** generate sheet name **/
       $sheetName = sprintf('%s-Test', format_date('m-d', Carbon::today()->toDateString()));

       /** prepare the data in array **/
       $data = [
           [
               'ID',
               'Name',
           ],
           [
               'U001',
               'John',
           ],
           [
               'U002',
               'Harry',
           ],
       ];

       /** generate a new sheet in a specific spread sheet **/
       Sheets::spreadsheet(config('google.post_spreadsheet_id'))->addSheet($sheetName);

       /** write the data in the newly generated sheet **/
       Sheets::sheet($sheetName)->append($data);

   }
}
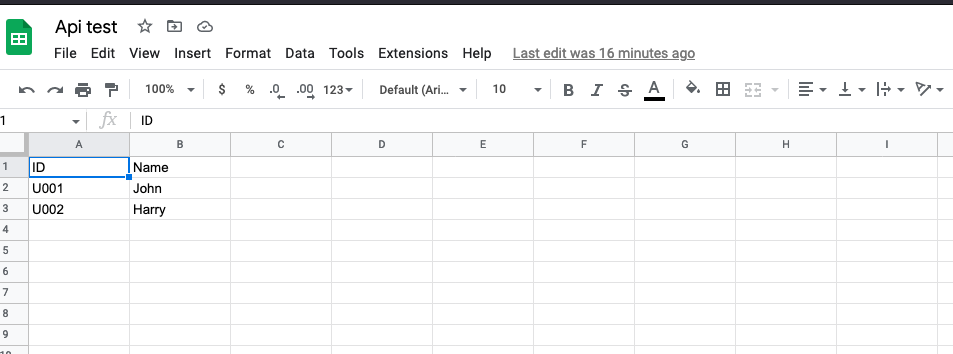
Results
Conclusion
This article is basically related to storing the data in already created google sheets which may help eliminate manually importing data processes.
References
Subscribe to my newsletter
Read articles from ashok gurung directly inside your inbox. Subscribe to the newsletter, and don't miss out.
Written by
