Apache forward proxy
 Kamal Eddine Boumahdi
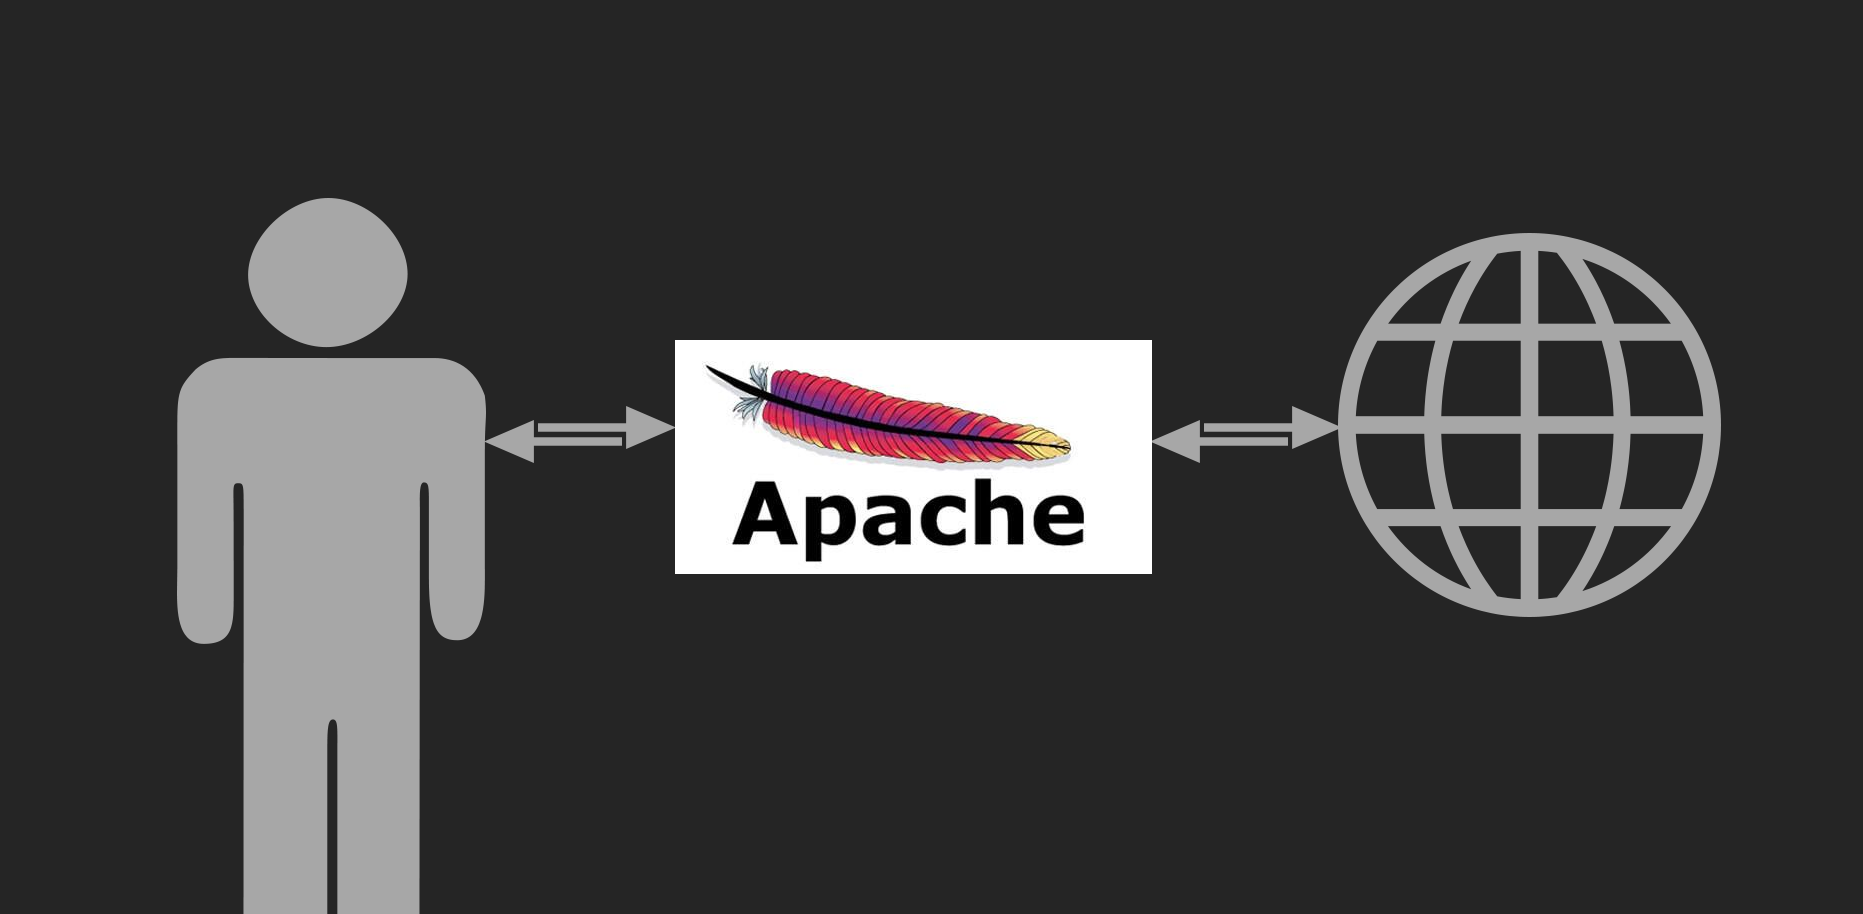
this is a quick walkthrough setting up Apache Forward Proxy on your windows machine. I'm on windows 11, but I suppose this could still work in previous versions of windows. before we get into it I’d like to thank Codeboard Club, this article is inspired by their video
we’ll be using XAMPP, you can just download it, the installation process is the typical next next install scenario.
once installed you’ll be presented with a nice GUI like so:
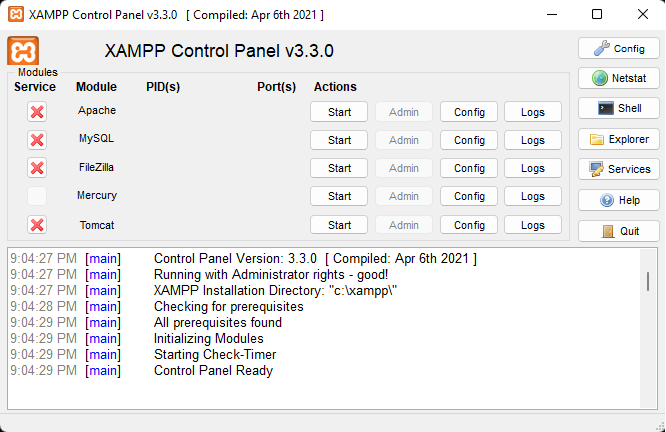
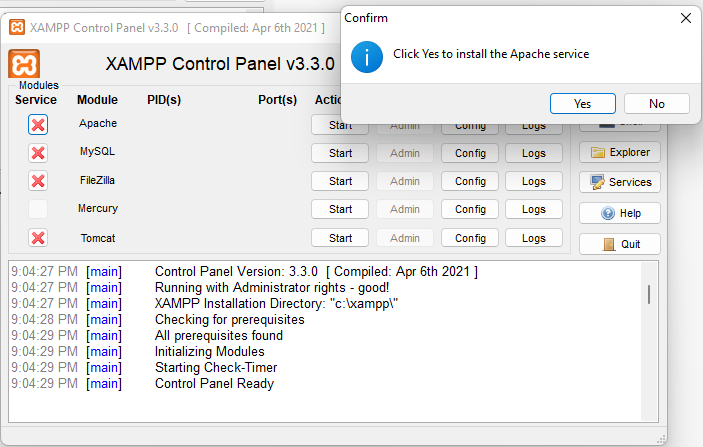
as of now, we don’t have our Apache service installed, so let’s go ahead and do that by clicking the ❌ next to Apache, then confirm like so:
once done, the ❌ will be replaced by a ✅, now we can configure it by pressing the Config button and selecting the option Apache (httpd.conf).
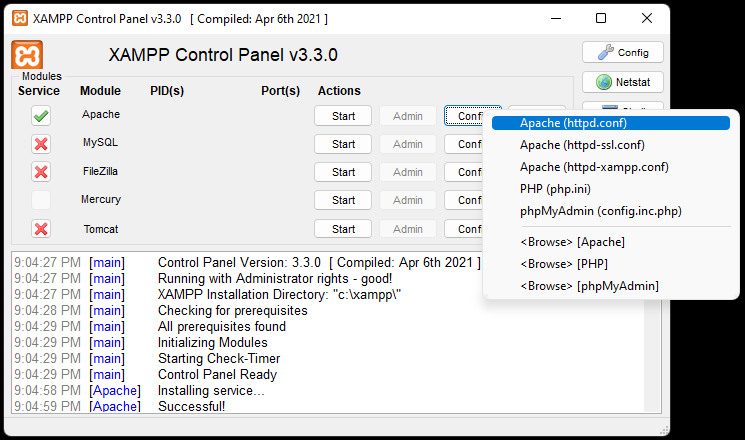
that will open up the file in this path C:\xampp\apache\conf\httpd.conf (that is ofc if you left the installation directory as default during installation process, which defaults to C:/ ), this file is populated with config statements, notice how some lines are commented using a hash #, we will be uncommenting a few to load modules needed for enabling proxy.
we will uncomment all the lines that begin withLoadModule proxy_, one way to easily do that is to press Ctrl key + h to open the replace window and replace #LoadModule proxy_ with LoadModule proxy_.
we will also uncomment a few other lines in a bit, but this will be enough for now, so just save and exit.
we’ll also need to change the hostname setting, so go to this file C:\xampp\apache\conf\extra\httpd-ssl.conf or press the Config button again this time selecting the option Apache (httpd-ssl.conf)
in there we will replace this line ServerName www.example.com:443 with this one ServerName localhost:443 because we don’t have a Domain name that we can associet to our proxy.
now the config is almost ready, but we still need to add afew things, lets open up this file now C:\xampp\apache\conf\extra\httpd-vhoststo add a proxy host,
btw you can browse to this C:\xampp\apache\ folder by pressing the config button and selecting the option <Browse> [Apache] and click your way from there.
to the bottom of that file you’ve just opened add the following pack:
<VirtualHost *:*>
    ProxyRequests On
    ProxyVia On
</VirtualHost>
now we’ll go to the Windows control panel and search for internet proprieties>connections>LAN Settings
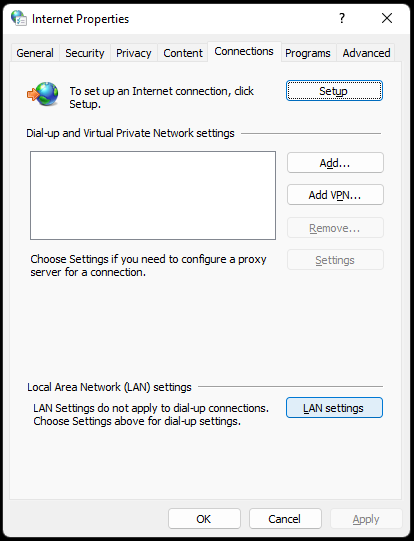 | 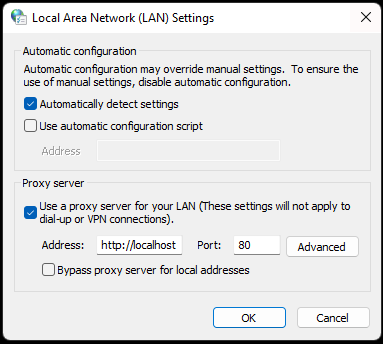 |
and in the Proxy server section, set the address to [http://localhost](http://localhost) cz that’s hat we’ve set in that httpd-ssl.conf file
GUI and press start, but nothing happens, so we need to check the logs for to fegure out what’s wrong, we do that by pressing the Logs button (next to Config) and selecting the option Apache (error.log) or by directly opening the file C:\xampp\apache\logs\error.log , there (in my case at least) we find the following problems:
I18n support in mod_proxy_html requires mod_xml2enc. Without it, non-ASCII characters in proxied pages are likely to display incorrectly. and Failed to lookup provider 'shm' for 'slotmem': is mod_slotmem_shm loaded??
both of them are related to modules that are not loaded, so we’ll go back to this file C:\xampp\apache\conf\httpd.conf this time uncommenting the following lines:
LoadModule proxy_html_module modules/mod_proxy_html.so to load this module proxy_html_module
LoadModule slotmem_shm_module modules/mod_slotmem_shm.so to load this module slotmem_shm_module
we can now retry starting Apache service and voilla:
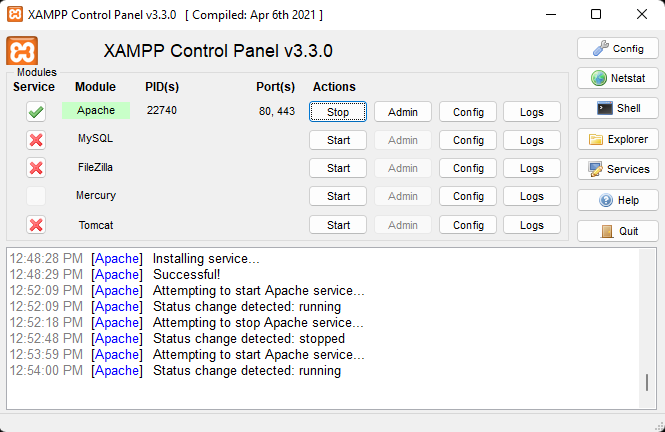
now we can surf the web a little bit, then come back and press the Logs button again this time selecting the option Apache (access.log) or by directly opening the file C:\xampp\apache\logs\access.log to see all our requests logged here because now all our they all go through the Apache Proxy Service.
Subscribe to my newsletter
Read articles from Kamal Eddine Boumahdi directly inside your inbox. Subscribe to the newsletter, and don't miss out.
Written by
