Integrating Hive as a database with Provider in your flutter project
 Rufai Kudus Adeboye
In this article, we would be integrating hive for local storage of data in your flutter project. Below is a list of the sections of this article
What is Hive ?
Deep dive into when and why you should use hive.
Setting up a hive datastore in your flutter project.
How to perform basic operations like creating, updating and deleting data from your hive datastore in your flutter app.
Hiving the provider way🥰.
Using our knowledge of hive to create a mini todo-list app.
What is Hive?
Hive is a No-SQL lightweight and fast key-value database solution that is cross-platform (runs on mobile, desktop, and web) and is written in pure Dart. This gives it an instant advantage over sqflite, which doesn’t support Flutter web — Hive has any native dependencies, so it runs seamlessly on the web.
Deep dive into when and why you should use hive.
According to statistics, Hive greatly outperforms SQLite and SharedPreferences when it comes to writing or deleting and when it comes to reading data from the storage SharedPreferences is on par with Hive when it comes to read performance. SQLite performs much worse. And the graphic representation below shows the benchmark was performed on a Oneplus 6T with Android Q.
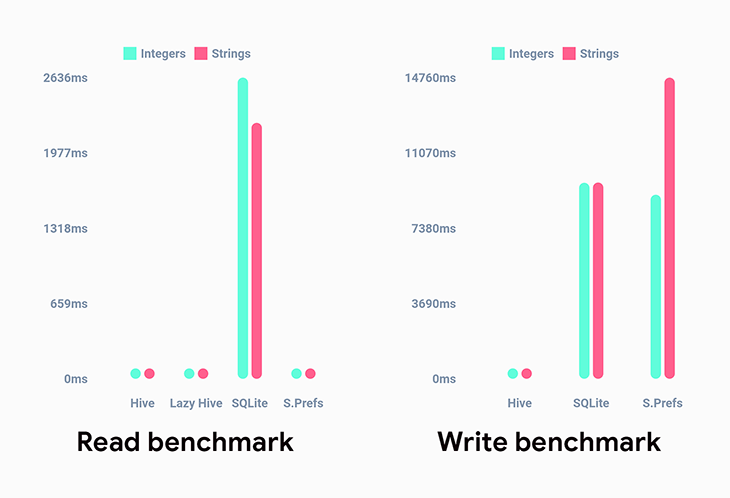
The image above shows the clarification of why you should use hive which brings on the lingering question "when should I use hive?".
"No matter who you are or what you do, sooner or later you’re going to need to store data in your app and then retrieve it later."
You use hive when you are after a simple database to store data on your device and don’t want the synchronisation from the server.
Setting up a hive datastore in your flutter project
Setting up hive for use in your flutter project is quite easy just a few steps are shown below.
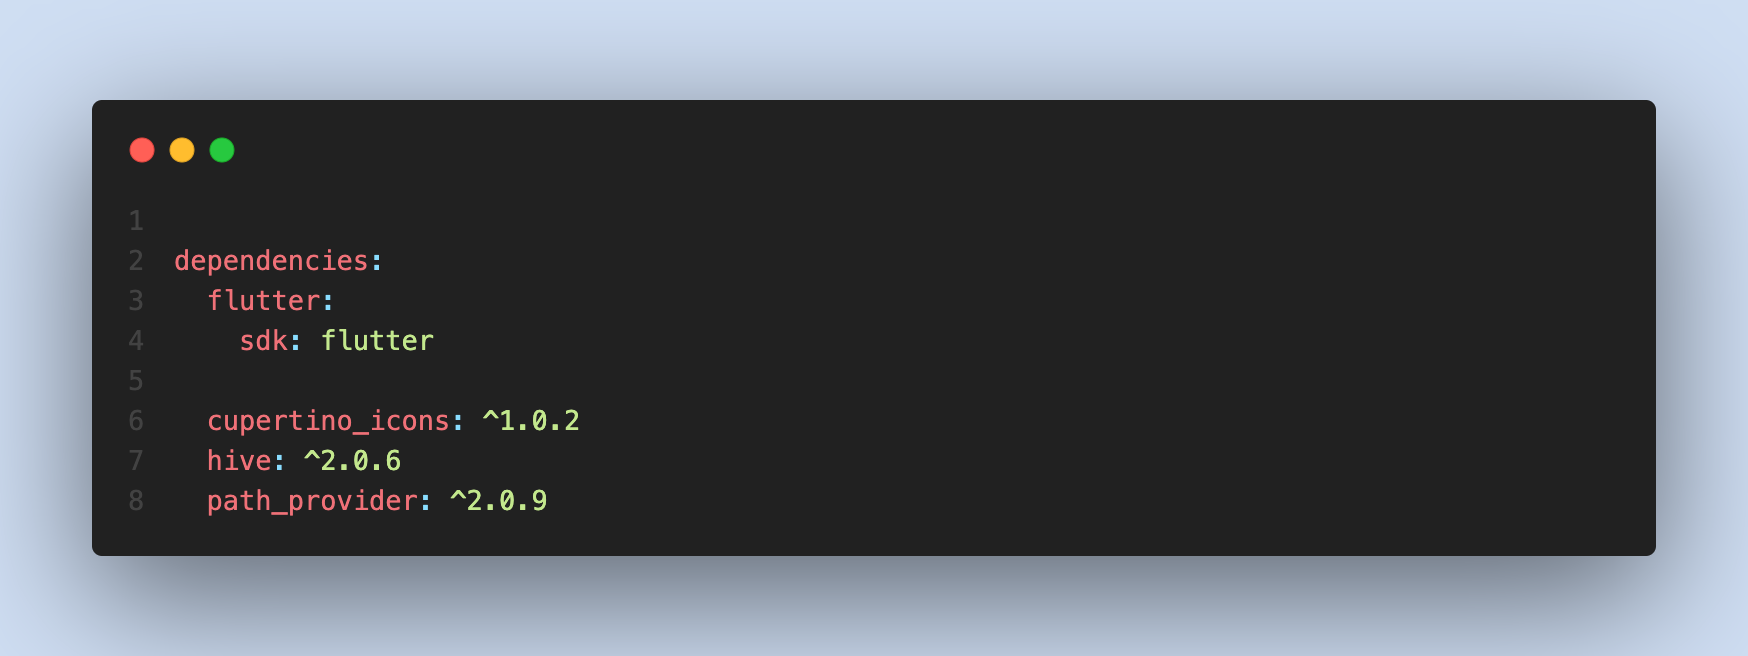
Add the hive package for the database, hive_generator for TypeAdapters,path_provider package (to set a location for the DB on the device) to your pub spec.yaml file in your flutter project
Create an async function to set up your database and call the function in the main function that runs the app in this example the name of my function is 'setUpLocator".
When it comes to storing data in hive, you treat each section of your data in the hive datastore as a box, in the image below you can observe that you need to open the box not forgetting that each box you create or open must have its own unique key.

To make your code more readable and maintainable, it's advisable to create a class to save the keys for your database just like in the image below

With these few steps you have " successfully" set up hive in your flutter project, up next is to make use of hive datastore to store whichever data you need to store in your app.
Perform basic operations like creating, updating and deleting data from your hive datastore in your flutter app
Creating data
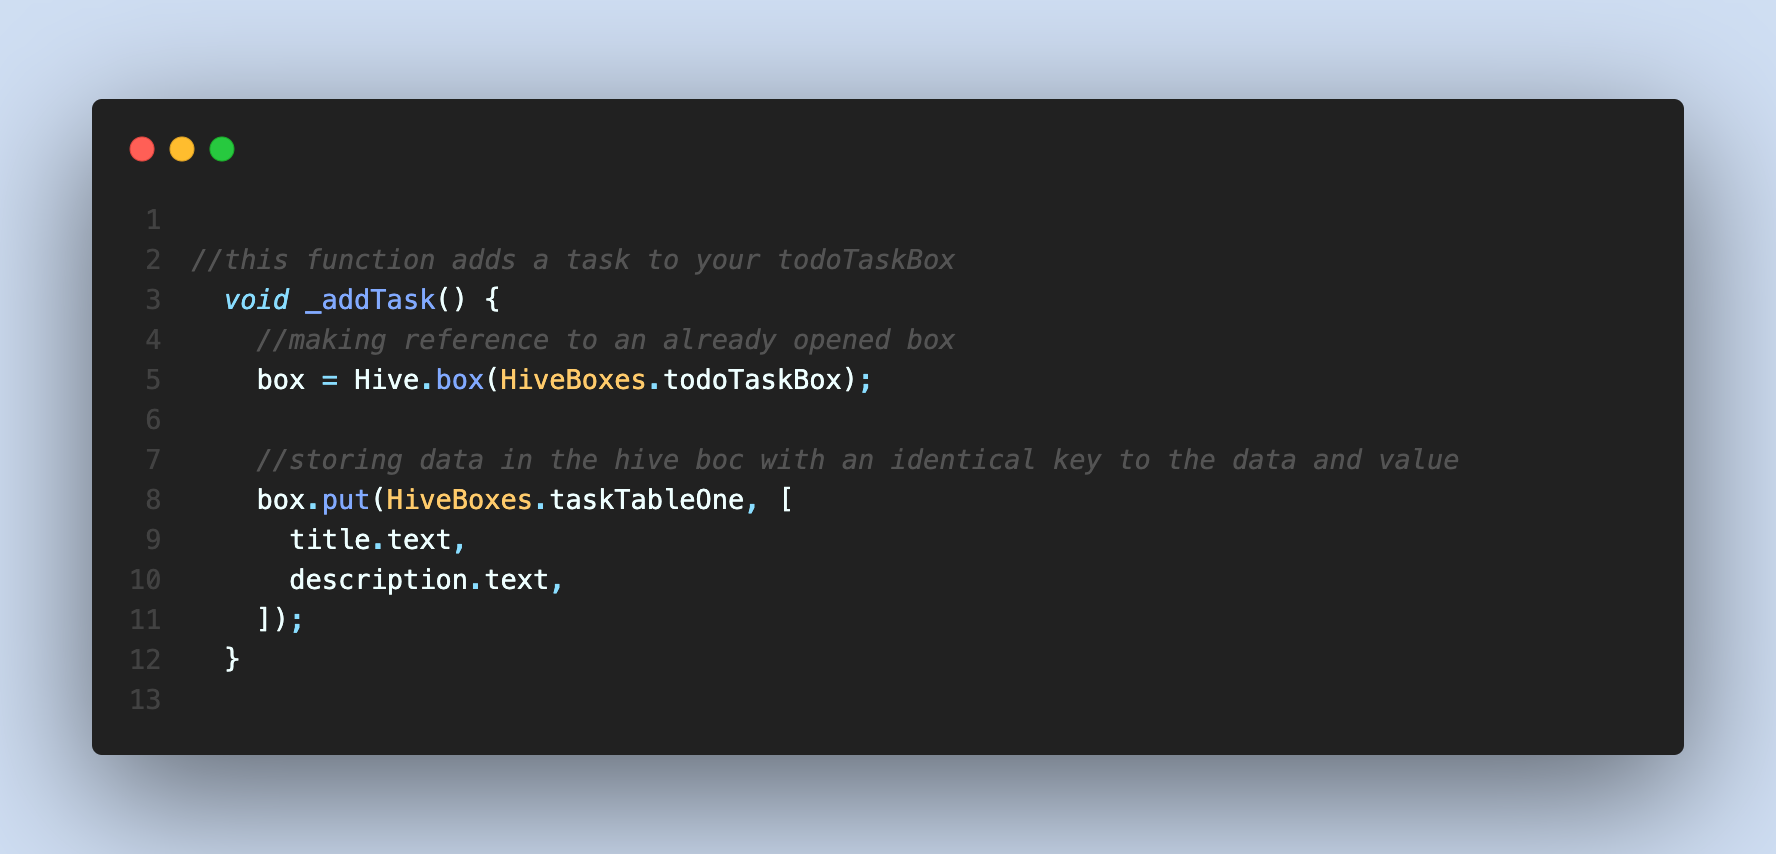
You can add data to your hive data store with these few lines of code. In the image below, i added a list of strings in form of input from a user(title and description) which is almost the same when you are updating data. Behind the scenes, you are overwriting the data attached to that hive box.
Getting data
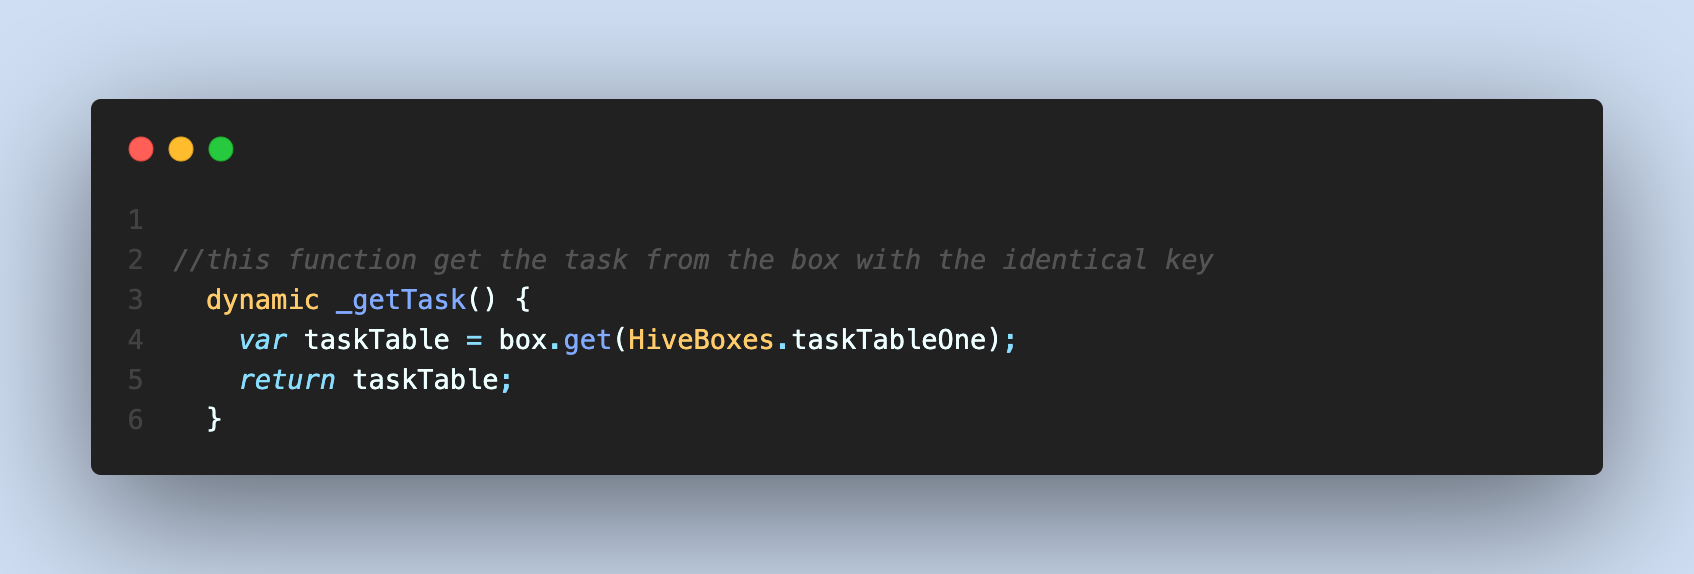
You can fetch data from your hive data store by passing your unique key to that hive box.
The box's unique key

Removing/deleting data
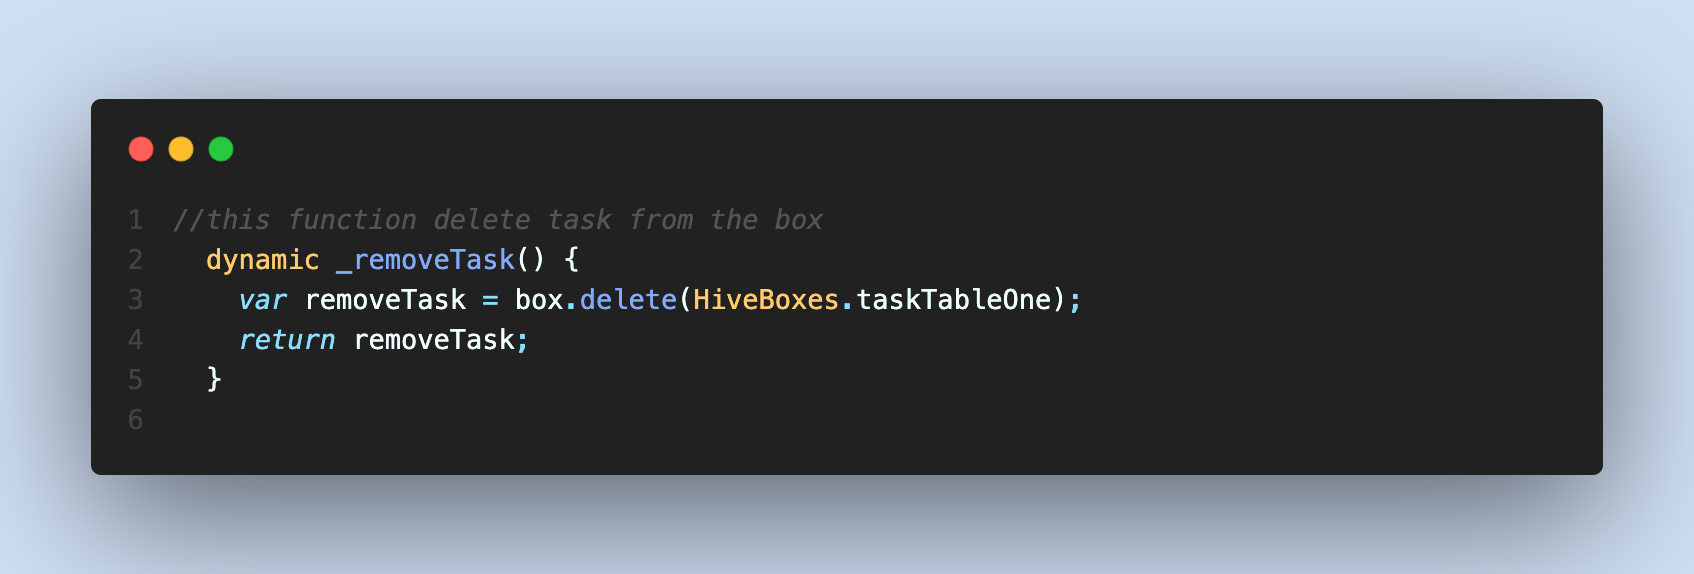
You can remove data from your hive data store with the unique key of the hive box
Hiving the provider way🥰.
- Set up your hive package dependencies and add the provider package(the version specified can be updated).
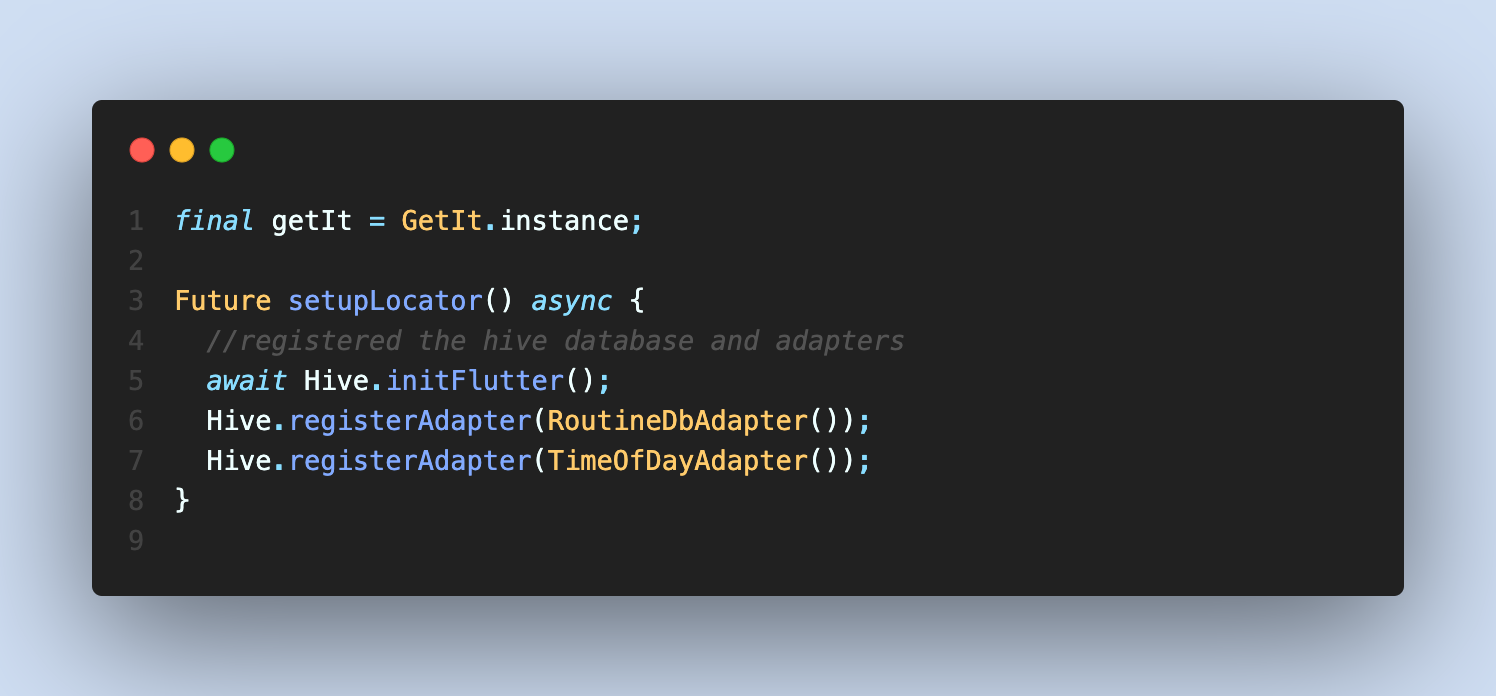
- Generate and Register your adapters based on your use case and use the build runner package to generate file.
- Create and add your Hive service Listenable provider to the list of providers in multi-provider.
- Create your BaseViewModel(which is optional your Hive service can extend a ChangeNotifier).
- Create your HIve service class.
- Connect your Hive service class to your UI which would serve as the controller that listens to your UI.
- We would be creating a mini routine checker app with the Hive service class for showing and doing basic task functionalities.

Set up your hive package dependencies and add the provider package(the version specified can be updated)
You just need to add the dependencies required for the project which is shown below ;
dependencies:
  flutter:
    sdk: flutter

  cupertino_icons: ^1.0.2
  # get_it for dependency injection
  get_it: ^7.2.0
  # provider to handle state
  provider: ^6.0.1
  # the official hive package
  hive: ^2.0.5
  # a dependency to the hive package
  hive_flutter: ^1.1.0
  # hepls format our date and time
  intl: ^0.17.0


dev_dependencies:
  flutter_lints: ^2.0.1
  flutter_test:
    sdk: flutter
  hive_generator: ^1.1.1
  build_runner: ^2.1.7
*Generate and Register your adapters based on your use case and use the build runner package to generate file
- Input db fields and generate adapters
import 'package:flutter/material.dart';
import 'package:hive/hive.dart';
part 'routinedb.g.dart';

@HiveType(typeId: 0)
class RoutineDb extends HiveObject {
  @HiveField(0)
  String title;
  @HiveField(1)
  String description;
  @HiveField(2)
  bool missed;
  @HiveField(3)
  bool done;
  @HiveField(4)
  TimeOfDay routineTime;
  @HiveField(5)
  DateTime routimeDate;

  RoutineDb({
    required this.title,
    required this.description,
    required this.missed,
    required this.done,
    required this.routimeDate,
    required this.routineTime,
  });
}
- Generate adapters with the build_runner package
// GENERATED CODE - DO NOT MODIFY BY HAND

part of 'routinedb.dart';

// **************************************************************************
// TypeAdapterGenerator
// **************************************************************************

class RoutineDbAdapter extends TypeAdapter<RoutineDb> {
  @override
  final int typeId = 0;

  @override
  RoutineDb read(BinaryReader reader) {
    final numOfFields = reader.readByte();
    final fields = <int, dynamic>{
      for (int i = 0; i < numOfFields; i++) reader.readByte(): reader.read(),
    };
    return RoutineDb(
      title: fields[0] as String,
      description: fields[1] as String,
      missed: fields[2] as bool,
      done: fields[3] as bool,
      routimeDate: fields[5] as DateTime,
      routineTime: fields[4] as TimeOfDay,
    );
  }

  @override
  void write(BinaryWriter writer, RoutineDb obj) {
    writer
      ..writeByte(6)
      ..writeByte(0)
      ..write(obj.title)
      ..writeByte(1)
      ..write(obj.description)
      ..writeByte(2)
      ..write(obj.missed)
      ..writeByte(3)
      ..write(obj.done)
      ..writeByte(4)
      ..write(obj.routineTime)
      ..writeByte(5)
      ..write(obj.routimeDate);
  }

  @override
  int get hashCode => typeId.hashCode;

  @override
  bool operator ==(Object other) =>
      identical(this, other) ||
      other is RoutineDbAdapter &&
          runtimeType == other.runtimeType &&
          typeId == other.typeId;
}
import 'package:flutter/material.dart';
import 'package:hive/hive.dart';

class TimeOfDayAdapter extends TypeAdapter<TimeOfDay> {
  @override
  final typeId = 101;

  @override
  void write(BinaryWriter writer, TimeOfDay obj) {
    writer
      ..writeByte(2)
      ..writeByte(0)
      ..write(obj.hour)
      ..writeByte(1)
      ..write(obj.minute);
  }

  @override
  TimeOfDay read(BinaryReader reader) {
    var numOfFields = reader.readByte();
    var fields = <int, dynamic>{
      for (var i = 0; i < numOfFields; i++) reader.readByte(): reader.read(),
    };
    return TimeOfDay(hour: fields[0] as int, minute: fields[1] as int);
  }
}
- Register your adapters
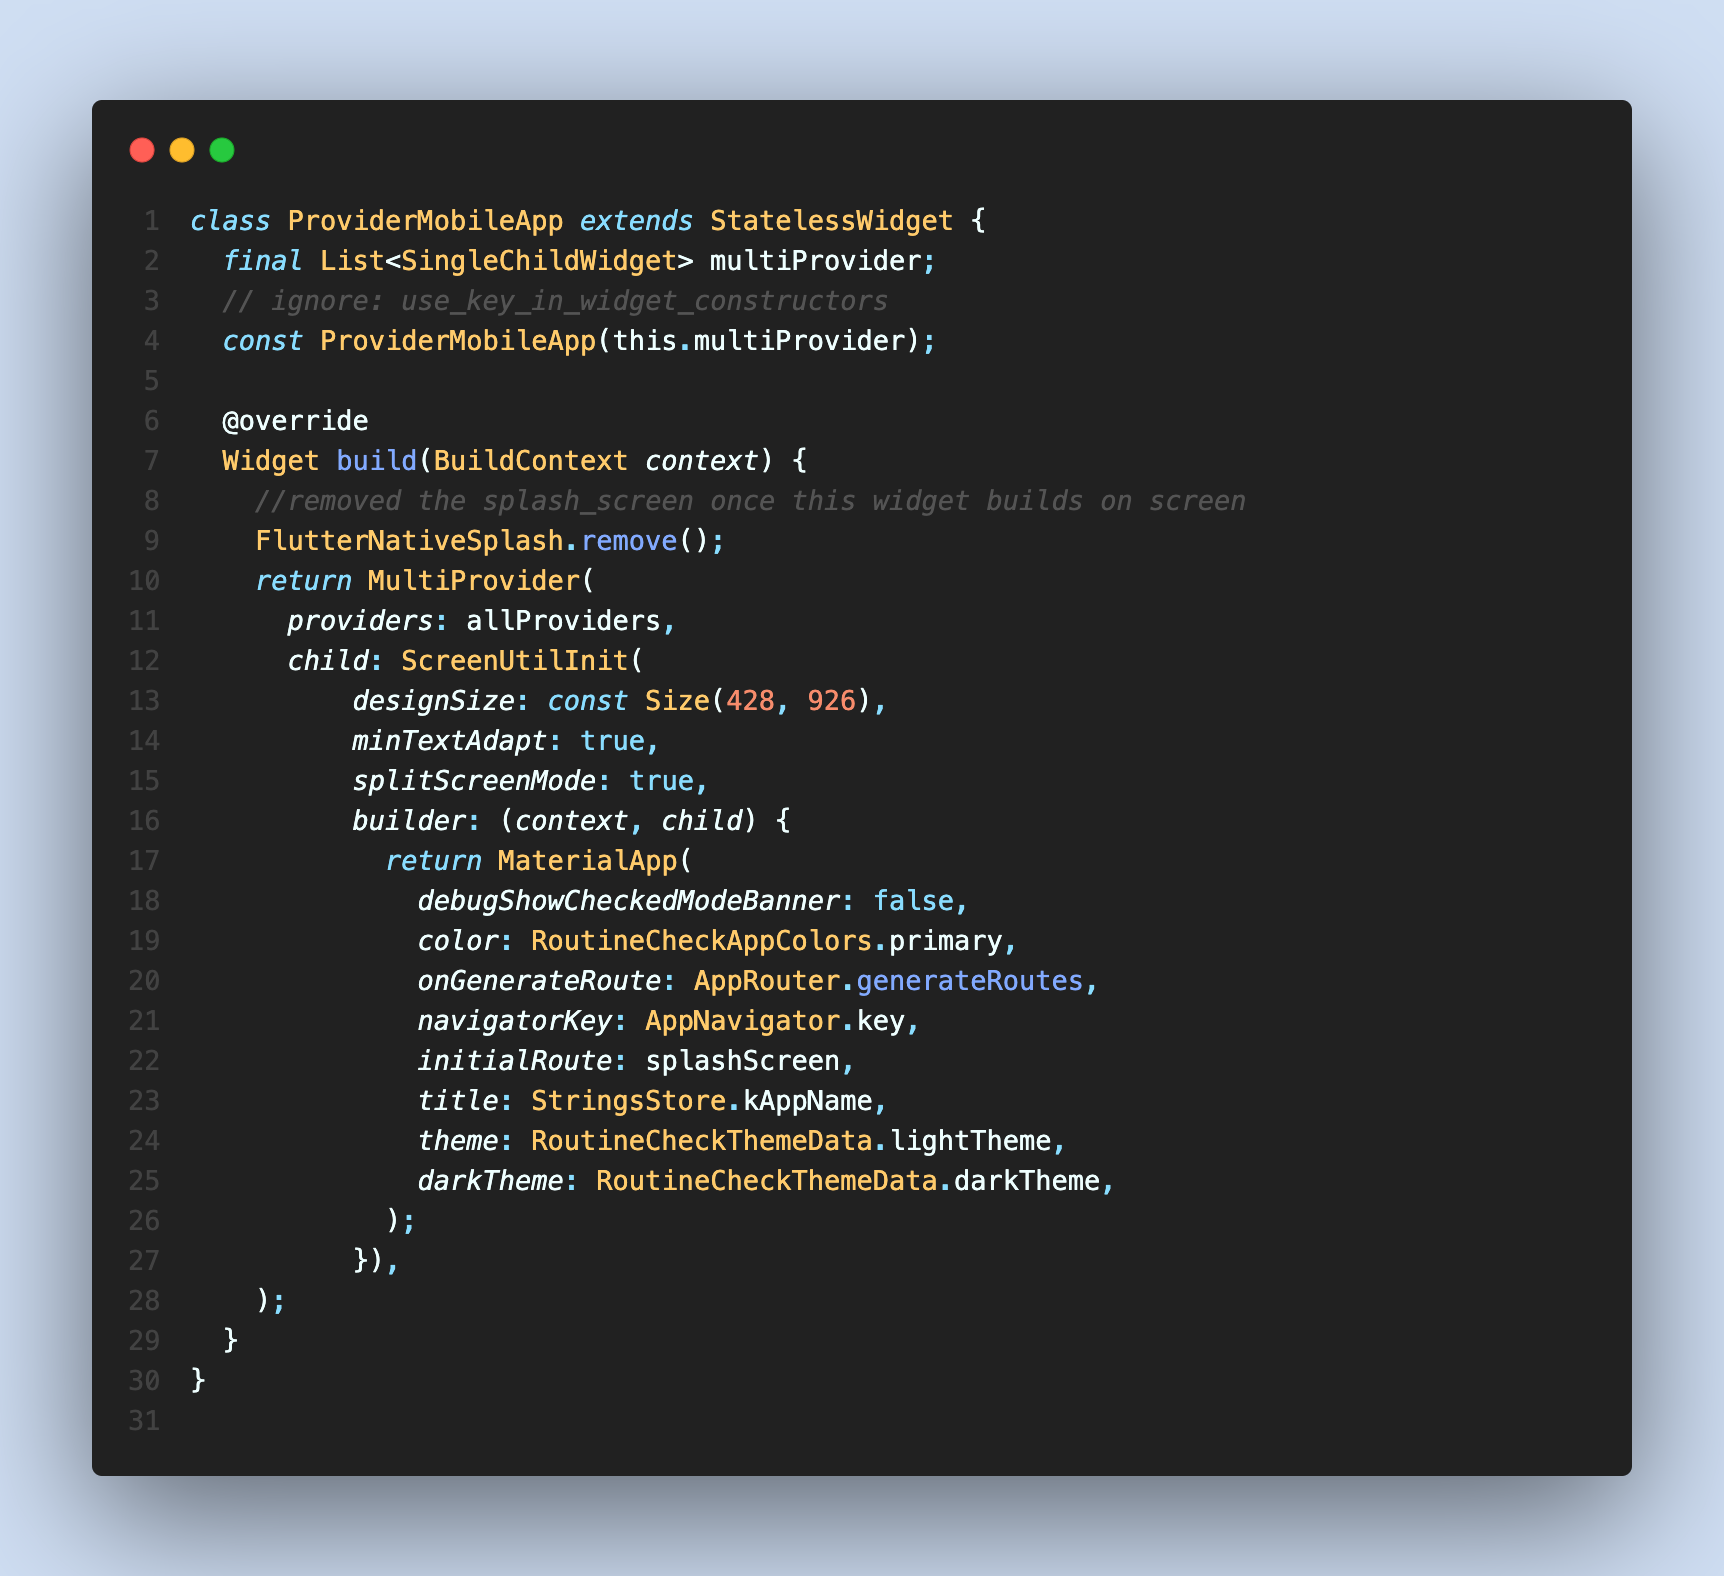
*Create and add your Hive service, Listenable provider to list of SingleChildWidget providers in multi-provider
In this section , we add hive service as a Listenable provider() to the list of provider for the multi-provider class made available by the provider package.

Create your BaseViewModel(which is optional your Hive service can extend a ChangeNotifier)
In this section, we create an abstract class that extends the changeNotifier which would contain helper functions like the (initState and dispose which are based on the scheduled frames for display) that we can use throughout the app for state management
import 'dart:async';
import 'dart:developer';
import 'package:estate_project/src/utils/enums.dart';
import 'package:flutter/foundation.dart';
import 'package:flutter/material.dart';
import 'package:flutter/scheduler.dart';

abstract class BaseViewModel extends ChangeNotifier {
  bool _isLoading = false;
  bool _isDisposed = false;
  bool _isInitializeDone = false;
  ViewState _state = ViewState.idle;

  bool get isLoading => _isLoading;
  bool get isDisposed => _isDisposed;
  ViewState get state => _state;
  bool get isInitialized => _isInitializeDone;

  FutureOr<void> _initState;


  BaseViewModel() {
    SchedulerBinding.instance.addPostFrameCallback((_) {
      //after displaying the frames on schedule we want to run our init function
      //this makes us avoid using stateful widget while using this architecture
      _init();
      log("init called VM...");
    });
  }

  FutureOr<void> initState();
  FutureOr<void> disposeState();

//this serves as an init state
  void _init() async {
    _initState = initState();
    await _initState;
    _isInitializeDone = true;
    initState();
  }

//changes the state of the bool based on the supplied parameter
  changeLoaderStatus(bool status) {
    _isLoading = status;
    notifyListeners();
  }

//we can keep track of the state of the ui with this  function
  changeEnumState(ViewState viewState) {
    _state = viewState;
    notifyListeners();
  }

  @override
  void dispose() {
    _isDisposed = true;
    disposeState();
    super.dispose();
  }
}
Create your HIve service class
In our Hive service concrete class which would be extending an abstract class BaseViewModel , we would be creating basic functions that handles basic task for the mini routine checker app for task based on the logic e.g (Getting all task , adding item to the task , creating a routine ...etc). The Hive service class would serve more like a controller that listens to our User interface.
class HiveService extends BaseViewModel {
  @override
  FutureOr<void> initState() async {
    log("instantiating --->>> hive service");
    String hi = getFirstCharactersOfRoutine("Table Cut");
    logConsole(hi);
  }

  @override
  FutureOr<void> disposeState() async {
    //close the hive box after the hive box have been dispose
    await Hive.close();
  }

  //database logic
  List<RoutineDb> routineDbList = [];
  UnmodifiableListView<RoutineDb> get routineDbListGetter =>
      UnmodifiableListView(routineDbList);

  // Create new routine of the routineDb model
  Future<void> createARoutine(RoutineDb routineDb) async {
    Box<RoutineDb> box = await Hive.openBox<RoutineDb>(routineDbBoxKeys);
    await box.add(routineDb);
    routineDbList.add(routineDb);
    routineDbList = box.values.toList();
    notifyListeners();
  }

  // Get a list of routineDb model in the database
  Future<List<RoutineDb>> getRoutineItems() async {
    Box<RoutineDb> box = await Hive.openBox<RoutineDb>(routineDbBoxKeys);
    routineDbList = box.values.toList();
    return routineDbList;
  }

  // remove a routinebd model based on the key in the database
  Future<void> addItem(RoutineDb routineDb) async {
    Box<RoutineDb> box = await Hive.openBox<RoutineDb>(routineDbBoxKeys);
    await box.delete(routineDb.key);
    routineDbList = box.values.toList();
    notifyListeners();
  }
}
Connect your Hive service class to your UI which would serve as the controller that listens to your UI
The snippet below shows an example of how we connect the HiveService to our UI . In this case the OverviewProvider extends the Hive Service and in our hive service ,there is a getRoutine function to get all routine
class OverViewScreen extends StatelessWidget {
  const OverViewScreen({Key? key}) : super(key: key);

  @override
  Widget build(BuildContext context) {
    return BaseView<OverViewProvider>(
      vmBuilder: (context) => OverViewProvider(context: context),
      builder: _buildScreen,
    );
  }

  Widget _buildScreen(BuildContext context, OverViewProvider overviewModel) {
    return FutureBuilder<List<RoutineDb>>(
        future: overviewModel.getRoutineItems(),
        builder: (context, snapshot) {
          if (snapshot.hasData) {
            if (overviewModel.routineDbList.isEmpty) {
              return const NoRoutinePlaceHolder();
            }
            return Container(
              margin: EdgeInsets.symmetric(horizontal: 10.w, vertical: 20.h),
              child: SingleChildScrollView(
                child: Column(
                  children: [
                    for (int i = 0; i < overviewModel.routineDbList.length; i++)
                      RoutineTile(
                        routinIsEditable: true,
                        editFunction: () {
                          AppNavigator.pushNamed(
                            editScreen,
                            arguments: overviewModel.routineDbList[i],
                          );
                        },
                        tileSubTitle:
                            DateTimeFormatter.formatDateTimeToNormalString(
                                overviewModel.routineDbList[i].routimeDate),
                        titleString: snapshot.data![i].title,
                      ),
                  ],
                ),
              ),
            );
//if the routine db list is empty

          } else {
            return const Loader();
          }
        });
  }
}
We would be creating a mini routine checker app with the Hive service class for showing and doing basic task functionalities
In this case, i would be showing functions to add items to routine, create routine , get routines e.t.c
- Add item
  // remove a routinebd model based on the key in the database
  Future<void> addItem(RoutineDb routineDb) async {
    Box<RoutineDb> box = await Hive.openBox<RoutineDb>(routineDbBoxKeys);
    await box.delete(routineDb.key);
    routineDbList = box.values.toList();
    notifyListeners();
  }
- Create routine
  // Create new routine of the routineDb model
  Future<void> createARoutine(RoutineDb routineDb) async {
    log("ref creating a routine of title =>>> ${routineDb.title}");
    Box<RoutineDb> box = await Hive.openBox<RoutineDb>(routineDbBoxKeys);
    await box.add(routineDb);
    routineDbList.add(routineDb);
    routineDbList = box.values.toList();
    notifyListeners();
  }
- Get routine
// Get a list of routineDb model in the database
  Future<List<RoutineDb>> getRoutineItems() async {
    Box<RoutineDb> box = await Hive.openBox<RoutineDb>(routineDbBoxKeys);
    routineDbList = box.values.toList();
    return routineDbList;
  }
I hope you were able to see an overview of how you can use hive with provider in your flutter project. Below is a link to the snippet used in article. PR's are welcome .Thank you.🥰🥰🥰🥰
Project link -> https://github.com/Raks-Javac/Routine_Check-App
Subscribe to my newsletter
Read articles from Rufai Kudus Adeboye directly inside your inbox. Subscribe to the newsletter, and don't miss out.
Written by

Rufai Kudus Adeboye
Rufai Kudus Adeboye
Im a mobile app developer that uses the flutter framework to build cross platform apps