Linux VNC server & macOS VNC client
 Pavel Durov
If you like me, having a Linux PC or a laptop at home but you're using your mac for work on a day-to-day basis. A local VNC server can be nice if you want to run or do some experiments with a native Linux OS.
In my case, I am running different compilation processes that are CPU-specific. Since my mac comes with an M1 chip, not everything is 100% compatible, especially when you go to the more niche software or when new updates break some kind of bizarre C lib dependencies 😶.
So, here’s a guide on how I installed the local VNC server that I used daily in segregation with plain ssh when CLI access is just enough. But sometimes GUI is all you need.
I will cover Linux VNC server setup and macOS client configuration, but as you probably guessed, you can also connect with not only macOS clients to the Linux VNC server.
VNC server install & config
There are several options for VNC servers; we’re going to use x11vn [1]. VNC server allows you to view and interact remotely with a machine.
Installation:
My Linux machine distro: Ubuntu 21.04
Installing VNC server and X window system:
$ sudo apt install lightdm x11vnc
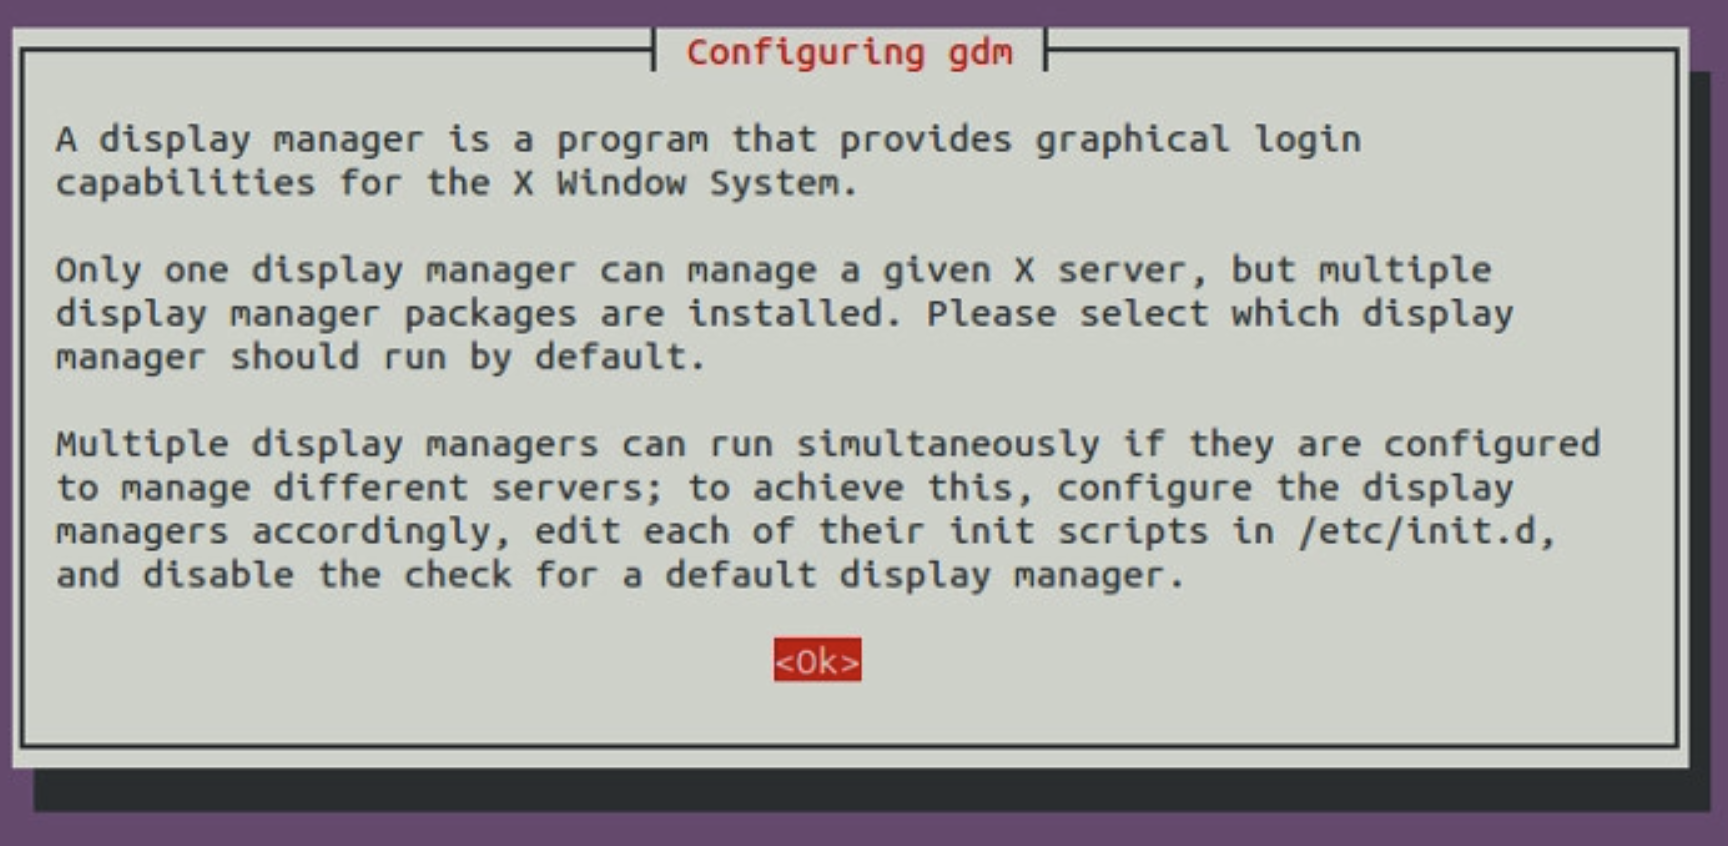
You will be prompted with a message to choose a display manager. I chose lightdm [2], don't ask me why 🙃.

Try running it after the installation to check that we’re good.
$ x11vnc
If all is good, you should see something like this; if not, then go fish 🎣.
28/09/2022 17:58:12 *** XOpenDisplay failed. No -display or DISPLAY.
28/09/2022 17:58:12 *** Trying “:0” in 4 seconds. Press Ctrl-C to abort.
28/09/2022 17:58:12 *** 1 2 3 4
28/09/2022 17:58:16 *** XOpenDisplay of “:0” successful.
....
The VNC desktop is:      kimchi-machine:0
PORT=5900
This means that x11vnc could successfully identify X display :0. I guess that meant that we could try and connect to it 🤔!
But before that, let’s configure our VNC server ☝️.
Creating systemd service
It's up to you, really, you don’t have to create a service to run on the server, but if you want the VNC server to run in the background instead of launching it from your terminal every time and make sure that nothing is closed the terminal session, you do need it. And tbh its quite easy todo.
Create our vnc service config [3] — located under/lib/systemd/system let’s call it vnc.service :
$ sudo vim /lib/systemd/system/vnc.service
I’m using vim as a text editor; you can use whatever. Here’s nano command:
$ sudo nano /lib/systemd/system/vnc.service
Then enter the following config, see comments for description:
[Unit]
# service description
Description=my local x11vnc kimchi service
# start this service after:
After=display-manager.service network.target syslog.target
[Service]
# the type of the service
Type=simple
# process config
ExecStart=/usr/bin/x11vnc -forever -display :0 -auth guess -passwd kimchi
# do this on process stop
ExecStop=/usr/bin/killall x11vnc
# restart when failed
Restart=on-failure
[Install]
# start this service before multi-user target
WantedBy=multi-user.target
You might ask — whats multi-user.target? I’m not an expert, but a quick internet search revealed that in this context, it means that our service would start when the system reaches run level 2 [4]. I guess that’s cool to know 😐.
note that I set the password to be “kimchi”, you should probably change it!
starting our systemd service
Reaload systemd [5] to load our new service:
$ systemctl daemon-reload
Enable our service:
$ systemctl enable vnc.service
Start our service:
$ systemctl start vnc.service
Check our service status:
$ systemctl status x11vnc.service
Should get something like this:

If you ever want to stop our VNC service, run:
$ systemctl disable x11vnc.service
$ systemctl stop x11vnc.service
Finally, connect from your mac
First, find your VNC server machine IP. You can do it by running:
$ ifconfig
the output differs between networks, mine looks like this:
enp5s0: flags=....
        inet ....
 broadcast 192.168.88.255
So we go the IP — 192.168.88.255 💪
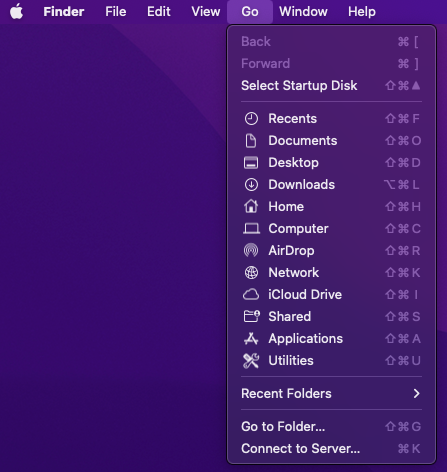
Next, open up your Finder and navigate to GO > Connect to Server

Enter the IP we got with the default port for VNC
IP — 192.168.88.255
Port — 5900
Protocol: VNC
All together now:
vnc://192.168.88.255:5900

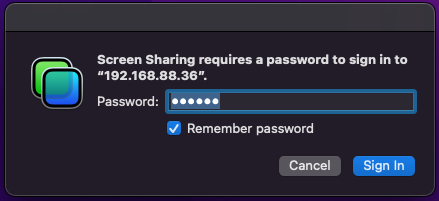
You’ll be prompted with a password. In case you forgot, its “kimchi” (or whatever you set):

And Voilà

That’s it!
References
[1] https://wiki.archlinux.org/title/X11vnc
[2] https://wiki.archlinux.org/title/LightDM
[3] https://www.digitalocean.com/community/tutorials/understanding-systemd-units-and-unit-files
[4] https://unix.stackexchange.com/questions/404667/systemd-service-what-is-multi-user-target
[5] https://wiki.archlinux.org/title/Systemd
Subscribe to my newsletter
Read articles from Pavel Durov directly inside your inbox. Subscribe to the newsletter, and don't miss out.
Written by

Pavel Durov
Pavel Durov
Human software engineer. My technical interests are Programming Languages, Open Source, Linux, Distributed Systems and Software Architecture. But you will probably find me doing other stuff most of the time.