How to reinstall Linux on encrypted LVM
 Kamil Gierach-Pacanek
Please note that following approach works only when Linux was installed previously with a separate
/homepartitionThis guide assumes you know how to install the Linux already. If not, please refer to previous article.
I'm using the Kali installer but steps should be same regardless the Linux flavour
Background
Story starts when I tried to get my CUDA working with a hashcat. I have installed video card drivers and tools with apt get install nvidia-driver nvidia-cuda-tools which leads to some serious issues that prevent me from logging into my installation.
I haven't found the complete guide on how to reinstall the system, leaving the /home (or simply any other) partition intact. So, whoever may want to do the same, here is what I did.
Unlock the LVM
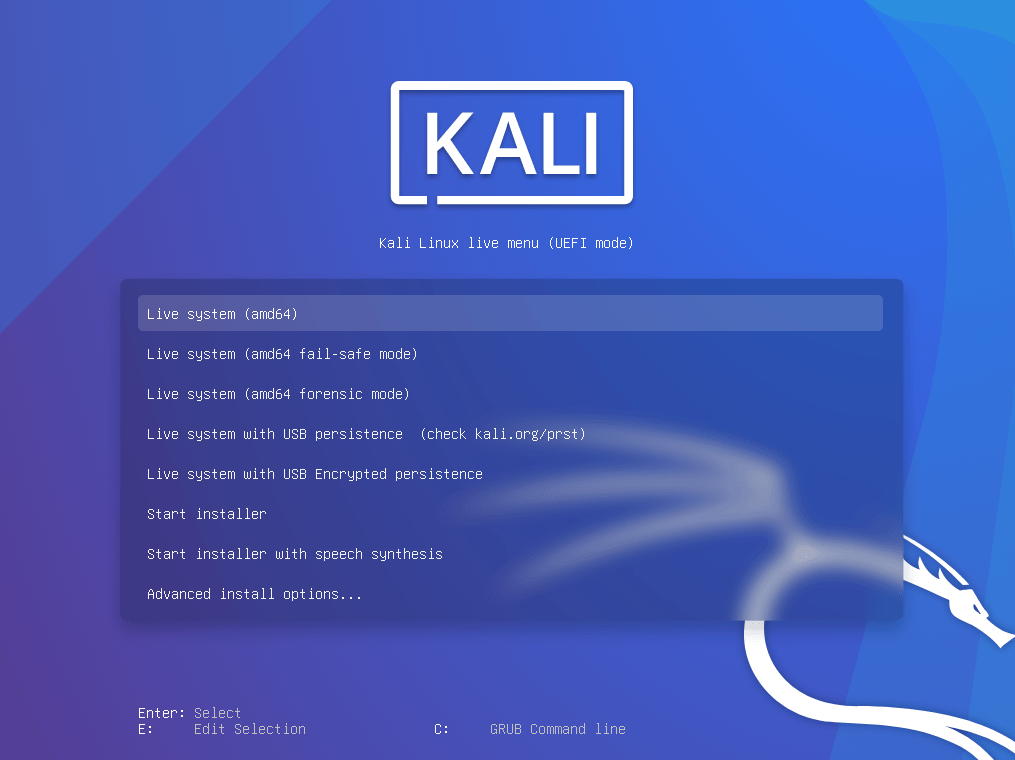
- Boot the system with Live CD Kali installation.
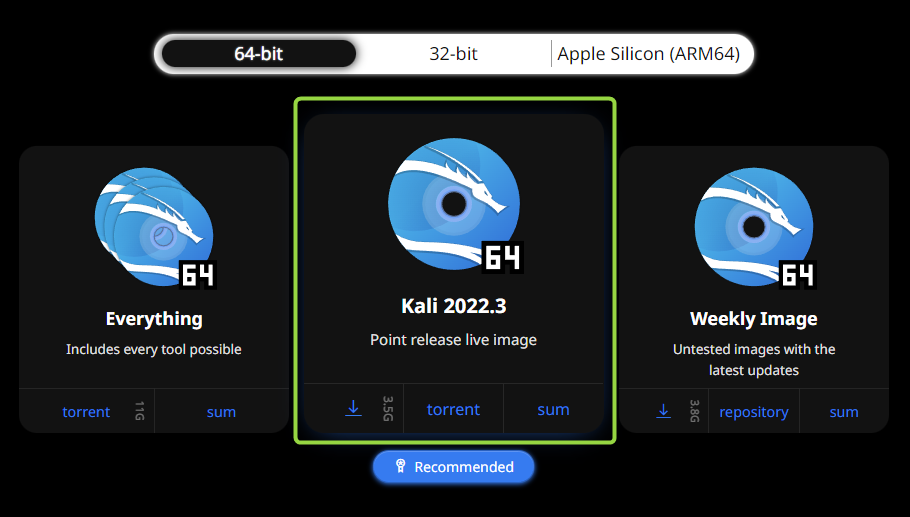
Verify the checksum of downloaded file with the one presented on the download page
- Boot into Rescue mode.
- Follow through the installation the usual way.
Can't confirm if you have to choose the same values as it was on original installation, but it shouldn't matter. Let me know in the comments if that causes some issues on you
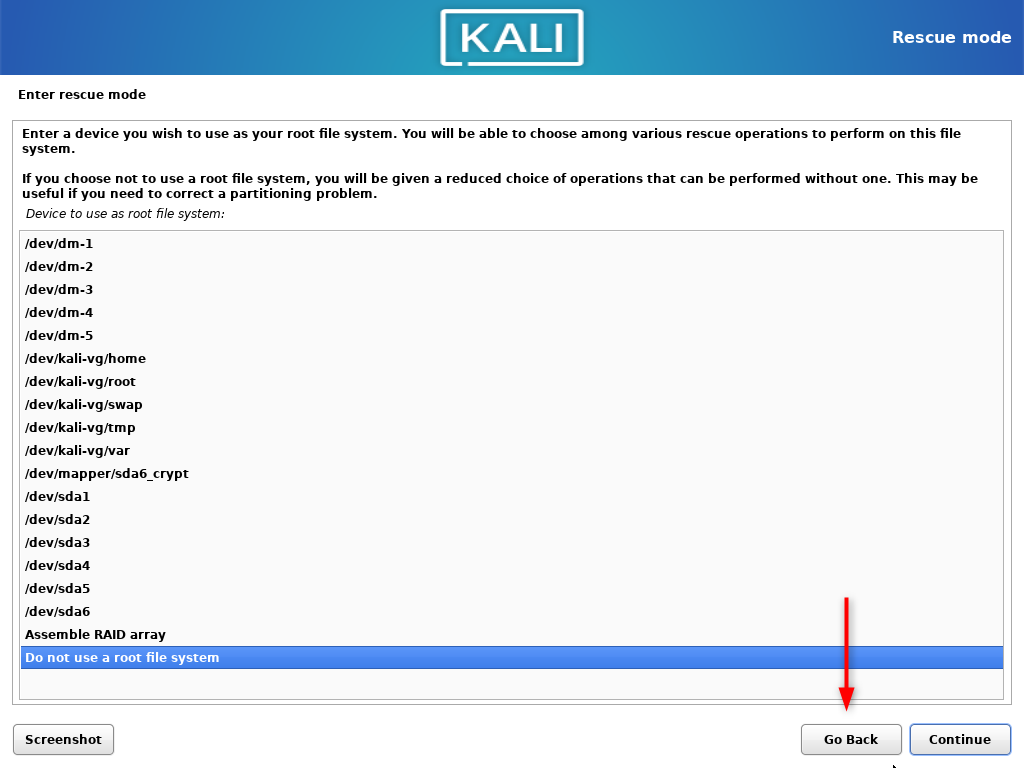
- On Detecting disks step, installer should detect the encrypted volume and ask you for the passphrase. Enter it.
Partitioning
- When asked to choose root do not use any, instead click Go Back to display the installation steps.
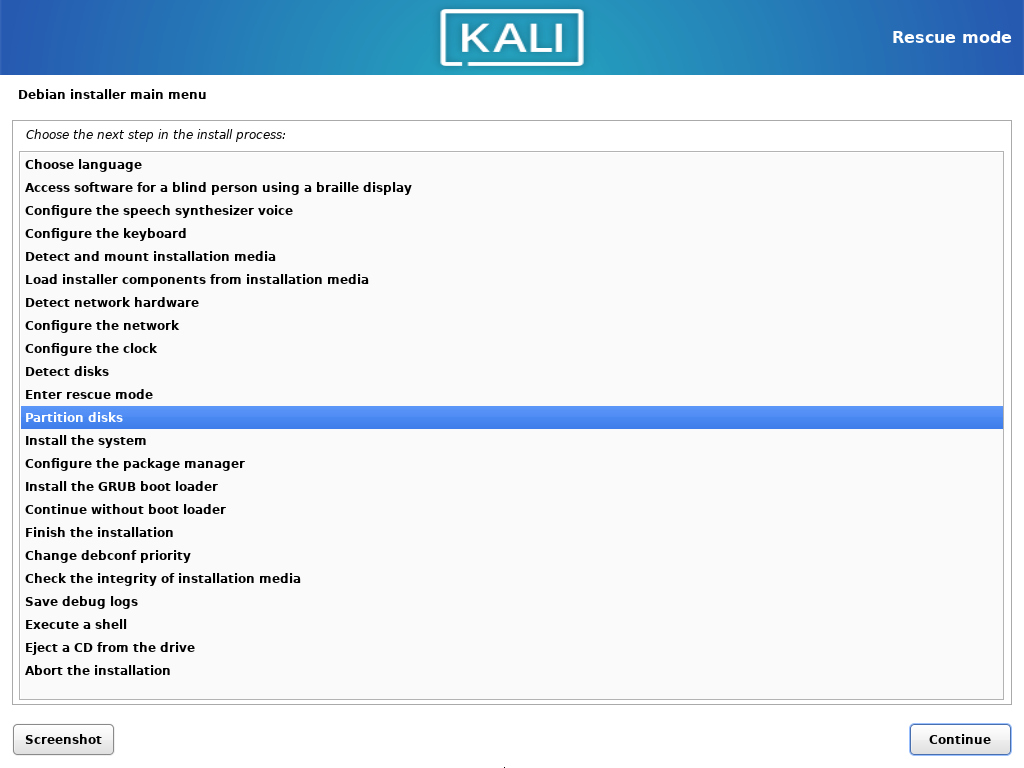
- Skip the Enter rescue mode and select the Partition disks step.
- Choose the manual partitioning. Now configure mounting points as it was done before. To not lose the
/homedata, leave the volumes size as it is. Choose to format every partition, but do not formathome.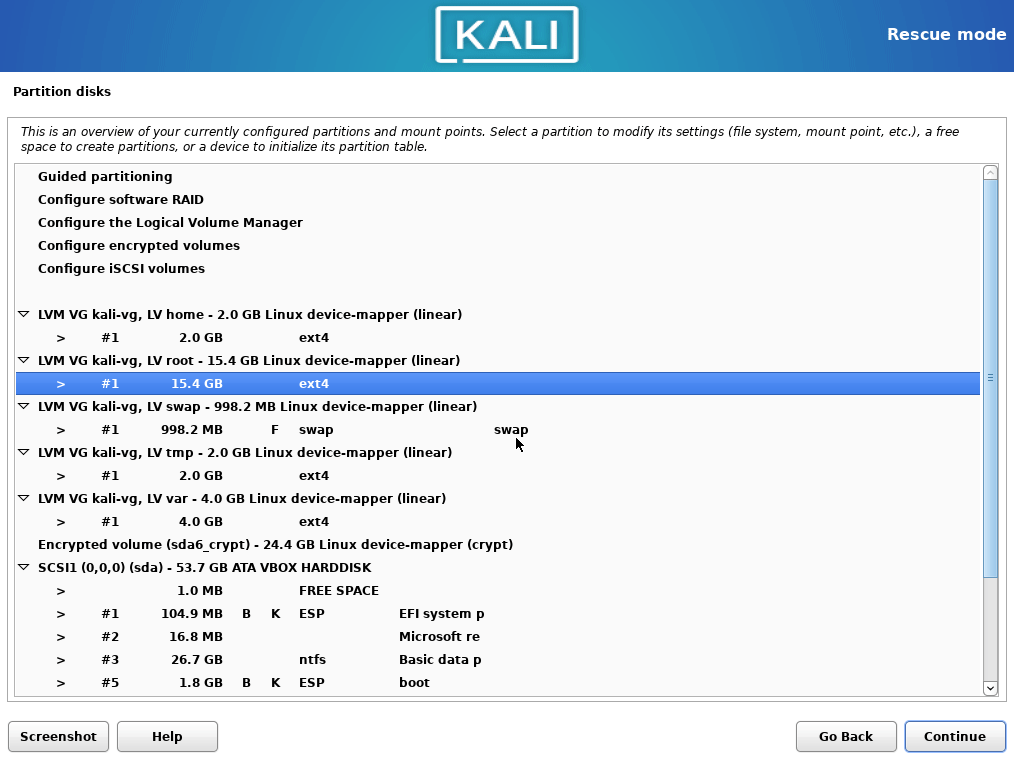
- Mount home partition as
/home, make double sure you are not formatting it.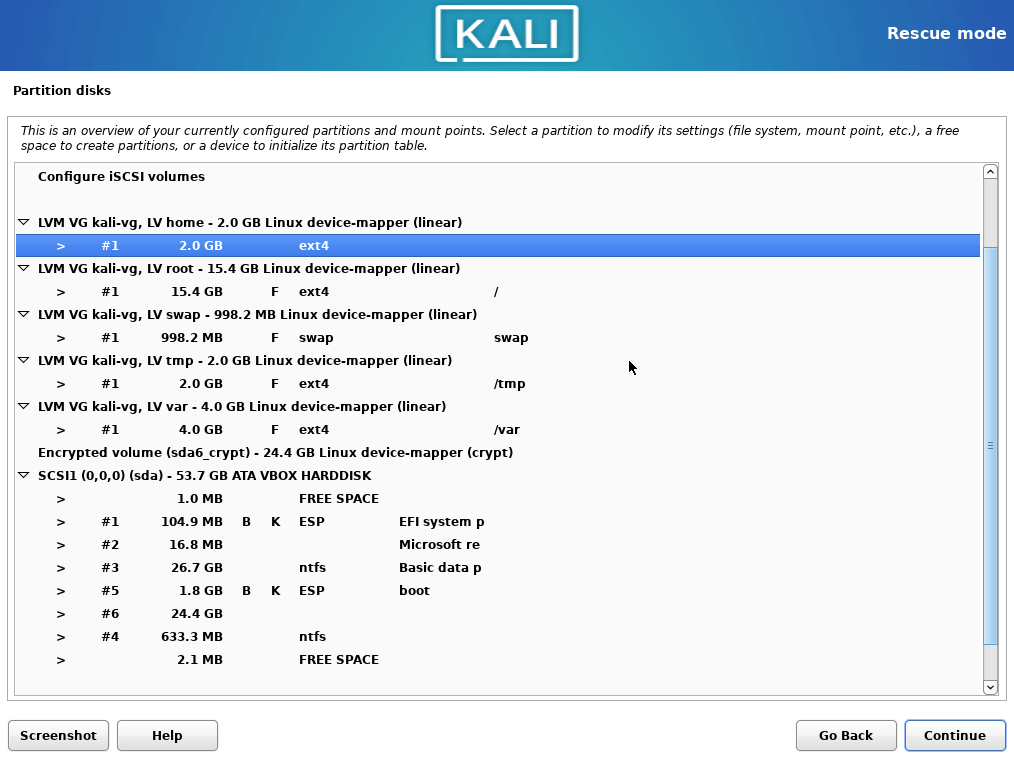
- Select boot partition, choose
Ext4and/bootmount point.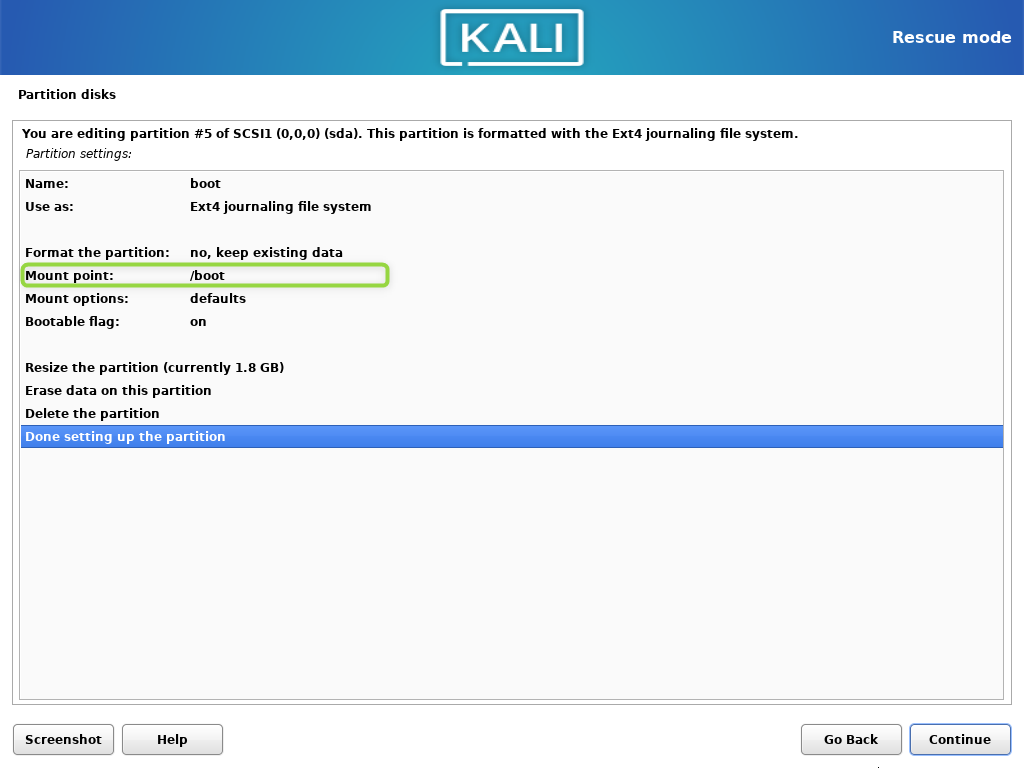
You can keep the existing data, because the encrypted volume itself does not change, only the LVM it contains.
This is how the partitioning schema looks like before changes are committed.

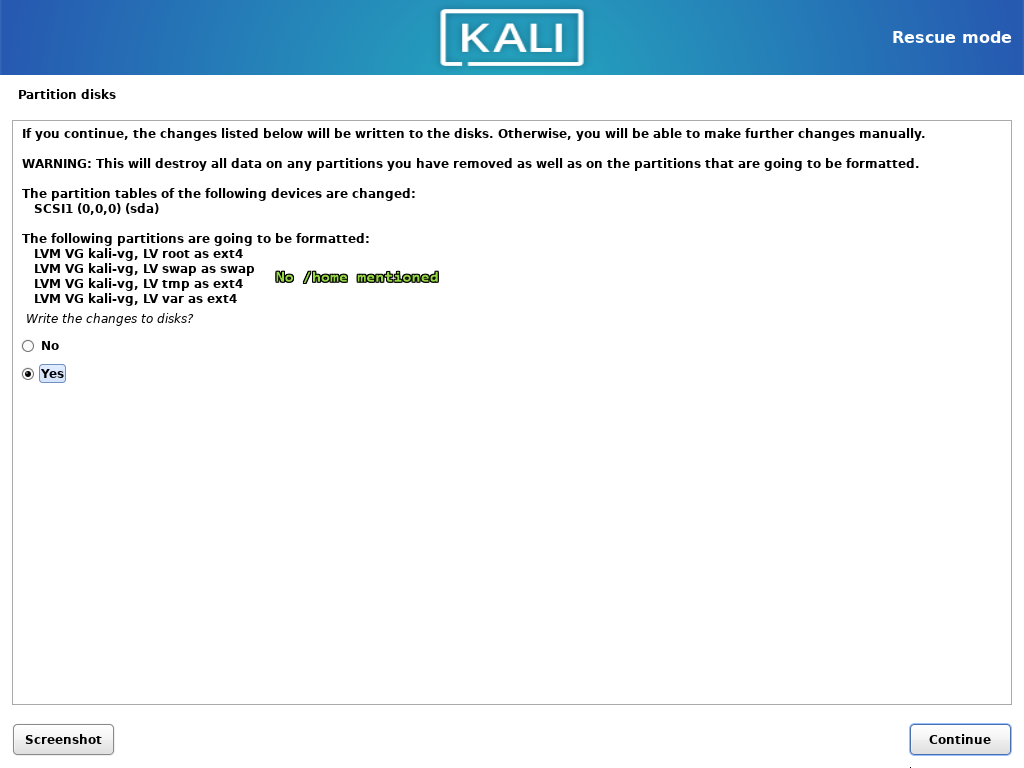 Now continue with the installation.
Update crypttable
After the booting on fresh system, Grub won't recognize/discover the encrypted volume, and it fails booting. It can show that device is not available or simply show initramfs prompt. Reason is that installer is not updating the /etc/crypttab file - probably because during the partitioning step, we actually didn't configure the encrypted partition; it was unlocked already before we entered the partitioning screen. To fix that, perform the following steps. Original author of this is Halacs from superuser.com.
- Boot the Live CD again, but this time actually start the Live System.
At the time of writing default credentials are
kali/kali. - Open terminal. Enter root shell by typing
sudo su. - Find out what is the volume path for
/bootand encrypted LVM. You will recognize file system by its size.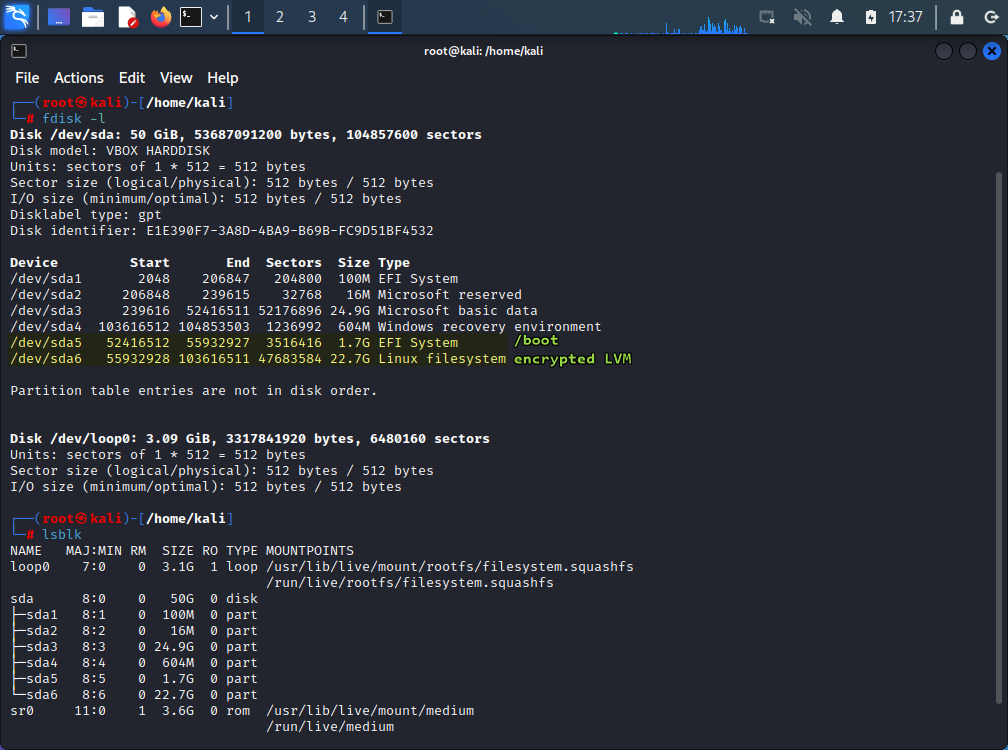
- Unlock the encrypted volume.
$ cryptsetup luksOpen /dev/sda6 gabor2-cryptIf you care of naming your encrypted volume (it will be visible on passphrase prompt each boot) change the
gabor2-cryptto your liking and use that name consistently during further steps. - After decryption, LVM content should be visible in both
fdisk -landlsblk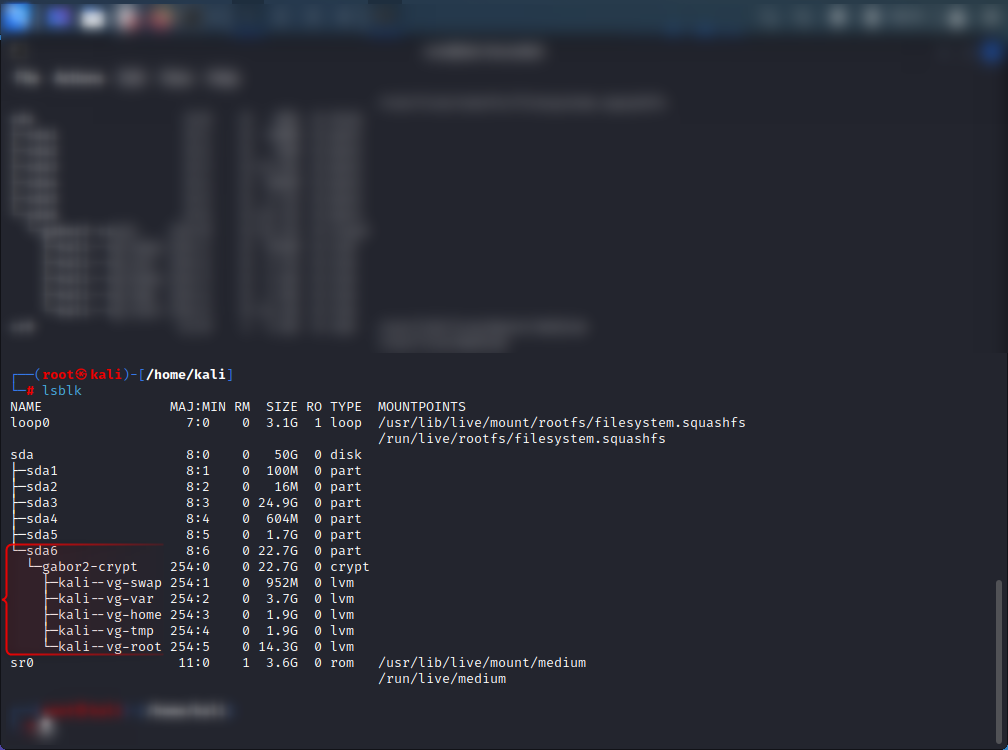
- Use
/mntto mount all new system and boot partitions. You will be switching root to the/mntlater, so it is important to keep all mount points in the single folder.mount /dev/mapper/kali--vg-root /mnt mount /dev/mapper/kali--vg-home /mnt/home mount /dev/mapper/kali--vg-var /mnt/var mount /dev/mapper/kali--vg-tmp /mnt/tmp mount /dev/sda5 /mnt/boot - Verify that mount points are correct using
lsblk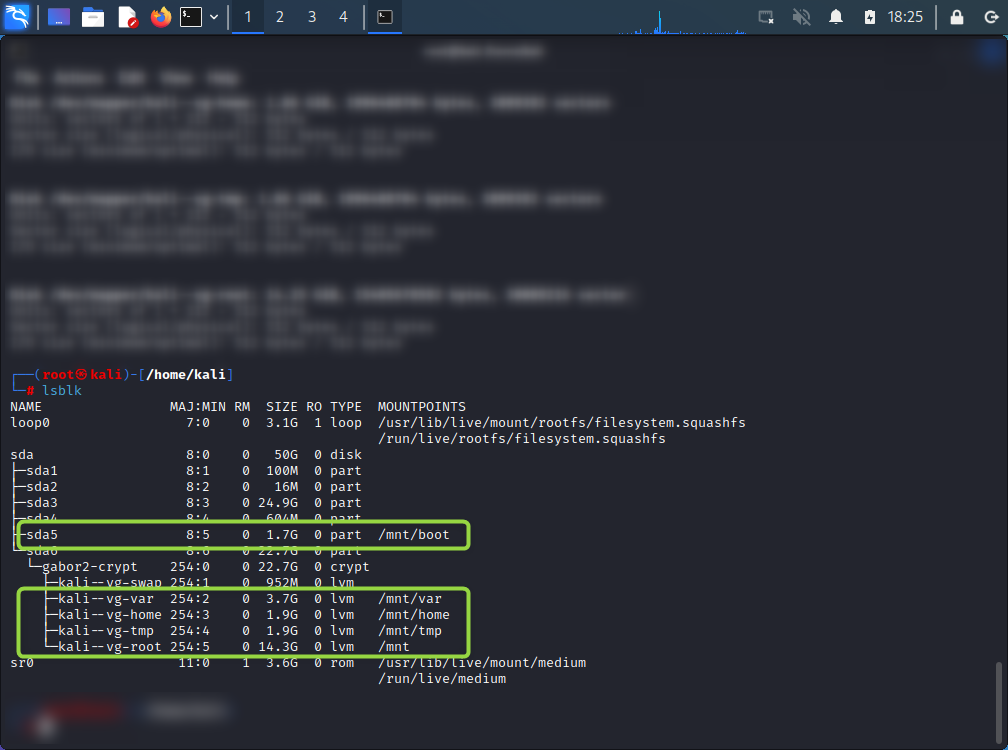
- Now mount other critical directories, without this further commands will fail.
mount --bind /dev /mnt/dev mount --bind /run /mnt/run mount --bind /proc /mnt/proc mount --bind /sys /mnt/sys - Switch the root to
/mnt.
From now on, until leaving thechroot /mntchrooted scope, all commands are performed on the newly installed system - Get the UUID of the encrypted volume to write to
crypttab.blkid /dev/sda6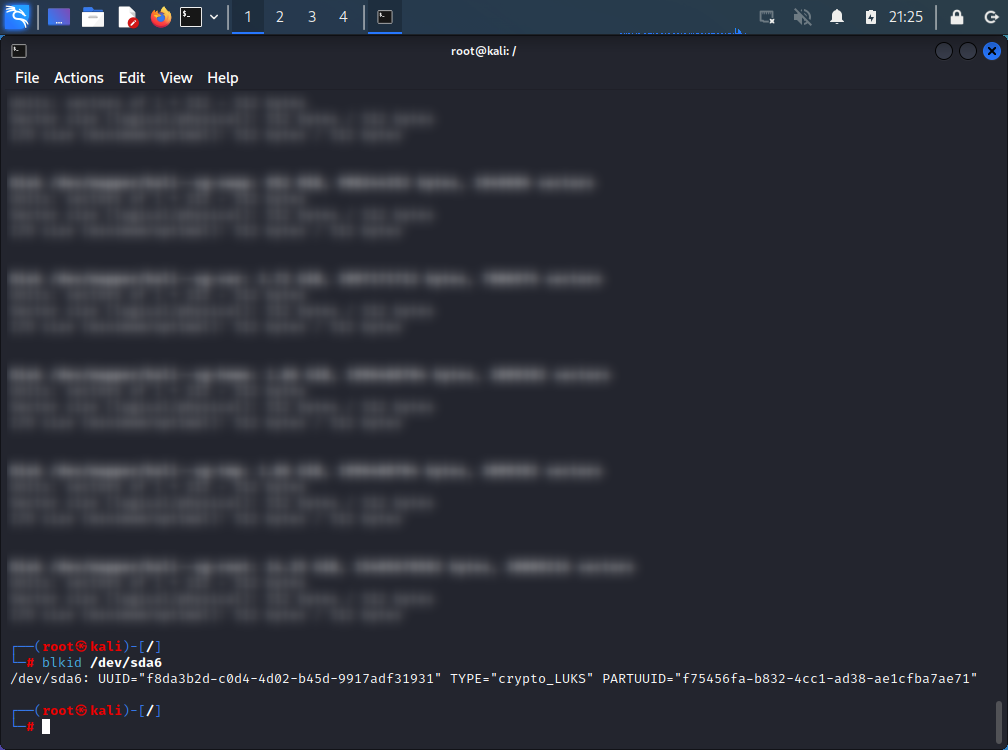
- Place these in the
crypttab.$ nano /etc/crypttab gabor2-crypt UUID="f8da3b2d-c0d4-4d02-b45d-9917adf31931" none luksPlease note that this is not copy-paste from previous step.
- Update initramfs and grub.
update-initramfs -u
update-grub
Watch out for warning messages, when device label in
/etc/crypttabdoes not match current label of decoded LUKS. If that happen, please ensure the name in/etc/crypttaband name of encrypted volume are the same.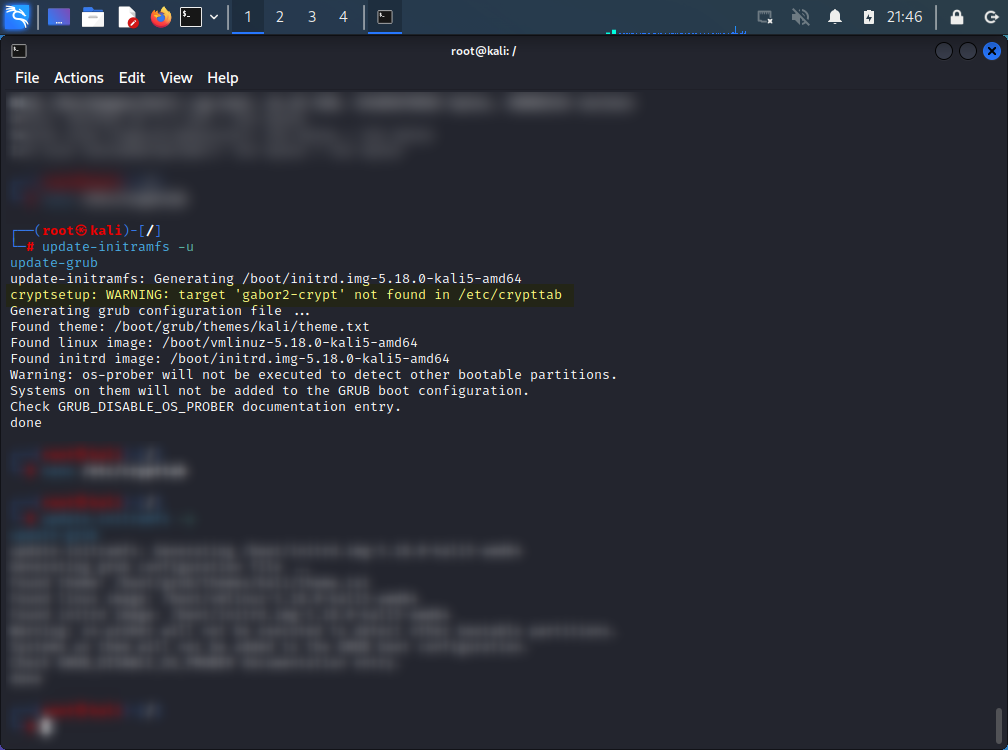
- Now exit
chrootscope, unmount all devices and close LUKS.exit umount -R /mnt vgchange -a n cryptsetup luksClose gabor2-crypt - Restart.
Now your system should show passphrase prompt and boot to login screen. Unfortunately, you can't login to your user because it does not exist yet on the new system.
If you are using the system that doesn't block root account password login, you can skip the next section.
Boot into root shell
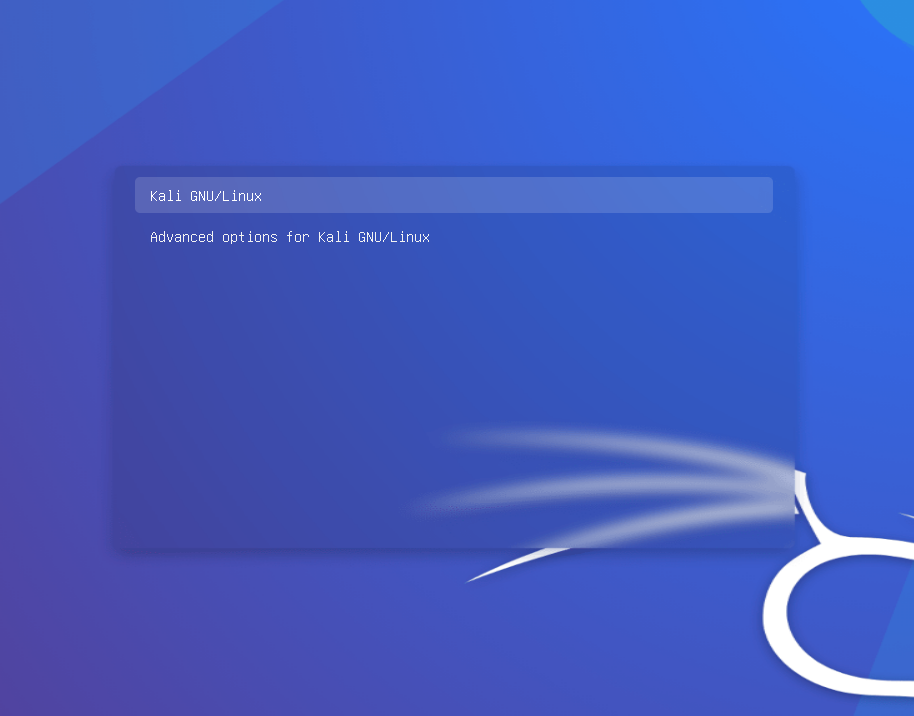
- Boot the system. Stop on GRUB loader. Highlight the "Kali" entry.
- Press
E. Search for the line starting withlinux.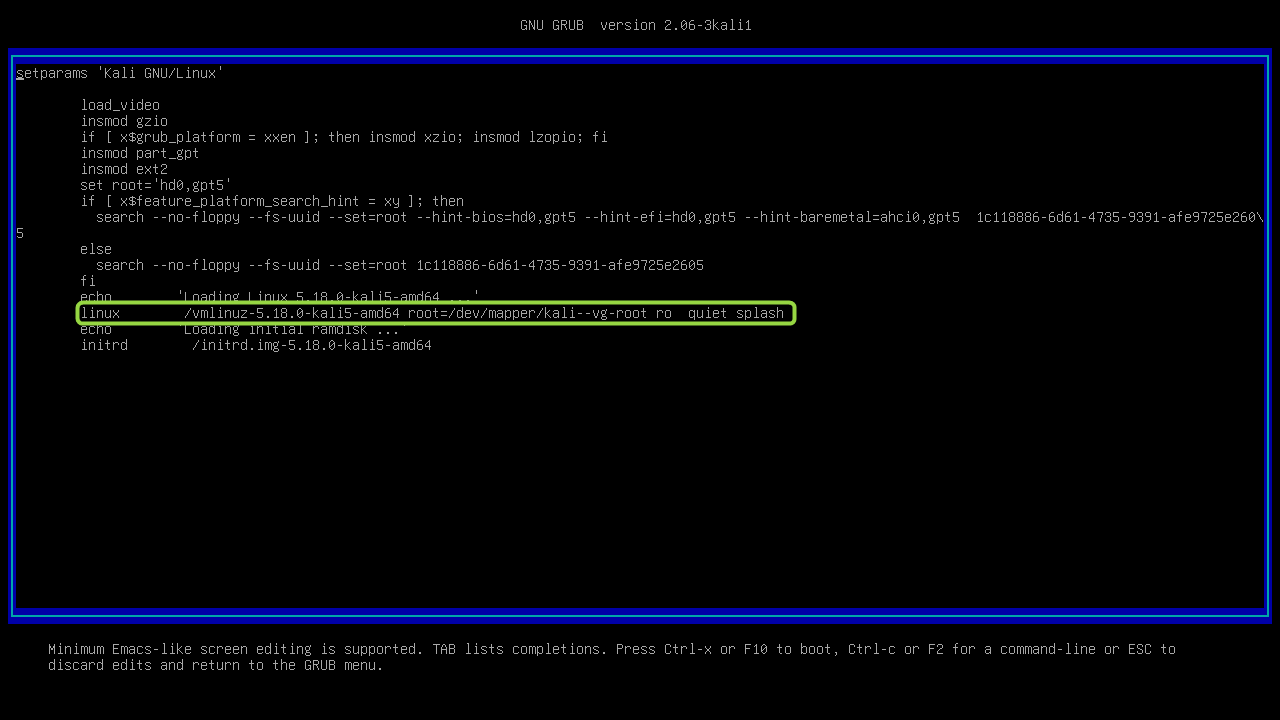
- Change the ending to
rw quiet init=/bin/bash. Press F10.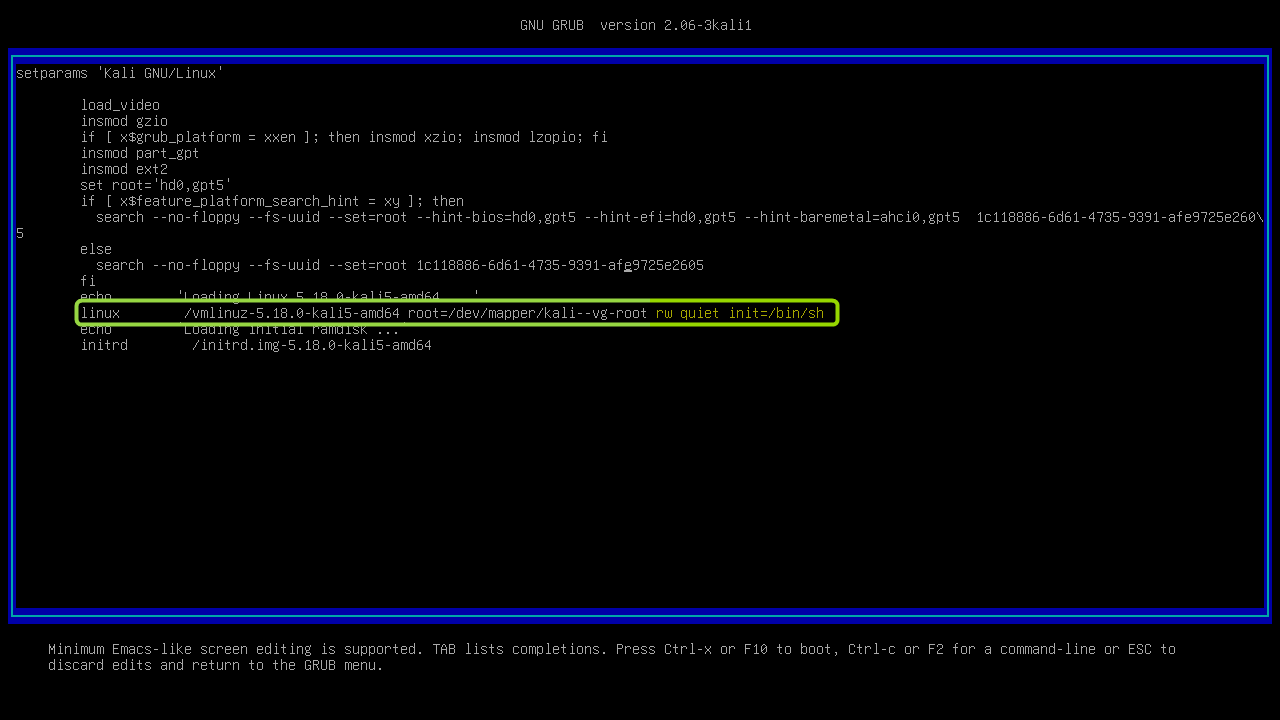
- Unlock the LUKS.
Add user back
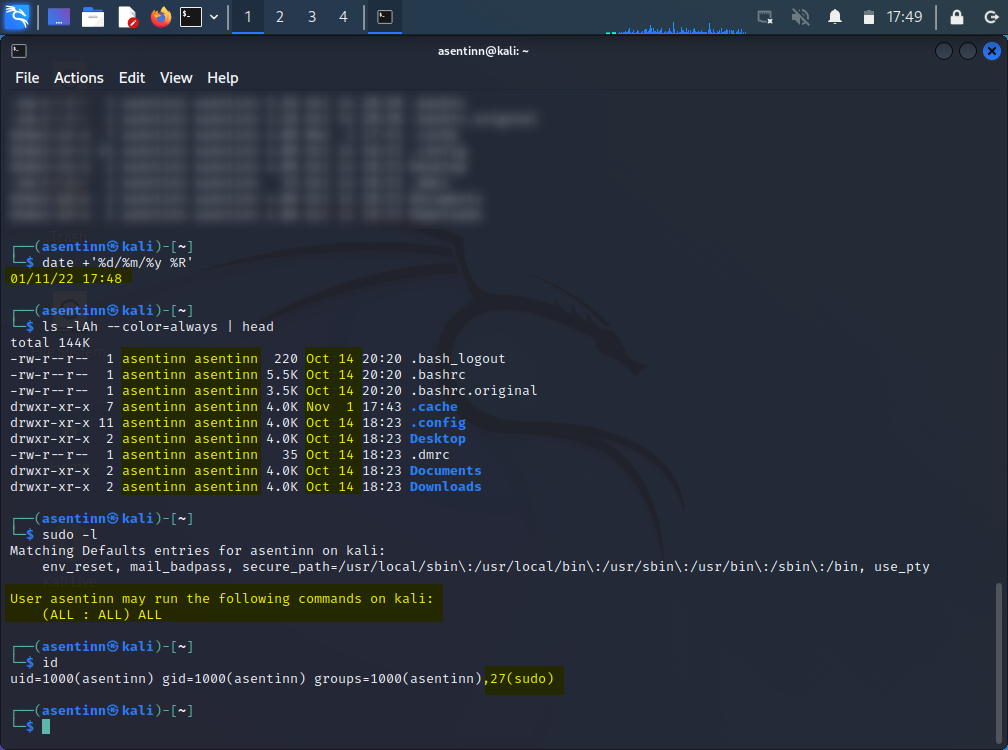
- Add user, add to sudoers.
useradd --no-create-home -d /home/asentinn -s /bin/bash asentinn chown -R asentinn:asentinn /home/asentinn sudo -l -U asentinn passwd asentinn - Reboot. Now you can login as sudo user with your old home partition.
Additional readings
Subscribe to my newsletter
Read articles from Kamil Gierach-Pacanek directly inside your inbox. Subscribe to the newsletter, and don't miss out.
Written by
Kamil Gierach-Pacanek
Kamil Gierach-Pacanek
Currently working as a Senior Consultant at Netcompany spending my full-time job solving the SharePoint riddles. In the free time I'm expanding my understanding of cybersecurity through hacking activities. Git fanboy.