A guide to Etherscan | Part 2: Transactions Overview
 Mocha
MochaUsing Etherscan is much easier than it looks
Last time, we learned about what Etherscan is, the different types of information we can learn by exploring Etherscan, and how to read Etherscan’s home page. If you missed it, you can check it out here: A guide to Etherscan | Part 1: The Homepage
Today we will be learning more about Etherscan’s transaction pages!
What are transaction pages on Etherscan? 💸
A transaction page on Etherscan provides information about a specific transaction. The information on this page includes things such as the transaction hash, the time of the transaction, and more.
Whenever you make a transaction on the Ethereum network- whether buying an NFT, registering an ENS name, or just sending some ETH to a friend- that transaction has to be verified across the blockchain to show that the transaction happened and it is valid. This is done via a consensus mechanism, which is a method by which Ethereum blockchain validators determine which blocks will be added to the blockchain.
When a transaction occurs and is verified by the blockchain validators, it is assigned a transaction hash. This is a long string of characters and numbers beginning with 0x that serves as a unique identifier for a transaction. Each transaction has its own unique transaction hash that can be used to look up information about the status of the transaction, including but not limited to who was involved in the transaction, how much the transaction cost, and the time of the transaction.
Here are some examples of what a transaction hash can look like:


After completing a transaction, the transaction hash will usually be shown to you on a confirmation screen by the website that you are interacting with and via your web3 wallet provider, such as Metamask.
Many websites and wallet providers will allow you to copy this transaction hash with one click. If this is not an option, we can highlight the transaction hash and copy it manually. On some sites and applications, the transaction hash may be referred to as a transaction ID or even a confirmation number.
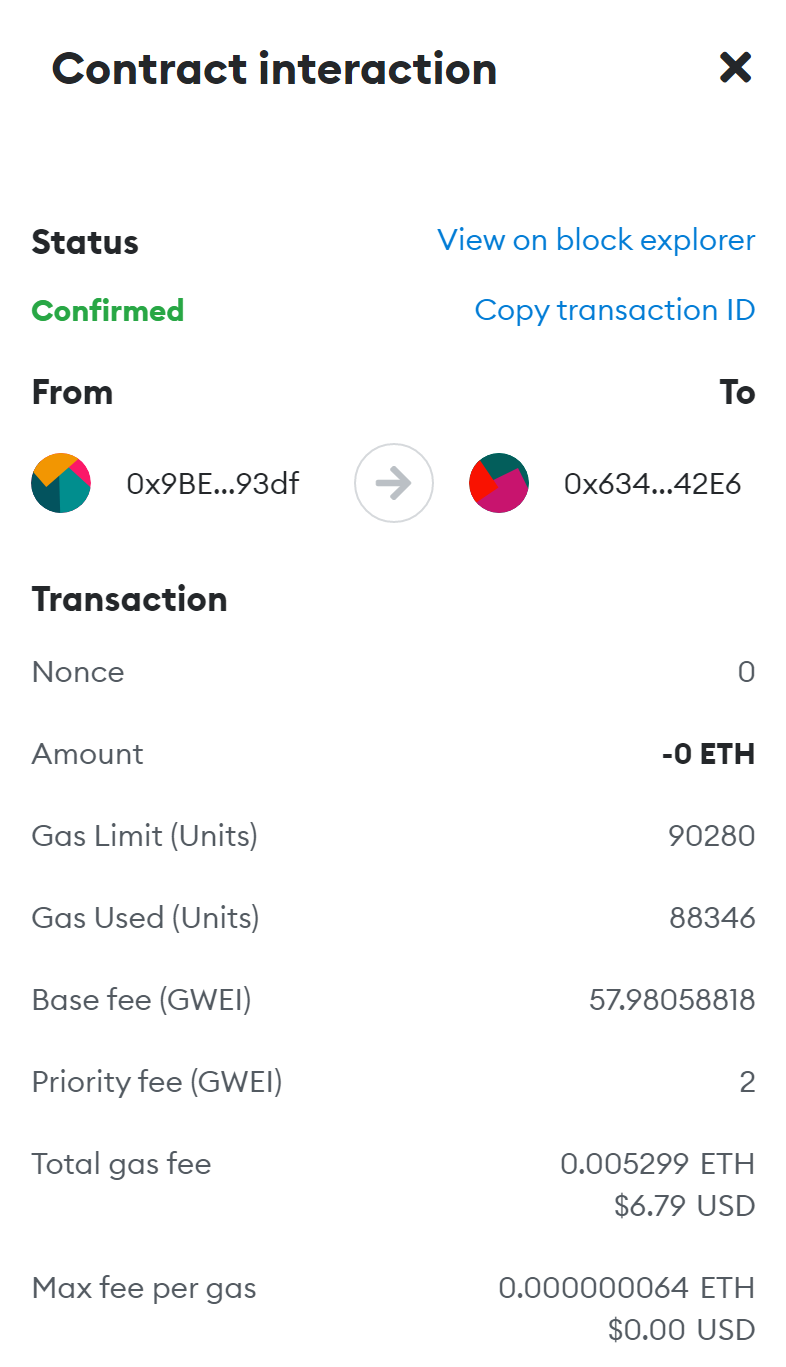
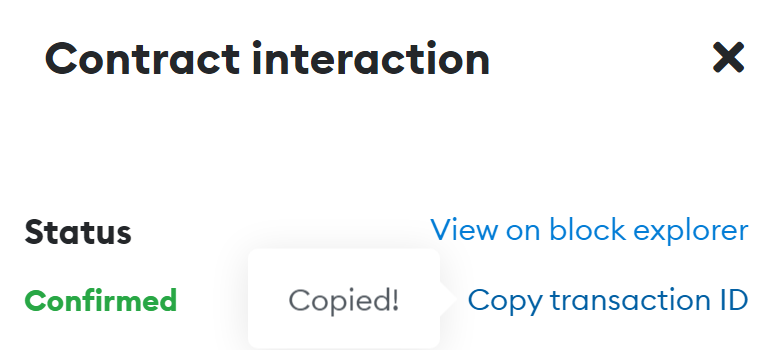 Metamask has an option to copy the transaction ID, which is the transaction hash associated with this transaction. Clicking the “View on block explorer” option will open the transaction page on Etherscan for the associated transaction with one click without the need to copy the transaction ID or having to manually navigate to the Etherscan homepage.
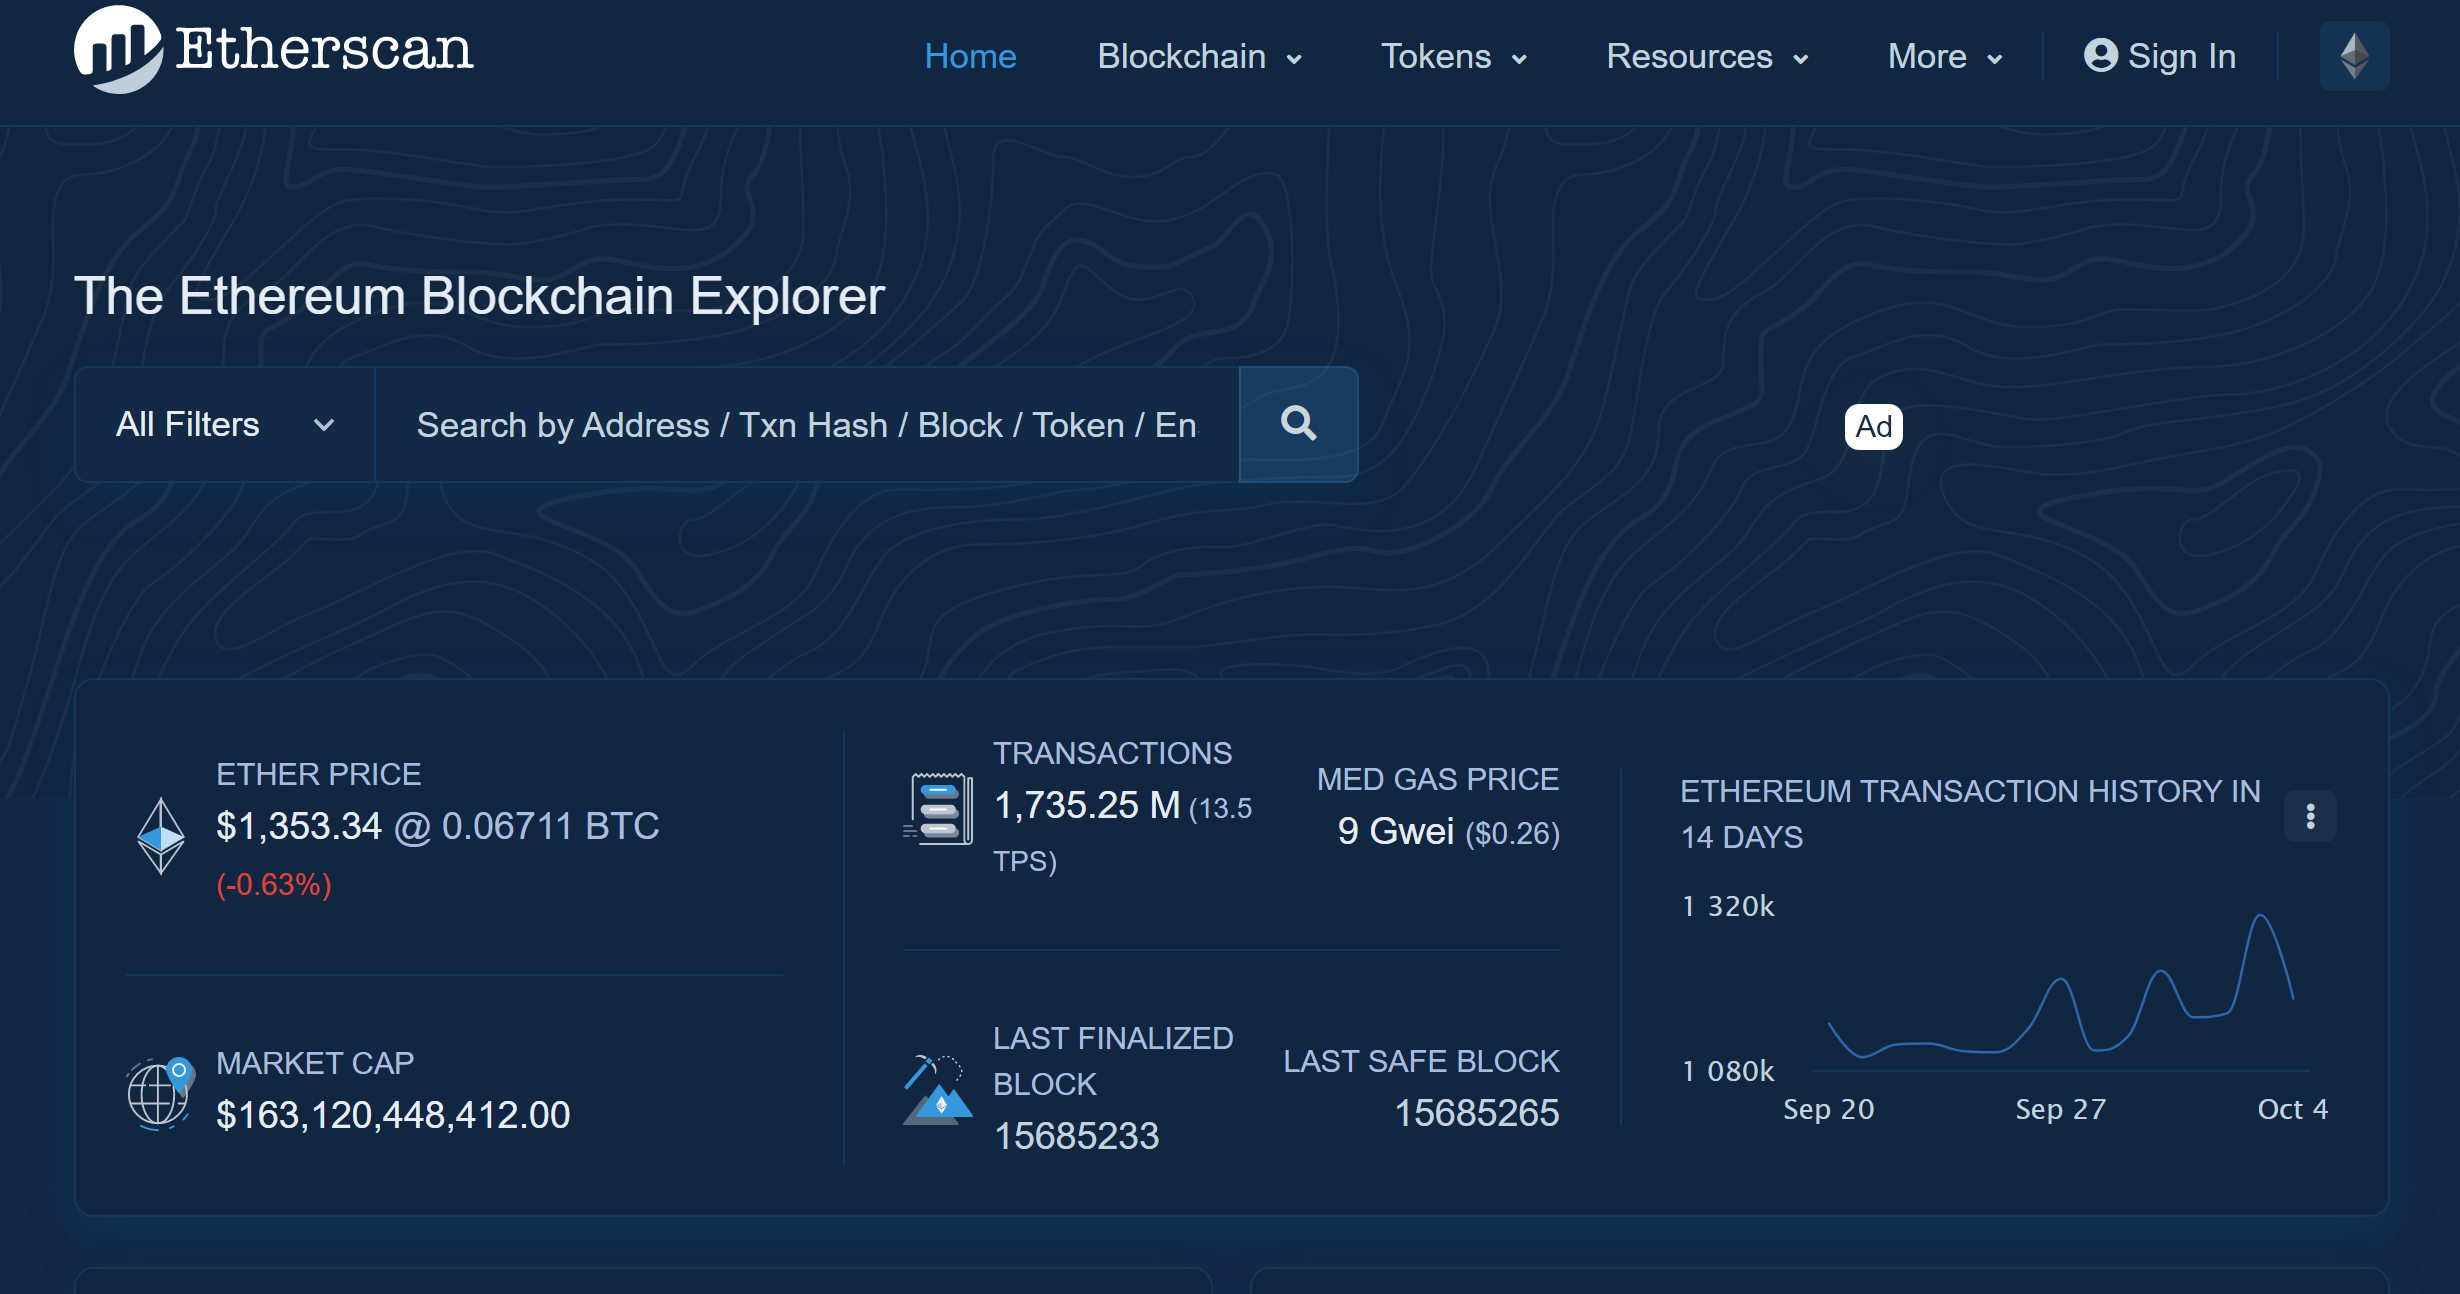
After copying the transaction hash, we can head to Etherscan (etherscan.io) to learn more about and check the status of the transaction.
We can paste the transaction hash into the search bar to find this transaction. There is no need to use any filters.

Once we click on the microscope or press the enter key to execute the search, Etherscan will load the Transaction Details page for the transaction with the associated transaction hash.
Let’s take a closer look at a transaction details page.
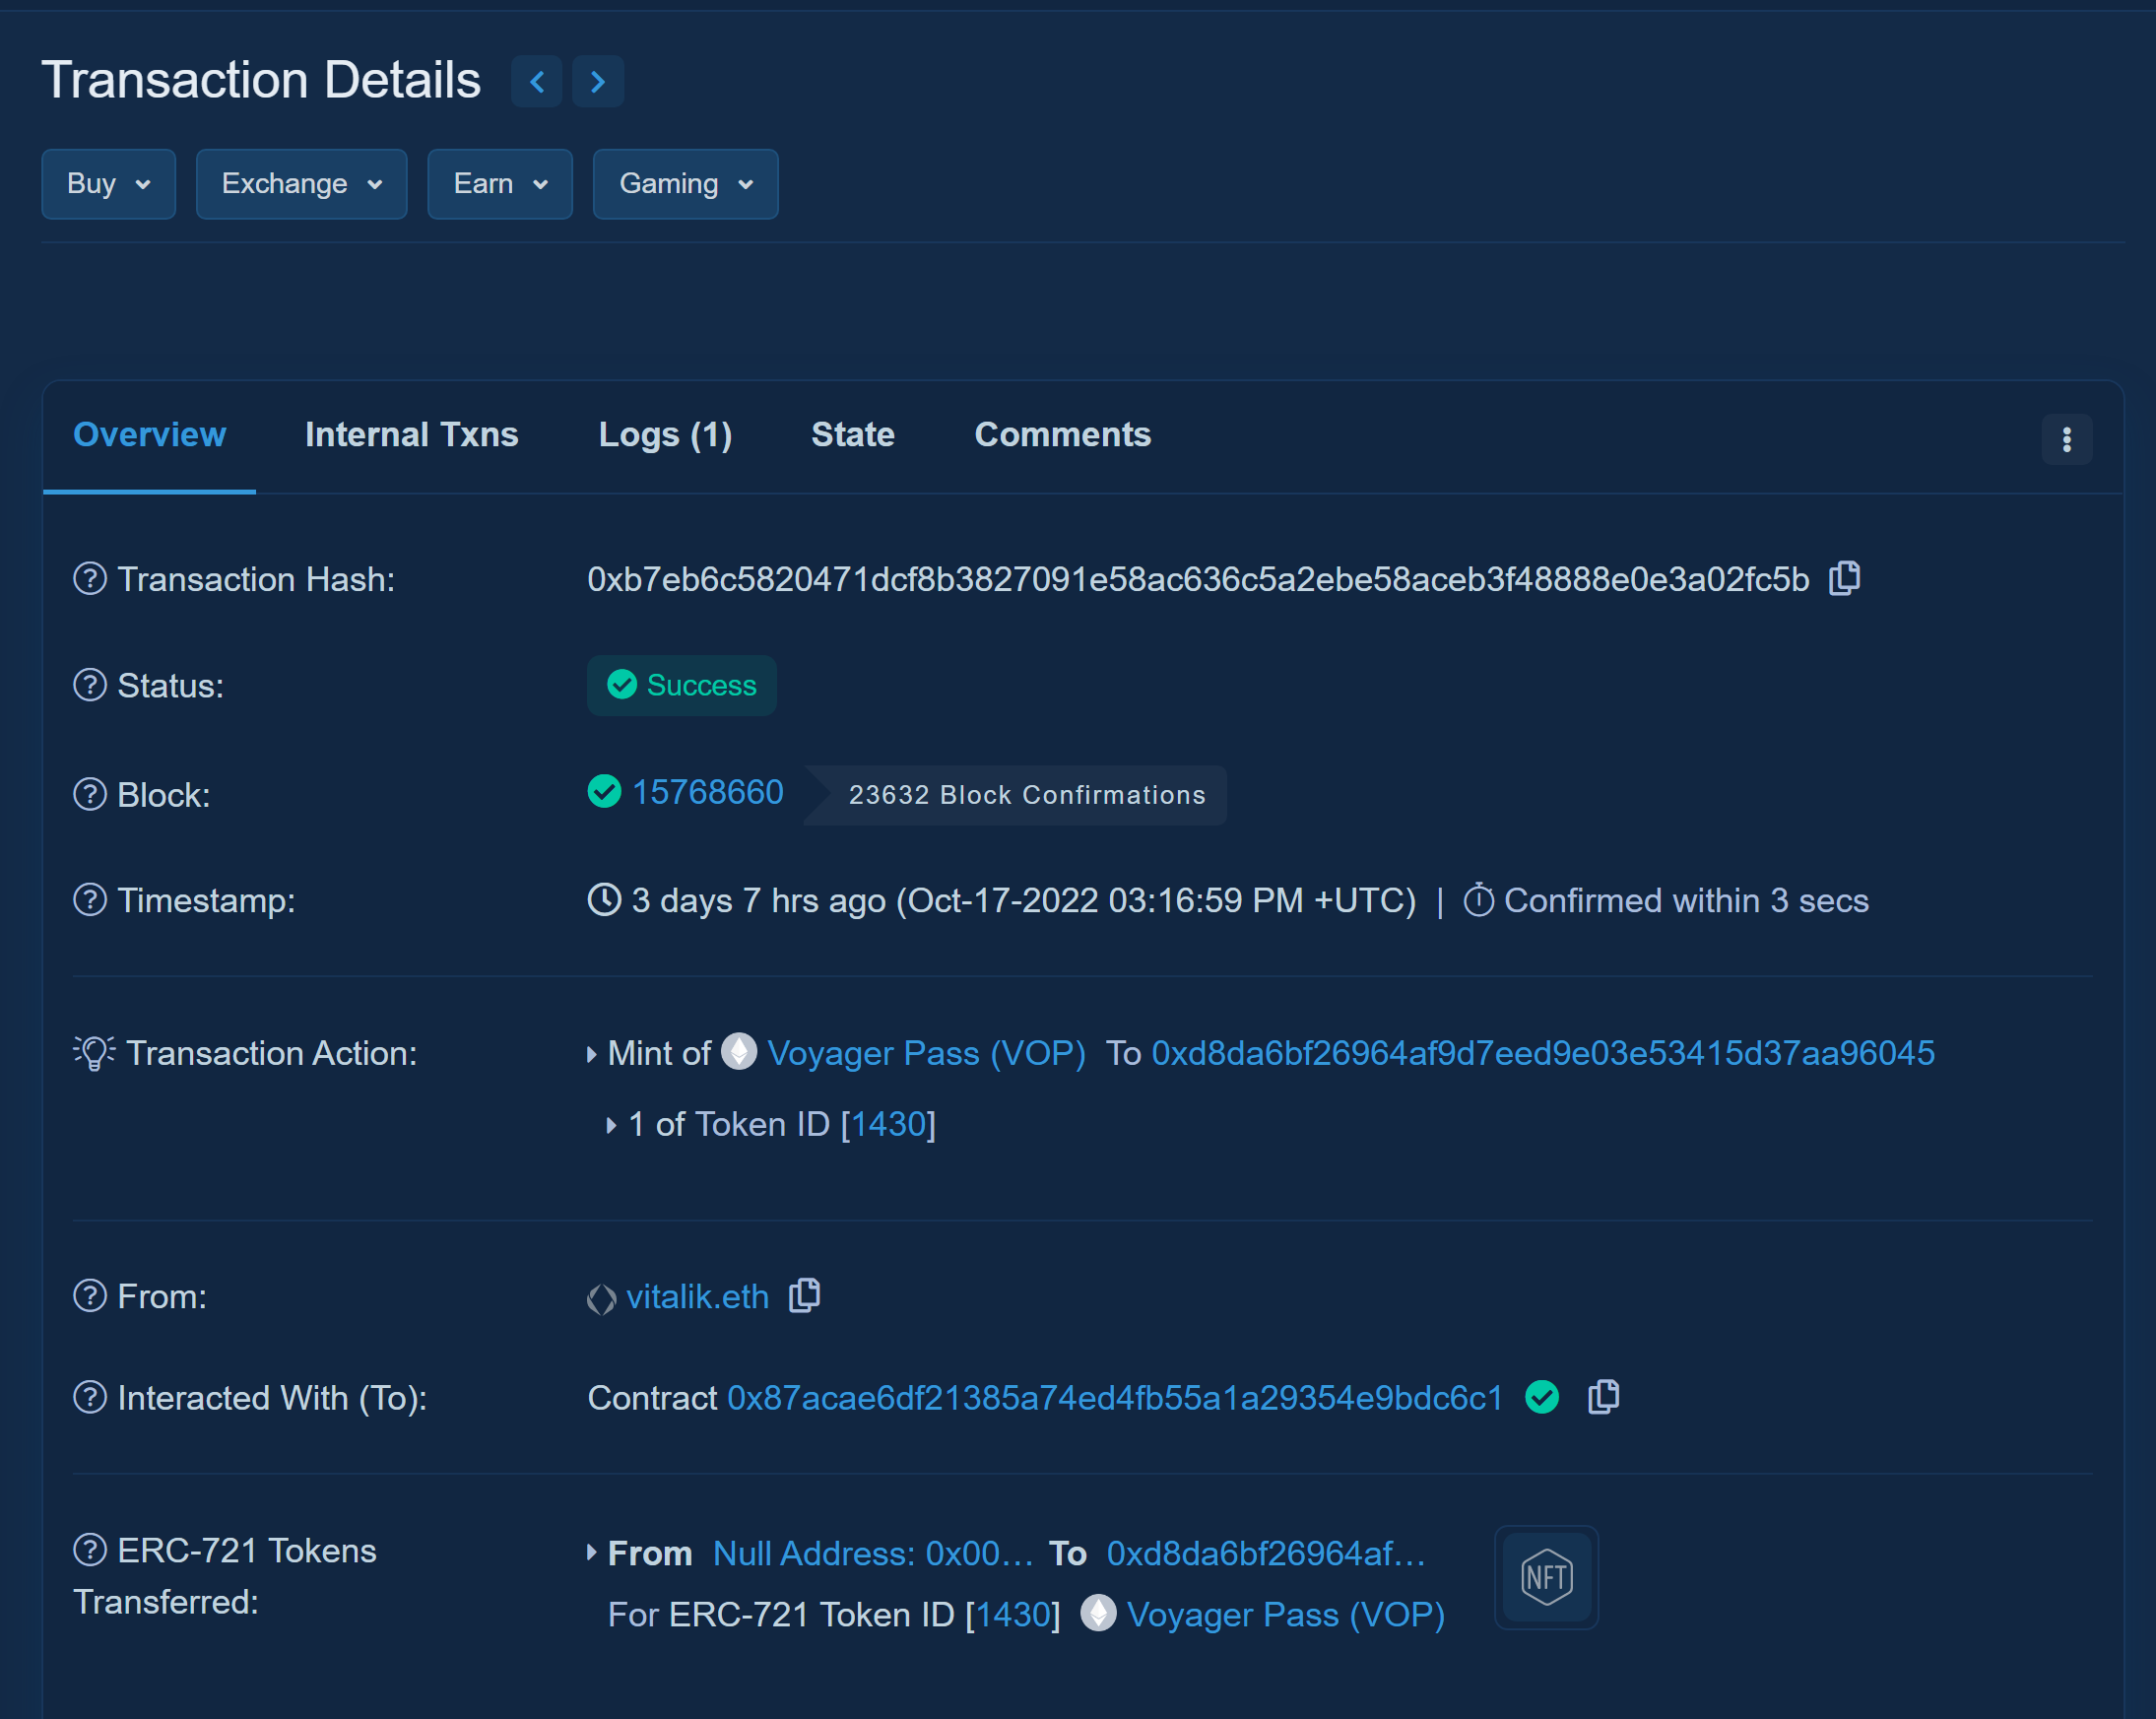
This page gives us detailed information about this transaction.
Clicking the arrows beside the words “Transaction Details” will show us the previous and next transaction by sender. The sender is the person who initiated the transaction.
The drop down links (Buy, Exchange, Earn, Gaming) under “Transaction Details” are advertisements.

At the top of the transaction details page, you may notice different tabs including an overview tab, a logs tab, a state tab, and a comments tab.
In addition, you will notice that a menu appears when we click the three dots in the upper right hand corner of the transaction details box. We will review these in order.
 This menu appears when we click the three dots.
First, let’s check out the overview tab. This is the default view for the Transaction Details page.
On this page we can see a few different things. In order, from top to bottom:
- This is the transaction hash. It is the unique identifier for this transaction. Etherscan allows us to copy the transaction hash in one click by clicking on the overlapping pages icon at the end of the hash.
The status of the transaction shows us if the transaction was completed or not. If the transaction completes successfully, a green “Success” message will appear.
If the transaction does not complete successfully, a red “Fail” message will appear. Some failure messages will show an error code. The error code will give more information about why a transaction failed.
In some cases, a grey “Pending” message will appear. In this case, the transaction is waiting to be validated by an Ethereum validator. The time it can take for a pending message to update to a “Success” message or “Fail” message depends on busy the validators are. However, this is usually not a long wait.
A pending transaction page has an italicized transaction hash. The status and block are pending as the transaction waits to be validated. The time last seen is when the transaction was last seen in the pool of transactions waiting to be validated. The estimated confirmation duration gives an estimate of how long it will be before a validator will check the transaction. The pending txn queue (pending transaction queue) bar shows the status of the transaction validation. When the bar is full, the transaction page will update to a “success” or “fail.”
Block shows the block the transaction was included in. Blocks are linked together via cryptography and store all past and present information about transactions within blockchains. Each block has a limit of information that it can store before a new block must be made to store additional information. For the Ethereum blockchain, a new block is added every 12 seconds.
Clicking on the number under block will give us detailed information about the block the transaction was included in. We can see that this transaction was included in block 15768660. The number beside the block number is the number of blocks added to the blockchain since this block has been added to the blockchain.
 The timestamp shows the time and date the transaction took place.
The transaction action shows the key event of the transaction. Not all transaction details pages will show a “Transaction Action” area.
 In this transaction, 1 voyager pass NFT was minted by the address shown in the screenshot. The To area in this section shows the address that received the NFT after minting. Token ID is the token ID number of a token in an NFT collection. In this case, the token ID is 1430. (”1 of Token ID[1430]”)
In this transaction, 1 NFT was sold for 0.35 Ether on OpenSea. This token was transferred from the address shown after the words “From” and sent to the address shown after the words “To.” In other words, the second address purchased the NFT from the first address.
The from section shows the sender of the transaction. This is the account that initiated the transaction. This can show as a wallet address (0x…) or an ENS name (somebody.eth)

The interacted with section shows the addresses that the sender interacted with during the transaction.
 In this transaction, the sender interacted with a smart contract (code that lives on the blockchain and is automatically executed when a certain condition is met- this code can be used for NFT mints, decentralized apps, and more). The address of the smart contract is shown. The green check indicates that the contract successfully executed.
In this transaction, the sender interacted with a smart contract. When this contract executed, it resulted in three internal transactions that transferred various amounts of Ether. Internal transactions are transactions that occur within or between smart contracts as a result of a smart contract executing. A smart contract is executed when a user interacts with a contract. In this transaction, the three internal transactions are shown under the contract address and show the type of transaction (TRANSFER) and the value of ETH transferred.
The tokens transferred section shows information about any tokens that were transferred as a result of the transaction.
 In this transaction, the sender minted a new NFT. When a new NFT is minted, it is sent from Null Address 0x000…000. The To section shows the address that minted the NFT. Under this, we can see the token type, the token ID number, and the token name.
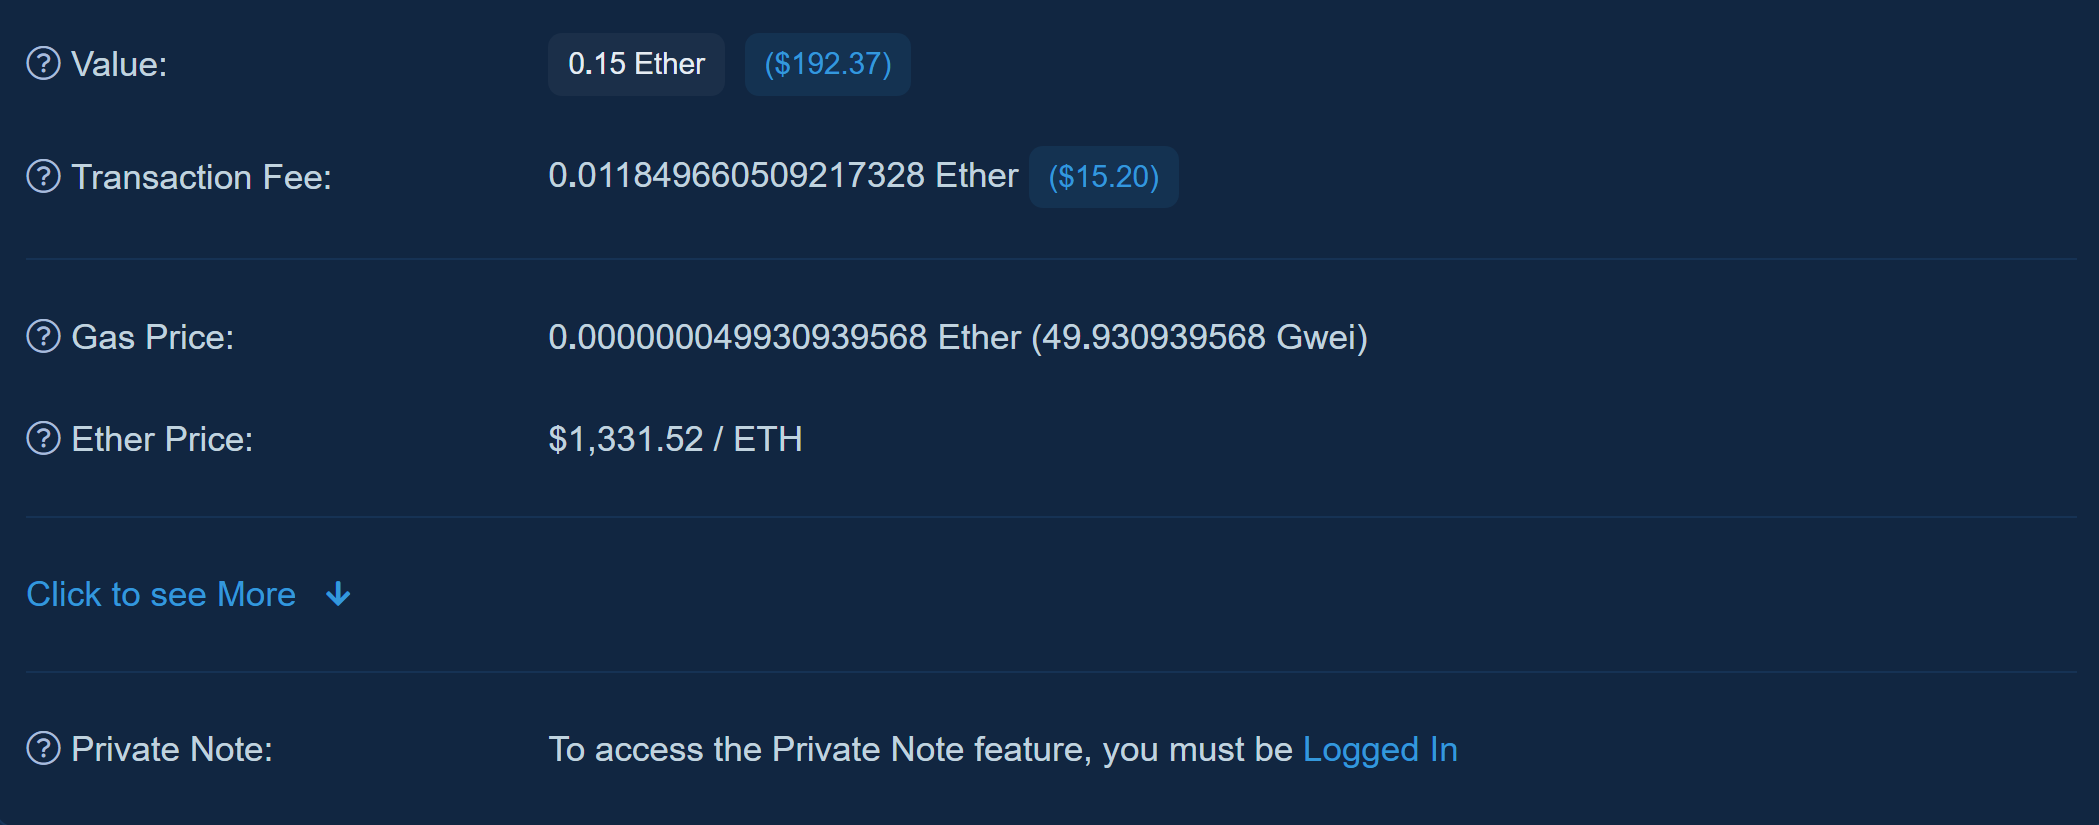
The value section shows the amount of Ether sent to the recipient of the transaction. This value is shown in Ether with a conversion to USD beside it.
The transaction fee section shows the amount in Ether, with a USD conversion, that the miner (pre-merge)/validator (post-merge) earned for processing the transaction.
 The transaction fee is calculated using the formula (Block Base Fee per gas + MaxPriorityFee per gas) × Gas Used.
The USD conversion shows the current rate of the fee. Clicking on the USD conversion will show an estimated fee amount on the day the transaction occured.The gas price is the fee required to conduct a transaction. Each transaction on the Ethereum network requires computational resources to compute since each transaction interacts with the Ethereum Virtual Machine (EVM).
The EVM is the heart of the Ethereum blockchain and stores all information that occurs on the Ethereum blockchain such as transactions and smart contracts. It defines what the current Ethereum blockchain is and rules about what can be added to the chain. Gas is just the unit of measurement used to track the computational resources necessary for interactions with the blockchain. Gas fees are reflective of this. Gas fees also help to keep the Ethereum blockchain secure by preventing spam and resource waste.
Therefore, the minimum gas price is based on the demands of the network at the time of transacting. If the minimum gas price isn’t met, it is likely that the transaction will fail. The gas price shown is the amount of gas used in this transaction. This value is shown in Ether and Gwei (1 Gwei = 1 billionth of 1 ETH). In this transaction, the sender used 30 Gwei of gas.
The Ether price shown in the transaction details is the price of Ether on the day the transaction occurred.
After the Ether Price section, there is an option to “Click to see more.” If we click this, we will see even more information about the transaction. This is detailed information about gas during the time of transaction, attributes of the transaction, and binary data that formed the input of the transaction.

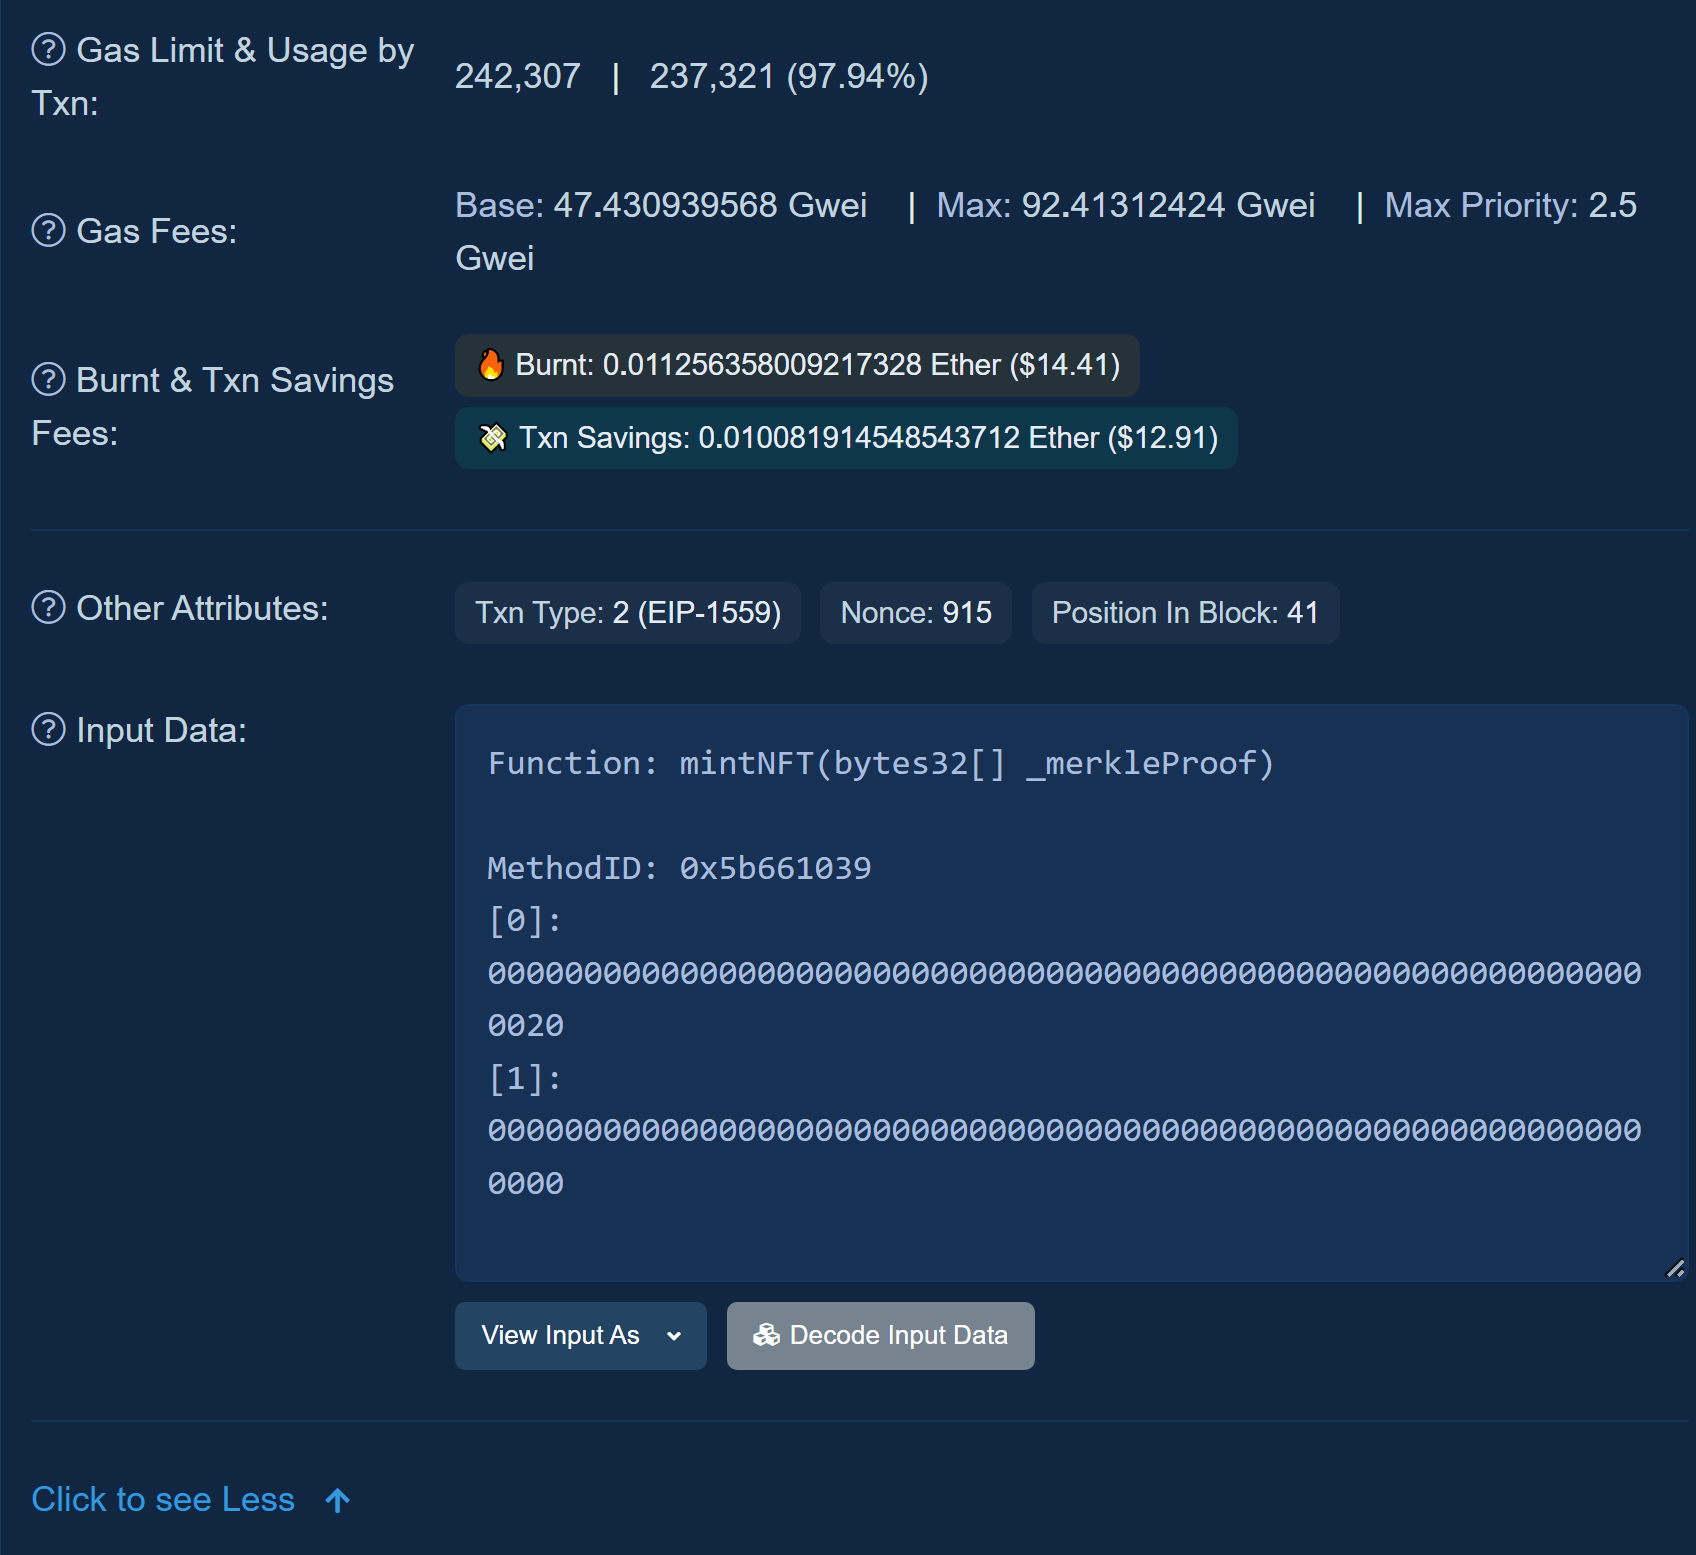 This information is not necessary for us to know to be able to check on the status of our transaction but it gives us some cool additional information about it. We’ll learn more about this section next time!
In the meantime, learn more about Etherscan by following their socials here:
Twitter: https://twitter.com/etherscan
Facebook: https://www.facebook.com/etherscan/
Reddit: https://www.reddit.com/r/etherscan/
Medium: https://medium.com/etherscan-blog
If you have any questions or just want to say hi, feel free to reach out to me on Twitter! ☕
Subscribe to my newsletter
Read articles from Mocha directly inside your inbox. Subscribe to the newsletter, and don't miss out.
Written by

