How to use an Azure Compute Gallery to Manage Your AVD Images
 Ash Roberts
Background
In the first article we built an Azure Virtual Desktop lab that consisted of cloud only infrastructure. We deployed Storage accounts ready for FSLogix profile containers and we created an instance of Azure Active Directory Services (AADDS) so we can use domain join/NTFS and other benefits we would get if we had synced an on premise domain via AD Connect.
We then deployed a host pool with a session host via the "create a host pool" wizard
If you missed that article or need a reference of what's been deployed or a refresher you can check the link out below!
https://switchitup.tech/setting-up-an-azure-virtual-desktop-lab
Introduction
Lets first look a bit more in depth at what an Azure Compute gallery can do for us.
If you have a large number of images that you need to maintain and would like to make them available throughout your company, you can use an Azure Compute Gallery as a repository.
When you use a gallery to store images, multiple resource types are created:
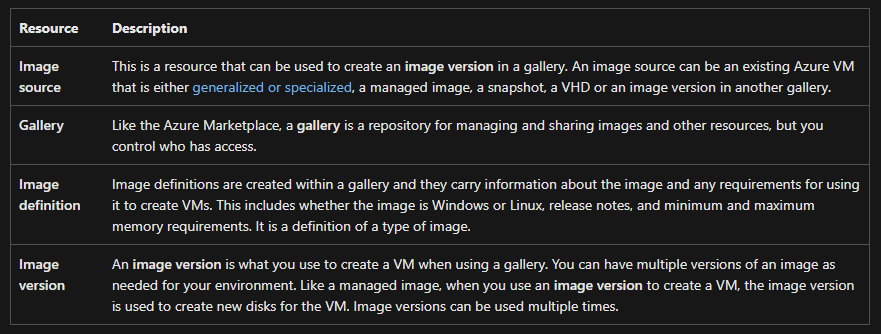
The next image shows us how an Azure Compute Shared Image Gallery can help us breakdown multiple image definitions with versioning control these can then be applied to multiple regions or a single region. or even to individual departments where the images are tailored for the apps they require.
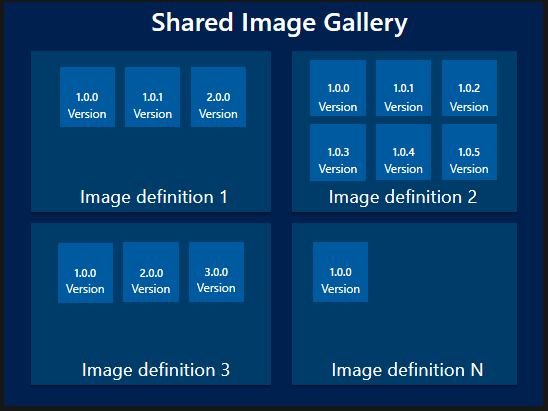
Information Courtesy of Microsoft Learn, check the following link for more in-depth information:
https://learn.microsoft.com/en-us/azure/virtual-machines/shared-image-galleries?tabs=azure-cli
Creating an Azure Compute Gallery
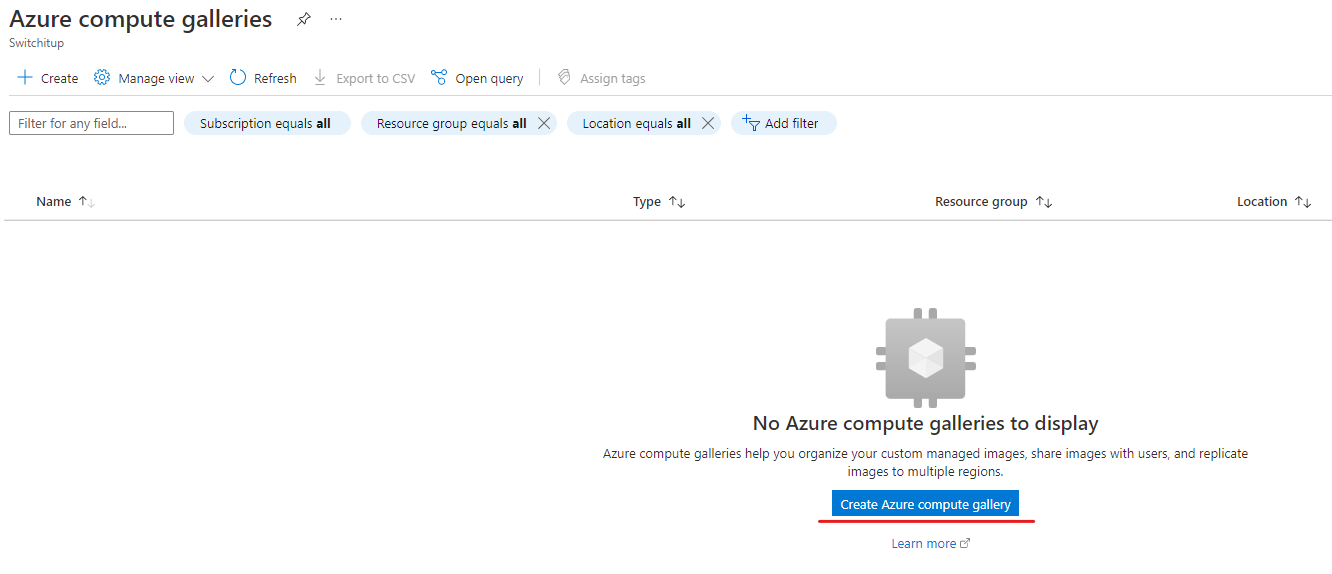
Find the service by searching for "Azure Compute Gallery" in the Azure Portal Search, when you click on the service, you will be greeted with an empty screen if you don't currently have one configured, we are going to click on "Create Azure compute Gallery" Button.
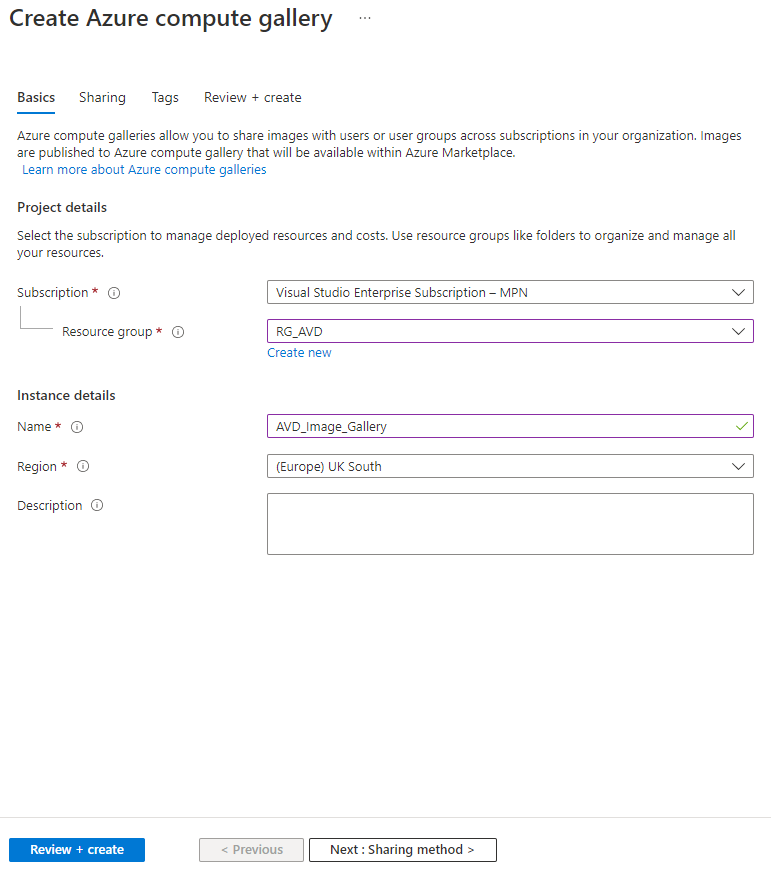
Leave Access Control as default:
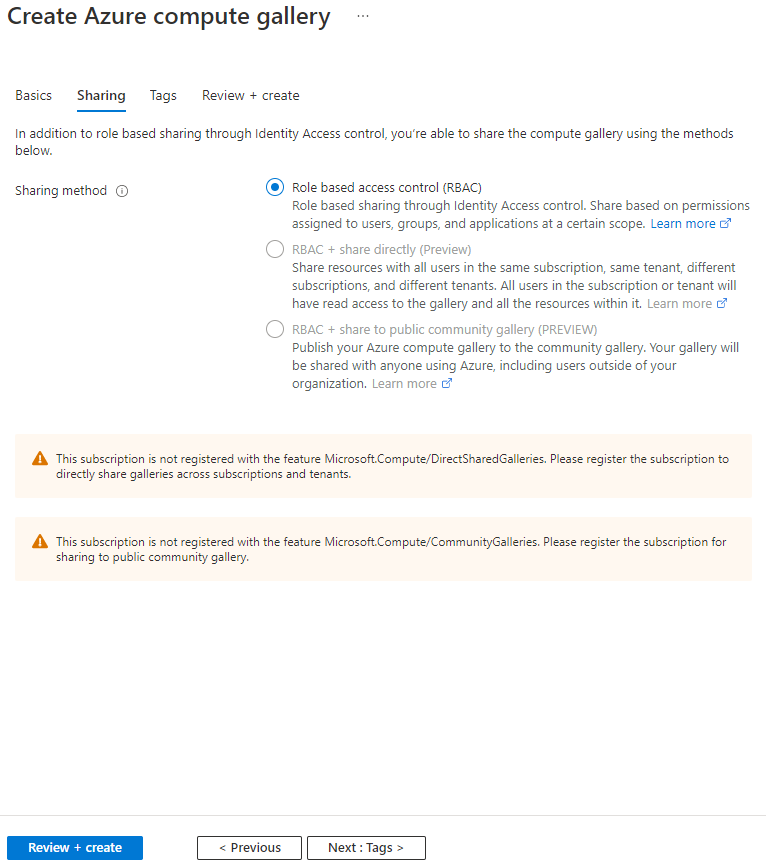
Review and Create.
Create an Image Definition
The image definition tells us information regarding the Image, it's purpose and recommended deployment parameters all is informational only and has no bearing on the VM you can create.
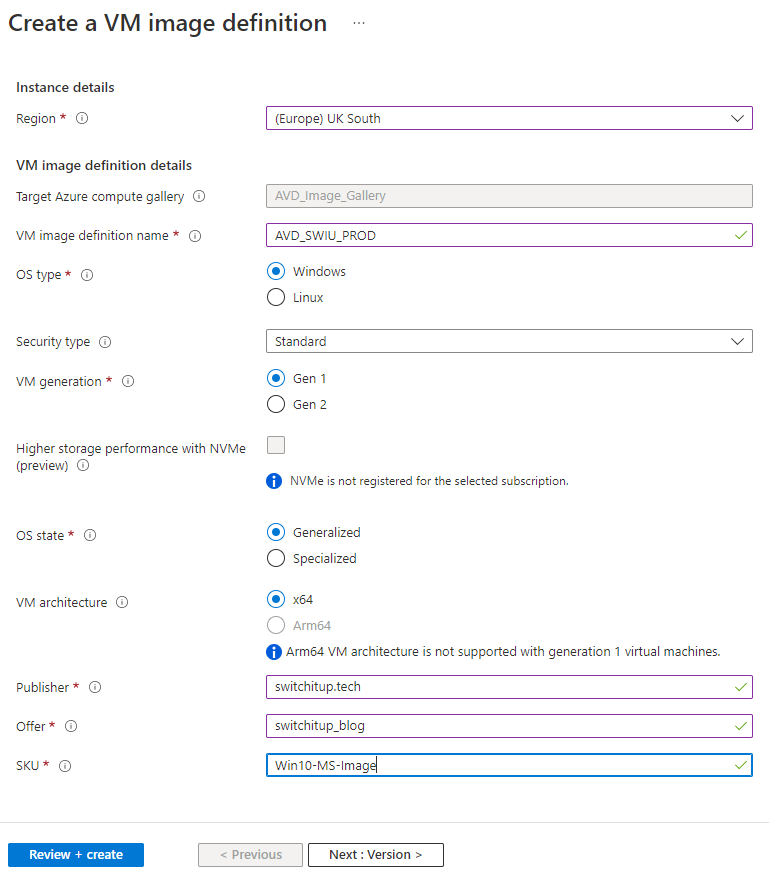
The version I have based on the date and the source Image is my AVD2 Gold Image. I'm not interested in replicating as I'm only using one region in my AVD and it's just for lab purposes.
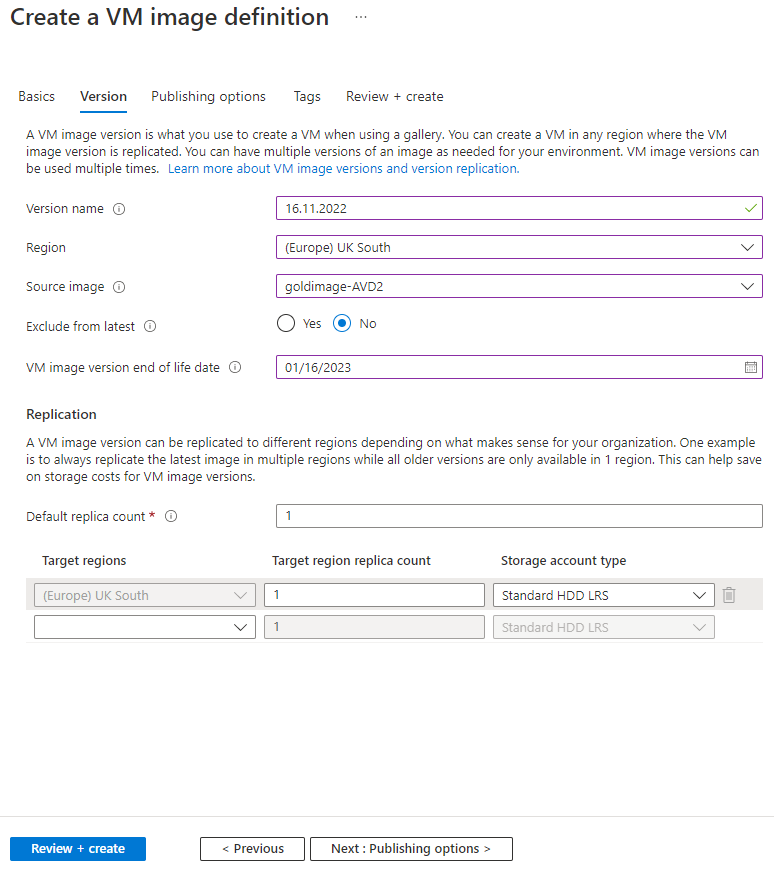
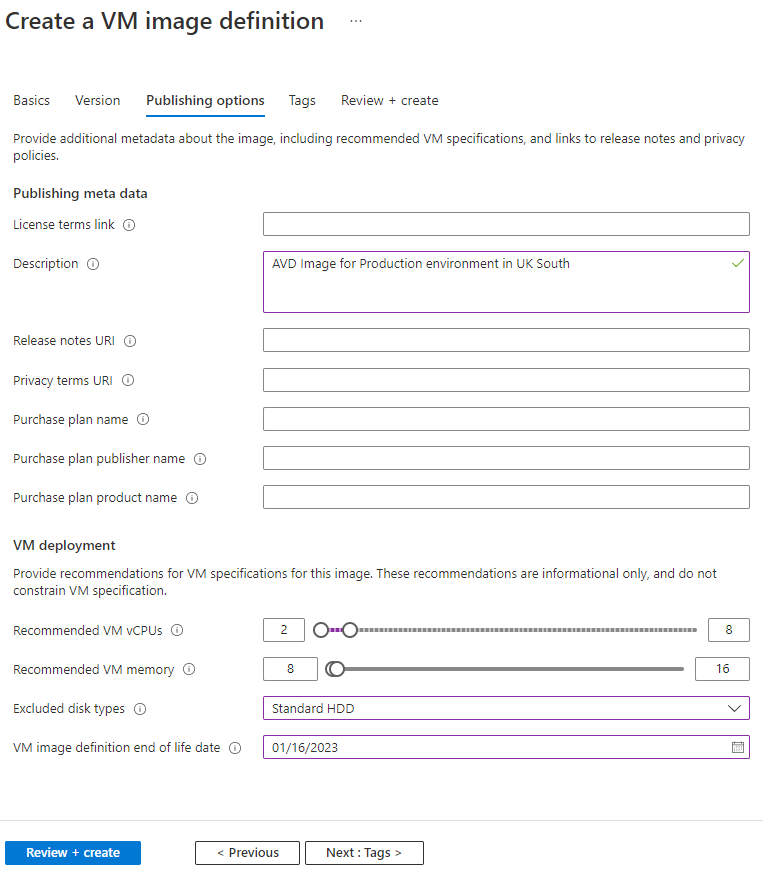
Once deployment is completed navigate back to your Compute Gallery to see your created definition:

If you drill down further, you can see the version and its provisioning state. When this state is "Succeeded" you can create a VM from this Image version using the link on the right-hand side.
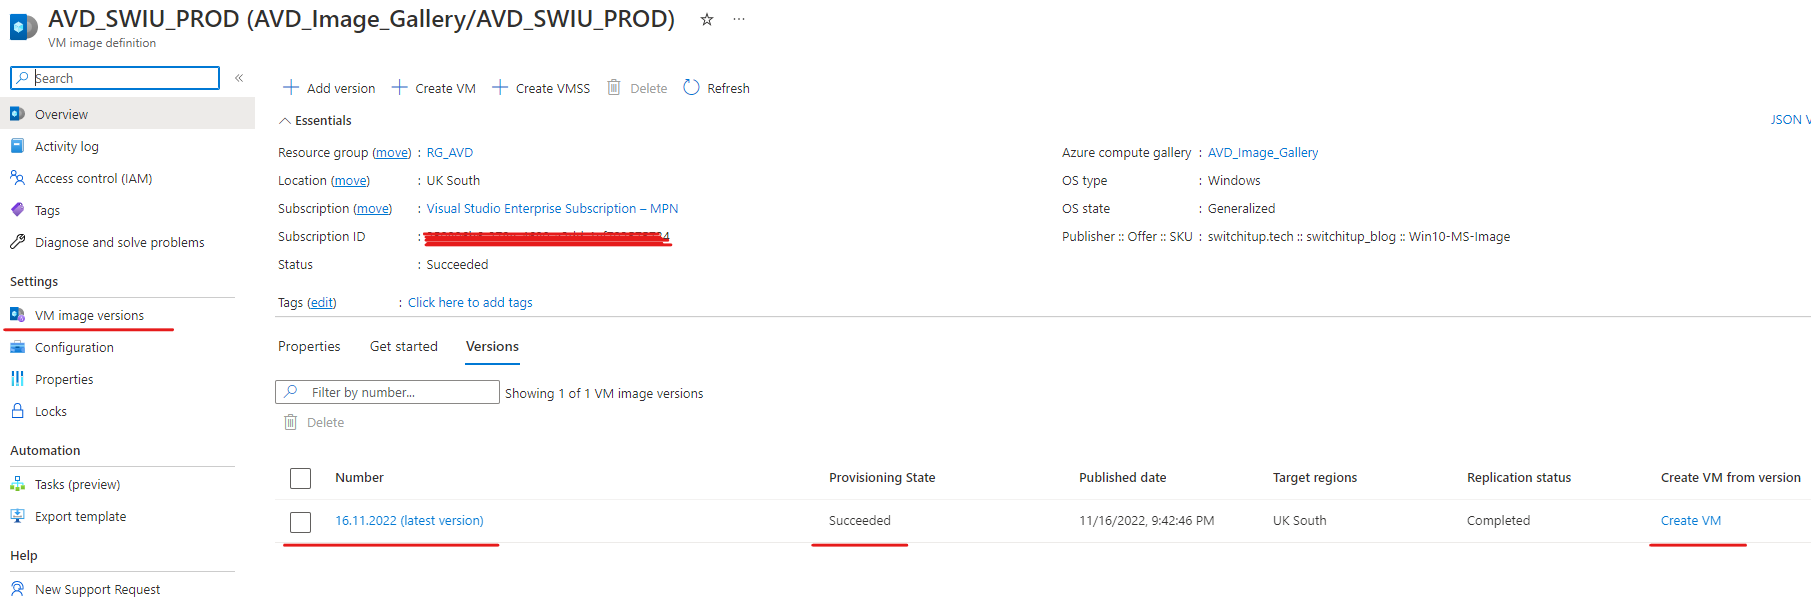
On the left navigation if you go into "VM image version" you can see the Image this is based on, my AVD2 Gold Image. Here you can also add a version which I'm going to do next. Now i'm going to be lazy at this part and "pretend" I have edited and patched my Gold Image (AVD2). I am going to run the same Image through but create it as a new version.
Adding a new Image version

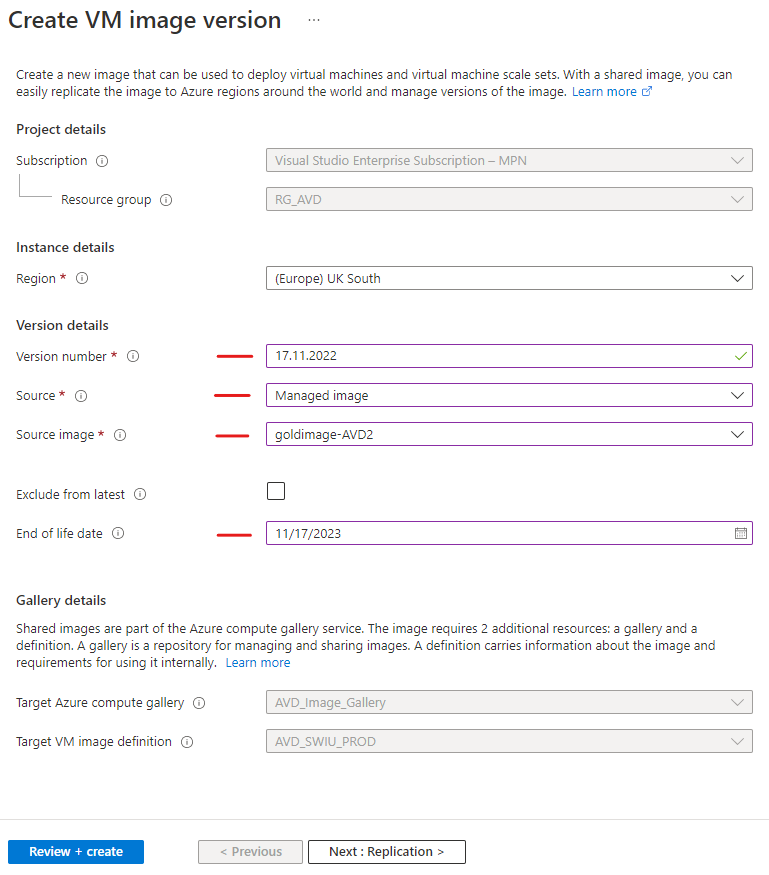
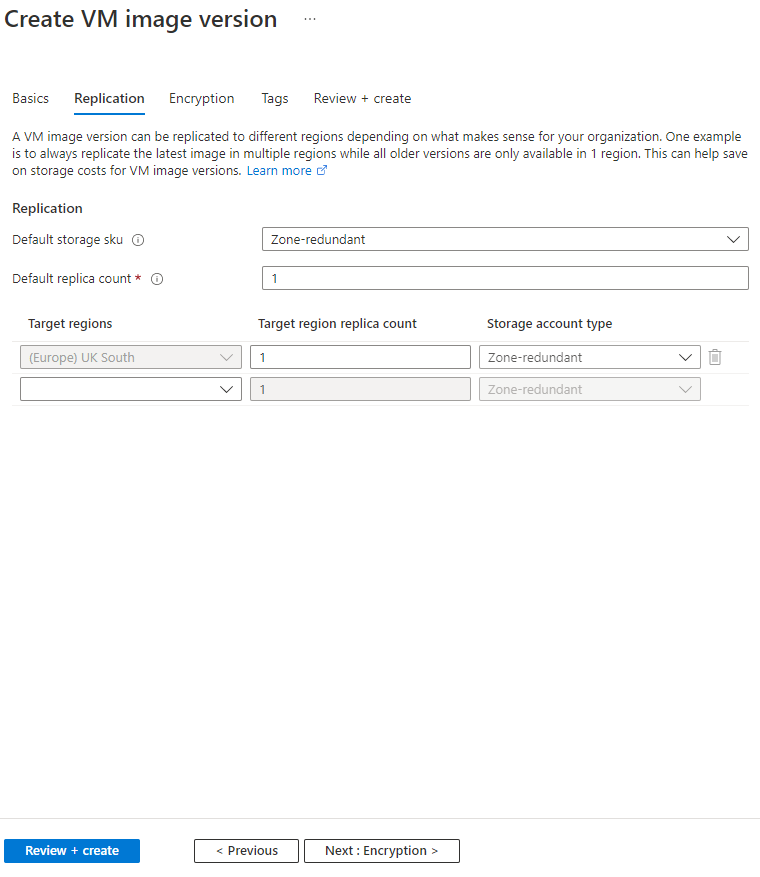
I don't want to replicate this to any other regions and as I'm only running a lab 1 replica is fine. It is recommended you have at least 3 replicas on your latest working image and 1 on older images to save storage costs.
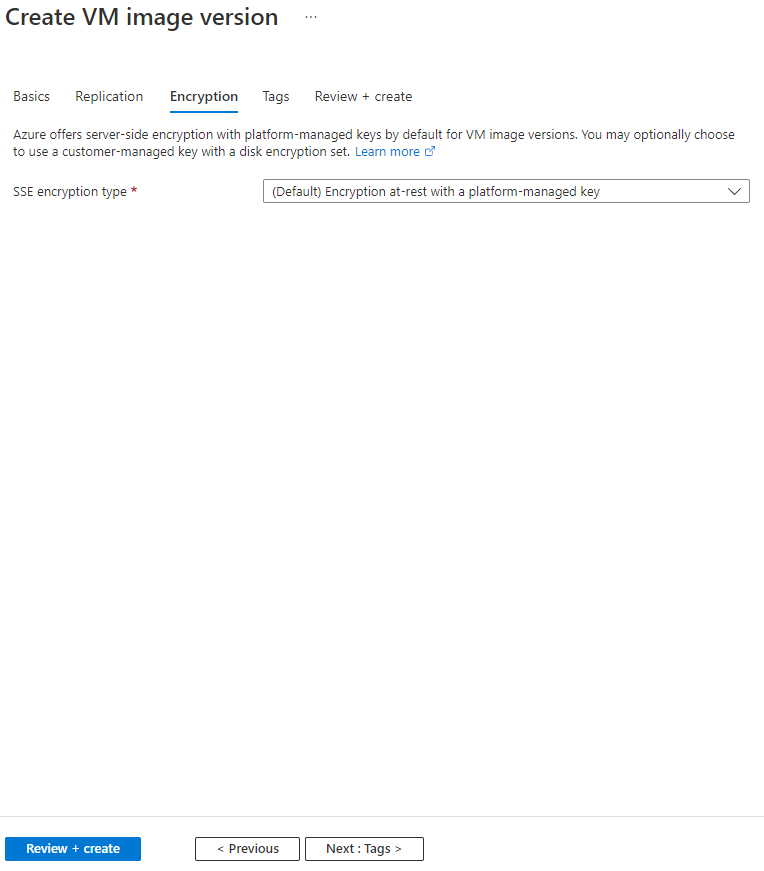
Finish by review and creating your new version. head back into your Azure Compute gallery and click on your Image Definition, you should see your second version in a provisioning state.

Deploying from a Shared Image Gallery
My previous article explained how to deploy a session host from a gold image. this time we will deploy from our compute gallery:
Navigate to your Hostpool in Azure virtual Desktop and select "session hosts" Enable Maintenance Mode on your existing Session Host. Then we are going to Add a New session Host:

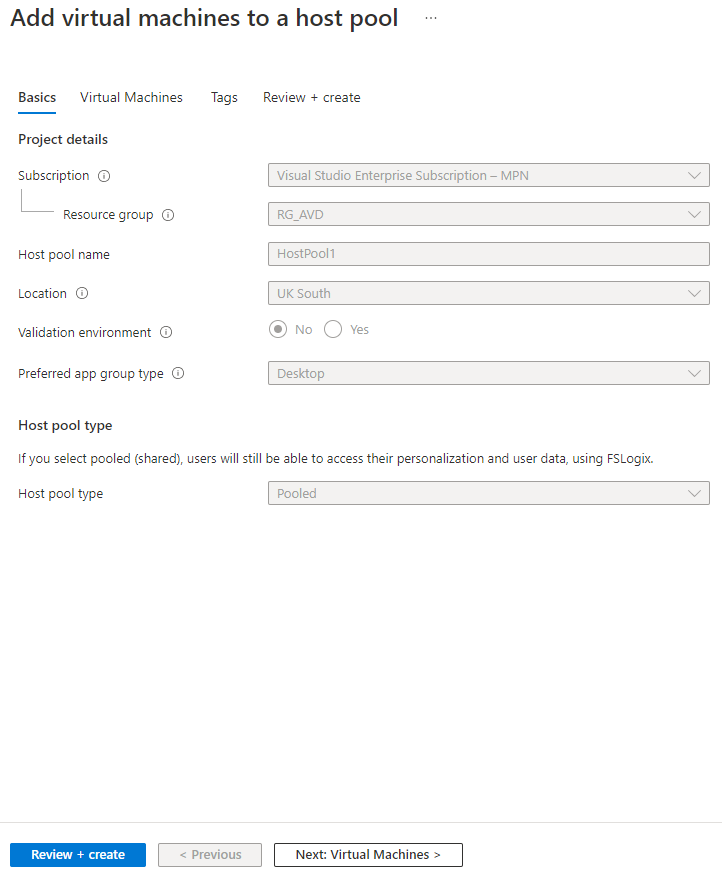
We want to select an image on this page:
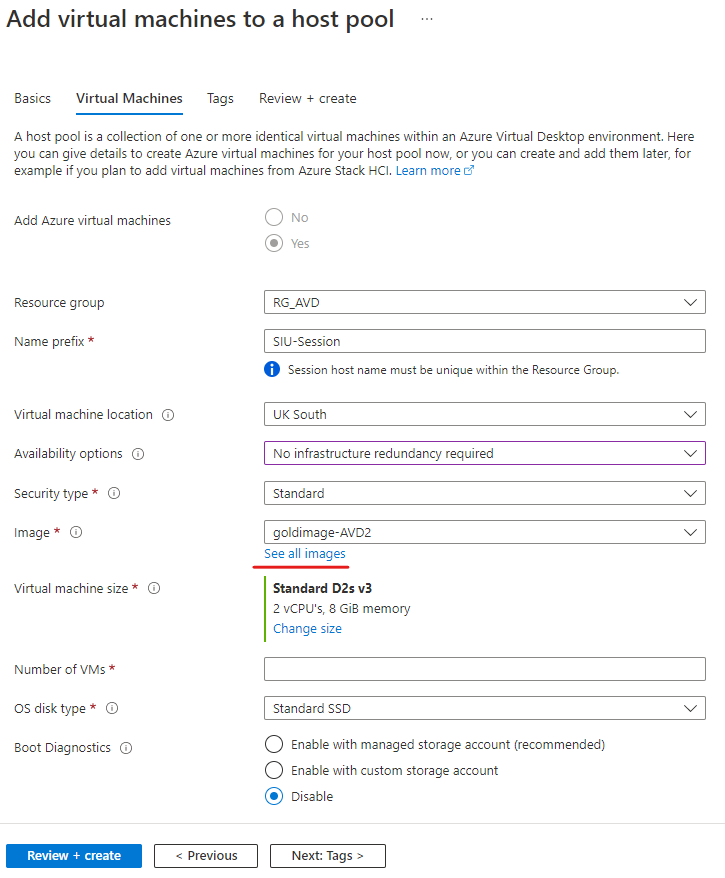
Here we can select from our shared images within an Azure Compute Gallery. You will see our image definition we have created. Once we select this notice we can see the current version (17.11.2022)


Continue to build out your new session host like we did in the previous article. Run validation and testing before removing the old session host.
Summary
Congratulations! We have now learned to deploy session hosts via a generalized image (non-shared) and also deploy an image from a shared compute gallery. We have also learned how we can use a Compute gallery to manage and control our images through image definitions, create versioning and replicate images to other Regions if required.
Subscribe to my newsletter
Read articles from Ash Roberts directly inside your inbox. Subscribe to the newsletter, and don't miss out.
Written by

Ash Roberts
Ash Roberts
I am a technical consultant for a fast growing MSP. Due to the nature of my job I have quite a range of real world experience focusing around server/cloud(Azure) infrastructures, network design, installation and configuration all across multiple vendors such as Microsoft/Cisco/HP Aruba/FortiNet to name a few. All which, I am trying to share with yourselves. Whether you are new to the IT landscape or a veteran I hope there is something for you as my content grows. Currently hold certifications in following: Aruba switching CCNA route and switch CCNA cyber ops CCNA security MCSA windows 10 MCSA server 2016 MCSE core infrastructure Azure Administrator (az104) O365 administrator expert (ms100/101) Modern desktop administrator (md100/101) Hybrid server administrator (az800/801) Azure virtual Desktop specialty (AZ140) So, join me on my learning journey as well as work experience!