Amazon S3
 B V AKASH
In this lab we are going to create a bucket on Amazon s3 , upload object and expose it to public
Step 1:- Go to your AWS dashboard and search S3, Click on it.

Step 2:- Click on create Bucket.

Step 3:- Give a unique Name for your Bucket and choose your region, Finally click on create Bucket.
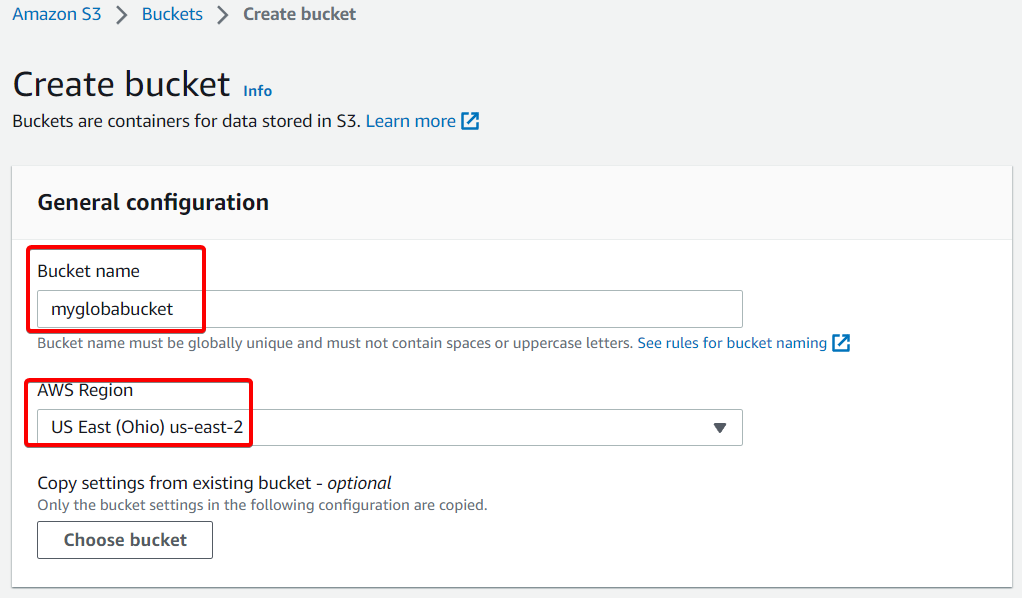

Step 4:- Your Bucket will be created, Now go inside your bucket.

Step 5:- Click on upload.

Step 6:- Click on Add files to Upload any image you wish.
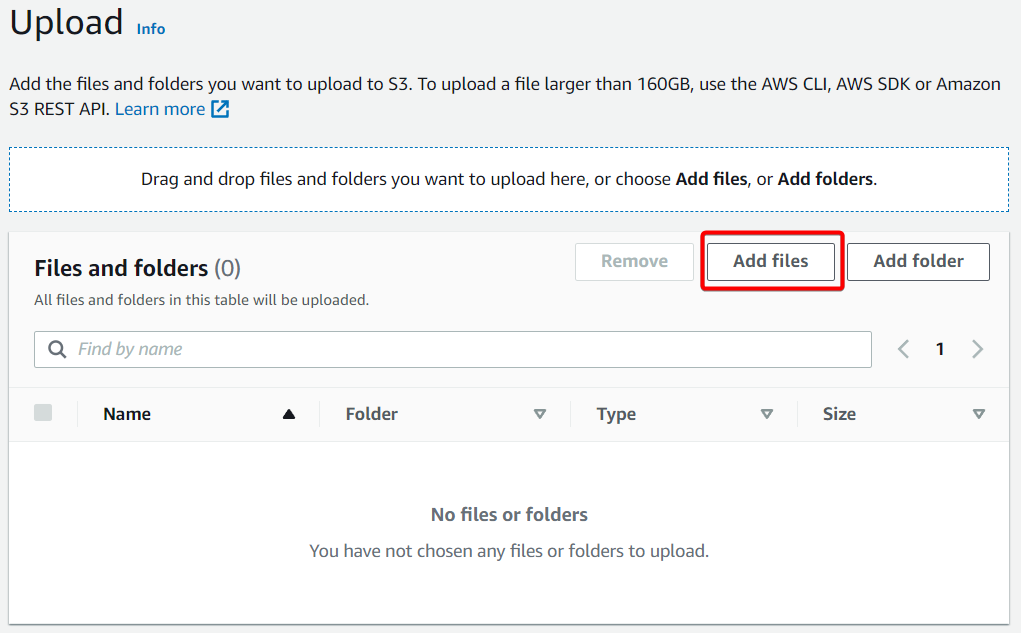

Step 7:- Click on Upload.

Step 8:- Your object will be uploaded and Click on Your bucket.

Step 9:- Copy object URL and paste it on your browser.

You can't access the bucket and object because it's not public.

Let's provide public access to our bucket.
Step 10:- Click on permission.
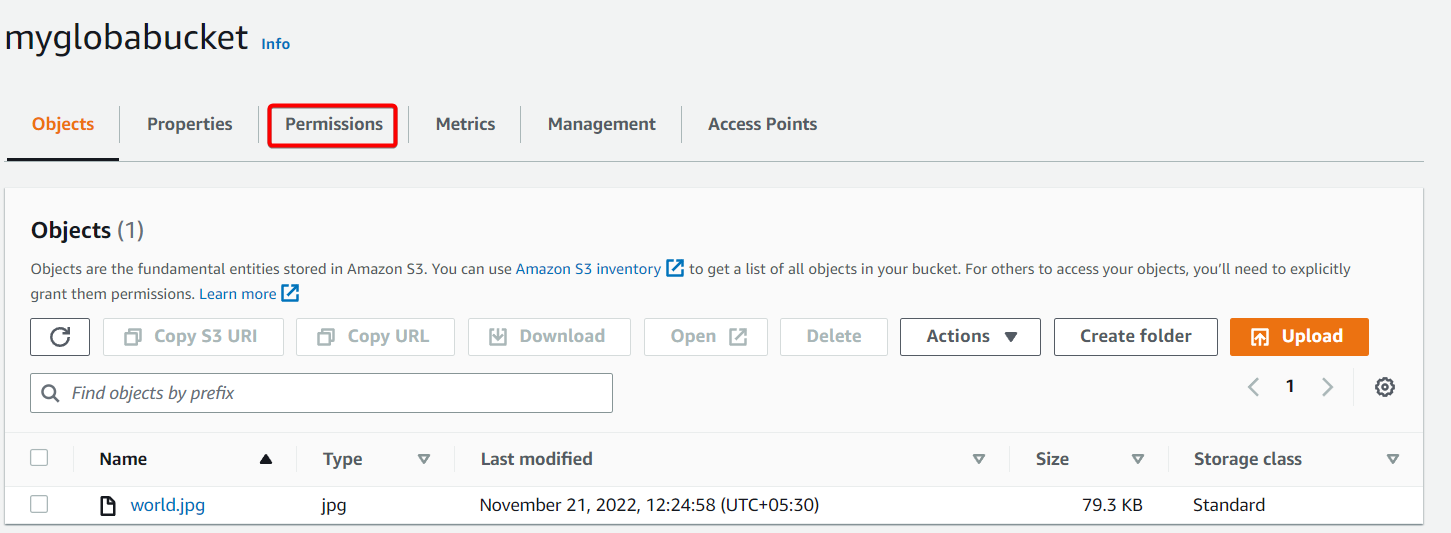
Step 11:- As you can see our bucket is not public, Now click on Edit.
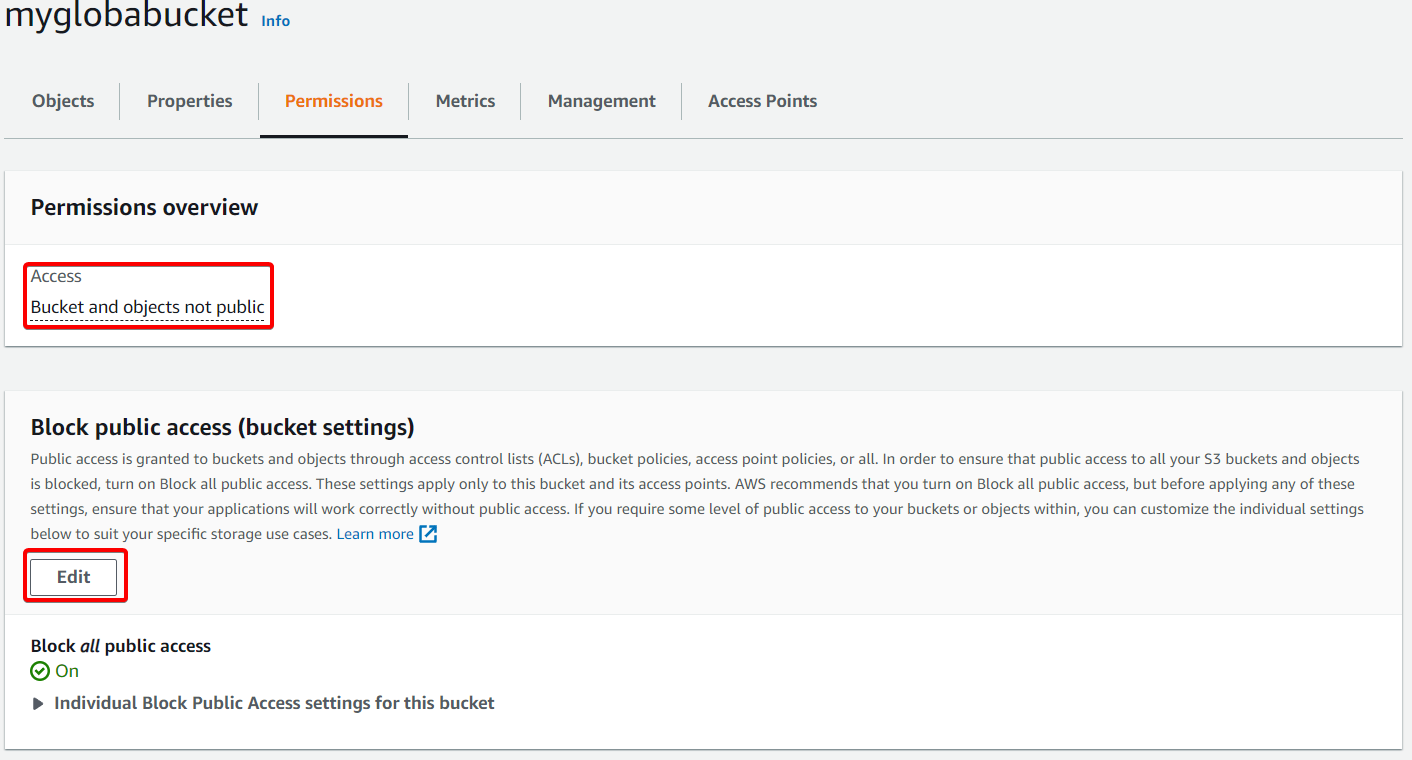
Step 12:- Disable Block all public access.
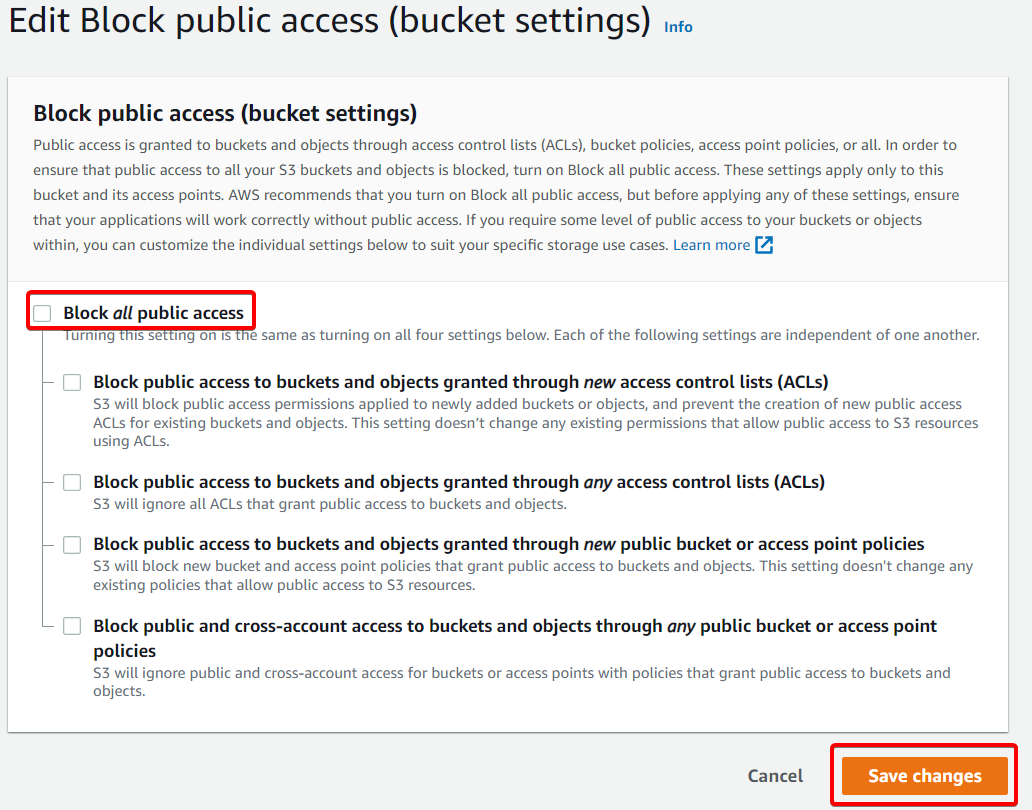
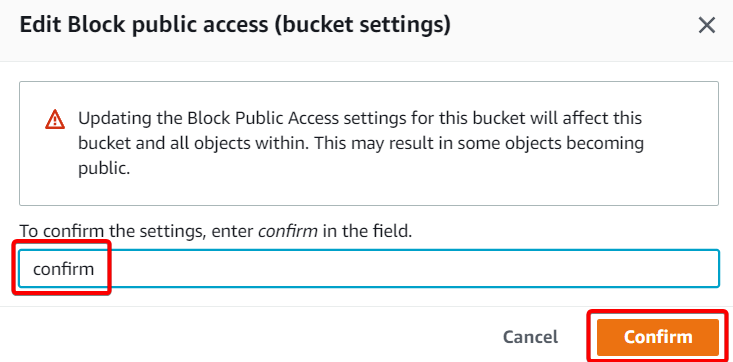
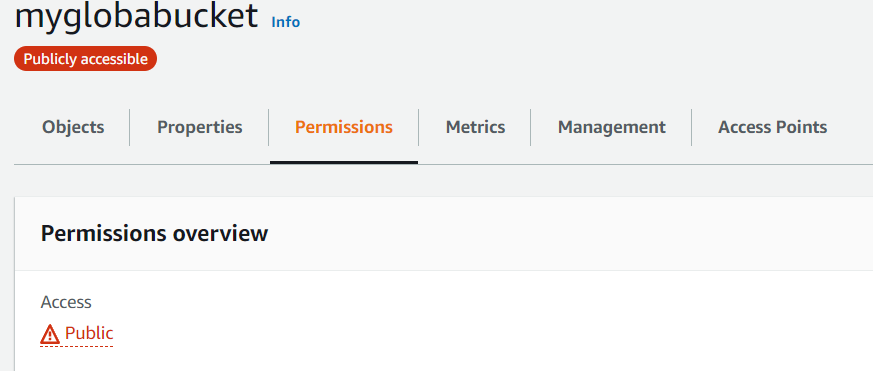
As you can see our bucket is public, Let's make our object public.
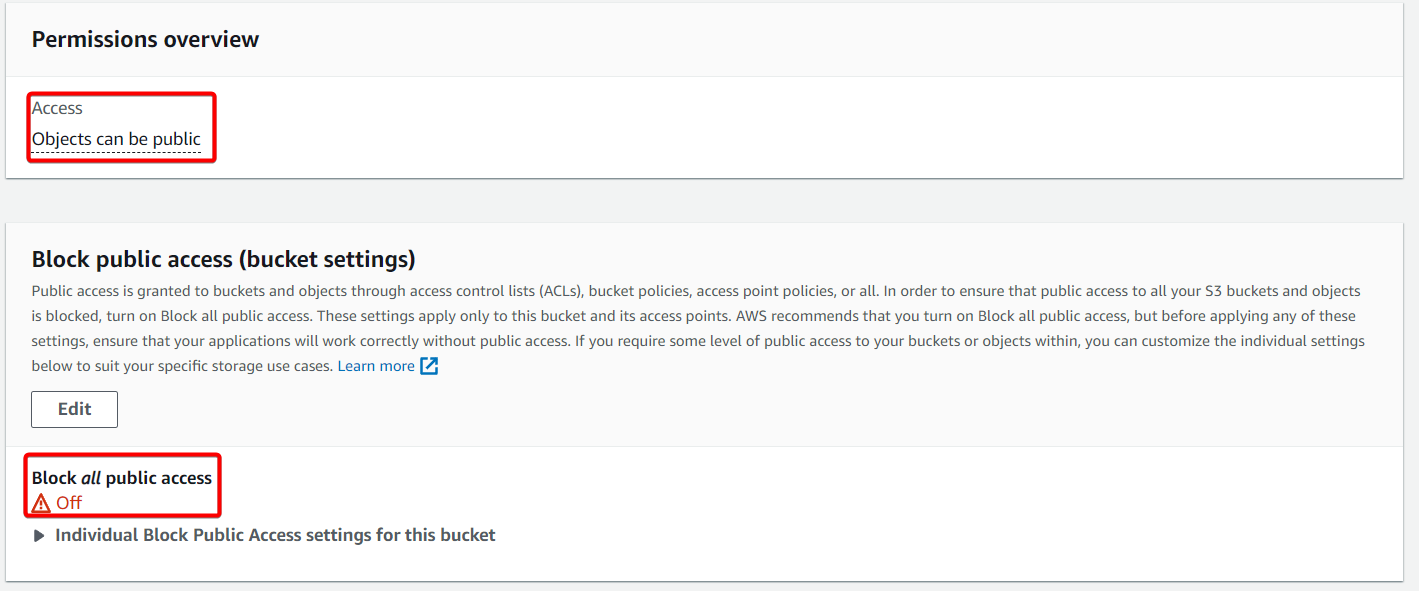
Step 13:- In Bucket Policy, Click on Edit.

Step 14:- Click on policy generator.

Step 15:- Choose S3 Bucket Policy.
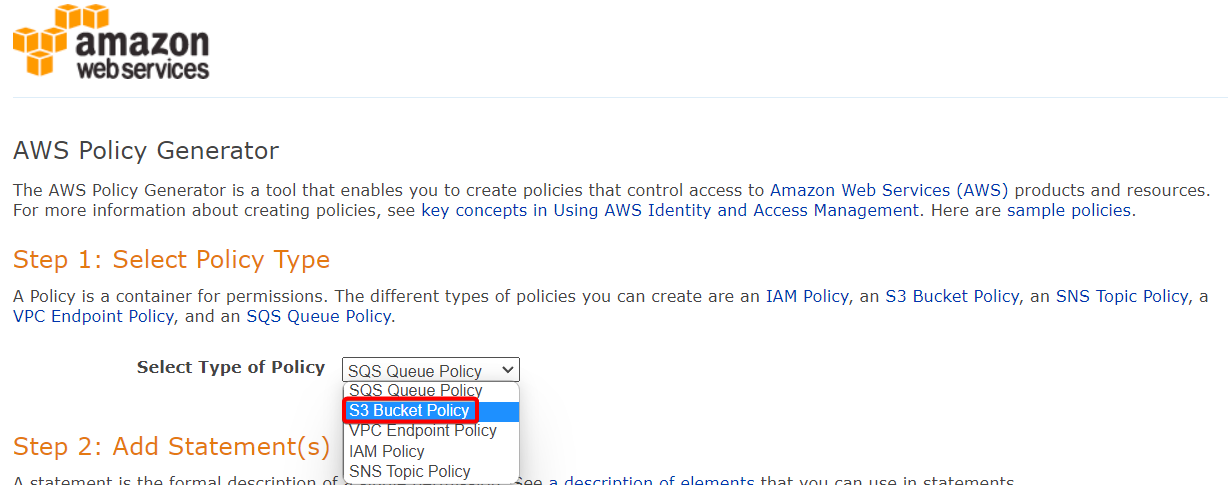
Step 16:- Effect "ALLOW" , Principal "*" , Actions "GetObject" .

Copy your ARN.
 Paste your ARN in Amazon Resource Name (ARN) arn:aws:s3:::myglobabucket/*
Make sure you add /* at the end of your ARN which means to access all your object inside your bucket, Finally click on Add statement.
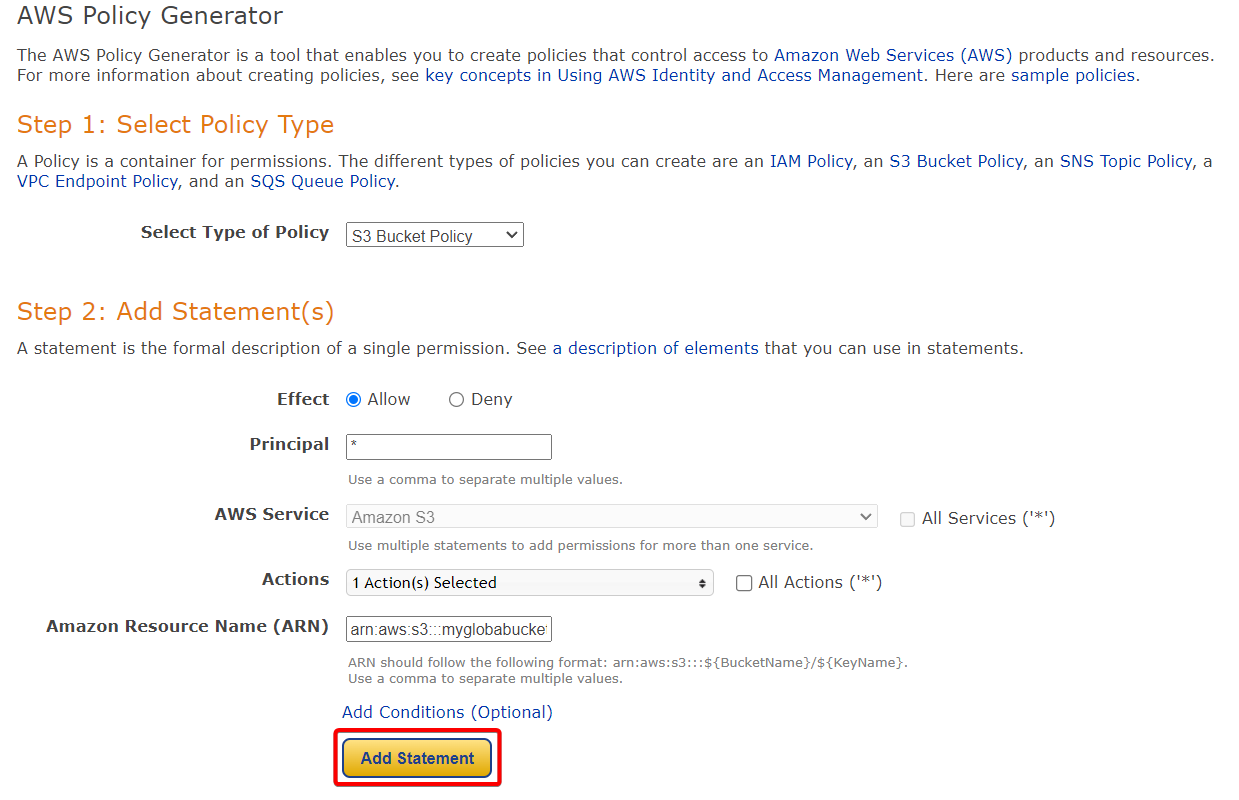
Click on generate policy.

Copy your Policy.
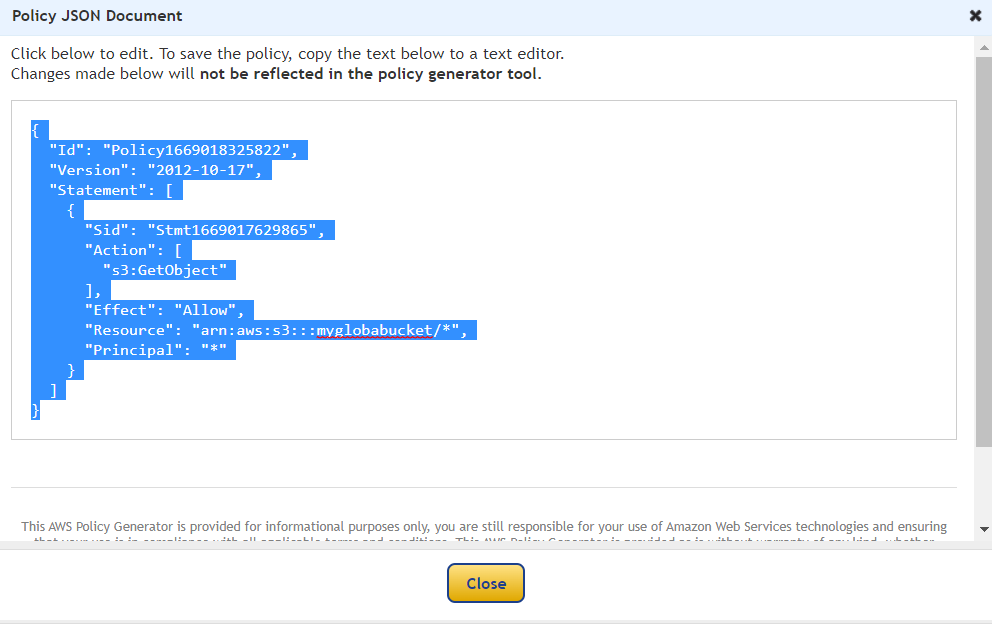
Paste your Policy.
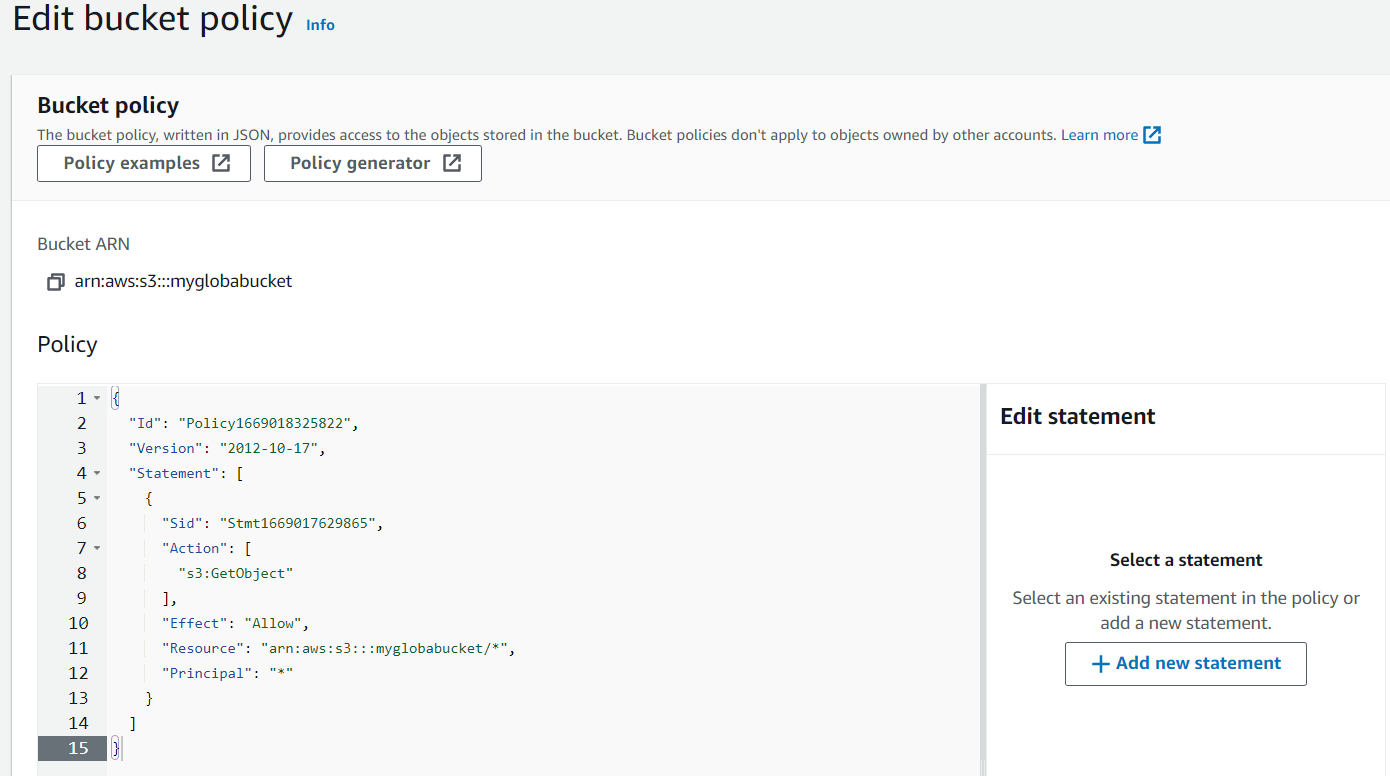

As you can see our Bucket and object is public now, Let's confirm it.
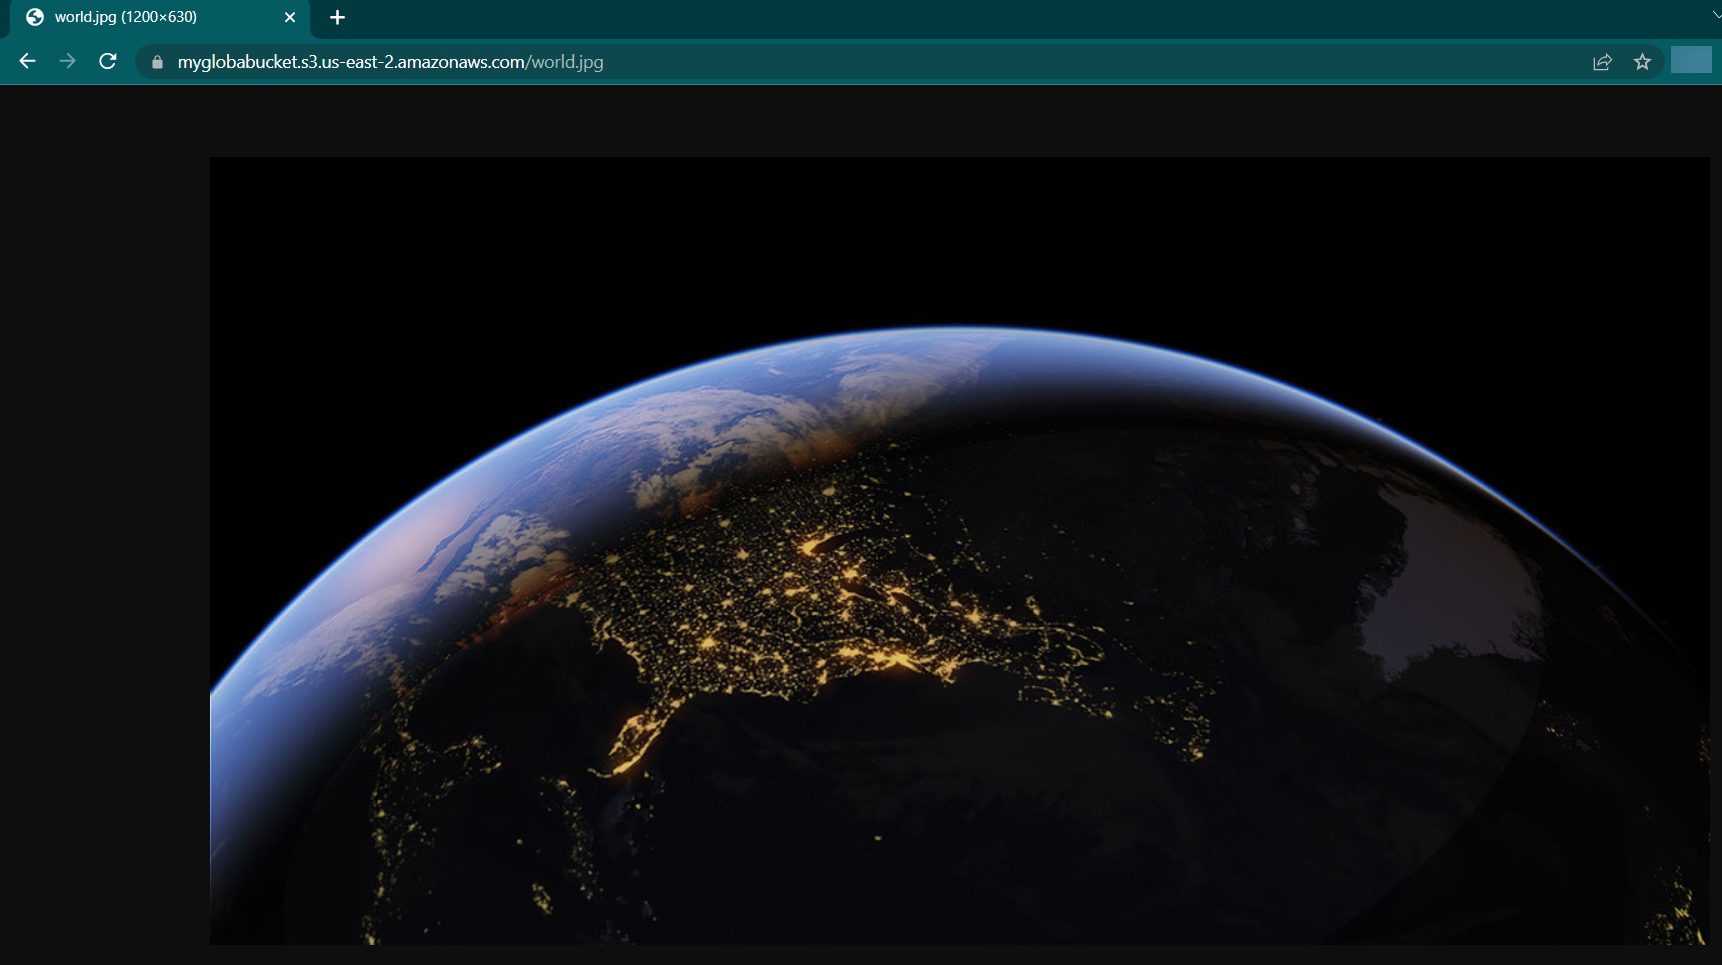
Select your object and copy your object URL and paste it in browser.
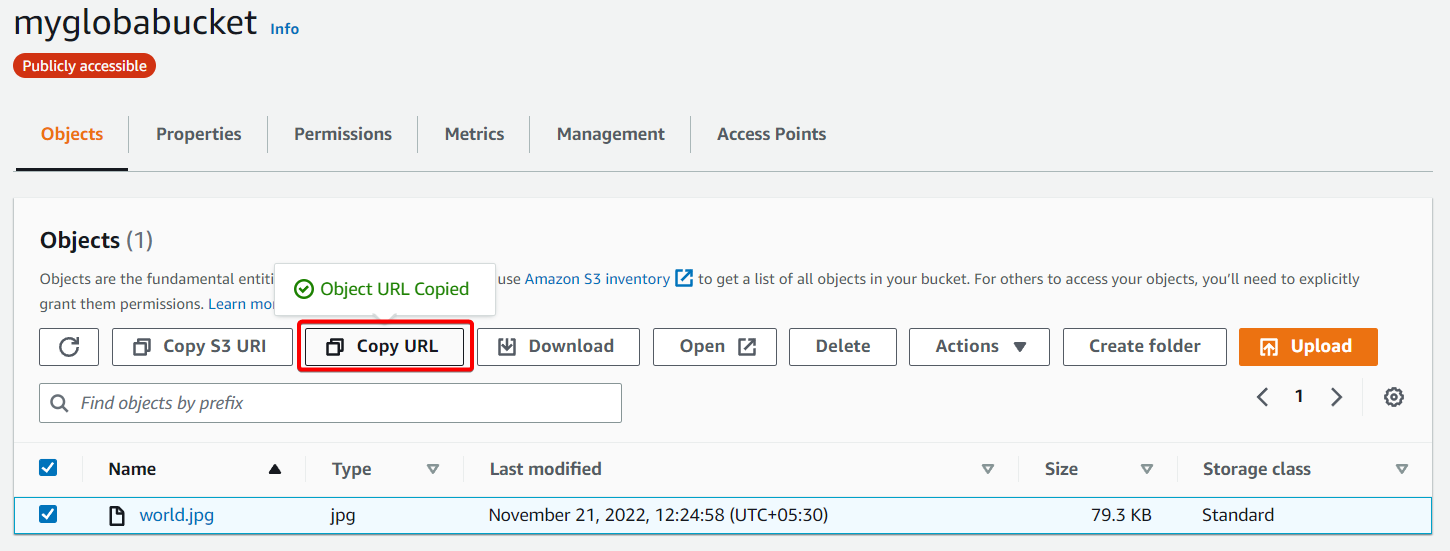
Finally we exposed our object publicly available.
That's it, for now, we will continue further more in next blog.
Hope you liked it. Will see you on the next topic 😃
Subscribe to my newsletter
Read articles from B V AKASH directly inside your inbox. Subscribe to the newsletter, and don't miss out.
Written by

B V AKASH
B V AKASH
I design, architect, and maintain hybrid cloud environments.