How to build an NFT minting site with RainbowKit + Next.js + thirdweb + Ankr
 joshcs.eth ᵍᵐ
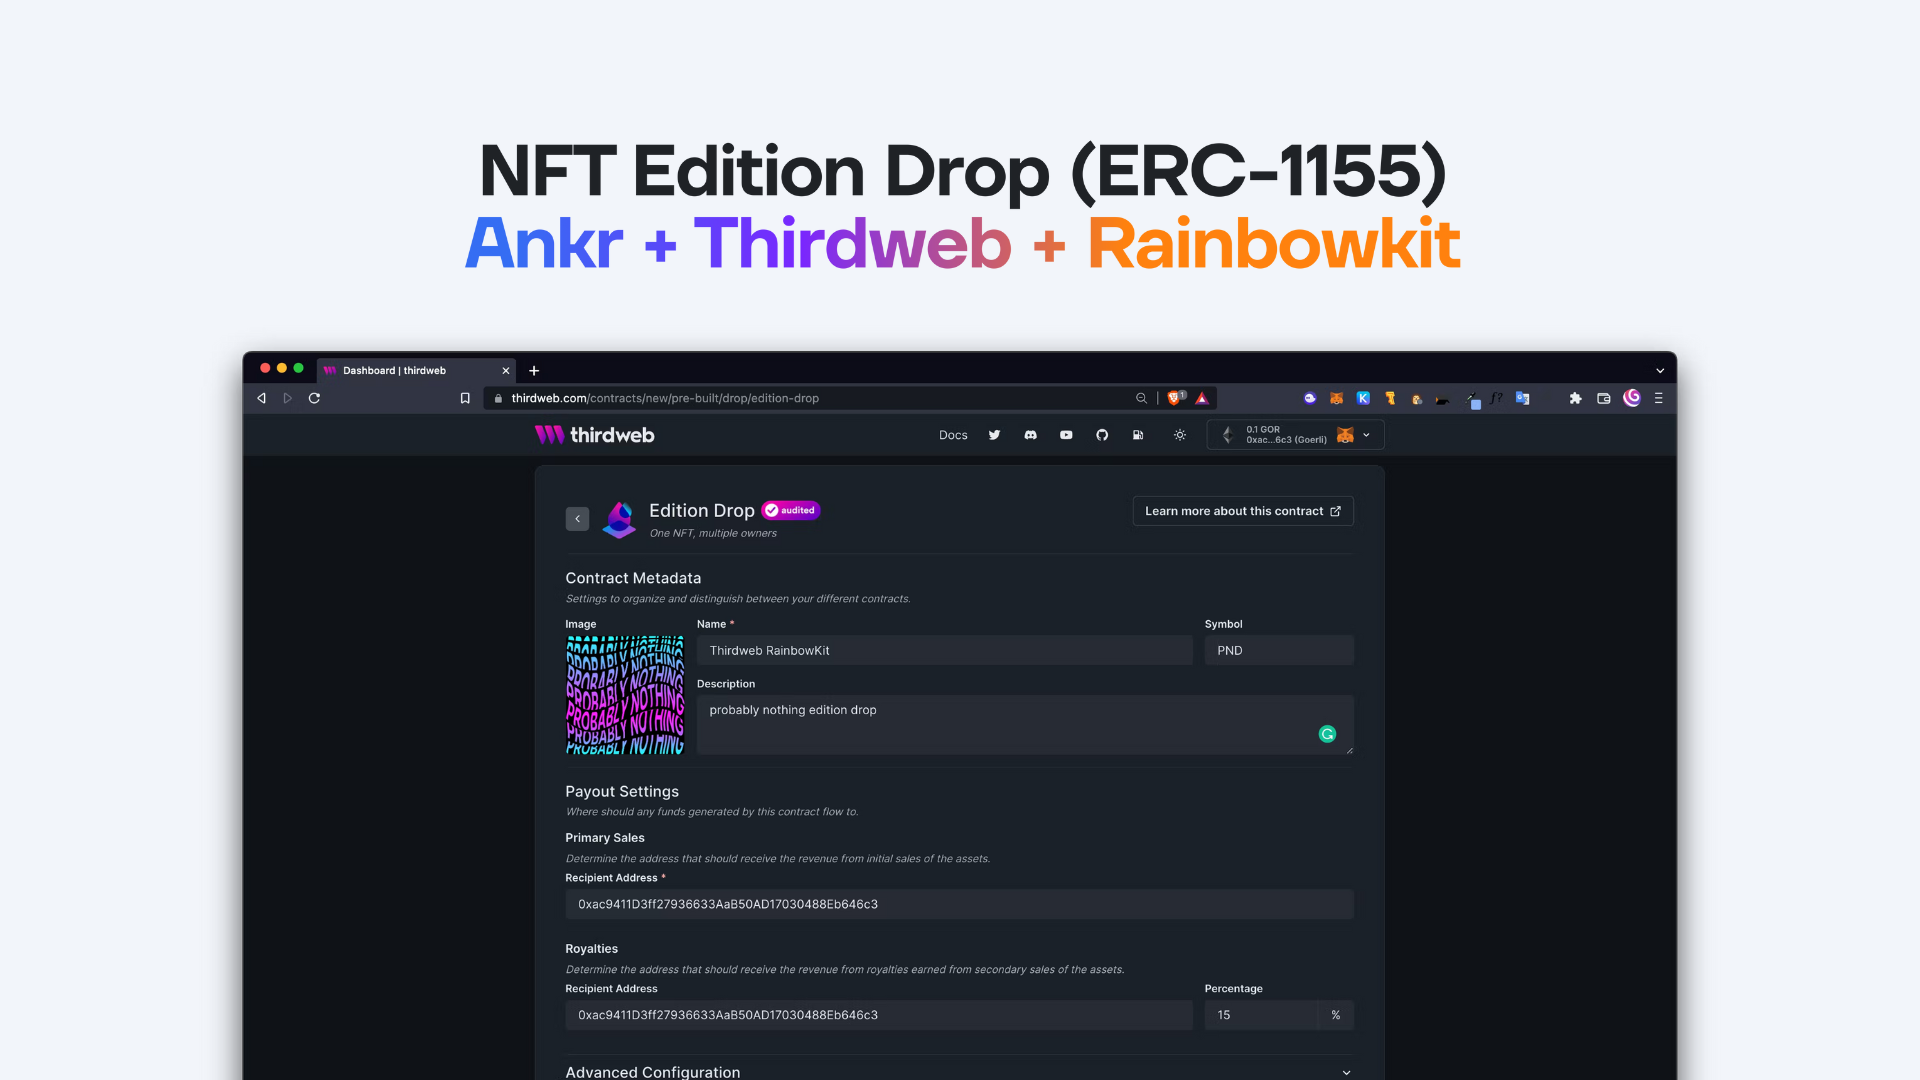
Launching your NFT project has never been easier! Looking to put your own NFT collection on the blockchain? You’re in the right place!
What are we building?
In this tutorial, we will be building an ERC-1155 (Edition) minting page. This will be a full-stack dApp made with Next.js, RainbowKit, thirdweb, and Ankr.
Tech Stack
RPC provider: Ankr
Wallet Connect: Rainbowkit
User Interface: Chakra UI
Smart Contract: Thirdweb
Prerequisite: To successfully finish this guide, you'll need Node.js and Yarn installed on your machine.
Step 01: Development Setup
Create Next.js app
First, open your terminal and run the following command to start your Next.js app:
npx create-next-app@latest --ts
We have named the directory thirdweb-rainbowkit, you can change directories to your Next app by running:
cd thirdweb-rainbowkit
Add Chakra UI
Next, add Chakra UI by running this command:
npm i @chakra-ui/react @emotion/react@^11 @emotion/styled@^11 framer-motion@^6
We’re not going to be using the api directory, so you can delete it.
Start up your instance of the Next App on localhost by running:
npm run dev
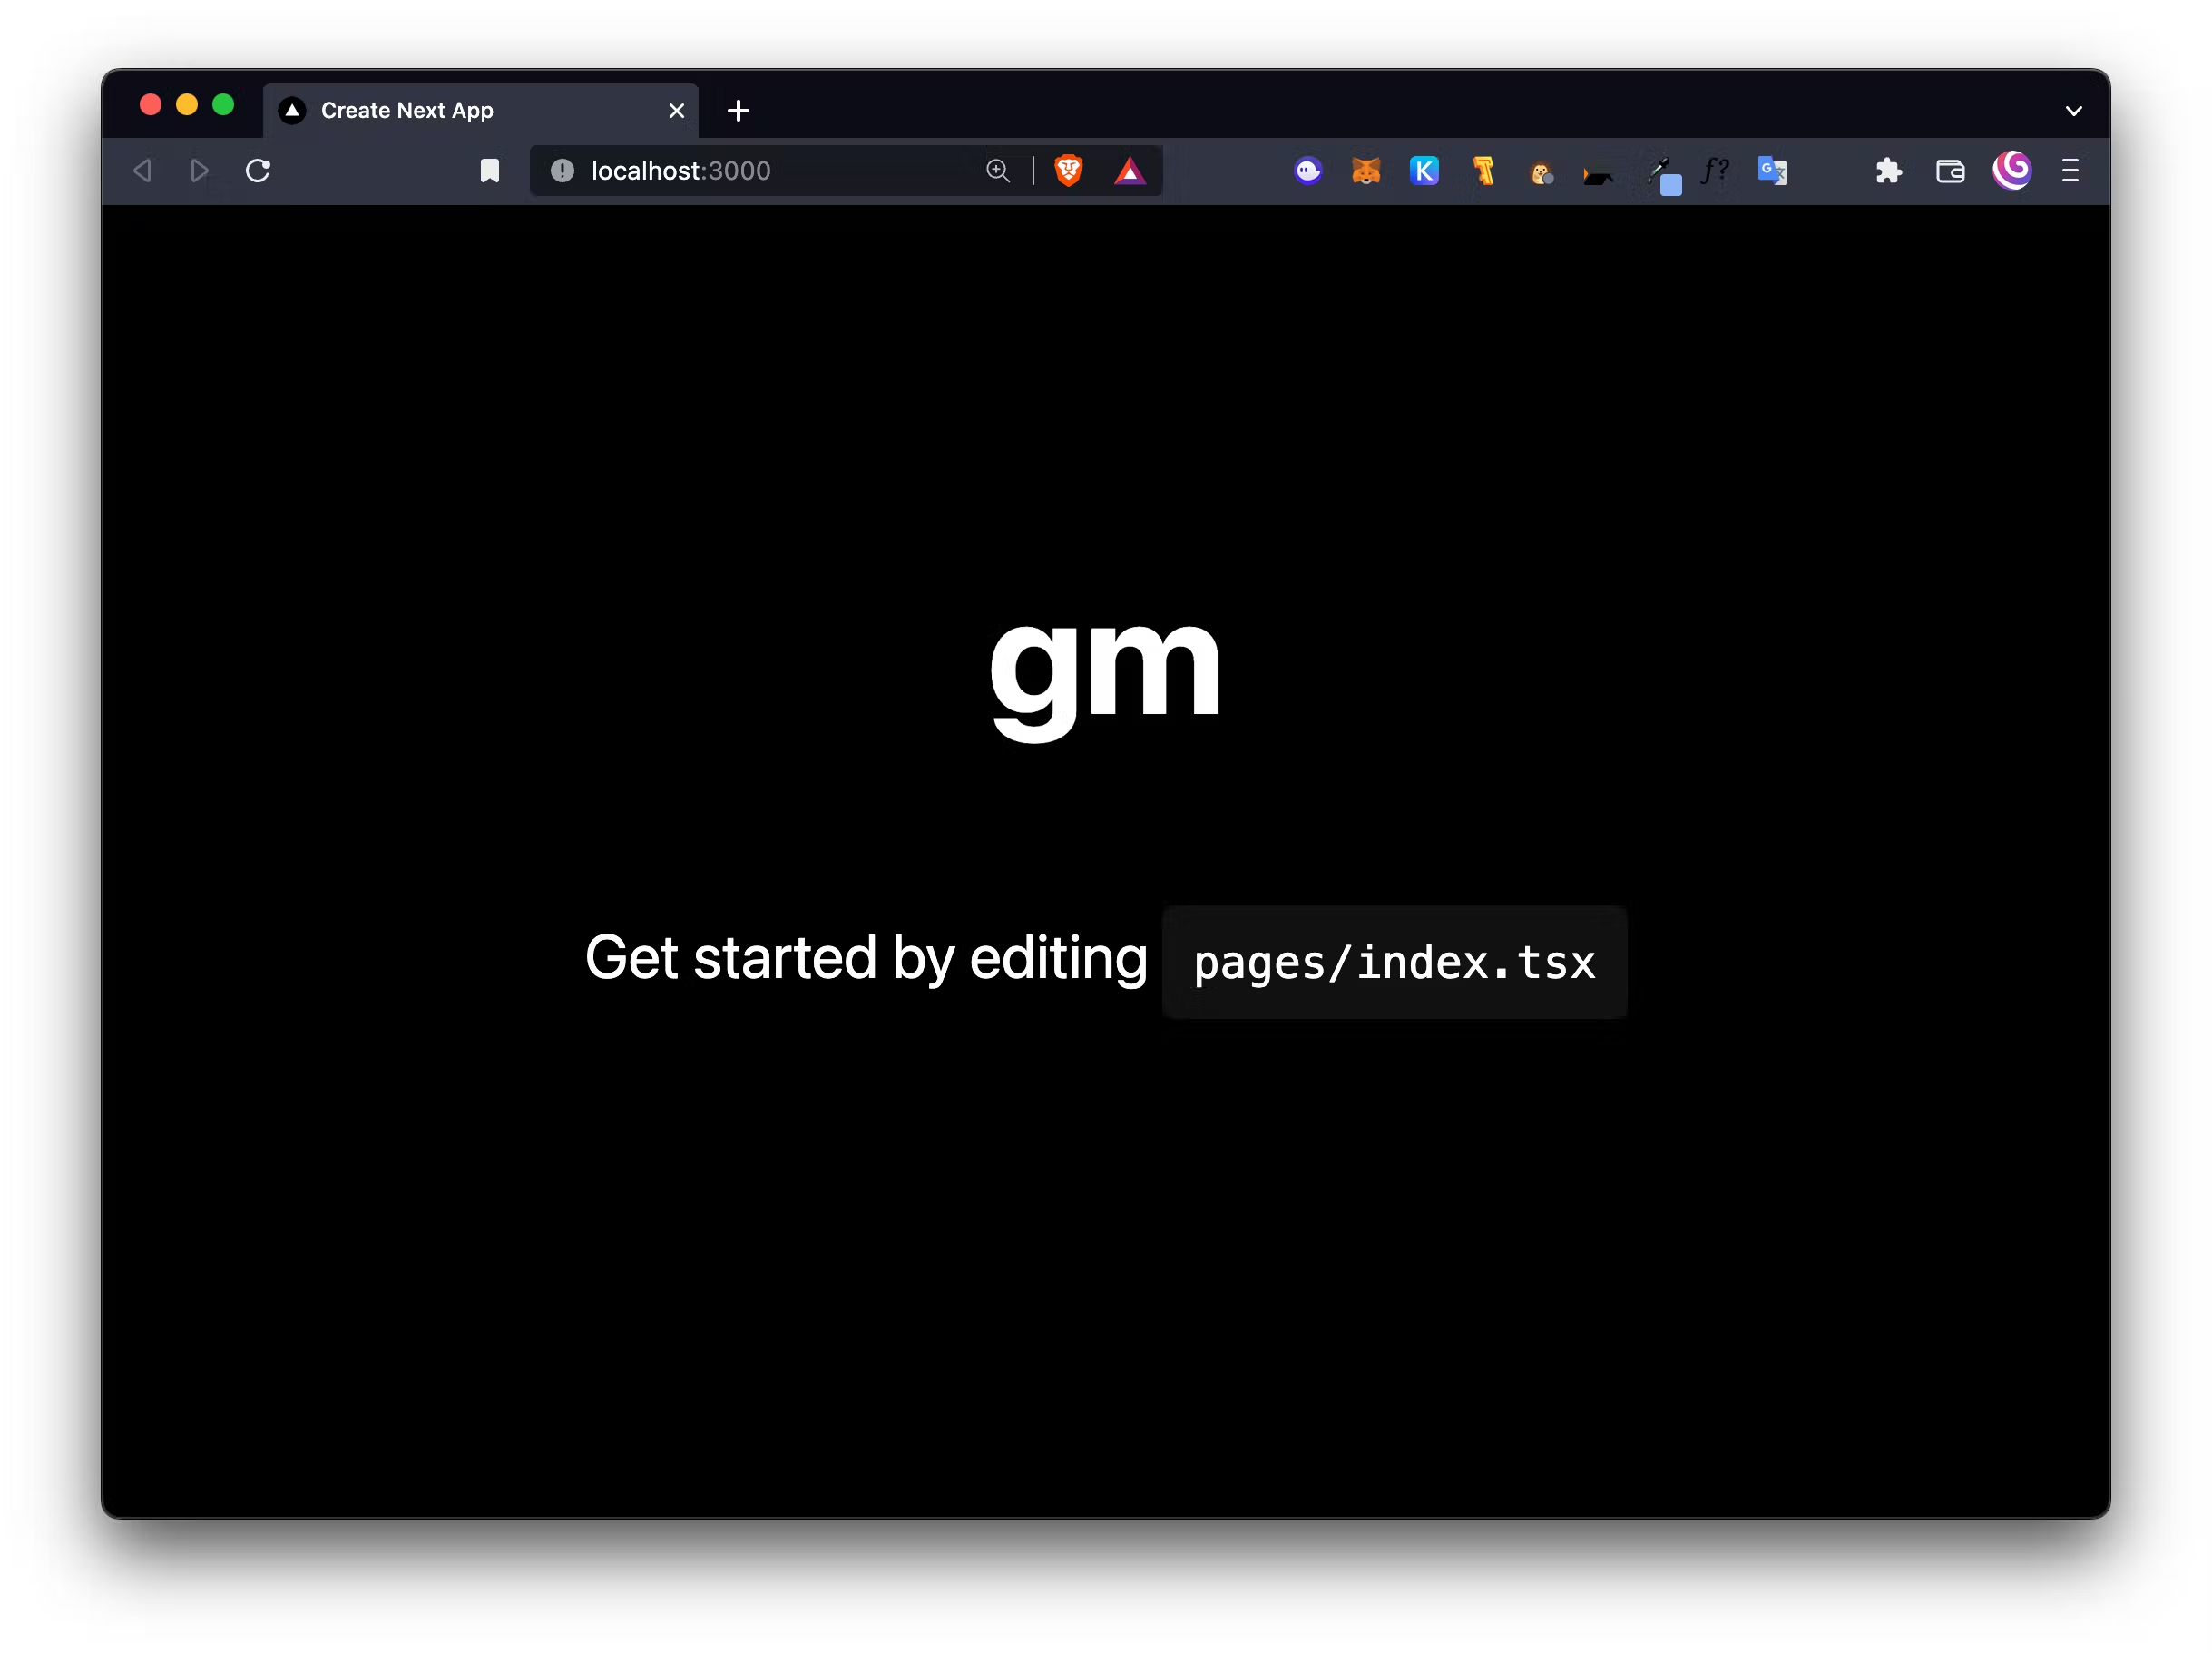
Now, head to pages/index.tsxand remove the <div> ... </div> and <p> ... </p> in <main> to clean up our minting page. This is also a good time to change the title from the boilerplate text, it should look something like the screenshot below:
Import the ChakraProvider, ColorModeScript, and extendTheme from @chakra-ui/react at the top of your _app.tsx file:
import { ChakraProvider, ColorModeScript, extendTheme } from "@chakra-ui/react";
Add the Chakra Provider to MyApp:
function MyApp({ Component, pageProps }: AppProps) {
return (
<ChakraProvider theme={theme}>
<Component {...pageProps} />
</ChakraProvider>
);
}
Below our imports, declare your initialColorMode, useSystemColorMode, fonts, and theme:
const config = {
initialColorMode: "dark",
useSystemColorMode: true,
};
const fonts = {
heading: "Inter", sans-serif,
body: "Inter", sans-serif,
};
const theme = extendTheme({ config, fonts });
Add ColorModeScript to your MyApp:
function MyApp({ Component, pageProps }: AppProps) {
return (
<ChakraProvider theme={theme}>
<ColorModeScript initialColorMode={theme.config.initialColorMode} />
<Component {...pageProps} />
</ChakraProvider>
);
}
Install RainbowKit
Now we’ll add our connect wallet button using RainbowKit:
npm install @rainbow-me/rainbowkit wagmi ethers
Import the required packages into the top of _app.tsx:
import {
  chain,
  configureChains,
  createClient,
  WagmiConfig,
  useSigner,
} from "wagmi";
import { publicProvider } from "wagmi/providers/public";
import { jsonRpcProvider } from "wagmi/providers/jsonRpc";
import {
  connectorsForWallets,
  wallet,
  RainbowKitProvider,
  midnightTheme,
} from "@rainbow-me/rainbowkit";
import "@rainbow-me/rainbowkit/styles.css";
Configure chains, provider, connectorsForWallets, and wagmiClient underneath of your config, fonts, and theme:
const { chains, provider } = configureChains(
  [chain.goerli],
  [
    jsonRpcProvider({
      rpc: () => {
        return {
          http: "<https://rpc.ankr.com/eth_goerli>",
        };
      },
    }),
    publicProvider(),
  ]
);

const connectors = connectorsForWallets([
  {
    groupName: "Recommended",
    wallets: [
      wallet.metaMask({ chains, shimDisconnect: true }),
      wallet.walletConnect({ chains }),
      wallet.coinbase({ appName: "probably nothing", chains }),
      wallet.rainbow({ chains }),
    ],
  },
  {
    groupName: "Others",
    wallets: [
      wallet.argent({ chains }),
      wallet.brave({
        chains,
        shimDisconnect: true,
      }),
      wallet.imToken({ chains }),
      wallet.injected({
        chains,
        shimDisconnect: true,
      }),
      wallet.ledger({
        chains,
      }),
      wallet.steak({ chains }),
      wallet.trust({ chains, shimDisconnect: true }),
    ],
  },
]);

const wagmiClient = createClient({
  autoConnect: false,
  connectors,
  provider,
});
Wrap your MyApp in WagmiConfig and RainbowKitProvider:
function MyApp({ Component, pageProps }: AppProps) {
  return (
    <ChakraProvider theme={theme}>
      <WagmiConfig client={wagmiClient}>
        <RainbowKitProvider chains={chains} theme={midnightTheme()} coolMode>
          <ColorModeScript initialColorMode={theme.config.initialColorMode} />
          <Component {...pageProps} />
        </RainbowKitProvider>
      </WagmiConfig>
    </ChakraProvider>
  );
}
Add thirdweb provider
Now we’re ready to set up our ThirdwebSDKProvider and declare the ChainId. First, add the package with NPM:
npm install @thirdweb-dev/react@2.6.0-1
Import the ThirdwebSDKProvider:
import { ThirdwebSDKProvider, ChainId } from "@thirdweb-dev/react";
Add the activeChainId in your constants:
const activeChainId = ChainId.Goerli;
Declare your ThirdwebProvider:
function ThirdwebProvider({ wagmiClient, children }: any) {
const { data: signer } = useSigner();
return (
<ThirdwebSDKProvider
desiredChainId={activeChainId}
signer={signer as any}
provider={wagmiClient.provider}
queryClient={wagmiClient.queryClient as any}
>
{children}
</ThirdwebSDKProvider>
);
}
Wrap your MyApp in the ThirdwebProvider:
function MyApp({ Component, pageProps }: AppProps) {
return (
<ChakraProvider theme={theme}>
<WagmiConfig client={wagmiClient}>
<RainbowKitProvider chains={chains} theme={midnightTheme()} coolMode>
<ThirdwebProvider wagmiClient={wagmiClient}>
<ColorModeScript initialColorMode={theme.config.initialColorMode} />
<Component {...pageProps} />
</ThirdwebProvider>
</RainbowKitProvider>
</WagmiConfig>
</ChakraProvider>
);
}
_app.tsx Review
Your _app.tsx file should look very similar to this:
import "../styles/globals.css";
import type { AppProps } from "next/app";
import { ChakraProvider, ColorModeScript, extendTheme } from "@chakra-ui/react";
import {
  chain,
  configureChains,
  createClient,
  WagmiConfig,
  useSigner,
} from "wagmi";
import { publicProvider } from "wagmi/providers/public";
import { jsonRpcProvider } from "wagmi/providers/jsonRpc";
import {
  connectorsForWallets,
  wallet,
  RainbowKitProvider,
  midnightTheme,
} from "@rainbow-me/rainbowkit";
import "@rainbow-me/rainbowkit/styles.css";
import { ThirdwebSDKProvider, ChainId } from "@thirdweb-dev/react";

const config = {
  initialColorMode: "dark",
  useSystemColorMode: true,
};
const fonts = {
  heading: `"Inter", sans-serif`,
  body: `"Inter", sans-serif`,
};

const theme = extendTheme({ config, fonts });

const { chains, provider } = configureChains(
  [chain.goerli],
  [
    jsonRpcProvider({
      rpc: () => {
        return {
          http: "<https://rpc.ankr.com/eth_goerli>",
        };
      },
    }),
    publicProvider(),
  ]
);

const connectors = connectorsForWallets([
  {
    groupName: "Recommended",
    wallets: [
      wallet.metaMask({ chains, shimDisconnect: true }),
      wallet.walletConnect({ chains }),
      wallet.coinbase({ appName: "probably nothing", chains }),
      wallet.rainbow({ chains }),
    ],
  },
  {
    groupName: "Others",
    wallets: [
      wallet.argent({ chains }),
      wallet.brave({
        chains,
        shimDisconnect: true,
      }),
      wallet.imToken({ chains }),
      wallet.injected({
        chains,
        shimDisconnect: true,
      }),
      wallet.ledger({
        chains,
      }),
      wallet.steak({ chains }),
      wallet.trust({ chains, shimDisconnect: true }),
    ],
  },
]);

const wagmiClient = createClient({
  autoConnect: false,
  connectors,
  provider,
});

const activeChainId = ChainId.Goerli;

function ThirdwebProvider({ wagmiClient, children }: any) {
  const { data: signer } = useSigner();
  return (
    <ThirdwebSDKProvider
      desiredChainId={activeChainId}
      signer={signer as any}
      provider={wagmiClient.provider}
      queryClient={wagmiClient.queryClient as any}
    >
      {children}
    </ThirdwebSDKProvider>
  );
}

function MyApp({ Component, pageProps }: AppProps) {
  return (
    <ChakraProvider theme={theme}>
      <WagmiConfig client={wagmiClient}>
        <RainbowKitProvider chains={chains} theme={midnightTheme()} coolMode>
          <ThirdwebProvider wagmiClient={wagmiClient}>
            <ColorModeScript initialColorMode={theme.config.initialColorMode} />
            <Component {...pageProps} />
          </ThirdwebProvider>
        </RainbowKitProvider>
      </WagmiConfig>
    </ChakraProvider>
  );
}
export default MyApp;
Add connect wallet button
Head over to the index.tsx file and import the ConnectButton from RainbowKit:
import { ConnectButton } from "@rainbow-me/rainbowkit";
Add <ConnectButton /> in the <main> ... </main> tag:
<main className={styles.main}>
   <h1 className={styles.title}>gm</h1>
   <ConnectButton />
</main>
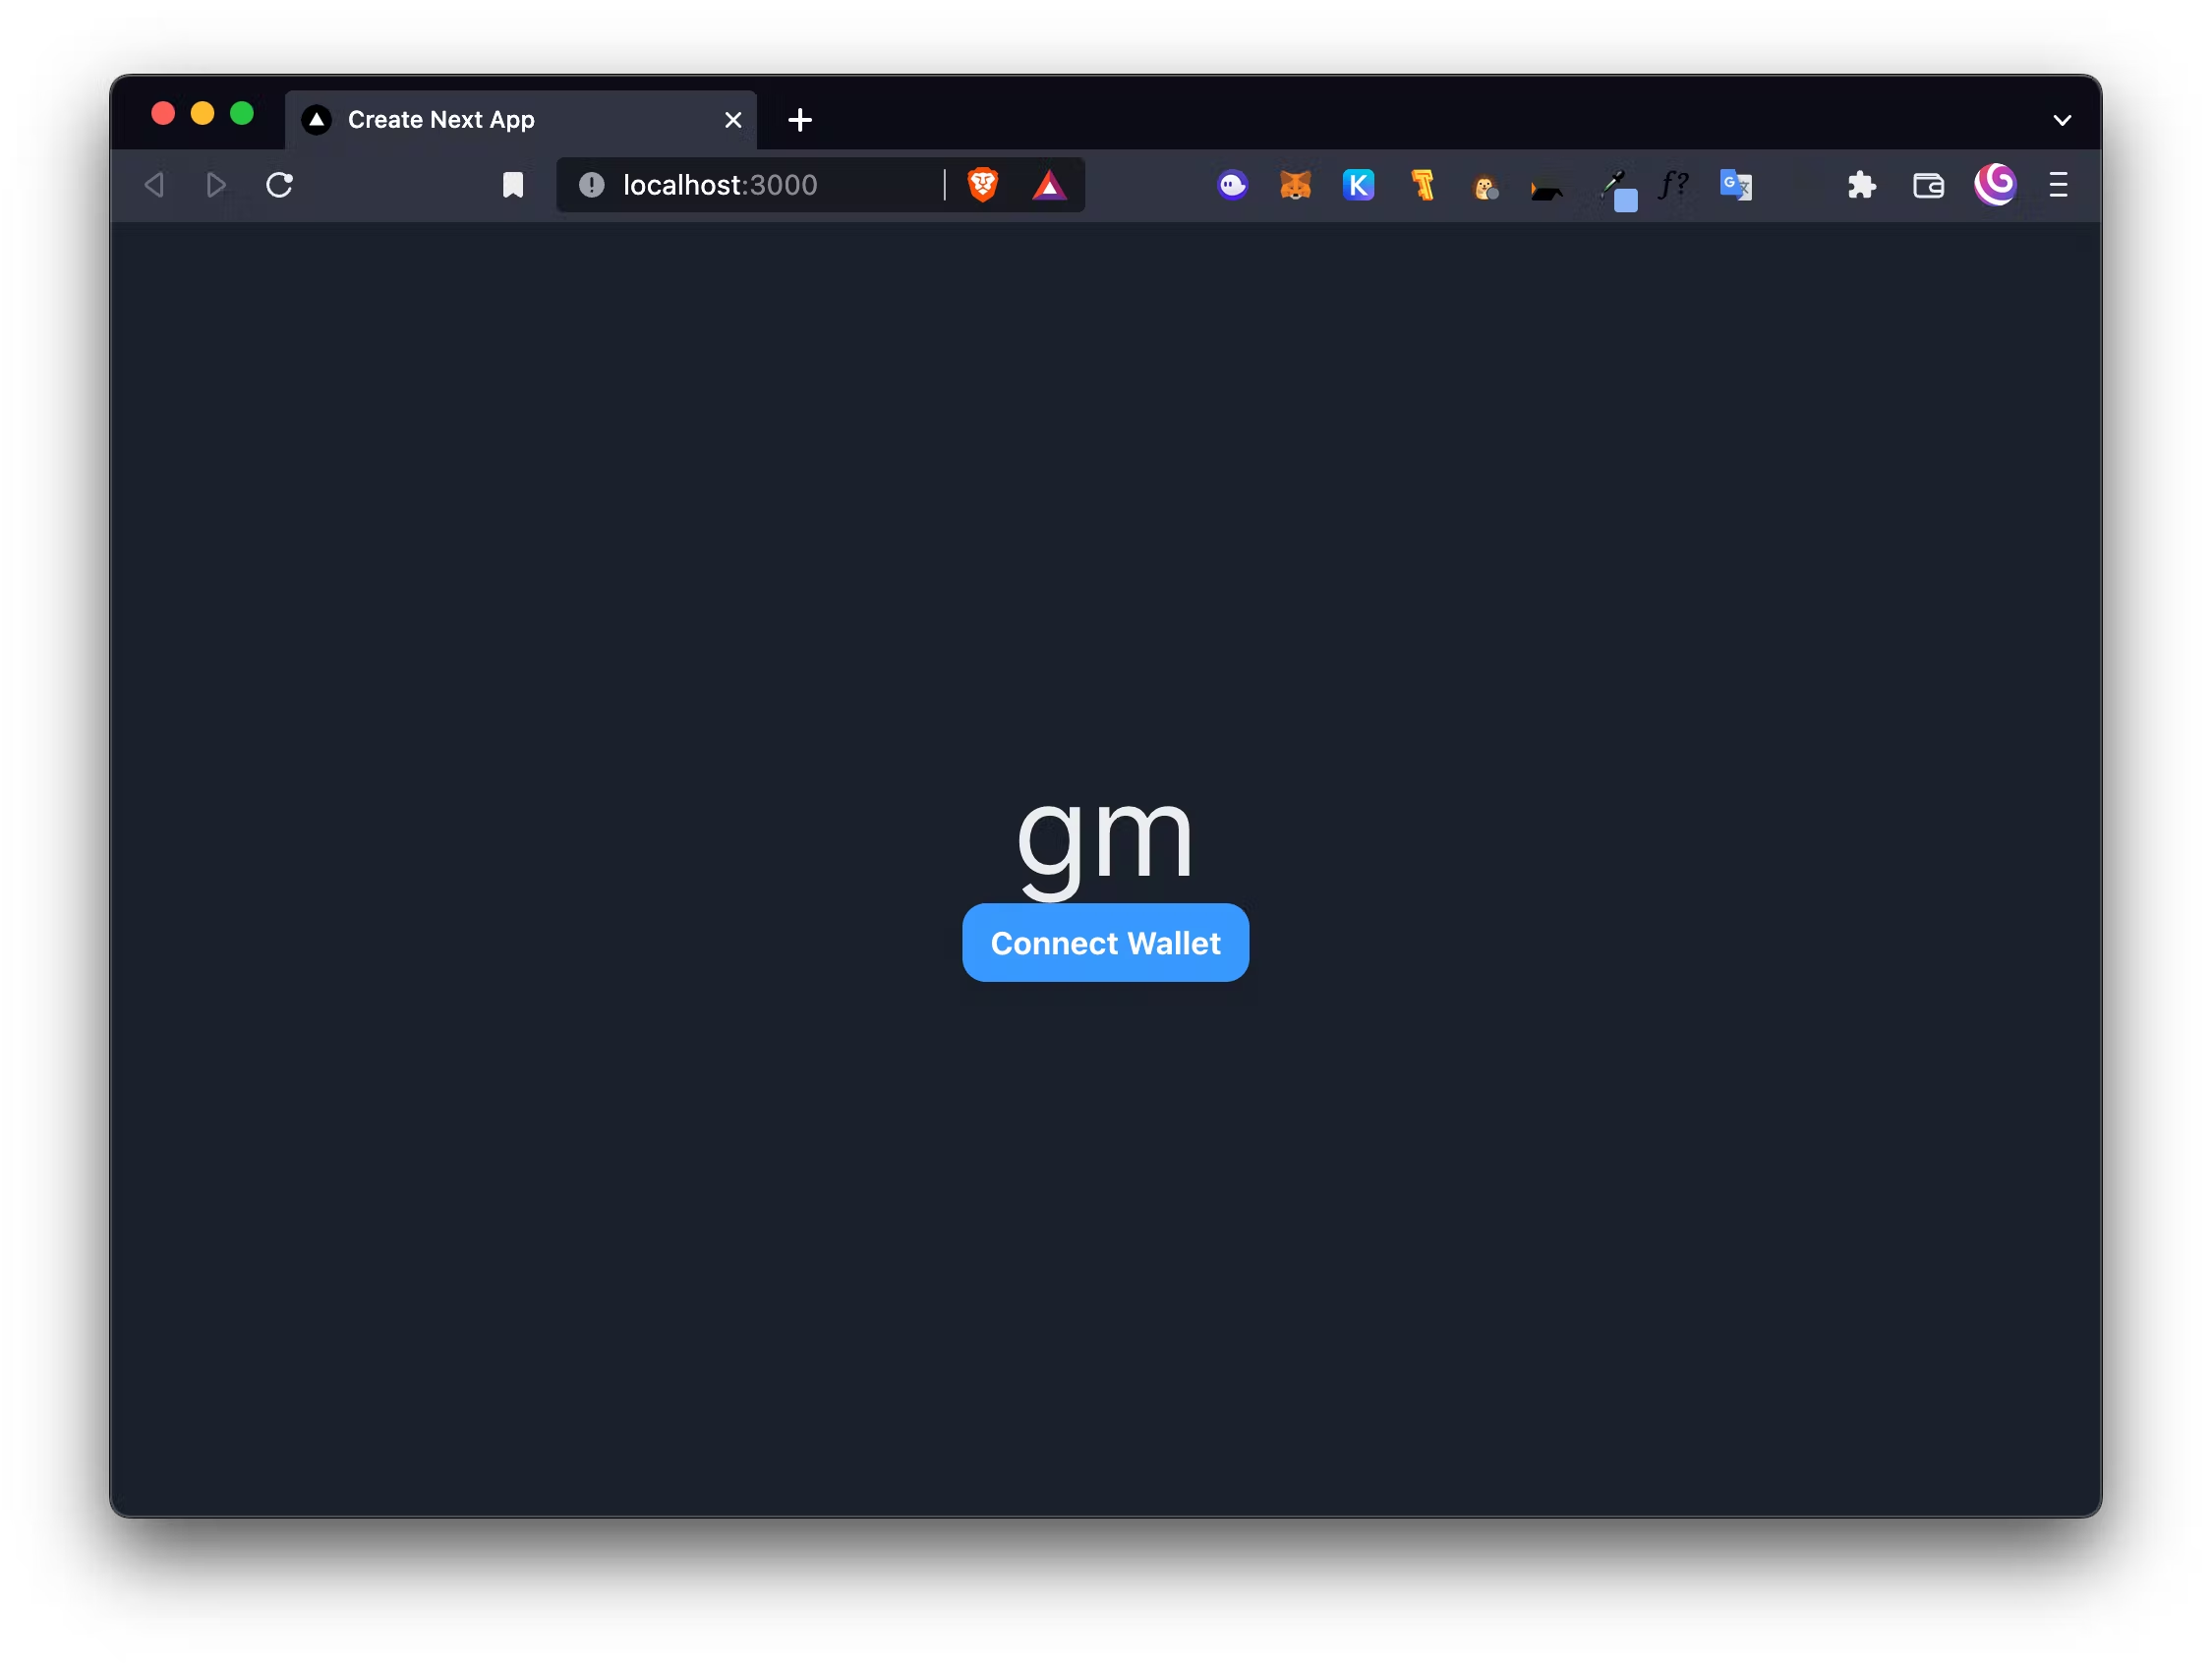
Congratulations 🎉 Your connect wallet button from RainbowKit should now show on localhost:3000:
Writing and deploying our contract on thirdweb
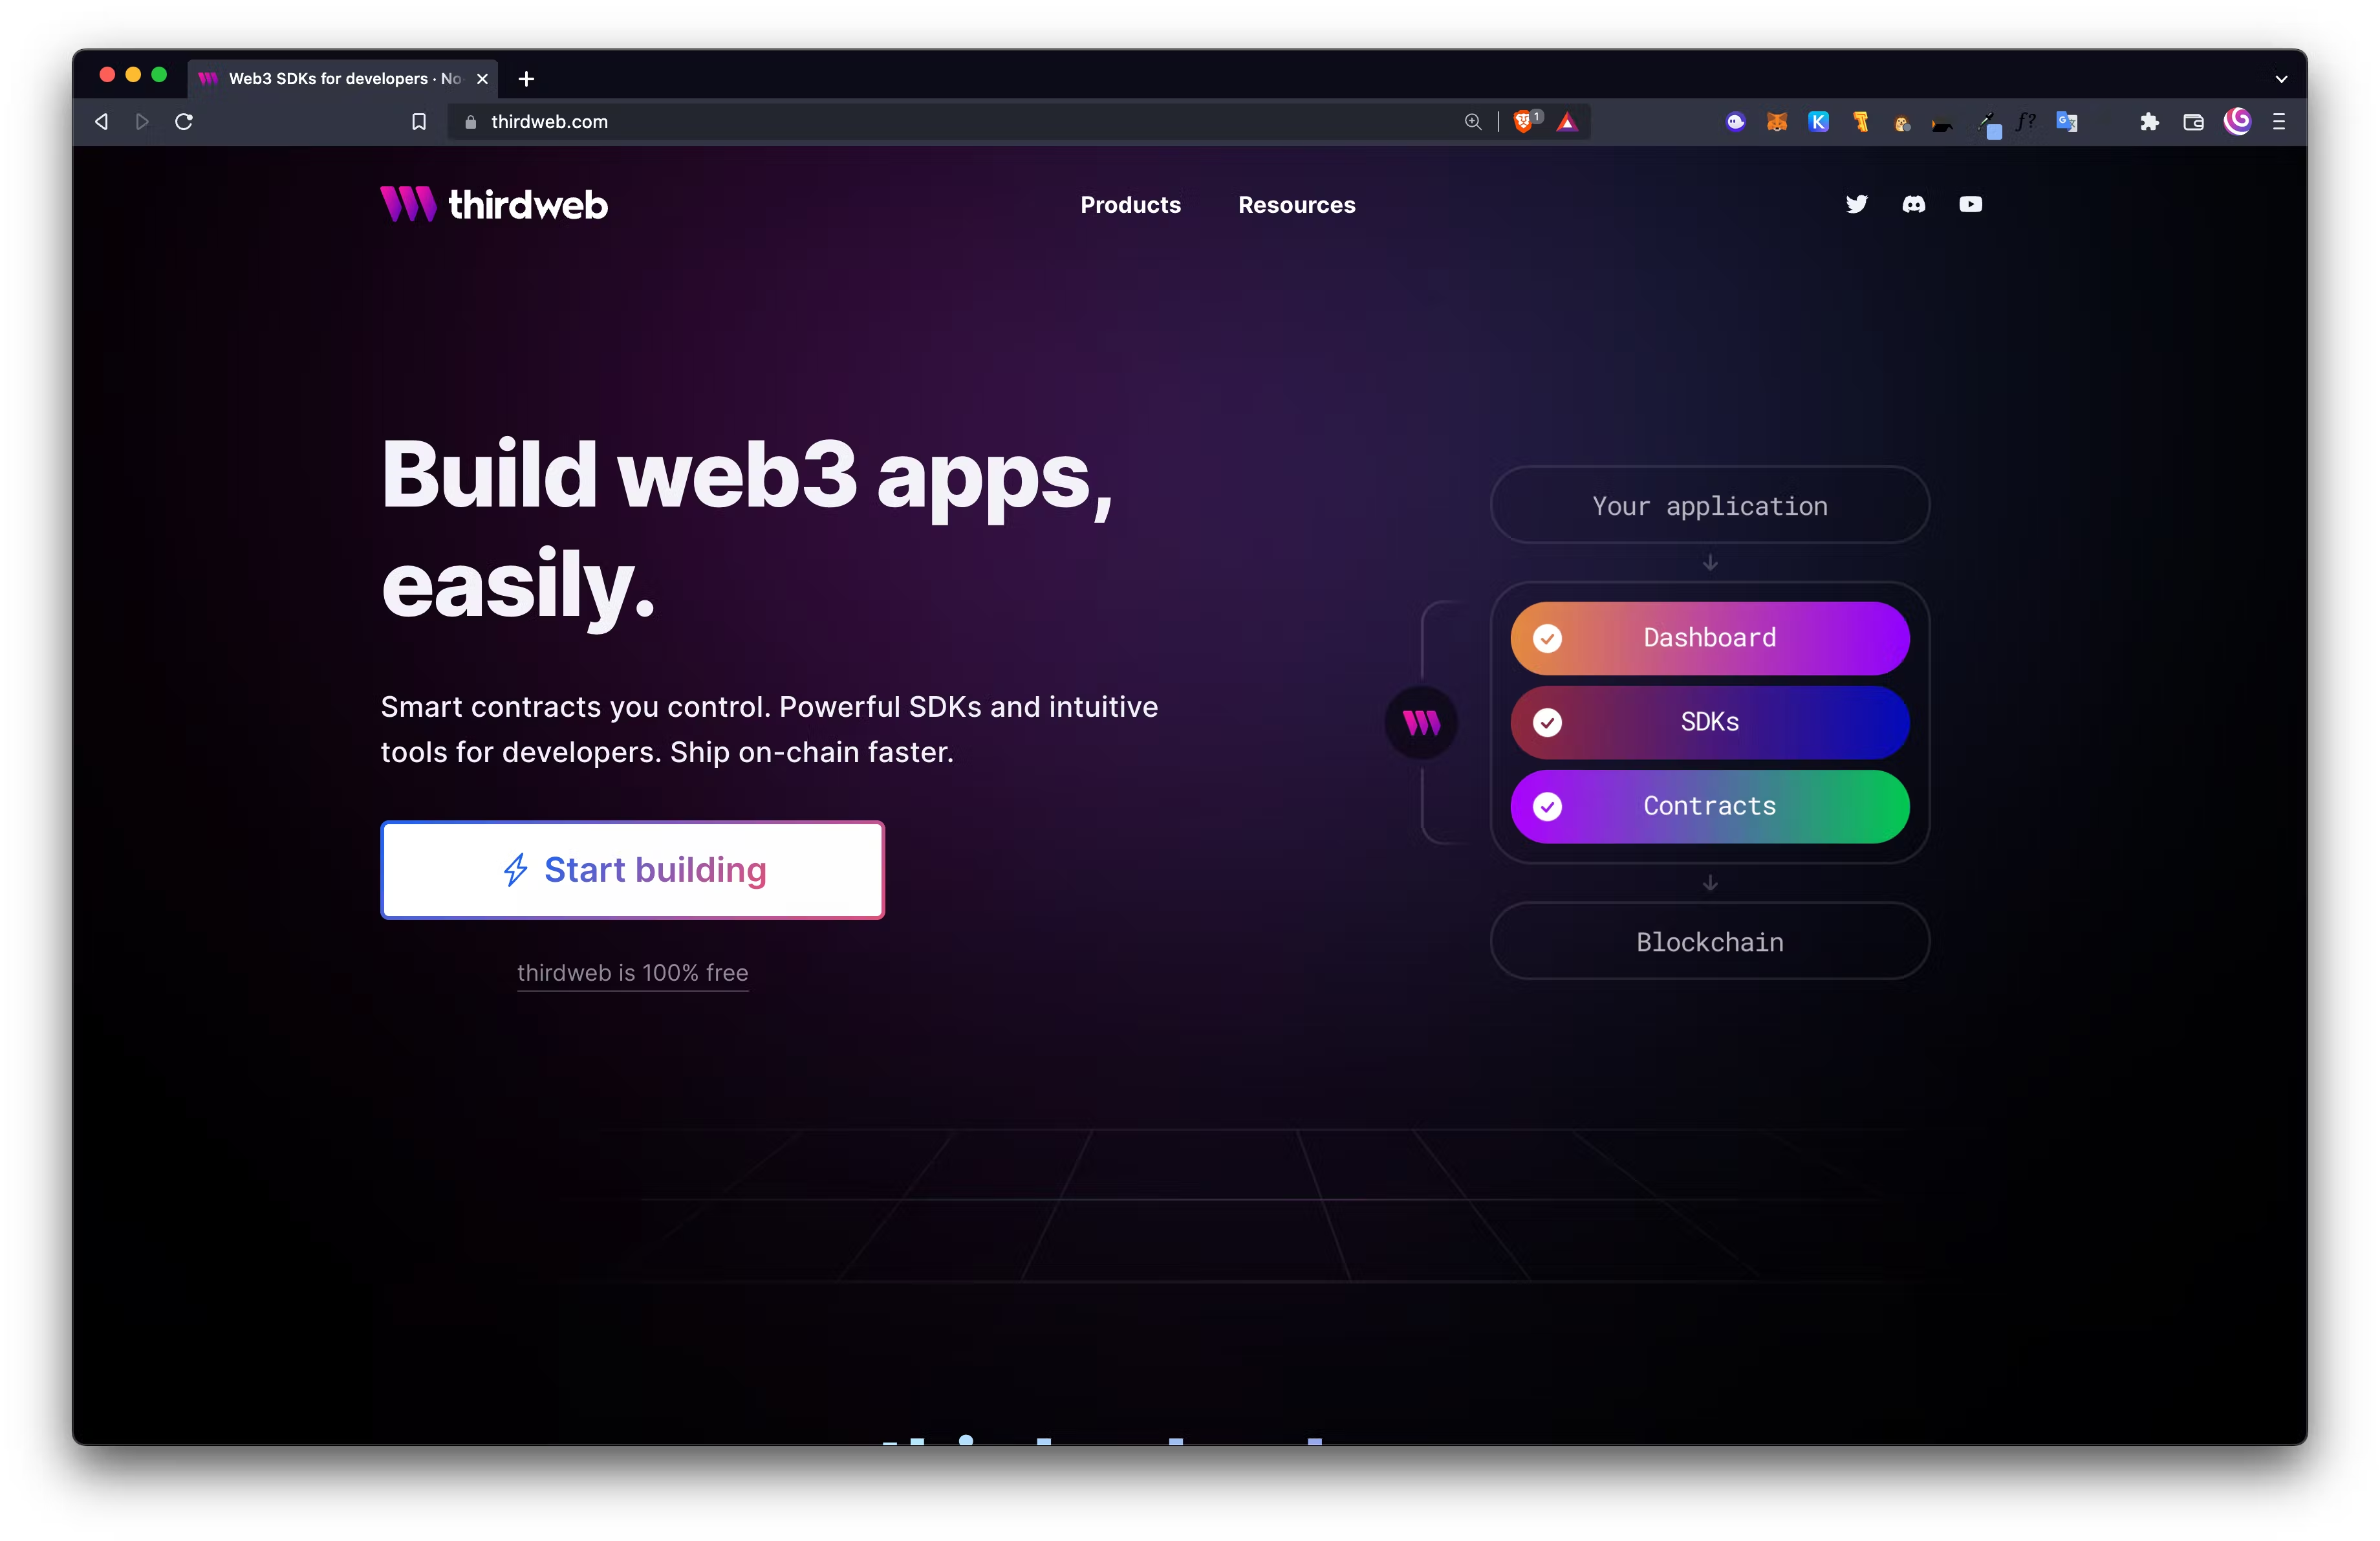
Thirdweb is a great way to get started deploying your own contracts while also maintaining security of your private keys and ownership of your contracts. Head to thirdweb.com and click Start building to begin deploying your first contract.
Before going further, you’ll need some Goerli ETH. Make sure to head over to any goerli faucet to request some test ether.
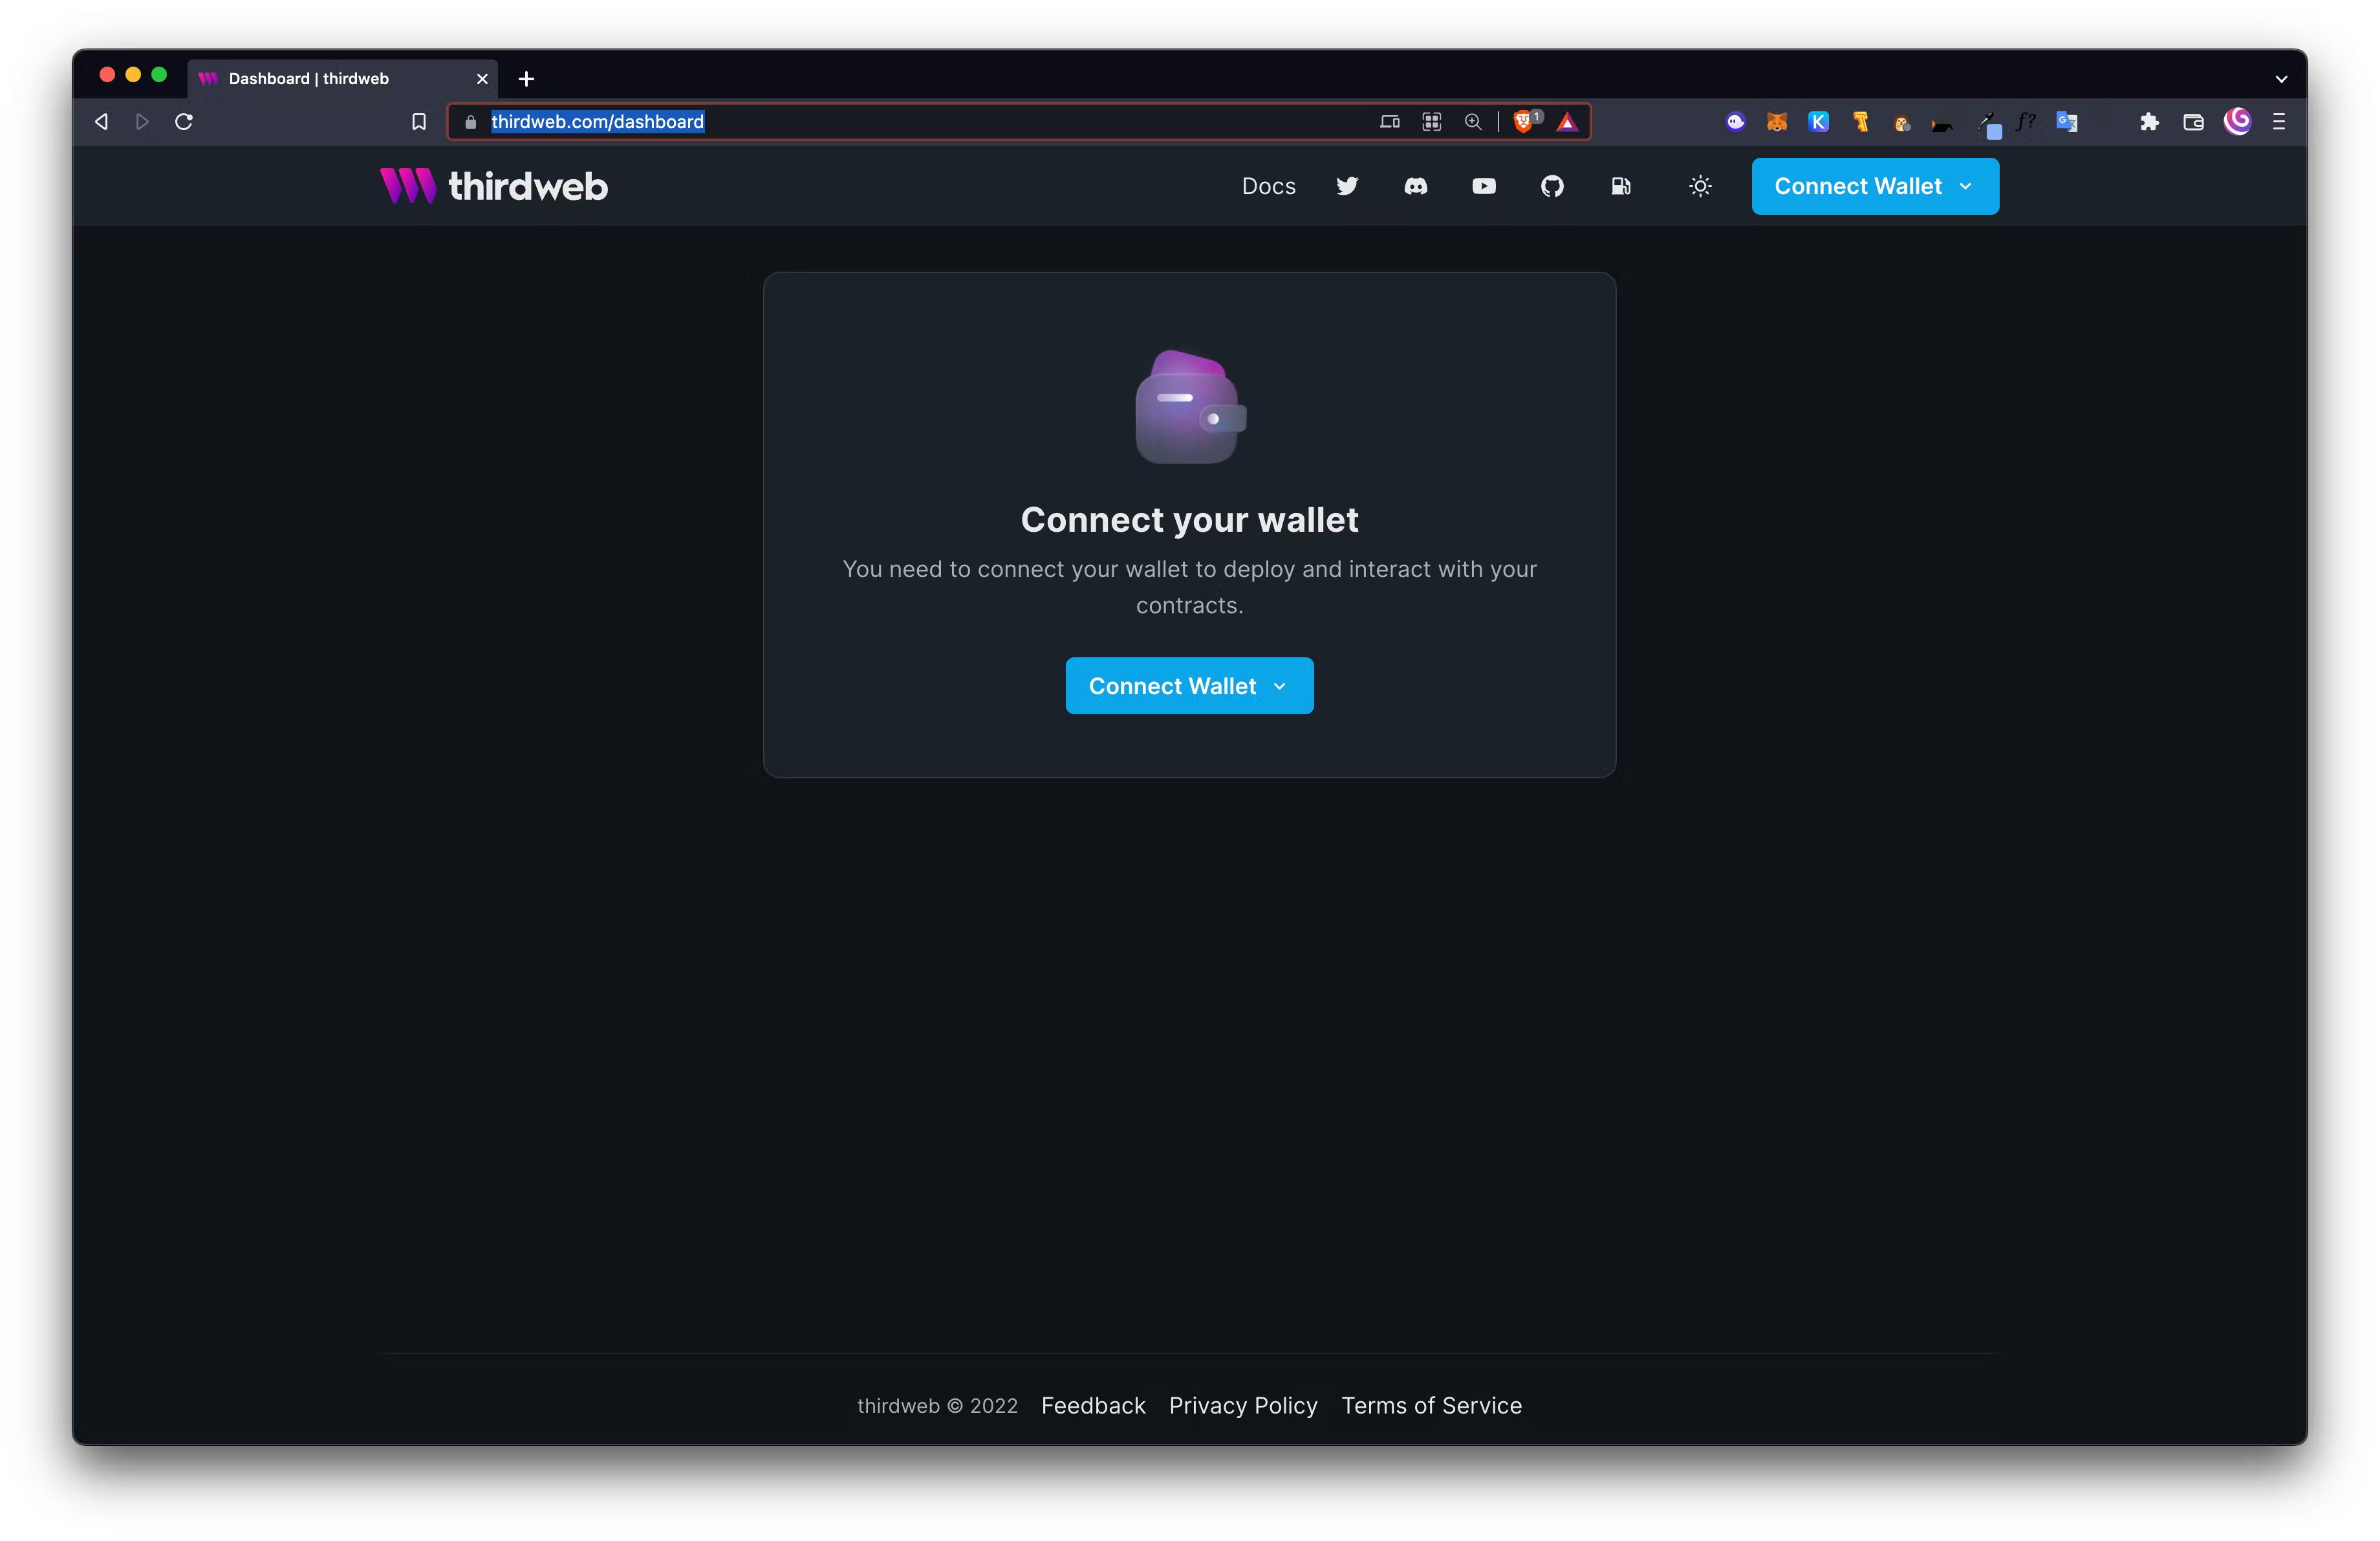
First, connect your wallet at https://thirdweb.com/dashboard
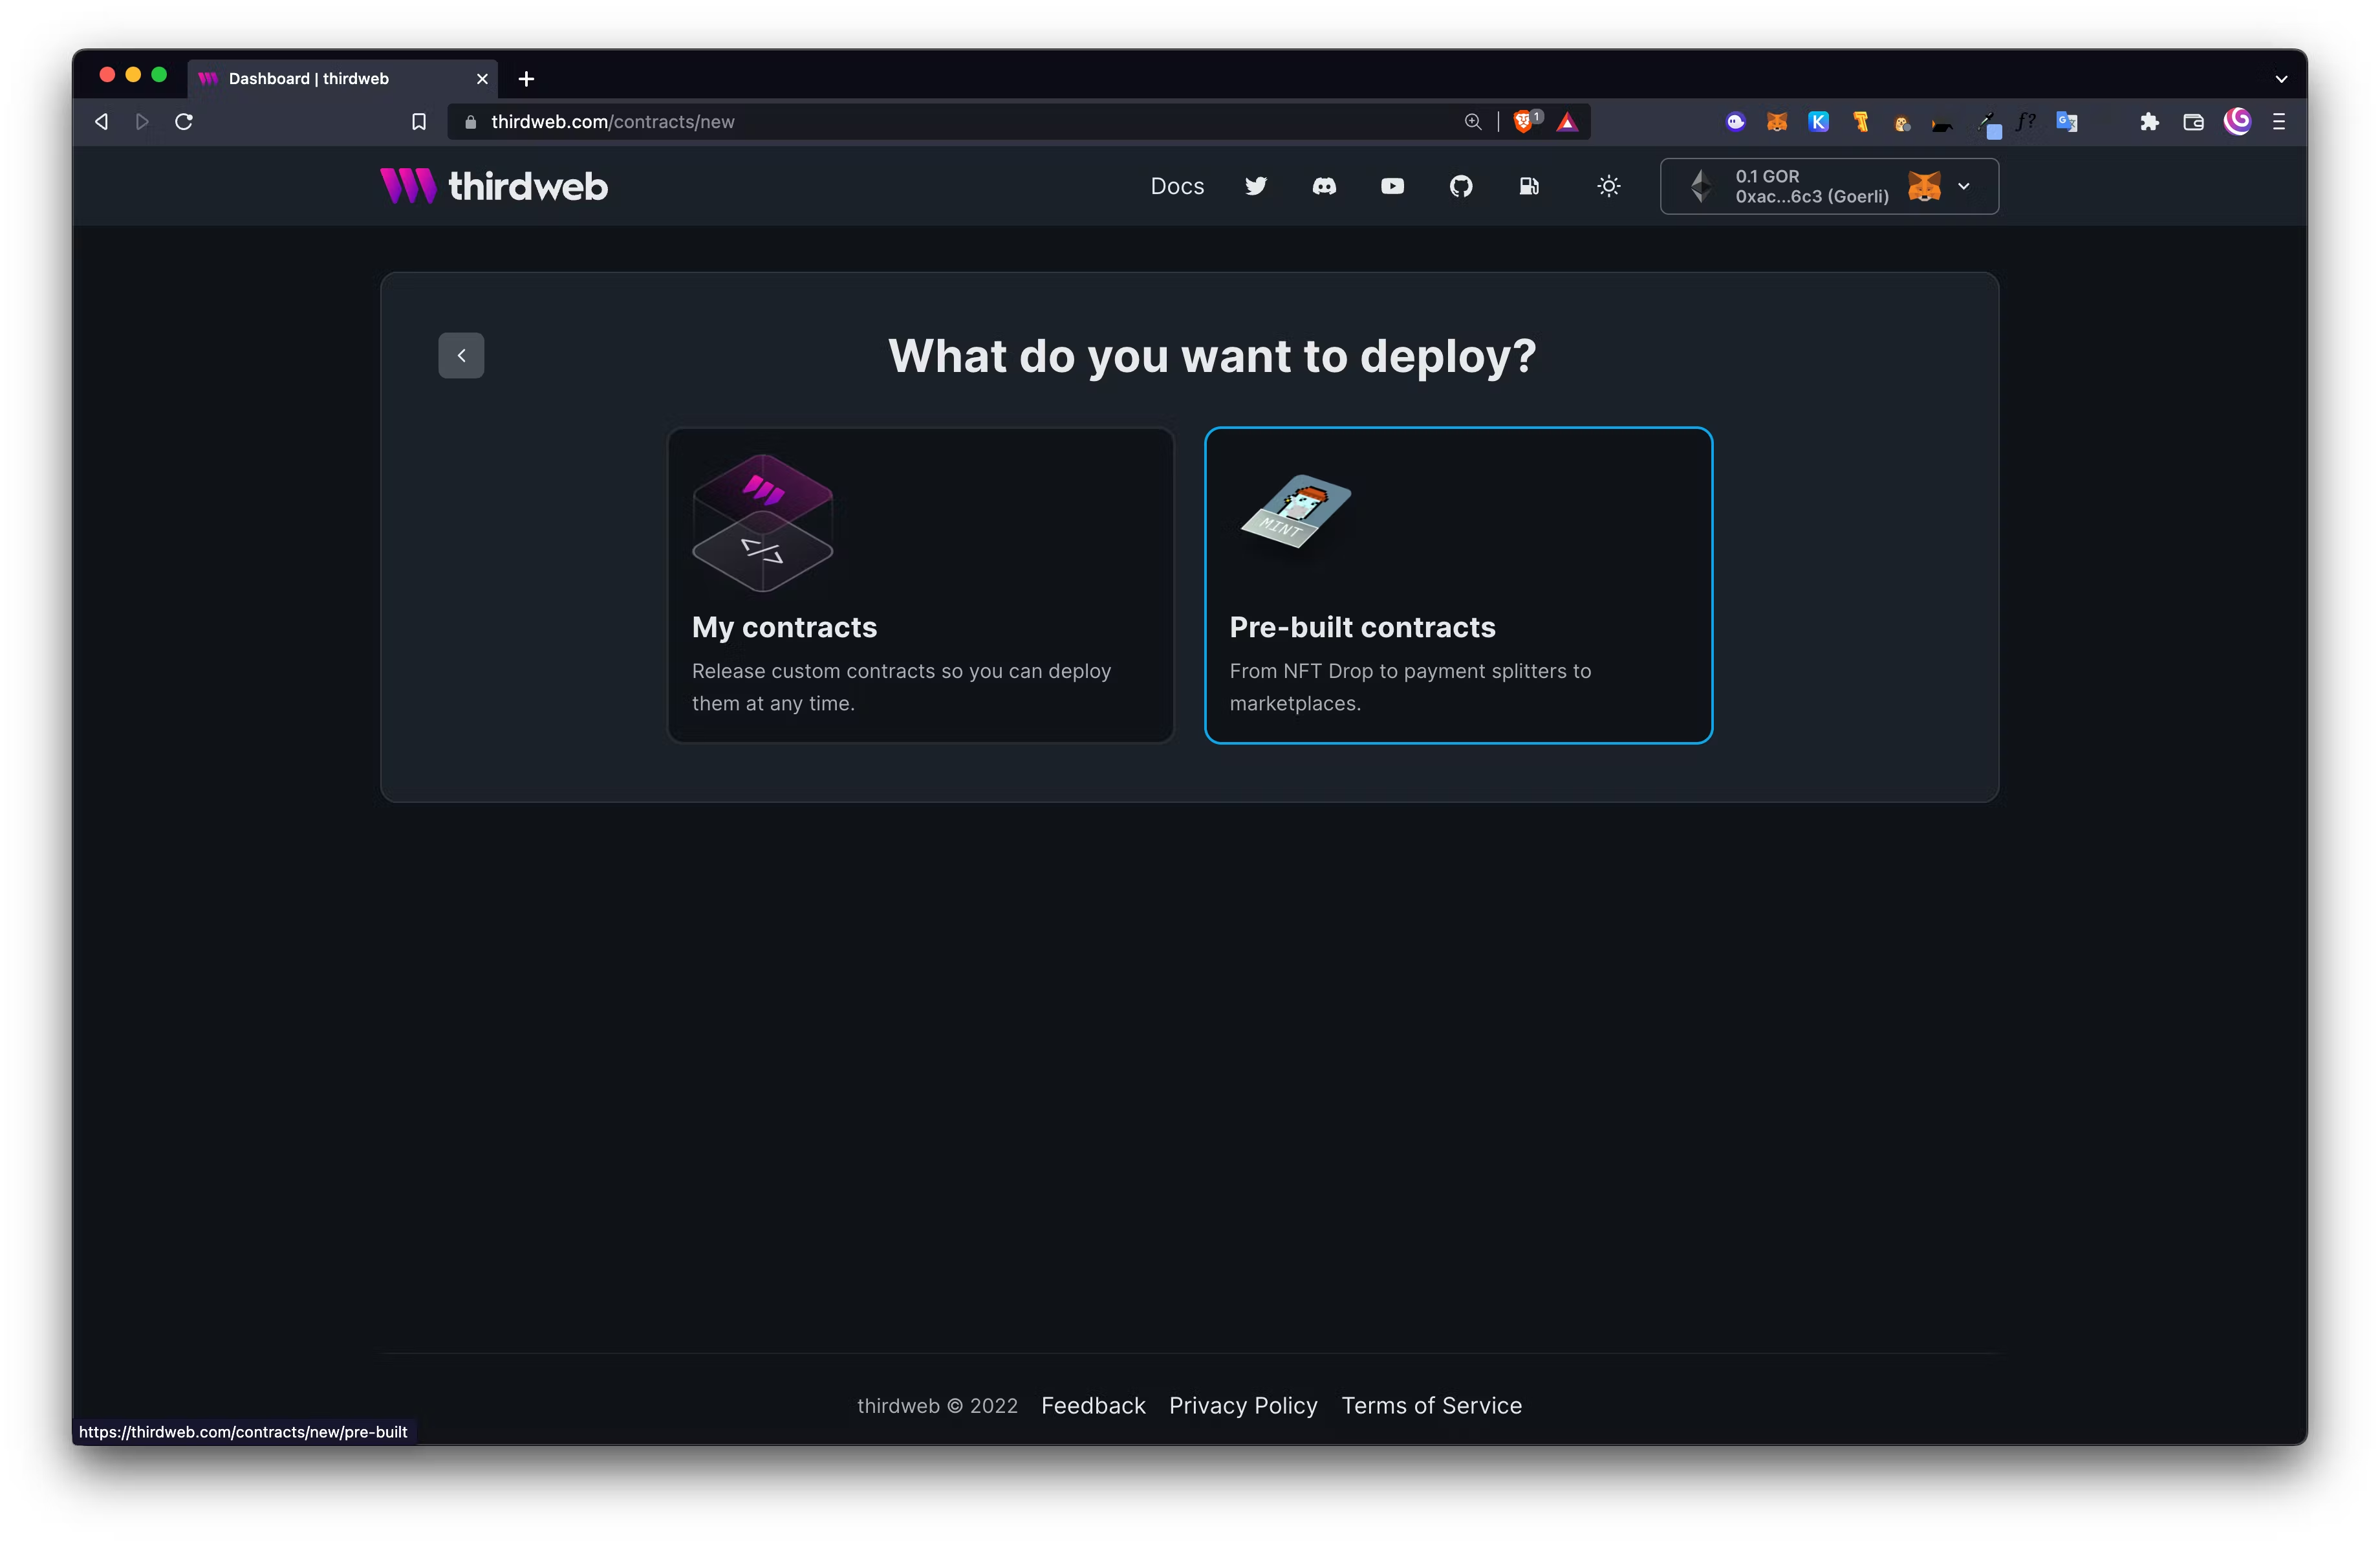
Next, select Pre-built contracts:
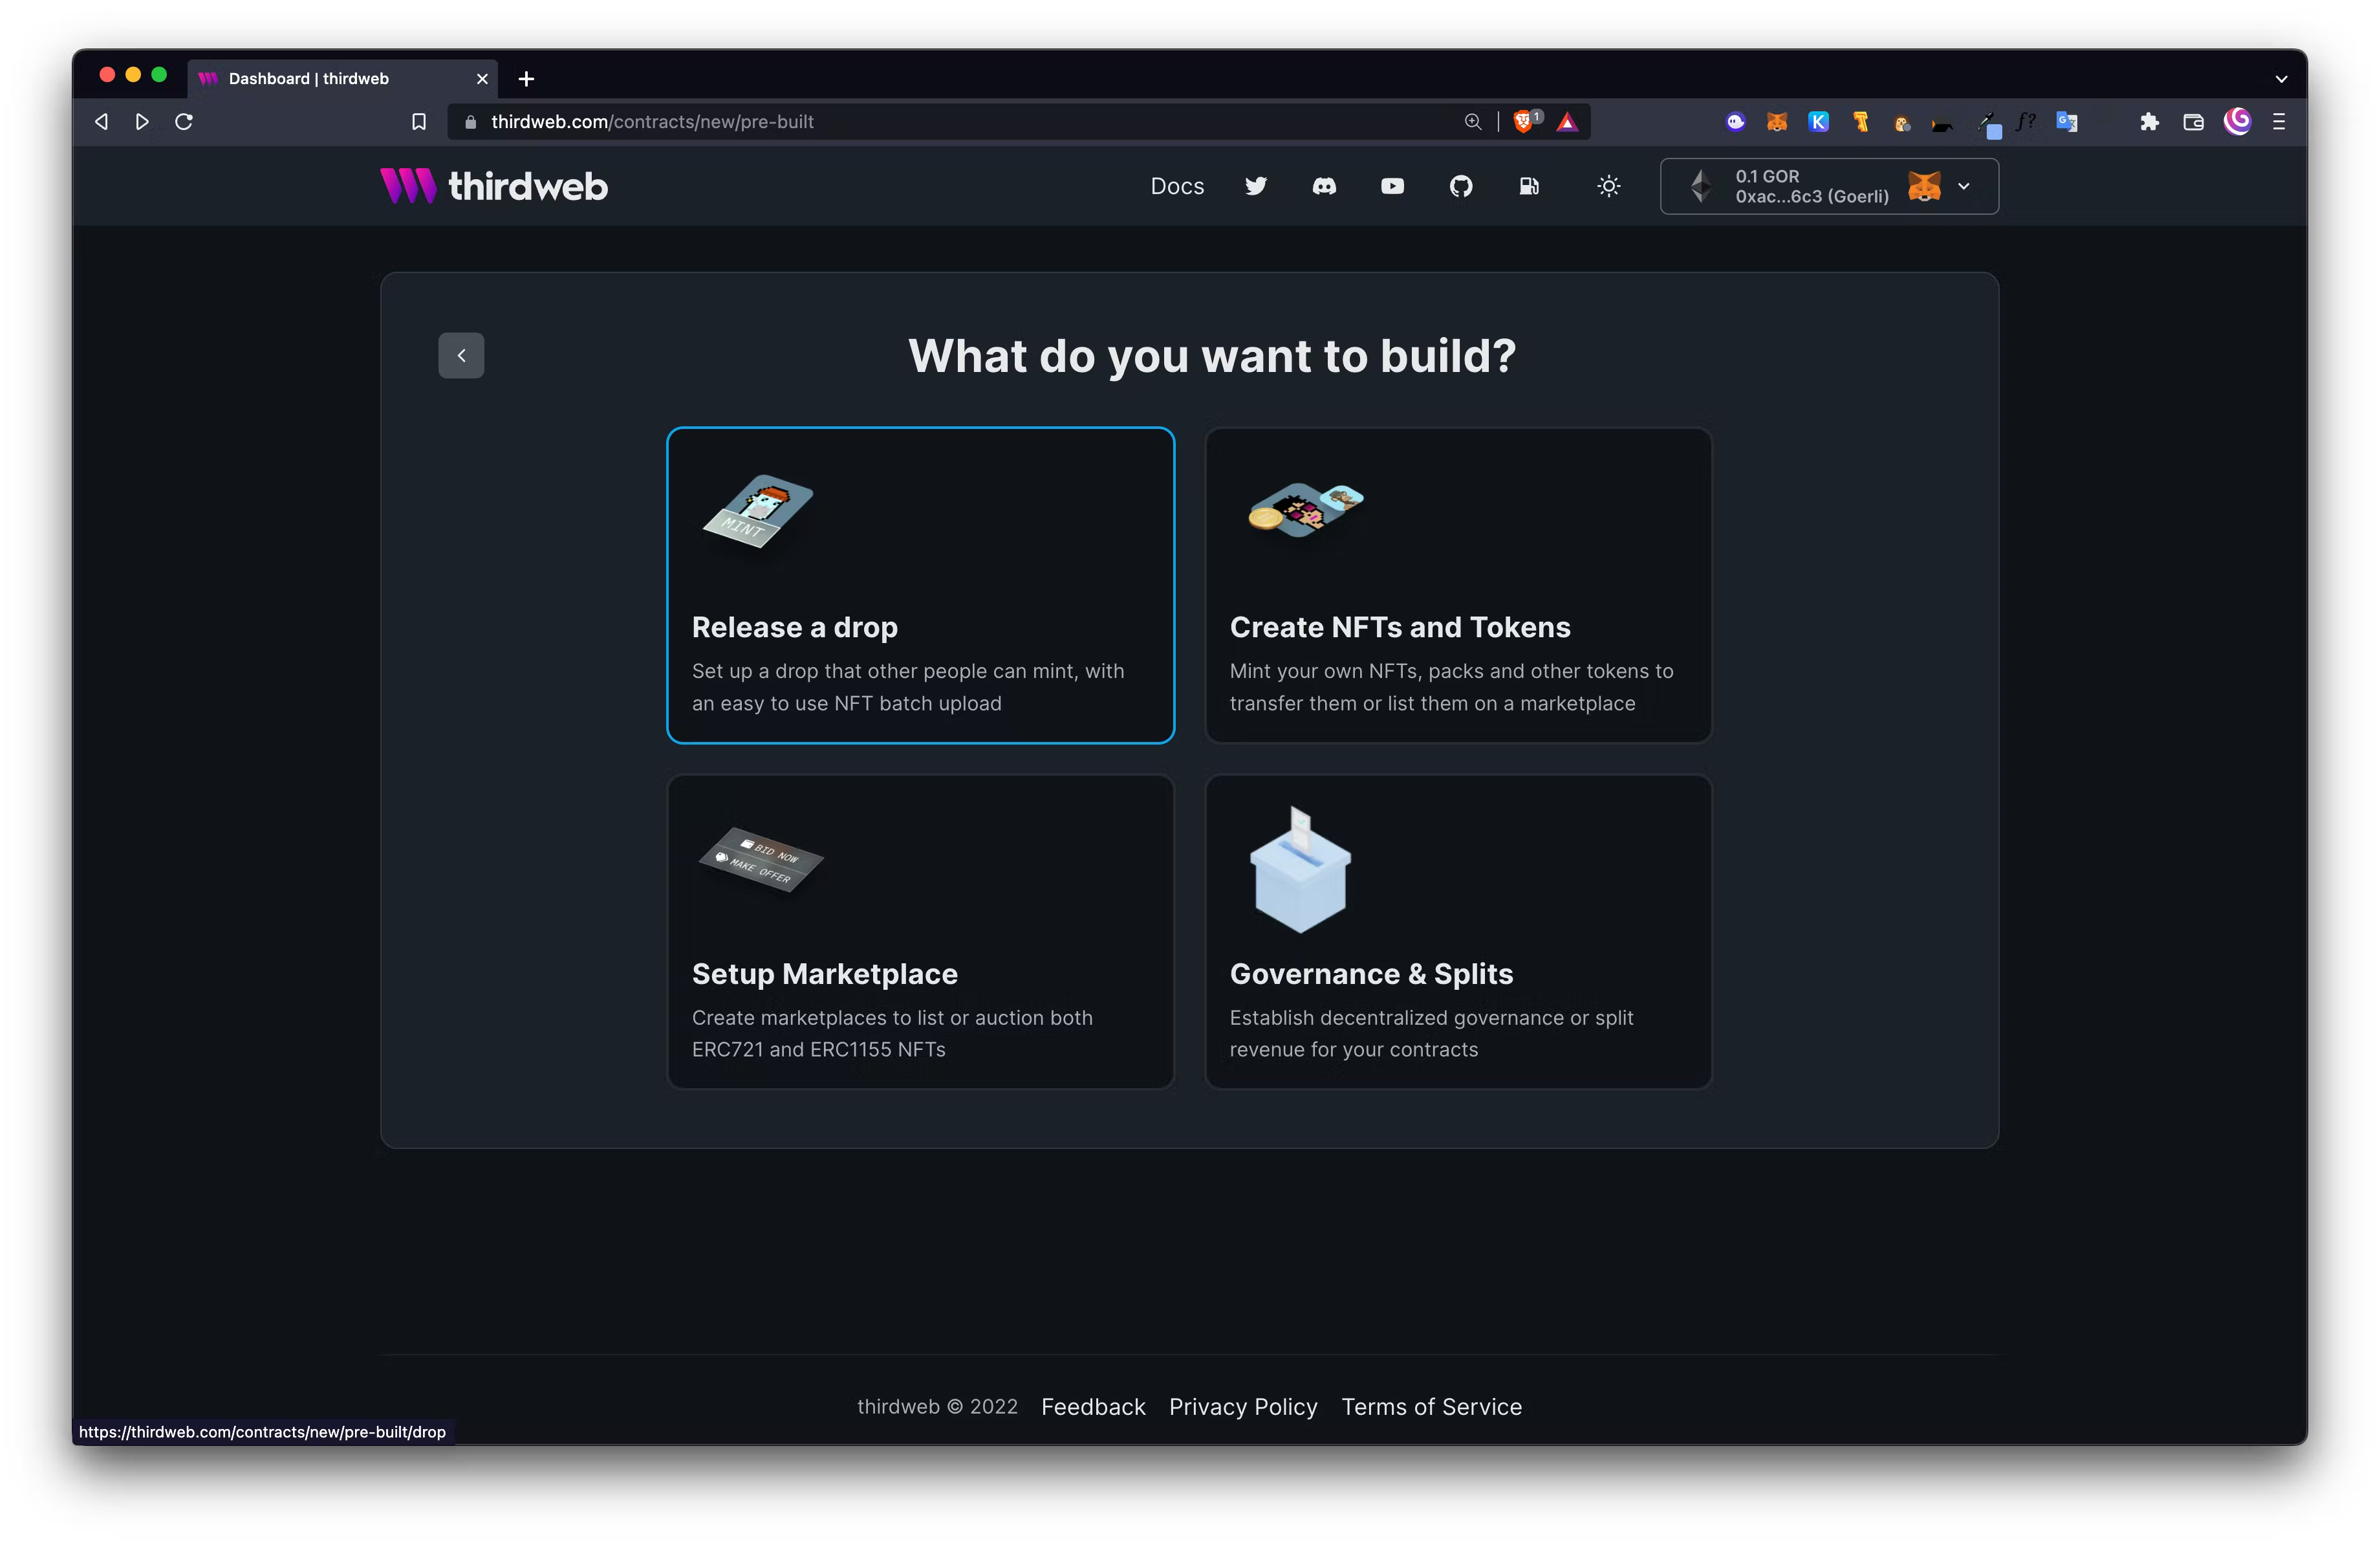
Then Release a drop:
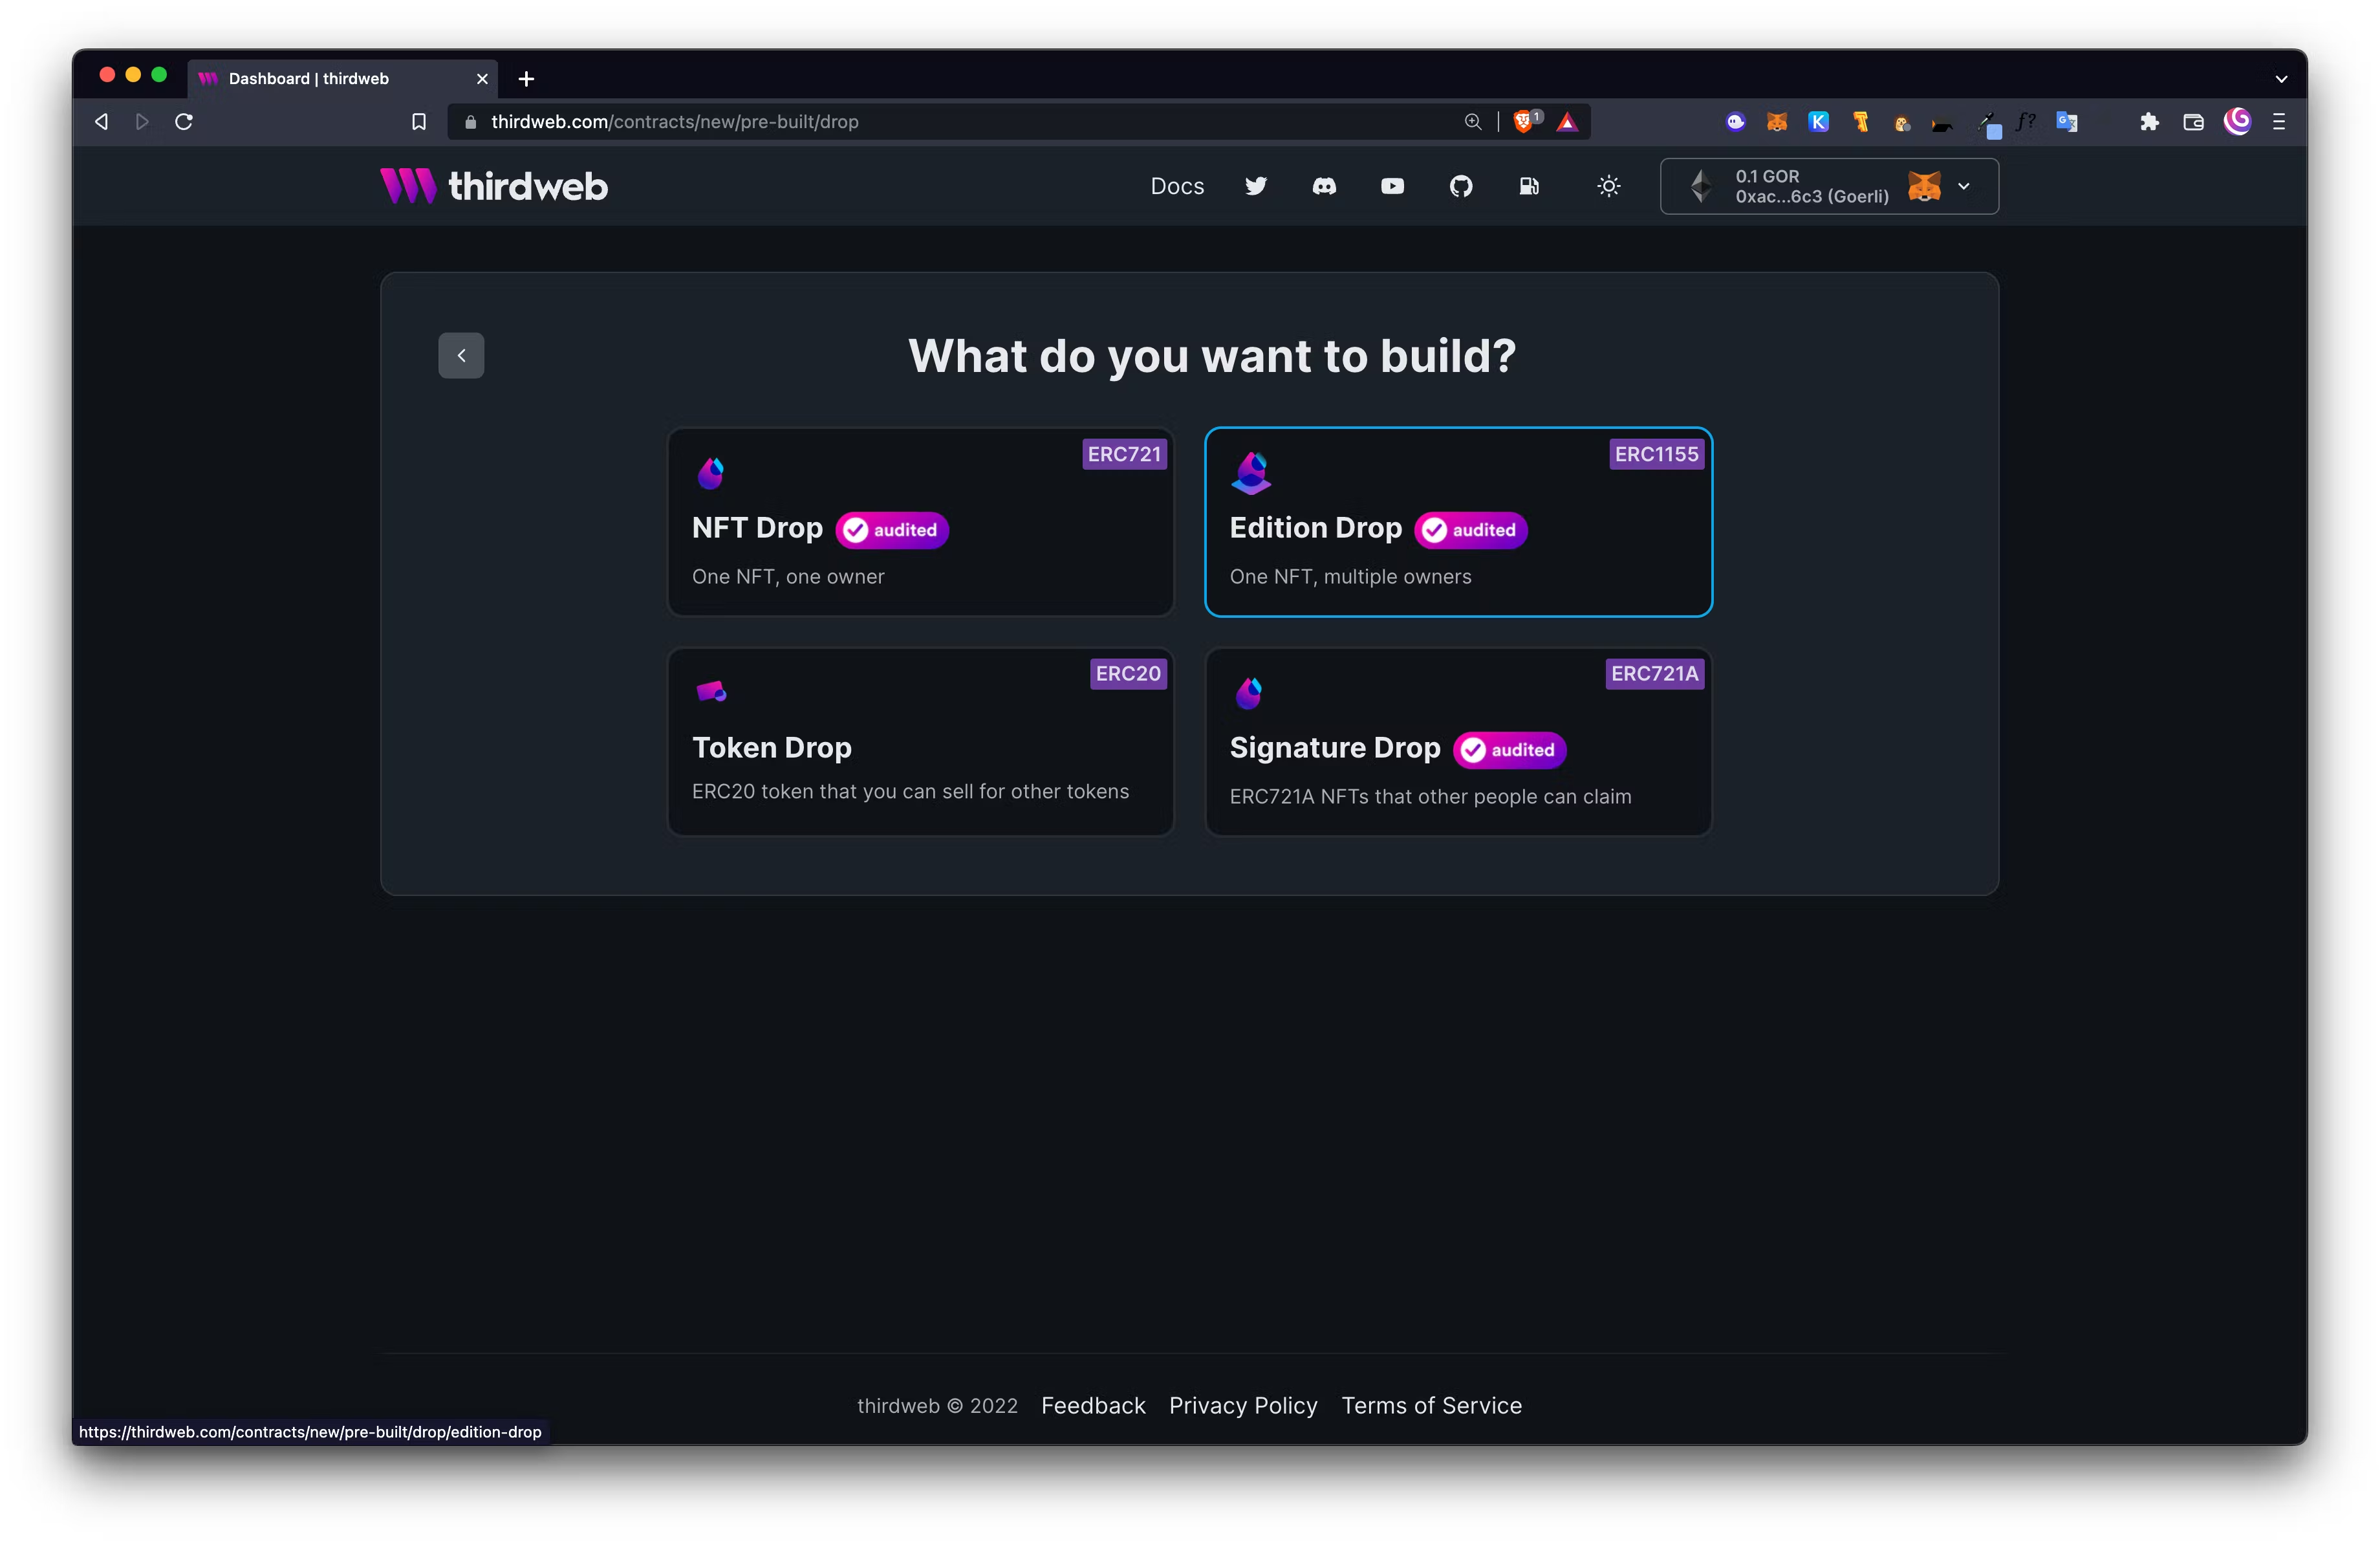
And then Edition Drop - this is an ERC-1155 Audited Smart Contract:
Add the contract metadata that describes what your contract is about. Here’s what we have put:
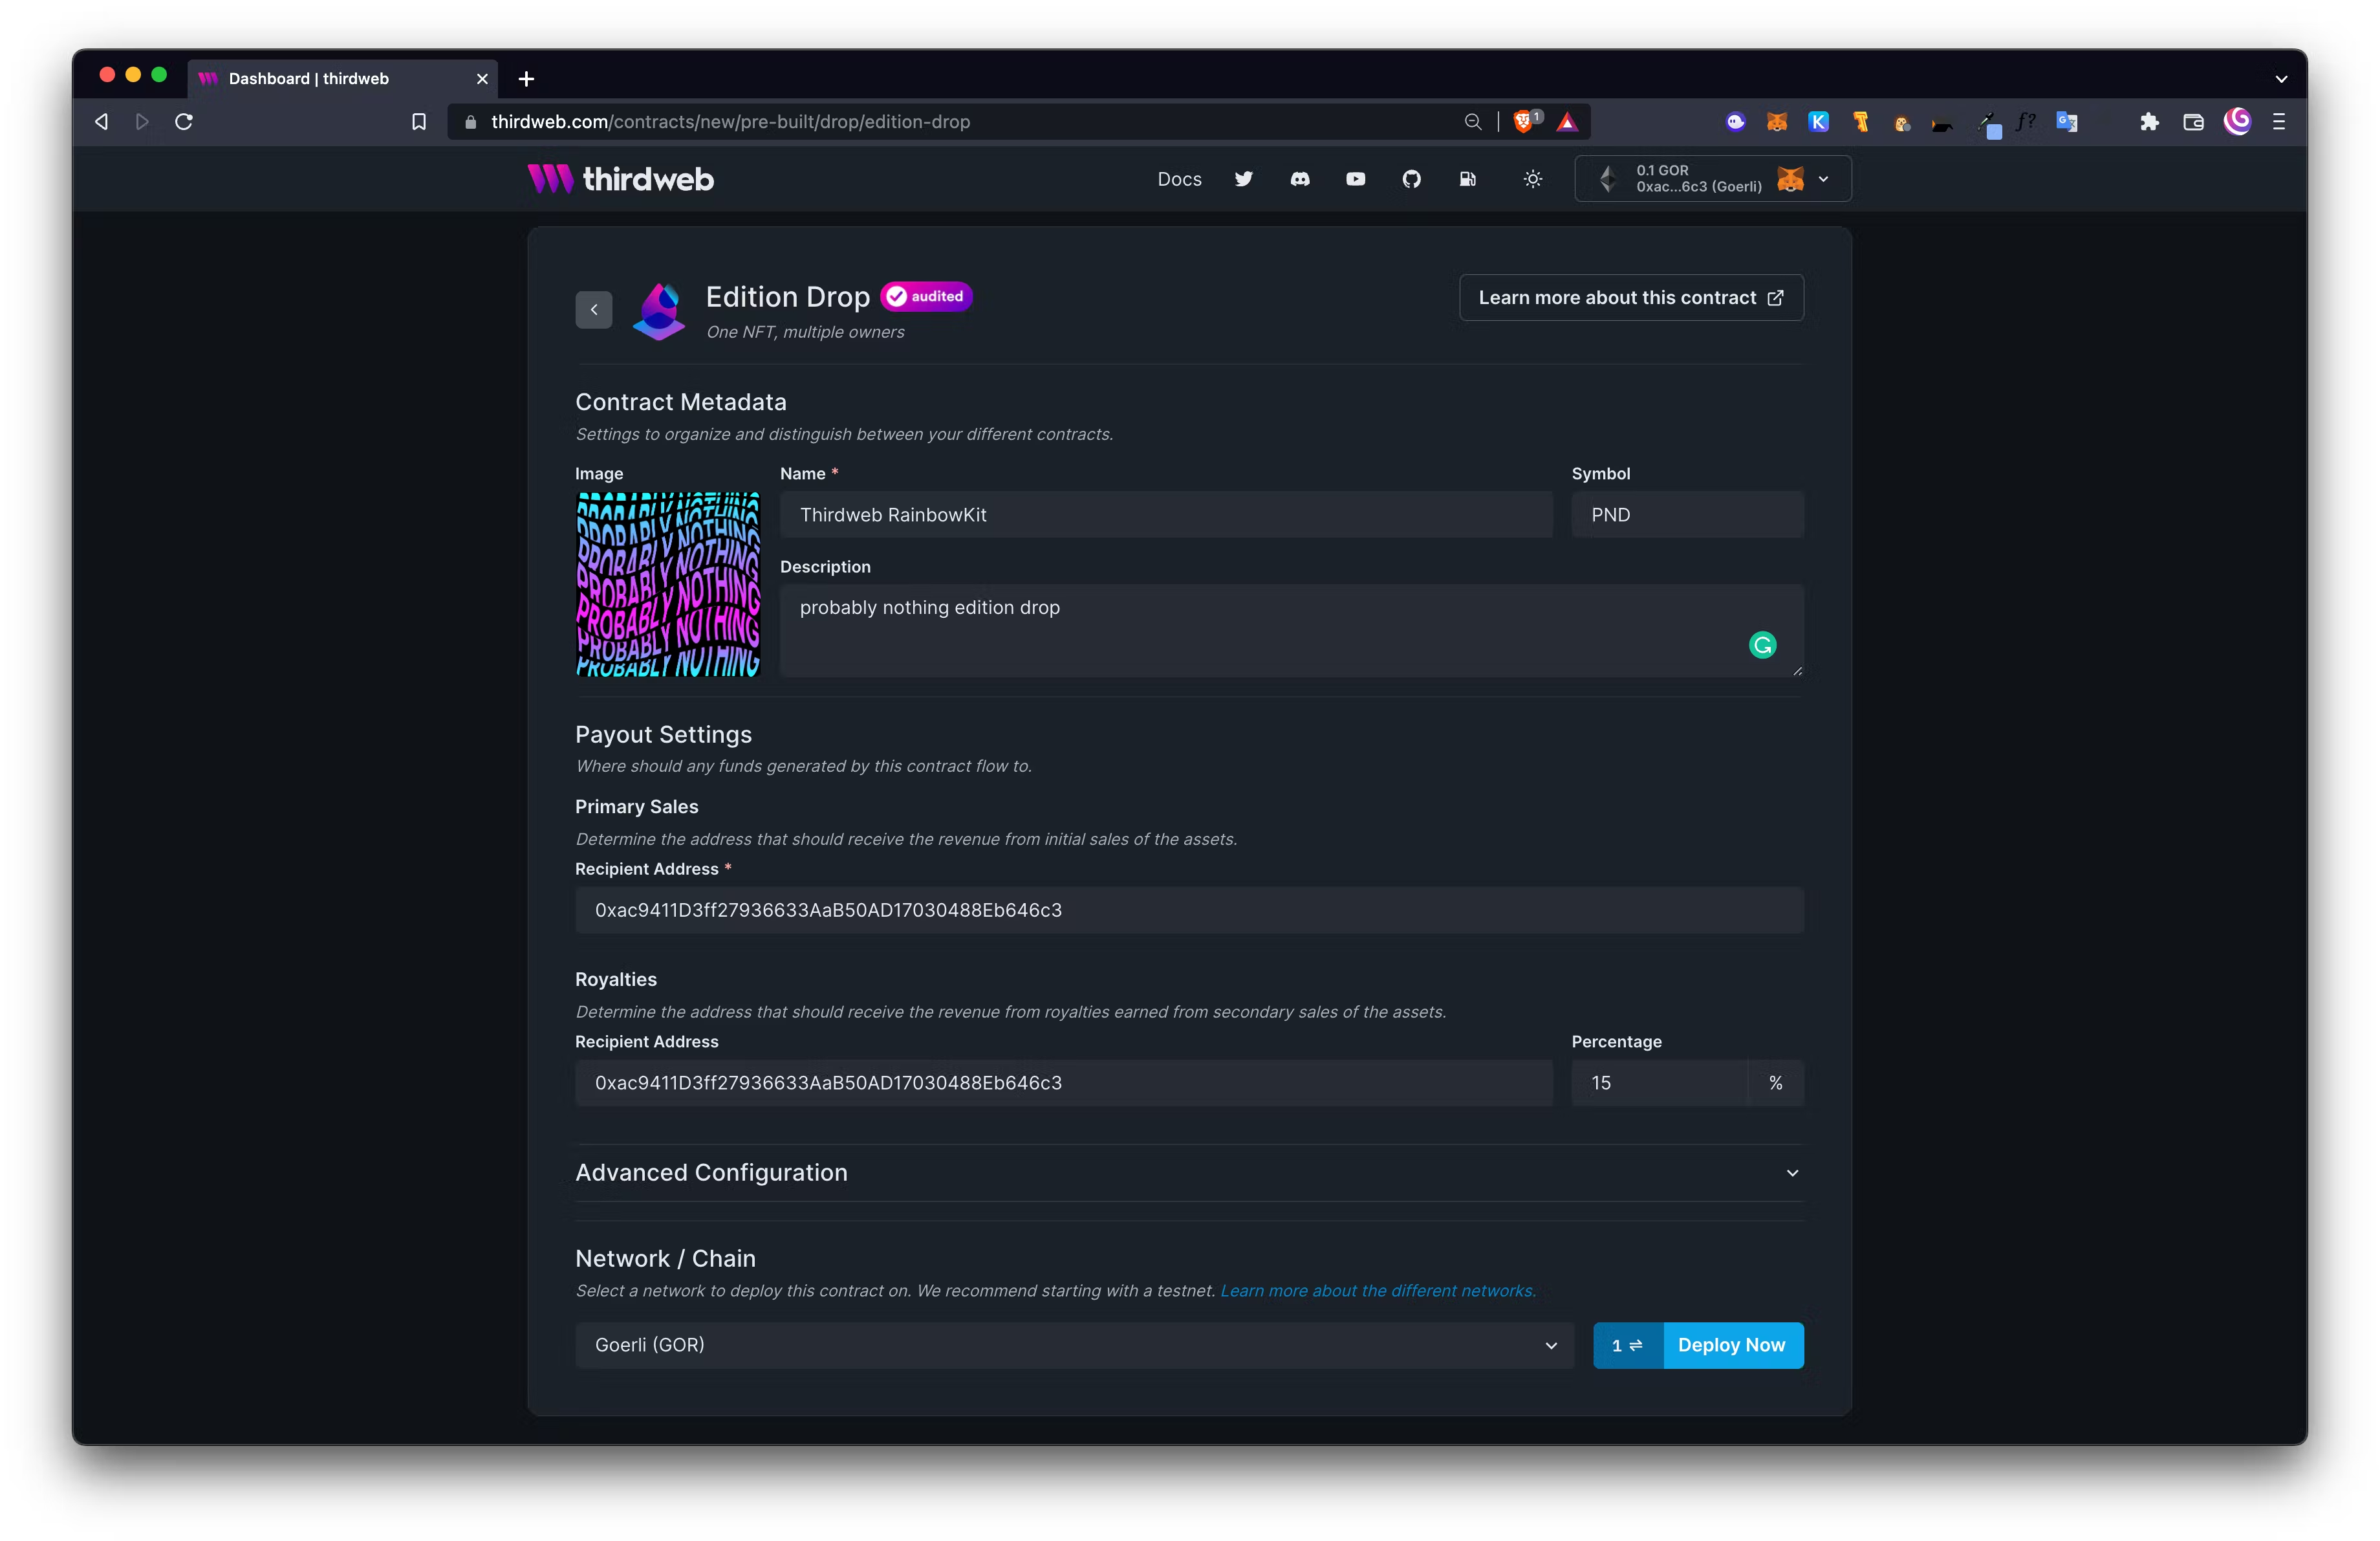
Click Deploy Now to deploy your contract. You’ll be prompted to confirm a transaction in your wallet.
Now, you’re ready to add your first edition drop! Click + Create to get started:
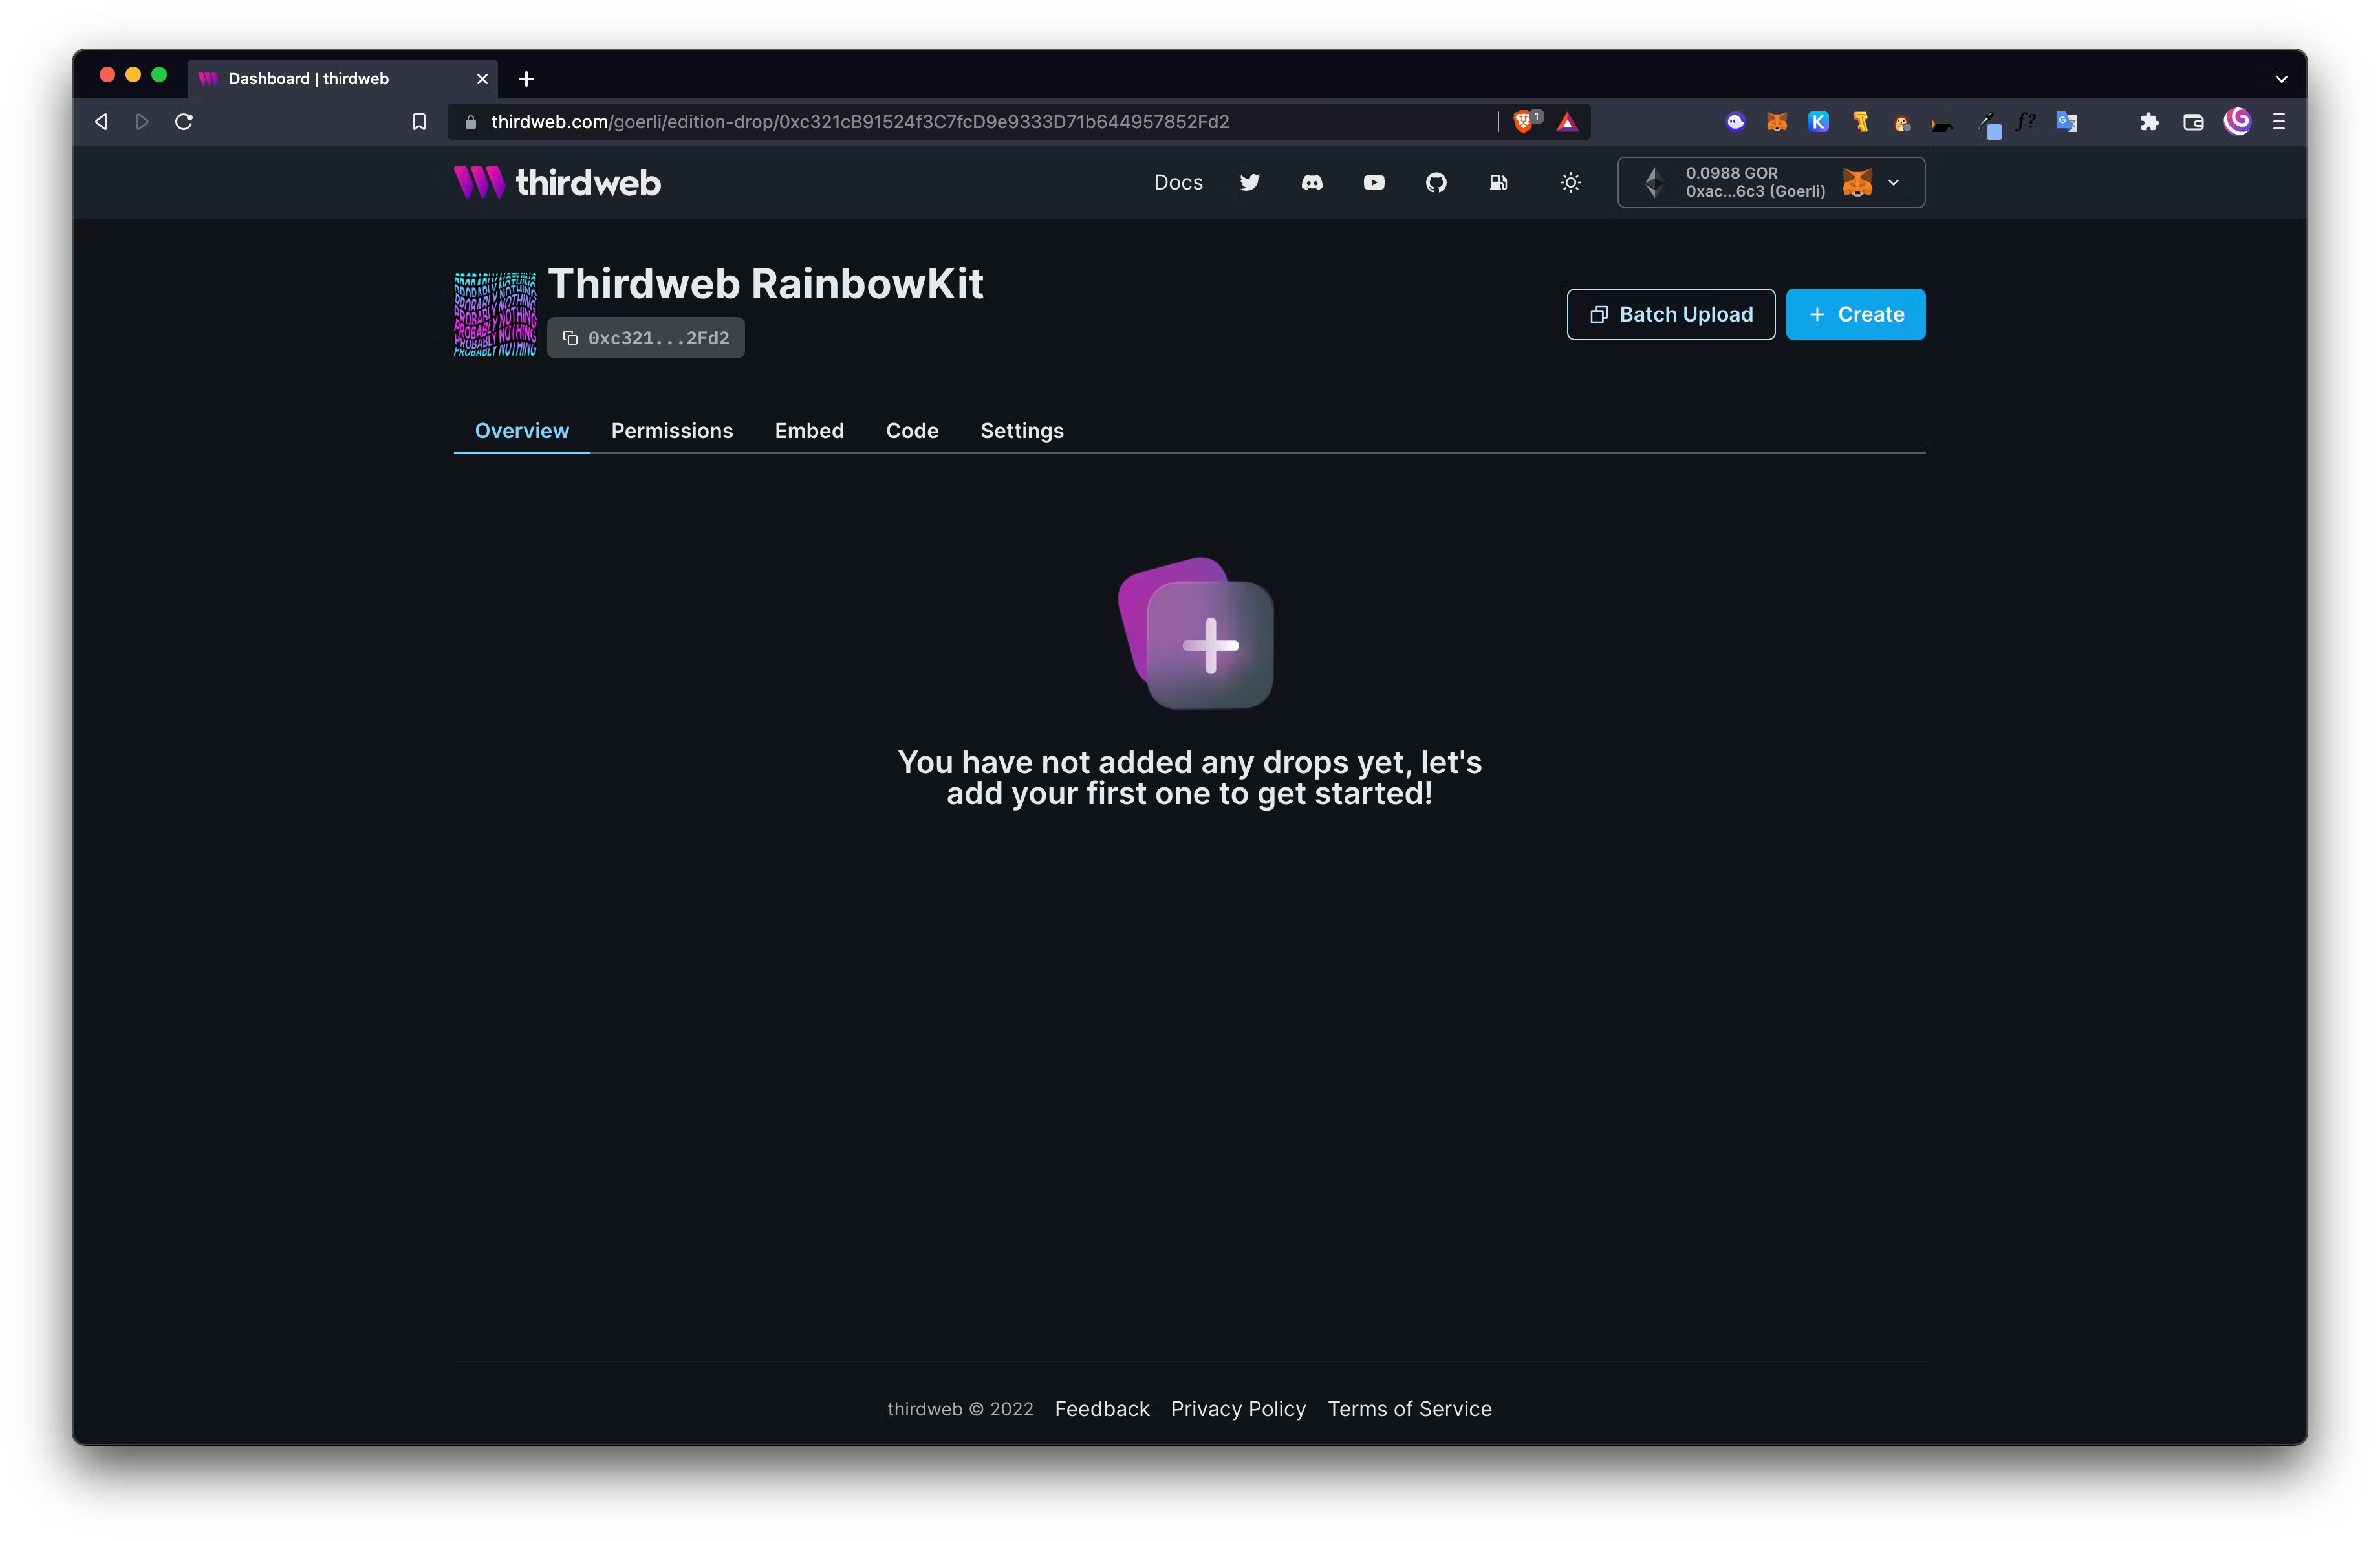
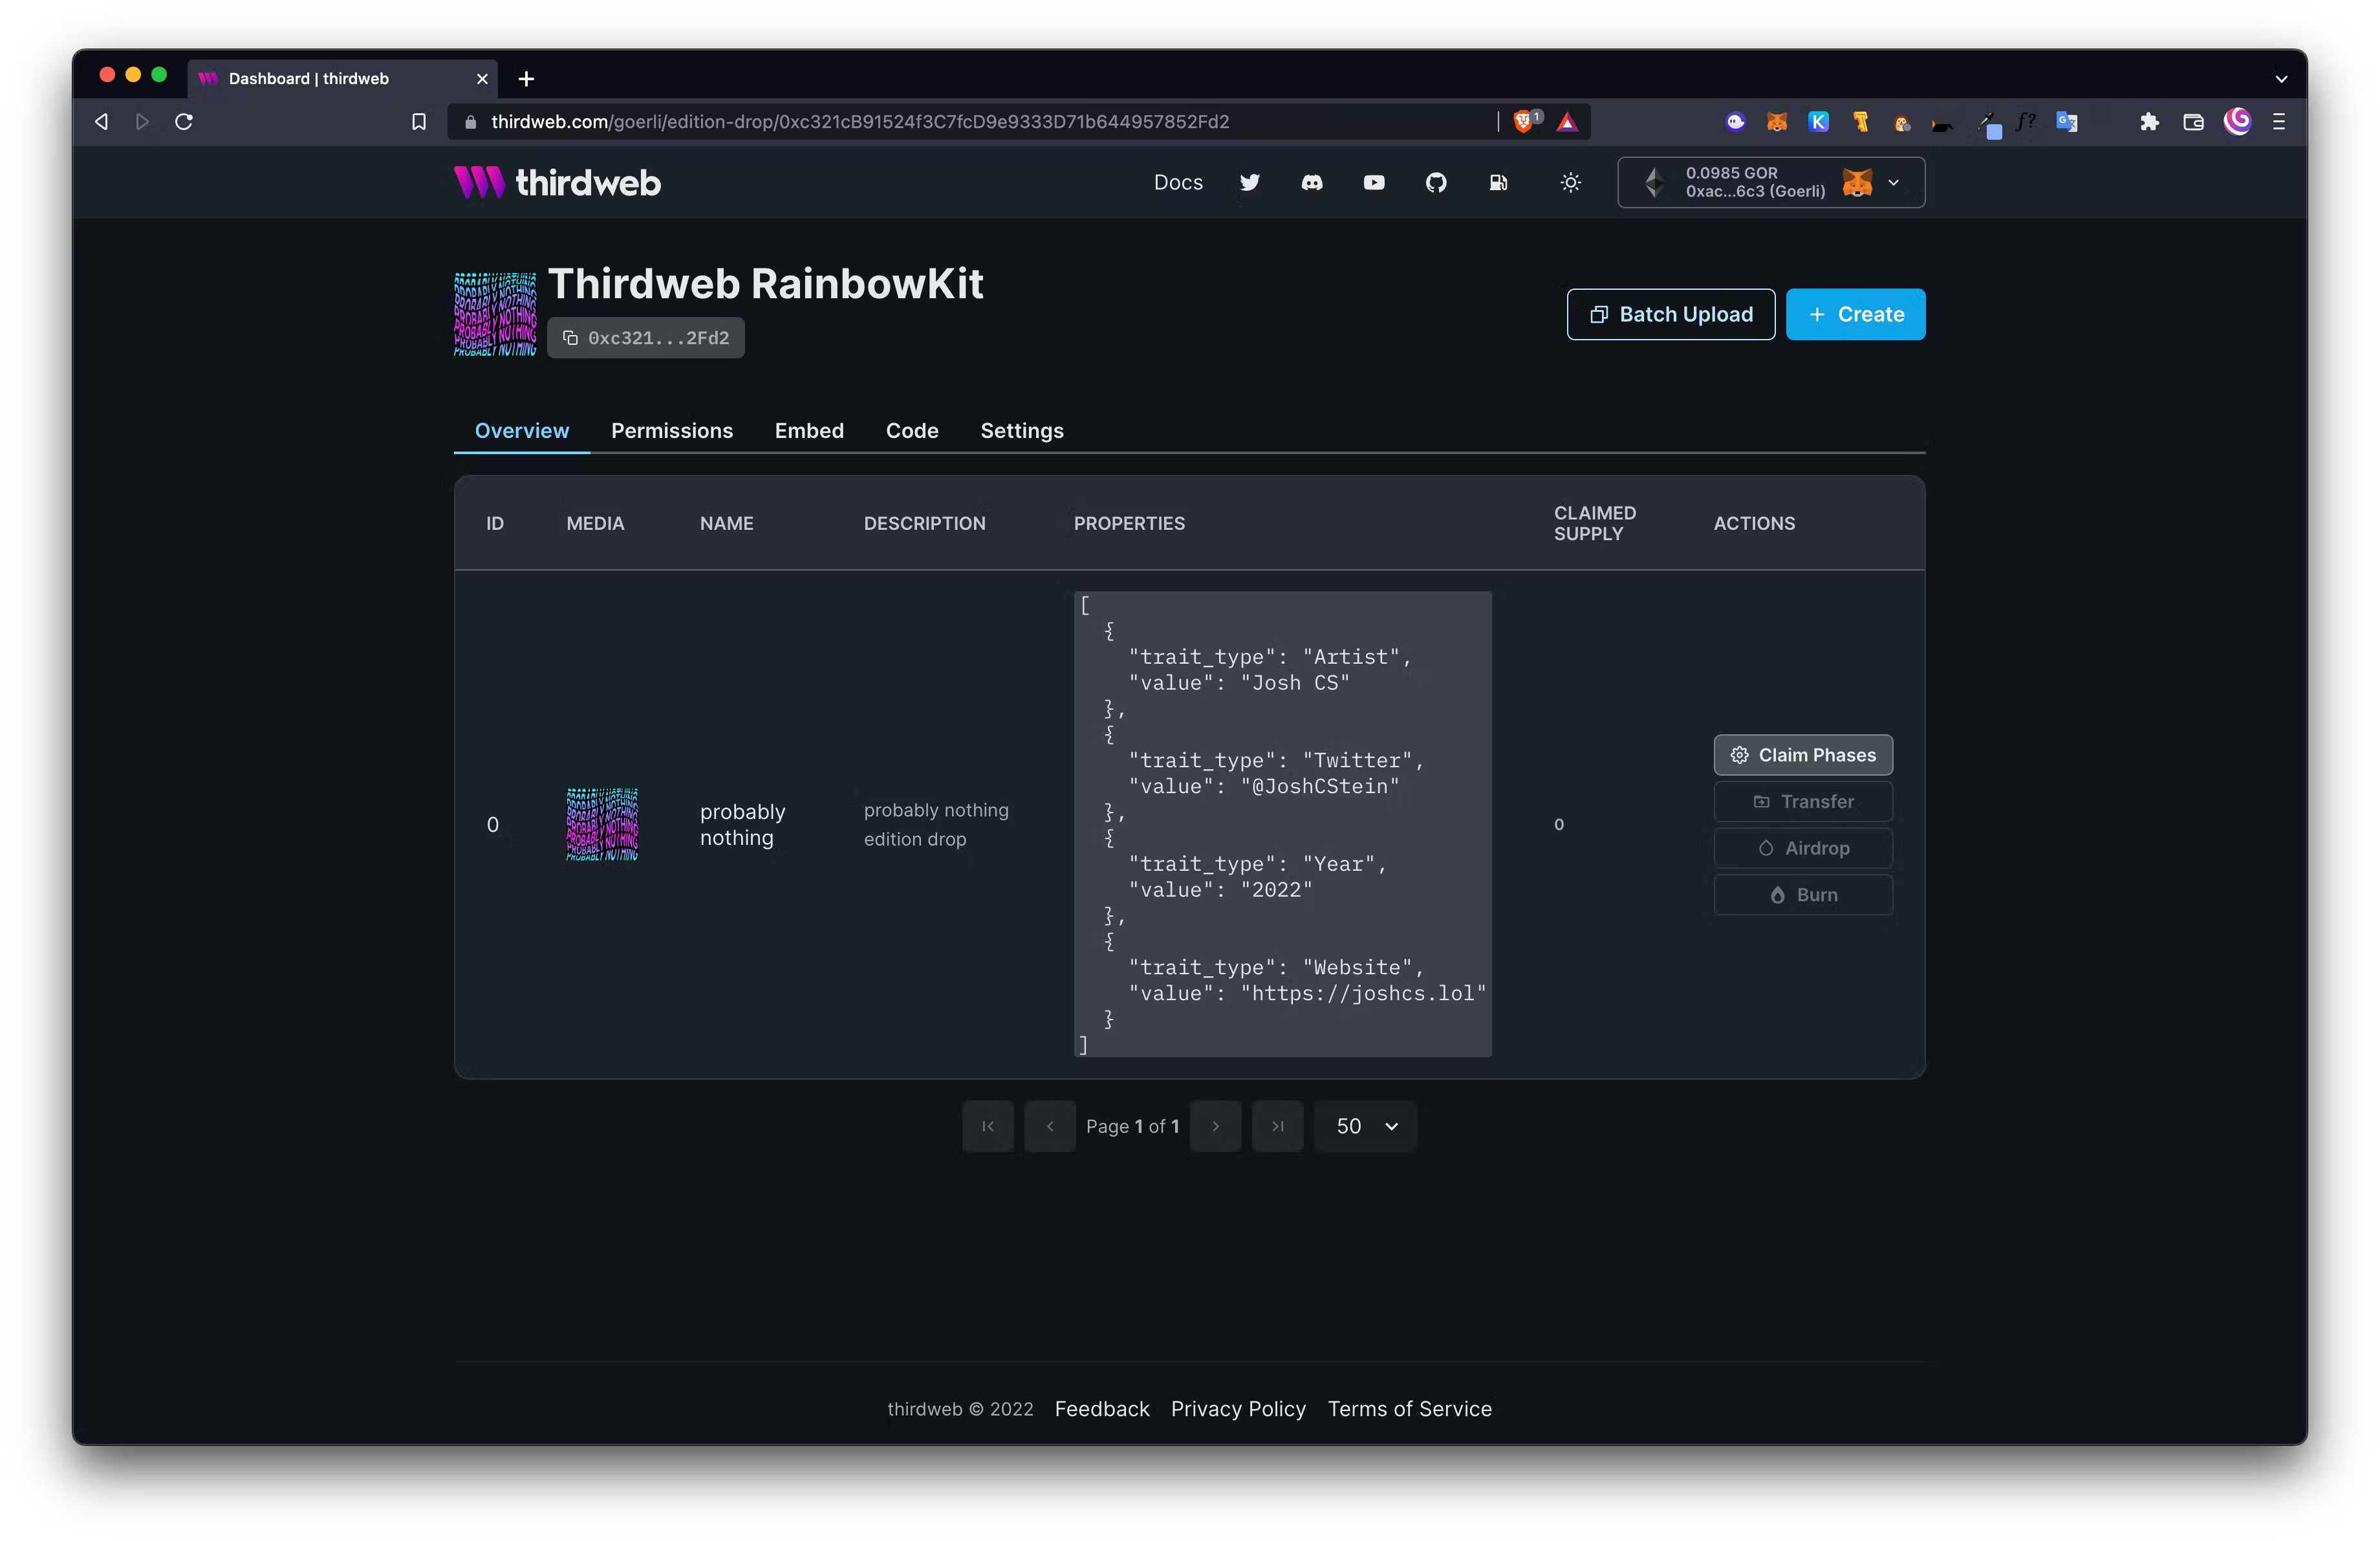
Upload your image for the ERC-1155 NFT, metadata, and click Create Edition Drop. You’ll be prompted to sign a transaction in MetaMask, confirm it. Once the transaction confirms we are ready to set the Claim Phase for this token. Your dashboard should look like this, click ⚙️ Claim Phases then + Add Initial Claim Phase:
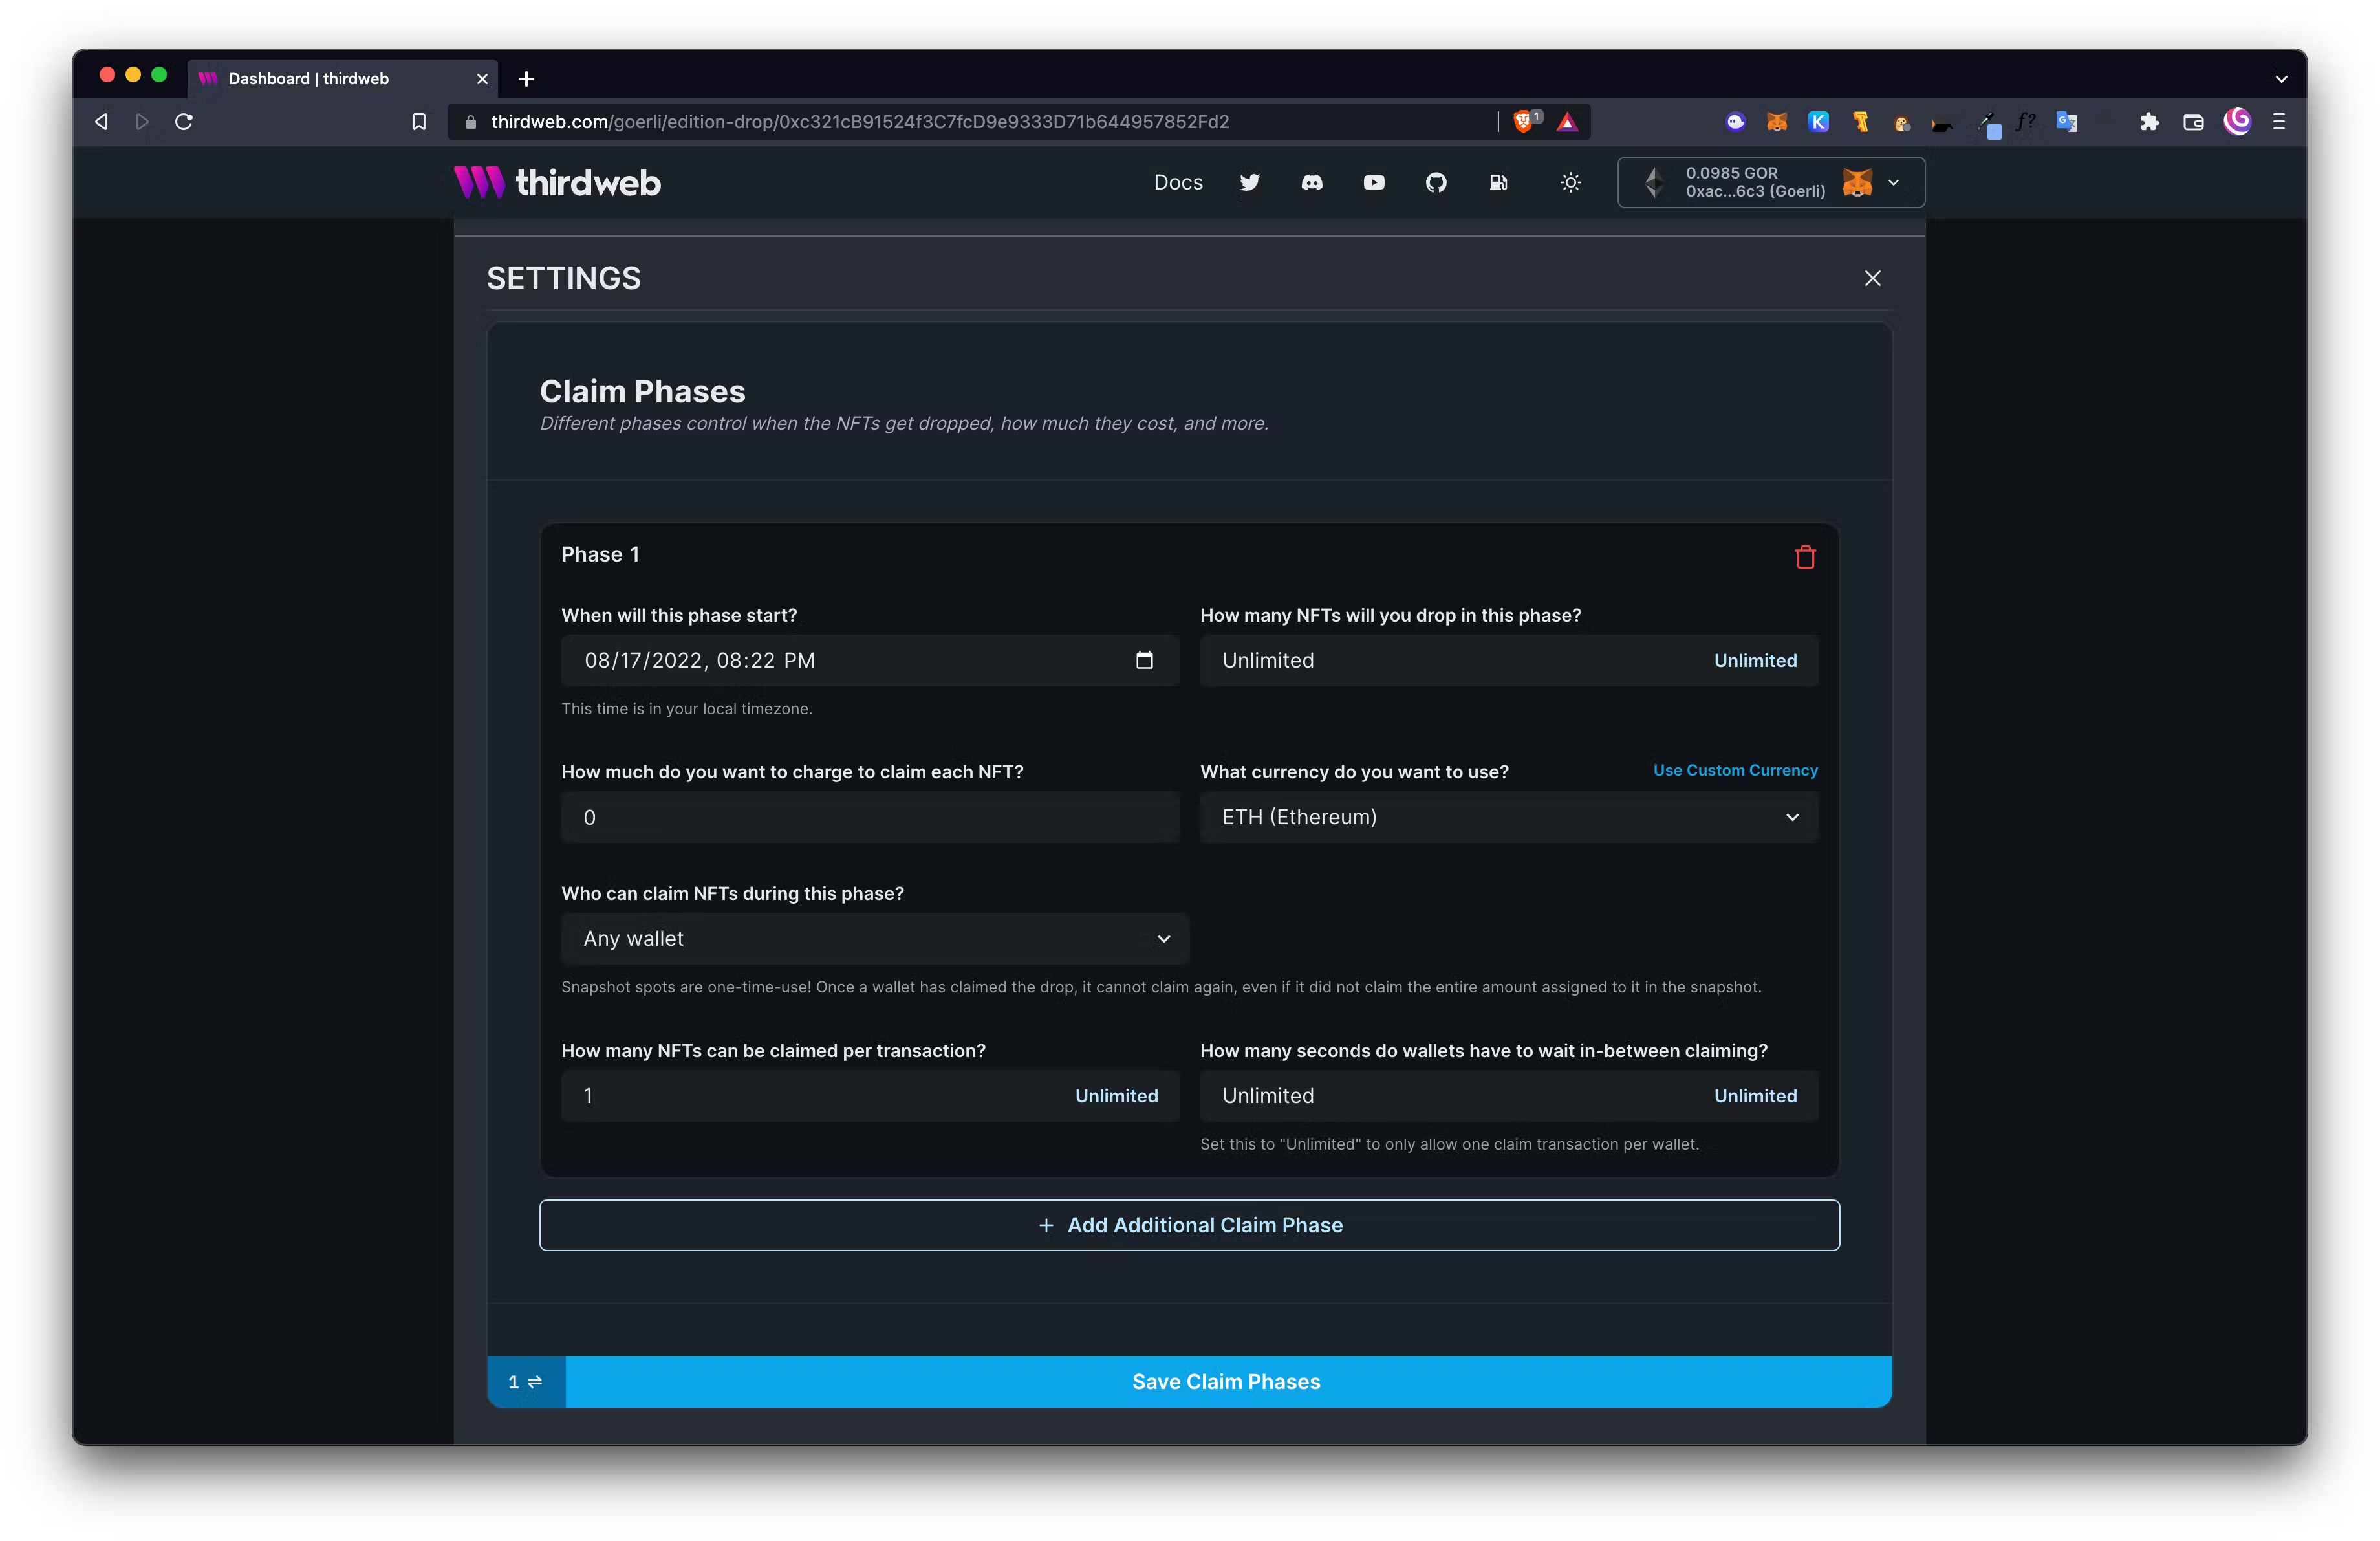
We’ve set 1 NFT per transaction, start date of the current time, unlimited NFTs on the drop, and only 1 NFT per wallet. Click Save Claim Phases and you will be prompted to confirm another transaction. Copy the contract address under the title of your Edition at the top of the page. For us, it is 0xc321cB91524f3C7fcD9e9333D71b644957852Fd2.
Now, we’re ready to head back to our Next.js app to continue building the minting functionality. We will be using the ThirdwebProvider and ThirdwebSDKProvider that we have already imported into our _app.tsx.
We’ll be starting in the index.tsx file. First we will clean up the heading and add padding before our connect wallet button. Add an import for the Chakra UI heading.
// imports
import { Heading } from "@chakra-ui/react";

// constants

return (
...
<main className={styles.main}>
   <Heading size="xl" textAlign="center" pb="3">gm</Heading>
   <ConnectButton />
</main>
Add minting to your dApp
Nice, now it’s time to add some minting functionality from the thirdweb SDK. Add the following imports to allow use of useEditionDrop and useClaimNFT and wagmi:
import { useEditionDrop, useClaimNFT } from "@thirdweb-dev/react";
import { useAccount } from "wagmi";
Now, add constants. Be sure to replace the CONTRACT_ADDRESS with your contract address from thirdweb:
const Home: NextPage = () => {
  // new constants
  const { address } = useAccount();
  const editionDrop = useEditionDrop(
    "CONTRACT_ADDRESS"
  );
  const { mutate: claimNft, isLoading, error } = useClaimNFT(editionDrop);
  if (error) {
    console.error("failed to claim nft", error);
  }
  // your frontend
  return (
Add Button and **Image**to your import with Chakra UI at the top of index.tsx:
import { Heading, Button, Image } from "@chakra-ui/react";
The next step will add logic to detect a connected wallet from RainbowKit and render the UI accordingly using a ternary statement. You’ll need to add an image in place of probablynothing.png and also add your <CONTRACT_ADDRESS> and <TOKEN_ID> for the OpenSea URL. Add and modify this code underneath of your <ConnectButton />:
{address ? (
  <>
    <Image
      src="./probablynothing.png"
      rounded="2xl"
      width="42%"
      maxW="300px"
      mt="5"
      mb="3"
      alt="probably nothing"
    />
    {isLoading ? (
      <Button
        colorScheme="purple"
        disabled={isLoading}
        isLoading
        loadingText="minting..."
        spinnerPlacement="start"
        _hover={{ transform: "scale(1.1)" }}
        size="lg"
        my="3"
      />
    ) : (
      <Button
        colorScheme="purple"
        disabled={isLoading}
        onClick={() =>
          claimNft({ to: address as any, tokenId: <TOKEN_ID>, quantity: 1 })
        }
        _hover={{ transform: "scale(1.1)" }}
        size="lg"
        my="3"
      >
        claim probably nothing!
      </Button>
    )}
    <Button
      colorScheme="blue"
      rightIcon={<GiSailboat />}
      onClick={() =>
        window.open(
          "<https://testnets.opensea.io/assets/goerli/><CONTRACT_ADDRESS>/<TOKEN_ID>",
          "_blank"
        )
      }
    >
      view on opensea
    </Button>
  </>
) : null}
Between your <Heading> … </Heading> and <ConnectButton />, add this code to conditionally render the image of the NFT to be minted if a wallet is not connected, and hide it if there is a connection:
{!address ? (
  <Image
    src="./probablynothing.png"
    rounded="full"
    width="42%"
    mt="5"
    maxW="300px"
    alt="probably nothing"
  />
) : null}
<br />
index.tsx review
Your index.tsx should now look very similar like this:
import type { NextPage } from "next";
import Head from "next/head";
import styles from "../styles/Home.module.css";
import { ConnectButton } from "@rainbow-me/rainbowkit";
import { Heading, Button, Image } from "@chakra-ui/react";
import { useEditionDrop, useClaimNFT } from "@thirdweb-dev/react";
import { useAccount } from "wagmi";

const Home: NextPage = () => {
  const { address } = useAccount();
  const editionDrop = useEditionDrop(
    "0xc321cB91524f3C7fcD9e9333D71b644957852Fd2"
  );
  const { mutate: claimNft, isLoading, error } = useClaimNFT(editionDrop);
  if (error) {
    console.error("failed to claim nft", error);
  }
  return (
    <div className={styles.container}>
      <Head>
        <title>thirdweb + RainbowKit + Ankr Edition Drop</title>
        <meta name="description" content="Generated by create next app" />
        <link rel="icon" href="/favicon.ico" />
      </Head>

      <main className={styles.main}>
        <Heading size="xl" textAlign="center" pb="3">
          gm
        </Heading>
        {!address ? (
          <Image
            src="./probablynothing.png"
            rounded="full"
            width="42%"
            mt="5"
            maxW="300px"
            alt="probably nothing"
          />
        ) : null}
        <br />
        <ConnectButton />
        {address ? (
          <>
            <Image
              src="./probablynothing.png"
              rounded="2xl"
              width="42%"
              maxW="300px"
              mt="5"
              mb="3"
              alt="probably nothing"
            />
            {/* <Text>0 out of ∞ Minted</Text> */}
            {isLoading ? (
              <Button
                colorScheme="purple"
                disabled={isLoading}
                isLoading
                loadingText="minting..."
                spinnerPlacement="start"
                _hover={{ transform: "scale(1.1)" }}
                size="lg"
                my="3"
              />
            ) : (
              <Button
                colorScheme="purple"
                disabled={isLoading}
                onClick={() =>
                  claimNft({ to: address as any, tokenId: 0, quantity: 1 })
                }
                _hover={{ transform: "scale(1.1)" }}
                size="lg"
                my="3"
              >
                claim probably nothing!
              </Button>
            )}
            <Button
              colorScheme="blue"
              onClick={() =>
                window.open(
                  "<https://testnets.opensea.io/assets/goerli/0xc321cB91524f3C7fcD9e9333D71b644957852Fd2/0>",
                  "_blank"
                )
              }
            >
              view on opensea
            </Button>
          </>
        ) : null}
      </main>
      <footer className={styles.footer}>
        <a
          href="<https://vercel.com?utm_source=create-next-app&utm_medium=default-template&utm_campaign=create-next-app>"
          target="_blank"
          rel="noopener noreferrer"
        >
          Powered by Vercel
        </a>
      </footer>
    </div>
  );
};

export default Home;
Beautiful!
Here, you can go and test out the mint functionality and play around the code to add more functionalities.
Subscribe to my newsletter
Read articles from joshcs.eth ᵍᵐ directly inside your inbox. Subscribe to the newsletter, and don't miss out.
Written by
