How To Deploy A Django Application on Python Anywhere
 ANTHONY UDEAGBALA

I developed a chest burn when I got the email that Heroku was ending their free tier plan. If you have used Heroku you would understand its ease of deployment.
I found python anywhere a reliable deployment platform with a free tier plan still existing.
Having bled my fingers trying to deploy a Django application to python anywhere, in this article, I will talk about how to deploy a Django application on the platform.
Sign Up
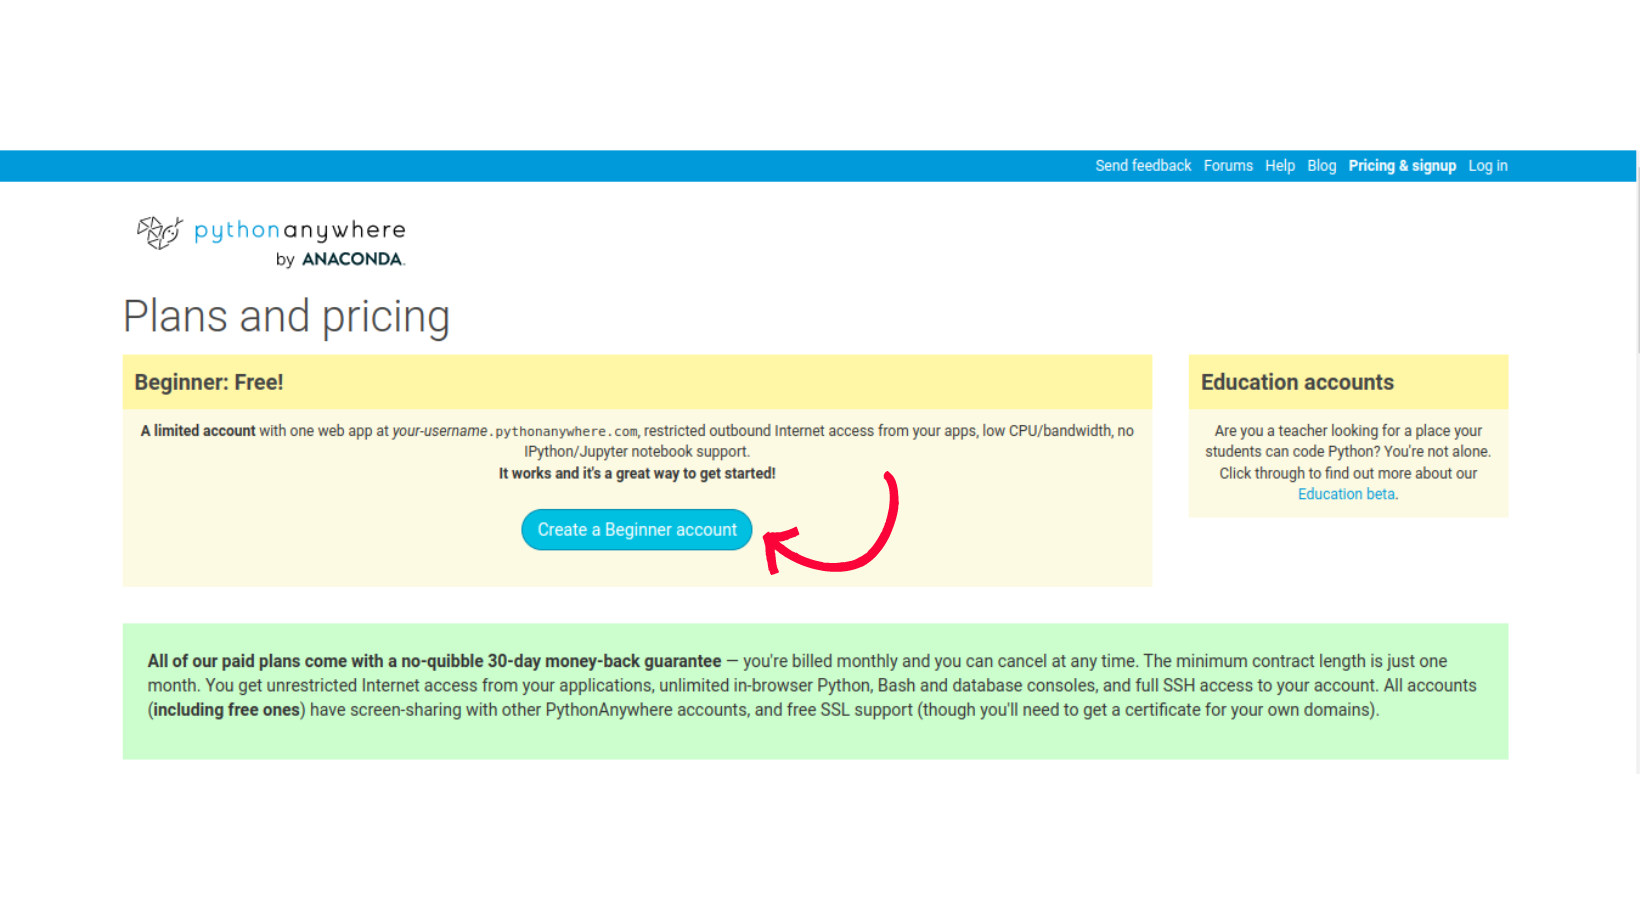
The first step is to create an account or log in if you already have an account. Visit the home page here. At the top right of the page click on "Pricing & signup" to get to the signup page.

On the "pricing & signup" page, click "Create a beginner account". This option enables you to create a free account on python anywhere.
Login
After you register check your mail and verify your account before you log in.
The user interface can be a lot on the first experience but ignore the busy layout and concentrate your eyes on the top right corner of the page/dashboard. Here you will see the second navigation bar of python anywhere; which has: Dashboard (the current page on logging in), Console, Files, Web, Tasks, and Database.
We have successfully created an account on python anywhere and what should come next is getting our Django application onto the platform. For ease of understanding, I am going to make use of an existing Django application on my GitHub account.
Consoles
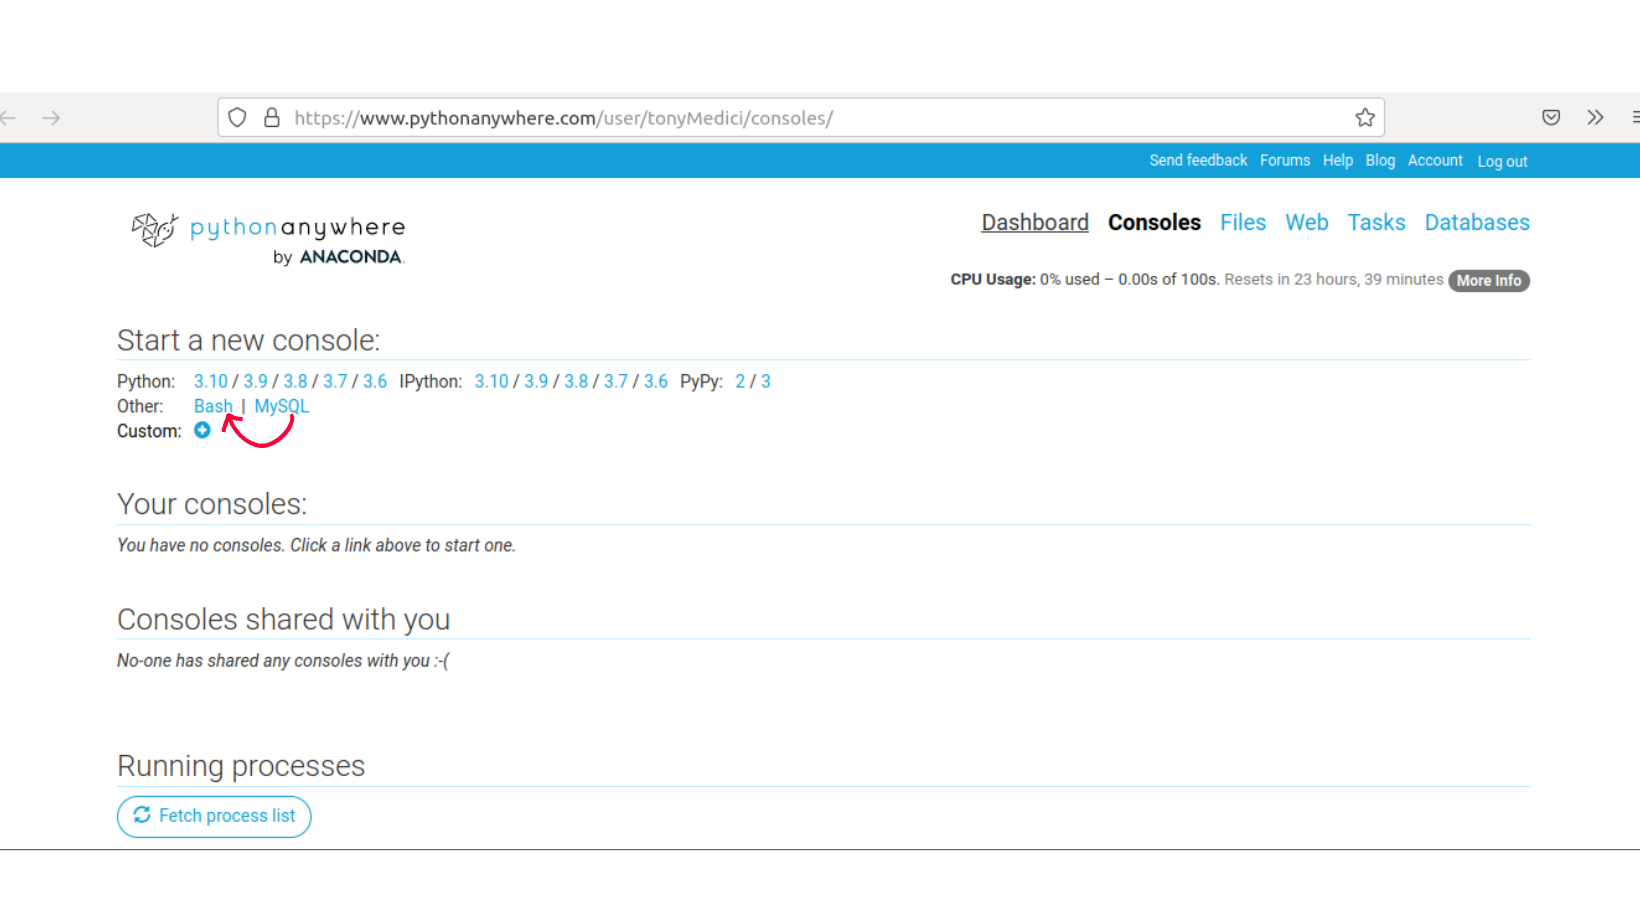
Open the "Consoles" nav link on a new tab. This is where we will import or clone an existing Django application.

Click on "bash" to open a terminal.
I built a simple Django application for this purpose you can find it here. This is the GitHub repository I will clone in my console.
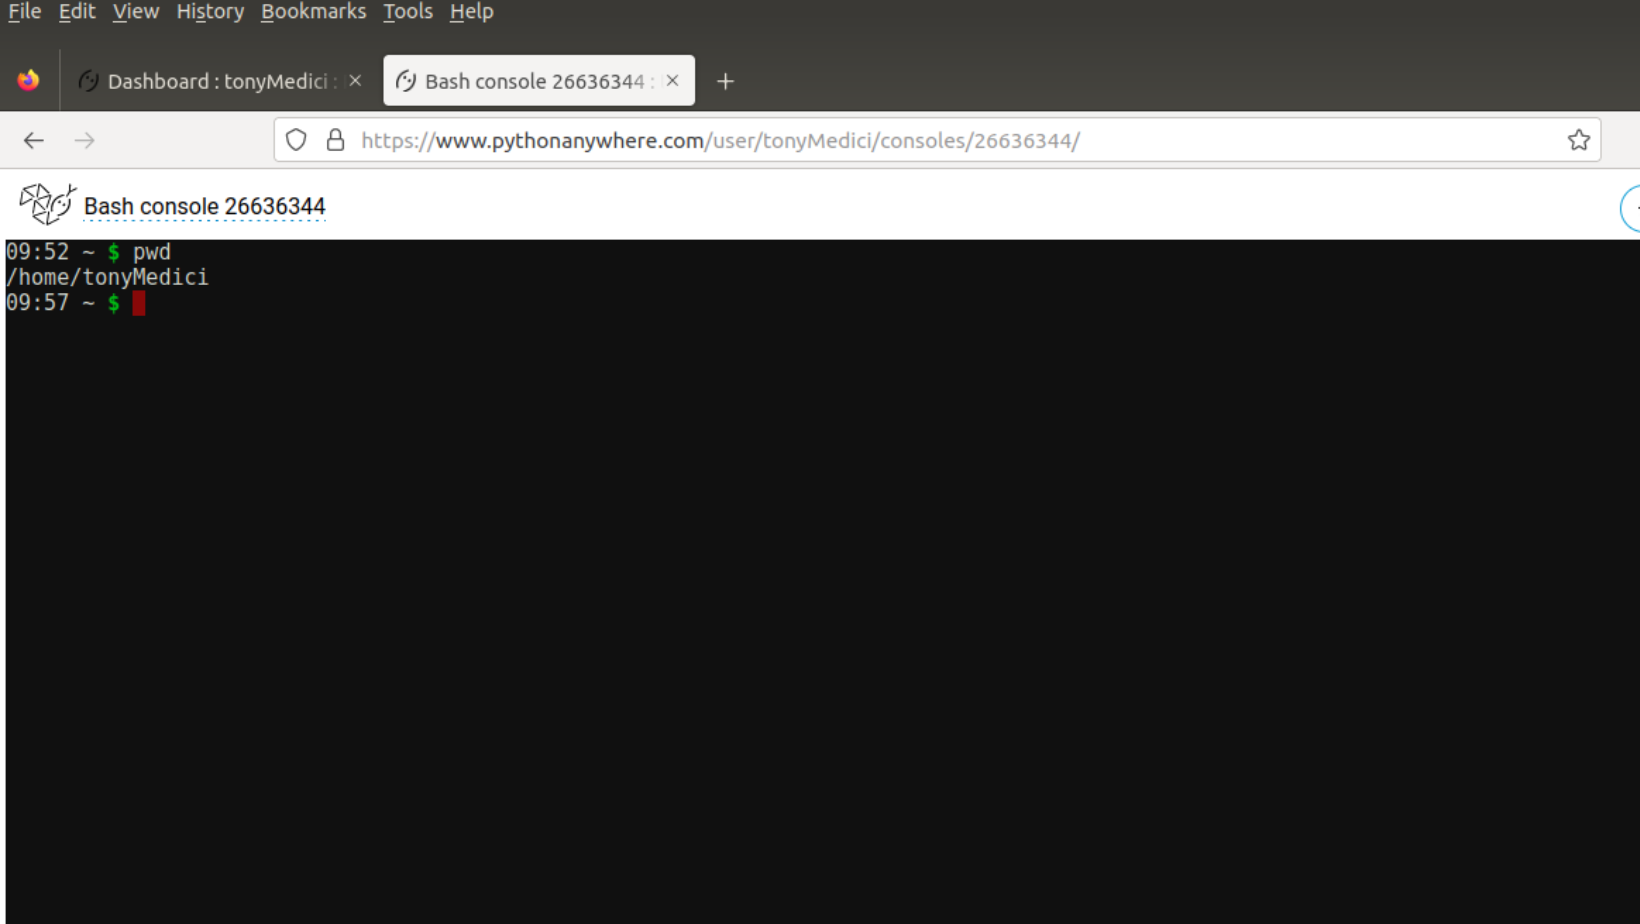
Before we clone our repository into our console we need to verify our current working directory. This serves as our home or root folder for anything we would do on pythonanywhere.
To verify your current directory on the console type:
pwd
The output will be a combination of home and your username on python anywhere as shown in the screenshot below.
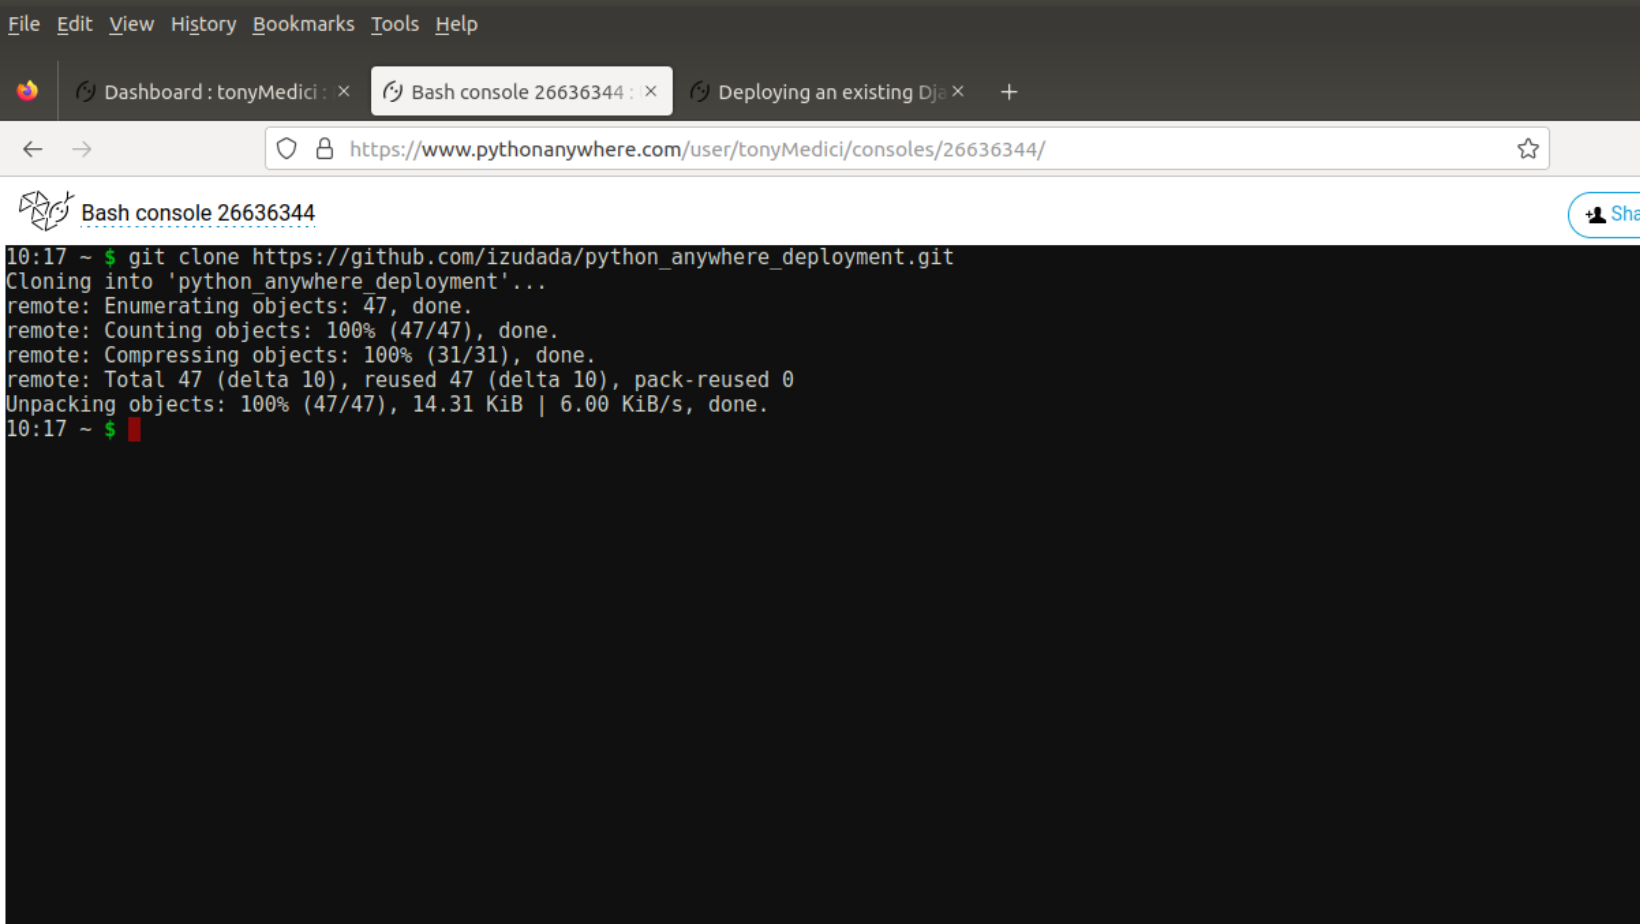
We will clone our repository into our bash console with:
git clone https://github.com/izudada/python_anywhere_deployment.git
To verify if we successfully cloned the GitHub repository let's list all the files and directories under our current working directory. using the command:
ls
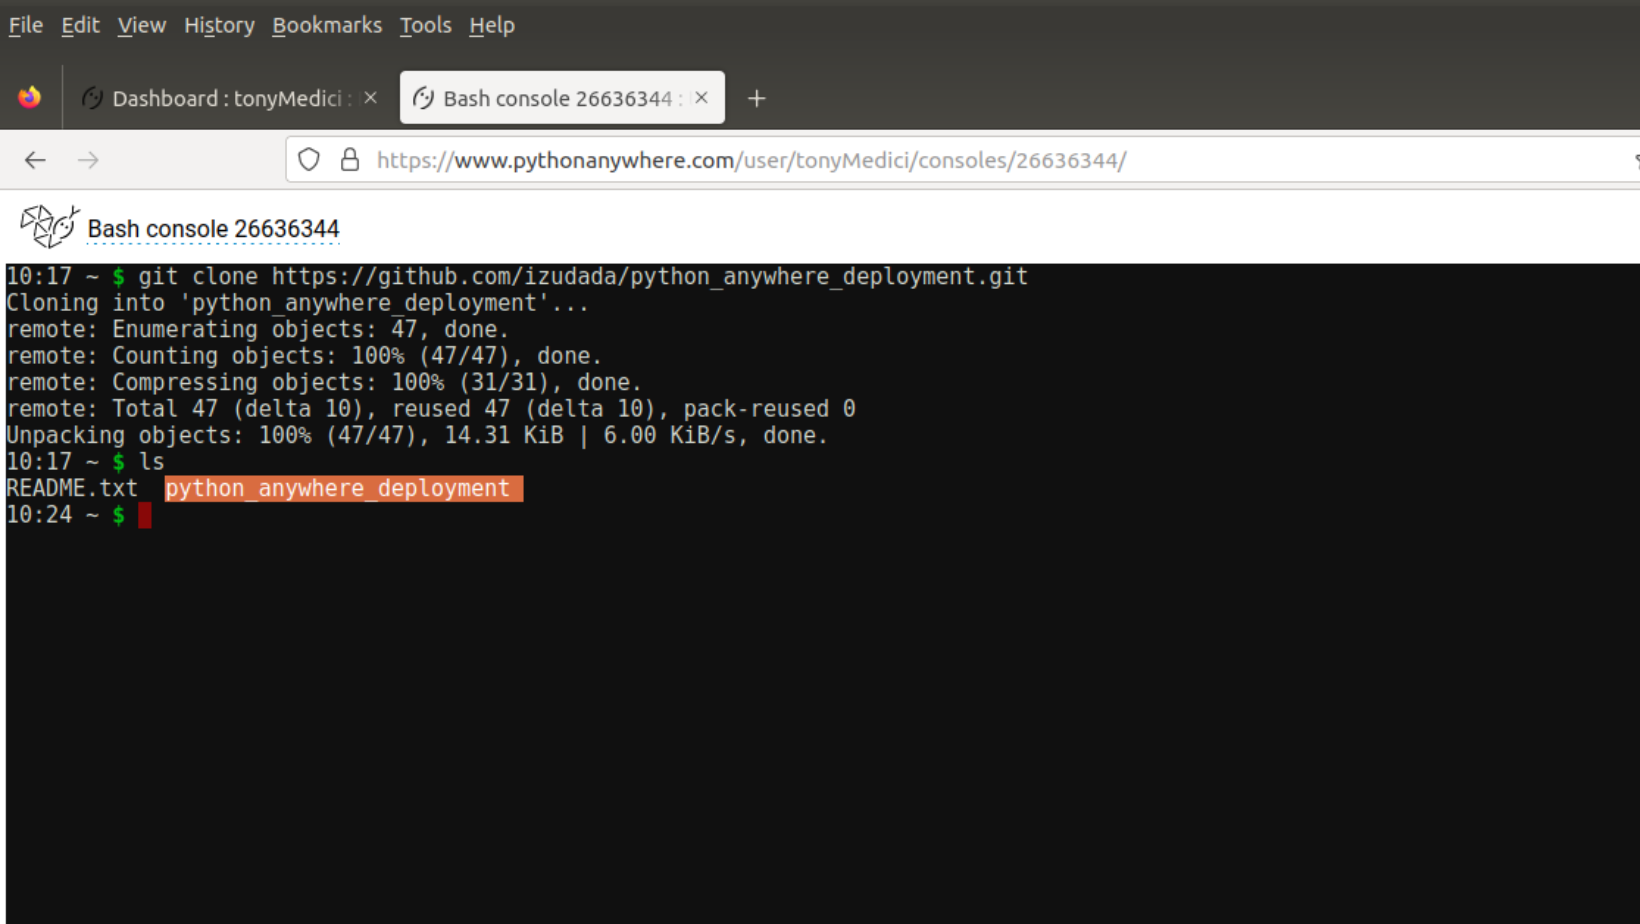
I have two files inside this directory; the highlighted file is my cloned Django project.
Virtual Environment
Before installing the requirements for this project it is advisable to create a virtual environment as we would do locally, using the command:
mkvirtualenv --python=/usr/bin/python3.10 my_env
To make your virtual environment compatible with the python version used locally in building your Django project replace "python3.10" in the above command with the said python version.
"my_env" serves as the name of my virtual environment which can be anything you choose. This will create a virtual environment and also activate it.
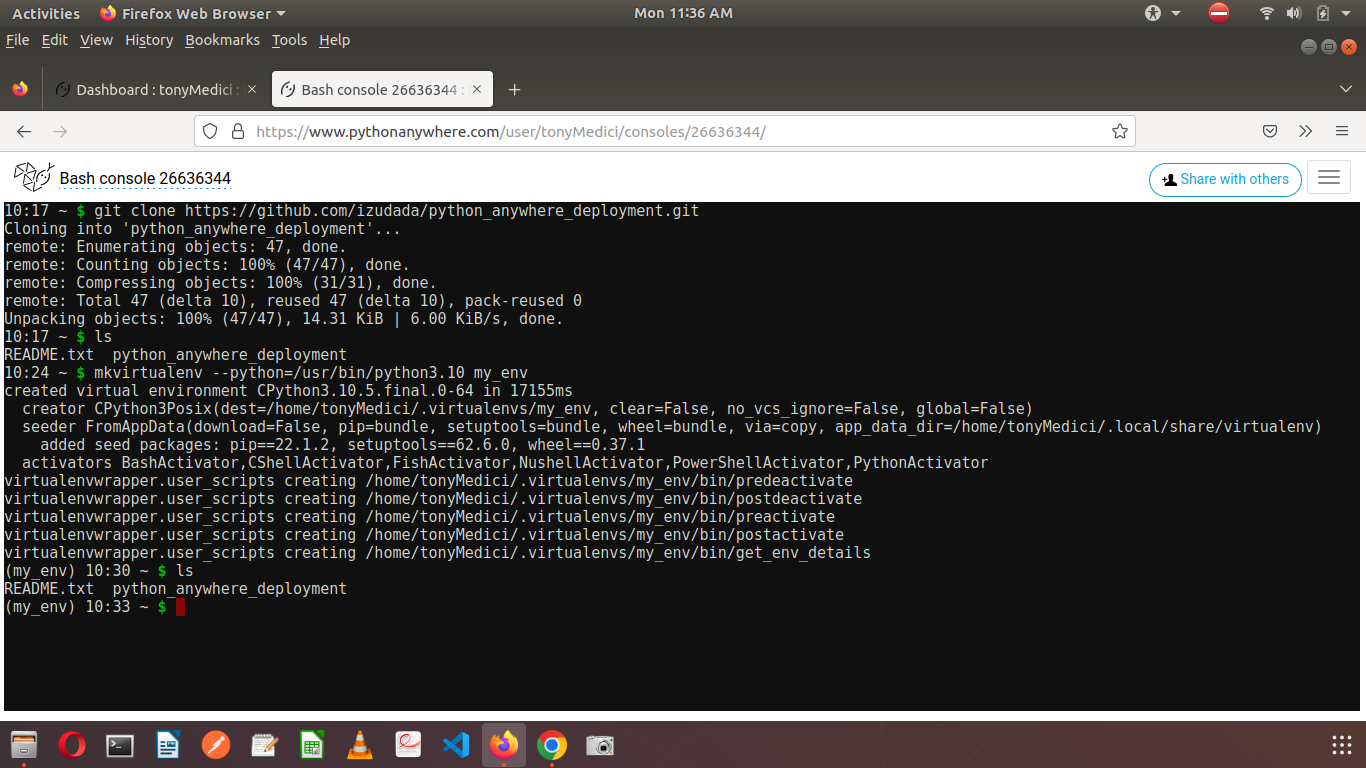
Listing files under this working directory will not display our virtual environment as shown in the above figure.
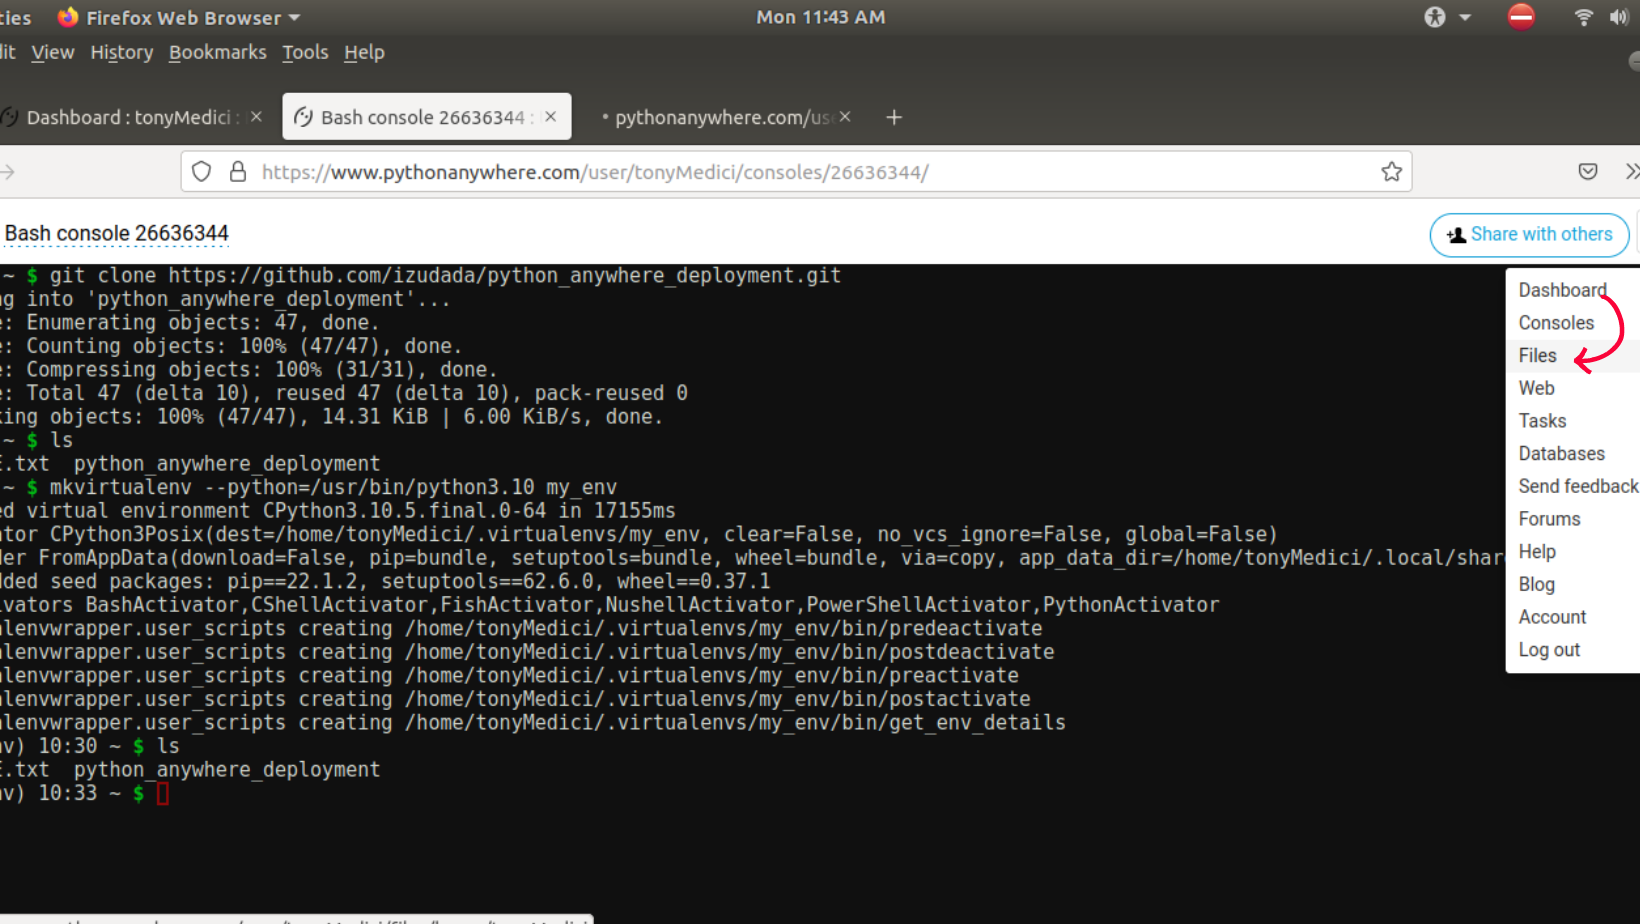
To see your virtual environments click on the hamburger button and open files on a new tab.
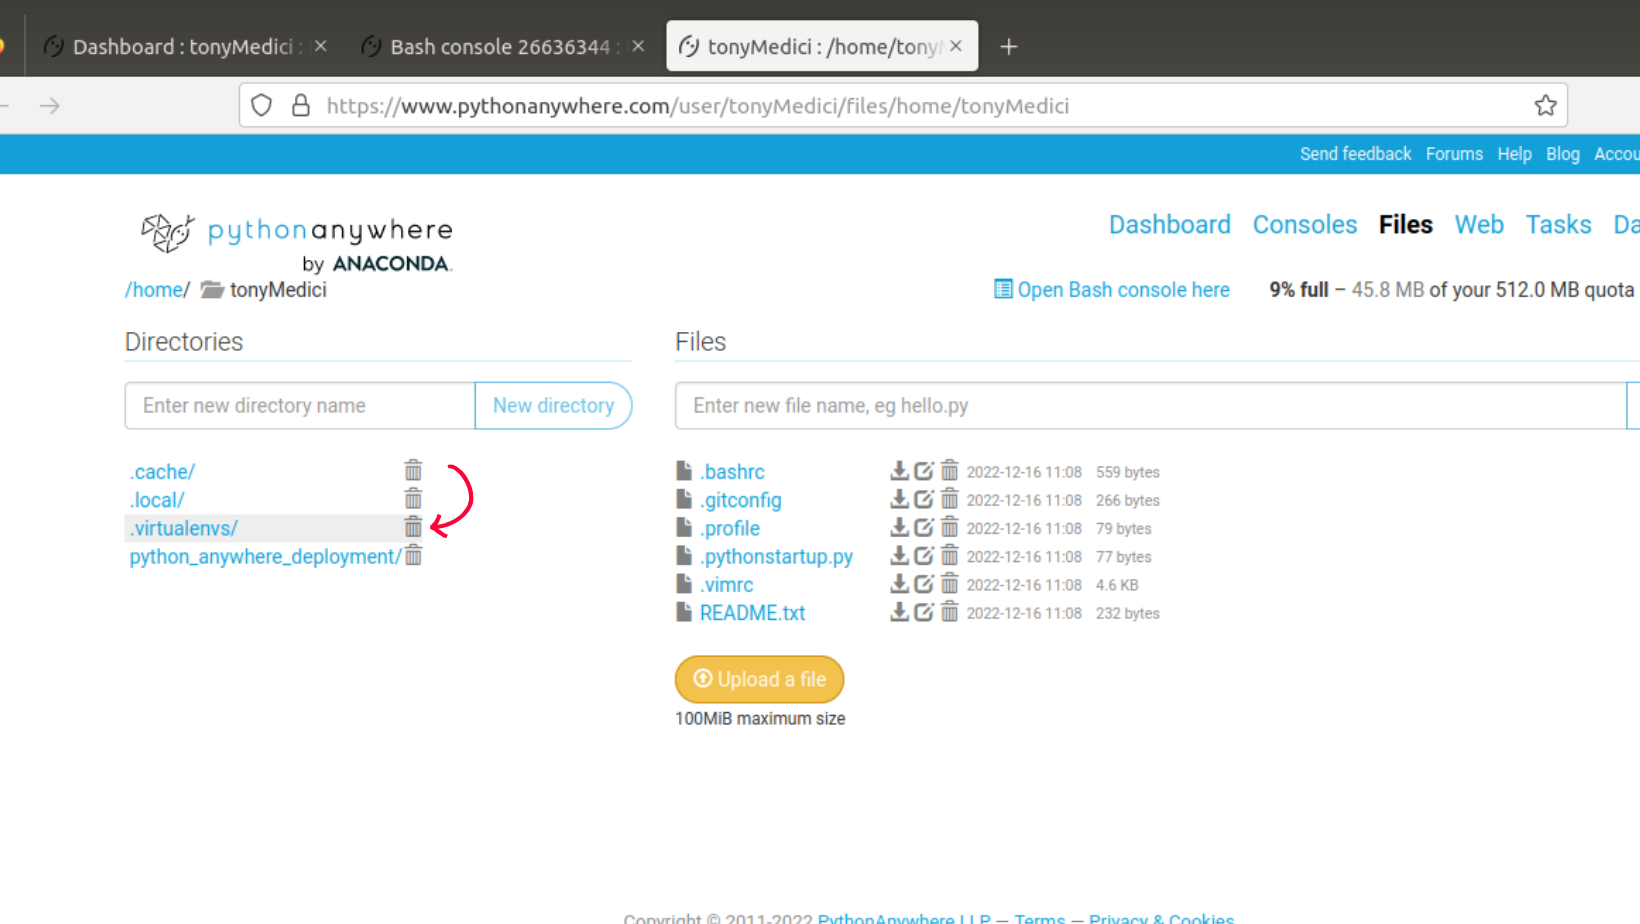
Here we will see the ".virtualenvs/" as a hidden folder that houses all our virtual environments.
Requirements
We have our virtual environment active so we can navigate into our project and install the contents in the requirements.txt file.
First, we go into the project folder:
cd python_anywhere_deployment/
"python_anywhere_deployment" is the name of my Django project which I previously cloned.
I have an existing "requirements.txt" file in my Django project. This will make installation or dependencies pretty easy.
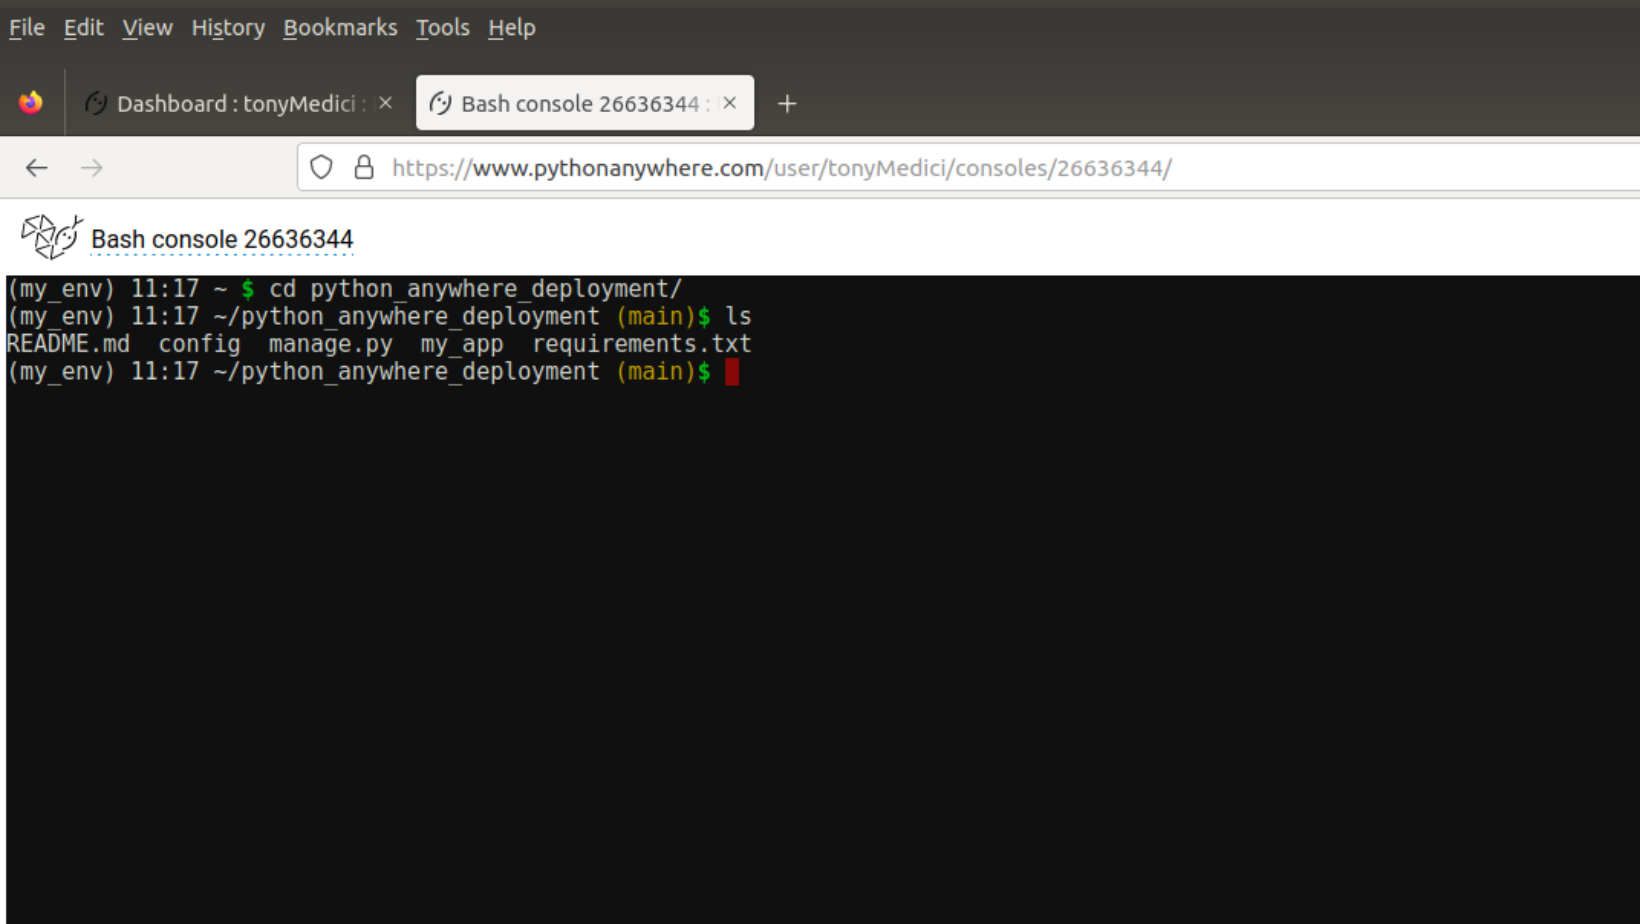
Next, install all dependencies using:
pip install -r requirements.txt
The installations might take some minutes to complete. You can go for a wall or take a glass of water to recharge.
If your installations were completed without any errors then you are good to go.
Web App and WSGI
We are going to connect our Django application to a WSGI file. Before we do this, we need to take note of 3 items:
Name of your virtual environment (mine being my_env)
Path to your Django project's top folder, where the manage.py file is located (mine being home/tonyMedici*/*python_anywhere_deployment)
The name of your project which contains your settings.py file (mine being config*)*
The next step is to create an application in which we will link its WSGI file to our Django application.
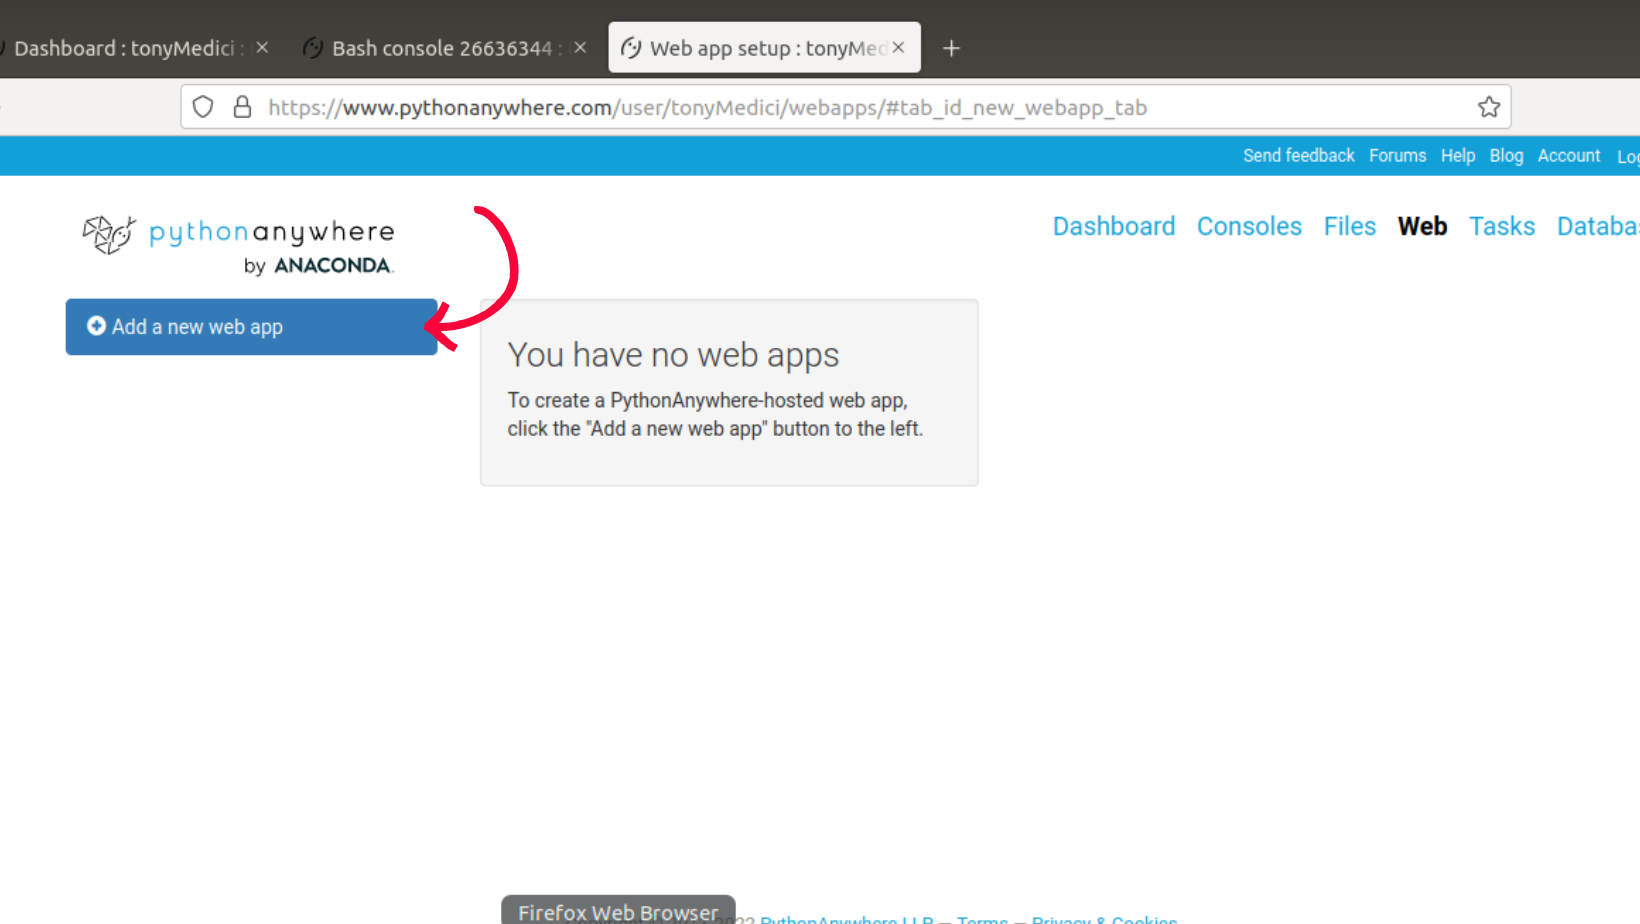
You can open or navigate to the "Web" page from anywhere on the platform, and click on the "Add a new web app" button at the top left corner of the "Web" page.
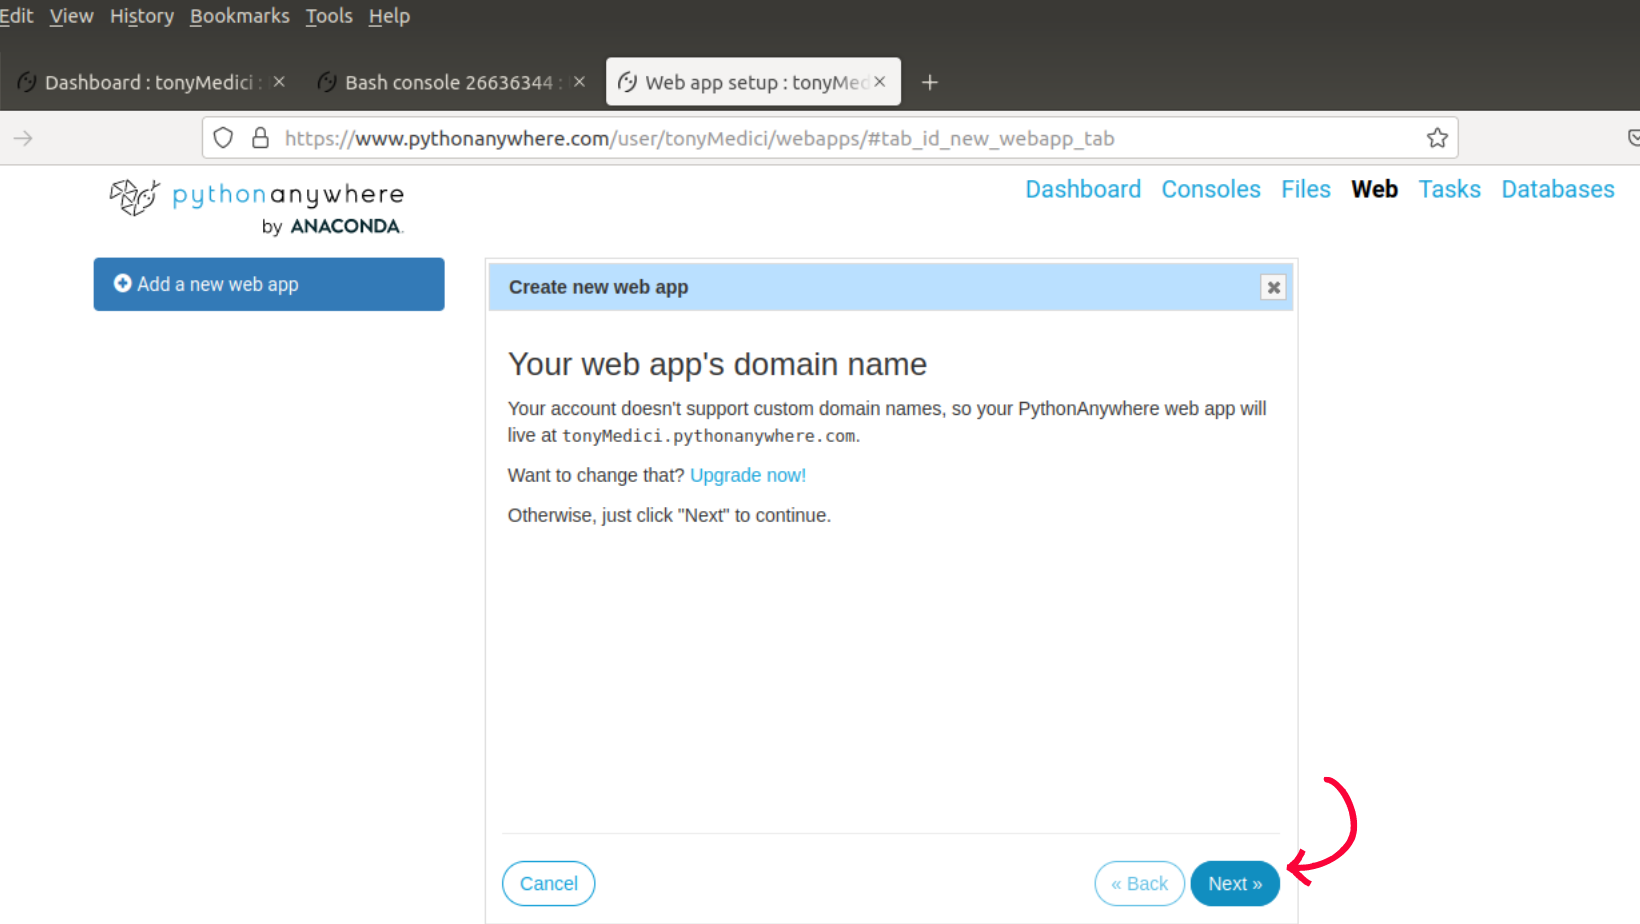
Disregard the upgrade notification and click on the "Next" button.
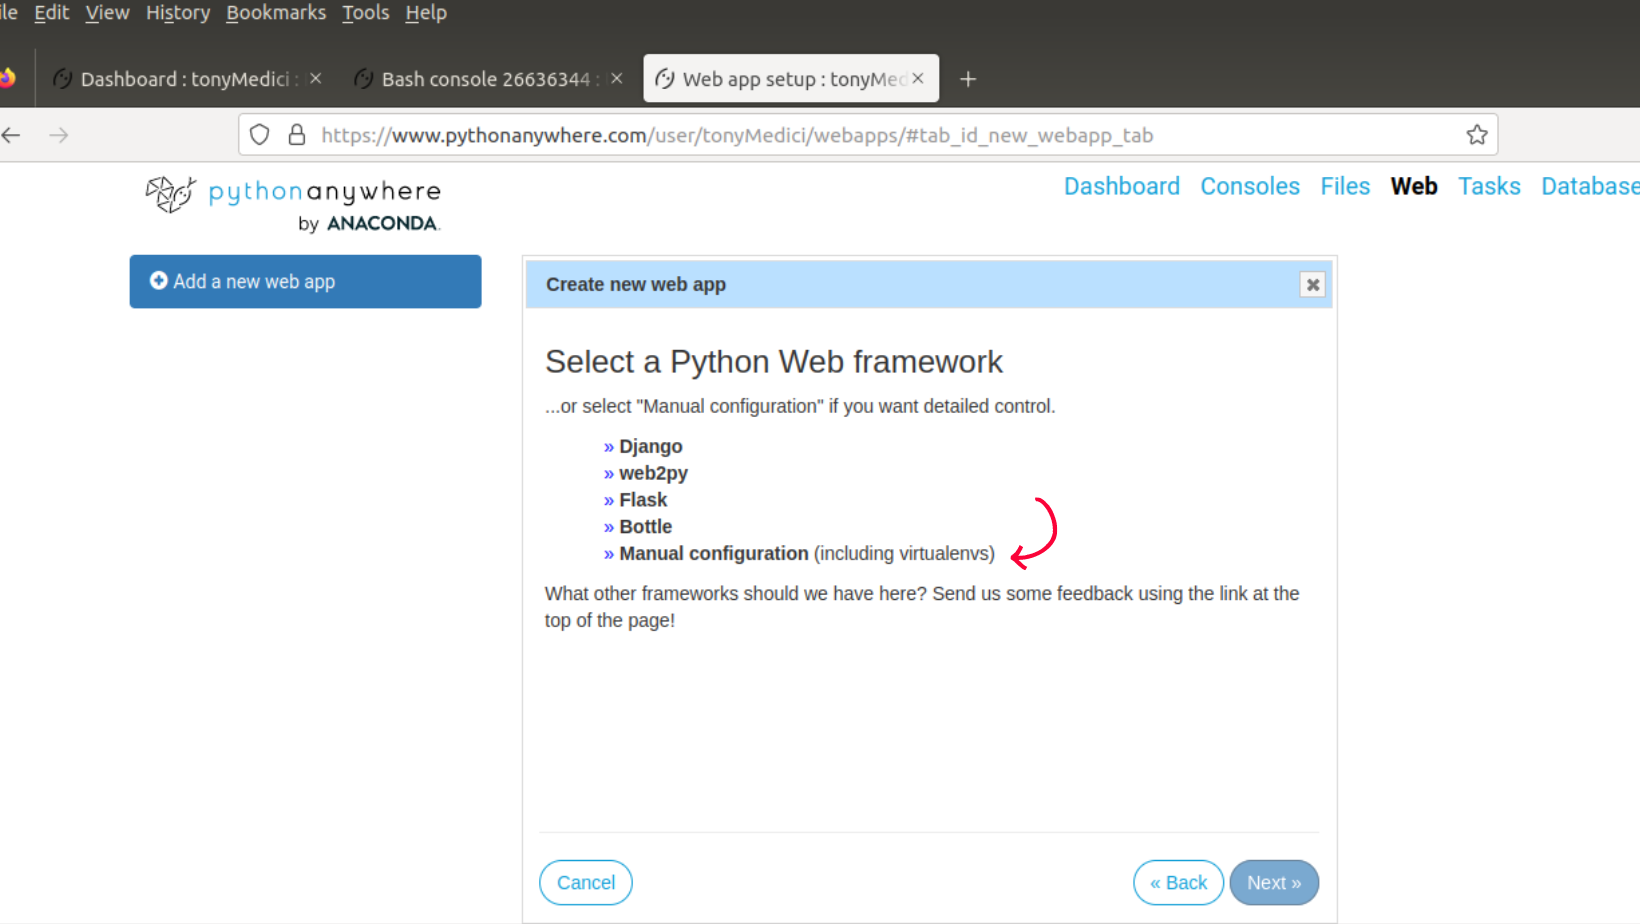
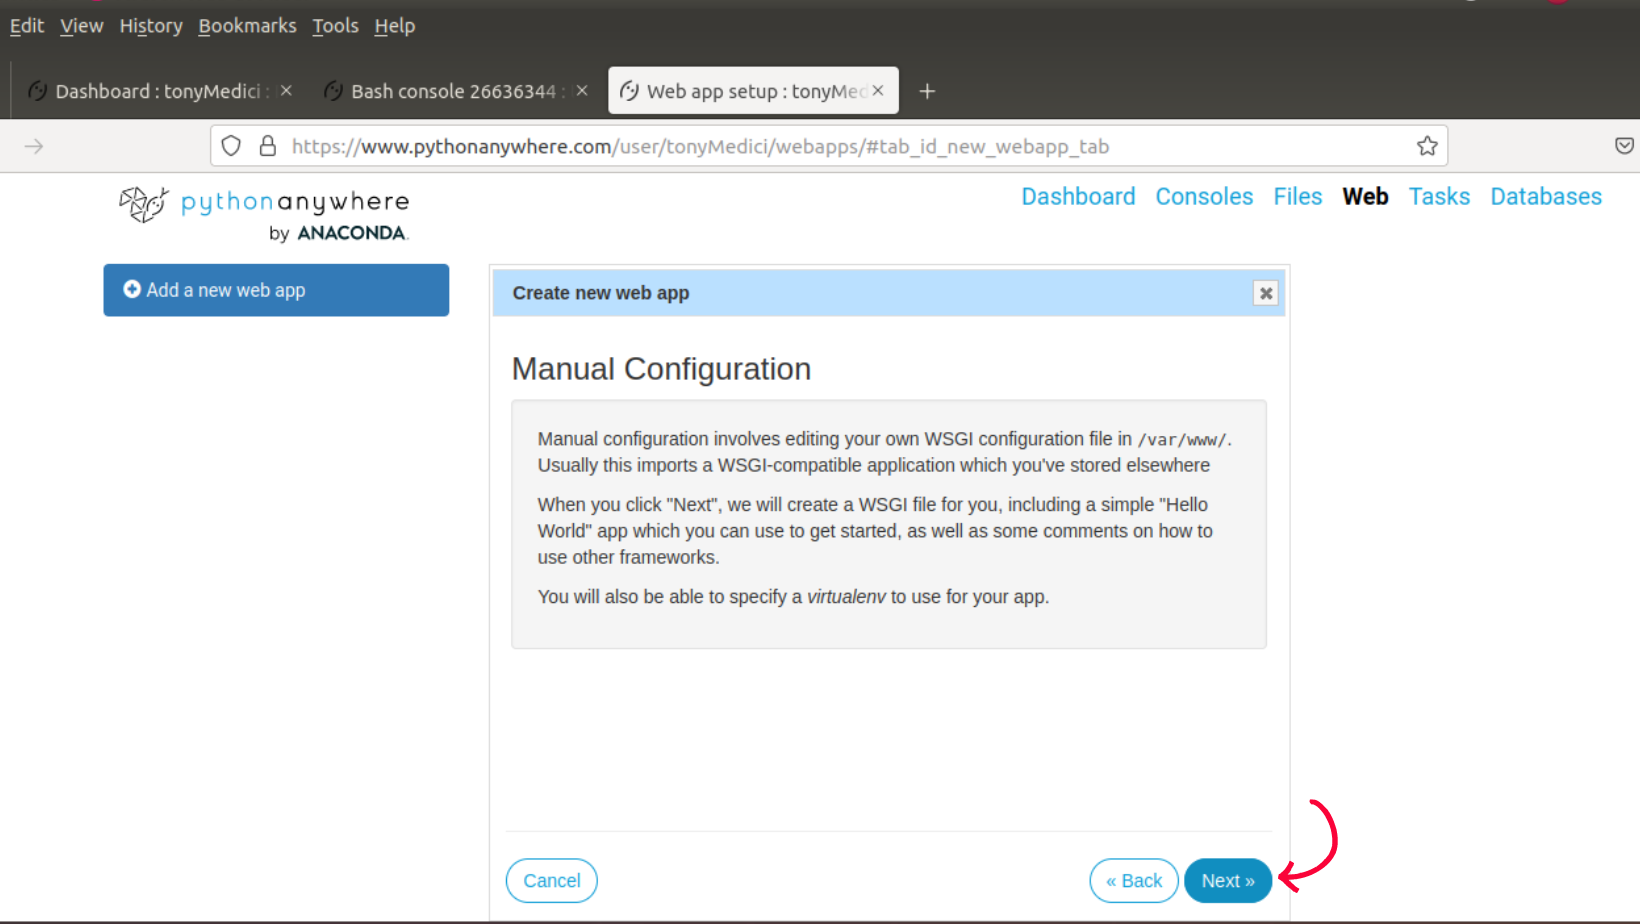
Your next slide will be for you to "Select a Python Web framework". We already have an existing Django project. All we need to do is to connect it to the web application we are about to create. We don't need to create a new Django application here, we will select "Manual configurations" as an option.
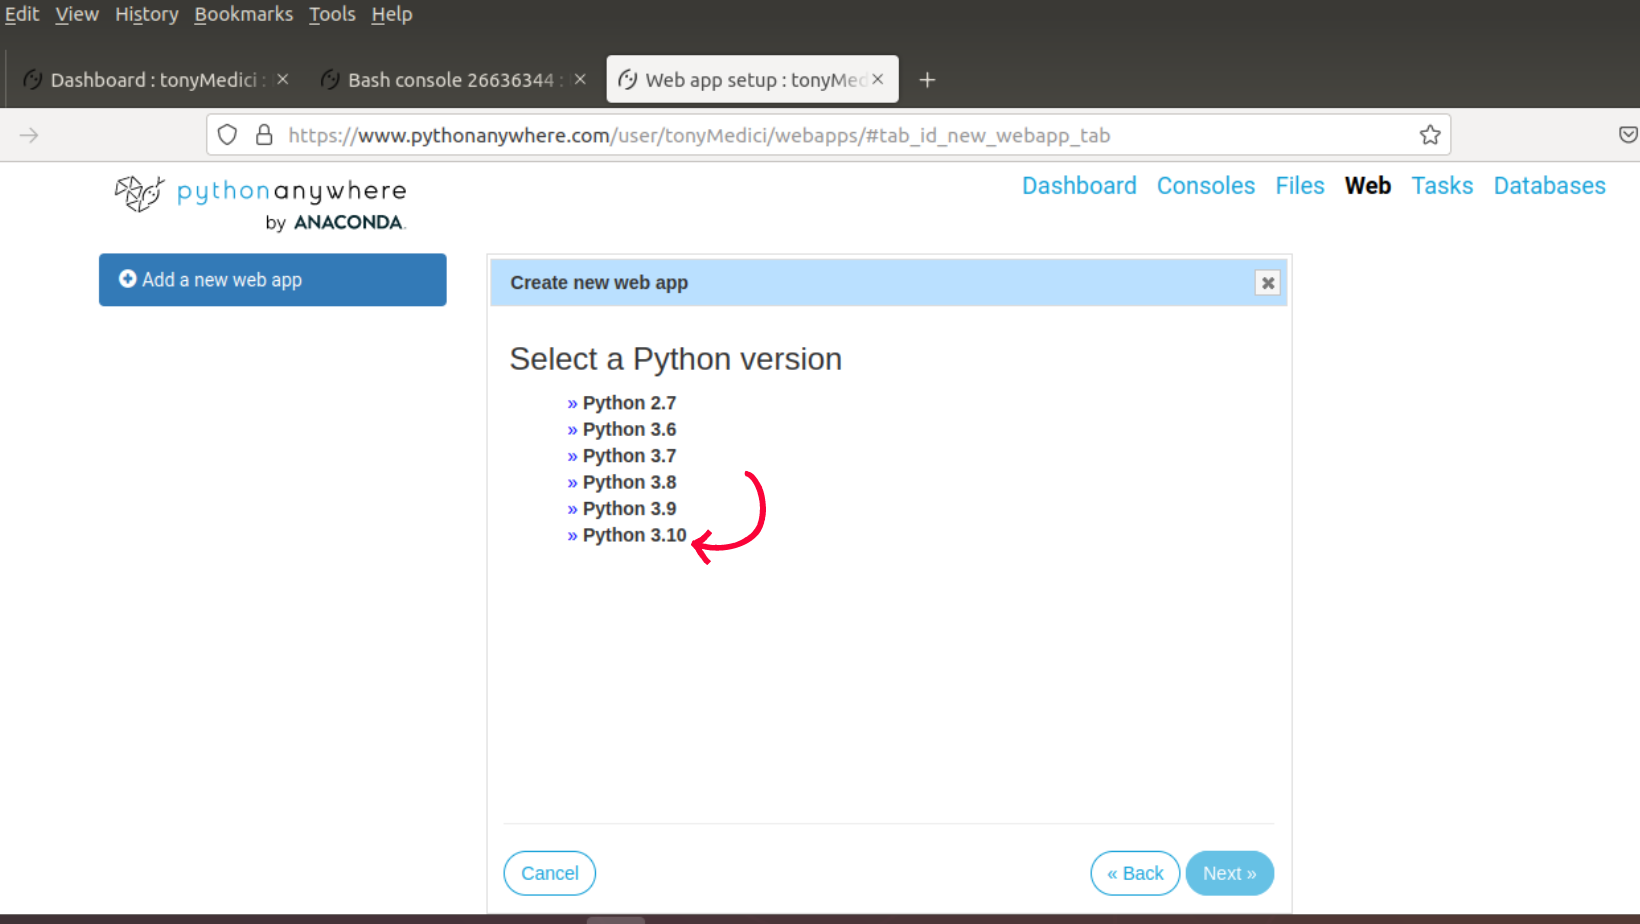
The next slide will provide options to select a python version. To avoid potential configuration errors, the python version you select must be the same as the one you used in creating your virtual environment. I created a virtual environment using the following:
mkvirtualenv --python=/usr/bin/python3.10 my_env
The above command created a virtual environment using Python version 10. It is important also to select the same version used in creating the virtual environment as in the image below.
Read the "Manual Configuration" details and click the "Next" button.
Virtualenv
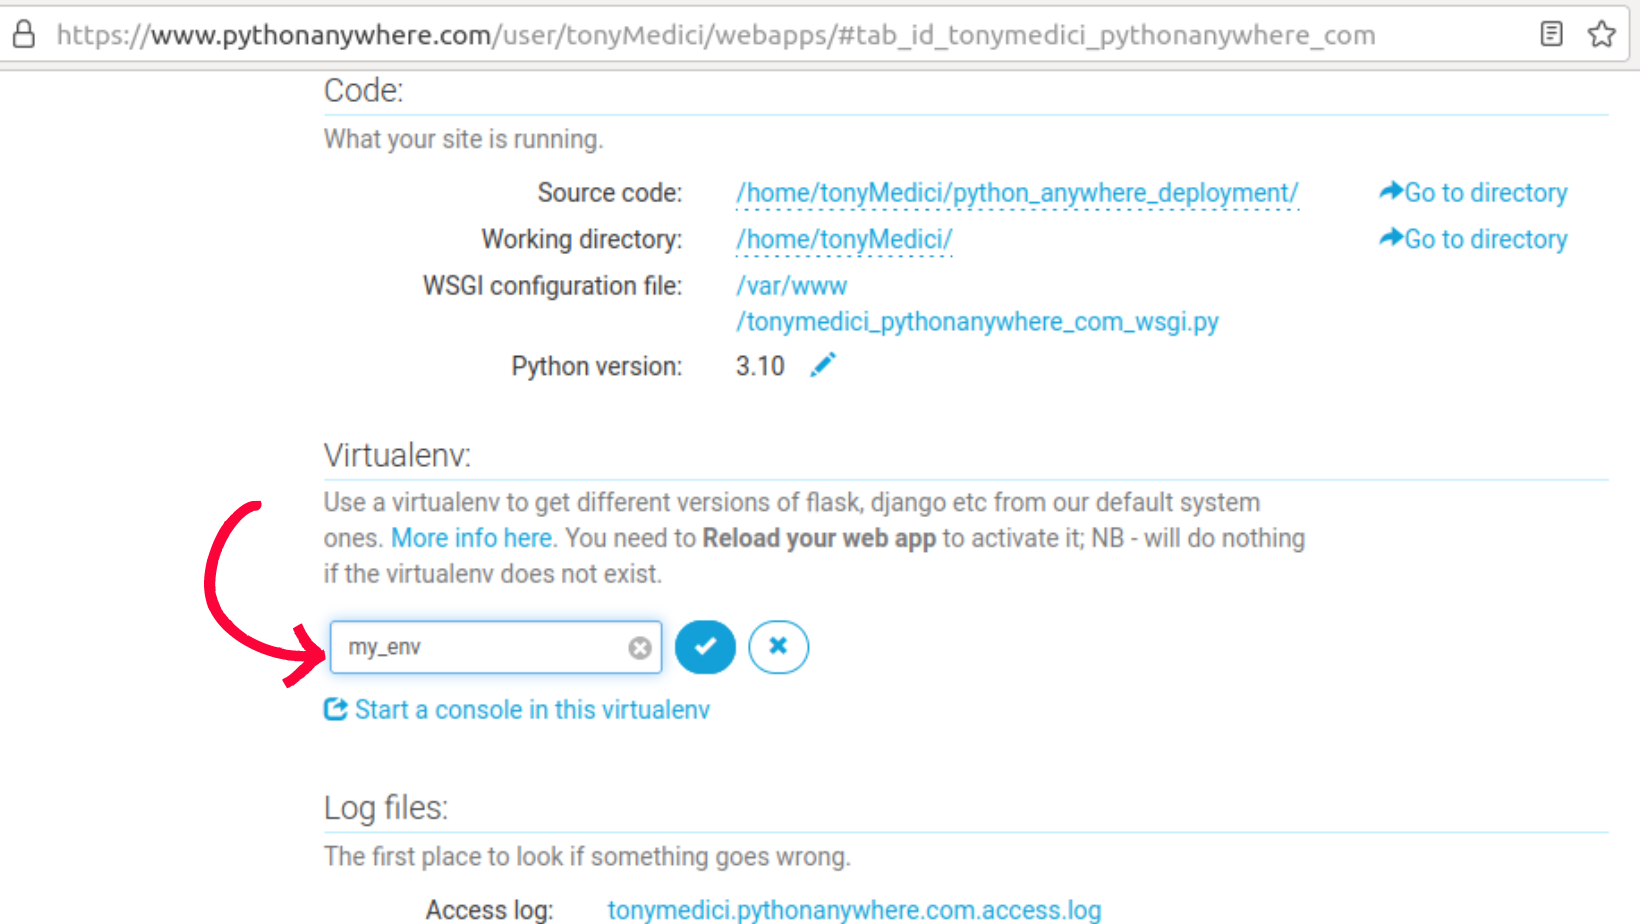
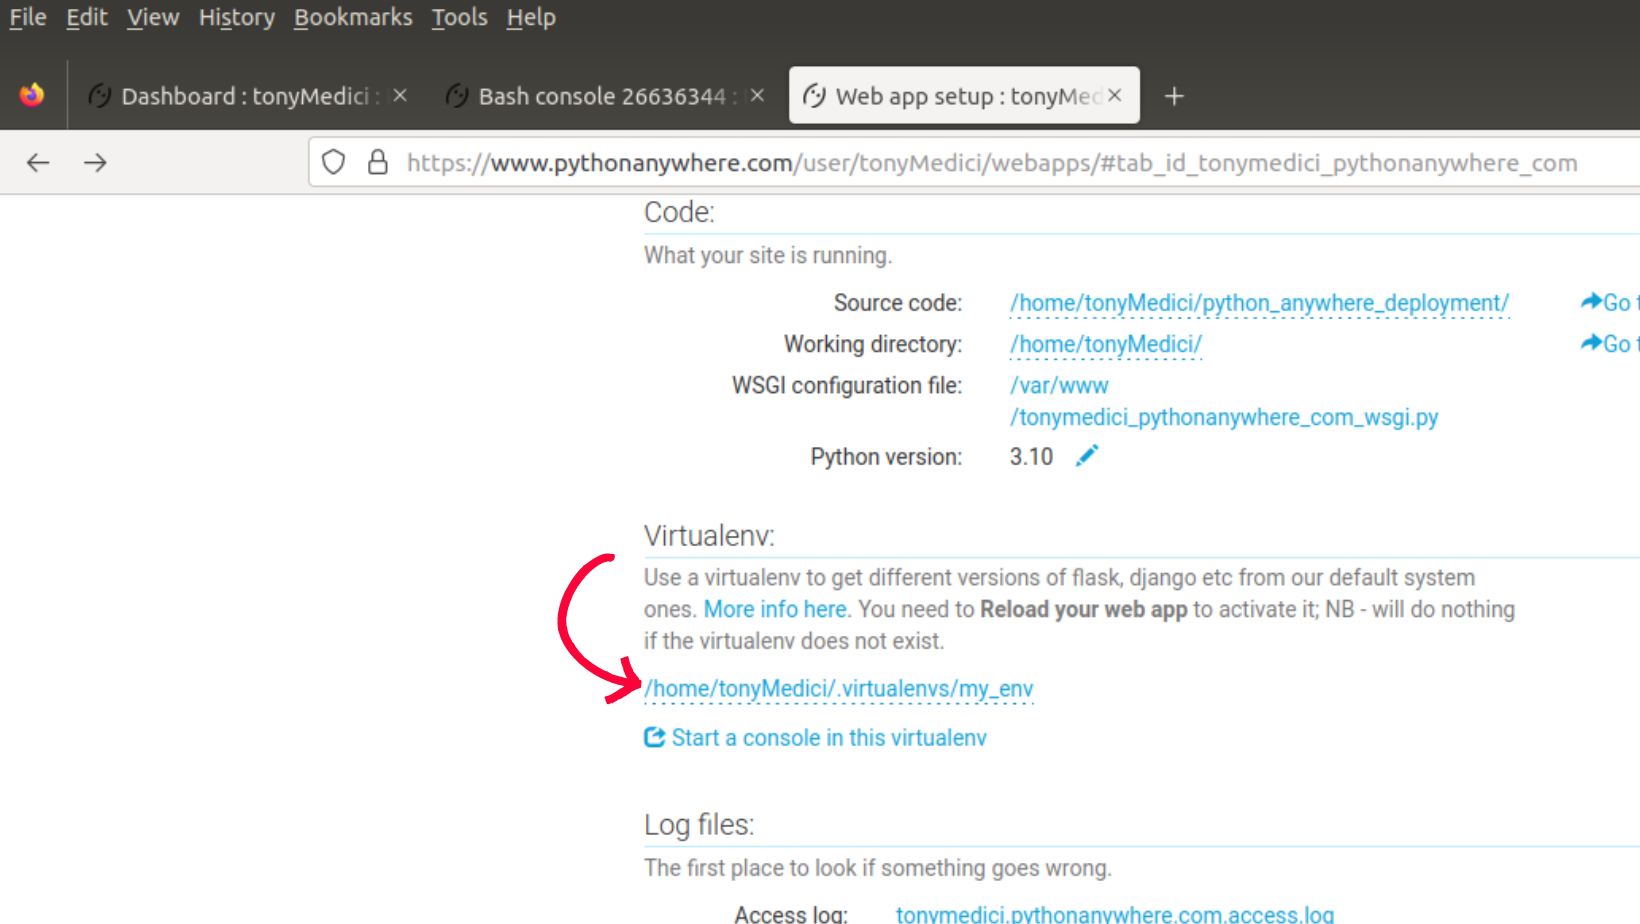
Scroll down to the "Virtualenv" section of your web application. Enter the name of the virtual environment you created and click enter. The absolute path to your virtual environment will populate the field.
The absolute path to the virtualenv is populated in the field.
Code
Scroll down to the "code" section of your web application. We are going to edit certain details of our web application in this section.
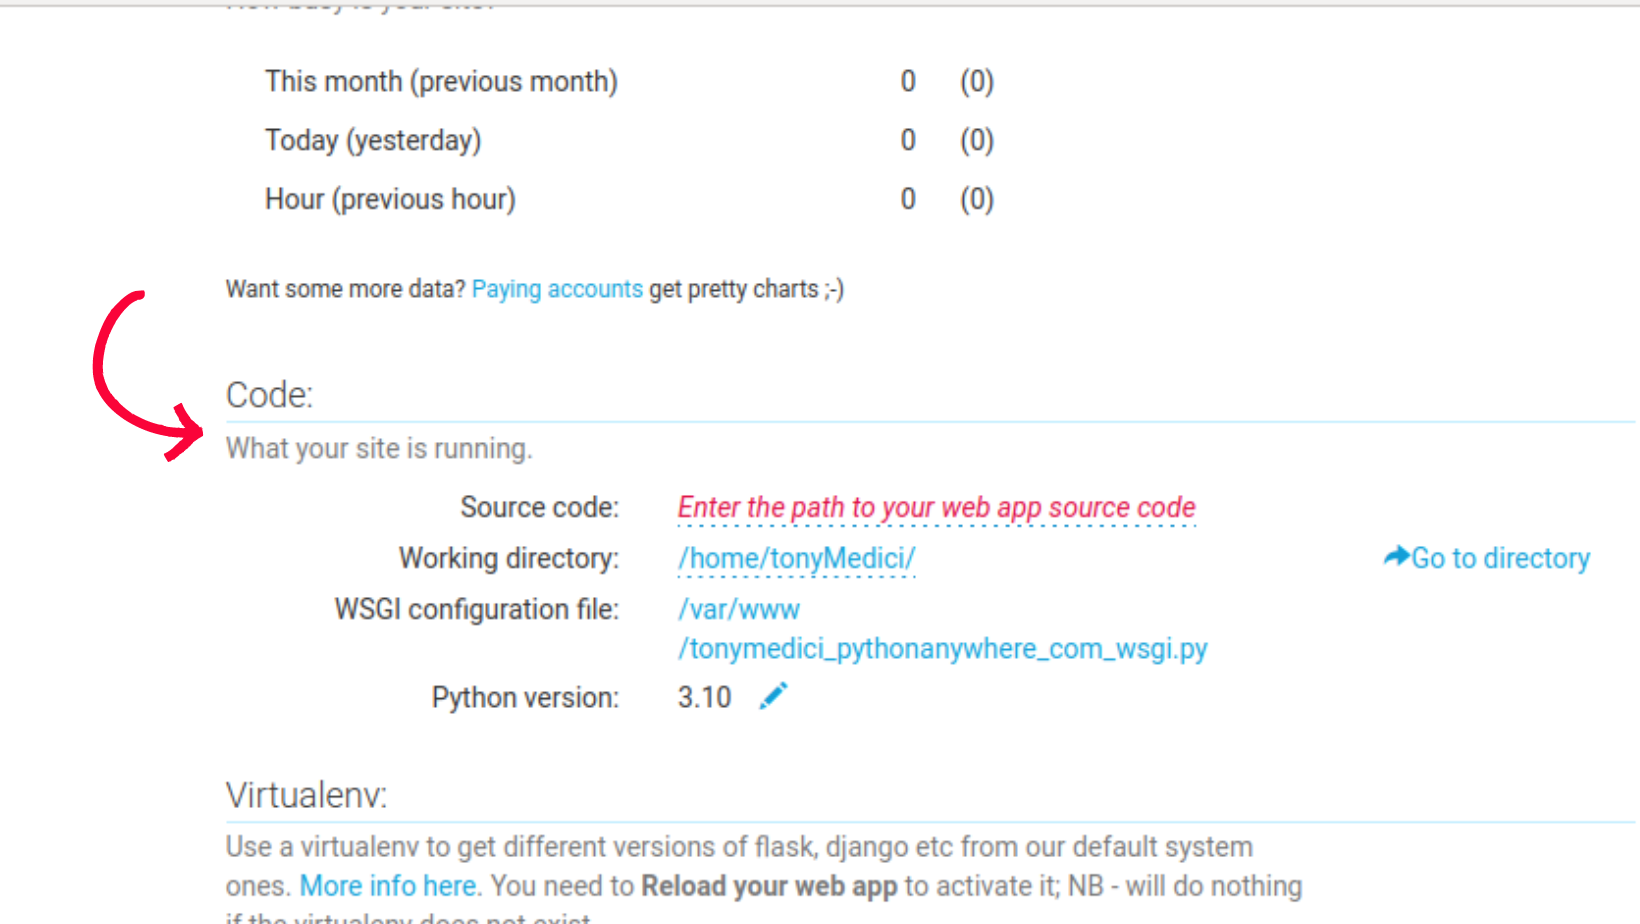
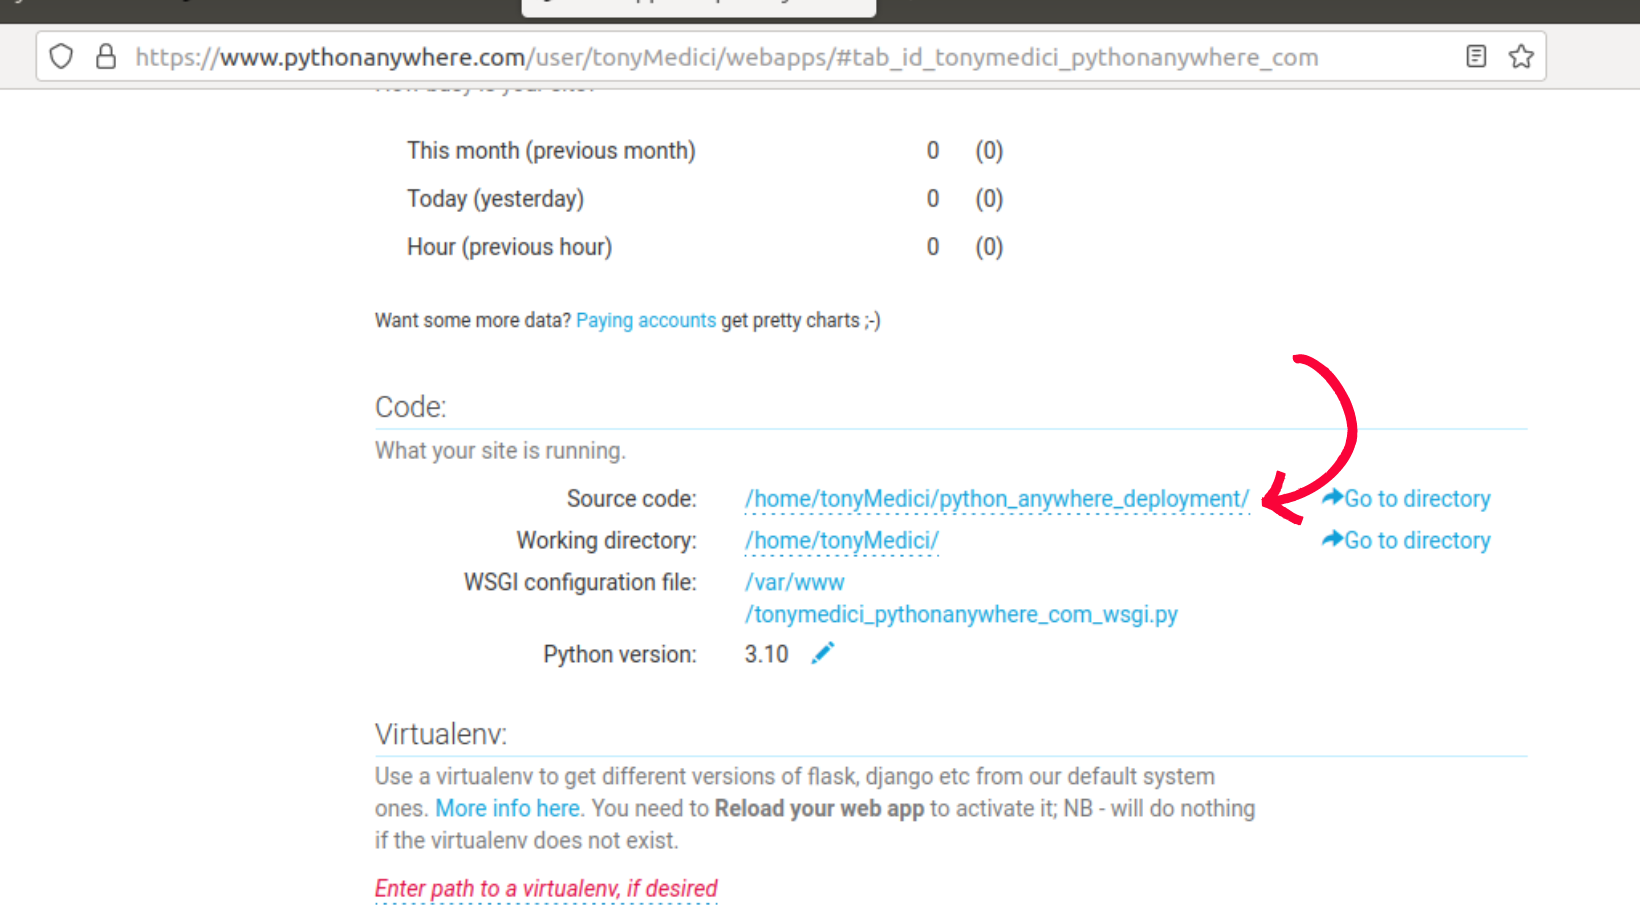
Firstly, edit the "Source code" value to the path leading to the cloned DJango application. This step is not a necessity but help bring clarity to the configuration steps.
If I cd into my Django application and check my current working direcotry I will have:
ls    # List all files in the directory
cd python_anywhere_deployment/    # Go into my my application folder/direcotry
pwd    # Get the absolute path
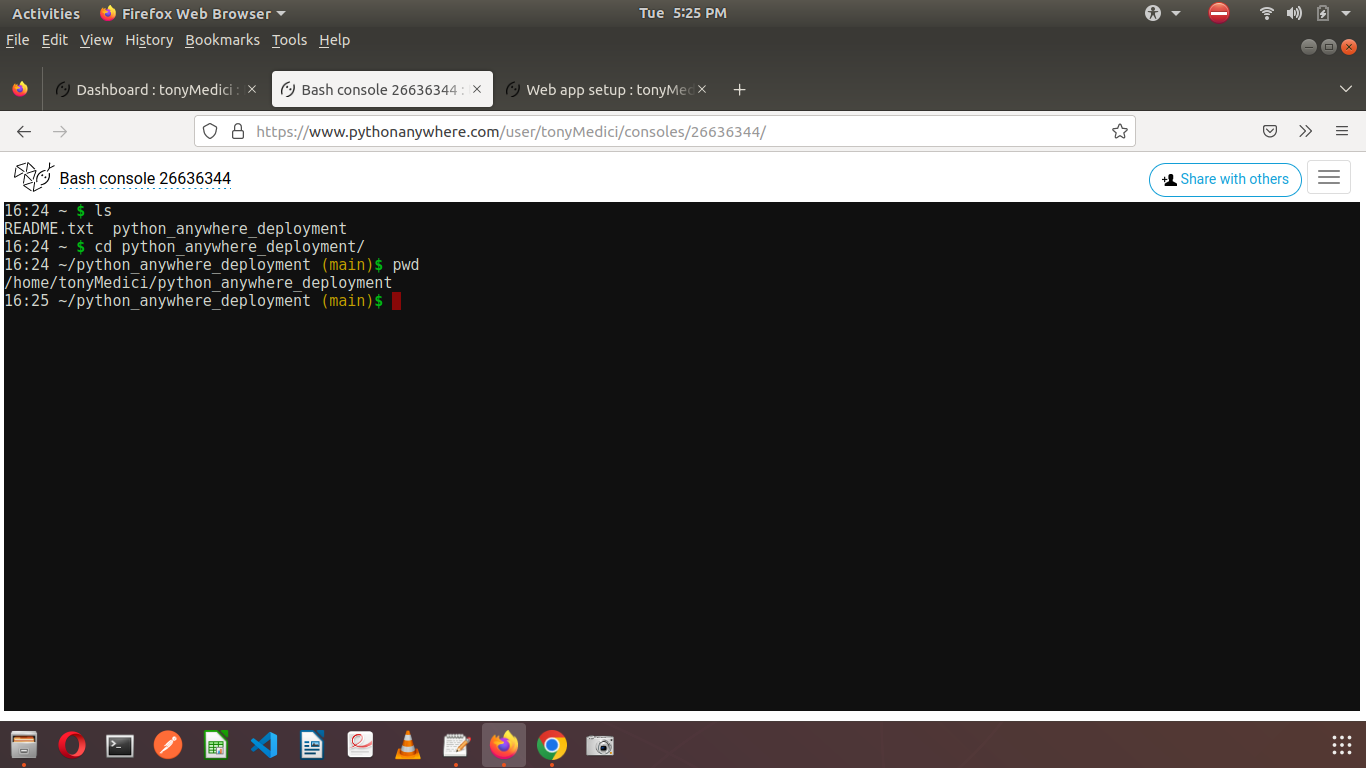
You can see the path from my home to my Django application. This is the value of the "Source code" of our web application.
WSGI
The next step is to edit the WSGI file belonging to the web application we created.
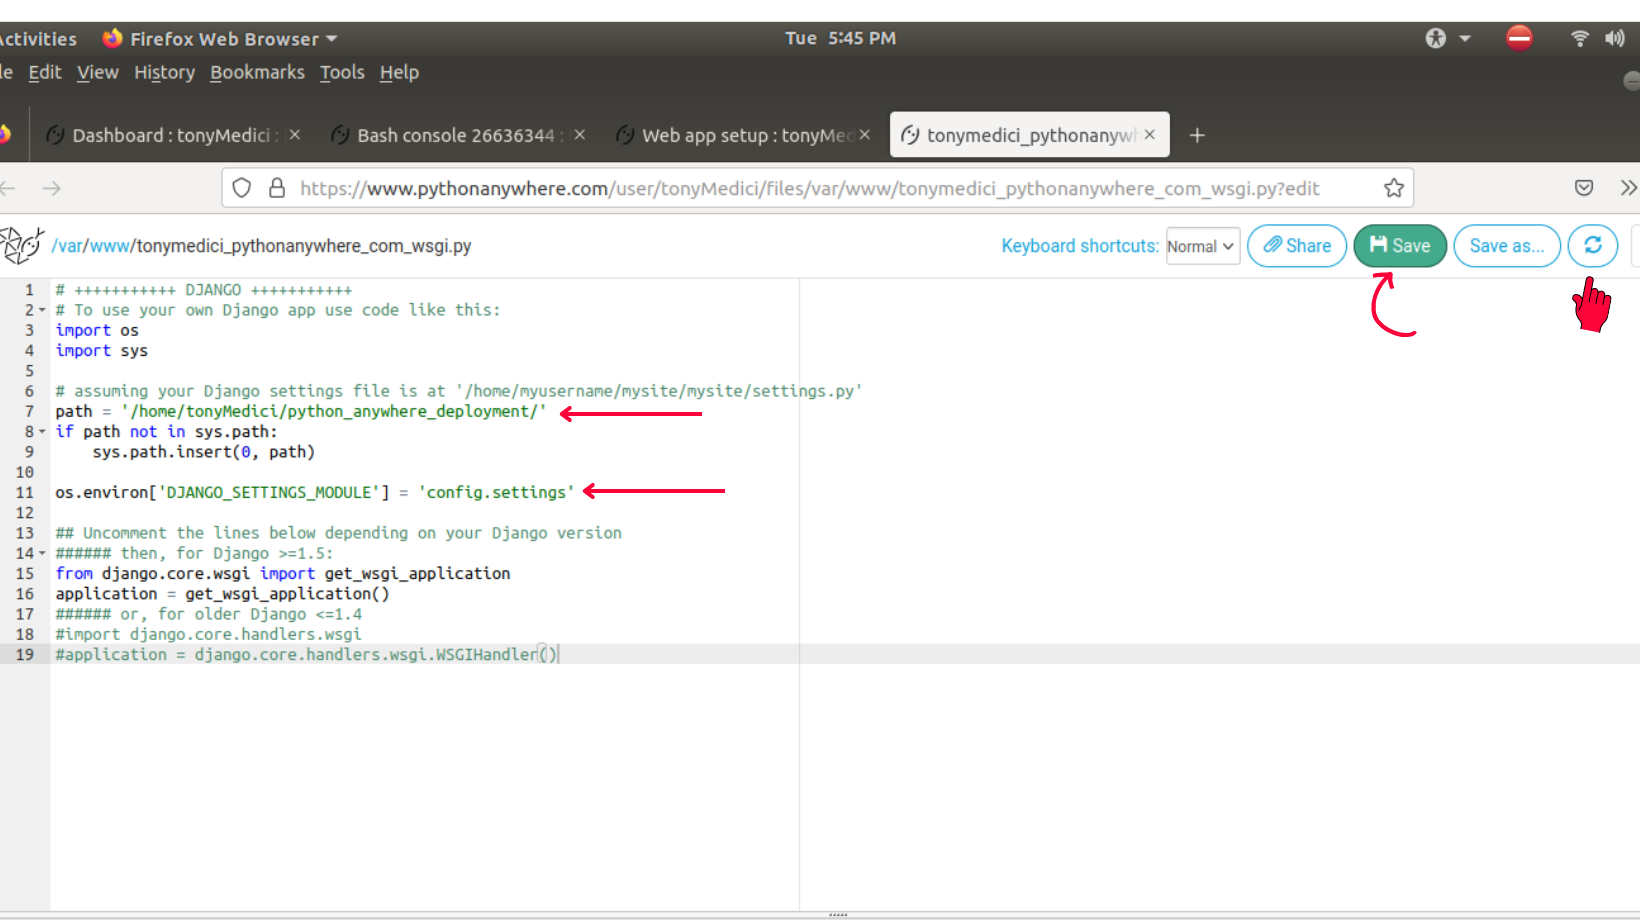
Open the URL attached to "WSGI configuration file:" on a new tab. Delete its content and replace with the below code:
# +++++++++++ DJANGO +++++++++++
# To use your own Django app use code like this:
import os
import sys

# assuming your Django settings file is at '/home/myusername/mysite/mysite/settings.py'
path = '/home/tonyMedici/python_anywhere_deployment/'
if path not in sys.path:
    sys.path.insert(0, path)

os.environ['DJANGO_SETTINGS_MODULE'] = 'config.settings'

## Uncomment the lines below depending on your Django version
###### then, for Django >=1.5:
from django.core.wsgi import get_wsgi_application
application = get_wsgi_application()
###### or, for older Django <=1.4
#import django.core.handlers.wsgi
#application = django.core.handlers.wsgi.WSGIHandler()
You will have to edit two things:
path (the same value as my source code)
DJANGO_SETTINGS_MODULE (the name of my Django project leading to my settings file)
Click on save, and the reload Icon, and you are good to go.
Settings File
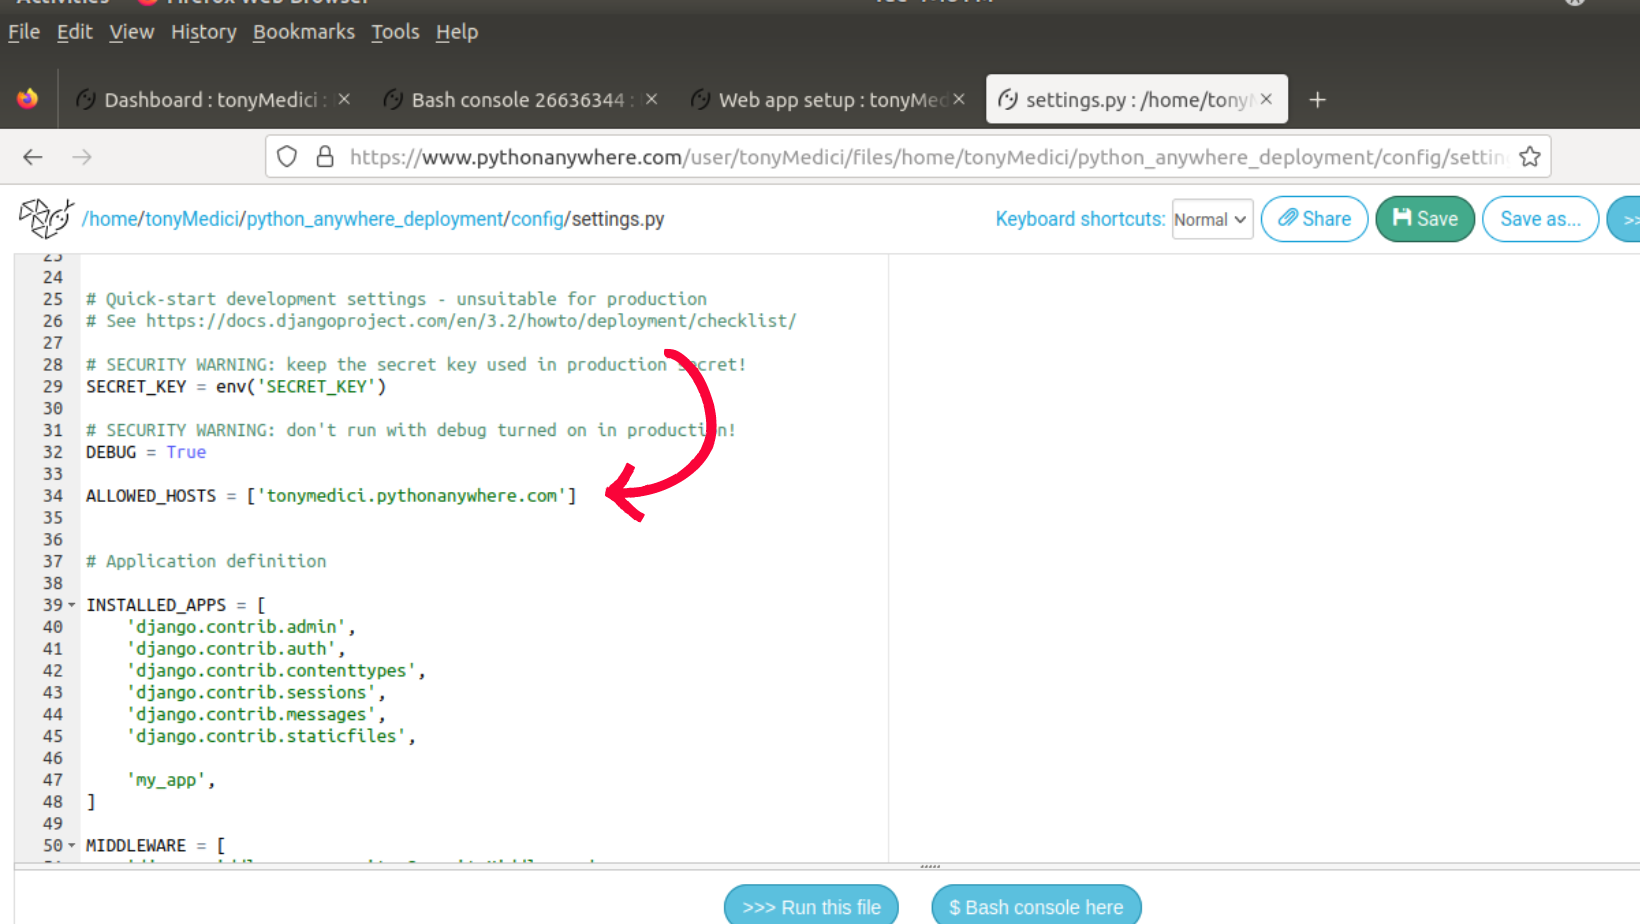
Before I click on the base URL of my web application, I need to add the base URL to my setting file.
I need to navigate to my Django application then to my project folder to open the settings.py file
Open the files page on a new tab, and navigate to your setting.py file
steps to settings.py from the "Files" page:
python_anywhere_deployment > config > settings.py
Add your base URL to the "ALLOWED_HOSTS" of your Django application.
The URL after the text"Configuration for" on your web application is the base for your Django application.
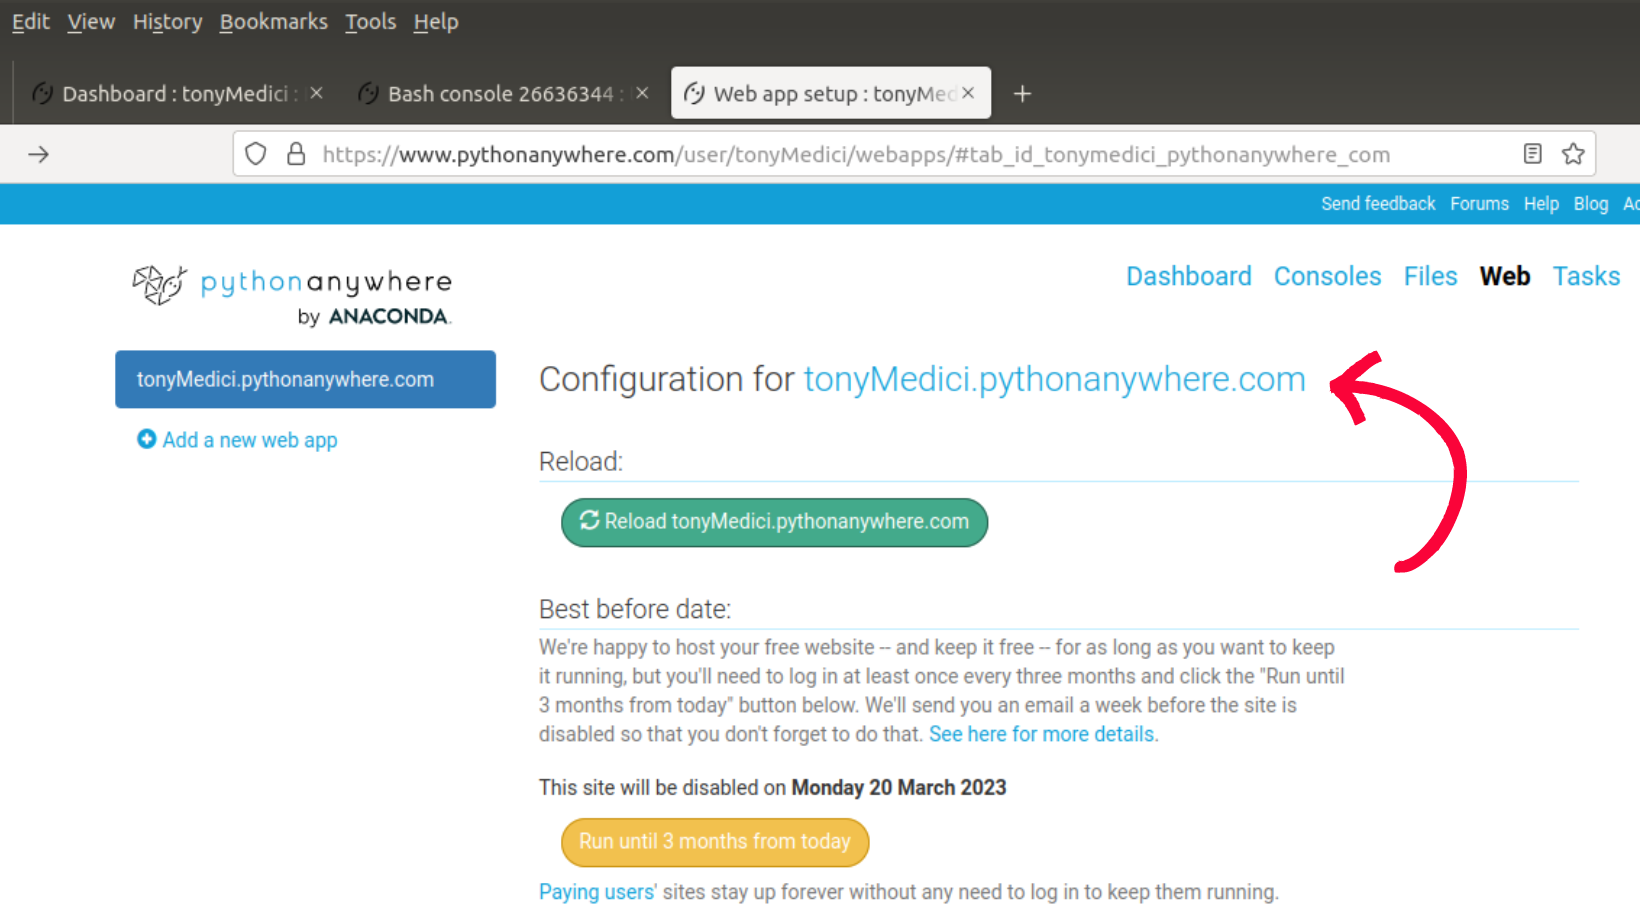
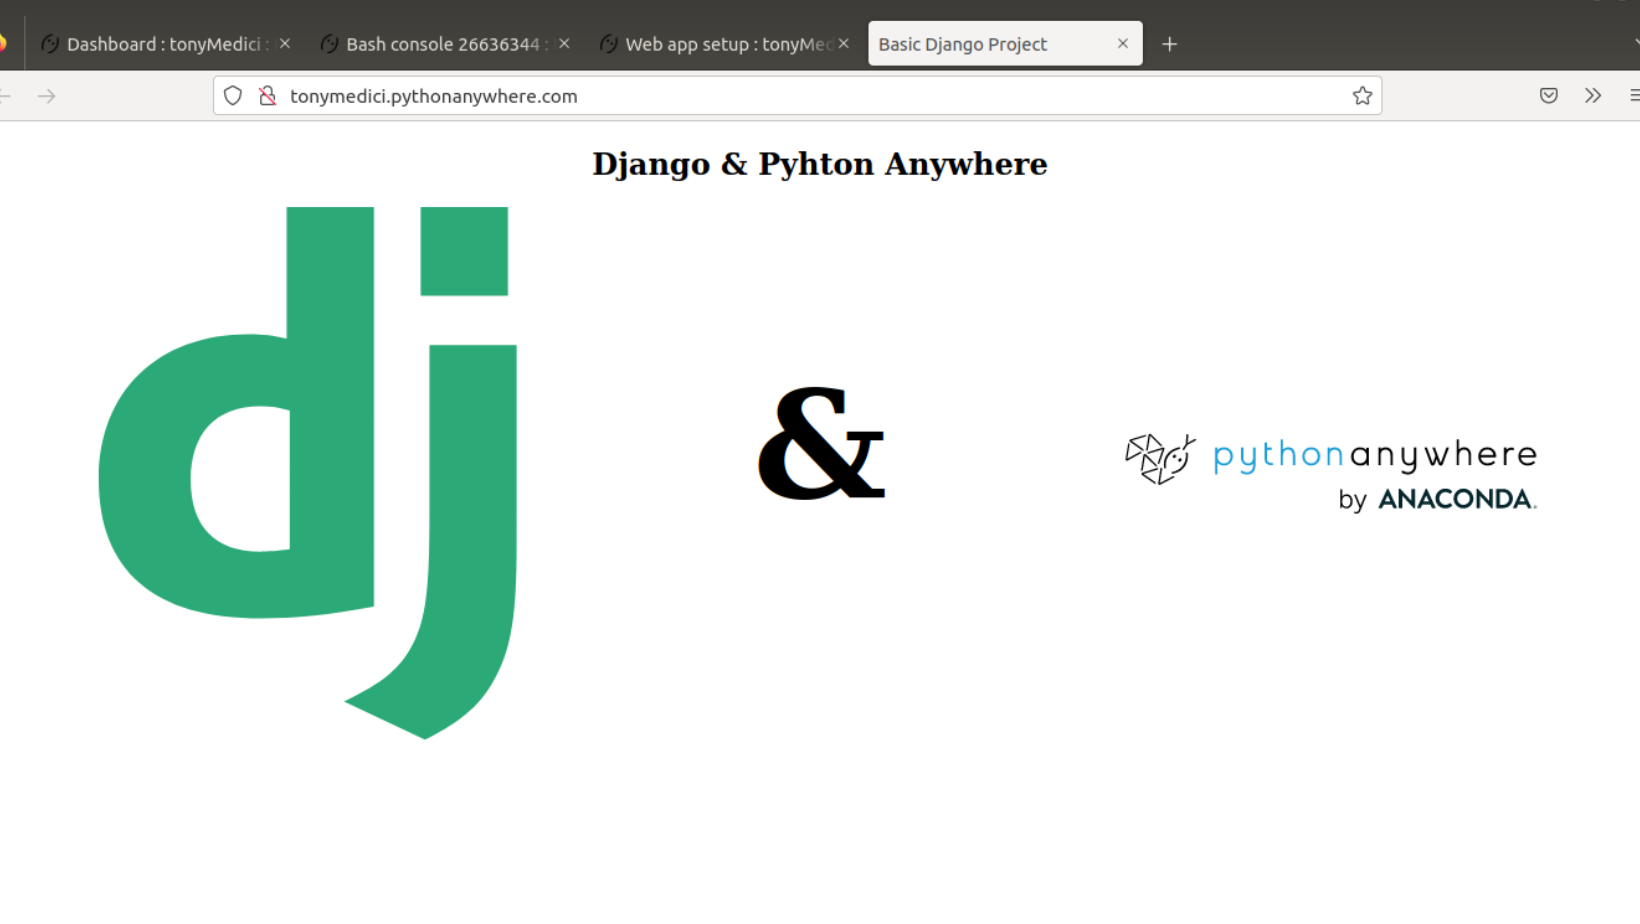
Click on the reload button and open the base URL on a new tab. The application should work just fine.
Static Files
Deploying Django applications simply means the value of the "DEBUG" variable in the settings.py file must have been set to "FALSE". This tells Django to use the "STATIC_ROOT" value and not "STATICFILES_DIRS". The latter variable serves static files only development server.
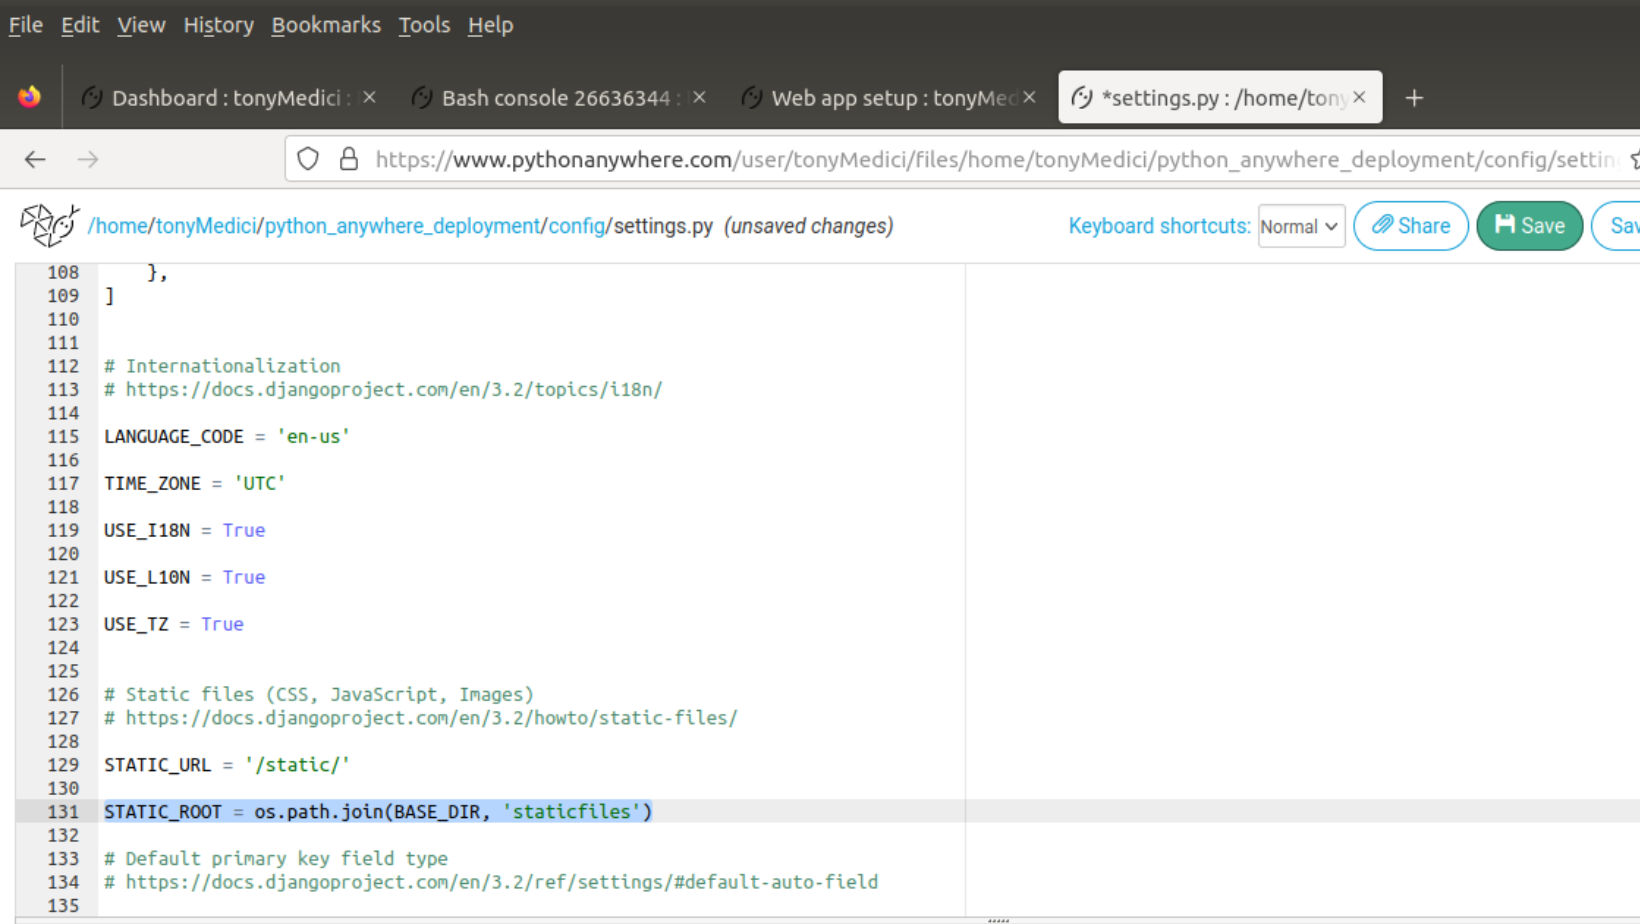
We simply tell Django where to look for static files when running on the production server.
The next step is to move all our static files and that of Django to the folder/directory we used as a value for "STATIC_ROOT" in the settings.py file.
Simply run
python manage.py collectstatic
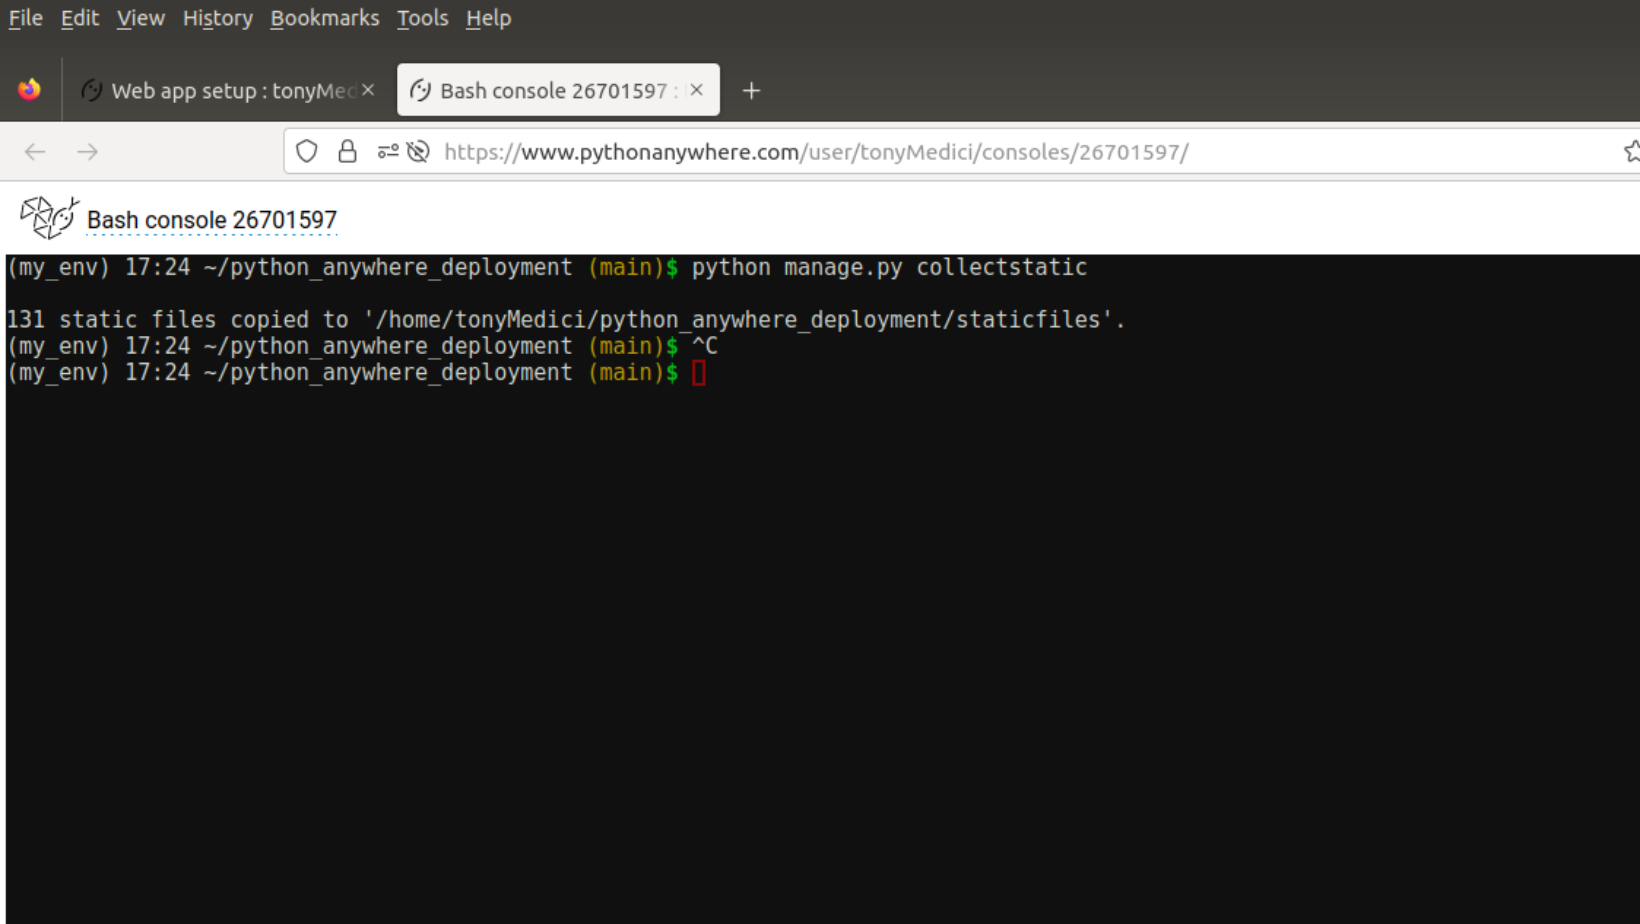
Reload your web application and view to make sure your static files were properly collected.
Subscribe to my newsletter
Read articles from ANTHONY UDEAGBALA directly inside your inbox. Subscribe to the newsletter, and don't miss out.
Written by

ANTHONY UDEAGBALA
ANTHONY UDEAGBALA
I have built products ranging from: Point of sales application Computer-based testing applications Blogs My career goals aim at combining my technical skills with my passion for adding value to the startup ecosystem. I want to explore writing and how I can provide value through creating.