Workaround for using nuke_i license with Nuke Bridge in Katana on Windows
 Minami Kanako
Table of contents
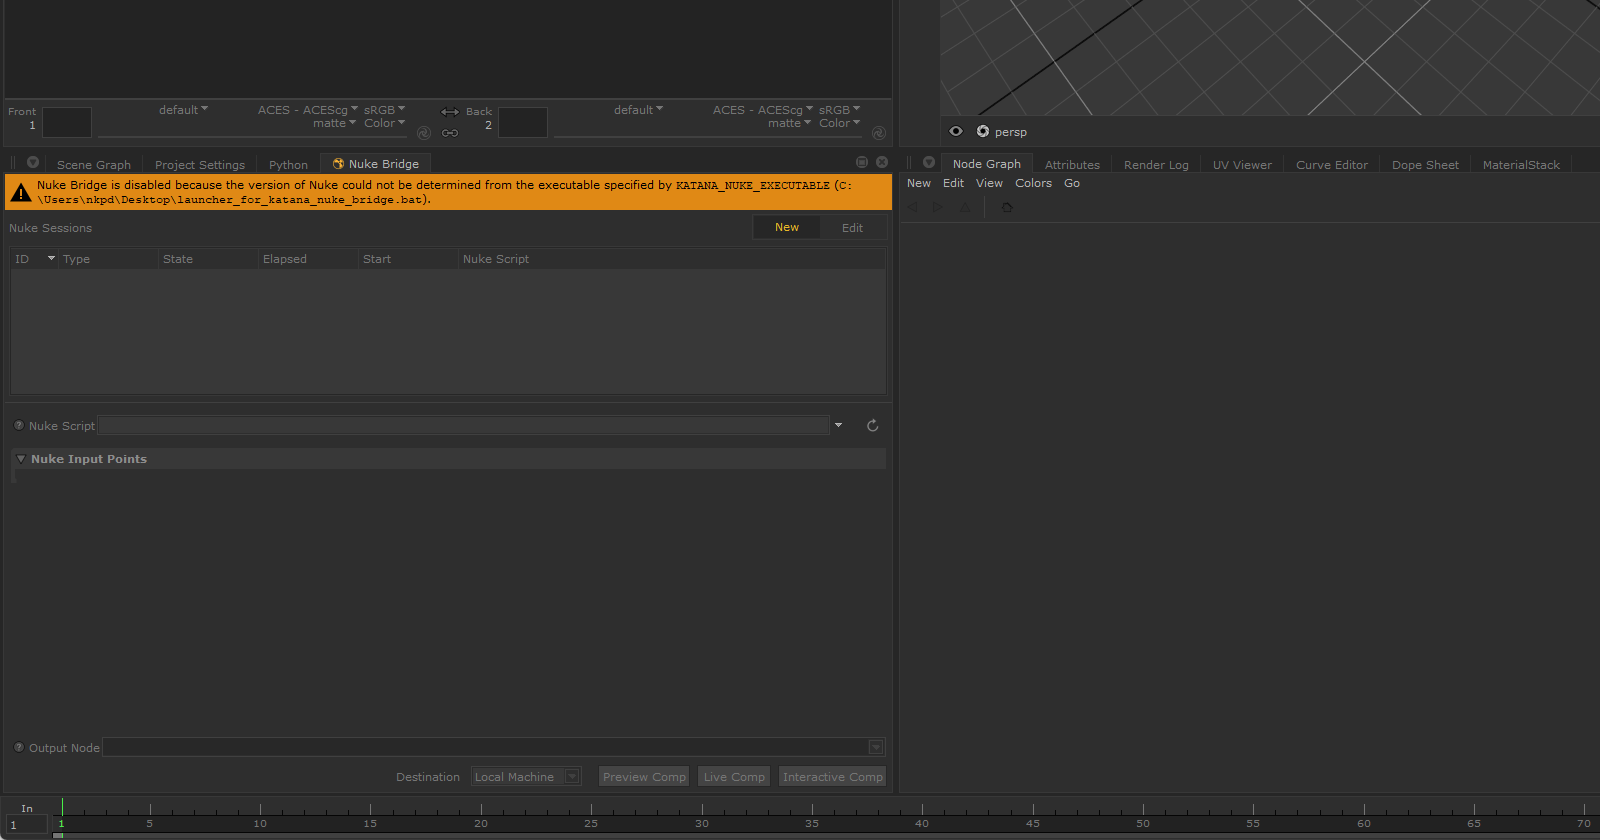
First of all, thanks to Foundry staff from Katana Forums for helping and providing a workaround!
As we can see from Katana User Guide about Nuke Bridge, we need to tell Katana to use nuke_i (Nuke, NukeX or Nuke Studio) license instead of nuke_r (Headless version of Nuke), if we don't have one or want to perform interactive comps.
The Problem
According to the User Guide, you need to create an additional custom launcher script for nuke_i license, then set it in KATANA_NUKE_EXECUTABLE.
On Windows, only binary executables (.exe) can be used as launchers at the moment. Otherwise, you'll get a message informed that it couldn't determine Nuke version from the launch script.

Workaround
For a workaround, we need to create a binary executable (.exe) that acts as a launcher script. This will get a bit technical, but don't worry you can follow along!
TLDR;
Download a C++ compiler (MSVC, MinGW, Clang, ...).
Create a new .cpp file and modify this code to your Nuke executable location.
 #include <cstdlib>
 #include <string>
 #include <vector>

 int main(int argc, const char** argv)
 {
     std::vector<std::string> arguments;
     //Specify the location of Nuke executable.
     arguments.push_back("C:\\Path\\to\\Nuke.exe");
     //Specify the edition of Nuke to use.
     arguments.push_back("--nukex");
     //Specify the type of license to use.
     arguments.push_back("-i");
     for (int i = 1; i < argc; ++i)
         arguments.push_back(argv[i]);

     std::string command;
     for (const std::string& argument : arguments)
     {
         if (command.size())
             command += " ";
         command += "\"" + argument + "\"";
     }
     command = "\"" + command + "\"";

     return std::system(command.c_str());
 }
Compile the code to .exe with your compiler of choice.
Point KATANA_NUKE_EXECUTABLE in Katana launcher script to newly created .exe.
Launch Katana with the launcher script.
Step-by-Step Guide
1. Getting a compiler
To compile or create an executable file from the code you'll need a compiler for C++, in this guide I'll use MinGW. You can install MinGW via MSYS2, which you can download from here.
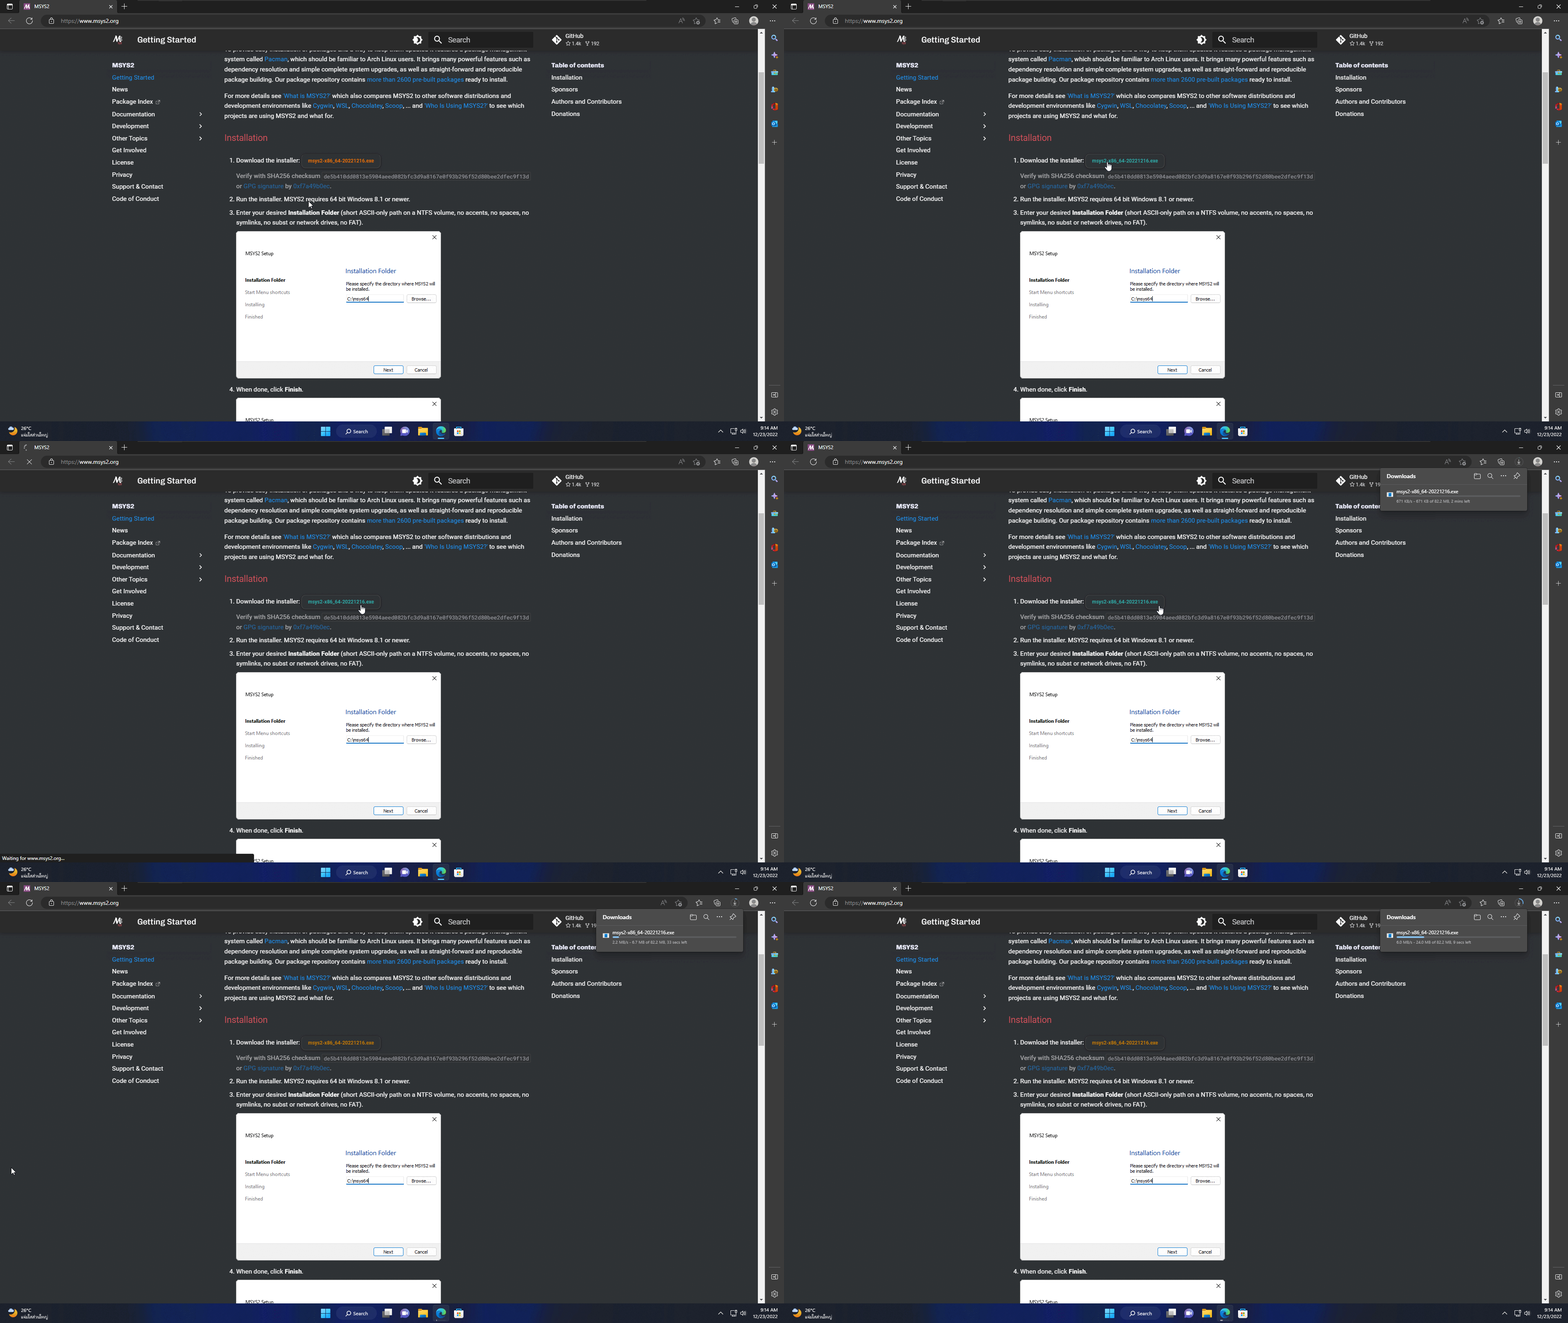
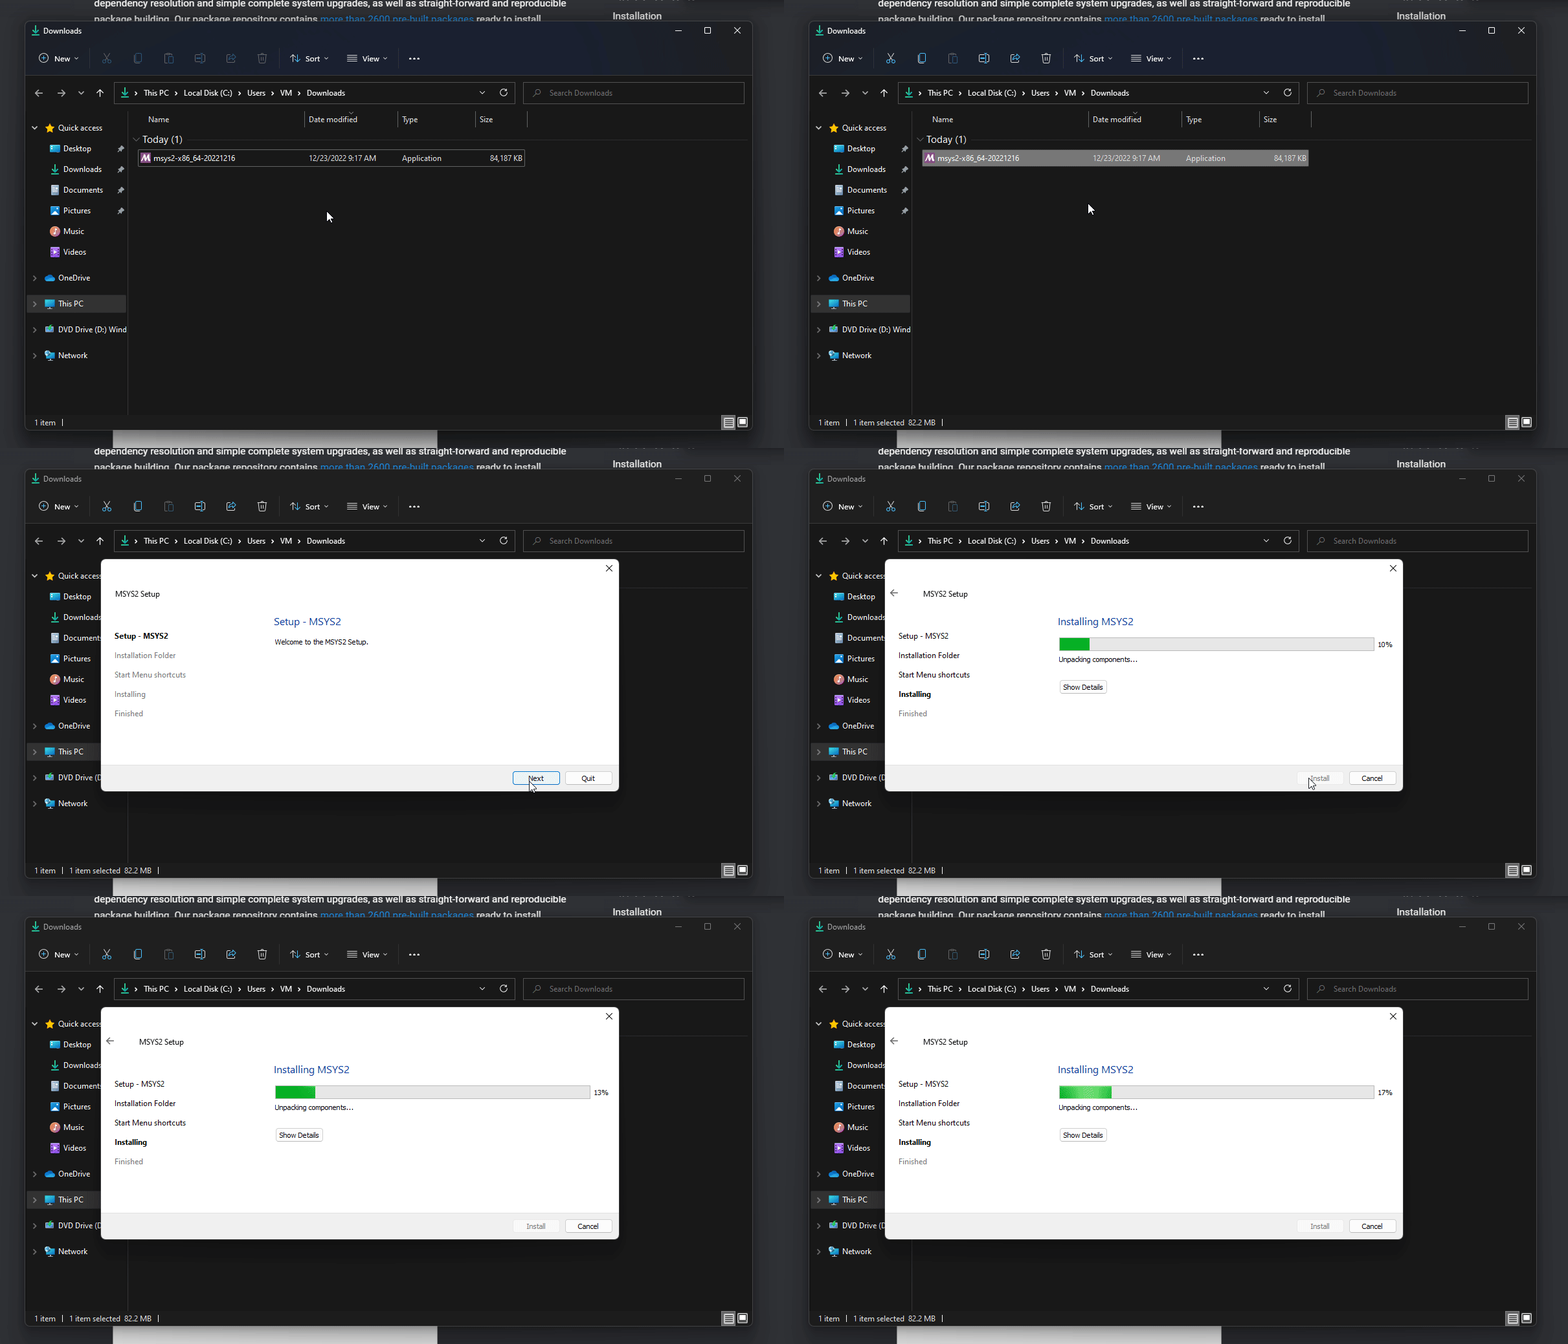
After the download is finished, open the file and simply go through the installation process.
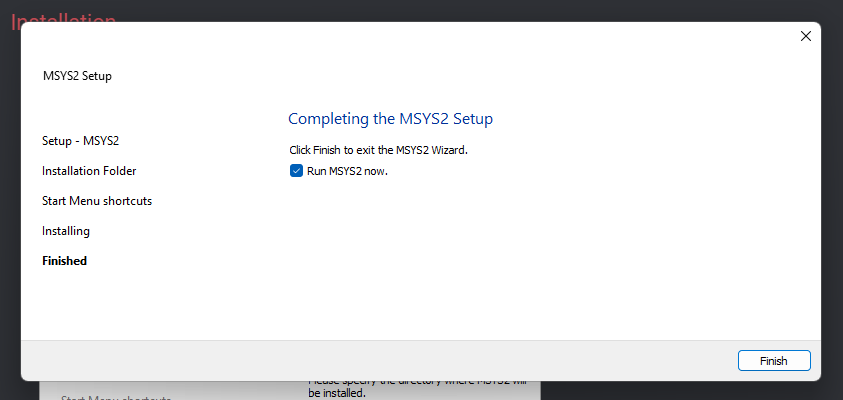
Next, click on Finish to run MSYS2.
Now, you'll be greeted by the black window. To install MinGW copy the command from the box below and paste it into that window by pressing Shift+Ins or right-clicking and selecting Paste, then press Enter to execute the command.
pacman -S --needed mingw-w64-x86_64-gcc
Then, type Y and press Enter to start installing all the necessary tools. This will take about 400MB of your disk space.
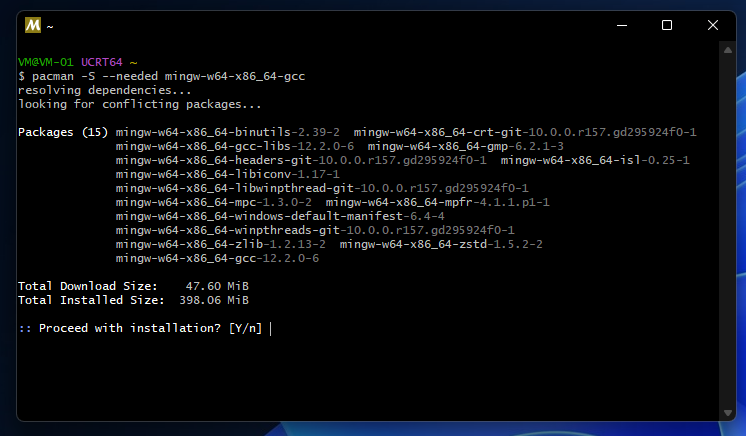
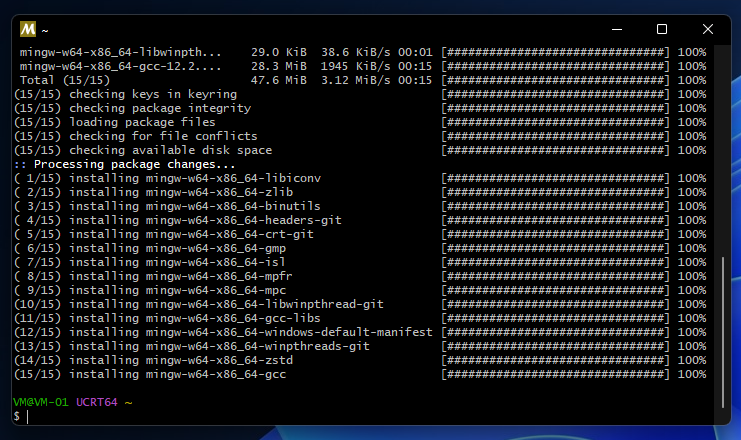
After it finished, you'll see a screen that looks like this. Feel free to close it as we don't need it anymore.
2. Adding MinGW to Path Environment Variables
After installing MinGW, we'll need to add it to Path to be able to use it properly.
First, open the start menu and simply type 'env' to search for Edit the system environment variables.
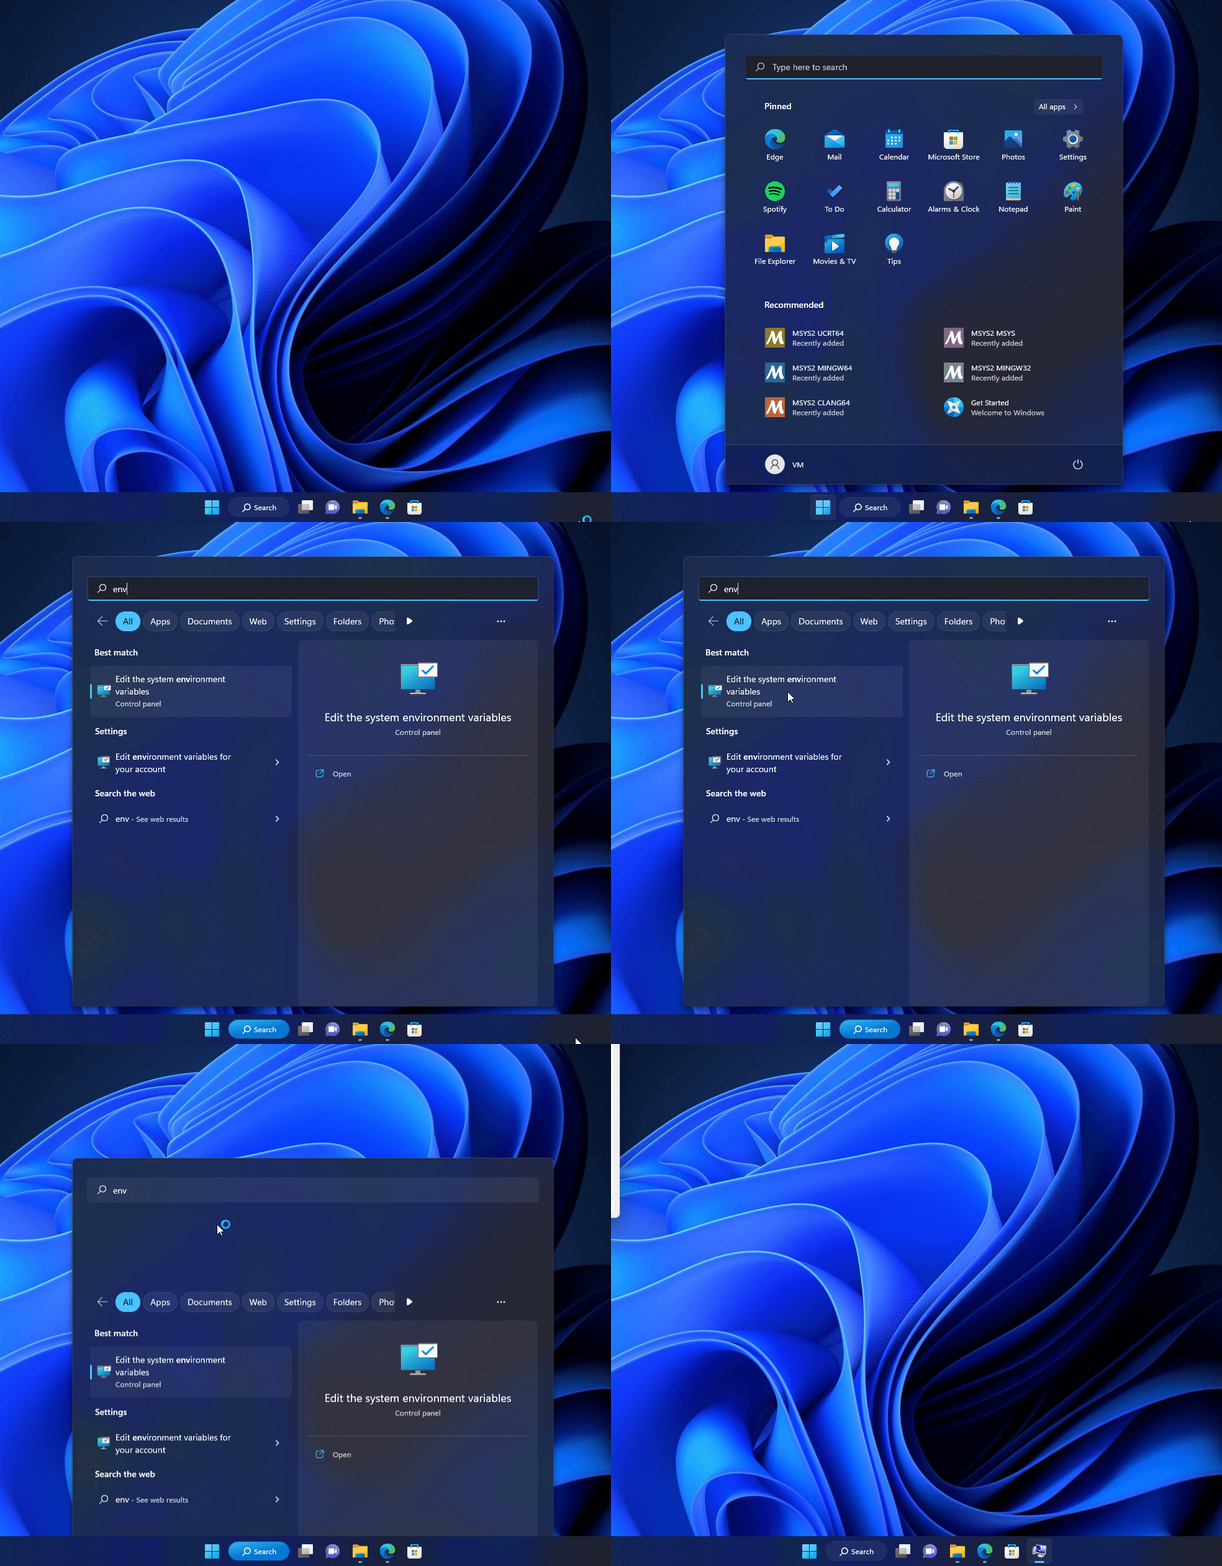
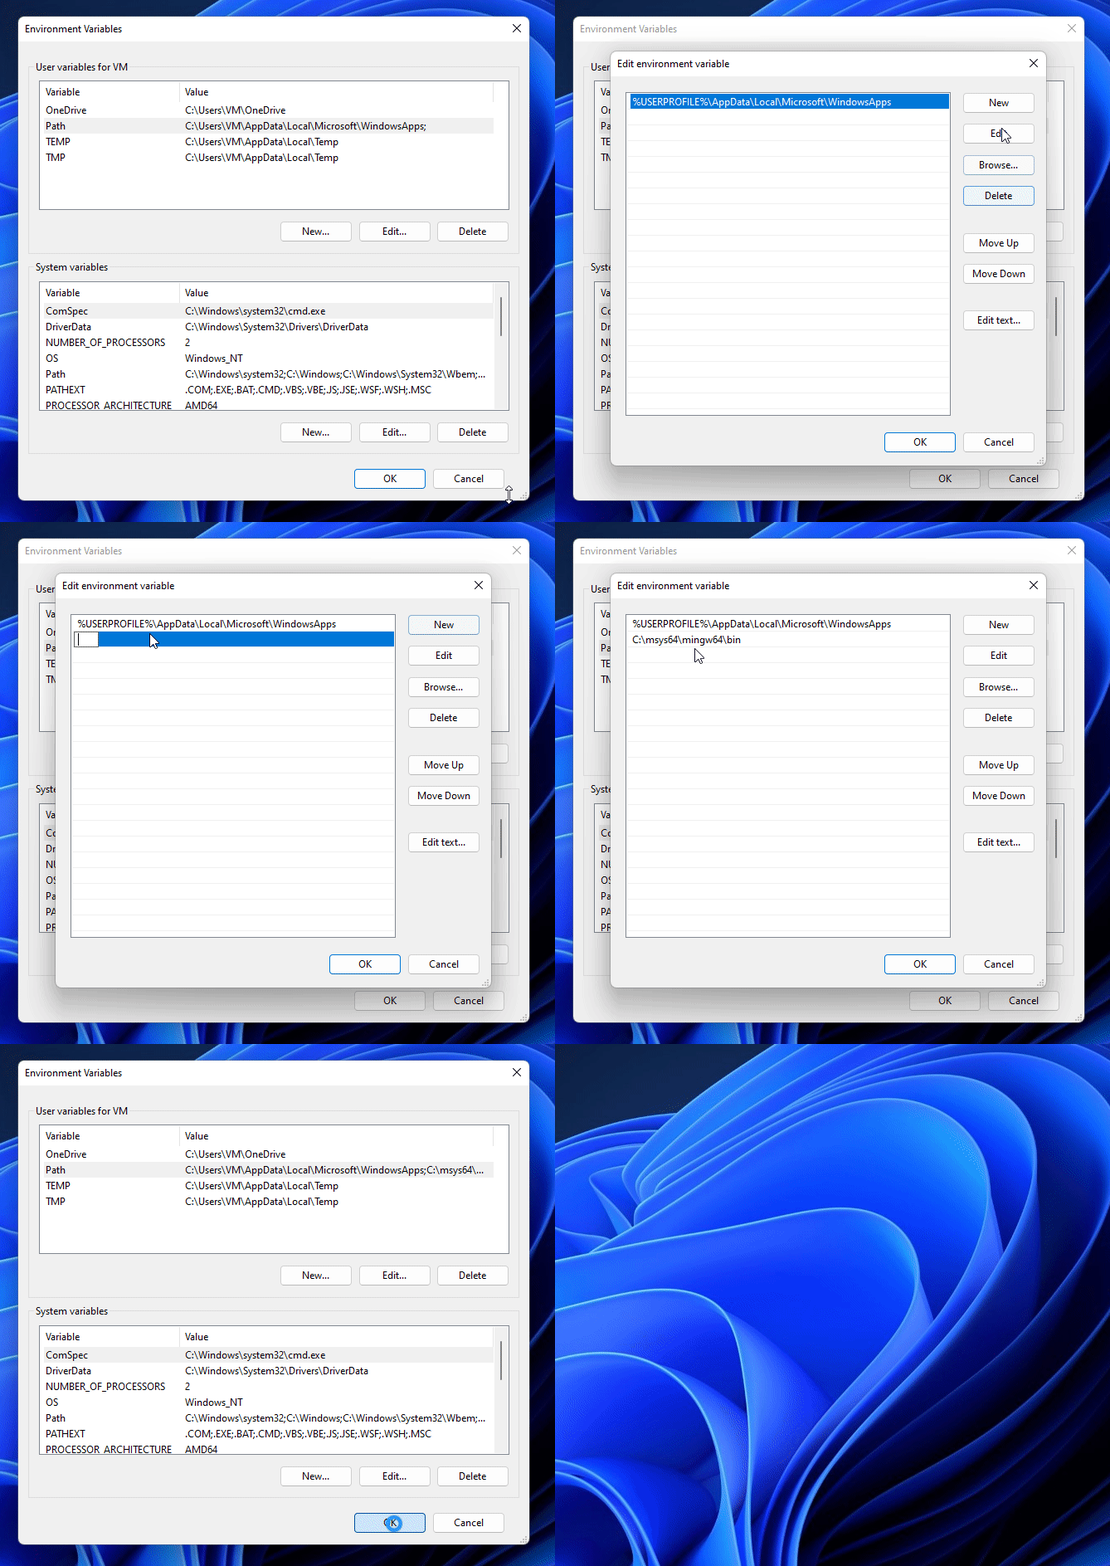
Next, click on "Environment Variables..." button at the bottom of the window.
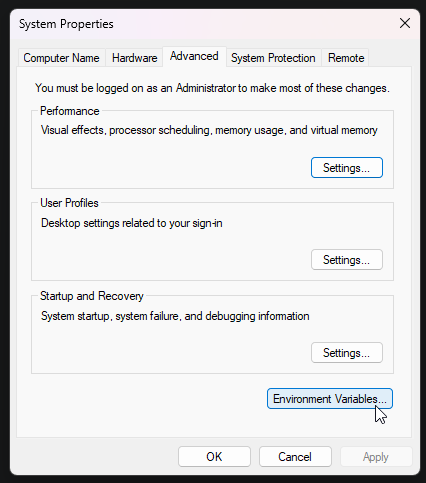
Double-click on Path to edit, then click on "New" button on the right and, type C:\msys64\mingw64\bin to add MinGW to Path. Then, click OK on every window to save.
3. Create a new C++ file
First, open Notepad or any other IDE of your choice, copy the code below and paste it in.
#include <cstdlib>
#include <string>
#include <vector>

int main(int argc, const char** argv)
{
    std::vector<std::string> arguments;
    //Specify the location of Nuke executable.
    arguments.push_back("C:\\Path\\to\\Nuke.exe");
    //Specify the type of license to use.
    arguments.push_back("-i");
    for (int i = 1; i < argc; ++i)
        arguments.push_back(argv[i]);

    std::string command;
    for (const std::string& argument : arguments)
    {
        if (command.size())
            command += " ";
        command += "\"" + argument + "\"";
    }
    command = "\"" + command + "\"";

    return std::system(command.c_str());
}
Then, modify the code where it said ("C:\\Path\\to\\Nuke.exe"); to the location of your Nuke executable. Don't forget to change \ to \\ !
If you want to use NukeX, you can add a new line and type arguments.push_back("--nukex");, for Nuke Indie can type arguments.push_back("--indie"); instead.
For example, my Nuke 13.1v5 executable is S:\Program Files\Nuke13.1v5\Nuke13.1.exe and I want to use NukeX my code would look like this.
#include <cstdlib>
#include <string>
#include <vector>

int main(int argc, const char** argv)
{
    std::vector<std::string> arguments;
    arguments.push_back("S:\\Program Files\\Nuke13.1v5\\Nuke13.1.exe");
    arguments.push_back("--nukex");
    arguments.push_back("-i");
    for (int i = 1; i < argc; ++i)
        arguments.push_back(argv[i]);

    std::string command;
    for (const std::string& argument : arguments)
    {
        if (command.size())
            command += " ";
        command += "\"" + argument + "\"";
    }
    command = "\"" + command + "\"";

    return std::system(command.c_str());
}
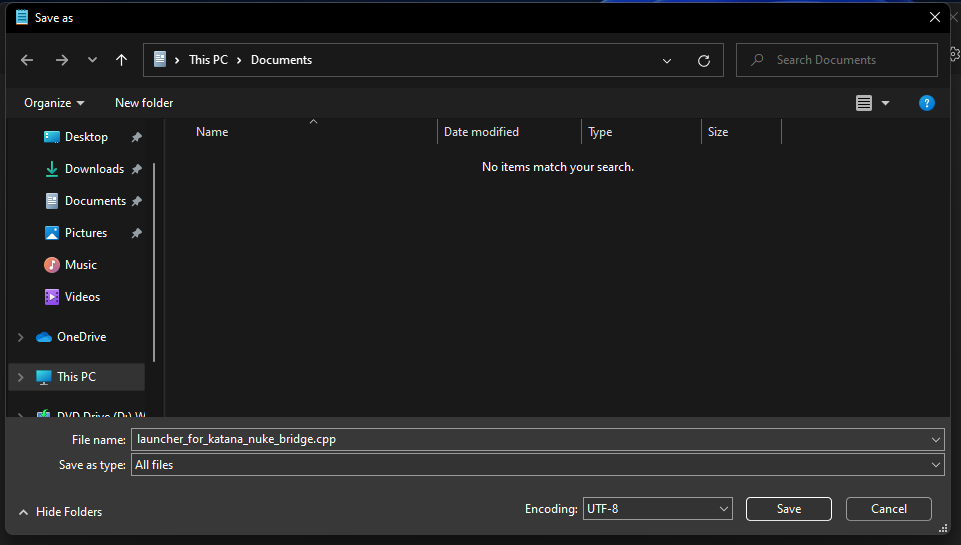
Next, save the modified code as .cpp file. In Notepad, you can Press Ctrl+S to save then change "Save as type:" to All Files and add .cpp to your file name.
3. Compile the code!
We are now close to the finish! To get the usable executable file we need to compile the code.
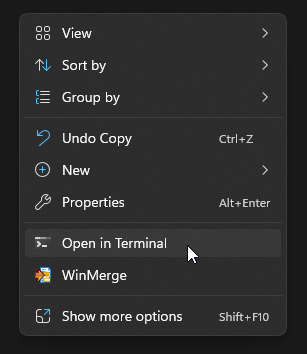
First, go to the location of the file saved in the previous step, right-click and select Open in Terminal.
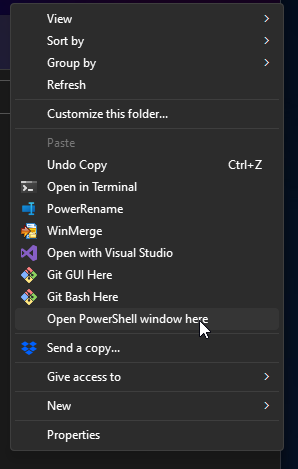
If Open in Terminal isn't available you can press Shift and right-click then select Open PowerShell window here.
Next, copy and modify the command below or type g++ then space and type your .cpp filename with the .cpp extension, then space and type -o , then space again and type the filename you want with .exe extension.
g++ your_cpp_file.cpp -o your_exe_file.exe
Use right-click to paste anything to Windows Terminal or PowerShell.
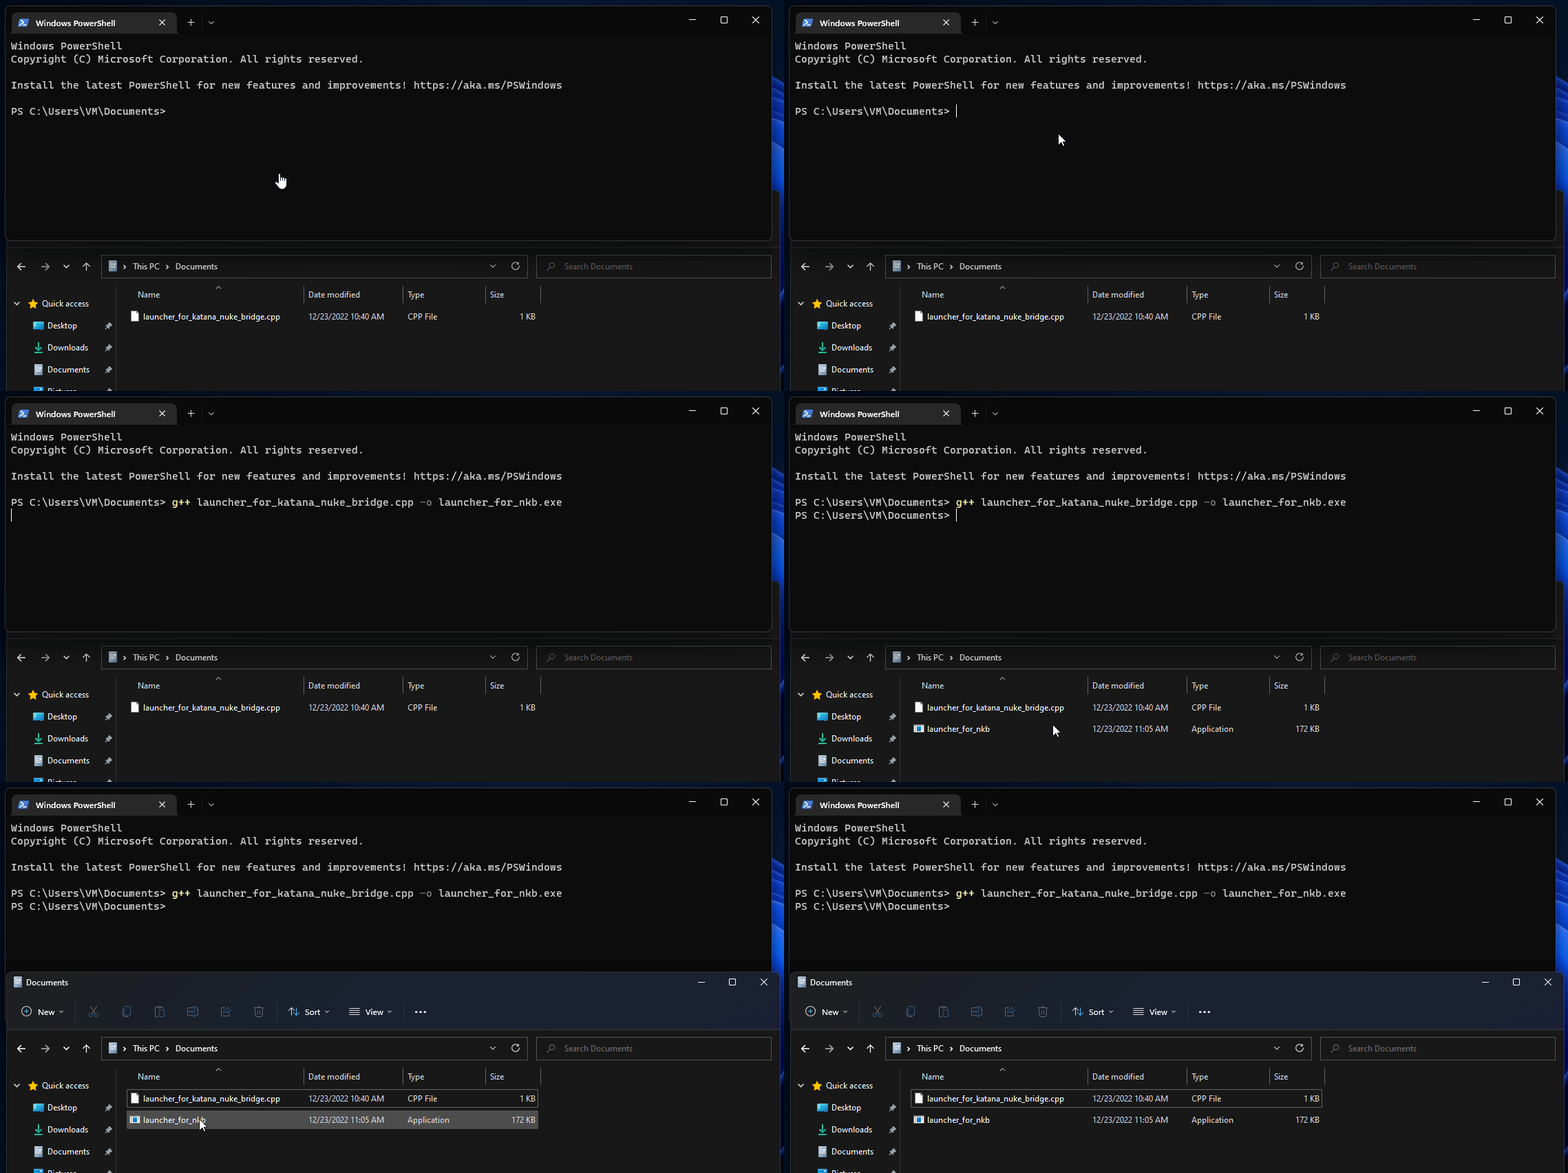
For example, my file is named launcher_for_katana_nuke_bridge.cpp and I want my .exe file to name launcher_for_knb.exe the command will look like this.
g++ launcher_for_katana_nuke_bridge.cpp -o launcher_for_nkb.exe
Finally, press Enter and the executable file will be created!
4. Tell Katana to use the new executable we created
We are now at the last step! Change KATANA_NUKE_EXECUTABLE to the executable we created.
Before
set KATANA_NUKE_EXECUTABLE=S:\Program Files\Nuke13.1v5\Nuke13.1.exe
After
set KATANA_NUKE_EXECUTABLE=C:\Users\VM\Documents\launcher_for_nkb.exe
Finally, save and launch Katana with your launcher script. You should be able to use Nuke Bridge with nuke_i license now!
Resources
Please let me know if anything needs to be changed or if something is unclear.
Subscribe to my newsletter
Read articles from Minami Kanako directly inside your inbox. Subscribe to the newsletter, and don't miss out.
Written by

Minami Kanako
Minami Kanako
I'm now a graduated Visual Effects student who is interested in coding, designing, animation, and many other things—especially technical stuff. I love cats. 🐱