Getting Started With Java Servlet Programming
 Soumyadip Dutta

Enough of Java Basics this is what I thought a while back. Well, I am not a competitive programmer but it was time I used Java's potential to develop applications. In an era where JavaScript and Python technologies are used as backends, Java still holds the fort quite well. Honestly, I never fully explored Java until now or in these few weeks. Thanks to a roadmap I got on a LinkedIn post, I decided to learn the complete Java backend stack. But in the beginning, it will not be easy but it is not boring as well. So where to start and what did you know at least to start Java Servlet Programming also known as JSP. Well here is a little touchdown of what I got to know in the few weeks.
Pre-requisites for JSP
Basic Java (of course)
OOPs will help
That's it. But before learning JSP, you need to get through JDBC(Java Database Connectivity) which is a standard API provided by Oracle for Java apps to interact with databases(relational mind that). Here you can pass queries like SQL and can perform CRUD ops. Create a table, insert and update data and delete them. Once you understand JDBC it's time to jump into Servlet and JSP.
What is Servlet?

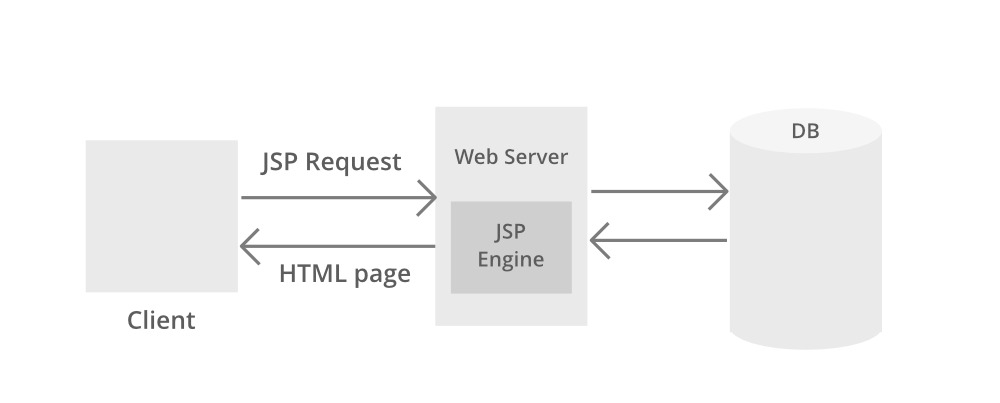
Servlet is just a Java program that runs on the server and handles requests and sends responses. If you have been to Web apps that fetch data and send responses you will already understand what it does.
How To Create Servlet?
To create a servlet we need to implement the Java Servlet interface. But we need to sort a few things first.
Install the Apache Tomcat Server on your machine.
On your IDE(I am using Eclipse) install the Java Web Developer tools since it does not come installed by default.
Open the Window on Eclipse and search for Server.
Click on Add and select the version of Tomcat you downloaded. Then, Next and browse the directory and select the folder where Apache is installed and select the parent directory of the bin folder.
The server environment is set and now you need to configure the server.
Click on Window again and select Show View -> Servers and click on the link to create a new server. Click Finish. Right-click and start the server.
Now, create a Dynamic Web Project and select the Runtime as Apache Tomcat. Add Web.xml and Finish.
That's it.
Now, we need to create a package in java/src and then create a JavaClass. Now you can use three kinds of classes here, Servlet, Generic Servlet, and HttpServlet. They will function the same but there are differences. While you need to implement the Servlet interface, you need to extend to Generic Servlet and HttpServlet with the class you are defining.
You can refer to this StackOverflow link below to understand the working in deep:
Servlet Vs Generic Servlet Vs HttpServlet
Depending on what you use the methods will differ in the user-defined class. After creating the class you need to do some work on web.xml which is essential. I am pasting the code for reference.
<servlet\>
<servlet-name\>Register</servlet-name\>
<servlet-class\>com.forms.RegisterServlet</servlet-class\> //Fully qualified class name
</servlet\>
<servlet-mapping\>
<servlet-name\>Register</servlet-name\>
<url-pattern\>/register</url-pattern\> //using this URL pattern you will be able to navigate to the register page
</servlet-mapping\>
I know I didn't explain the code of the Servlet class and this web.xml might appear confusing, but since it will differ in every use case, you need to get the code as per your requirement.
I don't know JSP fully yet but this is my learning compiled in the past week. Until I learn some more stuff I hope you have an amazing start to the year 2023. Meet you in the next article.
Stay hungry. Stay foolish
- Steve Jobs
Subscribe to my newsletter
Read articles from Soumyadip Dutta directly inside your inbox. Subscribe to the newsletter, and don't miss out.
Written by
