How to passwordless authenticate DEV and PROD Systems with an Azure Service
 Jens Caasen
When accessing Azure resources, the Storage Account, for example, you can make the access by using the access key or Connection String that is provided on the resource.
The problem with keys

While this is a feasible way of managing access, there are several problems with this approach:
There are only 2 keys/connection strings. If you have more than 2 people or systems accessing the resource, someone has to share. While this is not optimal from a security perspective you will have to rotate the key at some point, which means everyone with the key has to act. Depending on how the key is stored that can mean a redeployment. That is if everyone was responsible enough to disclose how to change the key in the first place.
Secrets can be leaked. Totally by accident. The safest secret is the one that has no chance of ending up in a GIT Repository or attached in a file in an email. This can be archived by not having a secret in the first place.
How to not have a secret in the first place
The answer is a combination of RBAC, Managed Identity and Application Registration.
For this test scenario, we have a Blazor Server App (Client), a Storage Account (Service) and a DEV Machine. The Blazor Server App will be hosted in Azure, but the same codebase should work both in Azure and locally.
Architectural overview
To archive this, we
Register an Application registration with Azure AD for the DEV machine and use the credentials locally
Enable Managed Identity on the deployed Web Application
Add RBAC role assignments on the service
Use DefaultAzureCredentials() in code
Application registration for the DEV machine
1) Open Azure Active directory at https://portal.azure.com
2) In Application Registrations, add a new one
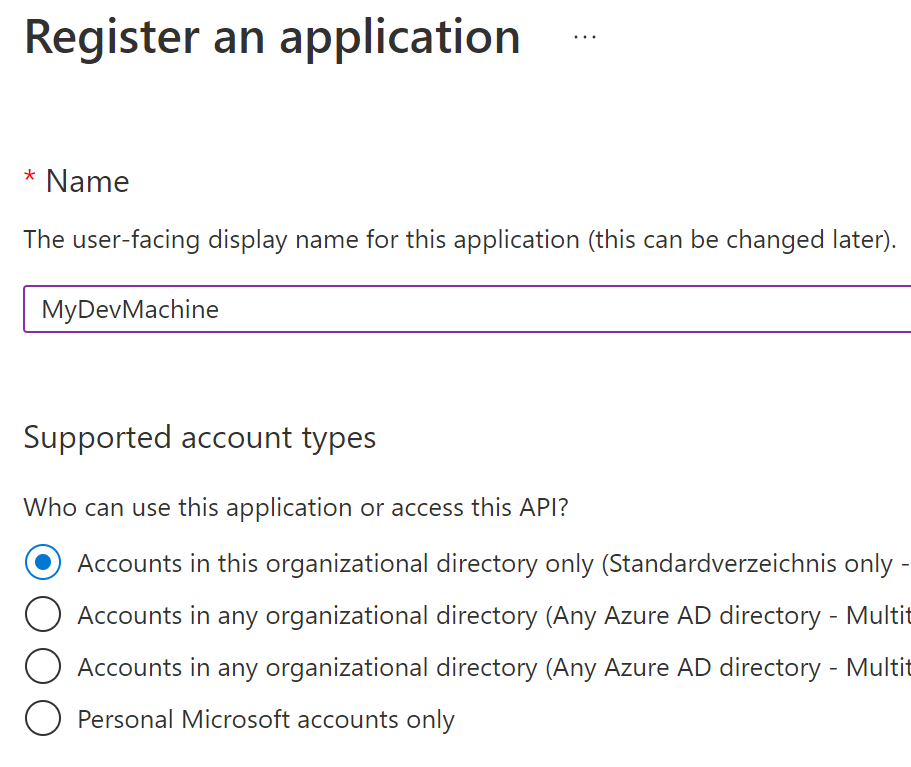
Choose a name you want to identify your machine with. The other options are not important.
3) Go to the overview page of the created application. In the essentials box, note down the Application (client) ID and Directory (tenant) ID
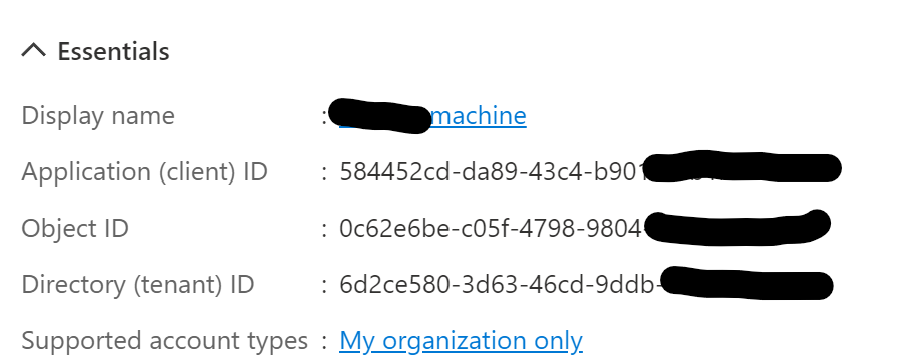
4) In "Certificates and Secrets" add a secret or a certificate. Both will work, depending on your preference, while certificates are more secure, but also more work. Note down the secret / save the certificate
5) Head to the DEV machine. Review this document: https://learn.microsoft.com/en-us/dotnet/api/azure.identity.environmentcredential?view=azure-dotnet
Add the corresponding variables to your system environment variables. Example for using a secret:

Enable managed identity on the deployed solution
1) go to your resource at https://portal.azure.com
2) click on "Identity" and switch "System assigned" Status to "On"
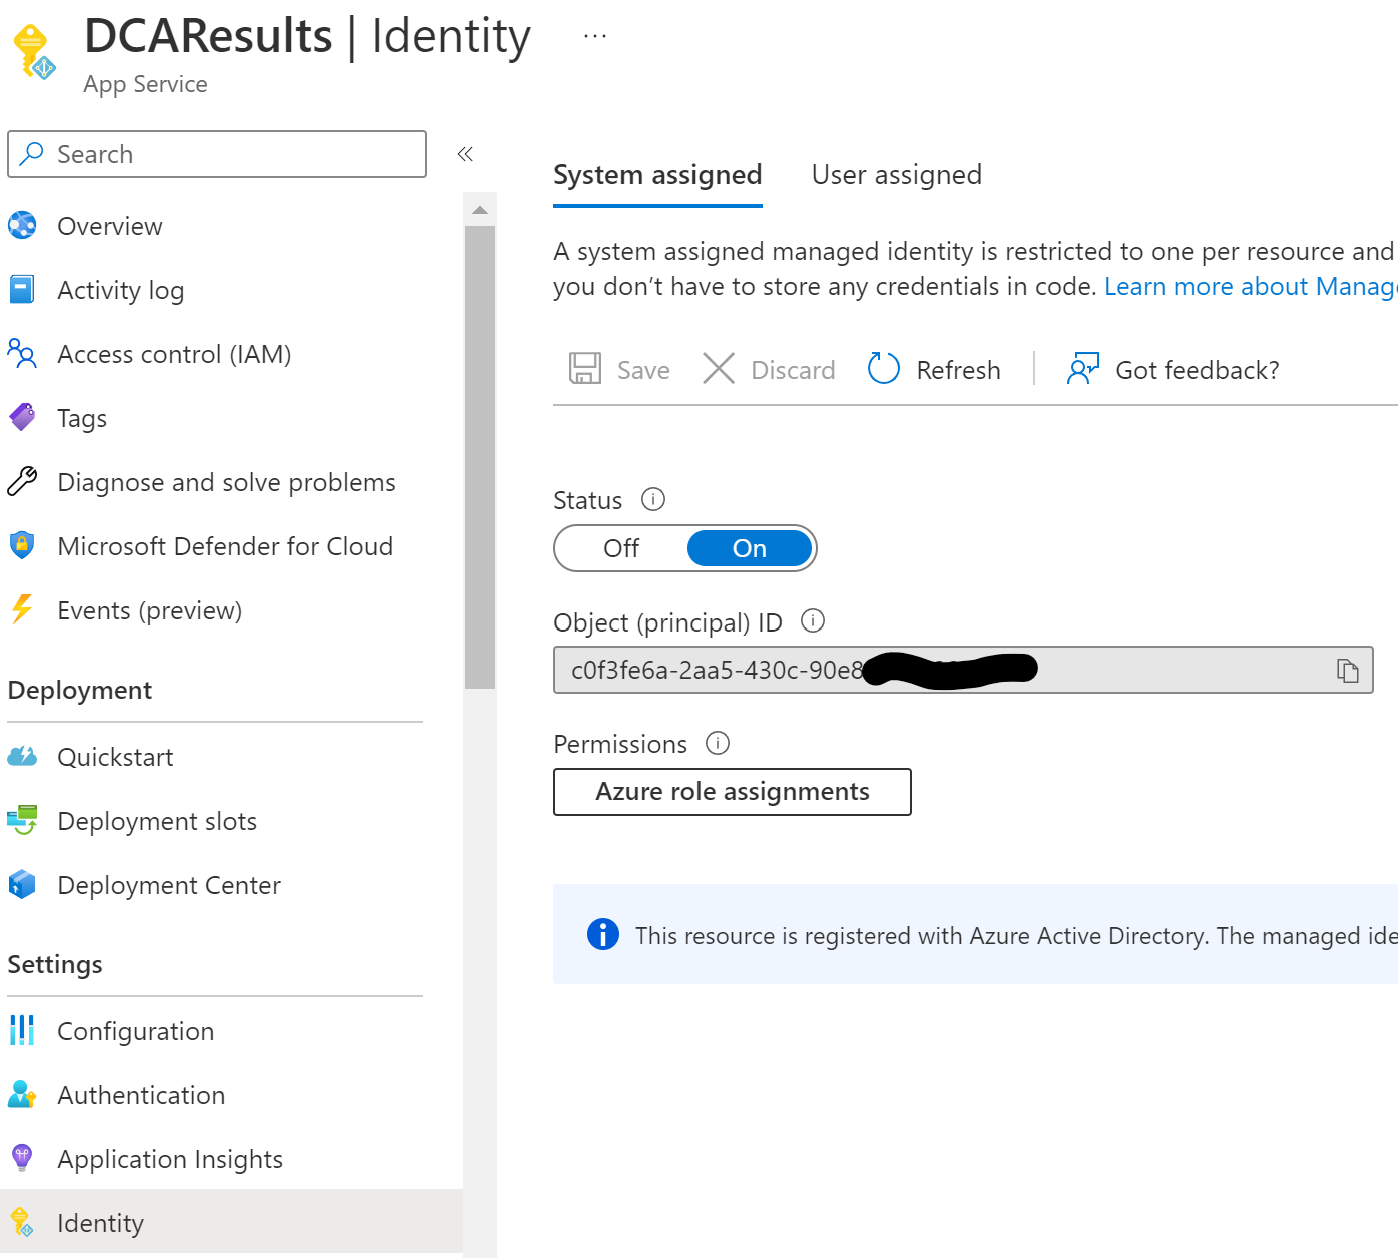
This will automatically create an enterprise application (which is NOT an application registration) with the name of the App Service ("DCAResults" in this case)
Add RBAC Role assignments
After creating an application registration for the DEV machine and an enterprise application for the deployed client app we need to give both access to the service (storage account) we want.
1) Open the service resource at https://portal.azure.com and click on "Access Control (IAM)"
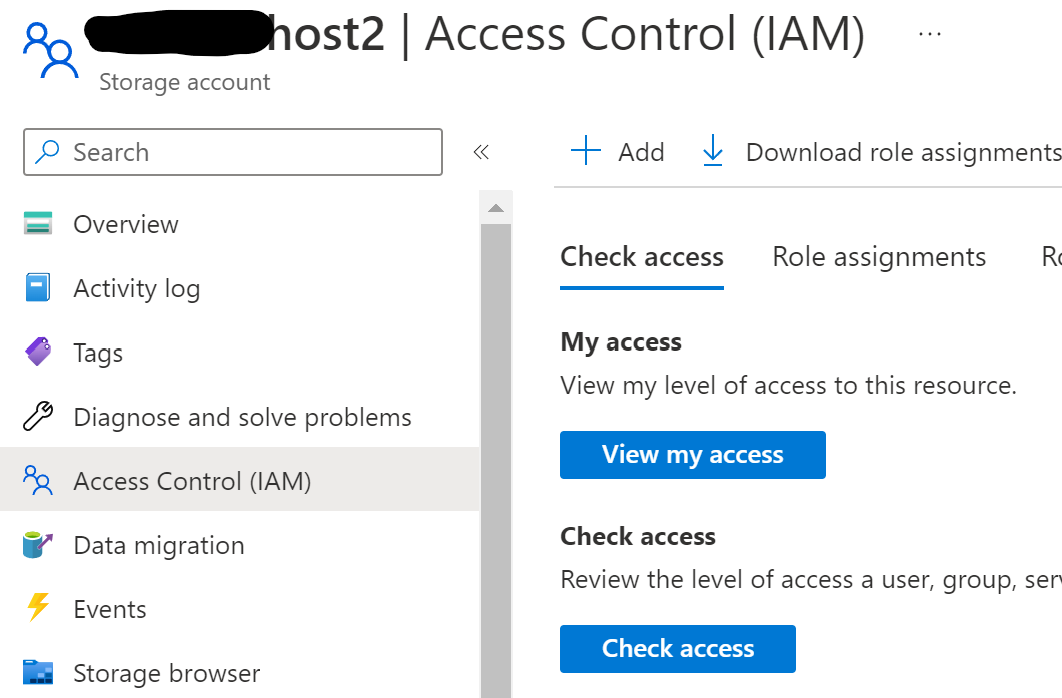
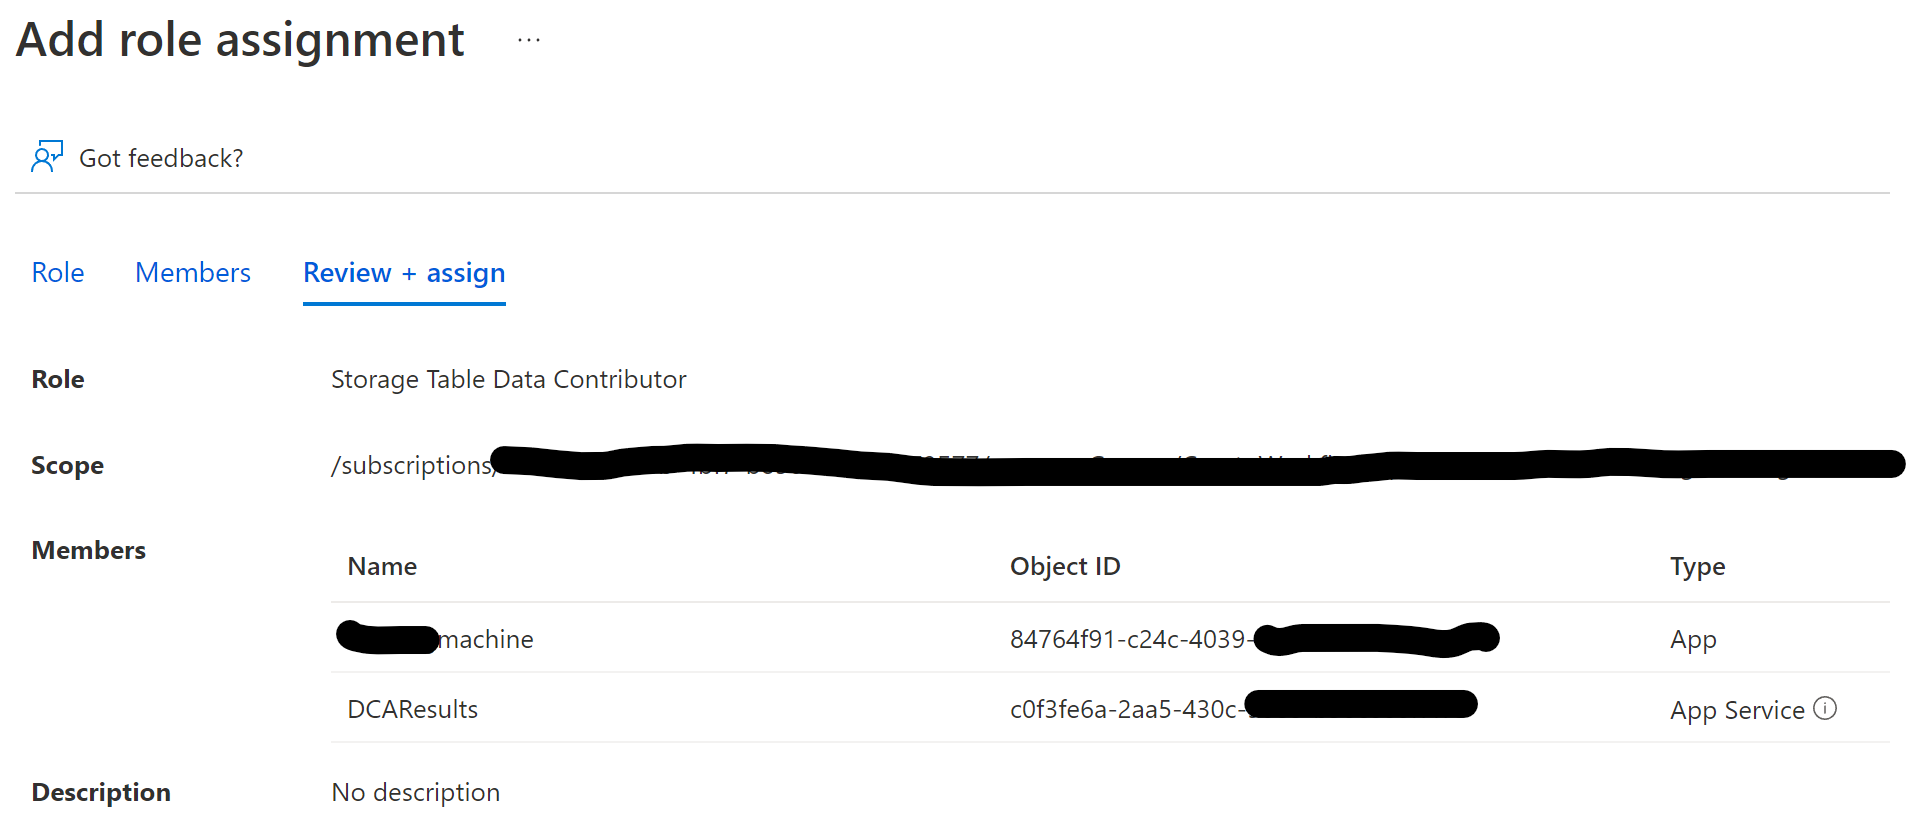
2) Click "Add role assignment" and select the role you need ("Storage Data Table Contributor" in my case, as my app needs to read and write data from a table, but not manage resources and not access blobs or queues).
3) in the "Members" blade, click on "User, group or service principal" and "Select members". In the popup, search for the Application Registration you created for the DEV machine and add it
4) Now select "Managed identity" and select the resource in the popup that you enabled managed identity on
The final summary should look something like this:
DefaultAzureCredentials
Now all that's left to do is to change the code to utilize both the service principal (app registration) and the managed identity. The class DefaultAzureCredentials tries a list of ways to log in as an azure resource. The ones we are going to use are "EnvironmentCredential" and "ManagedIdentityCredential". Based on what is available the class will automatically select.
private static TableClient GetTableClient()
        {
            var credential = new DefaultAzureCredential();
            var serviceClient = new TableServiceClient(new Uri("https://XYZhost2.table.core.windows.net/"), credential);

            TableClient tableClient = serviceClient.GetTableClient( tableName: "dca");
            return tableClient;
        }
Conclusion
And that's it. The code is now going to run both locally and deployed in azure without having a key or ConnectionString stored. The Service Principal on the DEV machine can be reused to give access from that specific machine automatically.
Subscribe to my newsletter
Read articles from Jens Caasen directly inside your inbox. Subscribe to the newsletter, and don't miss out.
Written by

Jens Caasen
Jens Caasen
I am a cloud-native developer at the international university of applied sciences, working mostly with Microsoft technology