How to Build a Counter App with a Buttery Smooth UI.
 FATIMAH BADMUS
Table of contents

This is my first Article and I would explain how I built a shopping cart app on my PC as a student of Software Engineering at AltSchool Africa using React. Features included are:
Custom counter hook with increment, decrement, reset, and set Value functions with a Buttery smooth UI.
Implement a combination of states with a UseReducer that implements a counter with the four evident features in the custom hook - increment, decrement, reset and set Value.
Implement a page for the custom hook, useReducer, and Error Page, with good error catch using error boundary and a good SEO.
Prerequisites
Basic knowledge of React and Javascript.
Tools
Integrated Development Environment. I used VS code editor. Here are instructions to set up VS code.
You need to download and install NODE.JS here.
To check the existing version of your NODE.JS run the command below from your terminal
node -vSee setup instructions here
Creating a React(vite) App.
Open a new Terminal and add the command below:
npm create vite@latest app-name -- --template react
cd app-n - this takes you to the app folder.
npm install npm run dev
npm Node package manager stems from when npm first was created as a package manager for Node. js. All npm packages are defined in files called package.json.

Default Installation
cd also known as chdir (change directory), is a command-line shell command, used to change the current working directory in various operating systems. So by passing cd shopping cart, you have changed the working directory to the shopping cart.
Install the Error Boundary Package by typing the command below in your terminal.
npm i react-error-boundary
Error boundaries are React components that catch JavaScript errors anywhere in their child component tree, log those errors, and display a fallback UI instead of the component tree that crashed. It catches errors during rendering, in lifecycle methods, and in constructors of the whole tree below them.
Lastly, install the React Router Dom Package with the command below.
npm i react-router-dom
Now that we have created the app and installed all the packages needed, you can start creating your files and folders by right-clicking on the file or folder at the top left-hand side as needed.
To start with, inside our SRC folder we are creating our
Components folder which will hold all our components
Pages folder to hold our pages
Hooks folder for our custom hook

Folders Structuring
Run the application using the command below;
npm run dev
To start building create your first componet inthe component folder and name it Nav.jsx and add all the code below
import React from "react";
import { Link } from "react-router-dom";

const Nav = () => {
  return (
    <>

      <nav>
      <Link to="/"   className="home">Home</Link>
        <div>
        <Link to="error" className="errorlink">
          ErrorBoundary
        </Link>
        <Link to="errorpage" className="error">
          404 Page
        </Link>
        <Link to="/customreducer" className="customlink">
          CustomHook
        </Link>
        </div>
      </nav>
    </>
  );
};

export default Nav;
Inside the src/App.js file, we can import the Nav.jsx we created so we can view it in the browser.
import React from "react";
import Nav from "./Components/Nav";

const App = () => {
  return (
    <div className="app">
      <Nav />
    </div>
  );
};

export default App;
Nav Preview in Browser after styling.

Create a Landing page file Under Pages and add codes below;
import React from "react";
import { Link } from "react-router-dom";
import Nav from "../Components/Nav";

const Landing = () => {
  return (
    <>
      <div className="err">

        <h1 >Welcome to DealDey</h1>
        <Link to="counter">Continue to the Shopping Cart </Link>
      </div>
    </>
  );
};

export default Landing;
Landing page preview on Browser after styling.

Add Your Reducer Component and add the codes below ;
function reducer(state,action) {
    console.log()
    switch (action. type) {
      case "increment":
        return state + 1;
      case "decrement":
        return state - 1;
      case "reset":
        return 1;
        case "set":
          return state= action.payload;
      default:
      return state
  };

}


export default reducer
Create Your Counter Page with the code below
import { useReducer, useState } from "react";
import { Link } from "react-router-dom";
// import useCounter from "../Hooks/useCounter";
import reducer from "../Components/reducer";

const Counter = () => {
  const [state, dispatch]=useReducer(reducer, 1);
  const[value,setValue]=useState(1)

  return (
    <>
      <section>
        <div  className="container">
        <h3 className="cart">My Shopping Cart</h3>
        <h2>Quantity:{state}</h2>

        <button
          className="btn1 decr"
          onClick={() => dispatch({ type: "decrement" })}
          disabled={state === 1}
        >
          -
        </button>
        <input
          className="input"
          type="text"
          value={value}
       onChange={(e)=>setValue(e.target.value)}

        />
        <button className="btn1 set" onClick={()=> dispatch({type: "set",payload:+value})}>Set</button>
        <button
          className="btn1 incr"
          onClick={() => dispatch({ type: "increment" })}
        >
          +
        </button>
        <button
          className="btn1 res"
          onClick={() => {dispatch({ type: "reset" })
        setValue(1)

        }}
        >
          Reset
        </button>
        <p>
          <Link to="error">
          <button className="btn cont" >
            CONTINUE SHOPPING
          </button>
          </Link>
          <button className="btn view" >
            VIEW CART AND CHECK OUT
          </button>
        </p>
        </div>
      </section>
    </>
  );
};

export default Counter;
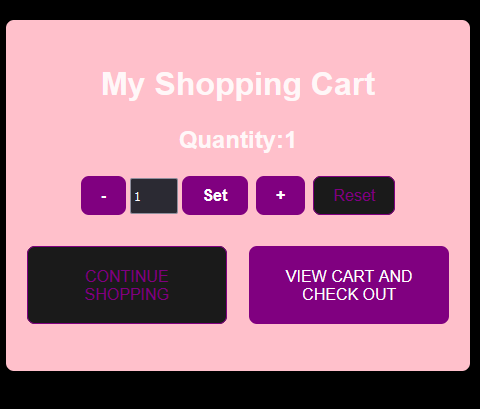
Counter preview on the Browser after styling

Add a file for the Error Boundary under the pages folder and add the code below:
import { useState } from "react";

const ErrorBoundaryTest = () => {
  const [error, setError] = useState(false);

  if (error) {
    throw Error("something went wrong");
  }
  return (
    <div className="err">
      <button onClick={() => setError(true)}>Test Error</button>
    </div>
  );
};

export default ErrorBoundaryTest;
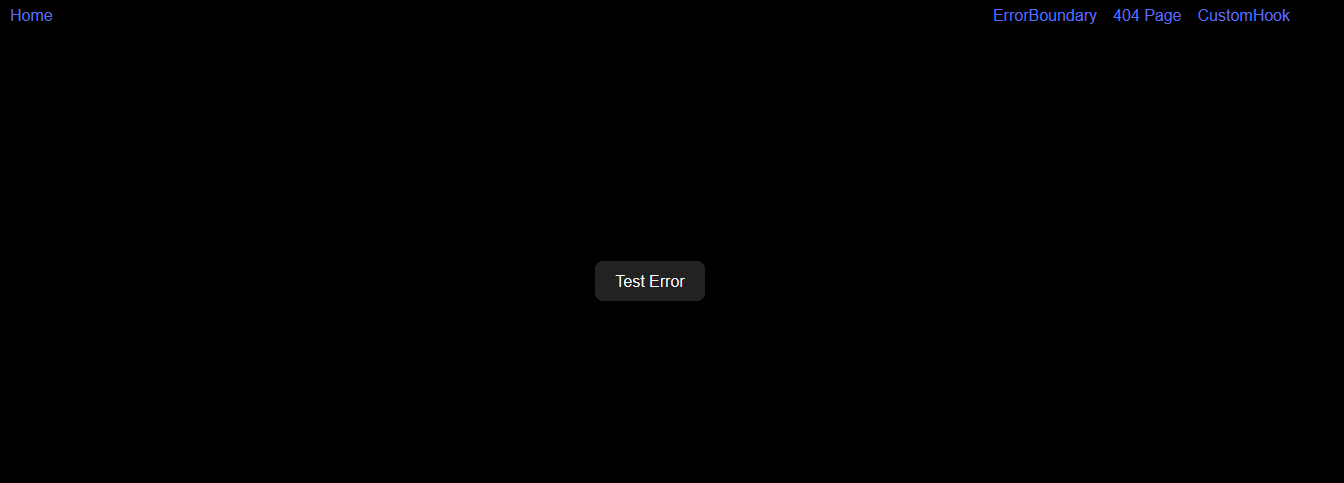
Browser Preview of Error Boundary page after styling.

When you click the Test Error Button it takes you here.

Now go to your App.jsx and add this code for your Nested routes and also implement your error boundary.
import React from "react";
import Counter from "./pages/Counter";
import { BrowserRouter as Router,Route, Routes, useNavigate } from "react-router-dom";
import Error from "./pages/Error";
import "./App.css"
import Boundary from "./pages/Boundary";
import Nav from "./Components/Nav";
import CustomHook from "./pages/CustomHook";
import {ErrorBoundary} from "react-error-boundary"
import Landing from "./pages/Landing";

function fallBack({error, resetErrorBoundary}){
  return <div>
    Something went wrong
    <p style={{color:"red"}}>{error.message}</p>
    <button onClick={resetErrorBoundary}>Go Home</button>
  </div>
}

const App = () => {
const navigate=useNavigate()
  return (
    <ErrorBoundary FallbackComponent={fallBack} onReset={()=>{
      navigate("/")
    }
        }>
    <div className="app">


      <Nav/>
        <Routes>
      <Route path="counter" element={<Counter />} />
      <Route path="customreducer" element={<CustomHook/>}/>
      <Route path="error" element={<Boundary/>}/>
      <Route path="/" element={<Landing/>}/>
      <Route path="*" element={<Error />} />

    </Routes>

    </div>
    </ErrorBoundary>
  );
};

export default App;
Create a file for the error page under the pages folder and add the code below.
import React from 'react'
import { Link } from 'react-router-dom'

const Error = () => {
  return (
    <>
    <div className="err">
      <h2>Oops! you have entered wrong URL</h2>
    <Link to="/">Go back Home</Link>
    </div>
    </>
  )
}

export default Error;
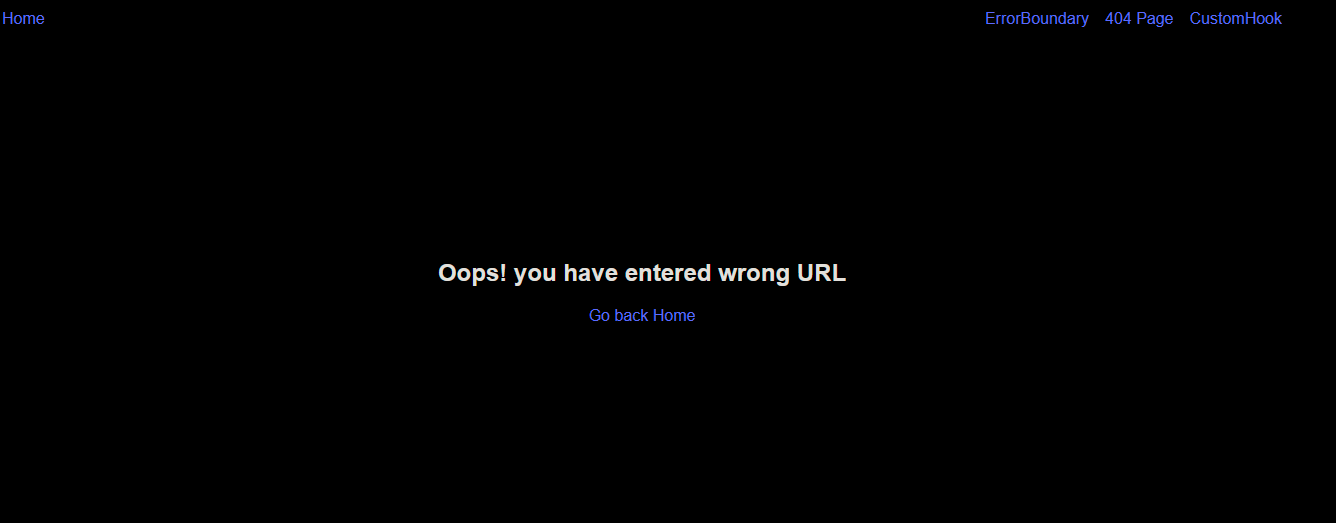
Browser Preview of the Error Page aka 404 page.

Add a file for UseCounter.js inside the Hook folder;
import  { useState} from "react";


function useCounter(reducer, initialState) {
 const[count, setCount]=useState(initialState)

 function dispatch(action){
    let state= reducer(count,action)
    setCount(state)

 }
 return [count,dispatch]
}

export default useCounter;
Lastly create the Customer Hook Page under pages folder and add the code below;
import React, { useCallback, useState } from "react";
import reactLogo from "../assets/react.svg";

const useCounter = (initialCount) => {
  const [count, setCount] = useState(initialCount);
  const handlechange = useCallback(({ target: { value } }) => {
    setCount(value);
  }, []);

  return {
    value: count,
    increment: () => setCount((prevCount) => prevCount + 1),
    decrement: () => setCount((prevCount) => prevCount - 1),
    reset: () => setCount(initialCount),

    handlechange: handlechange,
  };
};

const CustomHook = () => {
  const counter = useCounter(0);
  const [value, setValue] = useState(0);
  return (
    <section className="App">
      <div>
        <div>
          <a className="imglink" href="https://vitejs.dev" target="_blank">
            <img src="/vite.svg" className="logo" alt="Vite logo" />
          </a>
          <span>{counter.value}</span>
          <a className="imglink" href="https://reactjs.org" target="_blank">
            <img src={reactLogo} className="logo react" alt="React logo" />
          </a>
        </div>
        <h1>Custom Hook with Use Reducer.</h1>
        <div className="card">
          <button className="btn1 incr" onClick={counter.increment}>
            +
          </button>
          <input
            className="input"
            type="text"
            value={counter.value}
            onChange={counter.handlechange}
          />

          <button
            className="btn1 decr"
            onClick={counter.decrement}
            disabled={counter.value === 0}
          >
            -
          </button>
          <button className="btn1 res" onClick={counter.reset}>
            Reset
          </button>
        </div>
      </div>
    </section>
  );
};

export default CustomHook;
Below is the CSS for the whole app. Add this to your App.css;
#root {
  max-width: 1280px;

  padding: 2rem;
  text-align: center;
}

.logo {
  height: 6em;
  padding: 1.5em;
  will-change: filter;
}
.logo:hover {
  filter: drop-shadow(0 0 2em #646cffaa);
}
.logo.react:hover {
  filter: drop-shadow(0 0 2em #61dafbaa);
}

@keyframes logo-spin {
  from {
    transform: rotate(0deg);
  }
  to {
    transform: rotate(360deg);
  }
}

@media (prefers-reduced-motion: no-preference) {
  a:nth-of-type(2) .logo {
    animation: logo-spin infinite 20s linear;
  }
}

section{
  height: 100vh;
  display: flex;
  align-items: center;
  justify-content: center;
}

.card {
  padding: 2em;
}

.read-the-docs {
  color: #888;
}

.container {
  background-color: pink;
  border-radius: 0.5rem;
  padding: 20px 10px;
}

.btn {
  margin: 0.7em;
  padding: 20px 20px;
  width: 200px;
}

.btn1 {
  margin: 4px;
}

.input {
  height: 30px;
  width: 40px;
}

.view {
  background-color: purple;
  color: white;
  transition: all 0.2s ease;


}

.view:active{
  transform: scale(0.9);

  }

  .cont:active{
    transform: scale(0.9);
  }

.cont,
.res {
  border: purple 1px solid;
  color: purple;
  transition: all 0.2s ease;
}

.cart {
  font-weight: bold;
  font-size: 2rem;
  text-transform: titlecase;
}

.decr,
.incr,
.set {
  background-color: purple;
  color: white;
  font-weight: bold;
}

body {
  background-color: black;
}


.App span {
  font-size: 11rem;
  color: white;
}

nav{
  display: flex;
  justify-content: space-between;
}

nav>div{
  display: flex;
  gap: 1rem;
}

.err{
    height: 80vh;
    align-items: center;
    justify-content: center;
    display: flex;
    flex-direction: column;
}

@media (max-width: 480px) {
  .imglink {
    display: none;
  }
  .App span {
    font-size: 2.5rem;
  }
  nav {
    margin-bottom: 3rem;
  }
  nav>div{
    flex-direction: column;
    row-gap: 0.25rem;
  }

  }
Congratulations!!! The Counter App should now work as expected with Error Boundary and 404 Page implemented.
Subscribe to my newsletter
Read articles from FATIMAH BADMUS directly inside your inbox. Subscribe to the newsletter, and don't miss out.
Written by
