Create A Django Form With Django Crispy Forms And HTMX.
 Ademola Thompson
A form is an essential part of most web applications, as it is used to collect input from users. Django is a Python web framework that provides a way to create forms without having to write HTML code. But creating forms the traditional way in Django can be tedious and time-consuming. In this tutorial, you will learn how to create a Django form with Django Crispy Forms, and the new JavaScript library, HTMX.
With these tools, you can quickly and easily create beautiful, responsive forms that are easy to maintain and update. By the end of this tutorial, you will have a basic understanding of how to use Django Crispy Forms and HTMX to create forms in Django.
Prerequisites
For you to fully understand this article and follow along, you need to fulfill the following prerequisites:
Sound knowledge of HTML forms.
Good understanding of Django views, URL patterns, and templates.
Basic understanding of how requests work
What Are Django Forms?
Django forms are a crucial part of the Django web framework for handling user input. They make it easy to create and manage forms for collecting user data in a web application. Django forms are used to validate and process user input before storing it in the database or performing other operations as required.
Django Crispy Forms And HTMX.
Django Crispy Forms is a third-party package for the Django web framework that makes it easier to create and style forms. It provides a simple, consistent, and flexible way to handle form layouts and rendering. It can be used to automatically generate Bootstrap forms as well as perform tasks such as customizing form rendering on a per-field or per-form basis and generating error messages as well. It can also render forms using template packs different from Bootstrap.
HTMX is a JavaScript library that allows you to update parts of your website with new HTML content without having to reload the page. It lets you handle form submissions, fetch data from the server, and update parts of the page without having to refresh the entire page.
Create A Project In Django.
The first step to successfully creating a form with Django is to create a Django project.
Step 1: Open your terminal or command line interface and navigate to your project directory.
Step 2: Install Django by typing the following:
pip install django
This will install the latest version of Django. You can specify a particular version to install. For example:
pip install django==3.0
Django 3.0 will be installed.

Step 3: Create a Django project. To do this, type the following command:
django-admin startproject your_project_name
This will create a project directory with the project name you specify. You can open the folder in vscode to verify this.


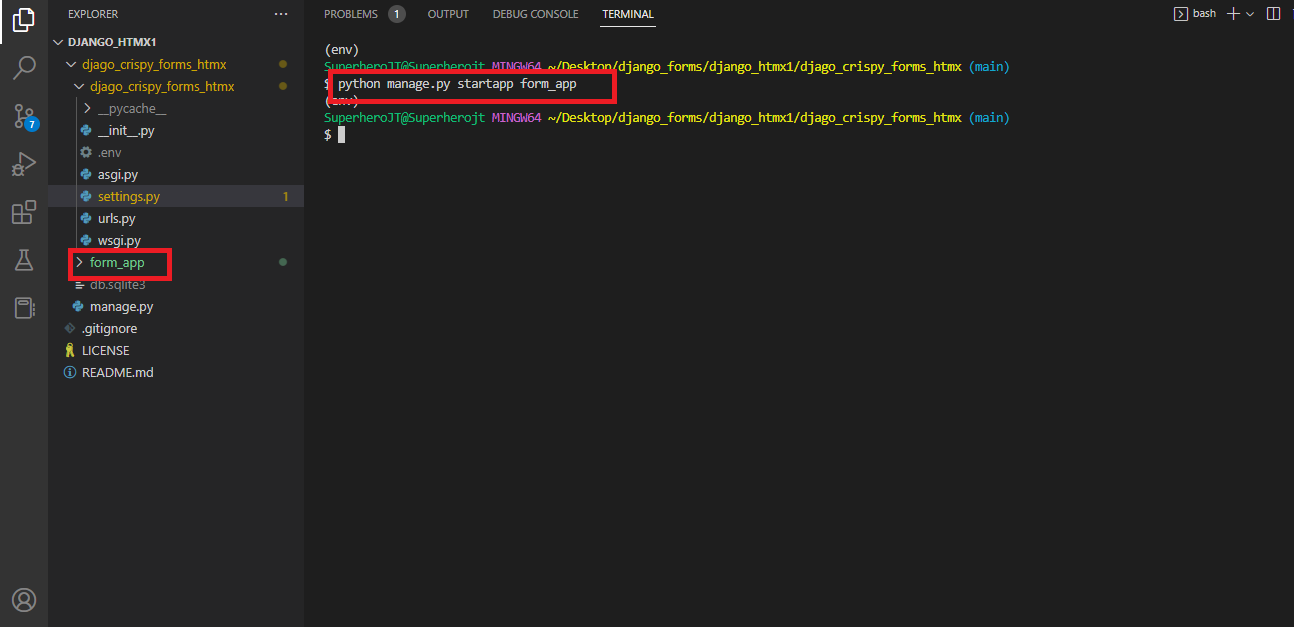
Step 4: Create a Django app. This can be achieved with the following command:
python manage.py startapp your_app_name
A subdirectory will be created. You can learn more about the differences between an app and a project in Django, here.
Creating Your Django Form.
Before diving into the creation of a form, I will explain how forms work in Django. All forms in Django inherit from the Django built-in Form class. The Form class defines fields such as text fields, checkboxes, radio buttons, and select lists, which are used in everyday forms. Each field can be customized with labels, validation rules, etc. Once defined, these fields will be mapped to HTML input fields.
Once a Form class is created, it can be rendered in the templates. It can also be processed by the logic written in the views. The process of creating a form in Django is almost the same as creating a model. To create one, follow this syntax:
from django import forms # make necessary imports

class FormName(forms.Form): # inherit from Django Form class
    field_name = forms.Field_name(**options) # this will be mapped as an HTML input field
Step 5: Create a forms.py file in your app directory.
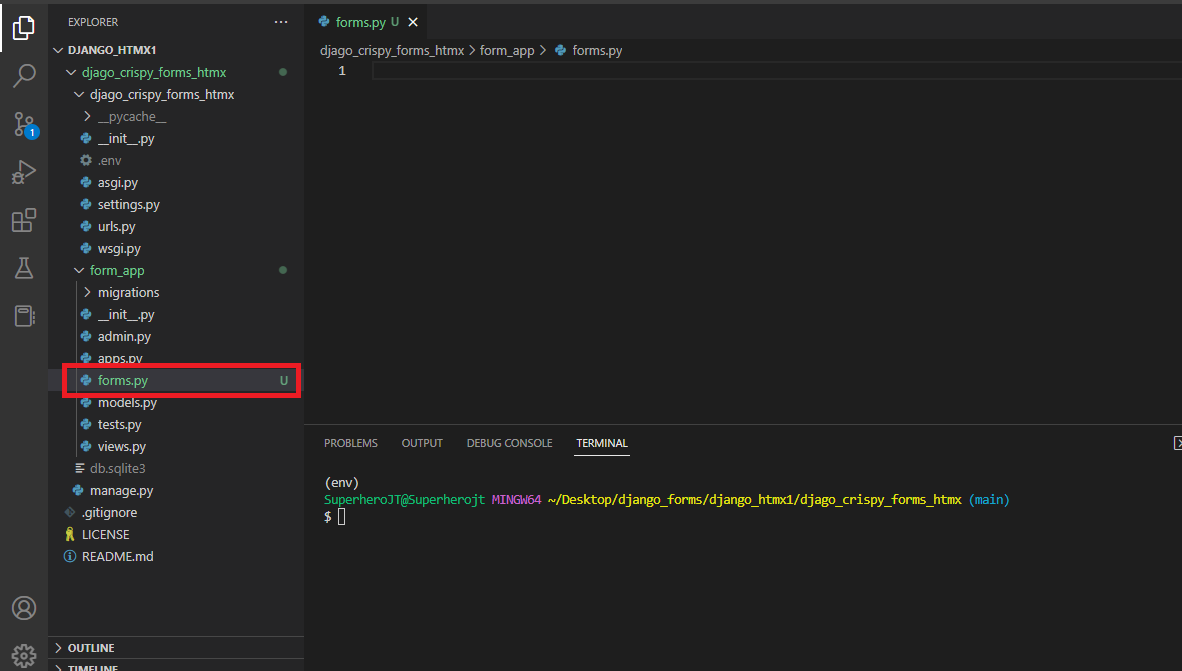
Step 6: Inside the [forms.py](http://forms.py)`` file, create a form of your choice using the syntax above. I will create a student enrollment form.
from django import forms

COURSE_CHOICES =(
    (1, 'Law'),
    (2, 'Computer Science'),
    (3, 'Business Administration'),
)
class EnrollmentForm(forms.Form):
    name = forms.CharField()
    age = forms.IntegerField()
    course = forms.ChoiceField(choices=COURSE_CHOICES)
    dob = forms.DateField()
In the code snippet above, I have created an instance of a form and defined four fields in it. I also have a tuple called COURSE_CHOICES. It contains a list of tuples, each one representing a course. The four fields in EnrollmentForm are name, age, course, and dob. The name and age fields are character and integer fields, respectively. They accept no parameters. The third field is a choice field. It will be displayed as a drop-down selection menu. It takes a parameter called choices. It is assigned to the COURSE_CHOICES tuple I earlier created. The options in the resulting drop-down will be the courses available in the tuple. Finally, the dob field is a date field. It will be used to accept the user’s date of birth.
Step 7: To visualize the form in the browser, you need to add it to your views.py file and pass it to your template.
# views.py file
from django.shortcuts import render
from .forms import EnrollmentForm # import the form from forms.py
# Create your views here.

def form(request):
    context = {
        'form': EnrollmentForm() # pass form into the context
    }
    return render(request, 'form_app/index.html', context) # Render the template with the context data and return it as the response to the client's request
# template file
{% extends 'form_app/base.html' %}

{% block content %}

{{form}}
{% endblock %}
Step 8: Make sure to include your project in the settings.INSTALLED_APPS. After this, type, python manage.py runserver in your terminal.
python manage.py runserver
Next, copy the localhost url and paste it into your browser. You should see a form. Make sure you configure your urls.py file correctly as well.
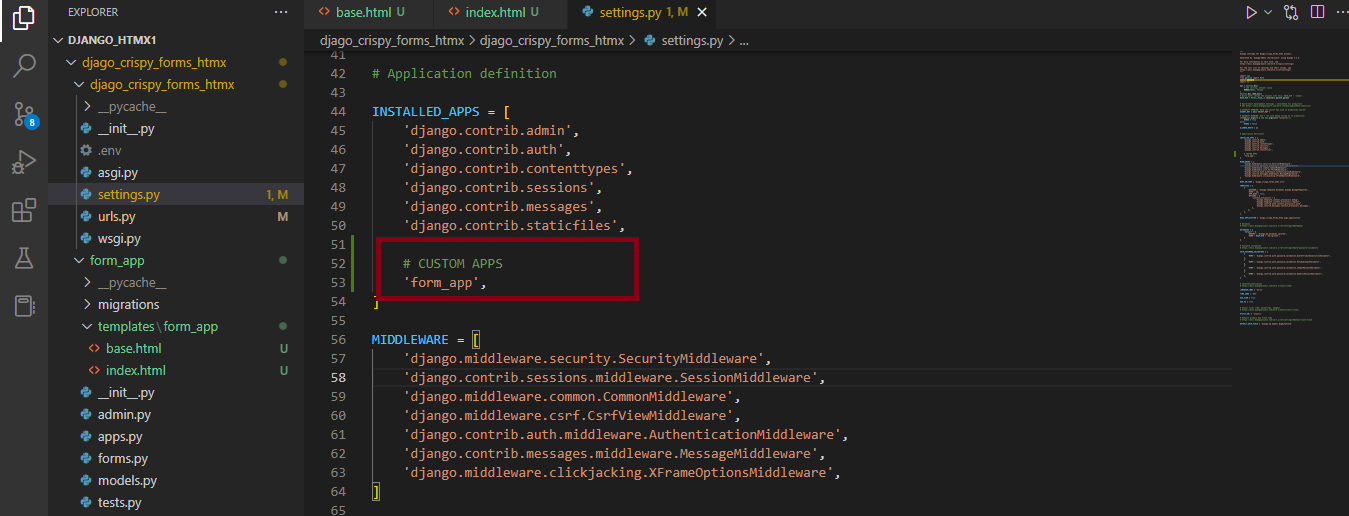


Step 9: Modify the form to allow each input field to be on a separate line.
# template file
{% extends 'form_app/base.html' %}

{% block content %}

{{form.as_p}}
{% endblock %}

Adding Crispy Forms And HTMX To Your Django Form
Adding Django Crispy Forms
Step 1: Install Django Crispy Forms with the pip command:
pip install django-crispy-forms
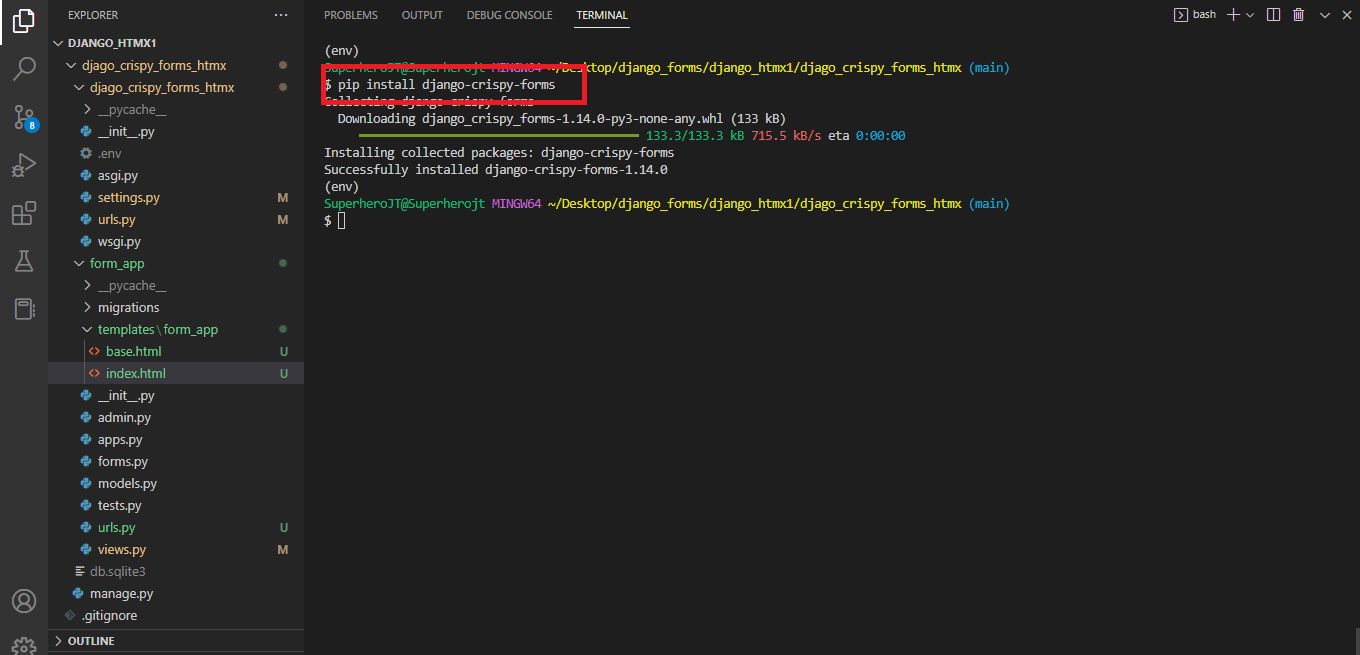
Step 2: Add crispy_forms to your installed apps.
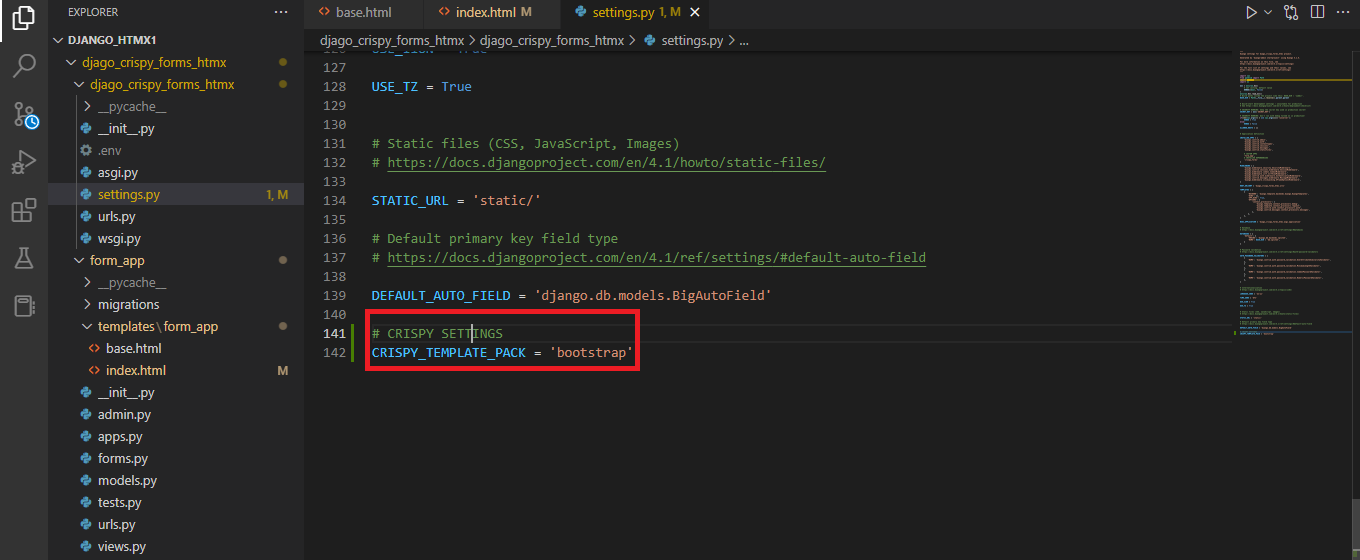
Step 3: Add CRISPY_TEMPLATE_PACK = 'bootstrap' to your settings file. This will let Django know that you are using Bootstrap.
Step 4: Add crispy_forms_tags to your template file and render the form with it. Your form should look different.
{% extends 'form_app/base.html' %}
{% load crispy_forms_tags %} #load crispy_forms_tag

{% block content %}

{% crispy form %} # render your form with the crispy tag

{% endblock %}
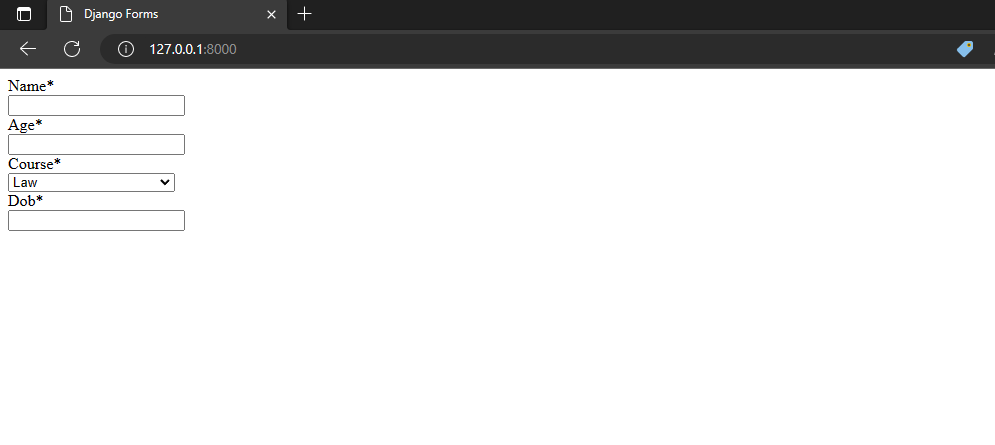
Step 5: Change the drop-down field to radio buttons and modify the date field. Django forms allow you to specify the widget you want when creating each field. To do this, modify your forms.py file and add the necessary widgets. Run the server and view your form. It should be different.
from django import forms
from datetime import datetime

COURSE_CHOICES =(
    (1, 'Law'),
    (2, 'Computer Science'),
    (3, 'Business Administration'),
)
class EnrollmentForm(forms.Form):
    name = forms.CharField()
    age = forms.IntegerField()
    course = forms.ChoiceField(
        choices=COURSE_CHOICES,
        widget=forms.RadioSelect # change widget to radio select
    )
    dob = forms.DateField(
        widget=forms.DateInput(attrs={  # change widget to date widget
        'type': 'date',
        'max': datetime.now().date()})) # prevent users from entering a future date

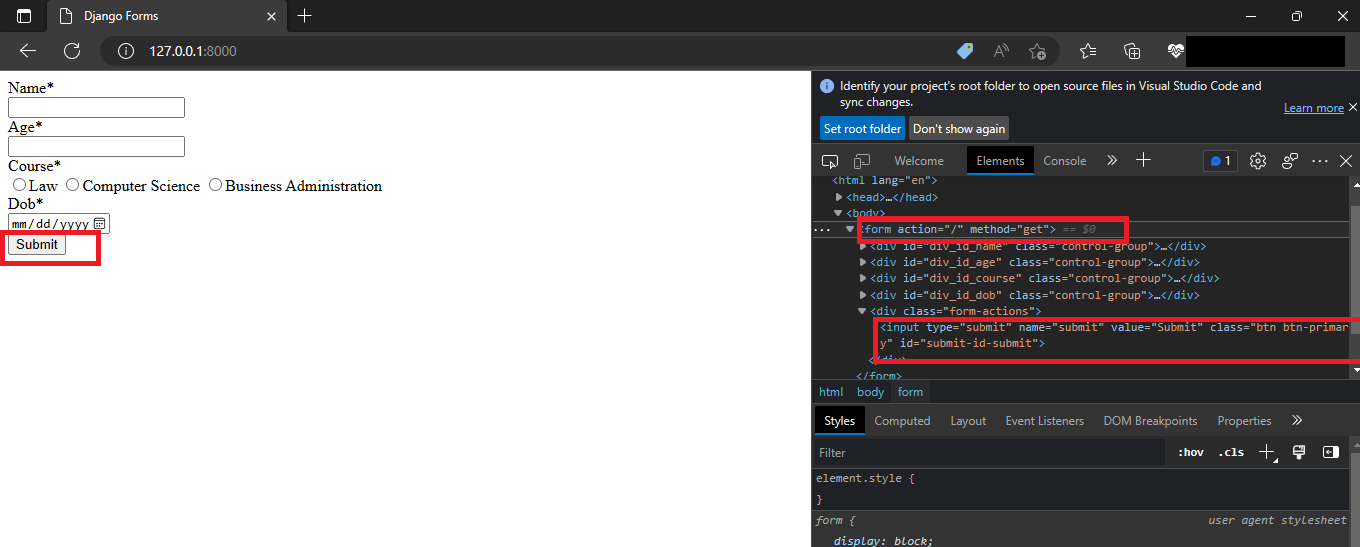
Step 6: Add a form method and a form action. Crispy forms allows you to add a method and action to your forms with ease while making use of the FormHelper class made available. The FormHelper helps you control the behavior of your form when rendered. It uses Python, so you will worry less about HTML codes. Modify your forms.py file to this:
from django import forms
from datetime import datetime

# new imports
from django.urls import reverse_lazy # for form action
from crispy_forms.helper import FormHelper
from crispy_forms.layout import Submit # for submit button

COURSE_CHOICES =(
    (1, 'Law'),
    (2, 'Computer Science'),
    (3, 'Business Administration'),
)
class EnrollmentForm(forms.Form):
    def __init__(self, *args, **kwargs):
        super().__init__(*args, **kwargs)
        self.helper = FormHelper(self)
        self.helper.form_action = reverse_lazy('form') #direct form action to the form() view
        self.helper.form_method = 'GET' # change form method to GET
        self.helper.add_input(Submit('submit', 'Submit')) # add submit button

    name = forms.CharField()
    age = forms.IntegerField()
    course = forms.ChoiceField(
        choices=COURSE_CHOICES,
        widget=forms.RadioSelect #change widget to radio select
    )
    dob = forms.DateField(
        widget=forms.DateInput(attrs={  # change widget to date widget
        'type': 'date',
        'max': datetime.now().date()})) #prevent users from entering a future date
In the above code, I used the __init__() function to initialize the helper attribute and create an instance of FormHelper.
self.helper = FormHelper(self)
To set the form action, I used the reverse_lazy() function. It works similarly to the url template tag. Here, I set the form action to go to the form() view. I also set the form method accordingly.
Lastly, I created a button for the form by making use of the Submit class available in crispy_forms.layout.
self.helper.add_input(Submit('submit', 'Submit'))
To visualize the changes, run your server, refresh your page, and inspect it. You should notice the changes in the markup.
Integrating HTMX Into Your Django Form.
You should be ready to add HTMX attributes to your form now. To do this, follow the following steps:
Step 1: Add the HTMX CDN to your template file. I will add mine to my base.html file.
<script src="<https://unpkg.com/htmx.org@1.6.1>"></script>
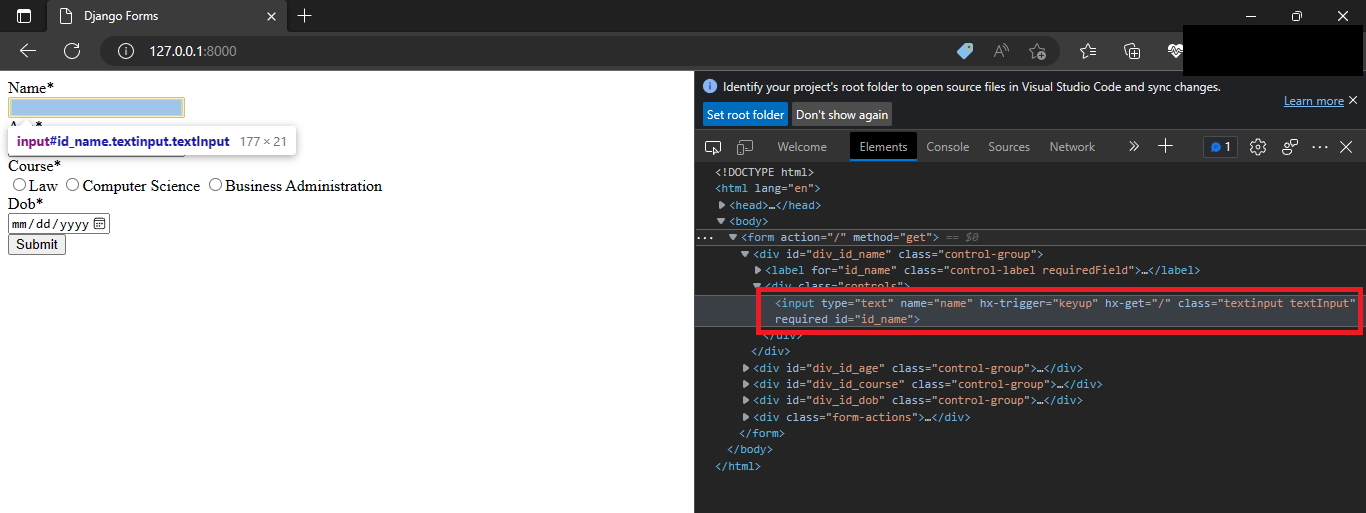
Step 2: Add HTMX attributes to form. This will be done in a similar way to when the DateInput widget was added to the dob field. I will add HTMX attributes to the name field. You can add them to any field you want. Modify the field like this:
name = forms.CharField(
        widget=forms.TextInput(
            attrs={
                'hx-trigger': 'keyup',
                'hx-get': reverse_lazy('form')
            }
        )
    )
You can add as many attributes as you want, and to any of your desired fields. To view the result of this, refresh your page and inspect it. You should see the attributes in the HTML markup.
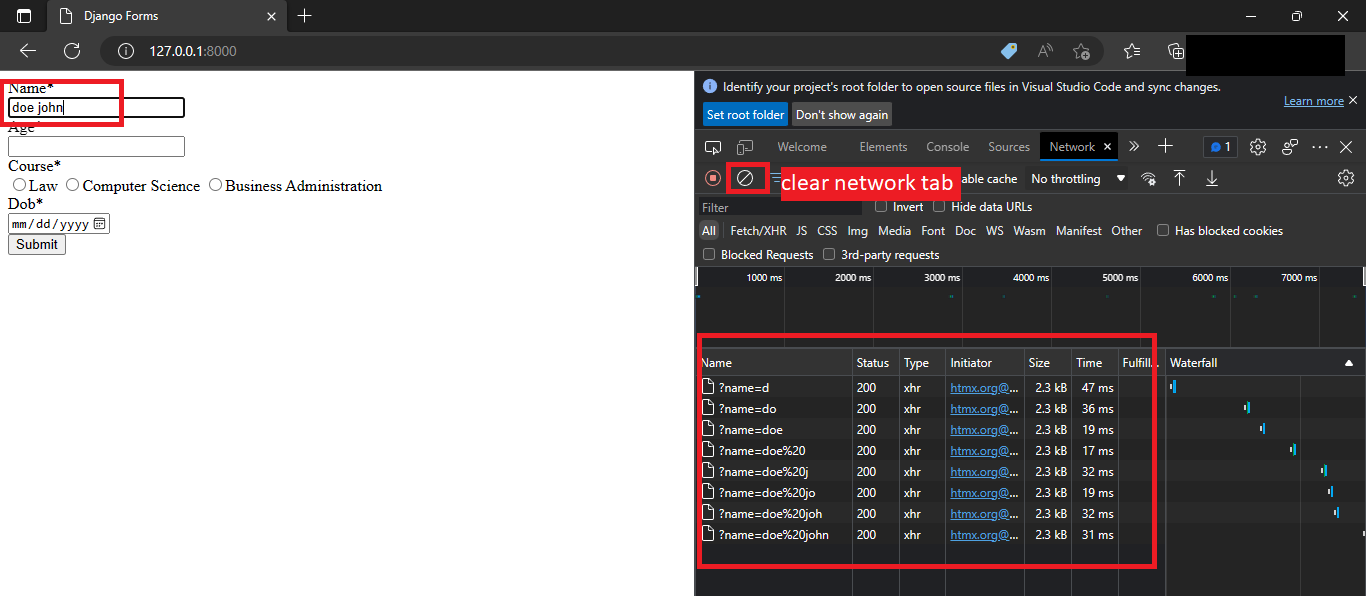
Switch to your network tab, clear it, and fill in the field you modified earlier. You will notice that you are sending HTMX Ajax requests as you type.
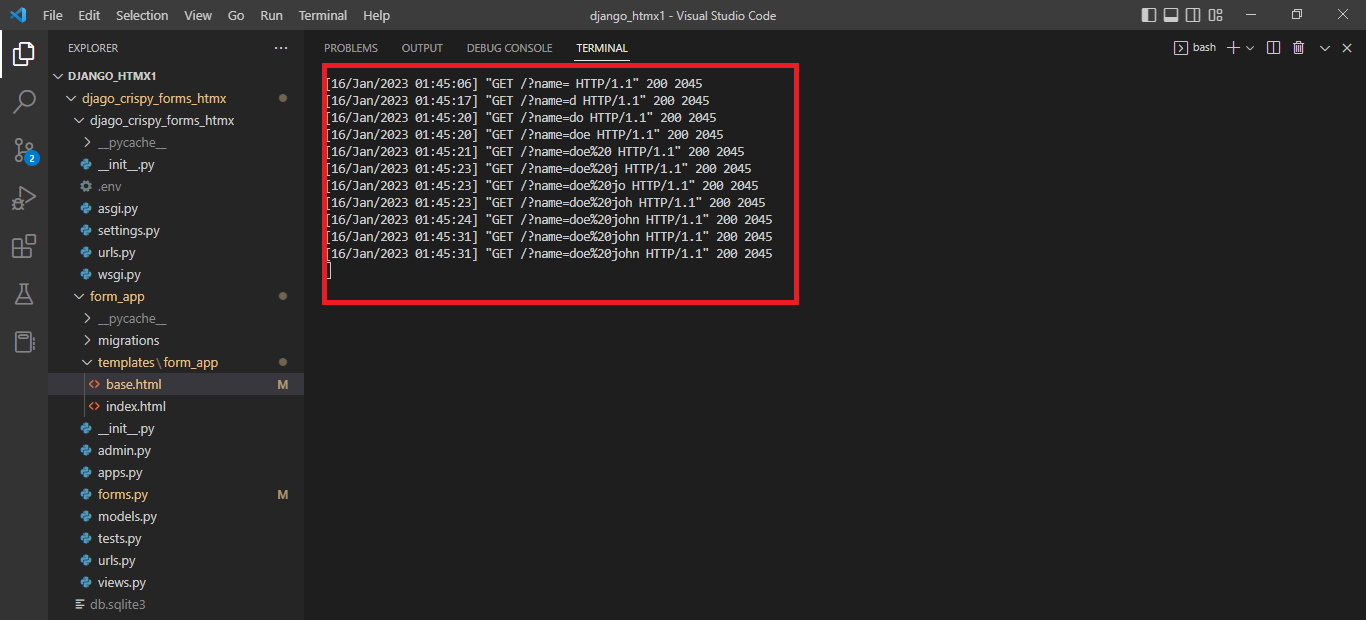
Another way to confirm this is by looking at your dev server. You should see GET requests coming in.
Conclusion
In this article, you have learned how to create a basic form with Django Crispy Forms and HTMX. In the next article, you will learn how to handle requests when the submit button is clicked. To truly understand how forms work in Django, you will need to practice them as often as possible. For further reading, you can check out these sources:
Django Forms: https://docs.djangoproject.com/en/4.1/topics/forms/
HTMX: https://htmx.org/docs/
Django Crispy Forms: https://django-crispy-forms.readthedocs.io/en/latest/
You can connect with me on Twitter. If you have any questions, please drop them in the comment section, and if you have found this article helpful, leave a like and share it with your friends. If you need the source code used in this article, you can find it here.
Subscribe to my newsletter
Read articles from Ademola Thompson directly inside your inbox. Subscribe to the newsletter, and don't miss out.
Written by

Ademola Thompson
Ademola Thompson
Ademola is a backend developer with experience with Django, a Python web framework. He enjoys teaching others what he knows about the web; hence he decided to become a technical content writer. Once in a while, he explores the possibilities of Solidity and Web 3.0. He is popularly known as SuperheroJT.