Launching an App on Apple's App Store
 Suzie
Suzie
One of the best moments as a developer is seeing your code come to life. As an iOS developer releasing an app on Apple's App Store is something to be proud of! Apple needs to review your app and approve it. Some go through no rejections, others will have at least one.
I just released my first one into the app store. I learned so much from this experience and wish I had a list of things to do prior so I could have been prepared for it. I was so focused on building my app that I wasn't as prepared as I'd like for the actual nitty gritty data part. In case you're curious (or just nosey), my first app, Parker Plays is a flashcard app geared toward kids now in the app store!
In this series, I share my some suggestions on how to prepare for App Store submission
SERIES
Part I: Preparing for the App Store
Part II: Making Sure Your App Is Ready
LET'S GET STARTED
Quick Steps
Make a developer account
Have your marketing text ready
Prepare your app preview images
Privacy Policy
Support Link
Expanded Version
Get your Apple Developer account
- TIP: If you're planning to release an app as a business (not sole proprietor), then you'll want to make sure you get an account in advance and have the required documentation read
Have Your Marketing Text Ready
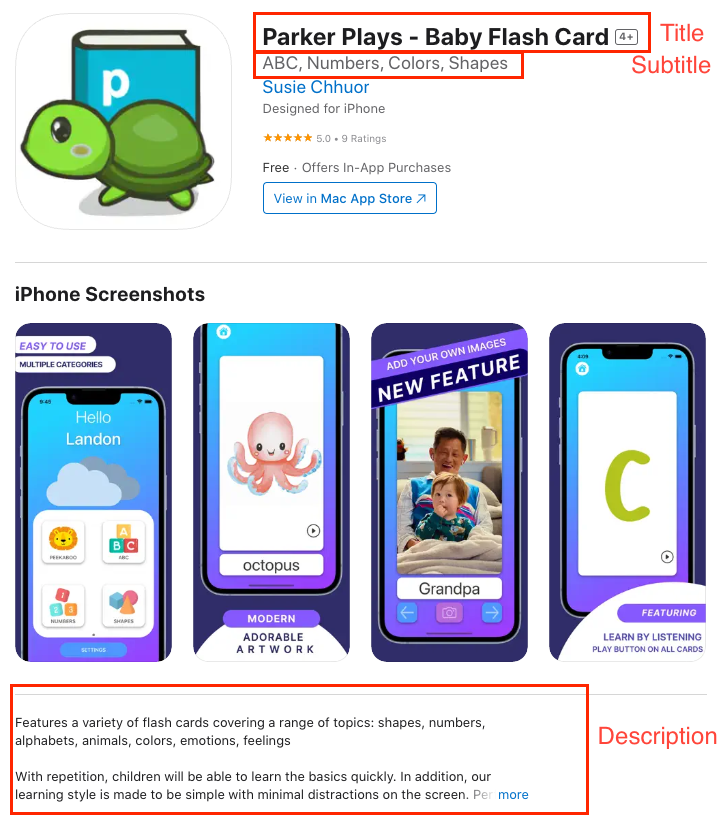
Consider working on your marketing text when you have downtime or just need a break from coding. It saves you from having to come up with what to write when you're ready to submit. Things to have written up:Title
Subtitle
Description
App Store Optimization (ASO) - keywords to help you show up better in searches. There will be a field for this when you're putting your submission together.
Example of what the Title, Subtitle and Description is

Create your App Store Preview Images
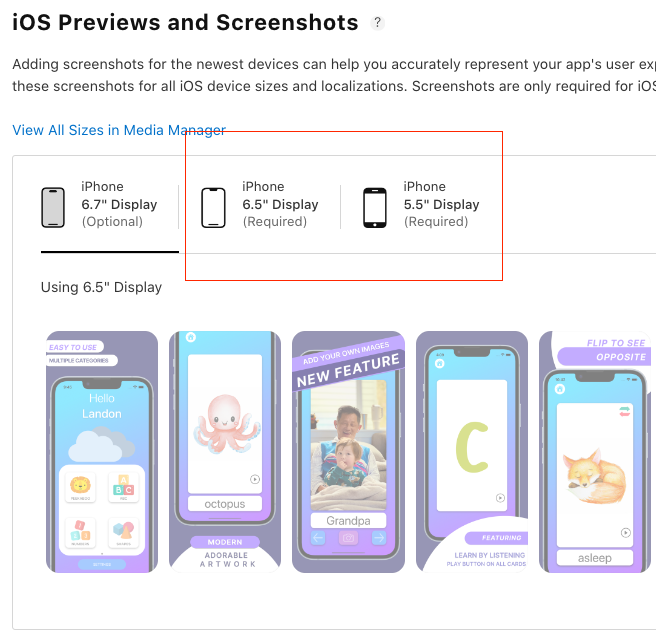
You'll want to have image previews. Depending on the device compatibility, you'll need different-sized images for each device.
Check your Xcode build under
For example, if you are iPhone compatible, you'll need images for a 5.5" screen and a 6.5" screen. If you're also iPad-compatible, you'll need additional images for those previews.
Resources:
Make your preview images include Figma (free), Canva (free), and Sketch (paid)
Get device templates to pop onto your app screenshot through Meta
TIP: Apple is extremely picky about the image sizes you're uploading - meaning the upload won't be accepted if it's not to their resolution requirements.
Apple will show you what is required. For example:

Privacy Statement: You'll need a privacy policy to link to the app store. The easiest way to do this is to create a Github README. You can easily copy and paste mine if you'd like and just change out the details (app name, contact, etc).
You can also generate your own here.
Support Link: You will need a support link / website where app users can contact you with any issues. You'll want to include at least an email. For my submission, I put something together quickly using carrd.io after getting rejected for only linking a Twitter account (hehehe :sweat_smile:)
And that's all! If you tackle this little by little while building your app you'll be able to plug everything in during submission time so you can worry about other things!
Subscribe to my newsletter
Read articles from Suzie directly inside your inbox. Subscribe to the newsletter, and don't miss out.
Written by
