NAT instance setup
 B V AKASH
In this lab, we will setup NAT instance
before this lab complete NAT Instance refer this link :-
https://bvakash.hashnode.dev/nat-instance
this is the continuation of previous lab
Step 1:- Once your NAT route is created, SSH into your nat-instance.
write the following commands:-
sudo sysctl -w net.ipv4.ip_forward=1
sysctl : it is used to view, modify the kernel parameters at the runtime.
Here we are using sysctl command to modify net.ipv4.ip_forward=1 parameter, here just to do whether IP forwarding is enabled or disabled, 1 means enabled and 0 means disabled, as per this command we enabled IP forwarding.
-w option specifies that the new value should be written to the kernel immediately, rather than just changing the value temporarily until the next reboot.
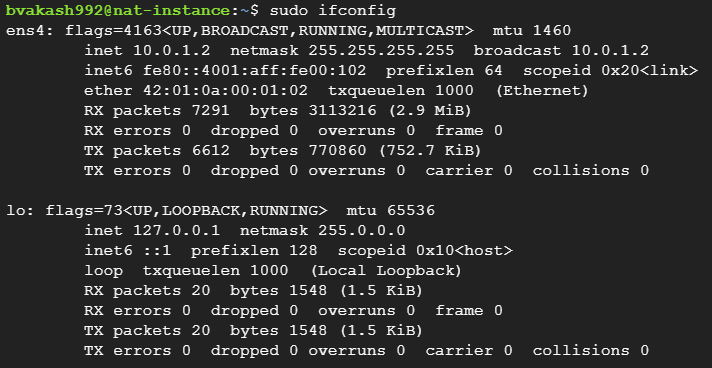
Identify the Internet-facing interface where your assigned IP address is facing the internet. In my case it is ens4. Sometimes you will get either ens4 or eth0.
ens4 similarly with eth0 is the name of the network interface that connects to the Internet on your NAT instance.
Step 2:- To identify the type of Internet-facing interface, write the following command.
sudo ifconfig

sometimes you might get error like command not found ifconfig.
You can try installing the net-tools package using the following command:
sudo apt-get update
sudo apt-get install net-tools
This package includes various network-related utilities, including ifconfig. Once the package is installed, you should be able to use the ifconfig .
Followed by next command:-
sudo iptables -t nat -A POSTROUTING -o ens4 -j MASQUERADE
iptables is a tool for managing the Linux kernel's netfilter system, which is used to manage network traffic or rules that specify how incoming and outgoing network traffic should be filtered, modified, or forwarded.
-t nat specifies that the rule should be added to the NAT table of the iptables firewall.
-A POSTROUTING specifies that the rule should be added to the POSTROUTING chain, which is applied to outgoing packets after they have been routed.
-o ens4 specifies that the rule should be applied only to packets going out through the ens4 network interface.
-j MASQUERADE tells iptables to modify the source IP address of the packet with the IP address of the ens4 interface, which enables NAT.
After applying this command to your NAT instance, That's it you successfully setup the NAT instance.
Now ssh into your webserver instance.

Give the following command to ssh into your database:-
ssh -i ssh-key [googleuser]@<your database Internal IP>

Once you go into your database server.
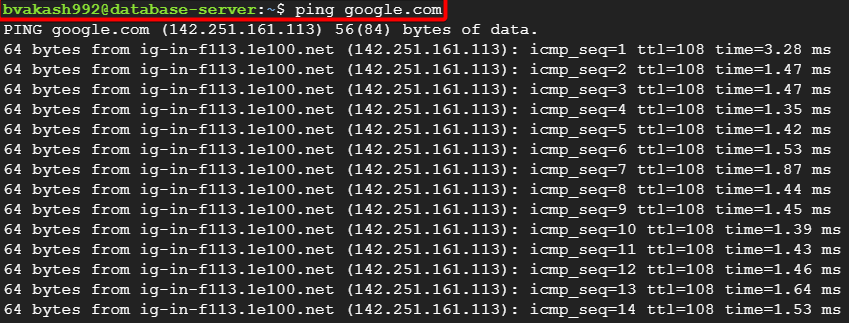
Type ping google.com

you should be able to ping since we set up a NAT instance, and our database server can talk to the network securely.
That's it, for now, we will continue further more in next blog.
Hope you liked it. Will see you on the next topic 😃
Next Topic
https://bvakash.hashnode.dev/set-up-mysql-in-ubuntu-compute-engine
Subscribe to my newsletter
Read articles from B V AKASH directly inside your inbox. Subscribe to the newsletter, and don't miss out.
Written by

B V AKASH
B V AKASH
I design, architect, and maintain hybrid cloud environments.