Implementing CI/CD pipeline for parallel build jobs on Jenkins agents
 Viraj Thorat
In this article, we are going to run a Jenkins pipeline as a code using Jenkinsfile which will be run on two Jenkins agents parallelly.
This pipeline will run our node-todo app on two Jenkins agents.
If you want to work on this project then you can fork my GitHub repository https://github.com/viraj777/node-todo-cicd
Prerequisites:
Understanding of docker, docker-compose, and Dockerfile.
Below is the step-by-step approach for implementing this pipeline.
Step 1: Configuring Jenkins agents
Please follow my previous article which will guide you through configuring Jenkins build agents https://hashnode.com/edit/clduf43k1000209juah4579dl
Configure two Jenkins agents with labels 'agent-1' and 'agent-2' following the above article.
Step 2: Writing Jenkinsfile
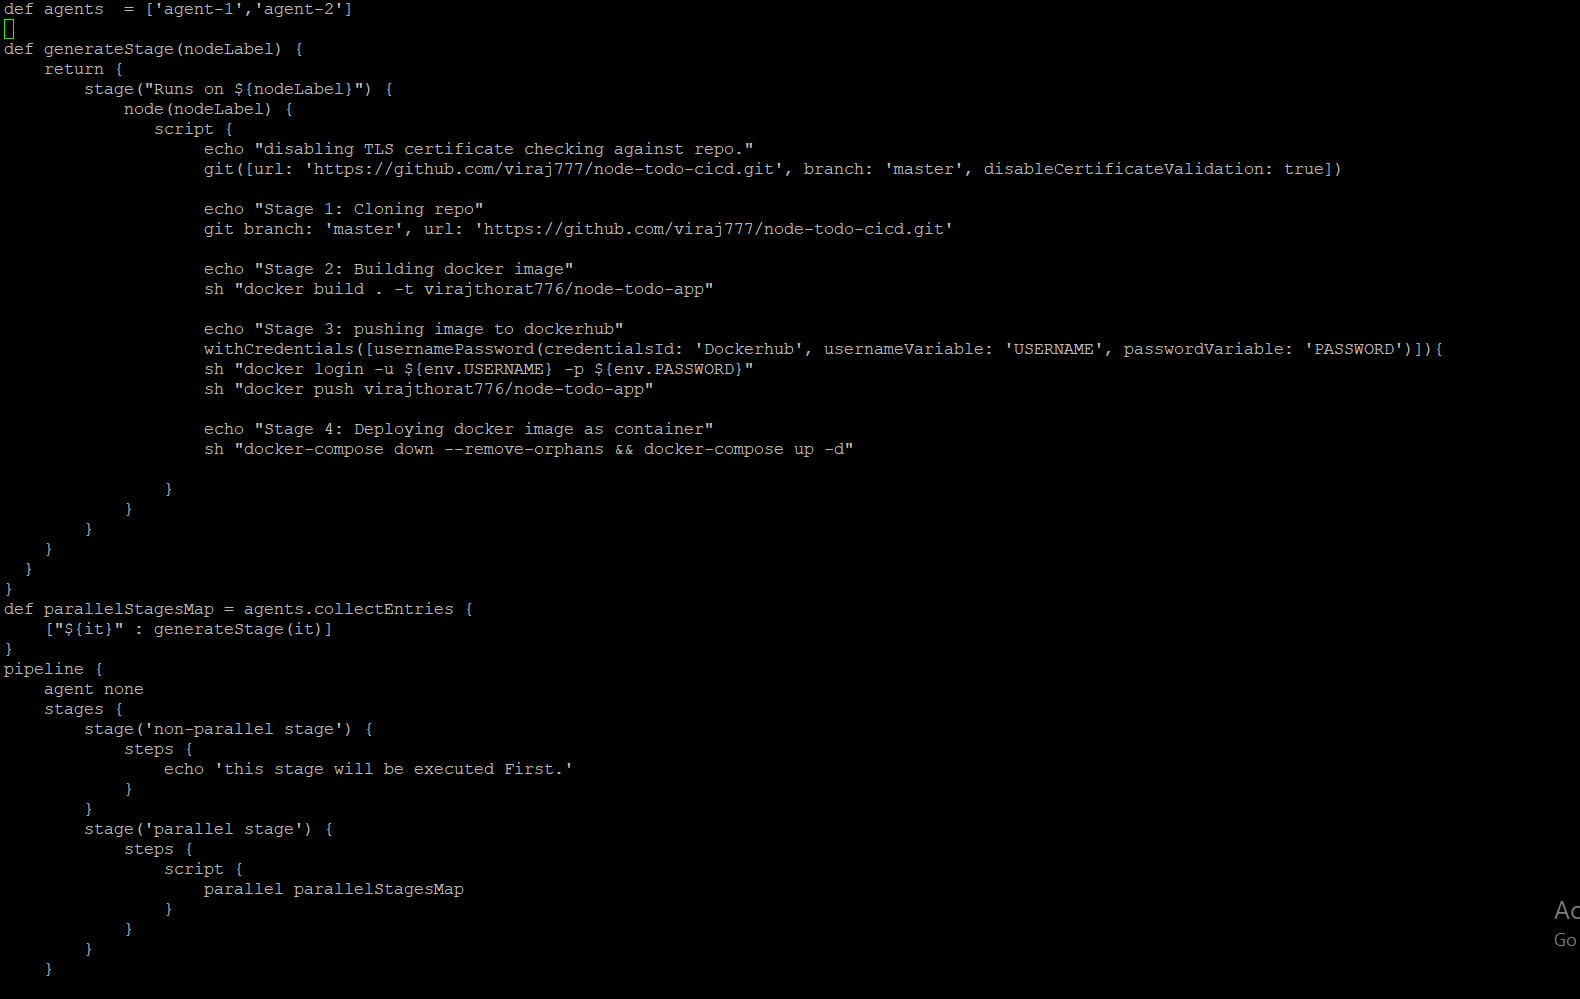
This Jenkinsfile defines a pipeline that runs on two agents named 'agent-1' and 'agent-2'. It defines a function named generateStage that takes a node label as an argument and generates a pipeline stage that runs on that node. The function returns a stage that clones a Git repository, builds a Docker image, pushes it to Docker Hub, and deploys the image as a container.
The pipeline itself consists of two stages, a non-parallel stage and a parallel stage. The non-parallel stage will be executed first, and it simply echoes a message. The parallel stage uses the parallel keyword to execute the generateStage function on both agents in parallel. The function generates a stage for each agent that runs the steps defined in generateStage.
The parallelStagesMap variable is a map that maps each agent to the stage generated by generateStage. This map is passed to the parallel keyword to execute the stages in parallel.
Note that the withCredentials block is used to pass the Docker Hub username and password to the docker login command. The credentials are stored in Jenkins as a credential ID named 'Dockerhub'.
Step 3: Configuring pipeline job in Jenkins
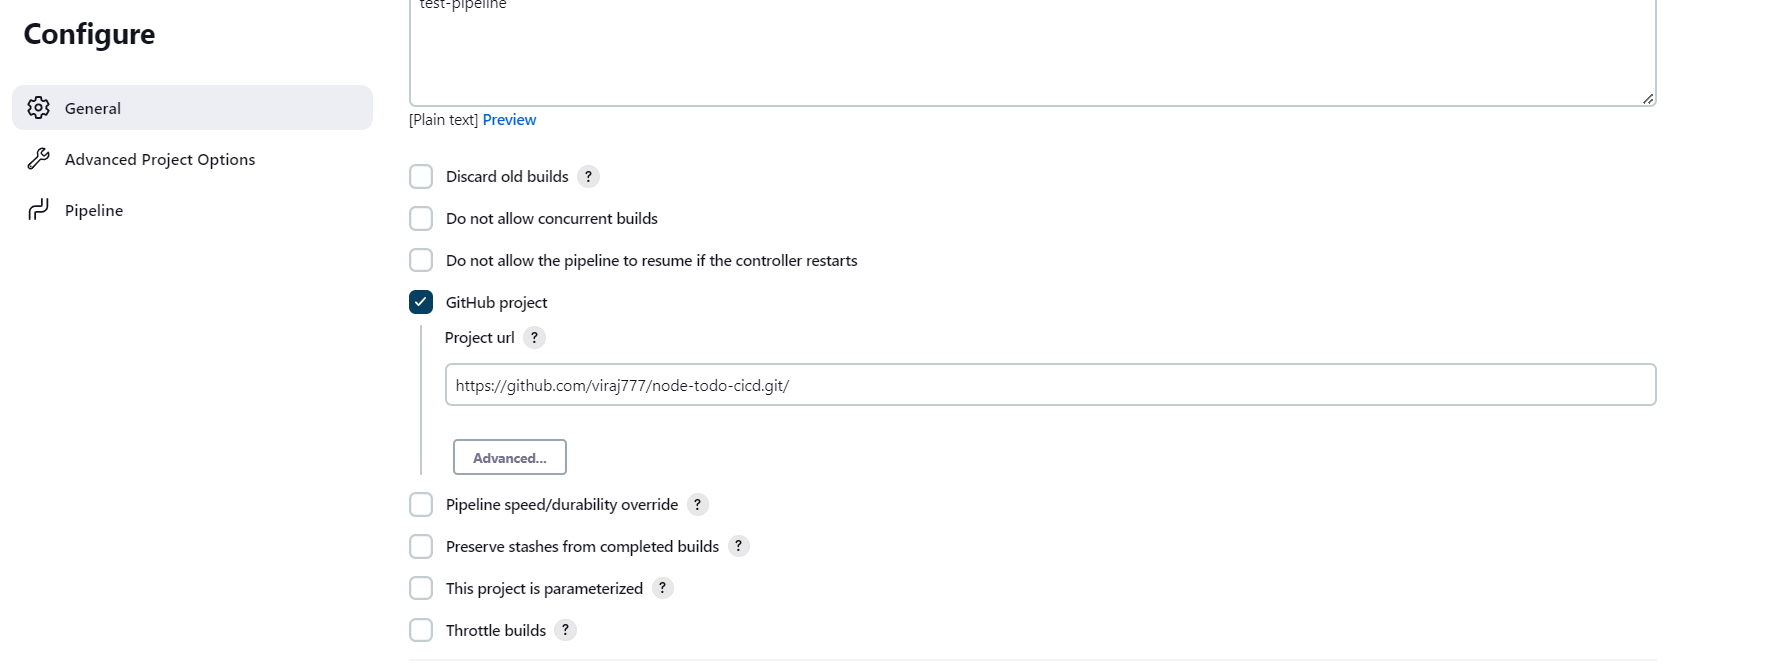
As shown in the above screenshot we will put our GitHub repository link in the GitHub Project section.

Then in the "Build Triggers" section, we will select the "GitHub hook triggers for GITscm polling" option which allows the pipeline to trigger for each git push with the help of "Github-webhooks".
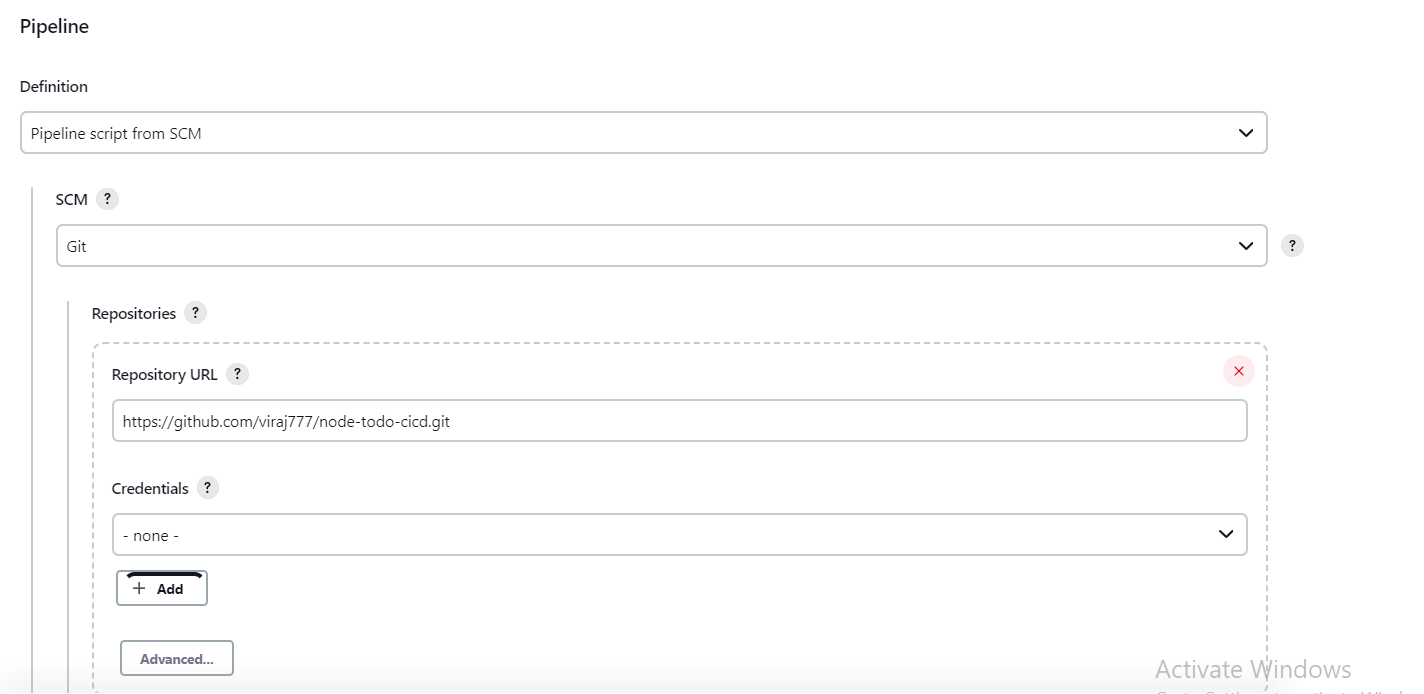
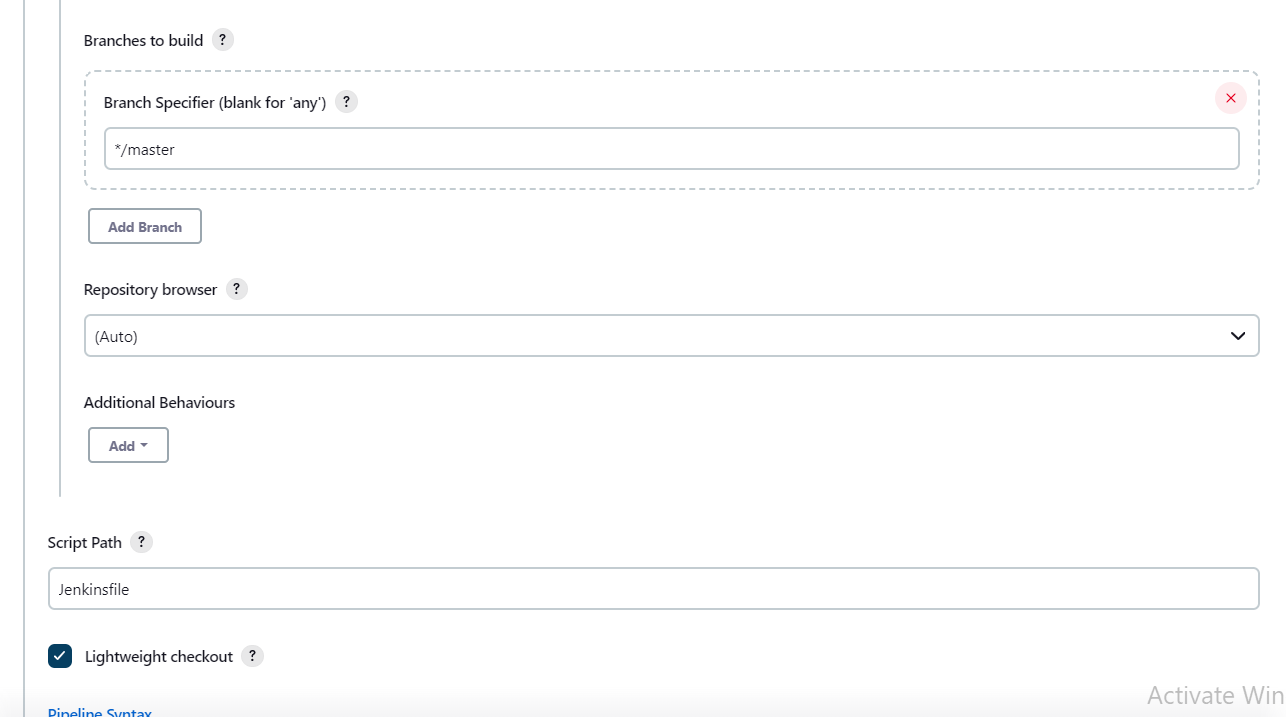
Then, under the "Pipeline" section for Definition, we will select the "Pipeline script from SCM" option which will ask Jenkins to look for Jenkinsfile in the GitHub repository, details of which we will provide in the required subsections as shown above.
Then we will save the pipeline configuration.
Step 4: Configuring GitHub webhook:
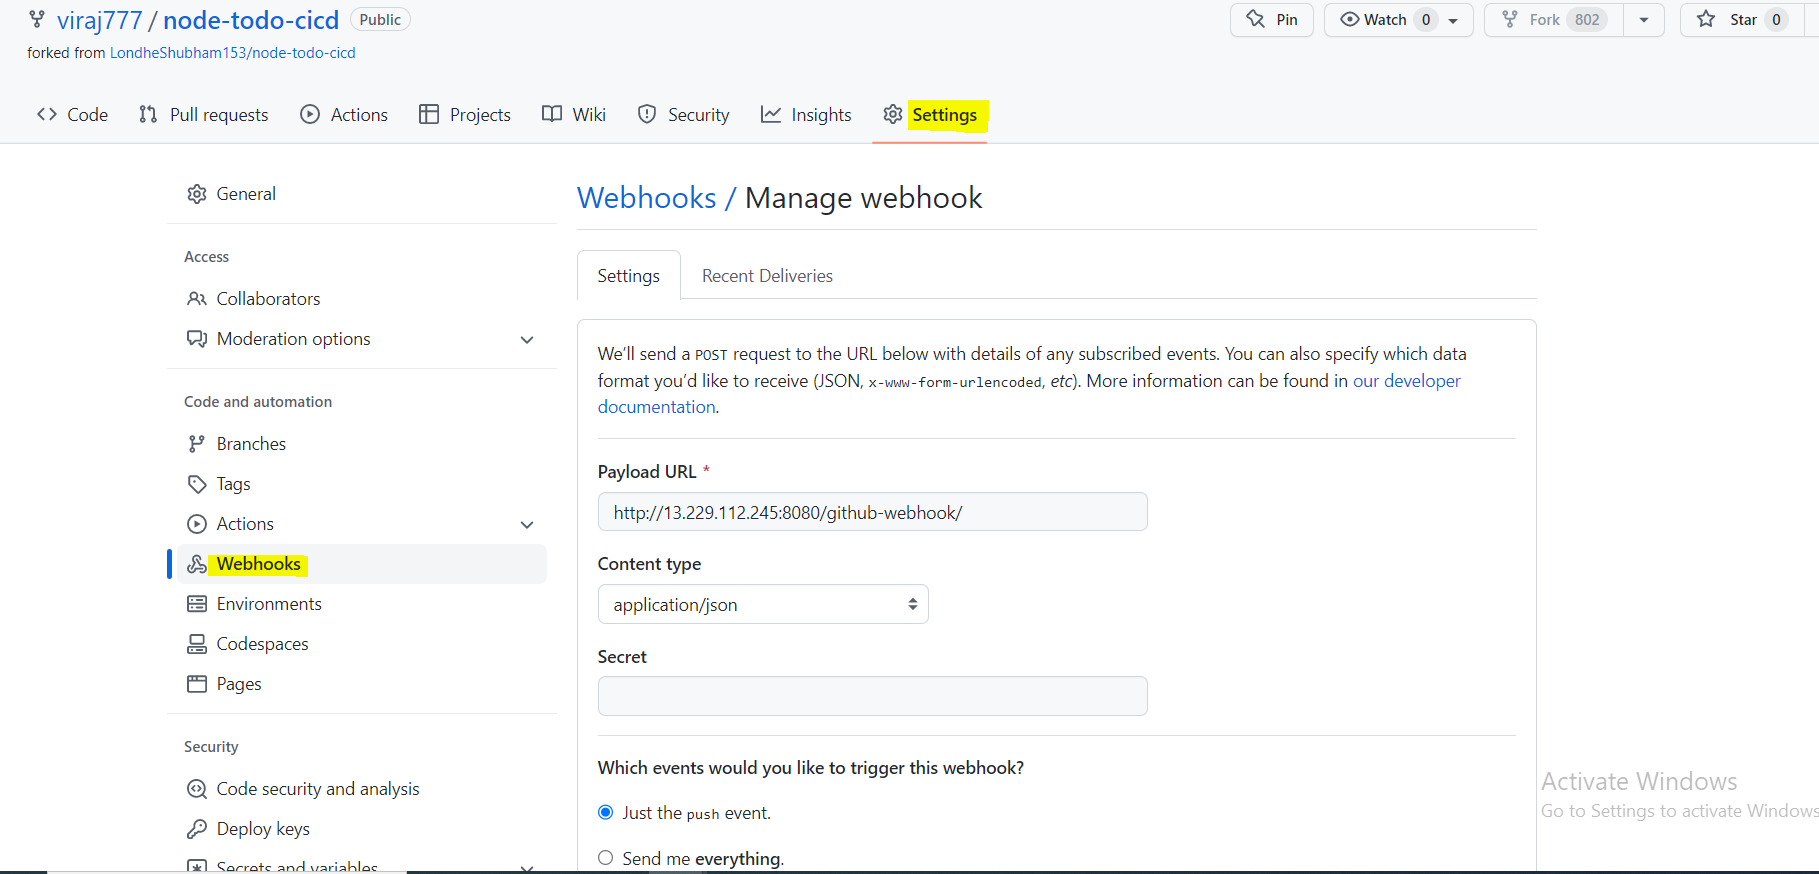
As shown above, we have to go to the "settings -> Webhooks" section of our GitHub repository and once we are there then we need to enter "http://<Jenkins_Public_IP>:8080/github-webhook/" under the Payload URL section and then click on Add webhook.
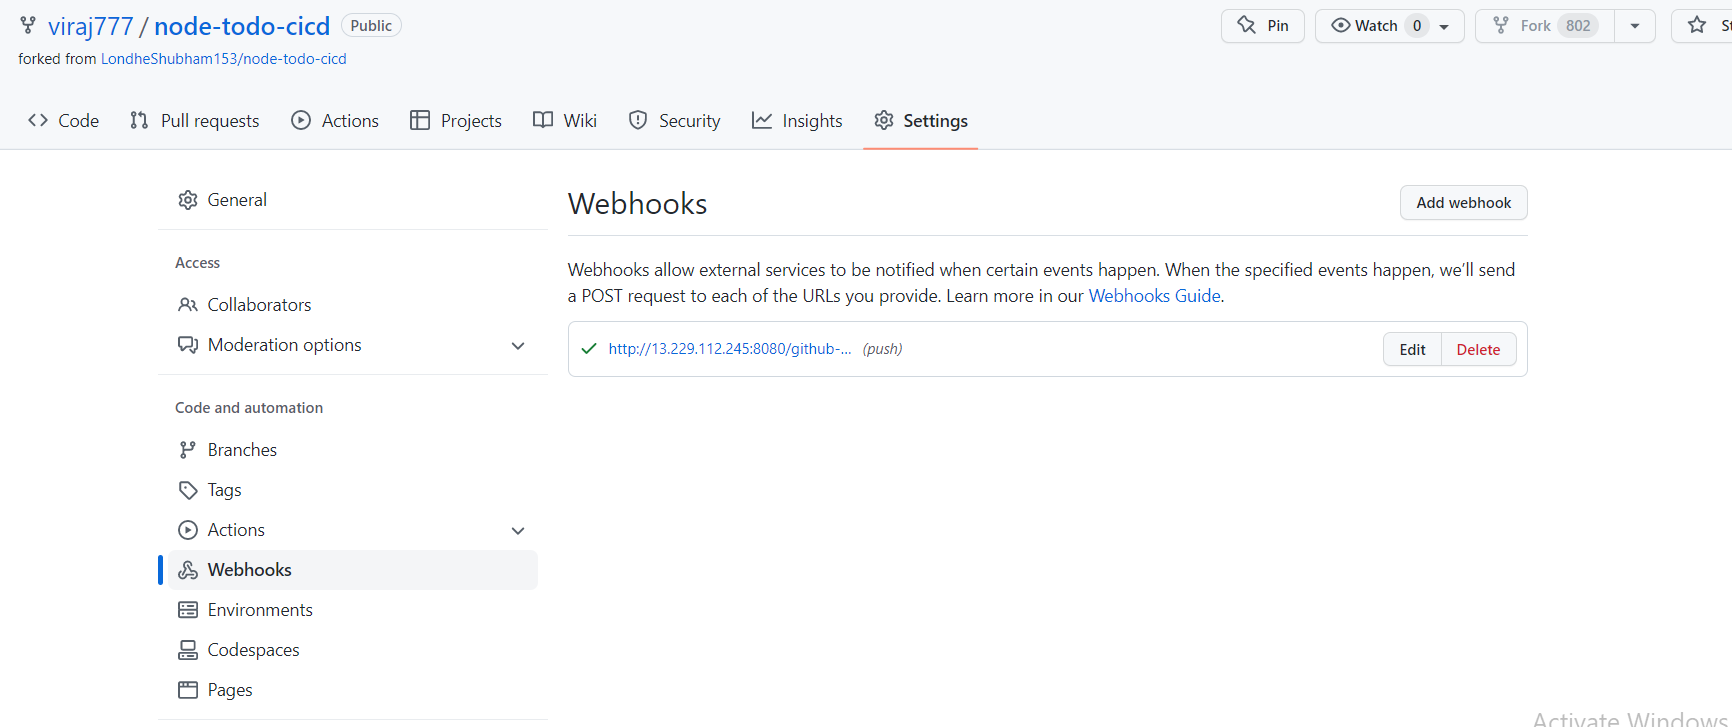
Upon adding a webhook, If GitHub is successfully able to communicate with the Jenkins server then we will see a green tick next to our webhook as shown above.
Step 5: Testing Pipeline
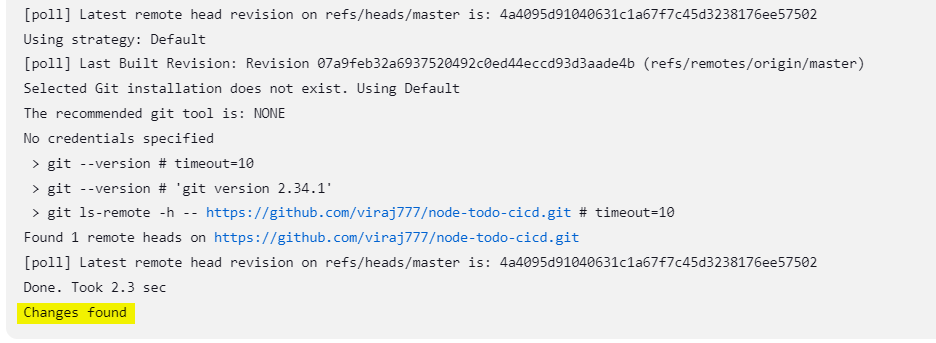
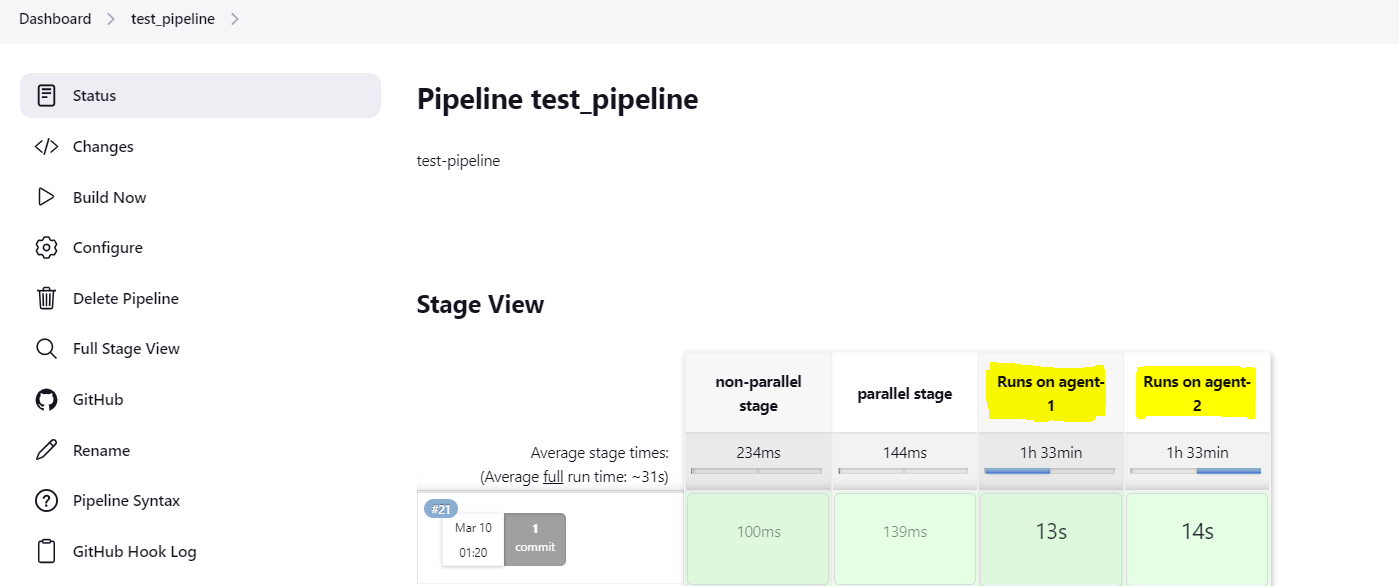
As we can see from the above screenshots, when any changes are pushed to the GitHub repository then it will result in triggering our pipeline. As we are executing jobs parallelly on both agents upon successful execution of the pipeline it will run our node-todo containers on both Jenkins agents.
Subscribe to my newsletter
Read articles from Viraj Thorat directly inside your inbox. Subscribe to the newsletter, and don't miss out.
Written by

Viraj Thorat
Viraj Thorat
I am a DevOps engineer passionate about experimenting with automation practices in my daily work routine. I enjoy writing tech blogs for sharing my knowledge and helping the community.