🇺🇸Installing Tailscale in a Clever Cloud Application
 Frederic Alix
For a few months now, the company I work for has been using Tailscale as a VPN solution. It is based on the excellent WireGuard, to which an administration console and a very user-friendly ACL manager have been added. Their solution quickly convinced me to use it for my other professional needs as well.
In this article, I will show you how to integrate Tailscale into your Clever Cloud applications. As an example, I will deploy an MQTT server, Aedes, a Node.js application. MQTT clients will communicate via Tailscale to reach the MQTT broker.
Note that from this point on, you will no longer be limited by the number of TCP and UDP ports that you can use on your applications deployed on the Clever Cloud infrastructure :-)
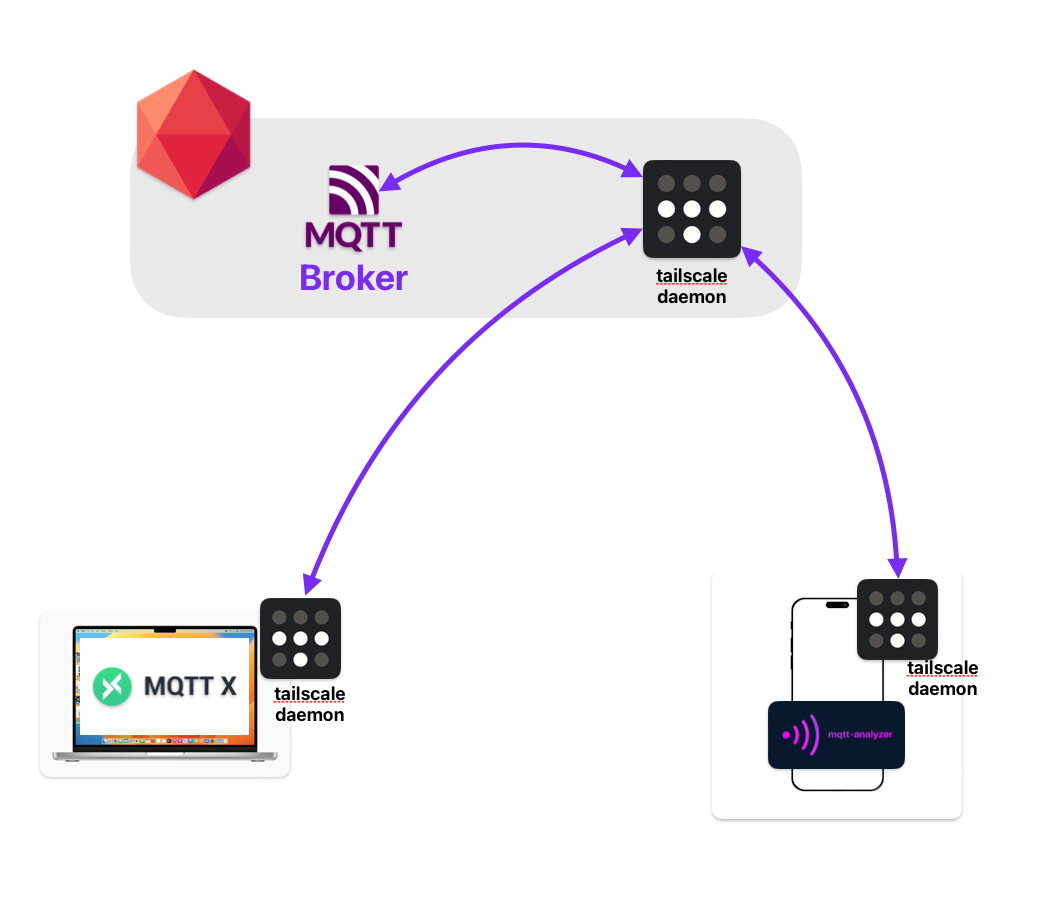
For the integration of the Tailscale agent on the Clever Cloud platform, I relied on the official documentation of the editor detailing the procedure to use their service from Heroku.
There are limitations with this method. Your various machines (PC, Mac, smartphone, VM) will be able to reach your applications on Clever Cloud, but the reverse may not always be possible if you try to reach a service that does not support SOCKS5 (for example PostgreSQL). To learn more, consult this documentation. It is quite possible that someday soon :-) Clever Cloud will natively offer the integration of the Tailscale agent in their images and use a
tuninterface to connect to the VPN.
Prerequisites
Make sure you have clever-tools installed on your workstation: Doc
Tailscale Key
We will need a token so that our Clever Cloud instance can connect to our network on Clever Cloud.
Go to the Settings menu of Tailscale
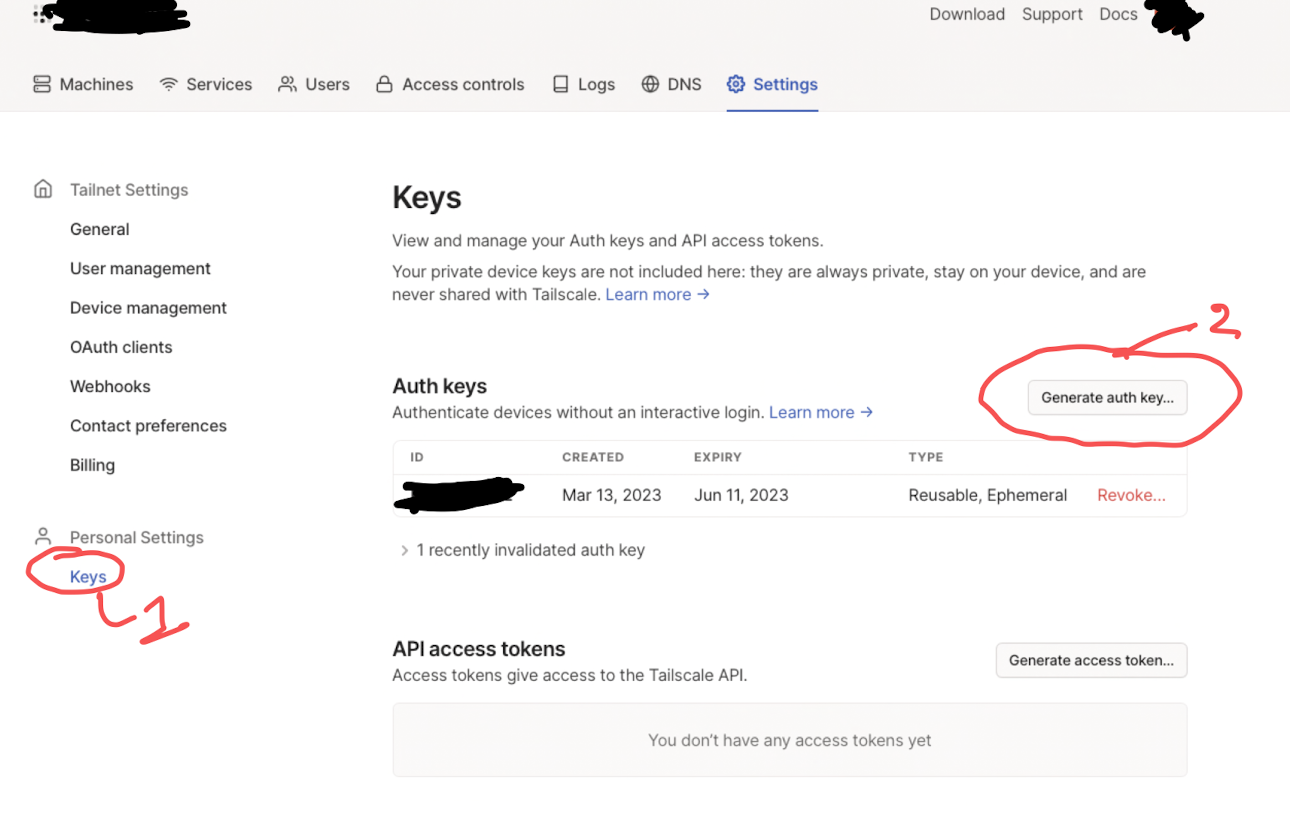
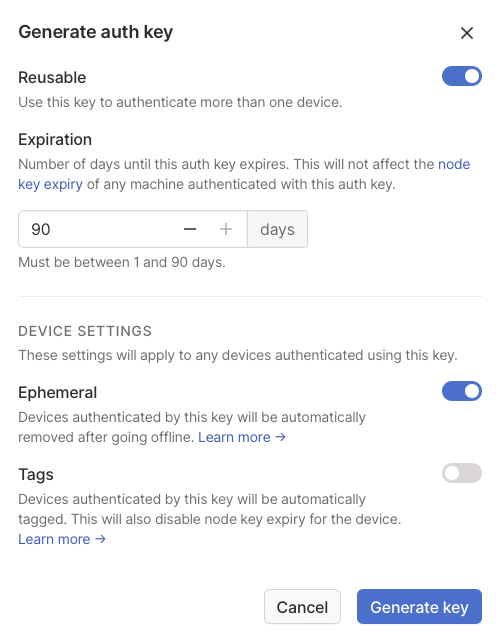
Click on the *Reusable and Ephemeral options. Validate by clicking on Generate Key
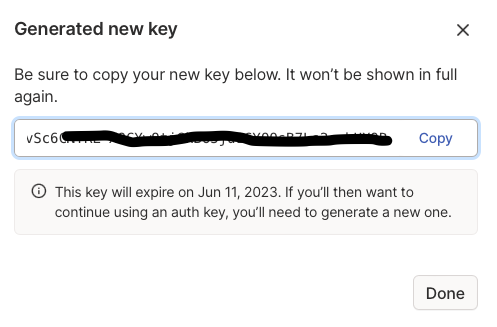
Take note of the indicated key, we will use it later to identify the Tailscale client that your Clever Cloud instance will use during deployment.
Preparing our test application
First step, download the following git repo containing the MQTT broker and switch to the no-tls branch :
git clone https://github.com/fredericalix/cc-aedes-mqtt-broker.git
cd cc-aedes-mqtt-broker
git checkout no-tls
Next, we will create the application on the Clever Cloud environment, as well as a Redis database that it will use.
clever create cc-aedes --type node --org <YOUR_ORGA_ID> --region par
clever config update --enable-force-https
clever scale --alias cc-aedes --flavor XS
clever addon create redis-addon cc-aedes-db --link cc-aedes --plan s_mono --yes
clever env set PORT 8080
clever env set MQTT_PORT 1883
clever env set MQTT_USER myuser
clever env set MQTT_PASSWORD myuser123
clever env set TSFILE tailscale_1.36.2_amd64.tgz
clever env set TSNODENAME cc-aedes
clever env set TSKEY <YOUR_TAILSCALE_KEY>
clever env set CC_PRE_RUN_HOOK "nohup ./start.sh &"
When declaring TSKEY, use the token that we created in the Tailscale administration interface.
Creating the script that will launch the Tailscale agent
Create the file start.sh
#!/bin/bash

wget https://pkgs.tailscale.com/stable/${TSFILE}
tar zxf ${TSFILE} --strip-components=1
./tailscaled --tun=userspace-networking --state=mem: --socket=/var/tmp/tailscaled.sock --socks5-server=localhost:1055 &
./tailscale --socket=/var/tmp/tailscaled.sock up --authkey=$TSKEY --hostname=$TSNODENAME
It is necessary to add it to the local repo in order to deploy it.
git add start.sh
git commit -m "Add start.sh script"
Deployment of the application
A few minutes later, your application will be online.
clever deploy
A few minutes later, your application will be online.

At this point, it will be accessible from your Tailscale network:
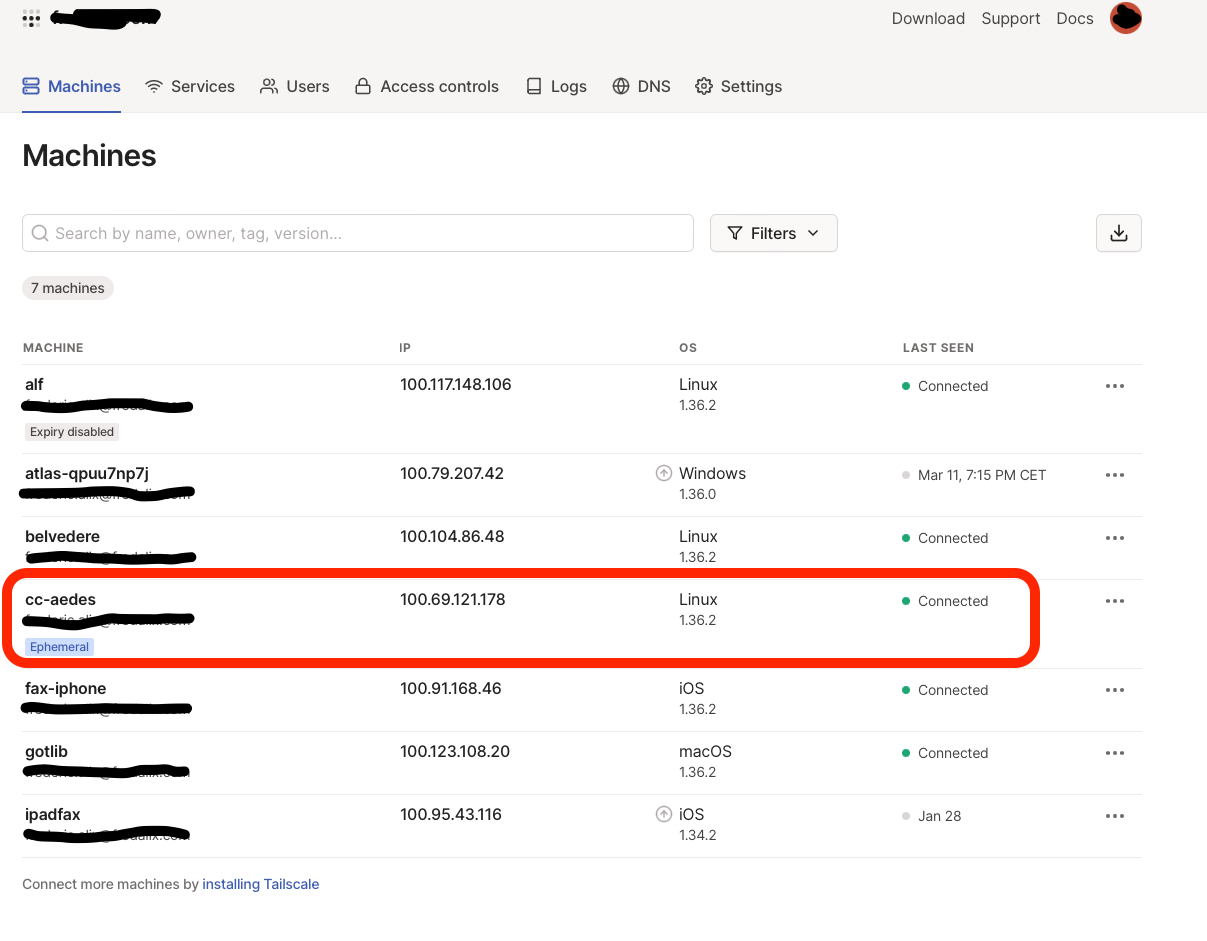
Tests
A little ping and then voilà
From your Windows, Mac, or GNU/Linux machine, open a terminal and use the ping command to verify that the network is working.
Of course, your machine must also be connected to your Tailscale network.
ping cc-aedes
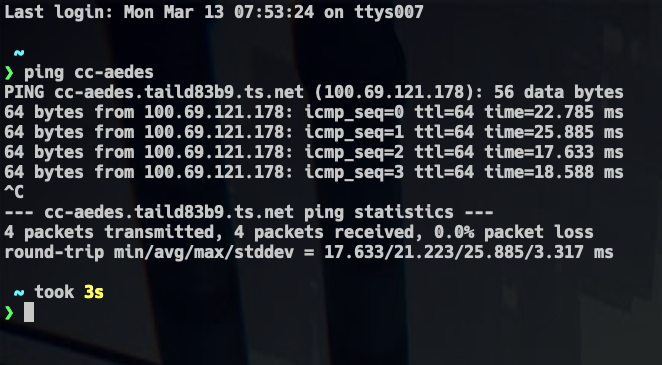
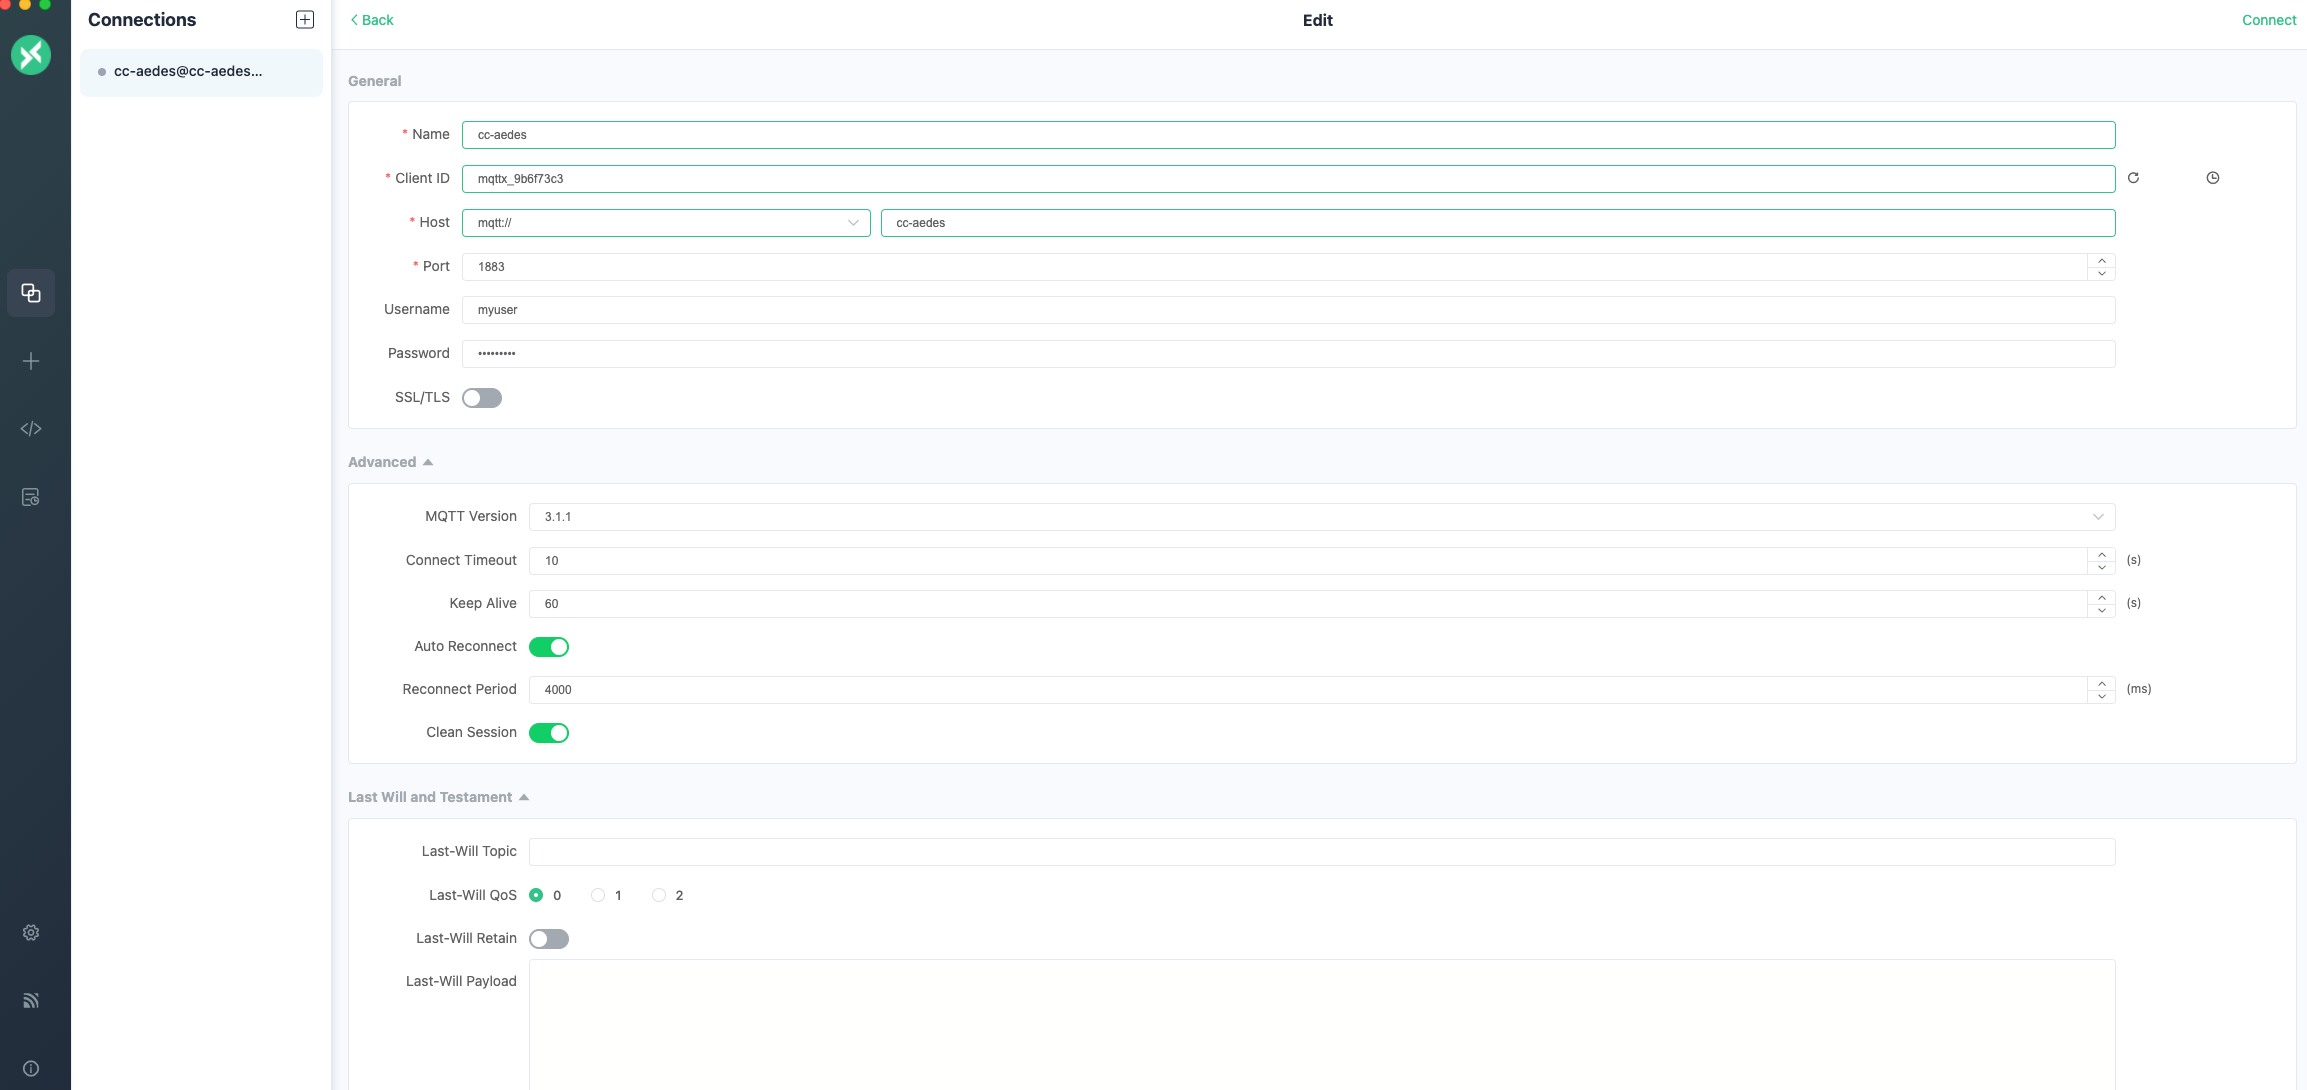
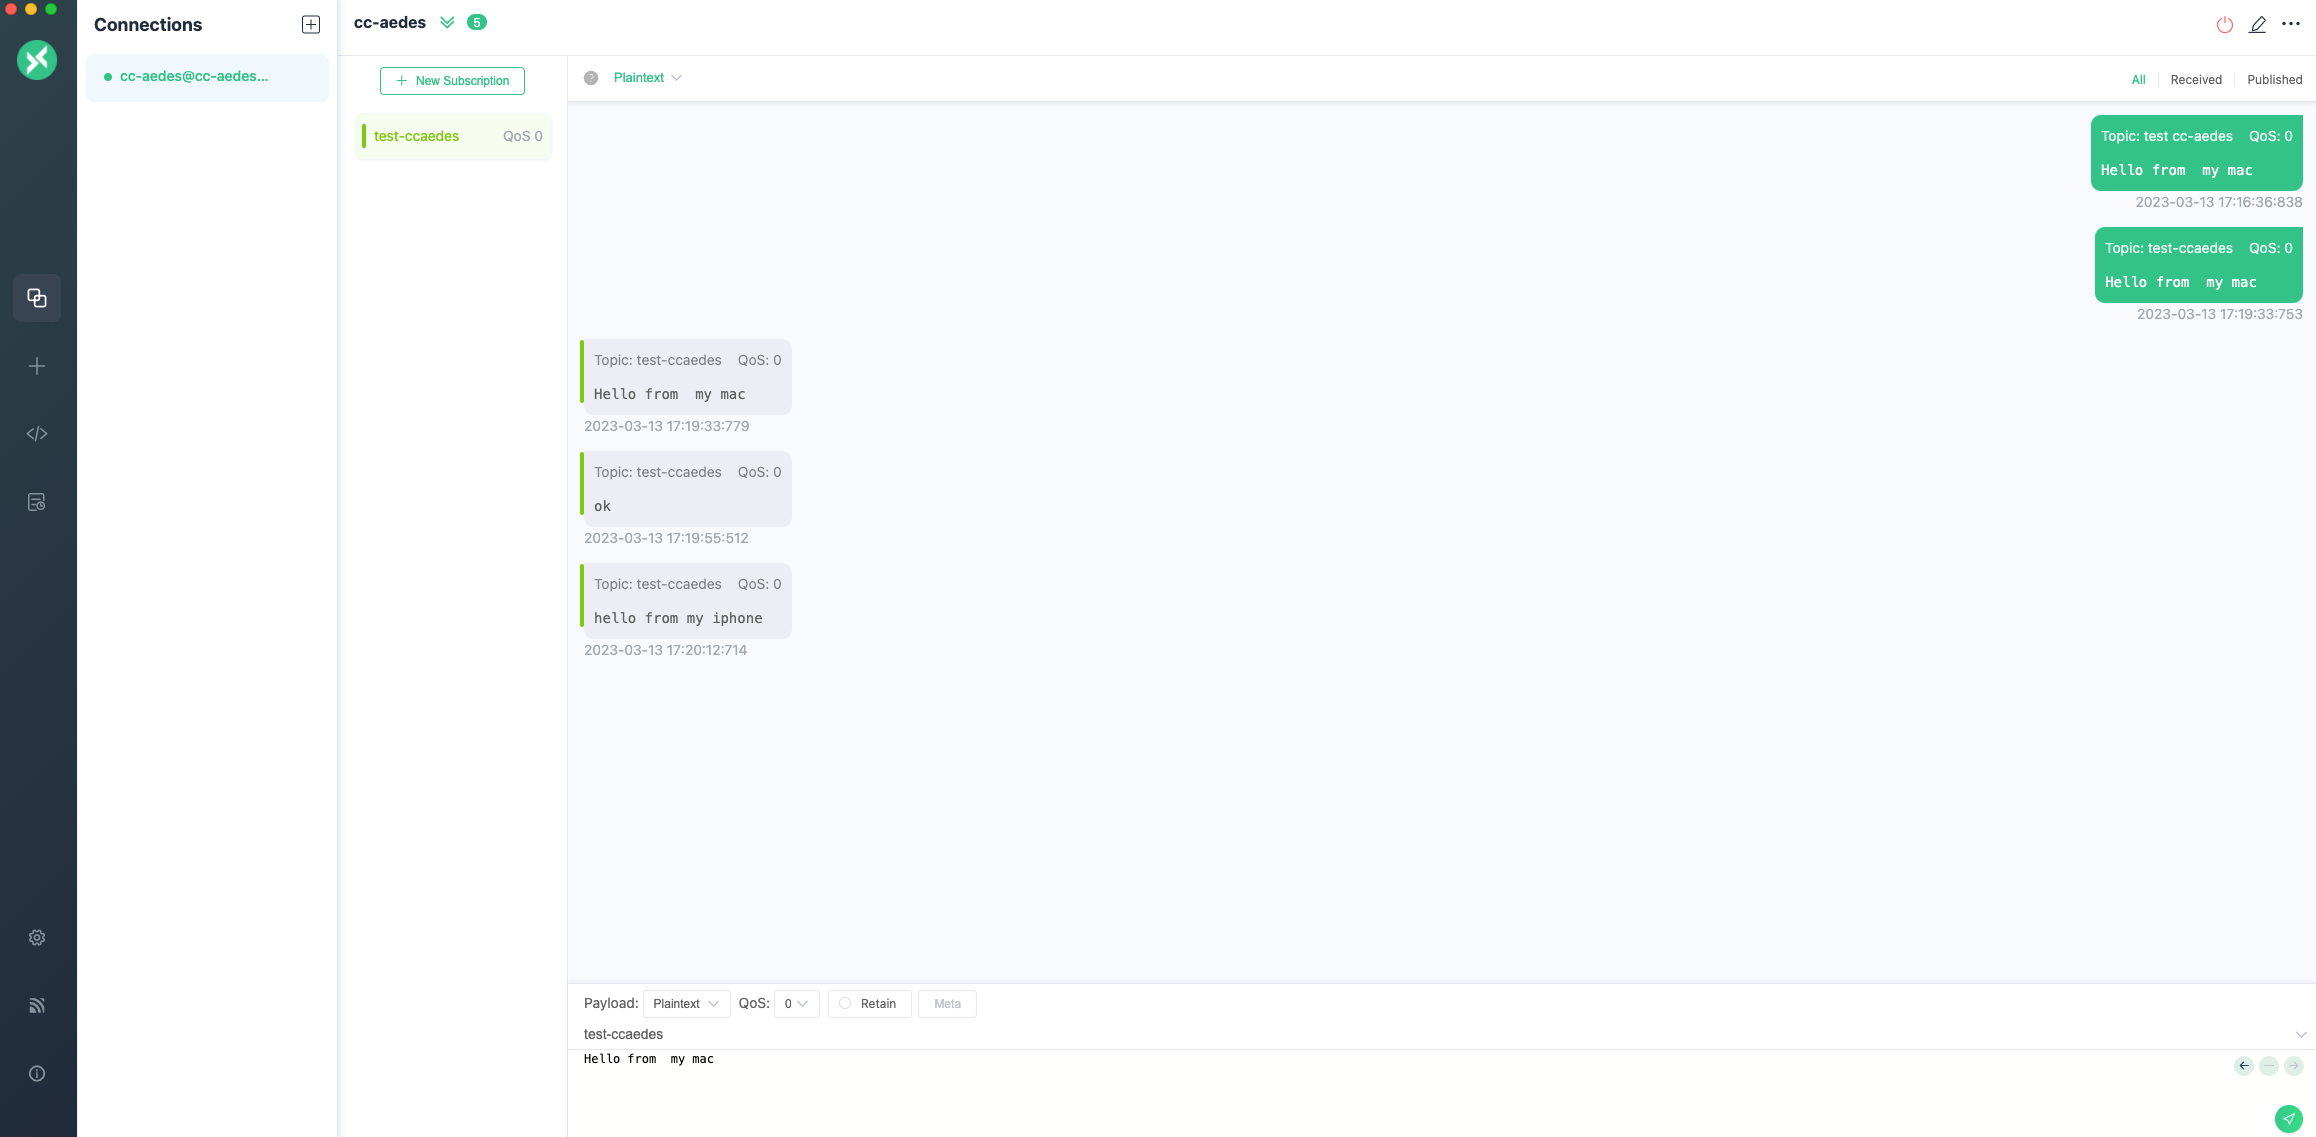
For the next tests, I will use a graphical MQTT client on macOS (MQTTX) and on my iPhone MQTTAnalyzer
On my mac
Connection
Messages
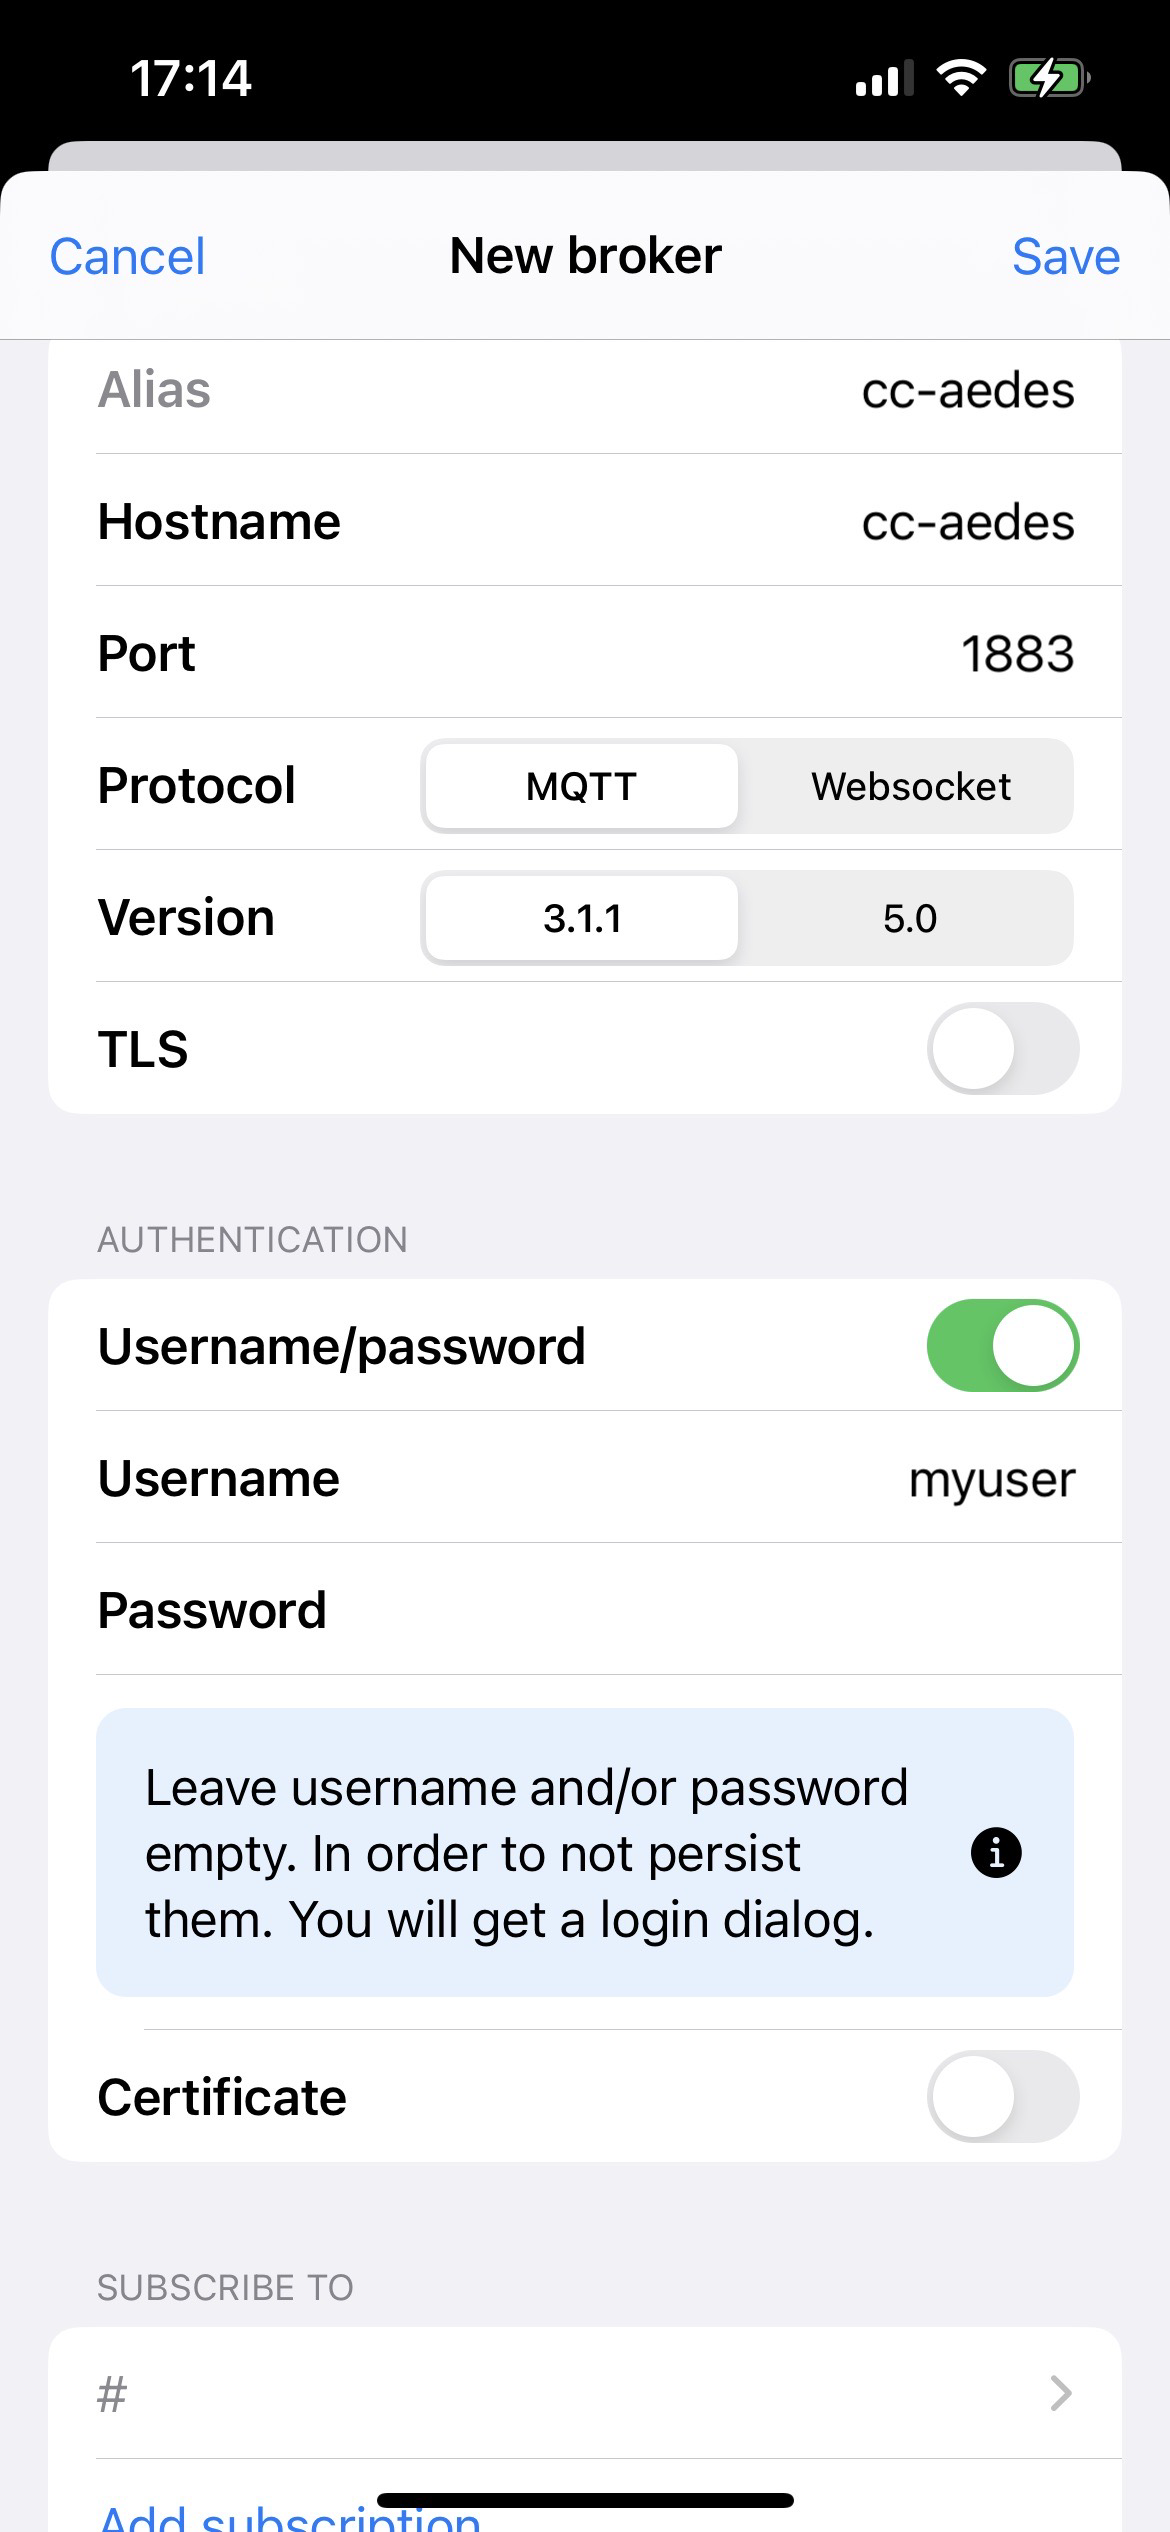
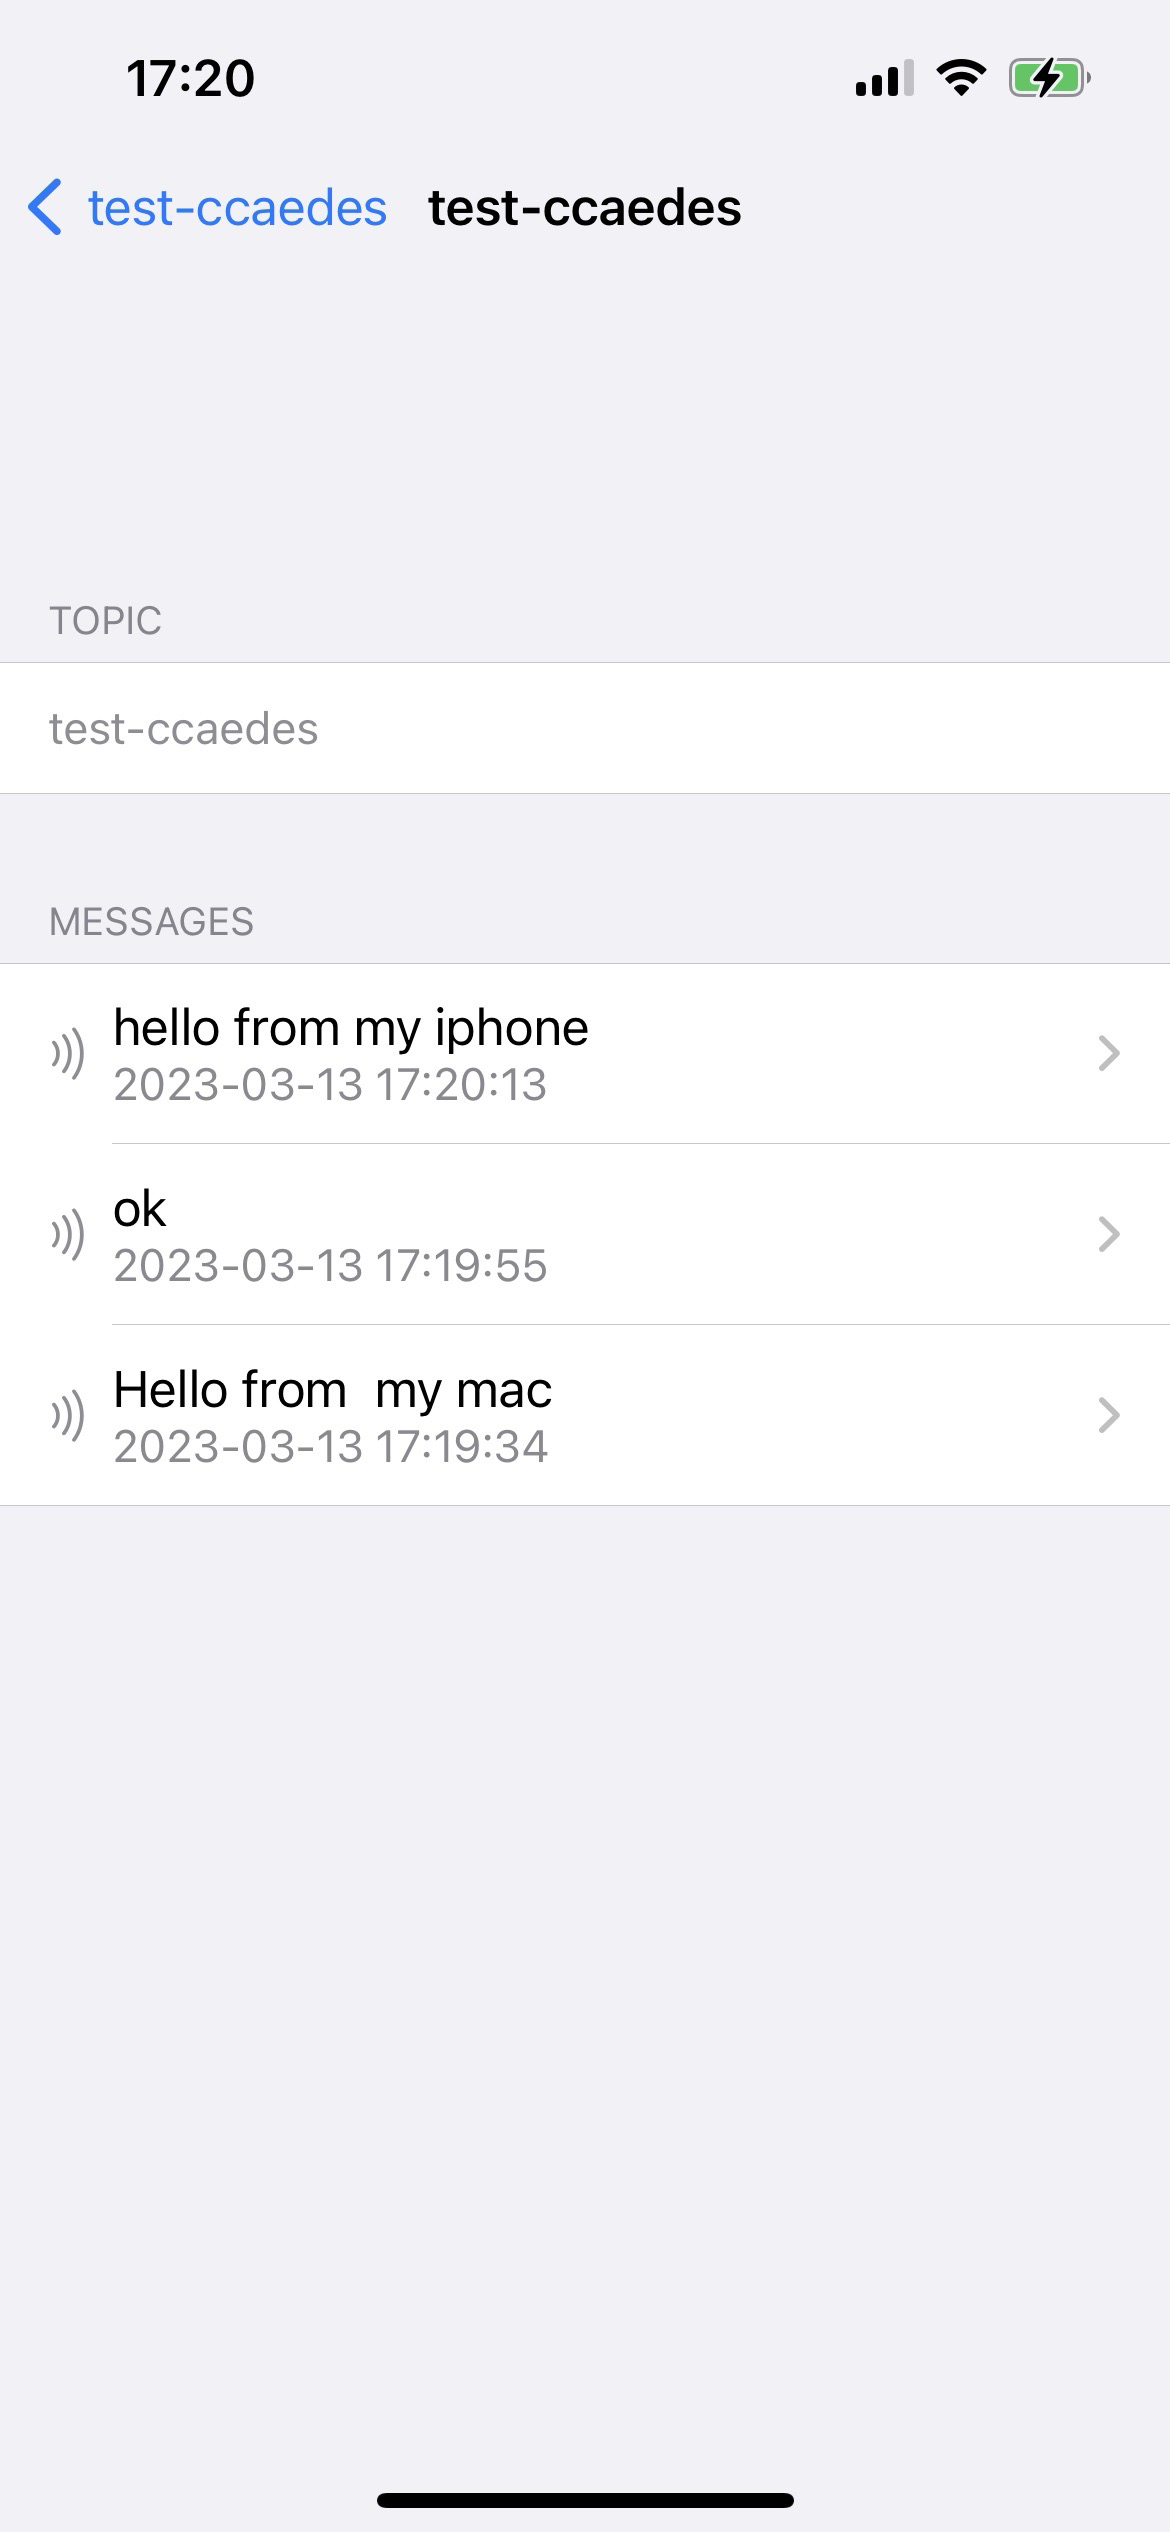
On my iPhone
Connection
Messages
Subscribe to my newsletter
Read articles from Frederic Alix directly inside your inbox. Subscribe to the newsletter, and don't miss out.
Written by

Frederic Alix
Frederic Alix
Depuis l'âge tendre de six ans, l'informatique a été mon terrain de jeu et, plus tard, elle est devenue ma vocation professionnelle pour plus de 25 ans maintenant. Mon intérêt s'est toujours porté sur le fascinant monde des serveurs informatiques, ce qui m'a amené à déployer des infrastructures robustes pour des entités renommées telles qu'EDF, RTL, RTL2, FunRadio, Axa, Orange, et SFR, parmi tant d'autres. Ma passion réside dans l'optimisation des systèmes Linux et le déploiement d'applications web en Java, Node.js, Go, et au-delà. La supervision des systèmes et des applications occupe également une place spéciale dans mon cœur professionnel, ajoutant une couche supplémentaire de satisfaction à mon quotidien déjà loin de l'ennui. En dehors de mon amour pour la technologie, je suis un fervent lecteur de littérature science-fiction et fantastique. Le cinéma et la musique sont mes compagnons fidèles dans la quête de l'évasion et de l'inspiration. J'apprécie les plaisirs simples de la vie et je chéris chaque opportunité de rencontrer de nouvelles personnes, élargissant ainsi mon cercle d'amis et enrichissant mon parcours de vie avec des échanges enrichissants. Avec chaque projet et chaque interaction, je continue à apprendre et à grandir, cherchant toujours à contribuer et à innover dans l'espace technologique, tout en appréciant les belles nuances de la vie.