Master GitHub in Minutes: A Beginner's Guide to the Ultimate Collaboration Tool
 Emamuzo Omokiti

GitHub is an essential tool to learn as a developer. By the end of this article, you will learn about GitHub, what GitHub is, why GitHub is necessary, the difference between GitHub and Git as well as the difference between GitHub Desktop and GitHub CLI, and also how to carry out some basic commands such as clone, pull request and commit.
What is GitHub
GitHub has a lot of definitions, but I like to define it as an online storage that you can use for storing your code and tracking your code, but there is more to GitHub than that.
We will be going with the definition from HubSpot.
GitHub is an online software development platform. It's used for storing, tracking, and collaborating on software projects. It makes it easy for developers to share code files and collaborate with fellow developers on open-source projects. GitHub also serves as a social networking site where developers can openly network, collaborate, and pitch their work.
Why GitHub
There are a lot of advantages that GitHub offers, such as;
- Great for remote collaboration
Developers from different parts of the world can work collaboratively with one another.
- Backup
Your code is safe and secured on your repository. In a situation where your system gets faulty or stolen. You can be assured that your code is safe in your repository.
- Community
GitHub has a large community. So imagine your code being seen by the large community.
Git vs GitHub
Git is the control system that lets you manage and keep track of your source code history, and GitHub is the service for projects that use Git.
There is a significant difference between Git and GitHub, according to Intellipaat. Some of the differences are listed below;
| Git | GitHub |
| Developed in the year 2005 by Linus Torvalds | Developed in the year 2008 and purchased by MicrosoftFocuses on code sharing |
| Installed locally on a system | Hosted on the web |
| A software tool | A service tool |
| Primarily, a command-line tool | Administered through the web |
| Doesn’t have a user management feature | Has the user management feature |
| A licensed open-source tool | A pay-for-use tier |
| Has a minimal external tool configuration | Supports third-party tool integration |
GitHub Workflow
GitHub has a lot of commands, but for this tutorial, we will touch on three of them, which are essential in the GitHub workflow.;
Cloning a repository
How to do a commit
Pull a request
Cloning a Repository
As the name implies, Cloning is copying a specific repository.
A repository contains all files found in the project, i.e. source code, images, etc. (includes all of your project's files and each file's revision history).
How to Clone a Repository on GitHub
Pre-requisite for cloning
To clone a repo from GitHub, you have to have an account on GitHub.
Let's assume you landed your first gig and have been given access to the company's repository on GitHub and need the files on your computer to start working. That is where cloning comes in handy.
There are six steps to clone a repository from GitHub.
Step 1
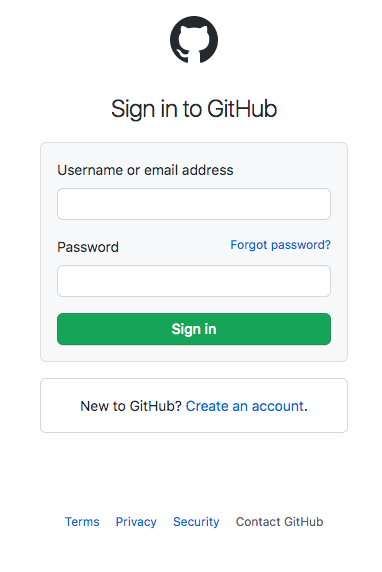
From the landing page click on the Sign In button.

Step 2
Fill in your credentials
Step 3
On the company's GitHub account, Click on the Repository tab.
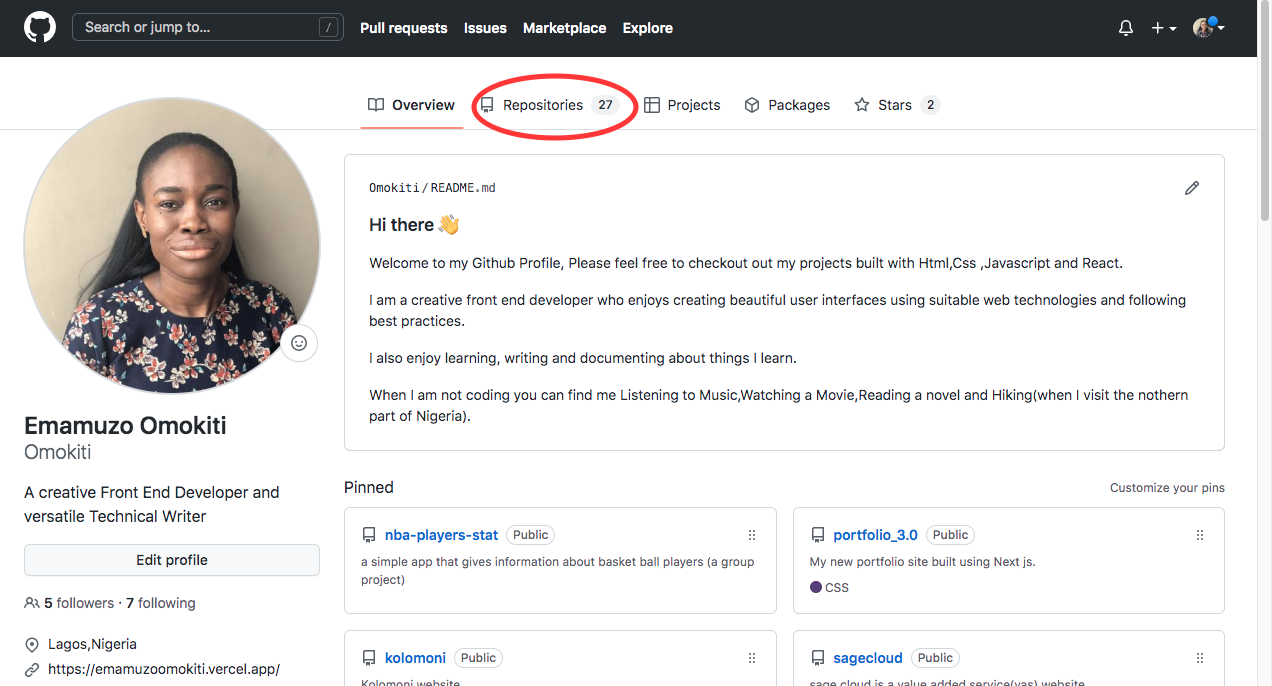
Note: I am using my account for the screenshot in step 3. I do not have the right to paste a company's GitHub account without permission.
Step 4
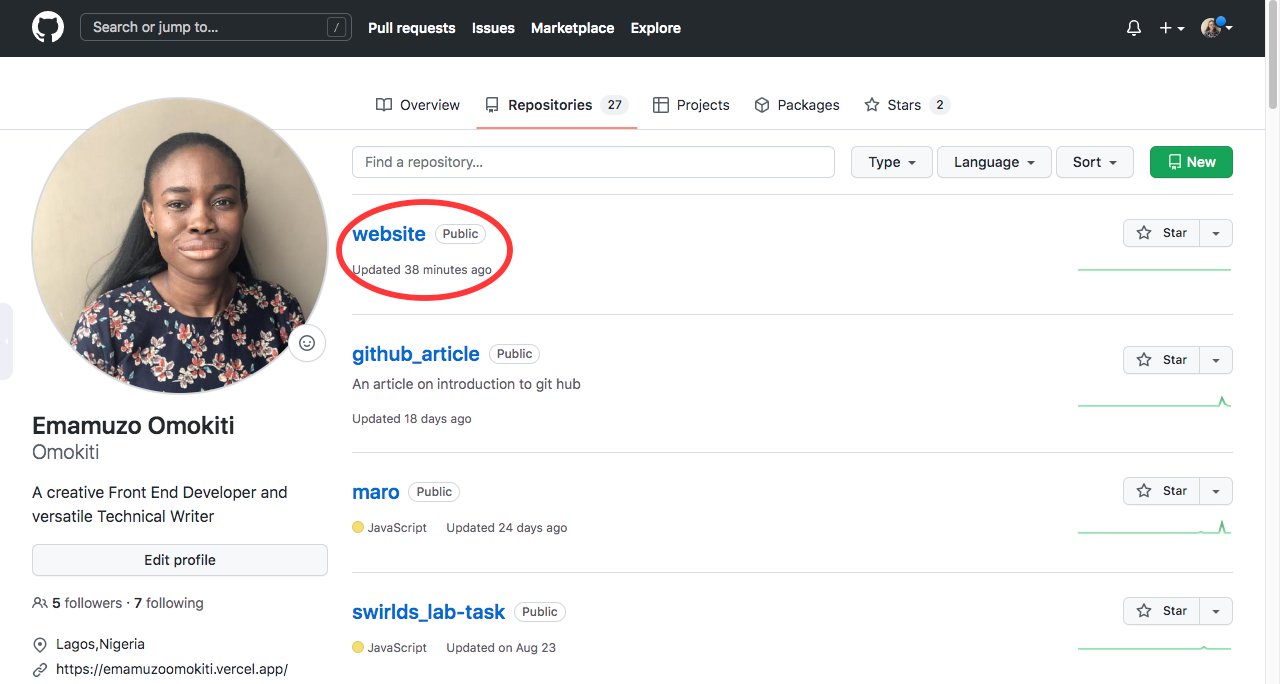
Click on the Repository assigned to you to work on. I will be using the website Repository.
Step 5
Click on the green Code button.
You can clone a repository by using any of the methods below;
HTTPS
SSH
GitHub CLI
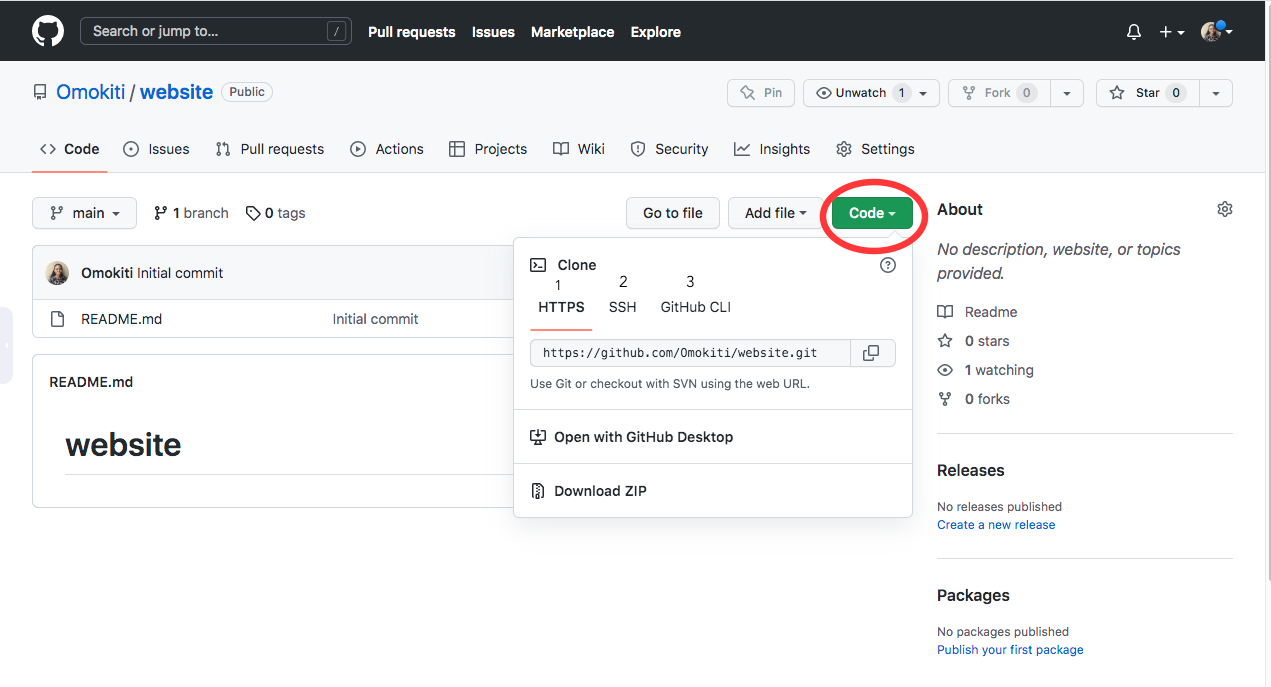
For this article, we will concentrate on the HTTPS method. Copy the URL https://github.com/Omokiti/website.git
I am using Vscode. You can use any integrated development environment (IDE) you are comfortable with.
Open your Vscode and click on Terminal, then New Terminal.
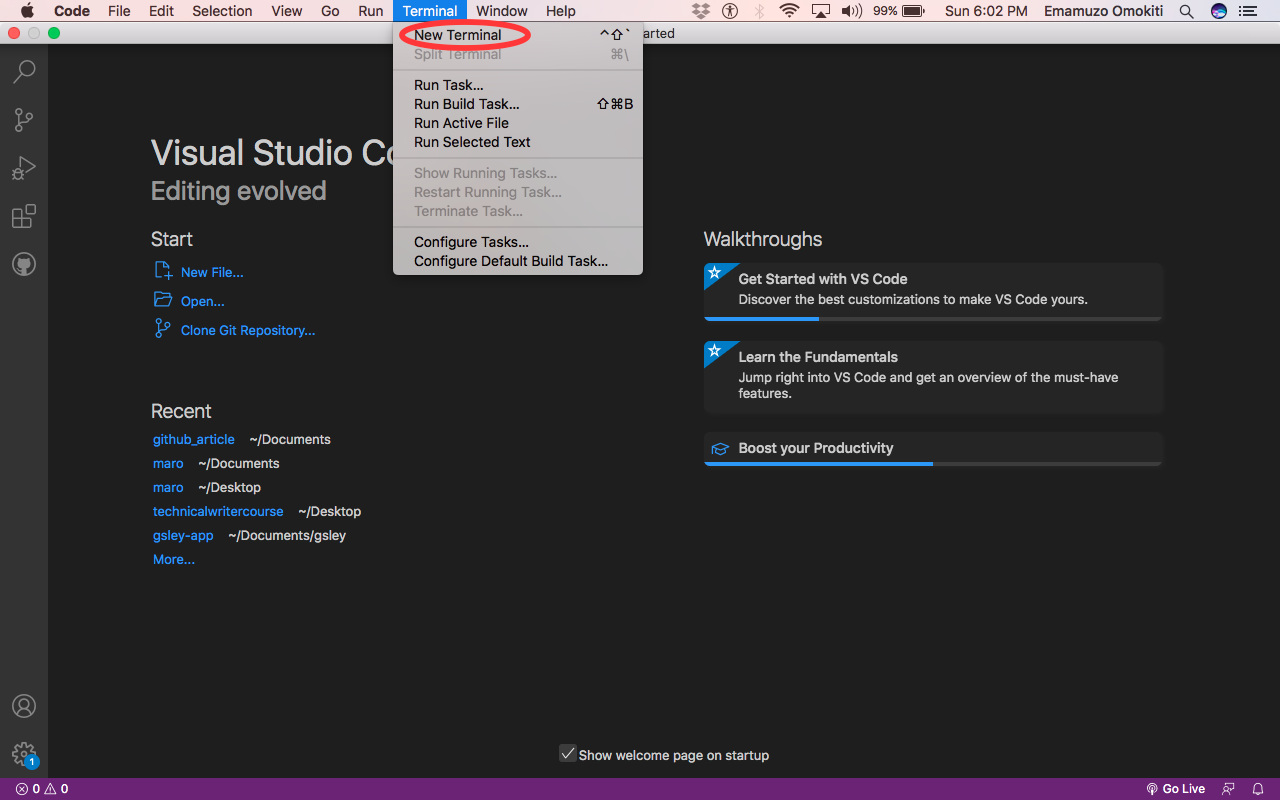
Make sure you are in the correct folder. I am cloning mine to the Desktop folder on my system.
git clone https://github.com/Omokiti/website.git
Use the command above to clone the repository. i.e. git clone the URL you copied from your company's repo on GitHub and hit enter.

Step 6
Go to the directory you cloned your repo, and you should be able to see your folder.
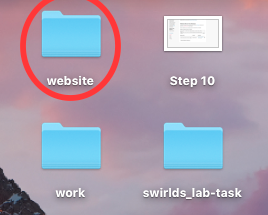
How to do a Commit
A commit is like saving a file after editing it. Remember you are working on the repository you cloned from the Company that just gave you your first gig.
So assume your first task is to create a sign-in button with a red background on the dev branch, and you are through with your task.
So before making a commit, you have to run this command below in your terminal;
git add .
The git add informs git that you want to include updates to all the files.
Then run the git commit command below;
git commit -m "feat:sign in button"
The m stands for the message of your commit. Then put your message in between the "".
Note: Do not commit without a message because providing a commit message helps your team members or anyone that sees your commit know what you are doing.

After you make the commit. You will run another command to push your code.
git push -u origin dev
Remember, the branch assigned to you for your task is the dev branch.
You can read more about branches here Git Branch
Note: In another scenario, your branch name can be anything you give it.
As the name implies, you are pushing your changes to the company's dev branch.

Note: Use git push -u origin when pushing your work to GitHub for the first time.
In subsequent pushes, you can use only git push.
git push
How to do a Pull Request
Once your code reflects on GitHub, you will do a pull request.
A pull request is commonly called PR.
A pull request informs your company that you have updated the files. In our case, we made updates by creating a sign-in button with a red background.
Step 1
You will get the notification that the branch just had a recent push.
Click on the Compare and pull request button.

Step 2
You will compare the dev branch to the main branch. Write a comment that shows what your pull request is about, and click on the Create pull request button.
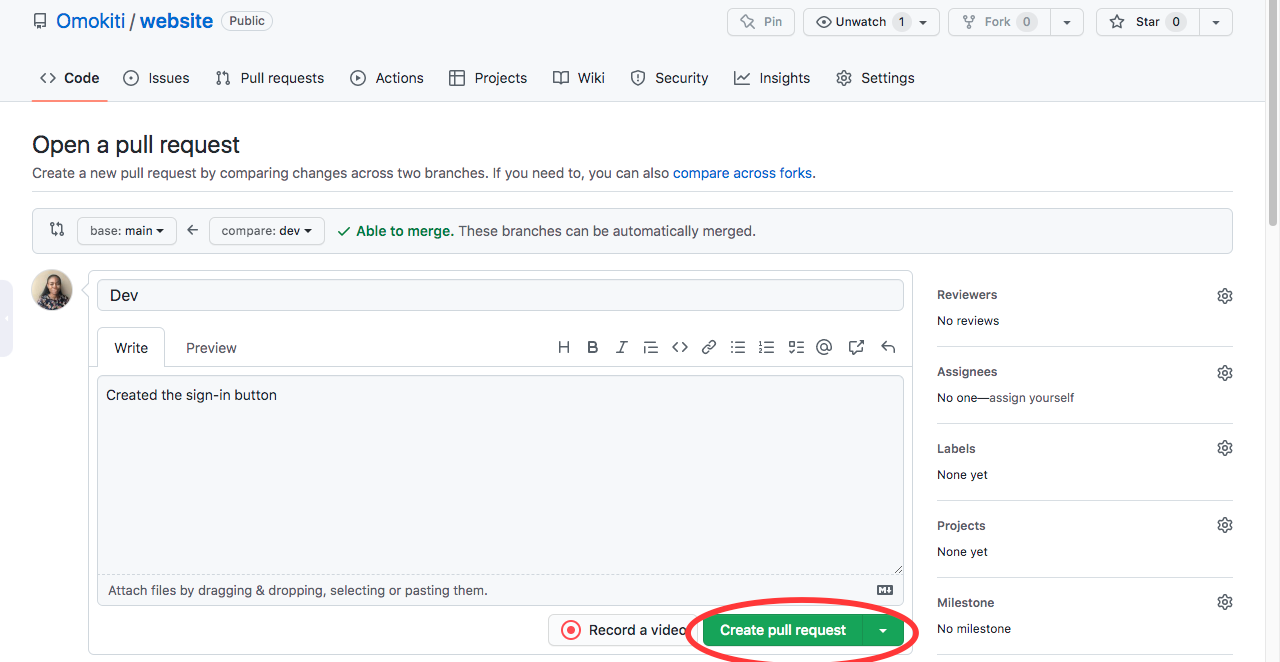
Your Boss will review your PR and merge it if it meets the task requirements.
Difference between GitHub Desktop and GitHub CLI
Git Hub Desktop and GitHub CLI are tools used to create a repo, push, create a pull request etc., in GitHub but have significant differences.
| GitHub Desktop | GitHub CLI |
| GitHub Desktop is the GitHub application that you can install on your system by visiting this site. | GitHub CLI is the Command Line interface tool for GitHub that brings pull requests, issues, GitHub Actions, and other GitHub features to your terminal. |
| GitHub Desktop is a super flexible tool | GitHub CLI is a bit complex |
| GitHub Desktop offers a beautiful and structured User Interface | GitHub CLI offers a black screen |
| It has a specific button for each and every Git command | Remembering all the commands can be difficult |
Conclusion
GitHub is an essential tool for every developer. It helps store your code, communicate and collaborate with other developers worldwide, contribute to open source, and display your projects to the world.
I hope you learnt a lot about GitHub from this article.
Happy Coding!!!.
Subscribe to my newsletter
Read articles from Emamuzo Omokiti directly inside your inbox. Subscribe to the newsletter, and don't miss out.
Written by

Emamuzo Omokiti
Emamuzo Omokiti
I am a creative Front-End Developer who enjoys creating beautiful User-Interfaces with excellent User Experience. I also enjoy writing about things I learn, challenges I face, solutions, etc.