Deploying Laravel-React app to Shared Hosting via GitHub and SSH
 Roberto Cannella
Table of contents

Deploying a Laravel-React app onto Shared Hosting
This post details the steps needed to deploy a Laravel-React web app into a cPanel host. This post specifically targets deployment to GoDaddy Services. I’m not affiliated with, nor a partner of any of the providers in this post. If you have recommendations, feel free to comment below. The project backend is written in PHP and its frontend is written in React, so choose a host that supports that functionality. Typically, emerging web developers oftentimes find themselves utilizing shared hosting services. Most times those services are limited, resulting in less-than-ideal configurations. This is such one case. Hopefully, the steps outlined here can be used as a general guide for the deployment of similar web apps onto various other hosting providers.
Assumptions
This post makes a few assumptions. You should have the following items configured and ready:
A fully functioning app running on your local environment.
You’ve been pushing frequent changes to a GitHub repository.
Already configured SSH access to your host
The App
We will be deploying our web application from a local development environment onto two different subdomains; both under my personal domain (www.robertocannella.com). One subdomain will be for the backend API (laravel-api.robertocannella.com) and the other for the frontend React app (react-app.robertocannella.com). The front end app uses an Axios client to make basic authenticated CRUD requests to the backend Laravel API. I created this repository when completing this Laravel tutorial by user Codeholic. I recommend his videos to anyone looking to learn Laravel. You can find my repository here: https://github.com/robertocannella/laravel-react-app
The tutorial takes the learner through backend configuration of the api as well as implementation of a front-end admin panel. The front end of this app is written in React (using VITE). The react portion of the app is encapsulated within a subdirectory of the main Laravel project.
DNS/SSL
Let’s begin the process by creating the appropriate DNS settings. The backend Laravel app will reside on a subdomain called laravel-api.robertocannella.com. From the cPanel admin, click on add subdomain and populate the relevant fields (let’s keep the default document-root suggested by GoDaddy). Create an additional subdomain for the front end app. For that, I’m using react-app.robertocannella.com.

This will create the redirect info GoDaddy needs to forward the domains to their respective directories. The dns for robertocannella.com is managed at Google Domains. So there, we need to add A Records to forward the subdomains “laravel-api” and “react-api” to the GoDaddy Servers. Here you will need to obtain the server IP. One method to retrieve the IP is to go the the GoDaddy Hosting Dashboard. There you will find the Server information:
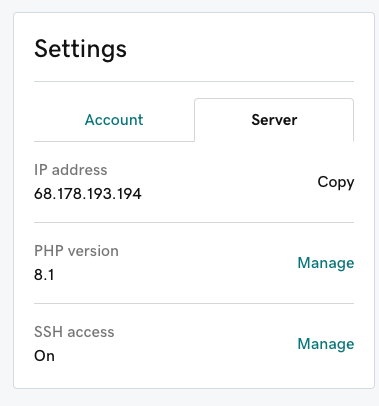
While we are here, confirm that SSH access is turned on (see this link to set it up), we will need it when pulling the repository from GitHub. Now, at Google Domains (or where you have your DNS hosted) add the appropriate A Records:


This process will take a few minutes to propagate over the internet. In the meantime, let’s go back to the cPanel dashboard and generate SSL for our new subdomains. By default GoDaddy generates a self-signed certificate when creating the domain, but Chrome doesn’t view these as secure. We can run AutoSSL from the SSL/TLS Status tool on the cPanel Dashboard to generate Secure Let’s Encrypt Certificates. Running it should generate certificates for both subdomains.

This process takes several minutes to complete. In some instances, rerunning the AutoSSL may be required. When this completes, our next steps are to clone the project into the directory. If you visit either domain at this point, you should receive a forbidden error (403). When we add our project, we will be creating .htaccess files to address this.

SSH
To clone our GitHub project, we will need access to our root directory via SSH. The username and password to log into the GoDaddy Server can be managed from the GoDaddy Hosting Dashboard:
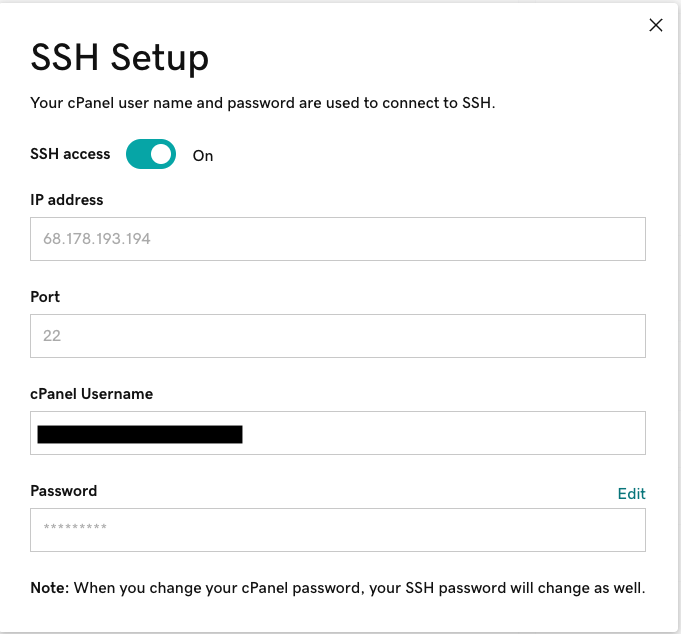
The general command to do this will look something like this:
ssh -i ~/.ssh/id_rsa_cpanel <cpanel_ssh_user>@<123.123.123.123>
The -i option informs the host of which id_rsa key to use when connecting. Setting up id_rsa can be cumbersome. I will not be addressing that here. Once you are able to login into your host via ssh, we begin the steps to clone the project.
Create a GitHub Deploy Key / Cloning
The content in this section is derived from implementing the process at this link: https://docs.cpanel.net/knowledge-base/web-services/guide-to-git-host-git-repositories-on-a-cpanel-account/
Part of the process of deploying our project is to clone the GitHub repository. This is completed by pulling the repository into a directory on the host. To do this, we will need to generate a deploy key. Our first step is to generate a private/public key from our SSH connection to on our host. There are plenty of outdated guides to do this via GoDaddy, but they utilize RSA encryption which GitHub no longer supports, so we will need to generate a ECDSA key.
When/if prompted for password, leave the field blank.
ssh-keygen -t ecdsa -f ~/.ssh/lara-api -b 521 -C "<username>@<servername | IP >"
This command generates a key pair. The public key needs to be added to GitHub. The command -f option saved the files as lara-api and lara-api.pub. Both files are saved into the specified directory. We will use the lara-api.pub key to generate a GitHub deploy key in the next step.
Next, we’ll need to create or update the SSH config file. Change into the the .ssh directory and see if a config file exits.
# Change to home/.ssh/ directory
cd ~/.ssh/
# Show all contents and details
ls -al

Since I have previous ssh configurations, a config file is present in my directory. If there isn’t one, run the following commands generate and configure the file. Use your GoDaddy username in the last command.
# Create the file
touch ~/.ssh/config
chmod 0600 ~/.ssh/config
chown <username>:<username> ~/.ssh/config
This file contains or will contain information regarding the SSH Session: Add to following to set up access for the repository. Replace username with your GoDaddy username.
Host github.com
  Hostname ssh.github.com
  Port 443
  IdentityFile /home/<username>/.ssh/lara-api
To test the configuration and our ability to connect to Github, run the following command:
ssh -i ~/.ssh/lara-api -T git@github.com

Log into GitHub and navigate to the repository. Under settings for the particular repository, we find a link in the side bar called Deploy Keys. Here we can add the public key we generated on the server. Copy the contents of lara-api.pub into the key field. I didn’t document this process in detail, but the process is fairly intuitive.
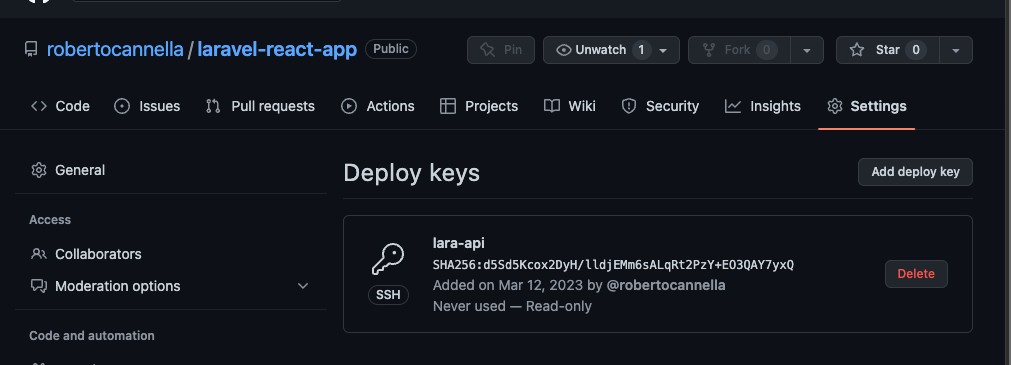
At this point we can clone our project. We can do this into a directory that resides next to public_html. But not inside it. We don’t want users to access the anything other than the public directory within the Laravel app. Execute this command from your home directory.
git clone git@github.com:robertocannella/laravel-react-app.git laravel
This is the file structure we are looking for
~<username> -
            |- /public_html/
            |- /laravel/
Run Composer Install
Change into the newly cloned directory:
cd ~/laravel/
Now that we’ve cloned our project, we can import and build our dependencies using composer. Verify composer 2 is installed (required by Laravel 10)
composer --version
Composer version 2.2.12 2022-04-13 16:42:25
Here, I am running a supported version. If composer is not install or not up to date: Run the composer install tool on this site: https://getcomposer.org/download/. Do not copy the text in this post, as it may change. But here is what it will look like.
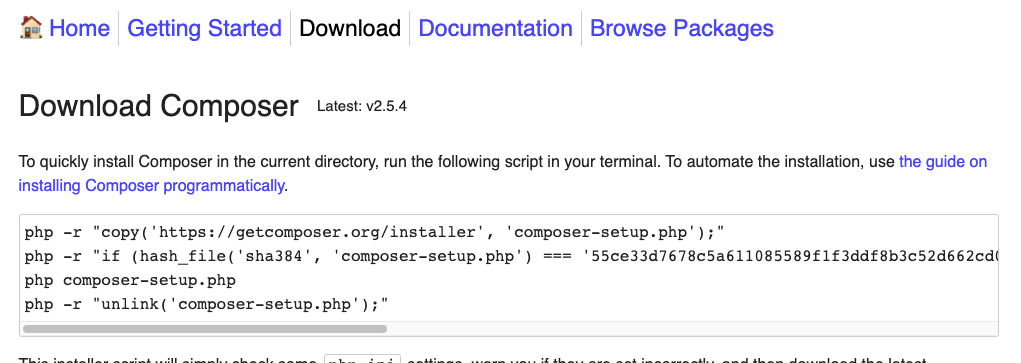
After downloading and installing composer, we can run:
composer install

Configure Environment
Create or change .env file to reflect the current environment: Leave the APP_KEY empty
APP_NAME="Laravel React"
APP_ENV=prod
APP_KEY=base64:
APP_DEBUG=false
APP_URL=https//laravel-api.robertocannella.com
Generate the APP_KEY:
php artisan key:generate --ansi
Expose the API
Everything we’ve done to this point has been behind our public site. We need to expose the public folder of our laravel api. GoDaddy created folders with respective names for us when we created the subdomains. We need to change the directory into a symbolic link to the public directory of our laravel project. First let’s delete the directory that GoDaddy created for us.
rm -rf laravel-api.robertocannella.com/
Now create the symbolic link
ln -s ~/laravel/public ~/public_html/laravel-api.robertocannella.com
Here is the file structure. In the IDE I’m using (phpStorm), the blue folder represents a symbolic link:

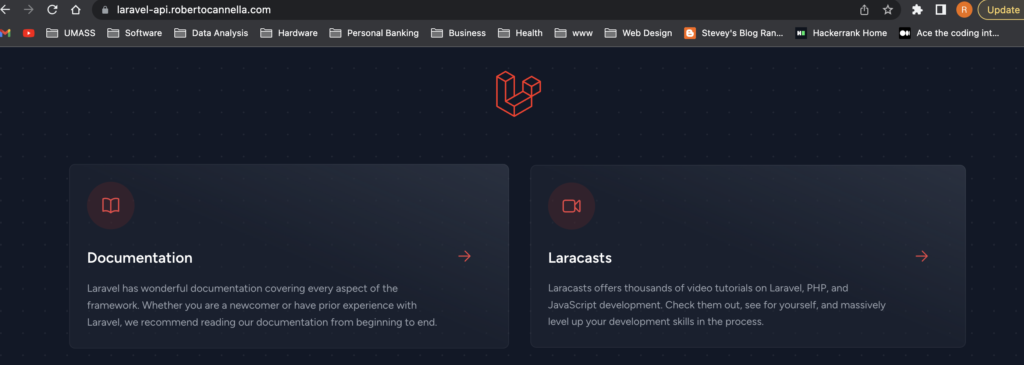
If we visit the root of our subdomain, we will find the laravel app running:
https://laravel-api.robertocannella.com
Create / Configure the Database
Inside the cPanel dashboard, under MySQL Databases, create a new database. When naming this database use a unique prefix. Since shared hosting creates conflicts when naming:


Add an existing user (or create a new one) and assign all privileges:

Be certain to click apply changes:

Lets now update our .env file to reflect the new database settings:
DB_CONNECTION=mysql
DB_HOST=127.0.0.1
DB_PORT=3306
DB_DATABASE=rc-laravel-react
DB_USERNAME=aeir90
DB_PASSWORD=*************
After saving changes, run migrations inside our laravel app folder.
php artisan migrate
Seed the database:
php artisan db:seed
After these steps, you can log into phpMyAdmin to verify the database has been configured.
Uploading Front End
The process for deploying the front end of our app is fairly simple. First lets check configuration of the .environment. Add the correct domain to VITE_API_BASE_URL to a new file called .env.production in the root of the react folder inside the Laravel App.
.env.production
VITE_API_BASE_URL=https://laravel-api.robertocannella.com/api
With this, when we build our project the Axios Service will use the appropriate environment variable:

Build the distribution folder:
npm run build
Upload the files from the dist directory to the document root that was used when creating the subdomain. In this case:
~/public_html/react-app.robertocannella.com/

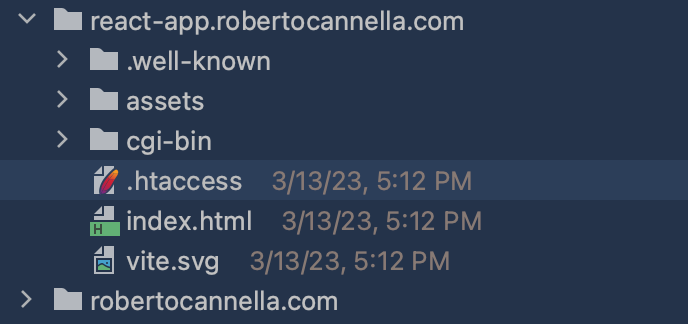
Create an .htaccess file with these configurations to allow access to the directory.
.htaccess
RewriteEngine On
RewriteCond %{REQUEST_FILENAME} !-f
RewriteCond %{REQUEST_FILENAME} !-d
RewriteRule . index.html
Other Considerations
If using the the storage folder inside the laravel directory structure (for uploading pictures) you may need a symbolic link to that folder from the document root as well.
ln -s ~/lara-api.robertocannella.com/storage storage
Artisan cache clearing commands
[~/laravel]$ php artisan down
INFO Application is now in maintenance mode.
[~/laravel]$ php artisan config:cache
INFO Configuration cached successfully.
[~/laravel]$ php artisan config:clear
INFO Configuration cache cleared successfully.
[~/laravel]$ php artisan route:clear
INFO Route cache cleared successfully.
[~/laravel]$ php artisan route:cache
INFO Routes cached successfully.
[~/laravel]$ php artisan up
INFO Application is now live.
[~/laravel]$ WINNER!
Subscribe to my newsletter
Read articles from Roberto Cannella directly inside your inbox. Subscribe to the newsletter, and don't miss out.
Written by
