Spring Boot – Deploy War File To Separate Tomcat In Maven Web Application.
 Jayani Sumudini
This post shows how to deploy a spring boot war file to the separate tomcat container in maven.
Step 1 : extends SpringBootServletInitializer subclass and overrides its configure method.
Typically, update your application’s main class to extend SpringBootServletInitializer.
For example:
Before extend:
package net.mzouabi.ng2.server;
import org.springframework.boot.SpringApplication;
import org.springframework.boot.autoconfigure.SpringBootApplication;
import org.springframework.web.bind.annotation.CrossOrigin;@SpringBootApplication
@CrossOrigin(origins = "http://localhost:4200")public class ServerApplication {
   public static void main(String[] args) {
      SpringApplication.run(ServerApplication.class, args);
   }
}
After extend:
package net.mzouabi.ng2.server;
import org.springframework.boot.SpringApplication;
import org.springframework.boot.autoconfigure.SpringBootApplication;
import org.springframework.web.bind.annotation.CrossOrigin;
import org.springframework.boot.web.support.SpringBootServletInitializer;
import org.springframework.boot.builder.SpringApplicationBuilder;
import org.springframework.boot.context.embedded.tomcat.TomcatEmbeddedServletContainerFactory;
import org.springframework.context.annotation.Bean;

@SpringBootApplication
@CrossOrigin(origins = "http://localhost:4200")
public class ServerApplication extends SpringBootServletInitializer{
   public static void main(String[] args) {
      SpringApplication.run(ServerApplication.class, args);
   }

   @Bean
   public TomcatEmbeddedServletContainerFactory tomcatEmbeddedServletContainerFactory() {
      return new TomcatEmbeddedServletContainerFactory();
   }

   @Override
   protected SpringApplicationBuilder configure(SpringApplicationBuilder application) {
      return application.sources(ServerApplication.class);
   }
}
Step 2: pom.xml changes
need to modify pom.xml to change the packaging to war:<packaging>war</packaging>
and also need to mark the embedded servlet container dependency as provided.
<dependency>
 <groupId>org.springframework.boot</groupId>
<artifactId>spring-boot-starter-tomcat</artifactId>
<scope>provided</scope>
</dependency>
<dependency>
<groupId>org.apache.tomcat.embed</groupId>
<artifactId>tomcat-embed-jasper</artifactId>
<scope>provided</scope>
</dependency>
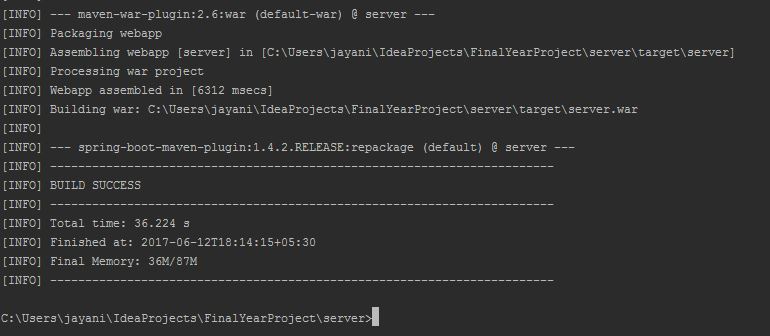
Step 3: run the maven command mvn package.
I got the following output:
and war file created in the project target as I show in follow:

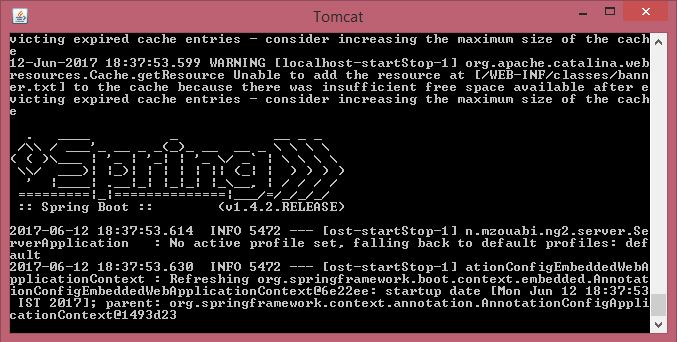
Step 4: Copy the WAR to tomcat webapps.
Here the name is important – whatever filename we choose will be used to map HTTP requests to our application.
I got the following output:
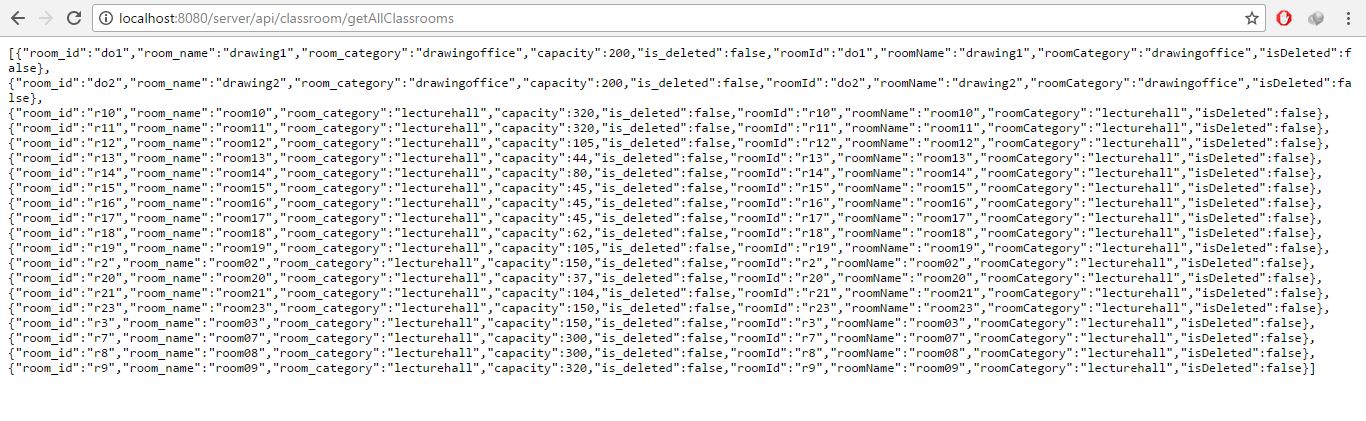
Step 5: After that, test your war file
Subscribe to my newsletter
Read articles from Jayani Sumudini directly inside your inbox. Subscribe to the newsletter, and don't miss out.
Written by
Jayani Sumudini
Jayani Sumudini
As a highly skilled back-end developer, I'm always on the lookout for fresh challenges that push me to innovate and grow. With more than 5 years of working experience in a competitive organization surrounded by highly skilled people, I've honed my skills in JavaScript, TypeScript, NodeJS, Java, Spring Framework, and AWS. My passion for back-end development stems from my love of problem-solving and creating efficient and scalable solutions that empower businesses to thrive. I believe that every project is an opportunity to learn something new and to push the boundaries of what's possible.