Conditional Rendering
 Smart Shock
Introduction
Conditional rendering is a crucial concept in React. It allows you to control the output of components based on the current state or props of the application. In this article, we will explore how to implement conditional rendering in React with a simple example.
Code
Let's start with a simple React component that displays a message based on the value of a boolean state variable.
import React, { useState } from 'react';

function App() {
  const [showMessage, setShowMessage] = useState(false);

  const toggleMessage = () => {
    setShowMessage(!showMessage);
  };

  return (
    <div>
      <button onClick={toggleMessage}>Toggle Message</button>
      {showMessage && <p>This message is displayed conditionally.</p>}
    </div>
  );
}

export default App;
In the code above, we define a state variable showMessage using the useState hook. The initial value of this state variable is false. We also define a function toggleMessage that updates the value of showMessage to its opposite.
The return statement of our component contains a button that calls the toggleMessage function when clicked. We then use the && operator to conditionally render a paragraph element based on the value of showMessage. If showMessage is true, the paragraph element is displayed. Otherwise, it is not rendered.
Explanation
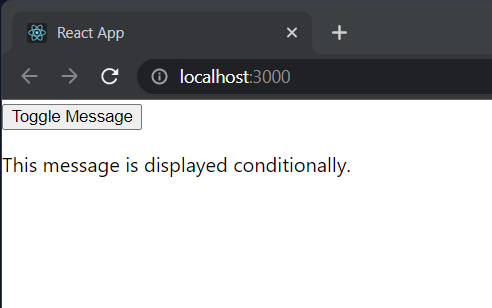
When the component is first rendered, the value of showMessage is false, so the paragraph element is not displayed. When the button is clicked, the toggleMessage function is called, which updates the value of showMessage to true. This causes the paragraph element to be displayed.
When the button is clicked again, the toggleMessage function is called once more, updating the value of showMessage back to false. This causes the paragraph element to be hidden once again.
Replication
To replicate this code on your local machine, follow these steps:
Open your terminal and navigate to the directory where you want to create your React project.
Run the following command to create a new React project:
npx create-react-app my-appNavigate to the project directory by running the following command:
cd my-appOpen the project in your preferred code editor.
Replace the contents of the
App.jsfile with the code above.Save the file and start the development server by running the following command:
npm startOpen your browser and navigate to
http://localhost:3000to see the rendered output of your React application.
Application screenshots


Conclusion
Conditional rendering is an important concept in React that allows you to control the output of components based on the current state or props of the application. In this article, we explored how to implement conditional rendering in React with a simple example. By following the steps outlined above, you should be able to replicate this code on your local machine and experiment with it to gain a better understanding of how conditional rendering works in React.
Subscribe to my newsletter
Read articles from Smart Shock directly inside your inbox. Subscribe to the newsletter, and don't miss out.
Written by
