Web Scraping Basics
 Corey McCoy
Web scraping
Web scraping has become a crucial skill for developers in the digital era, providing a means to extract valuable data from websites. In this article, we'll explore building a compact app using JavaScript, Node.js, and Express that extracts website data, saves it as a CSV file and sends it via email.
As programmers, we like to work smarter, not harder. So I decided to build this handy web scraper to make it easy to get the names and social media links of food trucks I wanted to reach out to for my web development business. But this process can be adapted for any website or purpose.
If you want to check out the HTML and selectors I used to get my data, head over to: https://thetexasfoodtruckshowdown.com/truck-lineup/.
By exploring the HTML structure, you can gain a better understanding of the selectors and how they were applied.
Setting up the project
Before diving into the code, let's ensure we have all the necessary tools and libraries in place for our web scraping app.
Here's a breakdown of what we'll need:
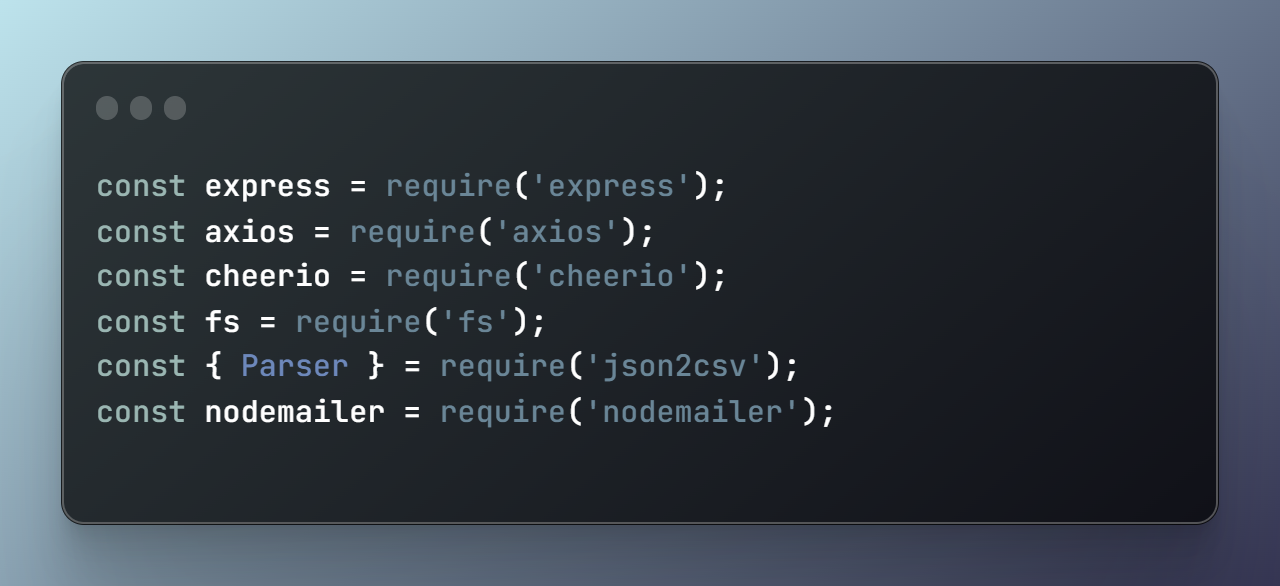
Express: A popular web application framework for Node.js that simplifies server setup.
Axios: A library for making HTTP requests, allowing us to fetch the website data.
cheerio: A library that helps us parse and manipulate the HTML content fetched by Axios.
fs: The built-in Node.js file system module, used for reading and writing files.
json2csv: A library for converting JSON data to CSV format.
Nodemailer: A library for sending emails with Node.js.
To install these libraries, open your terminal and run the following command:

Now that we have the necessary tools installed, let's import them in our main app file, (e.g. app.js)
The main app structure
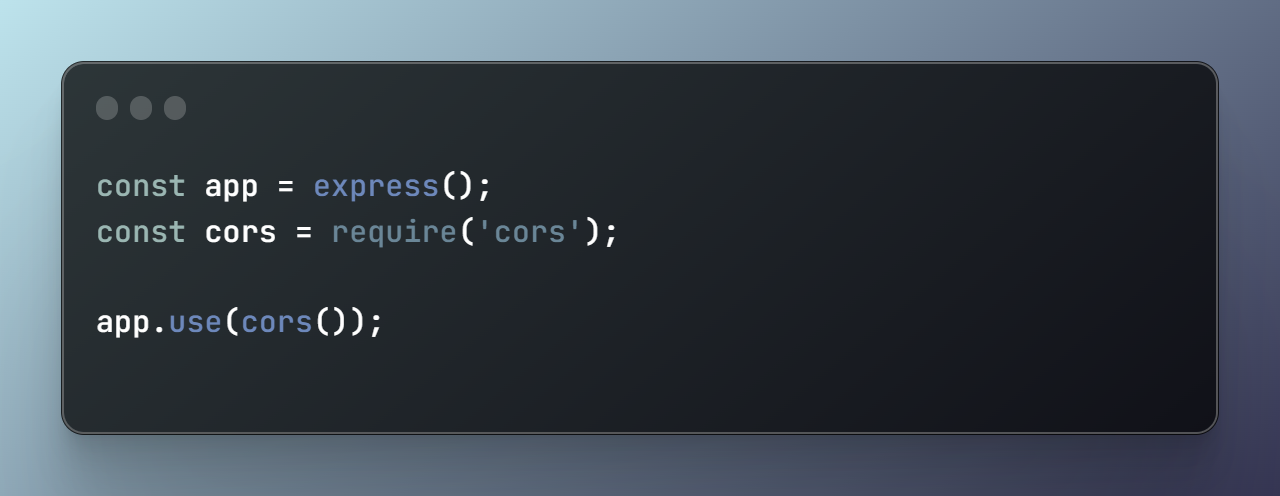
Now that we've got our libraries in place, it's time to lay the foundation for our web scraping app. In this section, I'll give you a brief overview of the app's structure and set up the server using Express and CORS.
1. App initialization: First, in your main app file, we'll create an instance of the Express app and configure it to use CORS (Cross-Origin Resource Sharing). This allows our app to handle requests from different origins, which can be useful if we want to utilize it from various domains or front-end applications.
2. Server setup: Next, let’s define the port our app will listen on. If the app is deployed on a platform like Heroku, it will use the platform's assigned port, otherwise, it will default to port 3000.

3. Route creation: Our app will have a single route, /trucks, which will handle the web scraping, data conversion, and email sending process. We'll define this route later.
4. Starting the server: Finally, we'll start the server by having the app listen on the specified port.

With the basic structure in place, we're ready to dive into the more exciting parts of our app - scraping website data, converting it to CSV, and sending it via email.
Scraping data with Axios and Cheerio
In this section, I'll walk you through the process of fetching website data using axios and extracting the desired information with the help of cheerio.
1. Creating the getTruckList function: To keep things organized, create a separate function called getTruckList that takes a URL as an argument and returns an array of objects containing the extracted data.

2. Fetching the webpage with axios: Inside the getTruckList function, we'll use axios to fetch the HTML content of the given URL.

3. Parsing the HTML content with cheerio: Once we have the HTML content, we'll utilize cheerio to parse it and make it easier to work with.

4. Extracting the required data: With cheerio, we can now traverse the HTML elements and extract the data we need. In our example, we'll be extracting food truck names and their social media links. However, this process can be used to extract any type of data from a website.
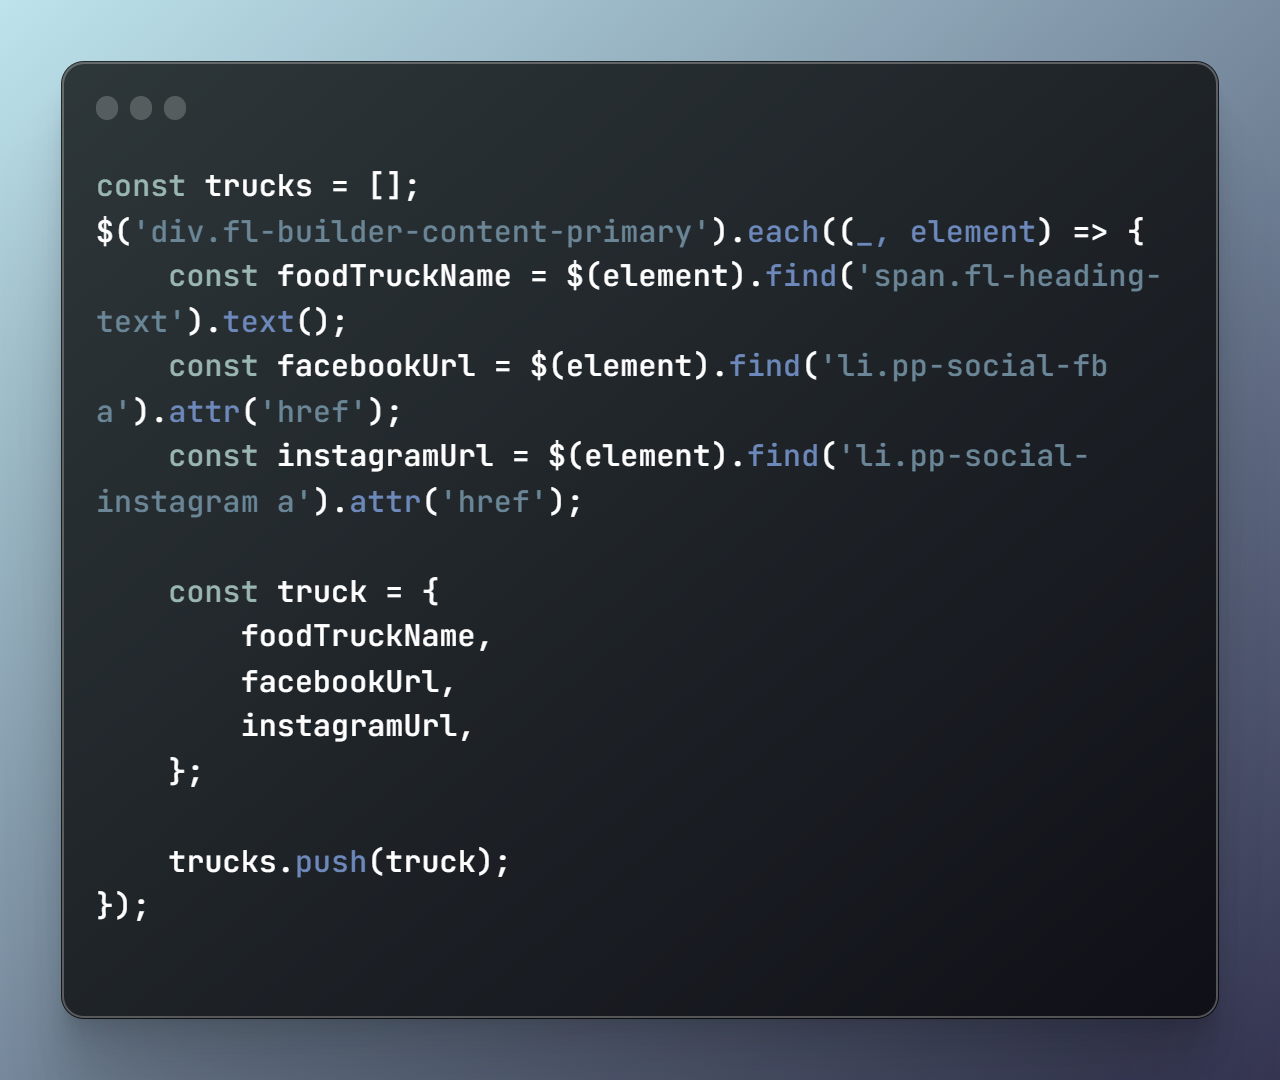
The getTruckList function will now return an array containing the extracted data. With our scraping process complete, it's time to save the data as a CSV file and send it via email.
Saving the scraped data as a CSV file
Now that we have our data in a neat array, it's time to convert it into CSV format and save it to a file. In this section, I'll show you how to use the json2csv and fs libraries to do this.
1. Converting JSON data to CSV format: The json2csv library provides a simple way to convert the JSON data (in this case, the trucks array) into a CSV format. We'll create a new Parser instance and use the parse() method to convert the data.

2. Saving the CSV file with the fs module: With our data now in CSV format, we'll use the built-in Node.js fs module to save it to a file called 'trucks.csv'. We'll use the writeFile method and specify the file name, data, and character encoding ('utf8').
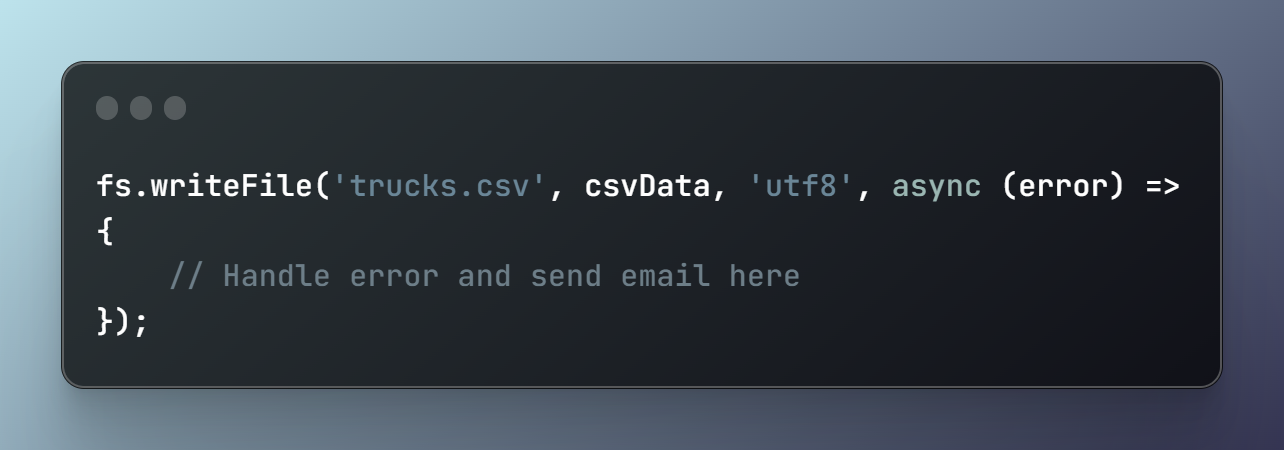
Inside the writeFile method's callback, we'll handle any errors that may occur while saving the file and proceed to send the CSV file via email.
Sending the CSV file via email with nodemailer: (optional)
With our data saved as a CSV file, it's time to send it to our inbox. In this section, I'll show you how to set up nodemailer to send the file as an email attachment.
1. Setting up the email transporter: First, we'll create an email transporter by calling the createTransport method from nodemailer. This transporter will handle the process of sending emails. Be sure to replace the SMTP server address, email address, and password with your own. I tried using Gmail, but it didn’t work with my 2FA enabled, so I went with one of my Titan email accounts. The host info, port and secure values were easy to locate in the Hostinger email admin panel.
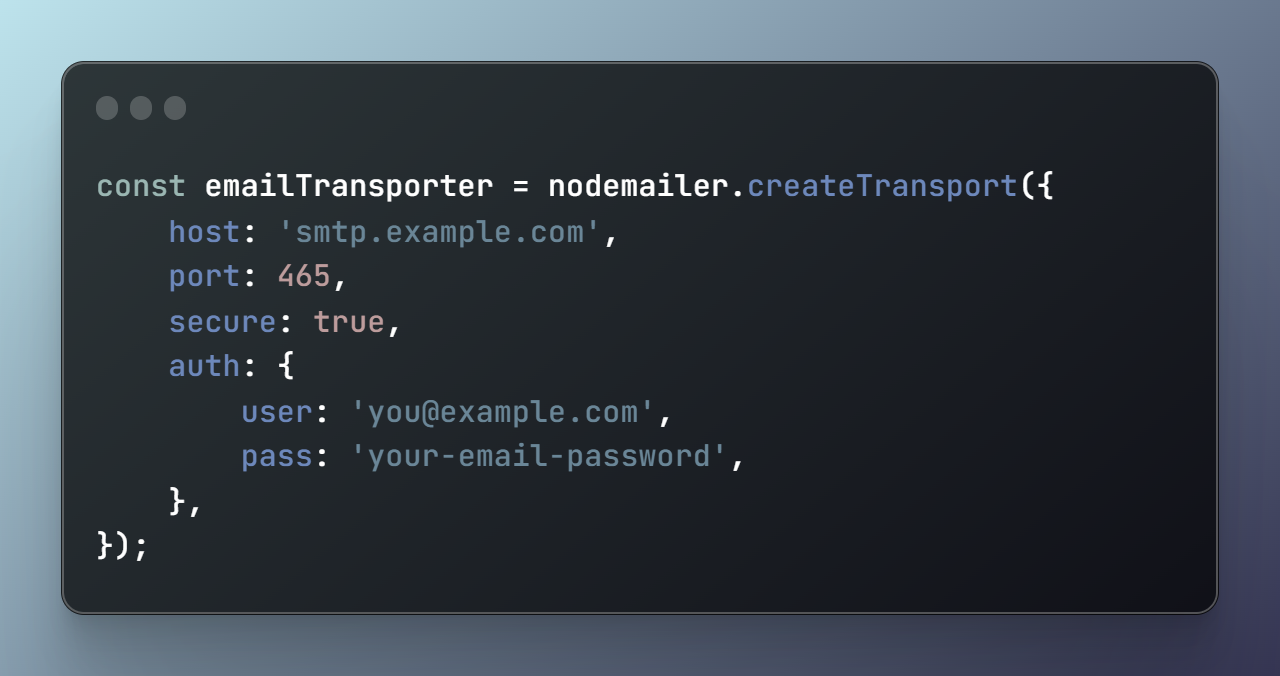
2. Creating the mailOptions object: Next, we'll create a mailOptions object that contains the necessary information for sending the email, such as the sender's and recipient's email addresses, subject, body text, and the attachment.
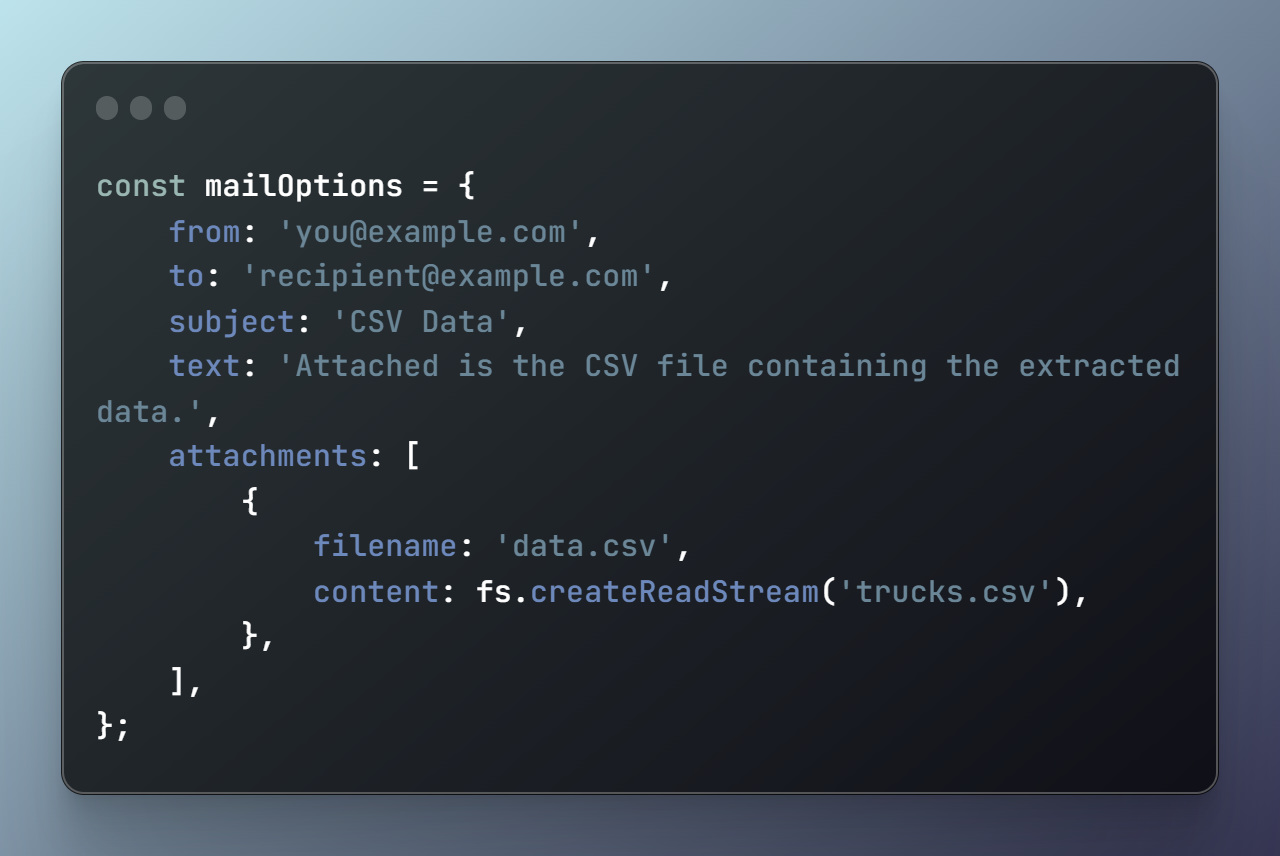
3. Sending the email: Finally, we'll use the email transporter's sendMail method to send the email with the attached CSV file. This method returns a promise, which we'll handle in our app's main route.

Now that we have our email-sending functionality in place, let's set up the app's main route to trigger the entire process.
Creating the app's main route
With all the pieces in place, it's time to create our app's main route, which will be responsible for initiating the web scraping, data conversion, and email sending process.
1. Defining the '/trucks' route: We'll create a new route in our Express app that listens for GET requests at the '/trucks' endpoint. Inside the route, we'll call our getTruckList function with the desired URL.
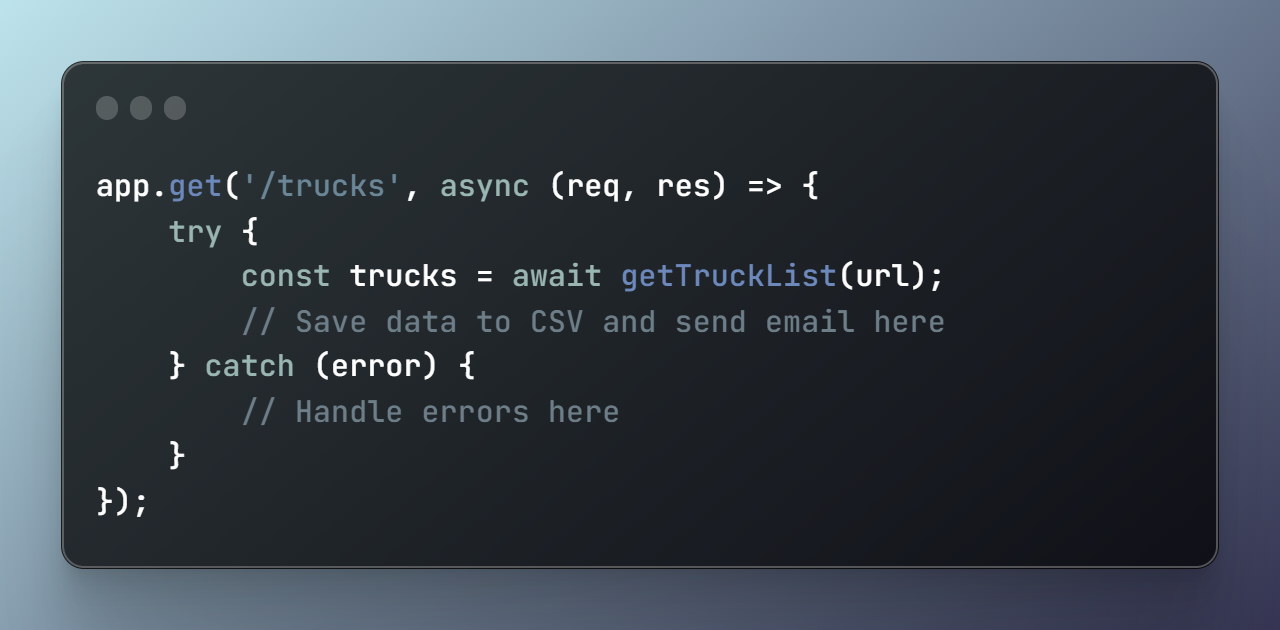
2. Handling errors and responses: In our route, we'll handle various errors that may occur during the scraping, file saving, or email sending process. If an error occurs, we'll respond with a 500 status code and a JSON object containing the error message. If everything goes smoothly, we'll respond with a JSON object containing the scraped data.
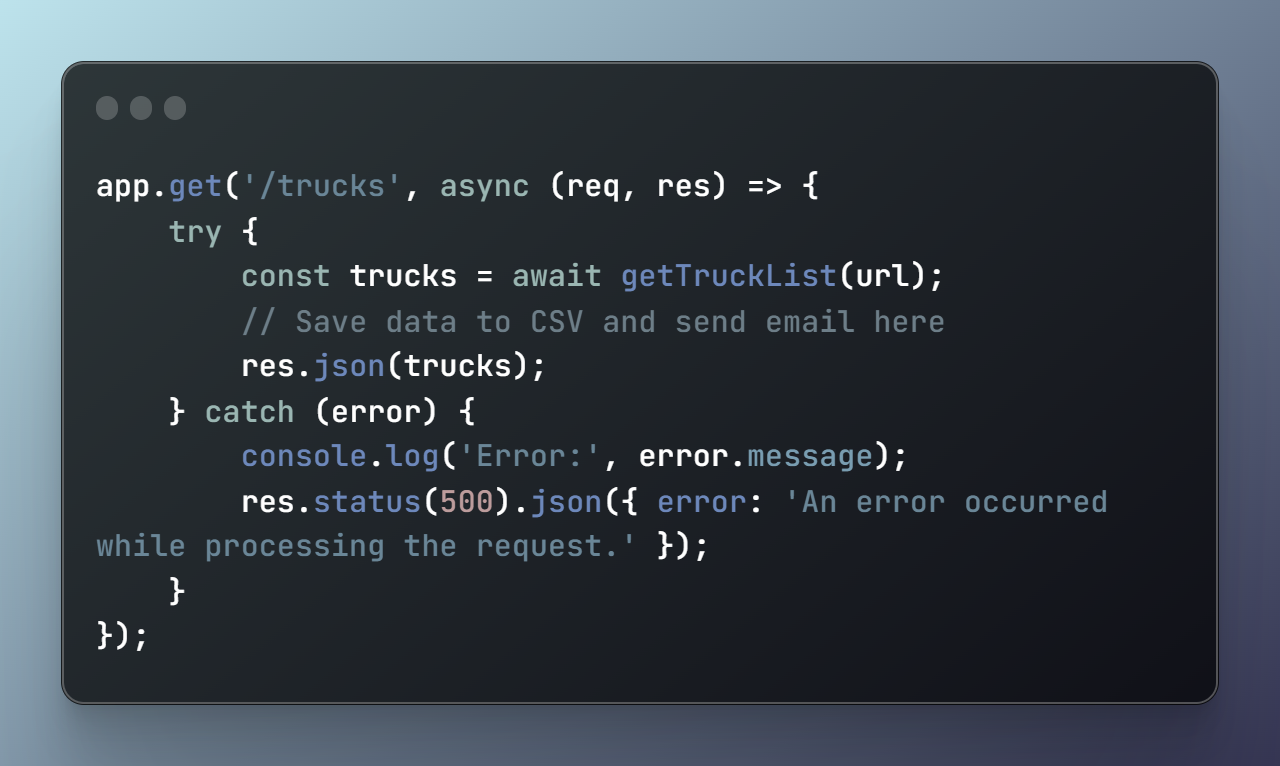
With our main route set up, our web scraper is now complete. When I make a request to the '/trucks' endpoint, I get back the data I need, it gets saved as a CSV file, and sent to me via email.
Starting the server and testing the scraper
With all the components of our web scraper in place, it's time to start the server and get it ready to accept incoming requests.
To start the server, open your terminal, navigate to the project directory, and run the following command:

This command executes the app.js file, and you should see the console message indicating that the server is running and listening on the specified port.
With the server up and running, you can now request the '/trucks' endpoint to initiate the web scraper.
Conclusion:
Way to go! You've just built a super handy web scraping app that not only grabs data from websites but also saves it as a CSV file and shoots it straight to your inbox. Even though we used food truck info as an example, you can easily tweak these techniques to work with any website or data type.
The magic of this app comes from how it snags web content with axios, extracts the info you want using cheerio, turns that data into a CSV format with json2csv, and then sends the whole package as an email attachment using nodemailer. This mix of libraries and techniques makes it a powerhouse for all sorts of stuff, like market research, data analysis, or even content aggregation.
Now that you've got the basics of web scraping down, go ahead and make this app your own. With your newfound skills and a little creativity, you can unlock a world of possibilities on the web and build even cooler tools.
Subscribe to my newsletter
Read articles from Corey McCoy directly inside your inbox. Subscribe to the newsletter, and don't miss out.
Written by

Corey McCoy
Corey McCoy
Software Developer building a portfolio of 1PBs 🚀 (one person businesses)