Start your Nostr relay on Nym
 cgi-bin
To understand the will to have Nostr relays working on the mixnet, please read the article Nostr x Nym which details our motivations.
The fact of having a Nostr relay that works through the mixnet will allow to protect the users as for example that their ISP can know that they are using Nostr, how often and to which relay, or to have the risk to see you asking for all the IP addresses that contacted your server. The system proposed here is functional with all current relays, it is still in development phase, so bugs are not excluded.
Here is the final architecture summarized
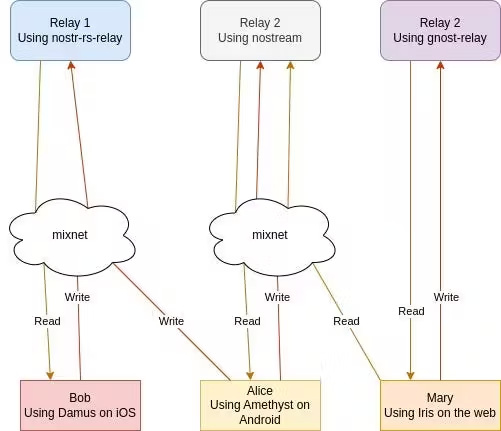
Several components are necessary to install to achieve this:
A relay, a very complete list is available here. For this article, nostr-rs-relay will be used because it is very simple, uses SQLite and runs easily on Docker
nym-client, which will make the link between your relay and the mixnet
nostr-nym, to "translate" the requests received from the mixnet and send them to the relay
Relay
If you do not have Docker installed you can find the information here: https://docs.docker.com/get-docker/. Docker is not essential for a relay to work but it greatly simplifies the explanations.
Now we have to start the relay :
mkdir data
docker run -it -p 7000:8080 \
  --mount src=$(pwd)/data,target=/usr/src/app/db,type=bind \
  scsibug/nostr-rs-relay
If all goes well, here is the output that should appear. The relay is now started.

Nym-client
The nym-client is the component that will allow to communicate with the mixnet.
The download is on Github: https://github.com/nymtech/nym/releases, you have to search for a release called "Nym Binaries v1.1.x". In this example, the version Nym Binaries v1.1.14 is used.
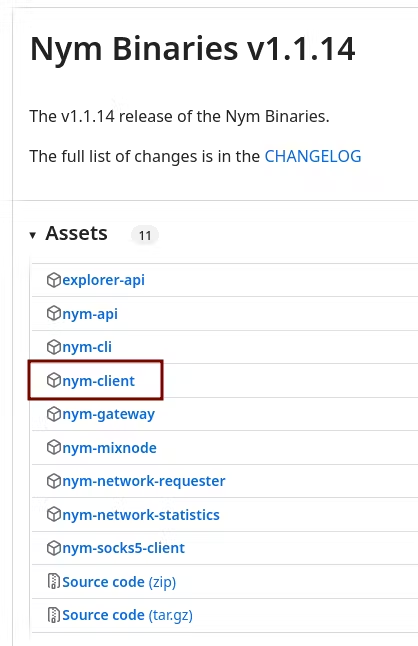
# Download the nym-client and give exec permission
wget https://github.com/nymtech/nym/releases/download/nym-binaries-v1.1.14/nym-client -O nym-client && chmod +x nym-client

# Init the nym-client
./nym-client init --id nostr-relay --latency-based-selection

# Start the nym-client
./nym-client run --id nostr-relay
If everything is correct the nym-client should now display its nym-client id. This is the element that will identify the relay and reach it in the mixnet.
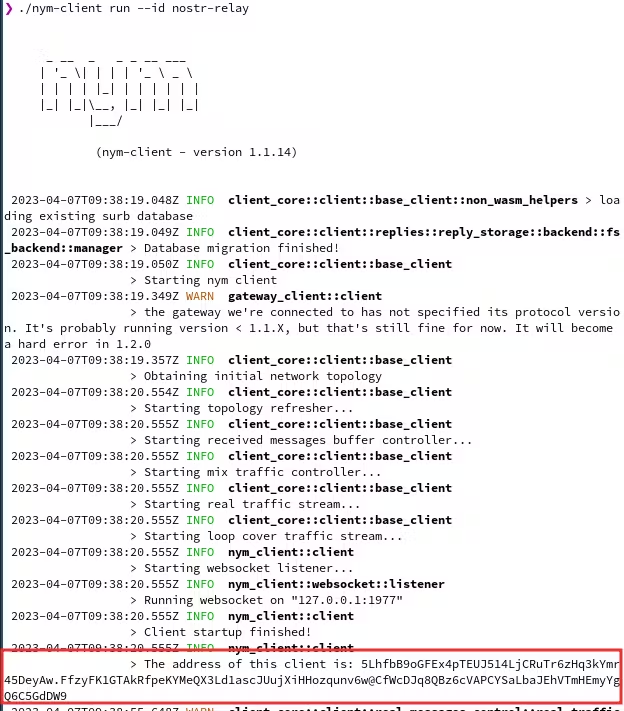
The window must remain open.
Nostr-nym
It is this element that will make the link between the mixnet and the relay. It will establish a connection with the nym-client, listen to the messages sent by the clients, transmit the Nostr events and send back the answer or notify the clients.
For more flexibility, pipenv is used. To install pip is necessary: pip install pipenv
# clone the repo
git clone https://github.com/notrustverify/nostr-nym
cd nostr-nym

# start pipenv shell and install dependencies
pipenv shell
pipenv install
End result, the window must remain open.

The relay is now accessible via the mixnet, in this example it is at the address (=nym-client id)
5LhfbB9oGFEx4pTEUJ514LjCRuTr6zHq3kYmr45DeyAw.FfzyFK1GTAkRfpeKYMeQX3Ld1ascJUujXiHHozqunv6w@CfWcDJq8QBz6cVAPCYSaLbaJEhVTmHEmyYgQ6C5GdDW9 that it can be reached.
The following section explains how to test the relay, a simple nostr client has been developed.
Test
Now that all the elements are in place, it is possible to test that creating notes and subscribing to new ones works.
In the previously cloned repository, there is a folder with a mixnet-compatible light Nostr client. Starting another nym-client is necessary.
# Init the nym-client
./nym-client init --id nostr-client --latency-based-selection --port 1978

# Start the nym-client
./nym-client run --id nostr-client
A public relay is available on the mixnet to easily test the operation :
2gc9QidpXs4YGKmphinsDhWTHxdy2TZgWYWz2VenN5jL.dkwwJqS1zXa9BuPAFdniRN2HxFvAbTybAmrUHGAT5KV@2BuMSfMW3zpeAjKXyKLhmY4QW1DXurrtSPEJ6CjX3SEh
# navigate to nostr client
cd nostr-nym/client

# start pipenv shell and install dependencies
pipenv shell
pipenv install
Publication of a new event.
python main.py --cmd text-note --message "Hello world (from the Nym mixnet)" --relay <nym-client of relay started before> --nym-client ws://127.0.0.1:1978
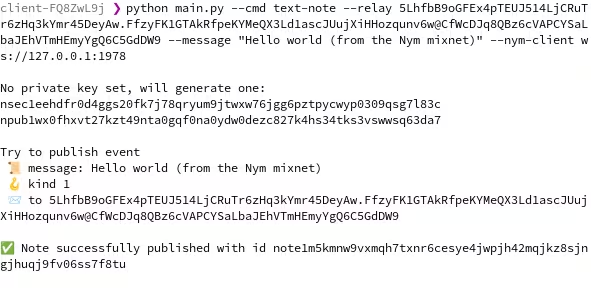
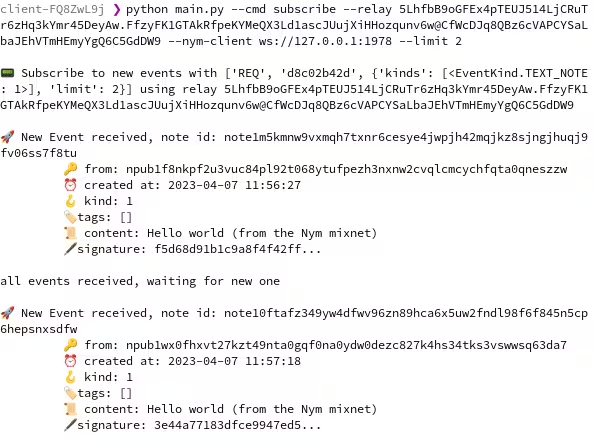
Subscription to new events.
python main.py --cmd subscribe --relay <nym-client id of relay started before> --nym-client ws://127.0.0.1:1978
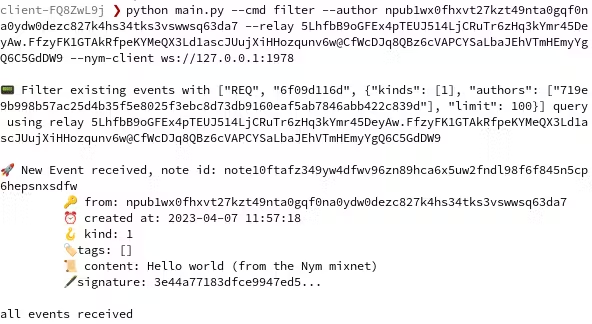
Event filtering.
python main.py --cmd filter --authors <npub to filter> --relay <nym-client id of relay started before> --nym-client ws://127.0.0.1:1978
Conclusion
The relay is now accessible via the mixnet. This is a first step towards more privacy and protection for relays.
A future article will present the benefits of setting up such an infrastructure for Nostr as well as the integration of the nym-client in an existing client such as iris.to, snort.social, damus on iOS or Amethyst on Android.
Resources:
Nostr-nym
Nym
Subscribe to my newsletter
Read articles from cgi-bin directly inside your inbox. Subscribe to the newsletter, and don't miss out.
Written by
