Basic Git Commands – How to Use Git with Github in a Real Project
 Ilyes
IlyesGit is a powerful version control system that is widely used in the software development industry. Git allows developers to track changes in their code, collaborate with other developers, and manage code versions effectively.
Today we will be looking at how to use some basic Git commands in a real project.
I created a simple project that we'll be using in this tutorial.

By going through this tutorial, you'll learn :
The Git flow
Initialize Git in your project
Add and commit your project
Create a repository on GitHub
Push your project to GitHub
Clone the repo to your laptop
WARNING! If you do not understand this meme, you should continue reading this article.

The Git flow
Git utilizes both remote and local repositories for storing code. The remote repository is located on a server, accessible to all developers, while the local repository is stored on each developer's computer. This allows for seamless collaboration between developers and the central server. The code is stored centrally, but developers have a complete copy of the code on their local machines.
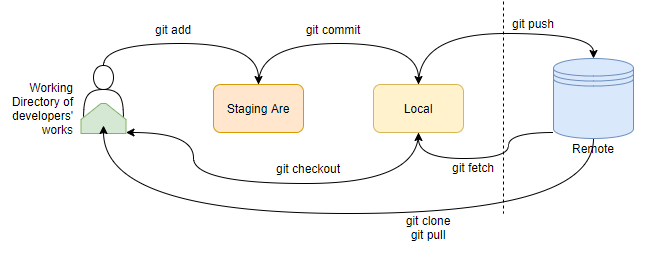
The staging area and local repository are virtual spaces that exist on a developer's computer but are not physically visible. However, the repository itself can also be hosted on an online platform such as GitHub or other similar services. These platforms allow for remote access and collaboration among multiple developers working on the same project.
A repository is a storage location that houses code in various databases and files for distribution over a network. It allows us to both store and fetch code.
Initialize Git in your project
the first step I need to initialize a local repo to become able to work with commands in my project (make sure that you have git installed in your system)
The git init command initializes a new Git repository in the current directory.

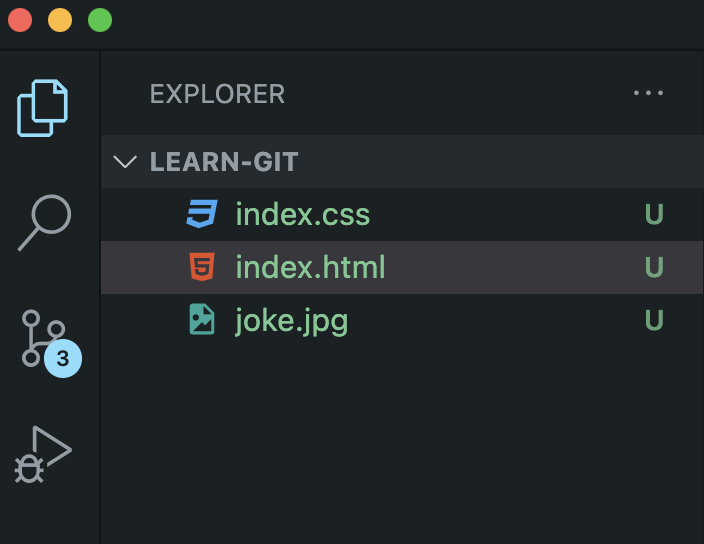
When you run this command in your terminal, you will notice some changes in color in your project. You will also see a U symbol which means your files are untracked.
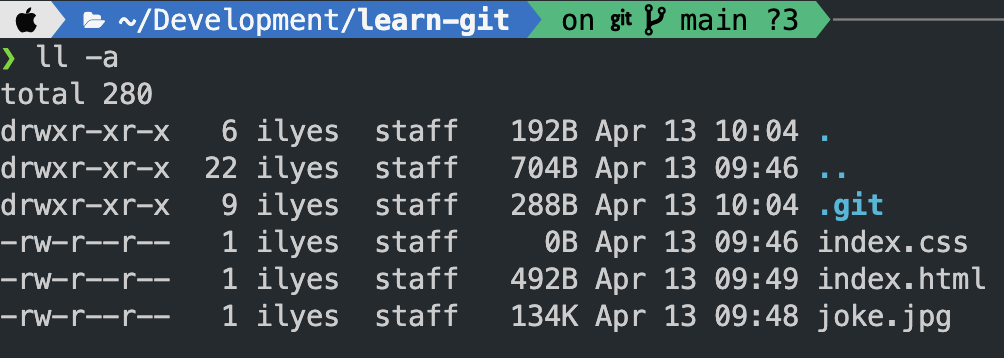
Also, when you open the folder where your project is stored/located, you will see another folder named .git which was automatically created when you ran the git init command.
Add and commit your project
Now, let's add our files to the staging area and prepare them for committing by running git add . ( the dot here means add everything from the current directory to the staging area)
When you run this command, you will see that the U symbol automatically changes to A. This means that your files have been added to the staging area and are now being tracked by Git, waiting to be committed.
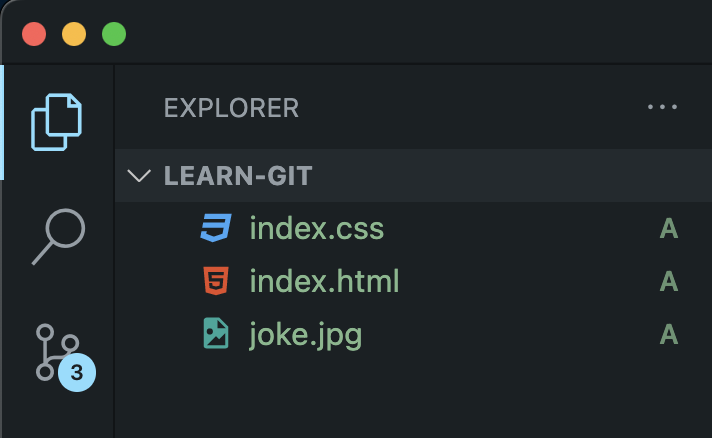
you can check that all files are added to the staging area by running git status
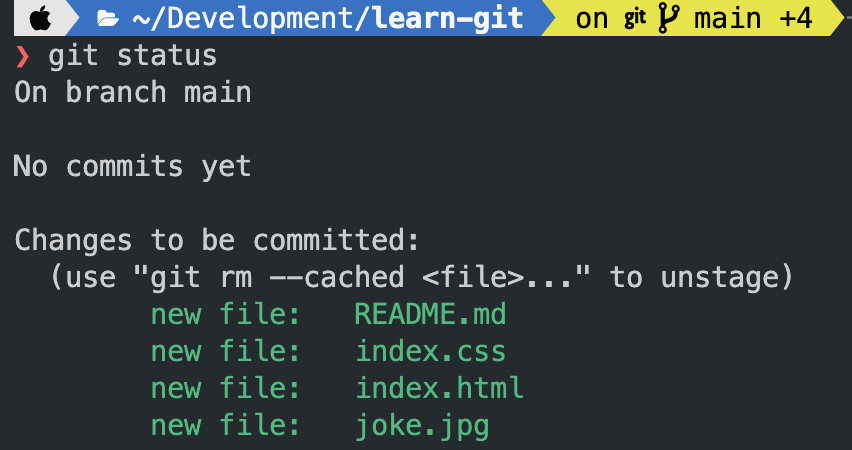
So after your project has been added to the staging area, the next thing you'll want to do is commit it by using the git commit –m “commit message” command.

By running the git commit command, you are saving this particular stage and the changes to your project permanently in the Git repository. This particular commit you made now will still be saved in the Git repository and can be accessed anytime.
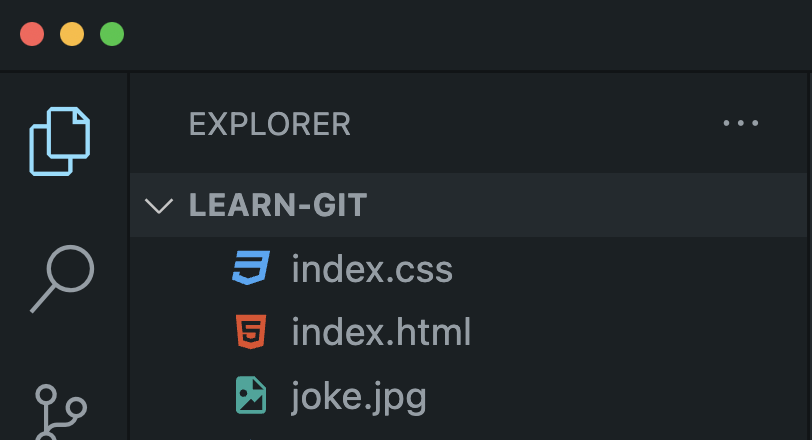
When you run this command, you should notice that the A symbol in the project is no longer there.
Create a GitHub repo & Push Your Project to it
Pushing your project to Github helps prevent your project from getting lost in the local storage. It also lets you access the GitHub repository freely from any place, with any computer (not necessarily your personal computer).
But before, we must create a GitHub repo
I can do this by logging into my account, then clicking on the new button located at the top left of the screen. When it opens, I will input my repository name, and the description, then choose if I want my project to be accessed publicly or privately. Then I'll click on "Create repository."
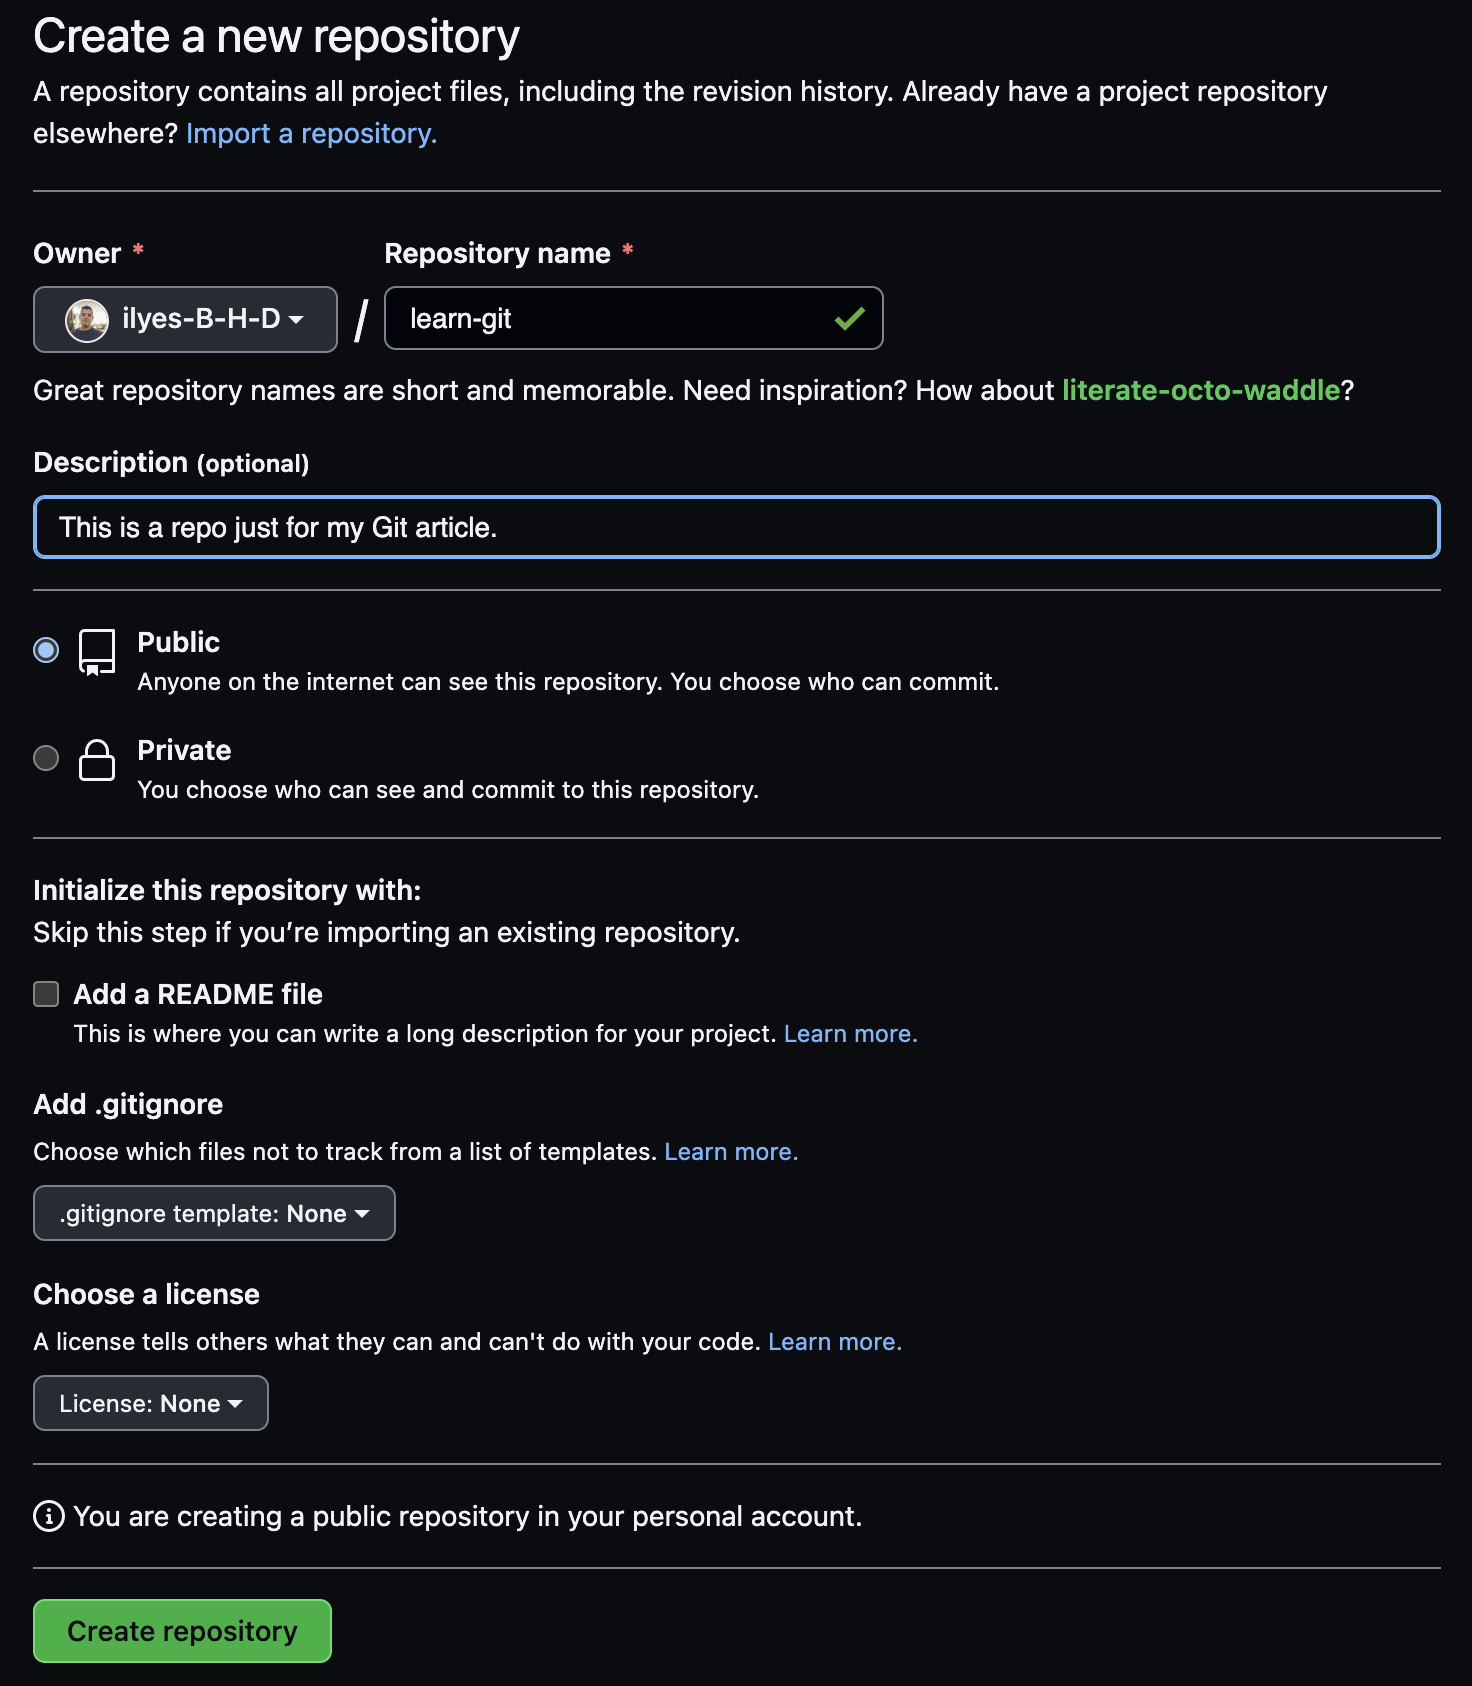
Before you can push your project to the GitHub repository, you must add the remote repository that you created on GitHub initially. However, before doing so, it's necessary to configure your git bash by running the following two commands:
git config -g name <your-name>
git config -g email <your-email>
Now, you need to run git remote add origin <repo-link> command.
and now, let's push our code, but don't use the -f or --force to not override the repo and get a bunch of conflicts.

To achieve this, run the git push –u origin main command and wait for it to load completely.
When this is done, go to the Git repository you created in GitHub and refresh the page. You will see that all your projects in the local repository have been uploaded to the GitHub repository.
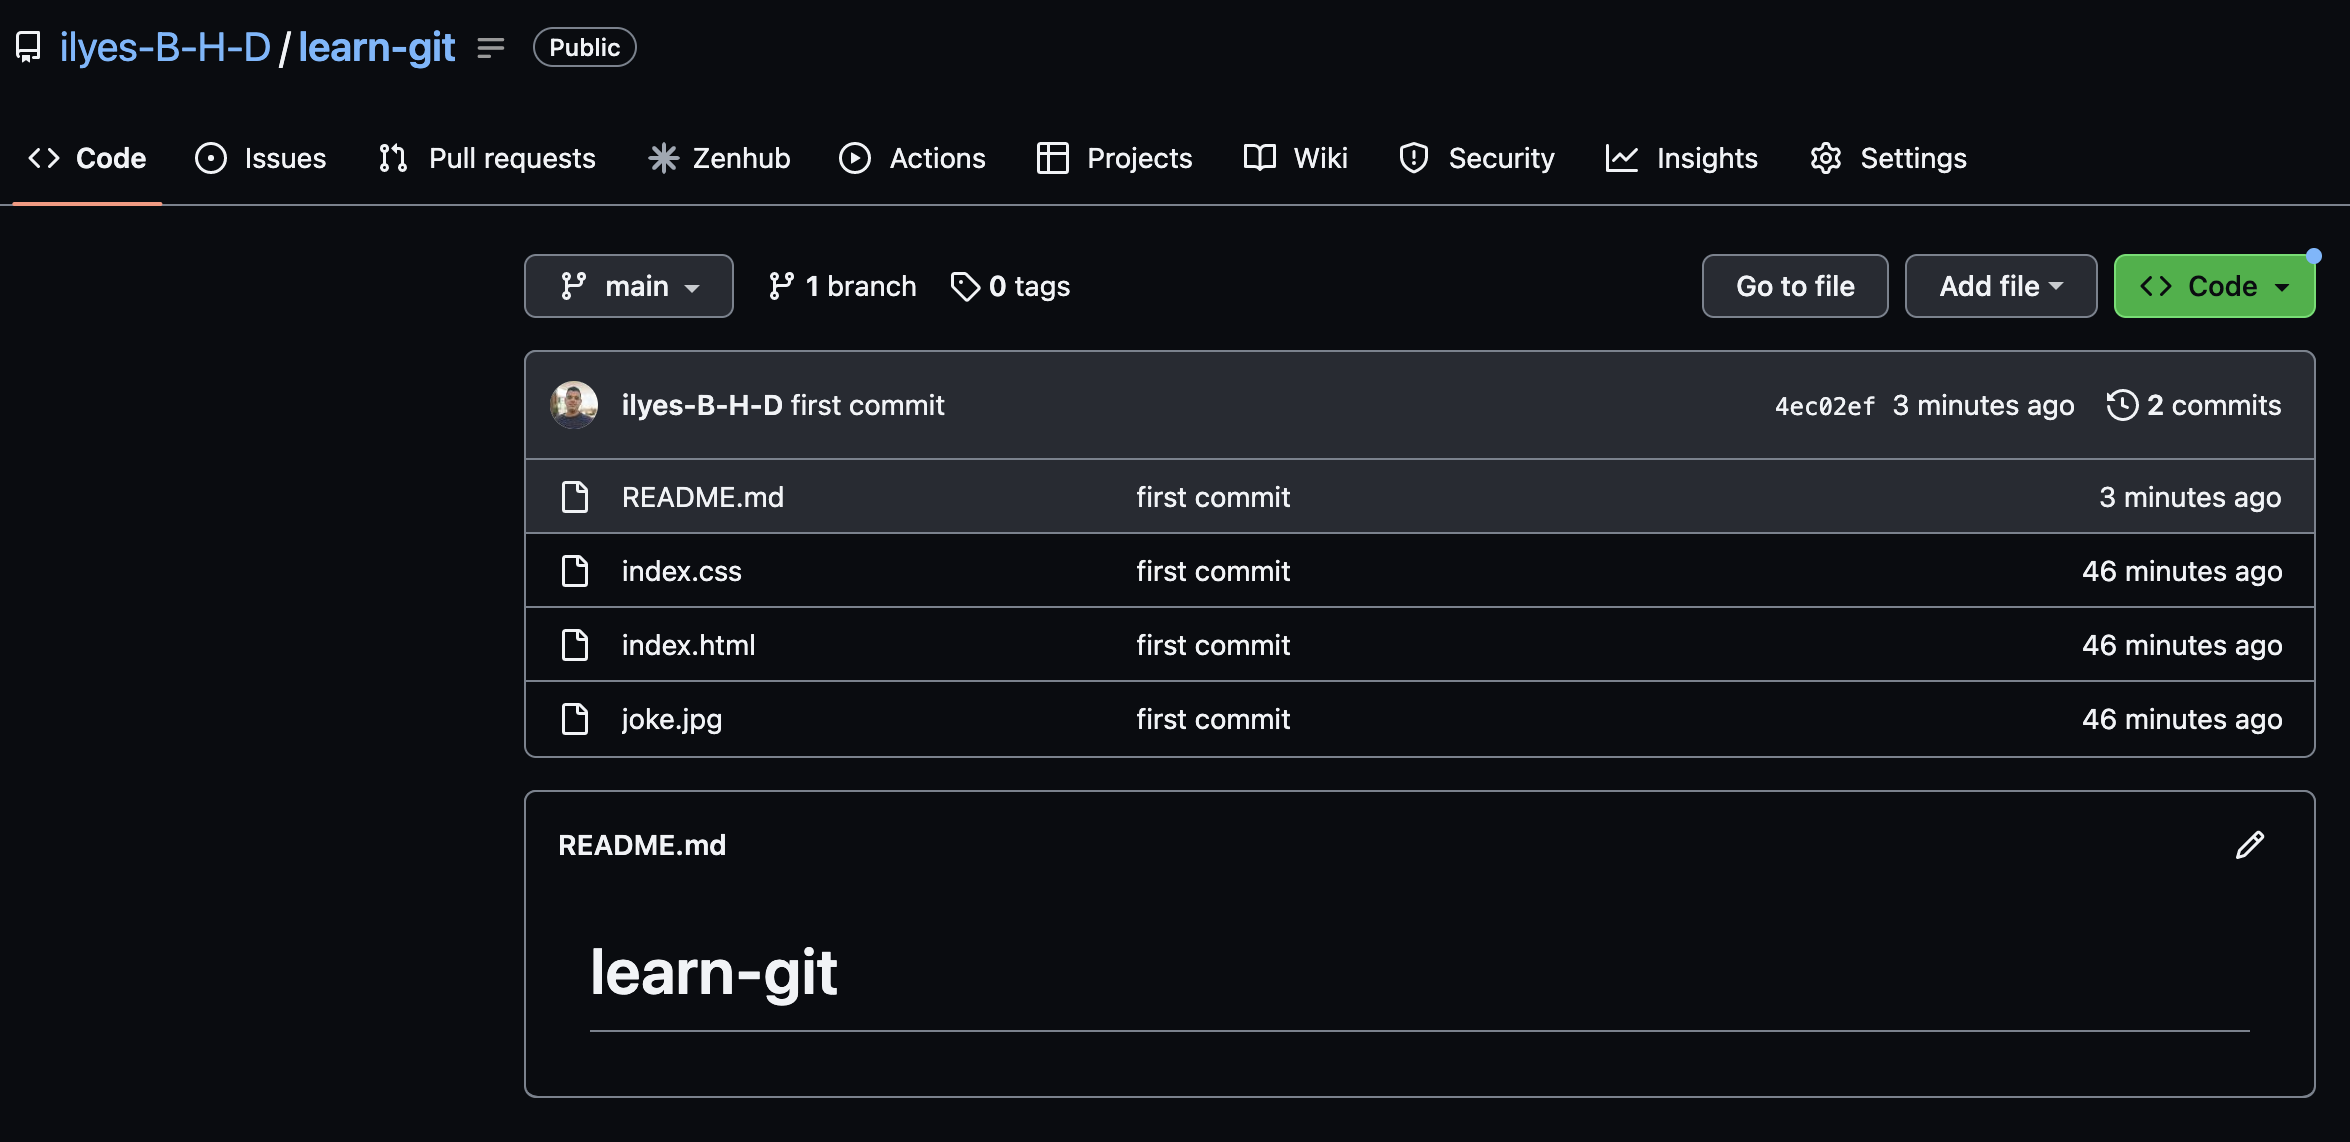
But guess what happened here, I found 2 commits here when I only push once, and that's because I committed twice in my local repo but pushed once to GitHub .

As I mention above, you have a local repo on your laptop that save the changes every commit, that's why you might find a lot of commits after only one push.
and now you can leave the building

Clone the repo to your laptop
To clone a repository onto your laptop, simply enter "git clone [repository link]" in your terminal. You can also try cloning this repository onto your laptop.

Conclusion
Mastering Git commands allows for efficient codebase management, streamlined collaboration with other developers, and comprehensive tracking of code changes. Despite initial challenges, my experience with Git has led me to consider it one of the most significant discoveries in computer science.
Subscribe to my newsletter
Read articles from Ilyes directly inside your inbox. Subscribe to the newsletter, and don't miss out.
Written by

Ilyes
Ilyes
I'm a Fullstack dev ( Javascript | Typescript | React | Vue | Express) and IT student. Here I write about the things I learn along my path to becoming the best developer I can be.