How To Send Text Through Emails In Reactjs
 Qasim Amin
Getting Started - How and What To Know
In this example, you will be learning how to send text via email in React. I will be using a website called EmailJS, which will allow communication between both the React app and the application (EmailJs). This example will include no backend code and will all rely on the front end
In the end, you will have a result where you will be able to send a message to a user using, forms, inputs, buttons, and variables. You will be able to choose your receiver, subject, and text.
Getting Started - React Project Setup
The first step in using APIs in React is to create a project using your command prompt or window shell. Using the command,npm create-react-app you can create a new project. Once you create your new project, you want to cd into your project and continue by typing code . into your console line. Then it should come up with your Visual Studio Code project in a new tab like this.
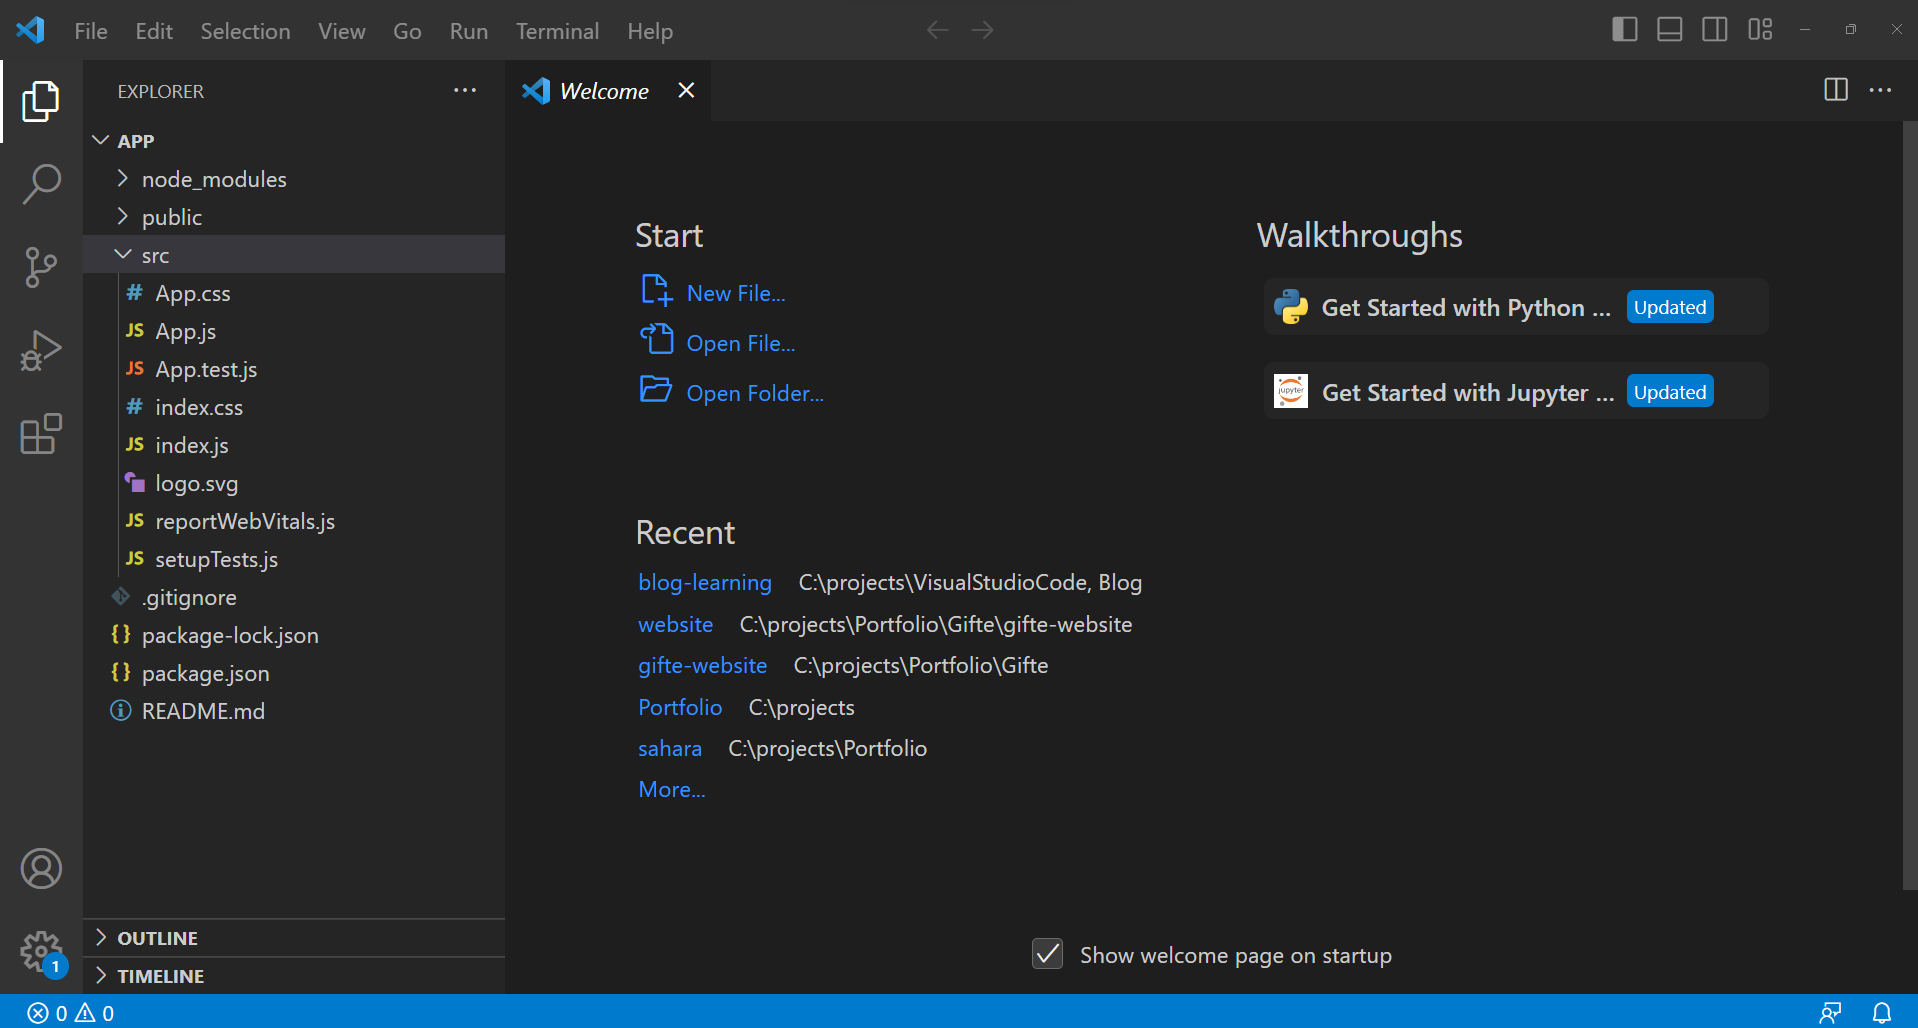
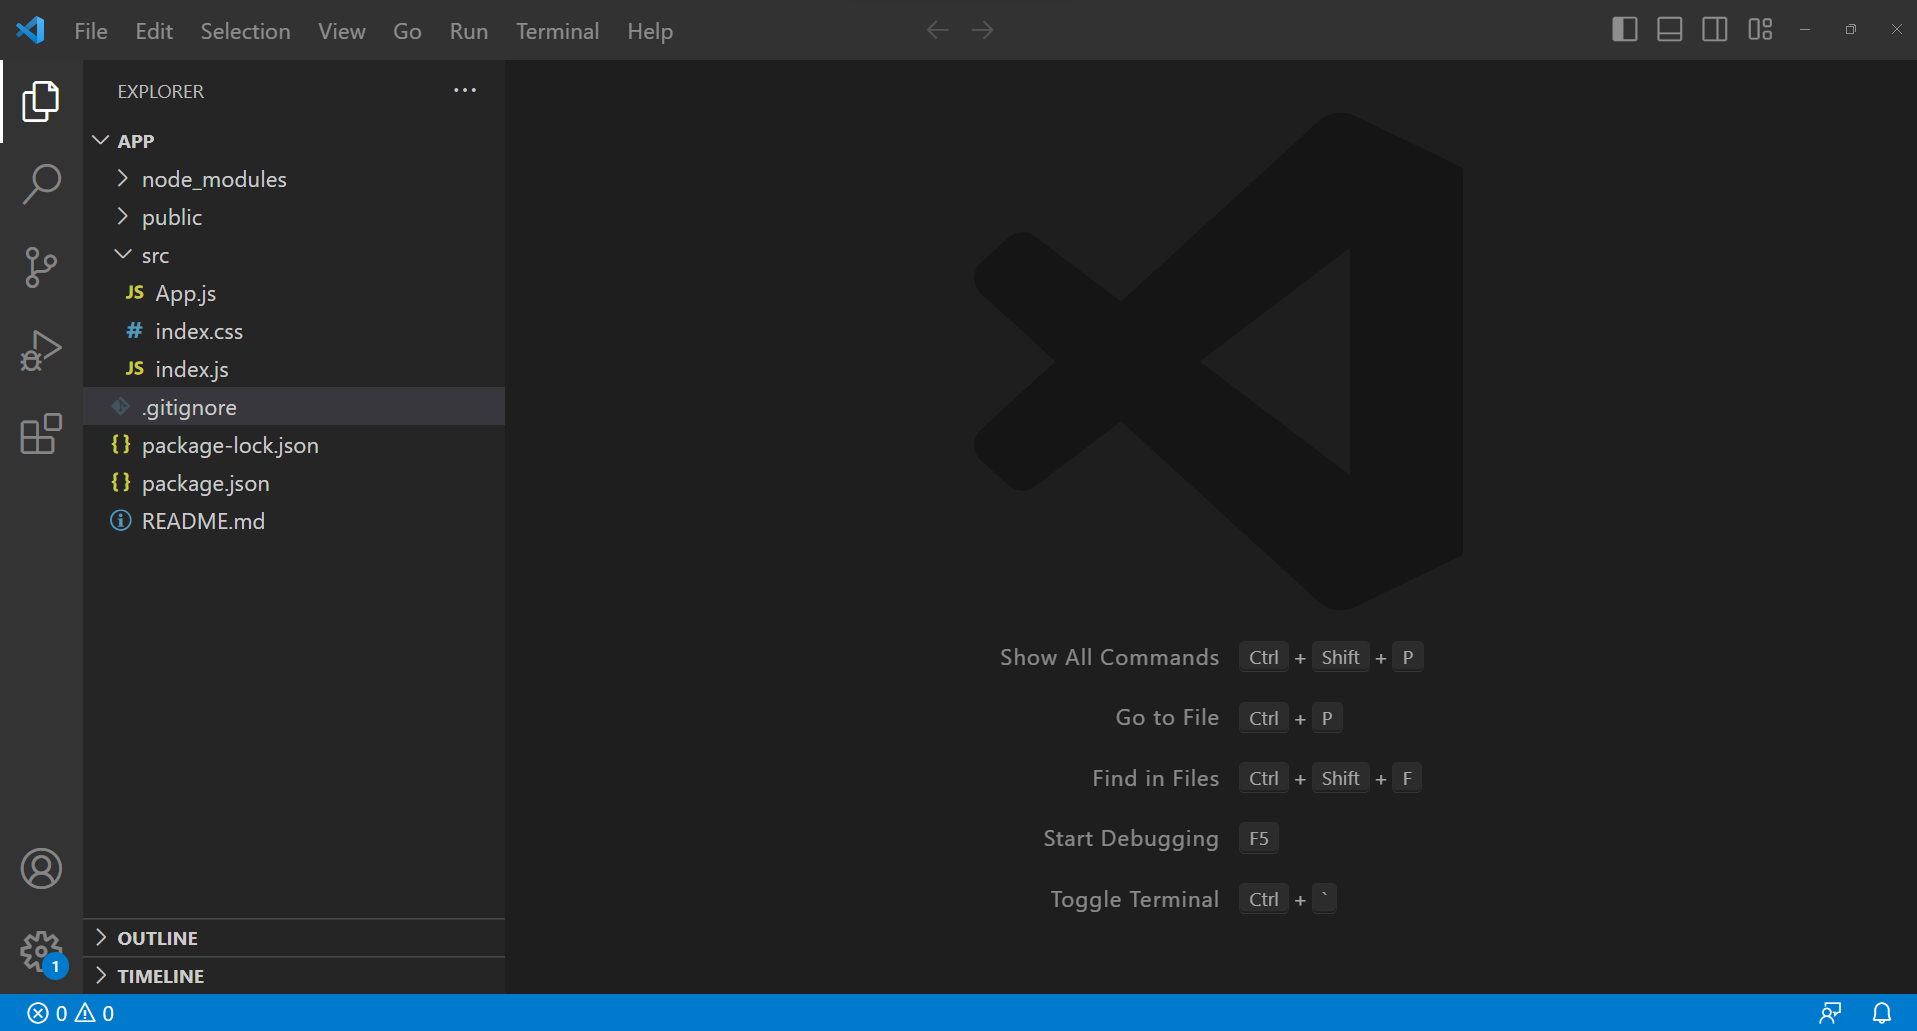
Now, once you have this up and running, we are going to do a bit of a cleanup. Get rid of the App.css, App.test.js, logo.svg, reportWebVitals.j, and the setupTests.js. After doing that, your project should look like this:
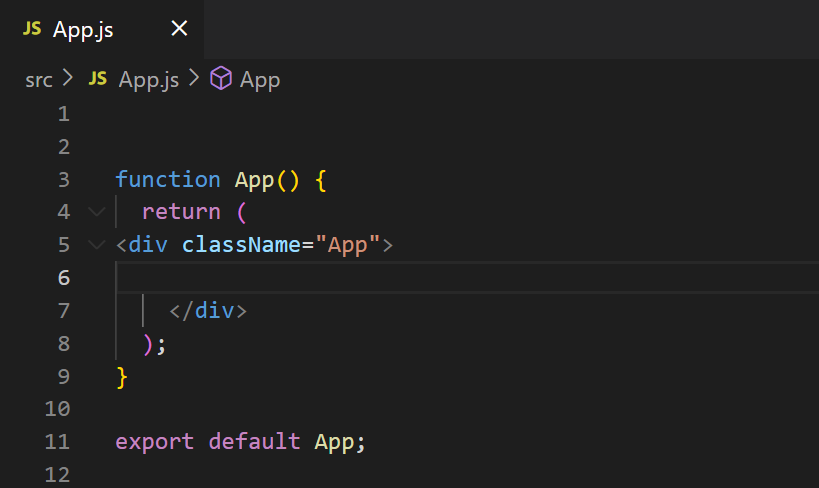
Now that you have deleted these files, we need to get rid of some code. First, you need to go into App.js and delete all of the imports at the top, as well as all the code inside the div tags. After doing that, it should look something like this:
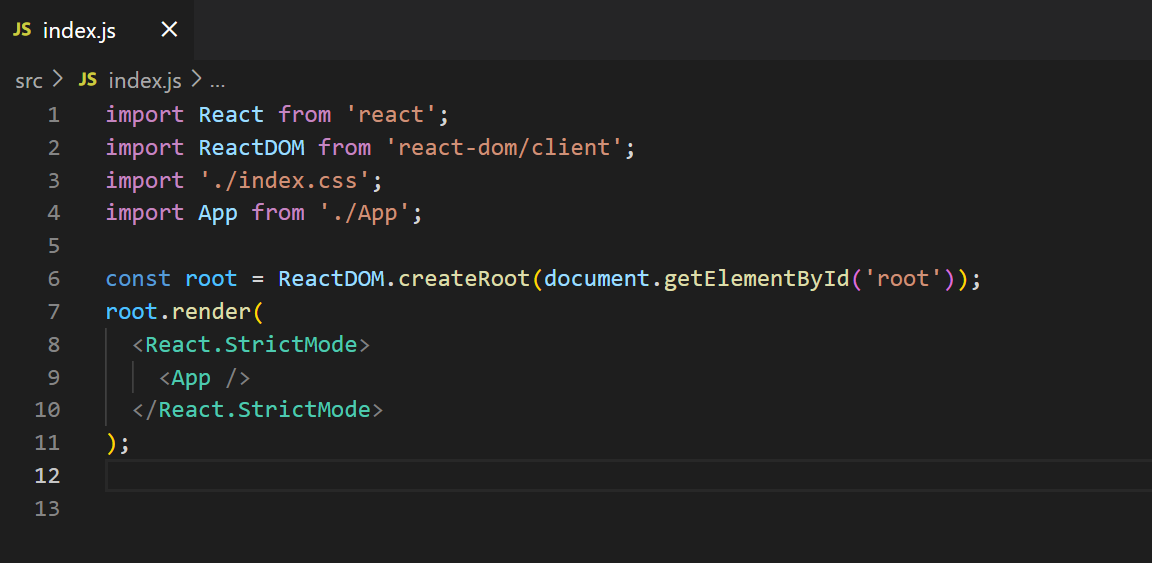
Another file we need to go to is index.js. In there, you need to delete the reportwebvitals import at the top as well as the reportWebVitals at the bottom of the file. After completing this, your index.js file should look something like this:
Before we move on to the code, we need to add some folders to your workspace. First, we need to go to the src folder, which is located below the public folder. To create a new folder, you have to right-click on the src folder, and you should see an option that says, "New Folder." You can also click the "Add Folder" button in your workspace, located at the bottom of the three dots. This should appear every time you click on a folder or file.
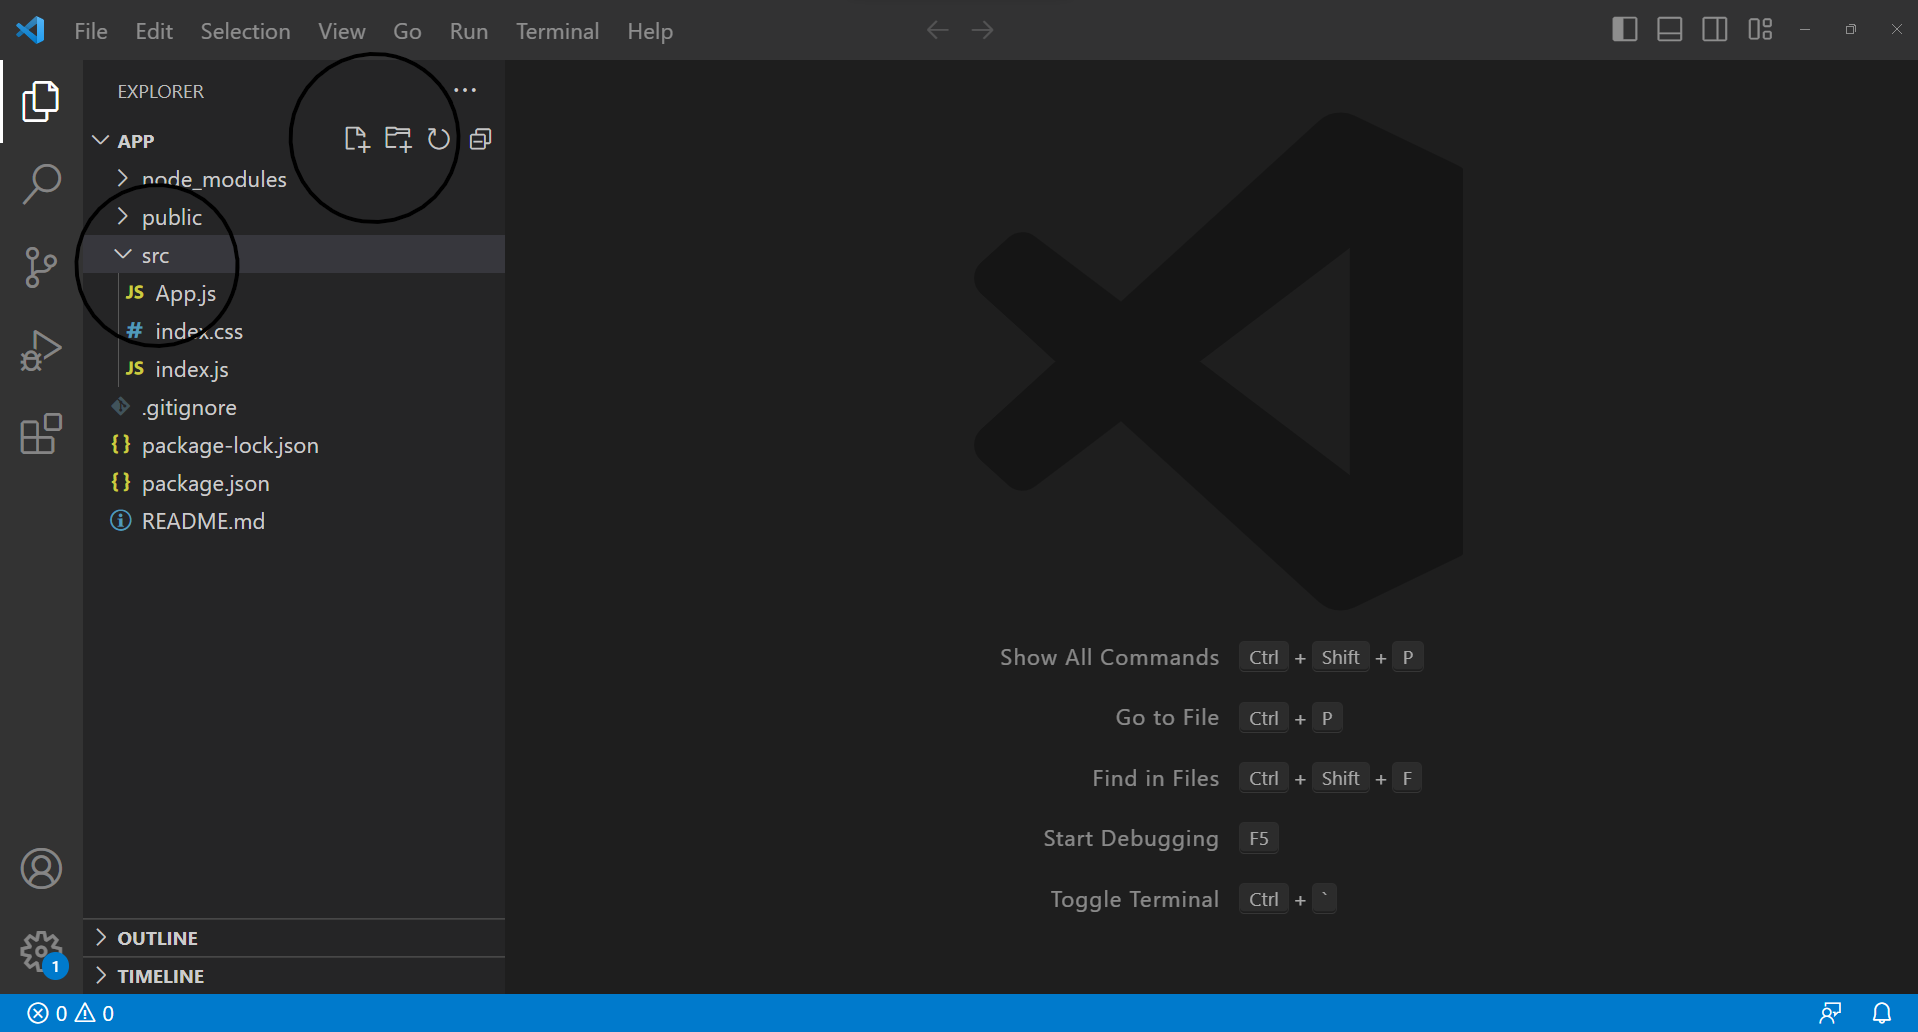
By clicking on it, name the folder "Components" as I will in this example. Inside this folder, create a file named "Contact.js" and you should be all set. In completing this, your project should look something like this:
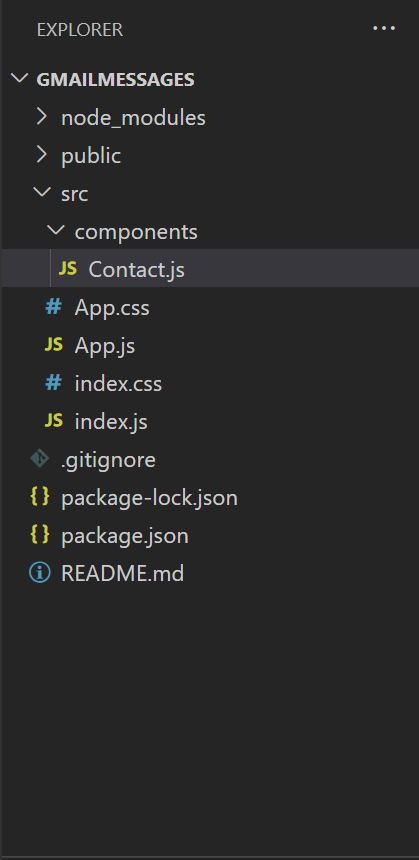
In your Contact file, instead of creating a function style, we will be doing a arrow function instead like this:
const Contact = () => {
}
export default Contact
Now that you have completed the setup, we can now move on to the code.
Writing Code - Basic Code
Now that you have the setup ready, we can write the basic code for the contact page. The first step is to add all the necessary functions.
return (
        <section>
            <div className="">
                <h2 className="">
                    Contact Us
                    </h2>
                <form
                onSubmit={}
                className="">
                    <input type="text"
                    placeholder="Full Name"
                    name="user_name"
                    required />
                    <input type="email"
                    placeholder="Email"
                    name="user_email"
                    required />
                    <input type="text"
                    placeholder="Subject"
                    name="subject"
                    required />
                    <textarea name="message" cols="30" rows="10">

                    </textarea>
                    <button
                    type="submit"
                    className=""
                    >Send Message
                    </button>
                </form>
            </div>
        </section>
    )
Here in the return, I just added a section followed by a div tag. I also added an h2 text, a form, followed by 3 input boxes, a text area, and a submit button.
On the form, you can see that I added an onSubmit and a className class. On all of the input boxes, you can see that they have a type, a placeholder, and a name. Each one has a different name based on what they individually do. For the name, you can name it whatever you want, but later you will see that we will be using these names to reference from the EmailJS application I will be explaining further.
Before we run the application, you need to reference this in the app.js like this:
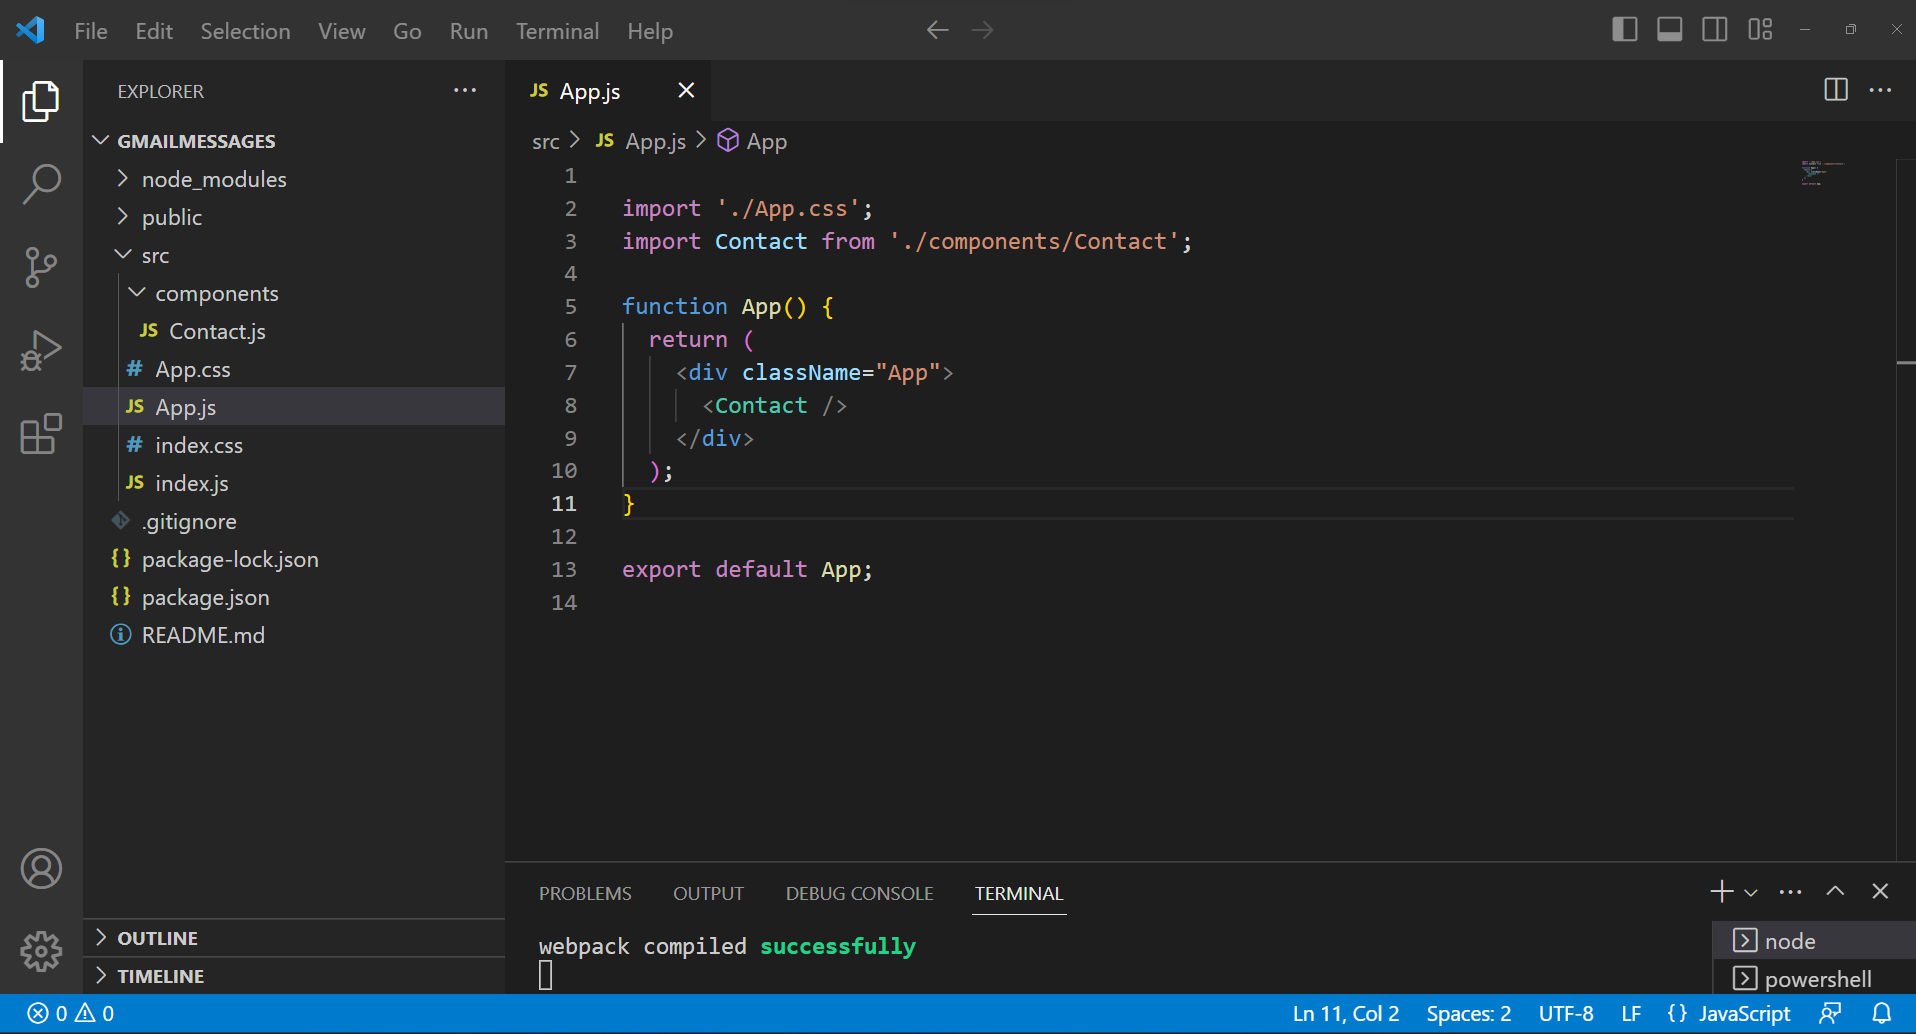
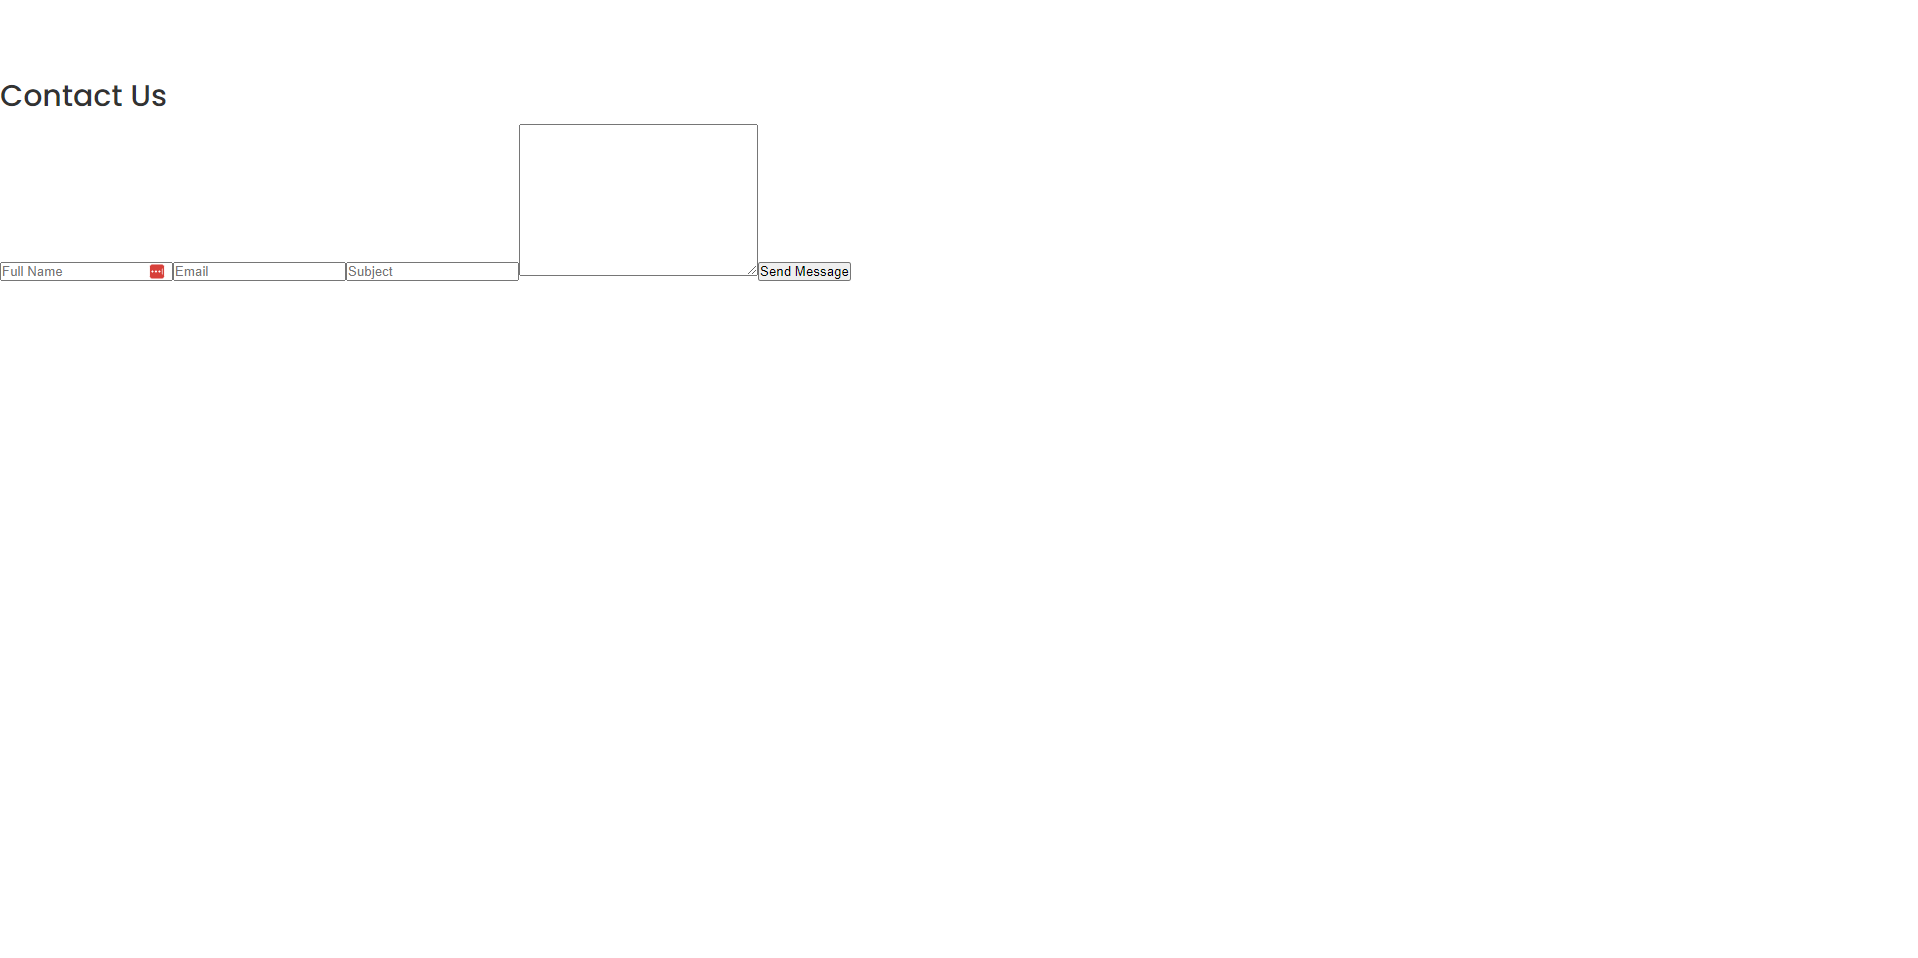
If you run the application simply by going to the terminal or creating one in VisualStudioCode and running, npm start. You will see that the application is displaying all of the inputs and text fields like this:
Writing Code - Styling Your Application
As you can see, the application doesn't look very appealing. Well, let's add some styles. In your index.css, get rid of any CSS code generated before, and you can either put your own CSS styles there or you could use mine. To use it, just go to this URL on my GitHub: https://github.com/Qasim-Amin/contactus-emailingsystem. After using that CSS code, we can now implement it into your app.
return (
        <section>
            <div className="container">
                <h2 className="--text-center">
                    Contact Us
                    </h2>
                <form
                className="--form-control --card --flex-center --dir-column">
                    <input type="text"
                    placeholder="Full Name"
                    name="user_name"
                    required />
                    <input type="email"
                    placeholder="Email"
                    name="user_email"
                    required />
                    <input type="text"
                    placeholder="Subject"
                    name="subject"
                    required />
                    <textarea name="message" cols="30" rows="10">

                    </textarea>
                    <button
                    type="submit"
                    className="--btn
                    --btn-primary"
                    >Send Message
                    </button>
                </form>
            </div>
        </section>
    )
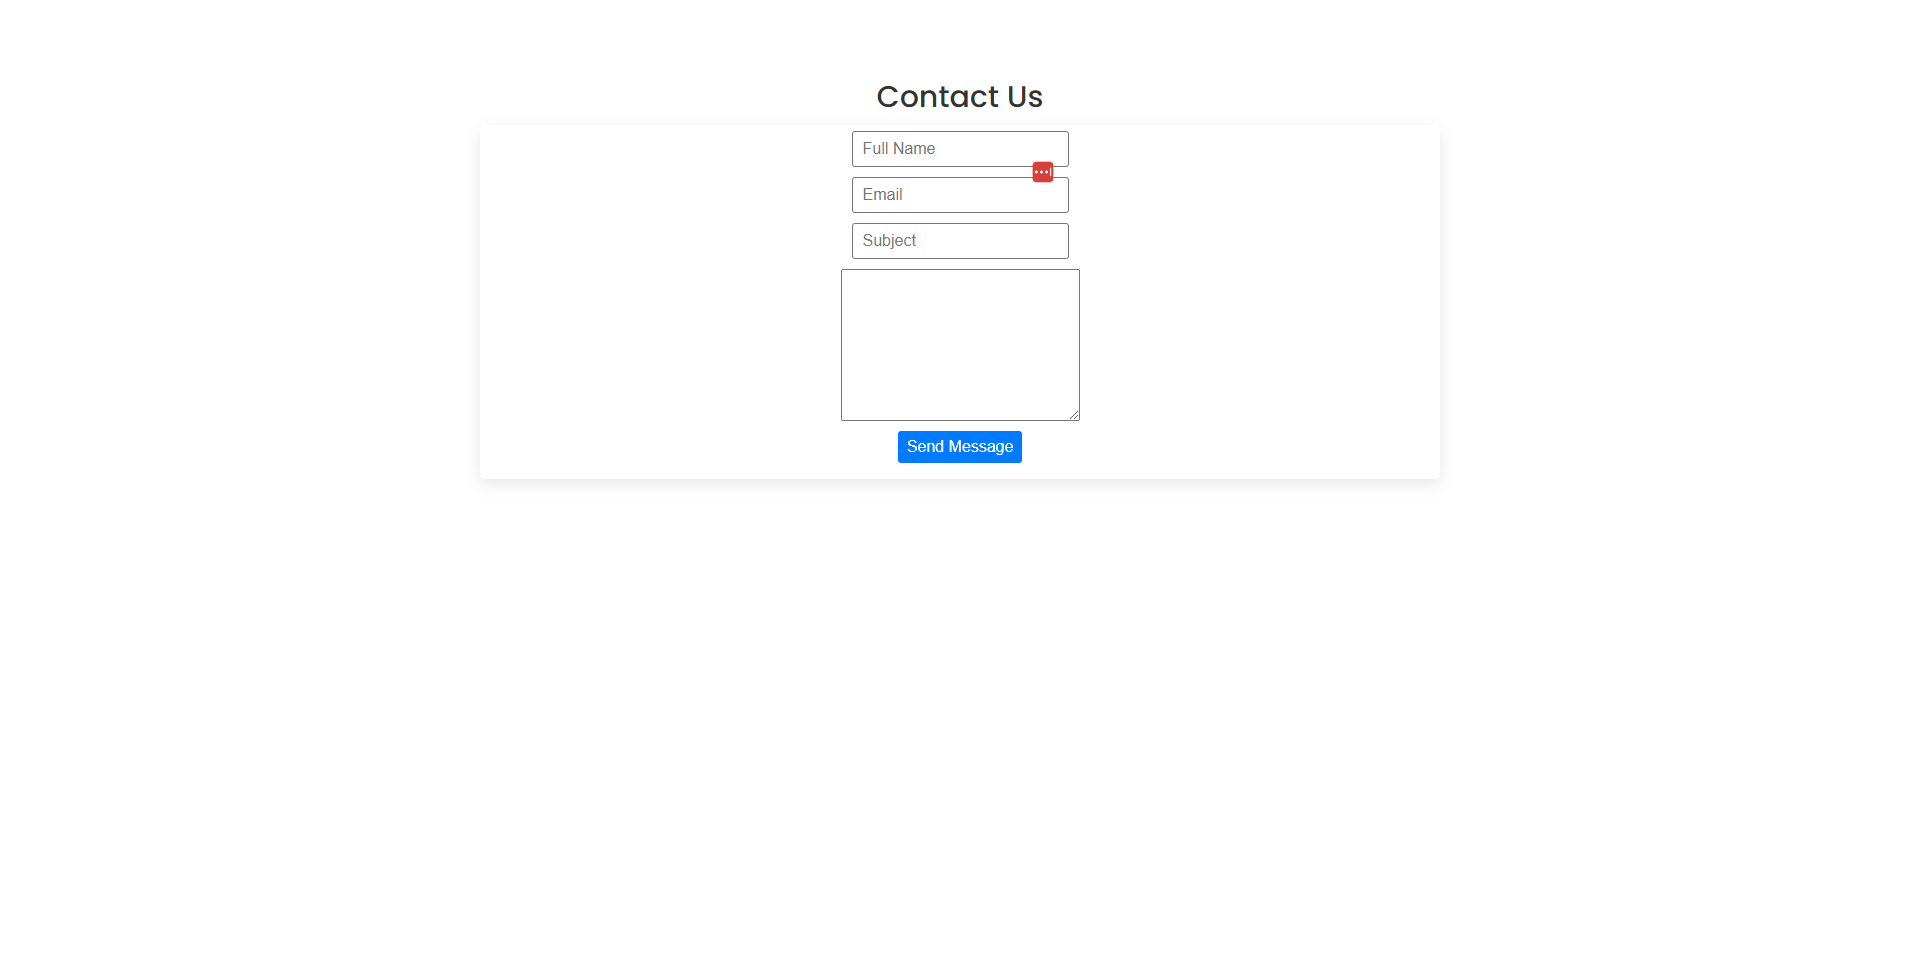
After using all your styles, your application should look like this:
EmailJS -Implementing Into Your Website
Now that the application is looking better, we can now use EmailJs. First, you are going to have to SignUp and create an account. Once you have done that, you will be greeted by a screen like this:
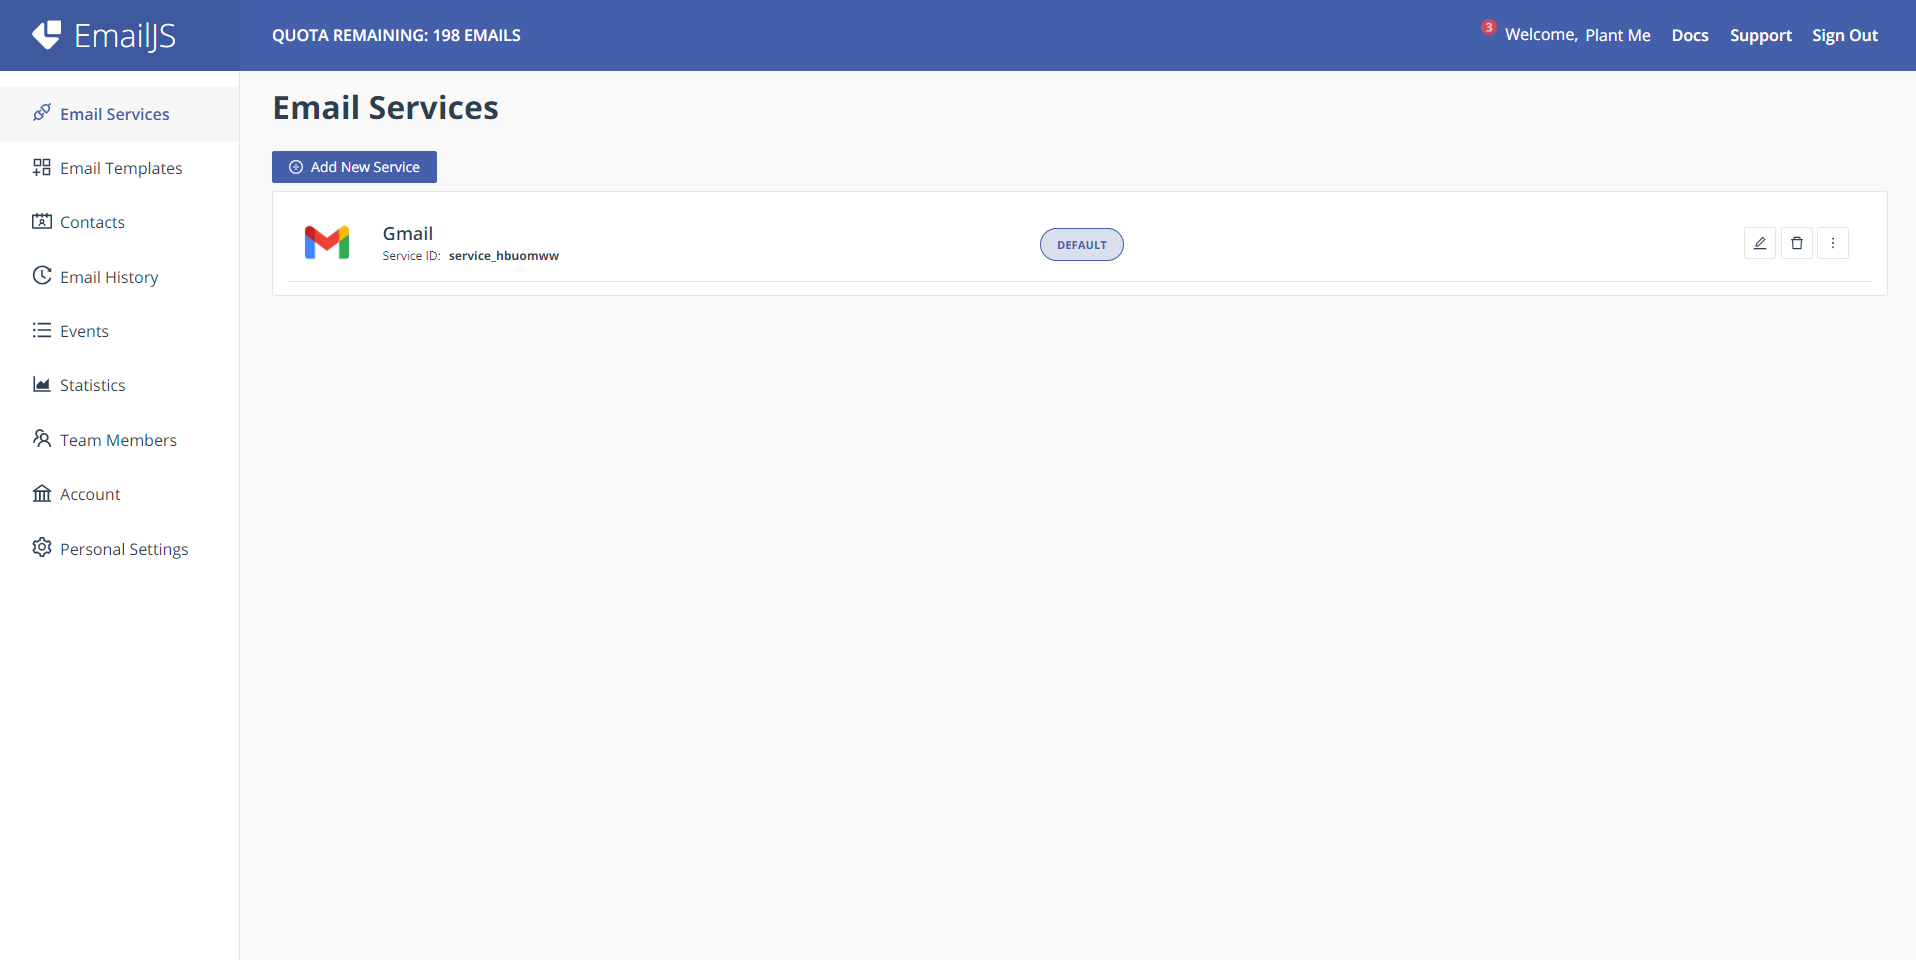
First, you are going to press, Add New Service, then press Gmail, and then create a new service, naming it whatever you want. Make sure you connect your account.
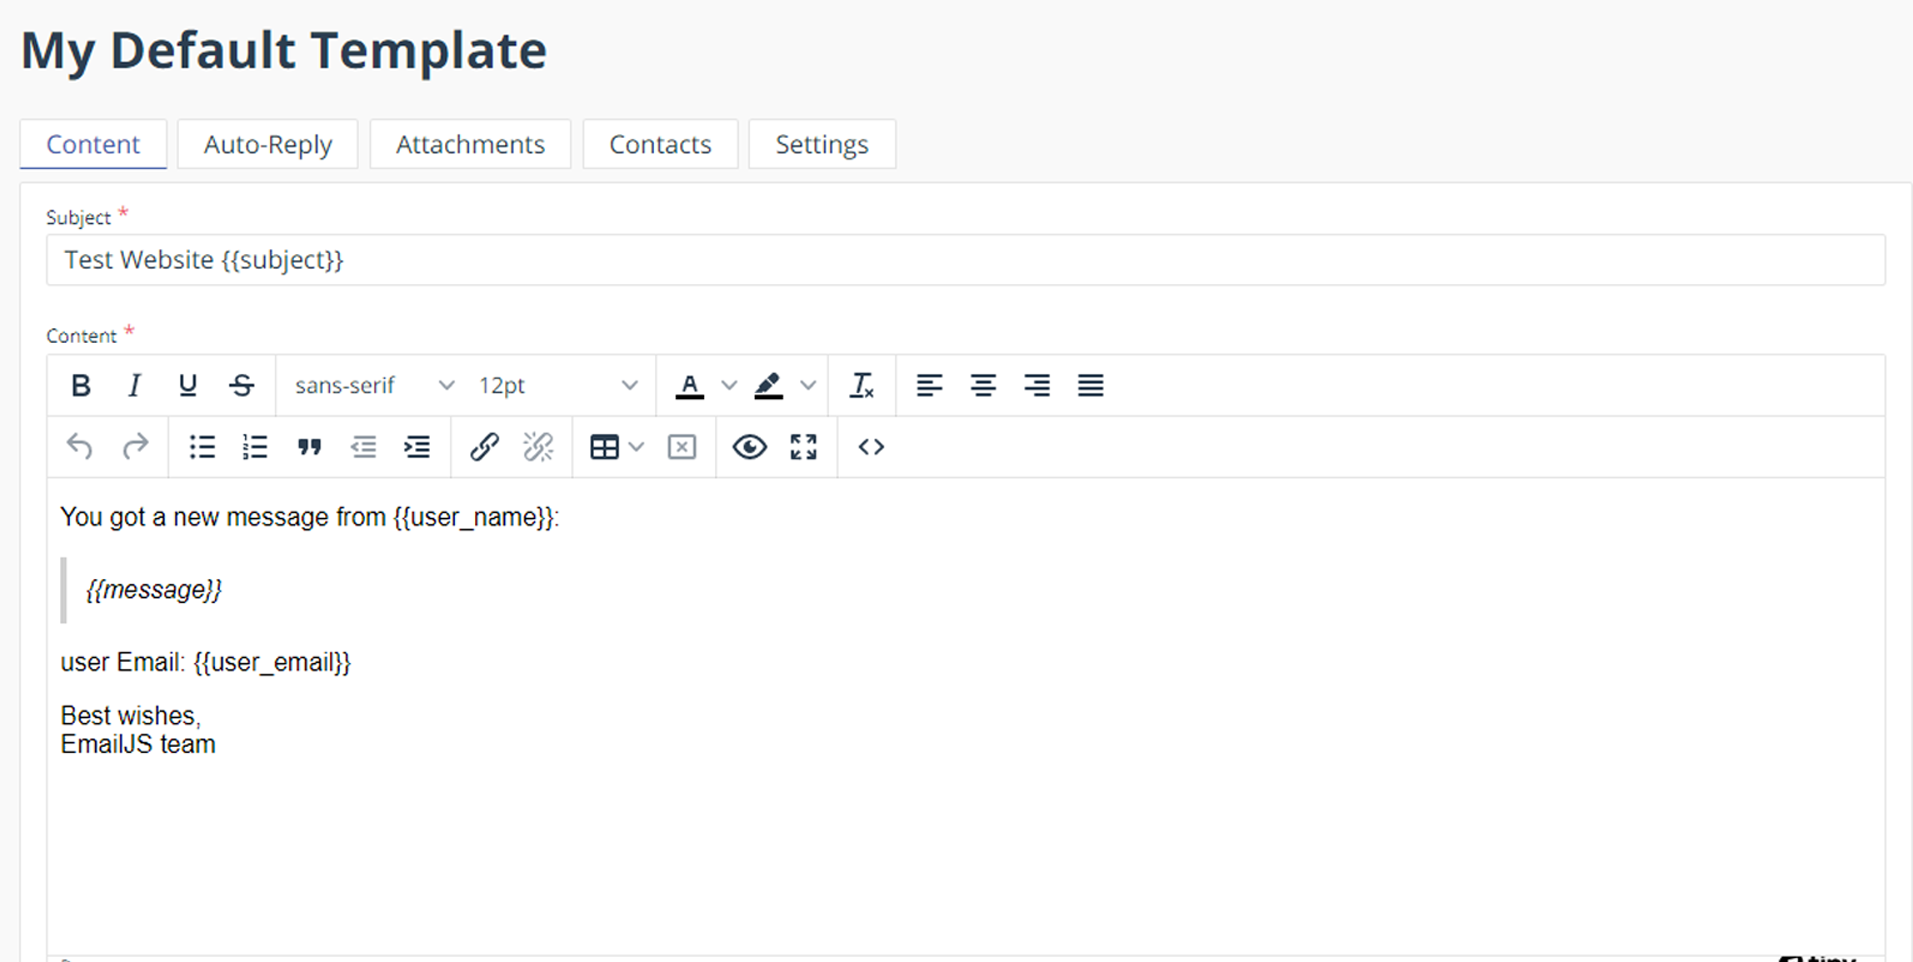
Once you have done that, go to Email Templates and create a new one. Once done, rename all of the default text messages to this, as I have done:
Once we have done this, we are going to add some code to the application. If you go back to the Contact file, I am going to a useRef and a sendEmail variable.
const form = useRef()

    const sendEmail = (e) => {
 };
The sendEmail variable will have nothing for now but will have code in it soon.
<form ref={form}
onSubmit={sendEmail}
className="--form-control --card --flex-center --dir-column">
Now, on your form, I will be adding a "ref" and an "onSubmit" class. The ref will have the "form" that we just created, and the "onSubmit" will have the sendEmail variable.
Installing - EmailJS
For EmailJs, we will need to install the package to allow us to put the code for the empty "sendEmail" variable. To install the package, you need to go to your terminal and enter this command. "npm i @emailjs/browser", after doing this, we can now put in the code required. If you go back to the EmailJS website and click on the docs section and scroll to the bottom until you see where it says react," then click on it.
Once you click on it there will be a bunch of code but the code that we want is the "sendEmail" part.
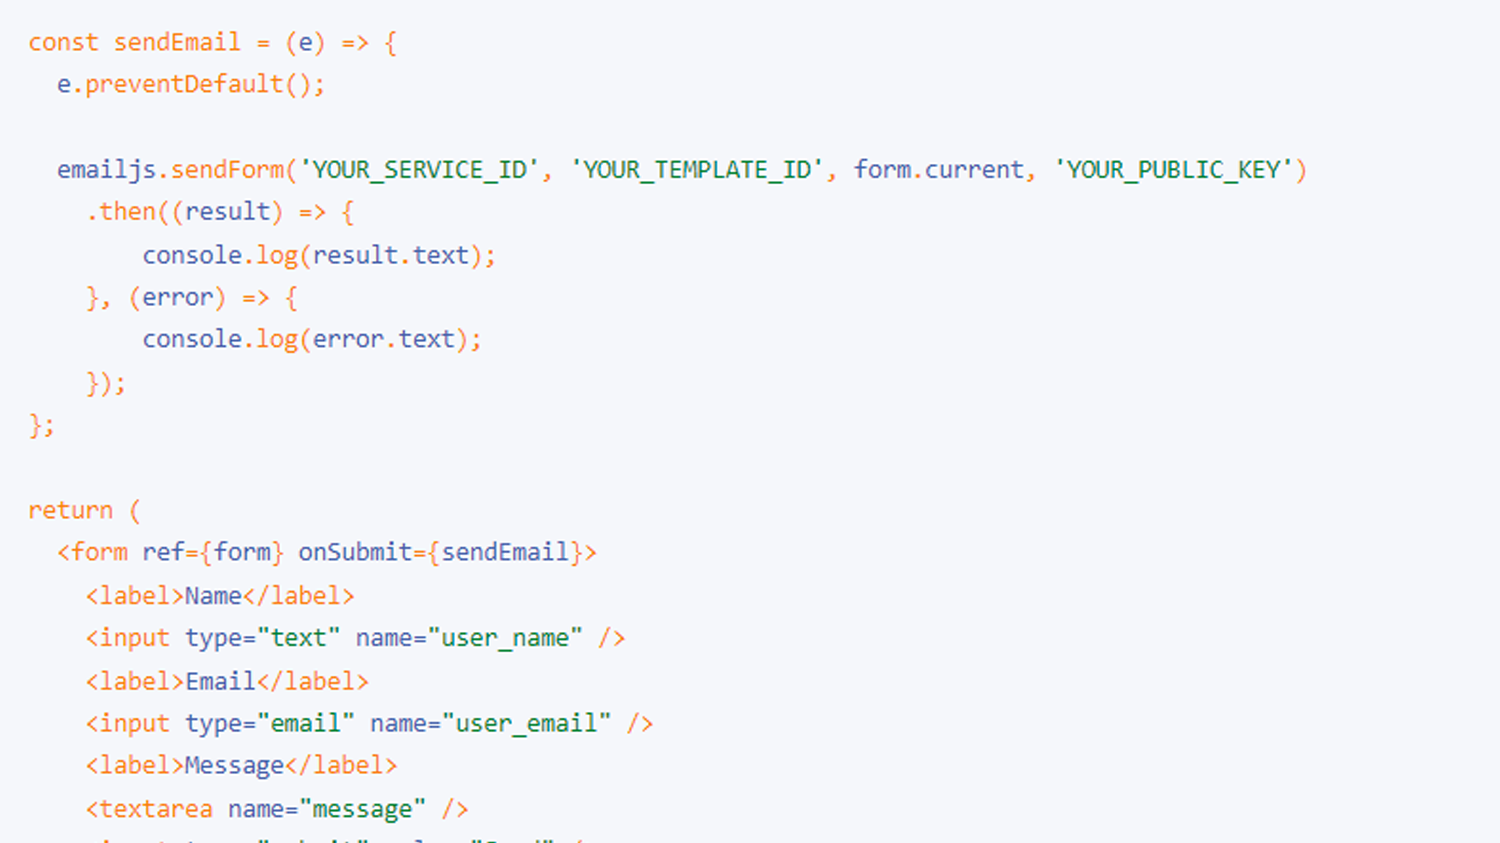
Once you copy the sendEmail code your code in your project should look like this:
import {useRef} from "react";
import emailjs from '@emailjs/browser';

const Contact = () => {
    const form = useRef()

    const sendEmail = (e) => {
        e.preventDefault();

        emailjs.sendForm('YOUR_SERVICE_ID', 'YOUR_TEMPLATE_ID', form.current, 'YOUR_PUBLIC_KEY')
          .then((result) => {
              console.log(result.text);
          }, (error) => {
              console.log(error.text);
          });
          e.target.reset()
      };
    return (
        <section>
            <div className="container">
                <h2 className="--text-center">
                    Contact Us
                    </h2>
                <form ref={form}
                onSubmit={sendEmail}
                className="--form-control --card --flex-center --dir-column">
                    <input type="text"
                    placeholder="Full Name"
                    name="user_name"
                    required />
                    <input type="email"
                    placeholder="Email"
                    name="user_email"
                    required />
                    <input type="text"
                    placeholder="Subject"
                    name="subject"
                    required />
                    <textarea name="message" cols="30" rows="10">

                    </textarea>
                    <button
                    type="submit"
                    className="--btn
                    --btn-primary"
                    >Send Message
                    </button>
                </form>
            </div>
        </section>
    )
}

export default Contact
The last step we need to do is fill in the YOUR_SERVICE_ID, YOUR_TEMPLATE_ID, and YOUR_PUBLIC_KEY.
To find these keys, we will start with the service id. To find this one go to Email Services and under your Service, there will be a key. Copy it and put it in the missing area.
The next one is your Template id. To find this one, go to Email Templates, and under your template, there should be a key. Copy it and put it in the missing area.
Finally, the public key, you will find this at the bottom where it says account and click on it. You will see that it says public key so just copy that and paste it into the missing area.
Conclusion - OutComes
In conclusion, you should have a running application that when you submit, will send a message to the user. In this case, you are the owner and they are sending messages to you.
Subscribe to my newsletter
Read articles from Qasim Amin directly inside your inbox. Subscribe to the newsletter, and don't miss out.
Written by

Qasim Amin
Qasim Amin
I am a 13 year old coder