Manage Your Projects Like A Pro With Trello: A Step-By-Step Guide For Developers.
 talk2felly
The ultimate tool for developers to boost productivity and manage projects effectively.
With its intuitive interface and powerful features, Trello can help you streamline your workflow, stay organized, and ultimately, deliver better results. Give it a try and see how it can transform the way you work!

Project management is a crucial aspect for developers and people in the open-source space. As a developer, keeping track of tasks, deadlines, and progress is essential to ensure the project’s success. Fortunately, there are many tools available to help manage these tasks. One such tool is Trello, a popular project management tool used by teams worldwide.
Getting Started With Trello
Trello is a web-based project management tool that uses a visual, card-based approach to organise tasks and projects. It is a powerful tool that has gained a lot of popularity in recent years due to its user-friendly interface, intuitive design, and powerful features.
To get started with Trello, you will need to create an account on the Trello website. Once you have created an account, you can start creating boards to represent your projects. Boards are like virtual whiteboards where you can create lists and cards to represent your project’s tasks.
Why is Trello right?
One of the main reasons why Trello is such a great project management tool is its simplicity: The card-based system makes it easy to organise and prioritise tasks, and the drag-and-drop interface allows users to quickly move cards around as priorities change. The ability to create checklists, add comments, and attach files to cards also makes it easy to keep track of all the important details related to a project.
Collaboration: One amazing feature of Trello is the ability to collaborate with teams. Members can be added to boards, and tasks can be assigned to specific team members. This ensures that everyone is aware of their responsibilities and that tasks are completed on time. Trello also integrates with a range of other apps, such as Google Drive and Slack, which makes it easy to keep all your project-related information in one place.
Flexibility: The tool can be used for a wide range of projects, from personal to professional, and from small to large-scale projects. The ability to create custom boards and workflows allows users to tailor Trello to their specific needs, and the mobile app makes it easy to manage projects on the go.
Overall, Trello is a great project management tool because it is easy to use, flexible, and offers a range of powerful features that make it ideal for team collaboration. Its simple and intuitive design ensures that everyone can get started quickly, while the range of customisations and integrations makes it a powerful tool for managing all types of projects.
Step—By—Step Guide
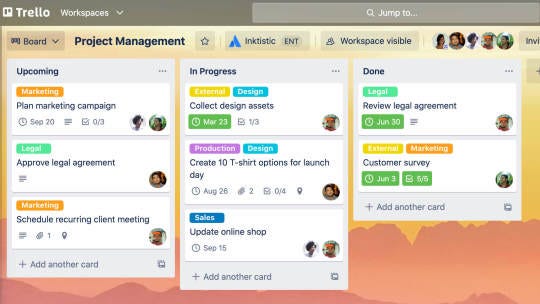
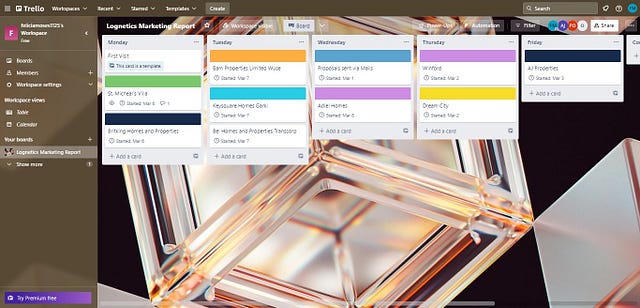
Trello uses a card-based system to organise tasks and projects. Each card represents a task, and each board represents a project. The cards can be moved around on the board as tasks are completed, priorities change, or as the project progresses. Here’s how you can use boards and cards to manage projects in Trello:
- Create a Board: A board in Trello represents a project or a collection of related tasks. Each board can contain one or more lists, and each list contains a collection of cards. A Trello board is the place to organise tasks, all the little details, and most importantly, collaborate with your colleagues. To get started, you’ll need to create a board for your project. You can do this by clicking on the “Create new board” button on the Trello homepage or selecting “Create Board” from the “Boards” dropdown menu. Give your board a name that identifies the project you’re working on.
2. Add Cards: Trello’s card system and boards are the foundation of its project management capabilities. Here’s how they work:
Cards represent individual tasks or items that need to be completed. Once you have your board set up, you can start adding cards to represent the tasks that need to be completed. To create a card, simply click on the “Add a card” button in the list where you want the card to be added. Give the card a name that identifies the task and add any additional information, such as due dates, checklists, and attachments.
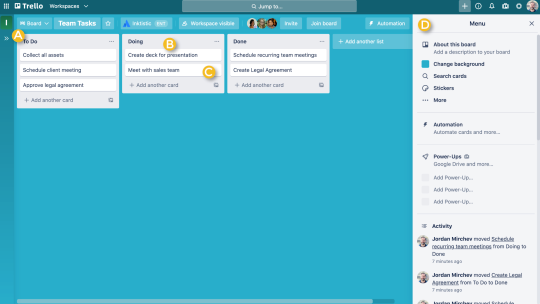
3. Organising Cards: You can move the cards around on the board to organise them according to their priority or status. For example, you might create a “To Do” list for tasks that need to be completed, a “Doing” list for tasks that are currently being worked on, and a “Done” list for tasks that have been completed.
4. Assign tasks and To-Dos: As a fundamental unit of a board, cards are used to represent tasks and ideas. It can be used for something that needs to get done, like a customer support issue, a new design, a blog post, or something project-related task that you need to be reminded of.
Cards can be customised to hold a wide variety of useful information by clicking on them. Drag and drop cards across lists to show progress. There’s no limit to the number of cards you can add to a board. You can assign tasks to team members by adding them as members to the card. This will send them a notification that they have a new task assigned to them.
5. Add lists: Once you have a board, you can create lists to organise your tasks. For example, you might create lists for “To Do,” “In Progress,” and “Completed.” You can also customise the names of these lists to reflect your project’s specific needs.
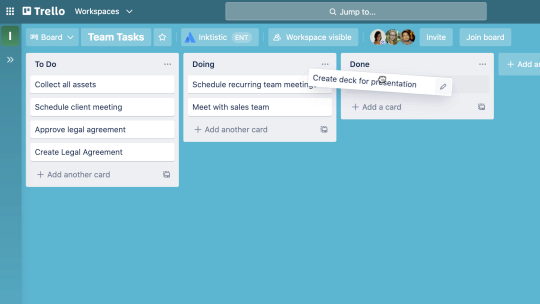
6. Move cards between lists: Moving cards between lists is a simple process that can help you keep your tasks organised and up-to-date. For example, a card might start in the “To Do” list and then be moved to the “In Progress” list when work begins.
Open the card. First, once you have the card open, click and hold down the left mouse button on the card. You should see the card lift slightly. Click on the card that you want to move. This will open up the card window. While holding down the left mouse button, drag the card over to the list you want to move it to. You should see a blue line appear, indicating where the card will be placed on the list. Once you have the card in the desired position, release the left mouse button. The card will be moved to the new list.
Alternatively, you can also move a card by clicking on the “Move” button at the bottom of the card window. This will open a menu where you can select the list you want to move the card to.
Moving cards between lists can help you keep track of the progress of your tasks and ensure that everything is organised in a way that makes sense for your workflow. Whether you’re managing a personal project or collaborating with a team, Trello makes it easy to stay on top of your tasks and keep everything organised.
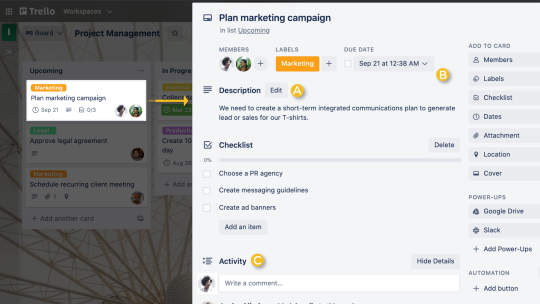
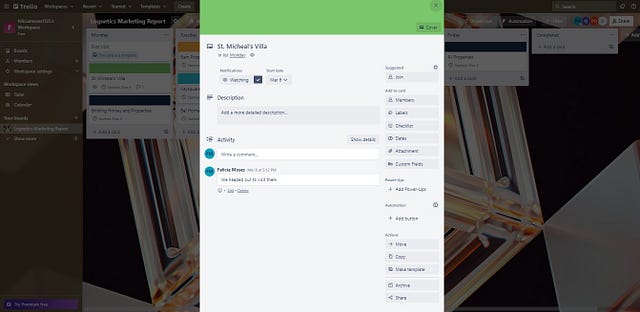
7. Add details on the Card Back: Adding more details to the back of Trello cards can help provide additional context or information about a particular task or project. Here’s how you can add more details to the back of a Trello card:
Open the card: First, click on the card if you want to add more details. This will open up the card window.
Click “Edit”: Once you have the card open, click on the “Edit” button in the top right corner of the window.
Navigate to the back of the card: Next, click on the “Back” button at the top of the card window. This will flip the card over and show you the back of the card.
Add details: On the back of the card, you can add more details such as a description, comments, attachments, checklists, due dates, and more. You can also customise the layout of the card by adding custom fields or changing the background colour.
Save your changes: Once you have added all the details you want, click the “Save” button at the bottom of the card window. Your changes will be saved, and you can flip the card back over to see the front of the card again.
By adding more details to the back of a Trello card, you can provide more context and information for yourself and your team members. This can help everyone stay on the same page and work more efficiently towards completing the task or project.
This is the “card back”, and it is where you can get more specific with your information.
- Collaborate with team members: Trello is designed for team collaboration, so you can invite others to your board by clicking on the “Invite” button. Team members can add comments to cards, attach files, and communicate with each other through Trello. This makes it easy to collaborate on tasks and keeps everyone on the same page.
9. Customise your board: This is my favourite thing about Trello. Trello allows you to customise your board in a variety of ways. You can add labels to cards, create custom fields, and use power-ups to integrate with other tools like Slack or Google Drive.
Looking to beautify your Trello board and cards? Here are some amazing tips
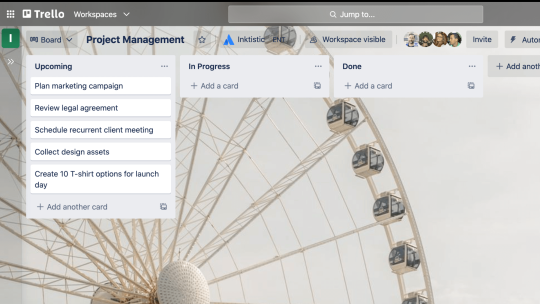
Customise your background: Choose a background colour or image that reflects your project or team. This can make your board feel more personalised and help you stay motivated. Under the “More” menu, you can customise the background of your board. You can choose from a variety of pre-made backgrounds, upload your custom background, or even create a gradient background.
Use card descriptions: Adding detailed descriptions to your cards can make them more informative and help you keep track of important details. Use formatting options like bullet points, headings, and bold text to make them easier to read.
Add a date to cards to track deadlines, and card members will receive a notification 24 hours before it’s due. From the date menu, you can pick a start date and a due date to keep track of when projects and tasks begin and end. Once the tasks are completed, dates can be marked as done.
Use labels: Labels can add visual interest to your cards and help you quickly identify tasks or items that need attention. Choose colours that are easy to distinguish and assign them to different categories or priority levels.
Add Attachments from both your computer and many cloud storage services like Dropbox, Google Drive, Box, and OneDrive.
Add comments: Use comments to communicate with your team members and keep everyone in the loop. Tag team members using @mentions to ensure they receive notifications.
Enable power-ups: Power-ups are integrations with other apps and services that can enhance the functionality of your Trello board. Under the “More” menu, click on “Power-Ups” to browse and enable any power-ups that you find useful.
Create checklists: Checklists can help you break down complex tasks into smaller, manageable steps. Use them to stay organised and track your progress as you complete each task.
Add cover images: Adding a cover image to your cards can make them more visually appealing and help you quickly identify them on your board. Choose an image that represents the task or item, or use a custom image that reflects your brand or style. By adding covers and colours to your card, you gain visual context and have the ability to provide additional callouts and details. Images that have been attached to the card can be displayed on the front as full-sized covers, and you can also change the colour of a card.
Add custom fields: Custom fields allow you to add additional information to your cards, beyond what is available by default. Under the “More” menu, click on “Custom Fields” to create and manage custom fields for your board.
Configure labels: Labels are a way to visually categorise and organise your cards. Under the “More” menu, click on “Labels” to create and manage labels for your board.
Set board permissions: Board permissions control who has access to your board and what level of access they have. Under the “More” menu, click on “Settings” to configure board permissions.
By customising your Trello board, you can tailor it to your specific needs and preferences, making it more effective and efficient for managing your tasks and projects.
By using Trello’s boards and cards to manage your project, you can stay organised, track progress, and collaborate effectively with your team. With a little bit of practice, you’ll be able to use Trello to manage all of your projects with ease.
Let me know what you think in the comments section. Kindly leave claps and comments for the algorithm. Thank you.
We can also connect on LinkedIn and Twitter
#2Articles1week #Hasnode
Subscribe to my newsletter
Read articles from talk2felly directly inside your inbox. Subscribe to the newsletter, and don't miss out.
Written by

talk2felly
talk2felly
Cybersecurity Analyst// SecOps//Technical Writer//
