Creation of GCE VM Instance In Google Cloud Platform GCP
 Murugappan Murugappan
Table of contents
Hello All😊 This post shows the readers "how to create the Google Cloud Engine VM Virtual Machine Instance in Google Cloud Platform" in a step-by-step manner.
To do this hands-on, the only pre-requisite is to create a free account in Google Cloud. This free account gives us some credits for a specific period to explore the Google Cloud Platform.
Once after creating and logging into the free account in Google Cloud, follow the steps given below to create our first VM Instance.
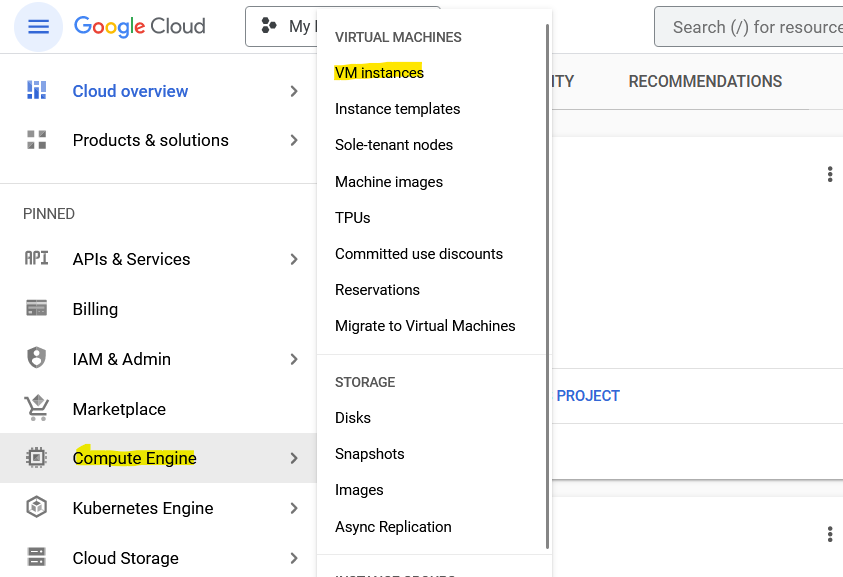
The Google Cloud dashboard will appear as shown below immediately after logging into the account. In the dashboard, click on the compute engine option on the left side of the dashboard and then choose VM instances as highlighted below in the screenshot to start creating the VM instance.
Then, Click on the create instance option as highlighted below in the screenshot

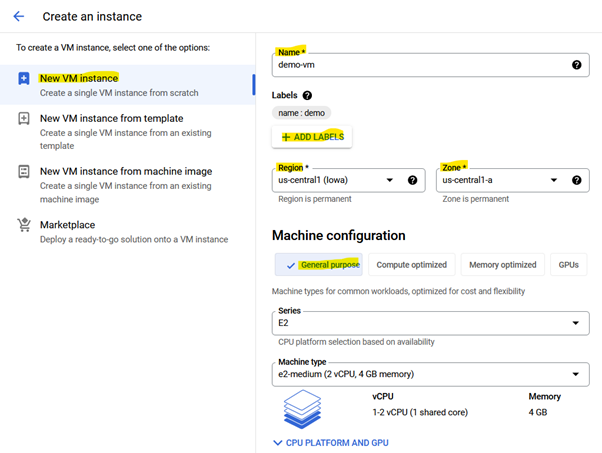
Now, Click on the New VM Instance option on the left side as highlighted in the screenshot and enter the required details like the Name of the VM, and the region and zone where we want the instance to be created and choose the required configuration for the instances as shown below
The default selections will be displayed and Click on the change option as highlighted below
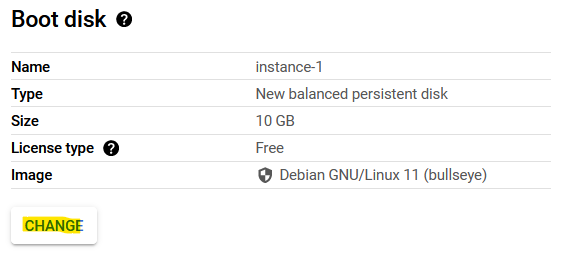
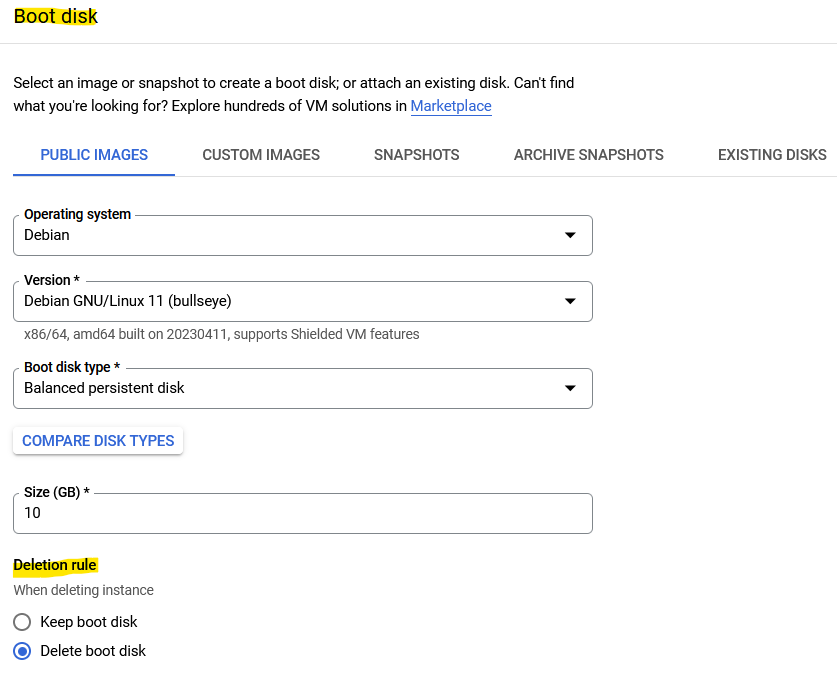
Once after clicking the change option, We will get the below-shown screenshot to select the required Image (i.e Linux Distribution), storage, etc and the deletion rule in the advanced settings option
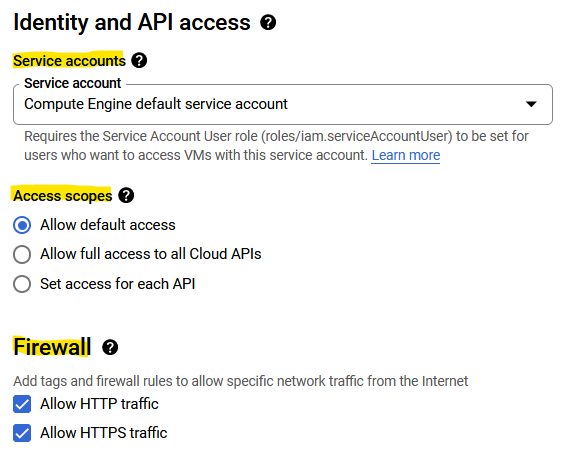
We need to select at least a service account to access this VM Instance, its access scopes to perform the required operations in the VM, and a firewall to access the web server running in the particular port through the internet as shown below in the screenshot
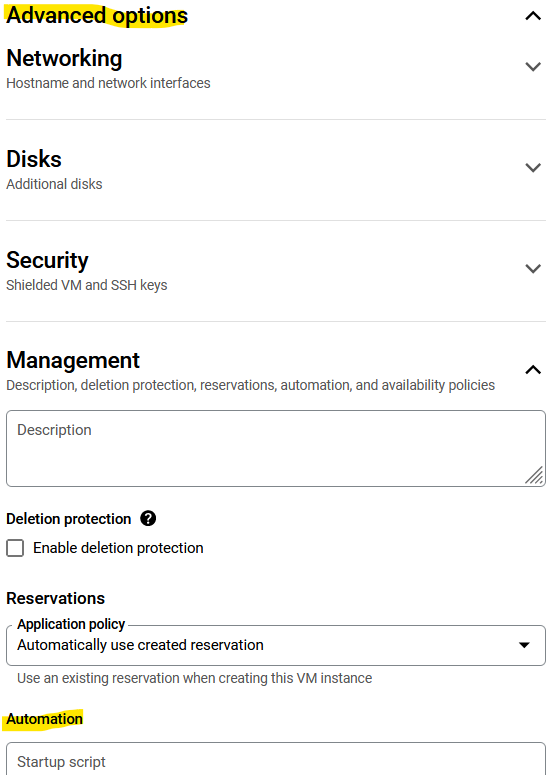
The below screenshot shows where we can add/ edit our advanced options like networking, disks, security, enable deletion protection, and startup script (if we want to install any software/ package and run any commands at the time of launching the VM Instance itself and is similar to user data creation section in AWS EC2 Instance creation)
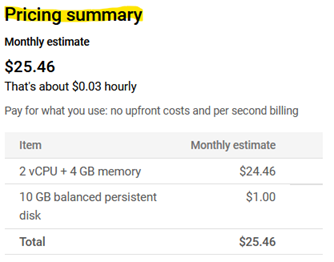
The additional advantage of the Google Cloud compared to other Cloud Service Providers is that it will show the pricing summary for our VM Instance
Another advantage is that GCP provides the equivalent code to create the VM instance through the command line/ REST/ terraform

Once after doing all these configurations to the VM Instance, just click on create option as shown in the below screenshot
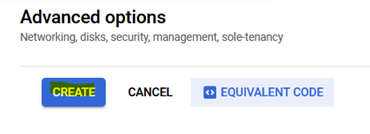
As soon as you click the create option, it might take a few seconds to create the VM and then the VM will be created. click on the start/ resume button below to start the VM instance as shown below in the screenshot

The below screenshot shows the internal IP of the VM, which is used to connect to the instance within the same network and also shows the external IP used to connect to the VM instance externally/ through the internet using SSH by the end user

Once the VM Instance is started, we can connect to the VM in multiple ways as options provided by various CSPs and here the GCP offers the SSH option as shown below to connect to the VM instance using the authorized keys generated by GCP
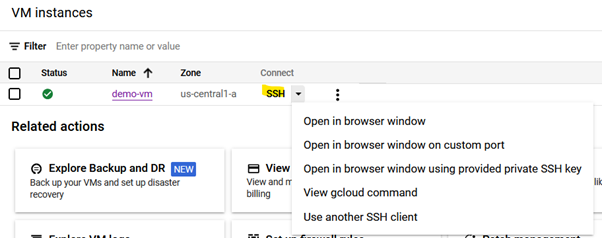
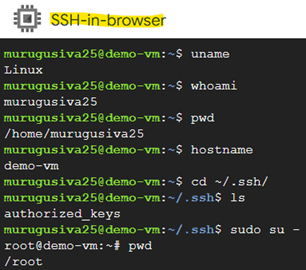
Once after connecting to the VM instance through any of the options as shown, execute the below Linux commands to check whether we are connected to the VM instance or not and whether we are connected to the right VM instance or not. And, also shows the location where the authorized keys added by Google are available in the VM instance
Here, the authorized keys added by GCP in the metadata section in the VM in the Google console are shown below (just to show the area where it is added and it is not the exact authorized key)

The location and the content of the authorized keys added by Google are shown in the below screenshot for reference (But, it is not good to share the keys with anyone for security reasons). Through these authorized keys, the user can able to connect to the GCP VM instance with the provided SSH options by transferring the SSH keys to the VM

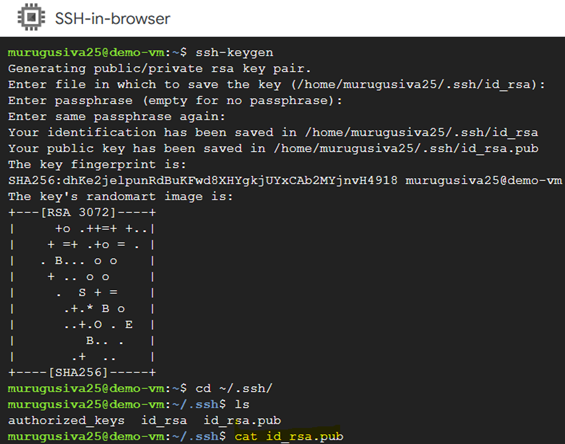
We can also delete the authorized keys generated by Google and can be able to generate the SSH keys on our own using the following commands as shown below screenshot and it will create 2 keys namely public and private keys as id_rsa and id_rsa.pub in the .ssh/ directory of the users home directory (~) as shown below. Then, Copy the content of the public ssh key (id_rsa.pub) using the cat command as shown
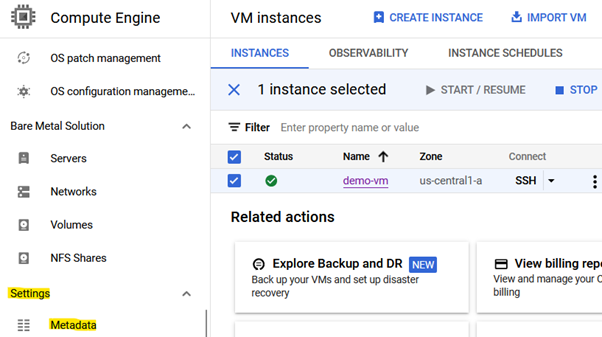
Then, Click on the metadata section from the settings pane on the left side as shown below
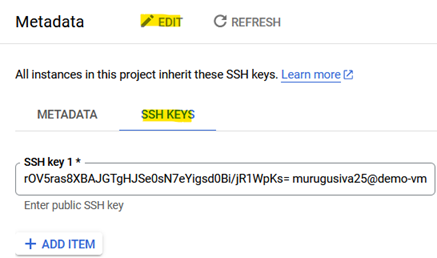
And click on the edit button and under SSH Keys, click on add items to add the copied content of the id_rsa.pub key as a new SSH Key. Now, this key can be used to connect to the VM Instance through the SSH options provided by Google Console by transferring it to the VM. This is another way of creating the SSH keys using the ssh-keygen command and connecting it to the VM apart from connecting to the VM using the default authorized keys generated by Google Cloud
Finally, we can stop the instance after performing all our tasks to reduce the bill generated by the GCP for the instance as shown below. But, Still, GCP will charge for the storage used by the instance even though the instance is not running/ stopped

So, To avoid the bill generated for the GCP VM Instance, We can delete the VM instance once all our tasks are completed. But, make sure to enable the deletion rule to delete the boot disk/ storage when we are deleting/ terminating the VM instance as shown below

Hope, this blog post gives you an overall idea about the creation of the GCE VM instance in the Google Cloud Platform using the free tier account in a step-by-step manner. Feel free to post your feedback/ recommendations to improve the blog in the comments section. All your constructive feedback will be taken into consideration for my next blog post. Always be ready to adapt to changes and learn new things. Good Luck and never stop learning in your life.
As I always say, Always run behind the knowledge. Don't run behind the money, when we start doing it, we will lose our sanity.
Guys! If you all find this post useful/ relevant, kindly share it with all of your connections and somebody will get benefitted out of it and also don't forget to tag me. Keep Learning!!!😊👍🤞
Subscribe to my newsletter
Read articles from Murugappan Murugappan directly inside your inbox. Subscribe to the newsletter, and don't miss out.
Written by

Murugappan Murugappan
Murugappan Murugappan
Turning my Table towards FOSS || Linux || Cloud Technology Aspirant || AWS || Internet Surfer || Idealist || Evolving Day By Day || Fitness Enthusiast || Chess Player