"Step-by-Step Guide: Creating and Configuring an Auto Scaling Group with Application Load Balancer on AWS".
 Anil Kushwaha
Creating and configuring an AWS Auto Scaling group with an Application Load Balancer involves several steps. Here is a step-by-step guide:
Create an Amazon Machine Image (AMI) of your application that will be used by the Auto Scaling group.
Create a launch template that defines the AMI, instance type, and any other settings that are required for your instances.
Create a target group for the Application Load Balancer that will be used by the Auto Scaling group.
Create an Application Load Balancer that will distribute traffic to the instances in the Auto Scaling group. Configure the listener rules and actions as needed.
Create an Auto Scaling group that will use the launch configuration, target group, and Application Load Balancer.
Configure the scaling policies for the Auto Scaling group. You can define scaling policies based on metrics such as CPU utilization, network traffic, or custom metrics.
Set up CloudWatch alarms to trigger the scaling policies when certain thresholds are met.
Test the Auto Scaling group by simulating traffic and monitoring the scaling activity.
Here are the detailed steps to create and configure an AWS Auto Scaling group with an Application Load Balancer:
Step 1: Create an Amazon Machine Image (AMI)
Open the Amazon EC2 console.
Launch an instance with the desired configuration for your application.

Configure and install any necessary software on the instance.
#yum install httpd -y#systemctl enable httpd --now#echo "this is $(hostname)" > /var/www/html/index.html
http://18.136.212.107/
Once the instance is configured, stop & then start it.

In the EC2 console, select the stopped instance and click "Create Image" from the "Actions" menu.
Provide a name and description for the image, and click "Create Image."

Wait for the image creation process to complete. The new AMI will be available in the AMIs section of the EC2 console.

Step 2: Create a launch template.
To create a launch template for AWS Auto Scaling, follow these steps:
Open the AWS Management Console and navigate to the EC2 service.
Click on "Launch Templates" in the left-hand menu.

Click on the "Create a Launch Template" button.
Provide a name and description for the launch template.
Choose an Amazon Machine Image (AMI) for your instances. You can either select an existing AMI, or create a new one by clicking on the "Create AMI" button.

Choose an instance type for your instances.
Configure the network settings for your instances, including the VPC, subnets, security groups, and any additional network interfaces.
Configure the storage settings for your instances, including the root volume size, volume type, and any additional volumes.
Configure the instance launch settings, including user data, IAM role, and SSH key pair.
Review your launch template settings and click on the "Create launch template" button to create the template.

Step 3: Create a target group
Open the EC2 console.
Click "Target Groups" in the left navigation menu.
Click "Create target group."
Provide a name and description for the target group.
Choose the target type as "Instance."


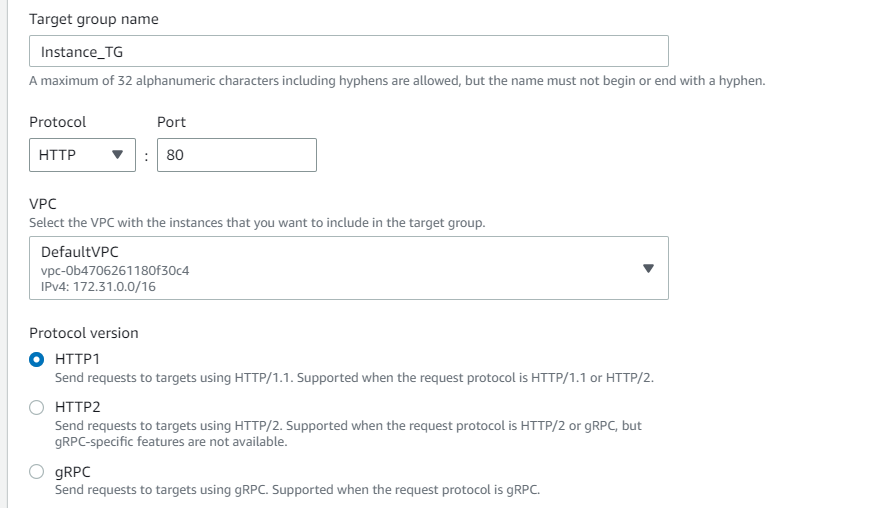

Configure any other settings that are required for your target group, such as the protocol and port.


Click "Create target group."

Step 4: Create an Application Load Balancer
Open the EC2 console.
Click "Load Balancers" in the left navigation menu.
Click "Create Load Balancer."

Select "Application Load Balancer."
Provide a name and description for the load balancer.

Choose the VPC and availability zones that you want to use for your load balancer.
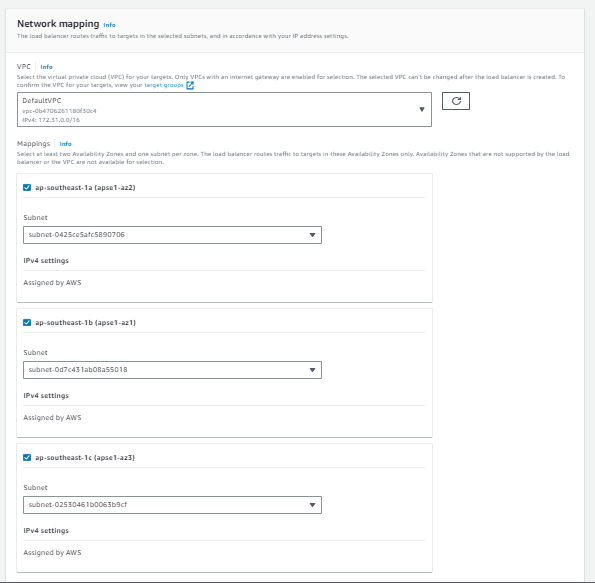

Configure the listeners and target groups as needed.
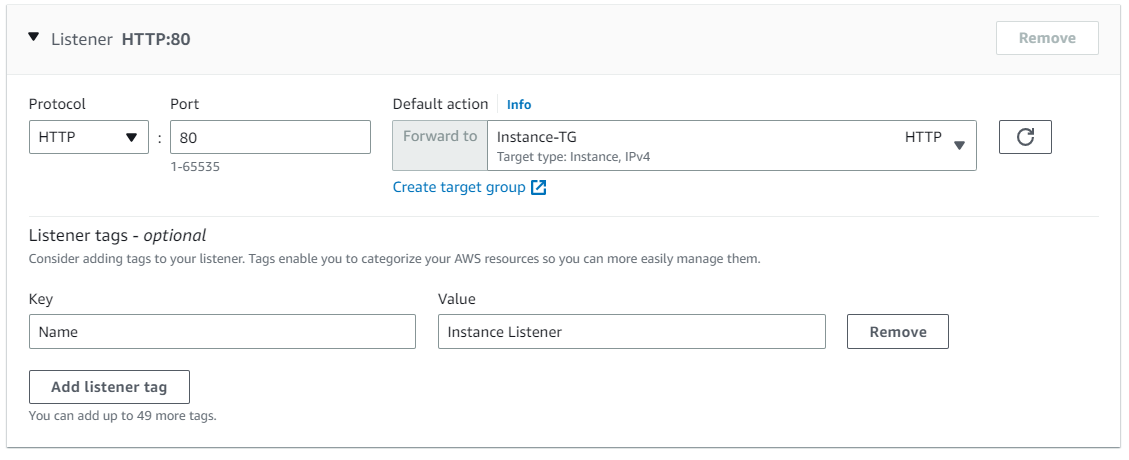
Click "Create."
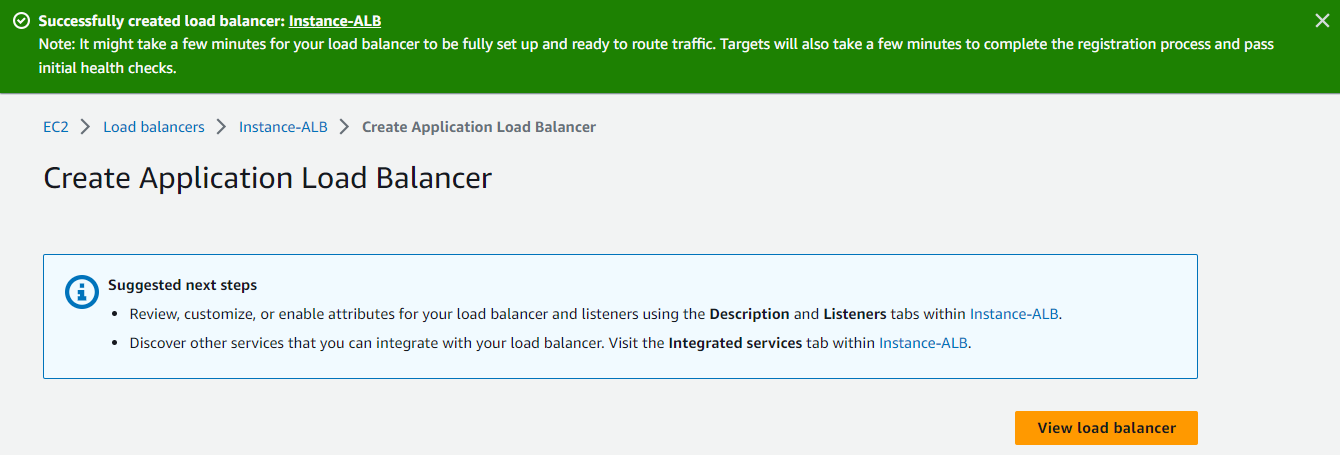

"Finally, our Application Load Balancer's DNS name is ready to serve traffic. You can access your application by visiting the following link:
Instance-ALB-1100665796.ap-southeast-1.elb.amazonaws.com.If you want to map this DNS name to a custom domain name, you can follow the instructions in this article:
https://stackoverflow.com/questions/49488095/validating-domain-for-aws-acm-in-godaddy. Once you have added the DNS name to your provider, you can access your application using your custom domain name."
http://instance-alb-1100665796.ap-southeast-1.elb.amazonaws.com/

Step 5: Create an Auto Scaling group
Open the Auto Scaling Groups console.
Click "Create Auto Scaling group."

Select the launch template that you created in step 2.


Choose the VPC and availability zones that you want to use for your instances.


Select the target group that you created in step 3.
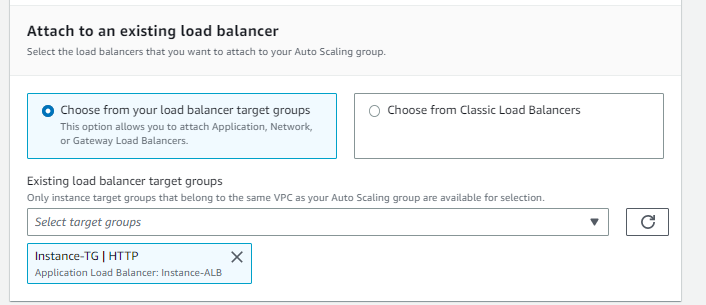


Click "Next."
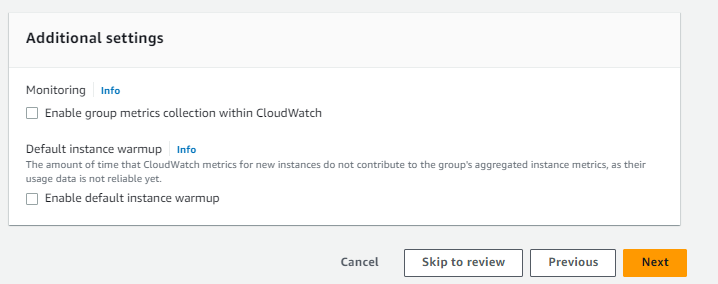
Configure any scaling policies that you want to use for your Auto Scaling group.
Configure the minimum, maximum, and desired number of instances for your Auto Scaling group.


Click "Next."

Configure any notifications:
"To set up notifications, please refer to my previous blog post on SNS where I have covered the topic in detail."
https://aws-devops.hashnode.dev/how-to-create-and-configured-cloud-watch-cloud-agent-sns-on-ec2-in-step-by-step


All done. :)
Next-Level Troubleshooting Solutions:
A.
We have to perform the below task to test the load balancer so that we will know whether our load balancer is doing load balancing properly or not.
We currently have three instances in our setup. The first instance was added during the setup of the load balancer, and the remaining two instances were launched using Auto Scaling. We will now execute the following command on all three instances, which will create an index.html file and assign individual IP addresses to each instance. After completing this step, we will be able to verify whether the load balancer is functioning correctly by refreshing the load balancer link.
#echo "this is $(hostname)" > /var/www/html/index.html
Do the same on the remaining instances.

http://instance-alb-1100665796.ap-southeast-1.elb.amazonaws.com/

Here is the load balancer tested and working correctly.
B.
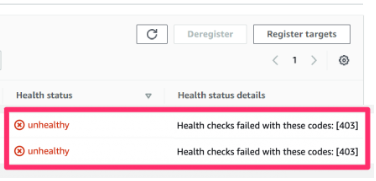
ALB Error Code:- health checks failed with these codes 403 alb
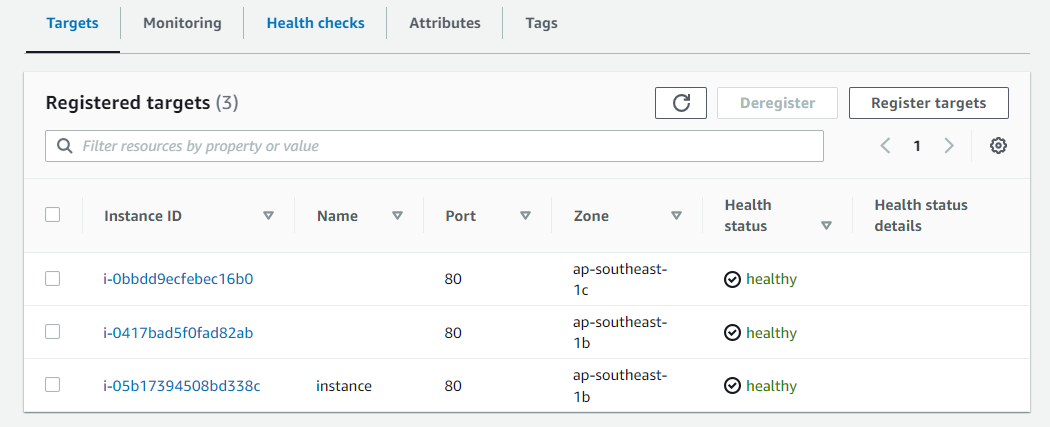
For instance, if an instance becomes unhealthy due to a 403 error code, you can resolve the failed health status issue by adding an index.html file to the web document root path, which is typically located at /var/www/html. Once the file has been added, check the instance's health status in your target group, and it should now be marked as healthy.
Before.
After.
C.
In order to verify that Auto Scaling is functioning correctly or not, so we need to perform the following task:
C.1
Here, we will install and use either the 'tmux' or 'screen' command to enable you to divide your terminal window into multiple panes.
#yum update -y
#yum install tmux -y
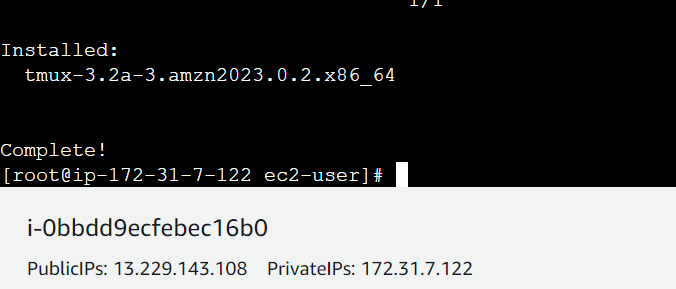
To split the terminal session using tmux, follow these steps:
Open the terminal session.
Type 'tmux' and press Enter to launch tmux.
Press 'Ctrl + b' and then '%' to split the session vertically.
Your session will now be split, similar to the example below:

C.2
"At present, three instances are up and running, and the CPU utilization is set at 50%. This means that when the CPU utilization exceeds 50%, a new instance will be launched, and when the utilization goes below 50%, the excess instance will be deleted to maintain the desired number of instances."
"The 'stress' utility will be installed and utilized here to induce system stress and test performance."
#yum install stress -y
Current Instance and Usages:


C.3
"CPU Utilization Reaches 100% After Running 'stress' Command, Triggering Launch of New Instance Following Successful Health Check below".


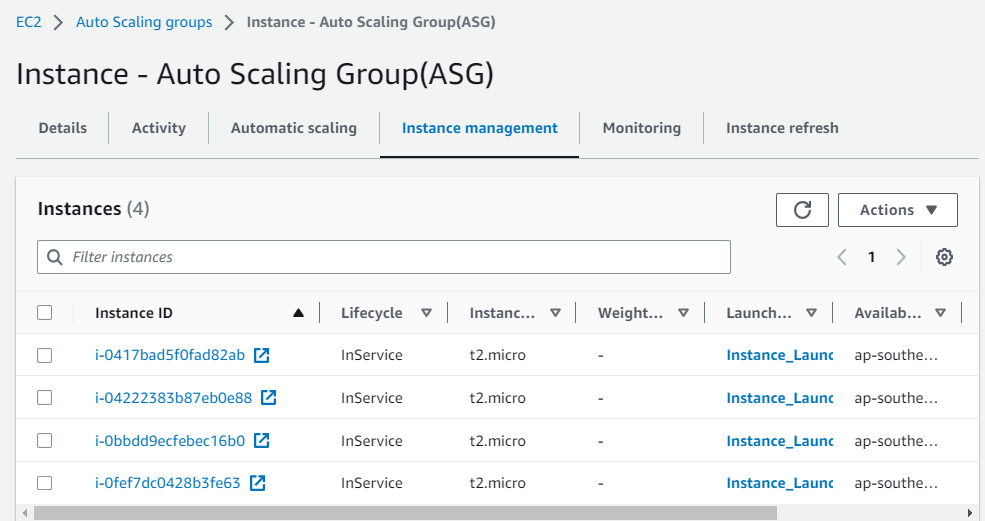

C.4
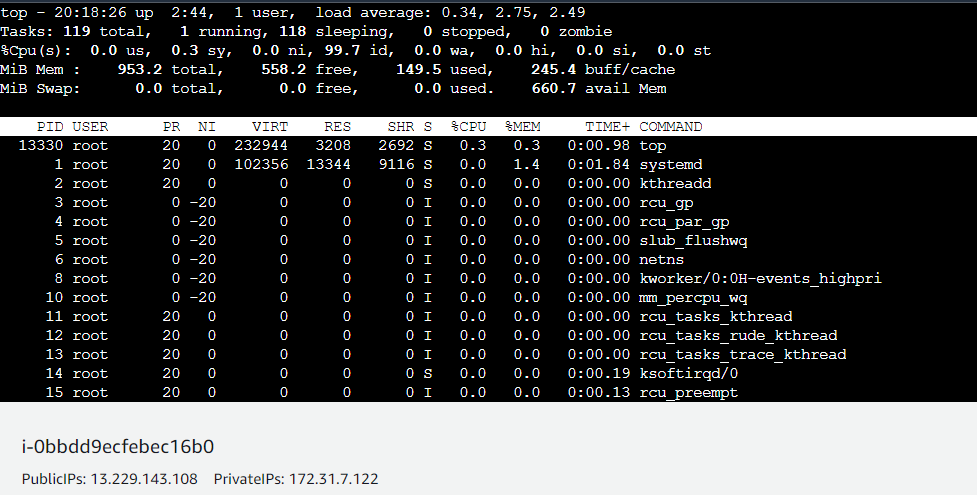
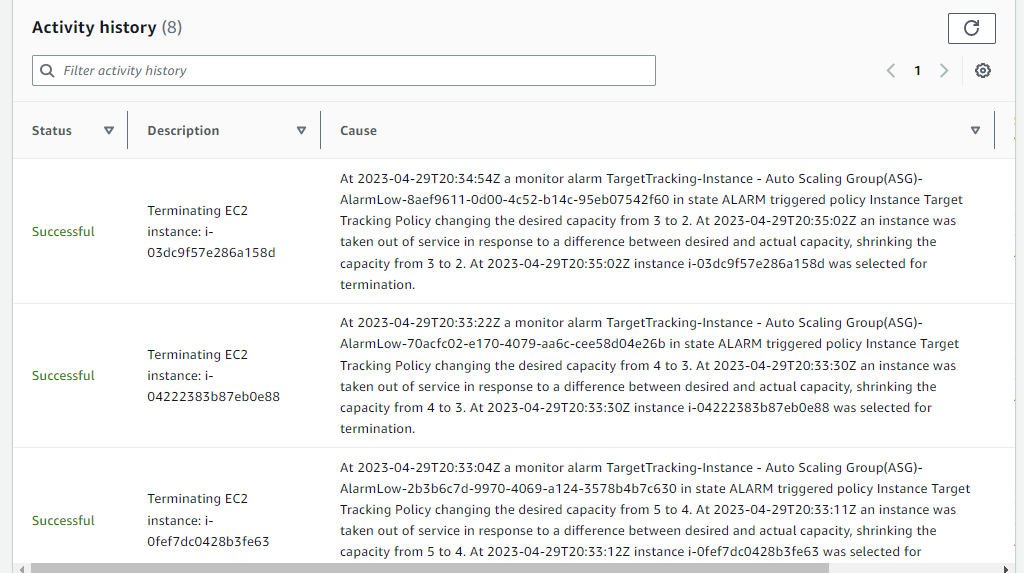
"After the 'stress' command was stopped, the CPU utilization returned to normal. As shown in the screenshot below, any instances that were launched after the CPU threshold was exceeded were automatically terminated through autoscaling until the desired number of instances was reached."
#ps aux | grep stress
#pkill stress
#top

By covering the following topics, I have created a blog on how to automate the Application Load Balancer and Auto Scaling Group in AWS step-by-step:
-EC2
-Auto Scaling Group (ASG)
-Launch Template
-Scaling Policies
-SNS/CloudWatch Alarms
-Application Load Balancer
-Target Group
-Listener
-Troubleshooting
Thanks,
Anil Kushwaha
Subscribe to my newsletter
Read articles from Anil Kushwaha directly inside your inbox. Subscribe to the newsletter, and don't miss out.
Written by

Anil Kushwaha
Anil Kushwaha
As a technology enthusiast with a passion for efficient operations, I specialize in Linux, AWS Cloud, Prometheus-Grafana, Security, Virtualization, and Git. With a deep understanding of these technologies, I am able to streamline development processes and ensure smooth operations for businesses.