Setup Database CI/CD for PostgreSQL using Flyway and GitHub Actions
 Arindam Ghosh
Continuous Integration/Continuous Deployment (CI/CD) ♾️ is a widely adopted practice in software development that helps ensure reliable and efficient delivery of applications. When it comes to databases, managing changes to a database can be complex and error-prone 🚨. Flyway is a powerful 🔥 open-source tool that simplifies database migrations, allowing you to version your database schema and apply changes in a controlled manner. In combination with GitHub Actions 🛠️, you can automate⚙️ the CI/CD pipeline for your PostgreSQL database, ensuring that changes to your database schema are deployed reliably and consistently 📈.
In this blog post, we will walk through the process of setting up PostgreSQL database CI/CD with Flyway and GitHub Actions, step by step 🧗.
Setting up a GitHub repo:
Let's set up a GitHub repository that will contain your database migration scripts.
For this demo, I'll create a repository named postgresql-flyway-demo and a blank folder inside it named migrations to keep the migration scripts 📜. These are the SQL files that define the changes you want to make to your database schema and data. Flyway will execute these scripts in order and keep track of the applied migrations.
You can use any naming convention for your scripts, but I recommend using the default Flyway convention. For example, V1.00__createtable.sql or V1.01__addcolumn.sql. The version number should be incremental and unique for each script. More details about the naming convention can be found 👉 here.
Create a GitHub workflow file:
A GitHub workflow file defines the steps to run Flyway and apply the migrations to your database. This file will be stored in your repository under the .github/workflows directory. Refer 👉 here for more details.

You can use the official Flyway action 🛠️ from the GitHub Marketplace, which simplifies the configuration and execution of Flyway.
For the demo, I am using this 👉 GitHub Action, available at GitHub Marketplace.
Let's take a look at the following 👇 workflow file postgresql-flyway-migrations.yml created for this demo.
name: postgresql-flyway-migrations
on:
  - push
jobs:
  test:
    runs-on: ubuntu-latest
    services:
      postgres:
        image: postgres
        env:
          POSTGRES_DB: ${{ secrets.DB_TEST }}
          POSTGRES_USER: ${{ secrets.USER_TEST }}
          POSTGRES_PASSWORD: ${{ secrets.PASSWORD_TEST }}
        options: >-
          --health-cmd pg_isready
          --health-interval 10s
          --health-timeout 5s
          --health-retries 5
    steps:
      - uses: actions/checkout@v2
      - uses: joshuaavalon/flyway-action@v3.0.0
        with:
          url: ${{ secrets.URL_TEST }}
          user: ${{ secrets.USER_TEST }}
          password: ${{ secrets.PASSWORD_TEST }}
          locations: filesystem:./migrations
      - run: echo 'testing'


  deploy-to-prod:
    needs: test
    runs-on: ubuntu-latest
    steps:
      - uses: actions/checkout@v2
      - uses: joshuaavalon/flyway-action@v3.0.0
        with:
          url: ${{ secrets.URL_PROD }}
          user: ${{ secrets.USER_PROD }}
          password: ${{ secrets.PASSWORD_PROD }}
          locations: filesystem:./migrations
      - run: echo 'deploying to prod'
The postgresql-flyway-migrations workflow consists of two jobs test and deploy-to-prod and will be triggered on push events, whenever you push a script to the migrations folder.
⚙️ ▶️The test job runs on an Ubuntu environment and uses the Postgres Docker image as a service to set up a PostgreSQL database as a Test Environment.
You can skip setting up the Test environment using
postgresdocker image and pass your DEV database URL instead if you have one.
It performs the following steps:
Checkout the code from the repository.
Build the Flyway Docker image 💿 with the migration scripts.
Run the Flyway migrations on the Test database with the connection settings and credentials from your GitHub Secrets and verify 👨💻 that the migrations are successful.
🧐 Notice that the database URL, user and password are provided as GitHub Actions secrets.
It is generally not recommended to include sensitive credentials, such as usernames and passwords, in your Git repository. Storing credentials in a public repository can pose security risks, as it makes them accessible to anyone who has access to the repository, including potential malicious actors 🚨.
Secrets are encrypted values that you can store in your repository settings and use in your workflows. Refer 👉 here to know more about GitHub encrypted secrets.
To create secrets for your database credentials, follow these steps:
Go to the
Settingstab in your repository.Navigate to the
Securitysection in the sidebar.Select
Secrets and variables.Choose
Actionsand click onNew repository secret.
⚙️ ▶️ The deploy-to-prod job triggers on successful completion of the test job. This ensures that only successfully tested changes are deployed to the Production database.
The steps are similar to the test job. However, the URL and credentials are of the Production database.
You can customize 👨💻 the workflow to suit your needs, such as adding more steps, environments, conditions, etc.
Test and deploy your database migrations:
The workflow will run whenever there is a push request to the main branch of your repository. The migrate command will apply any pending migrations to your database in order.
Let's perform the following migrations and see 😎 if it's working.
Create a new table
Add a column to the table
⚙️ ▶️ Create a new table - V1.00__createtable.sql
CREATE TABLE customers (
    id INT NOT NULL PRIMARY KEY
);
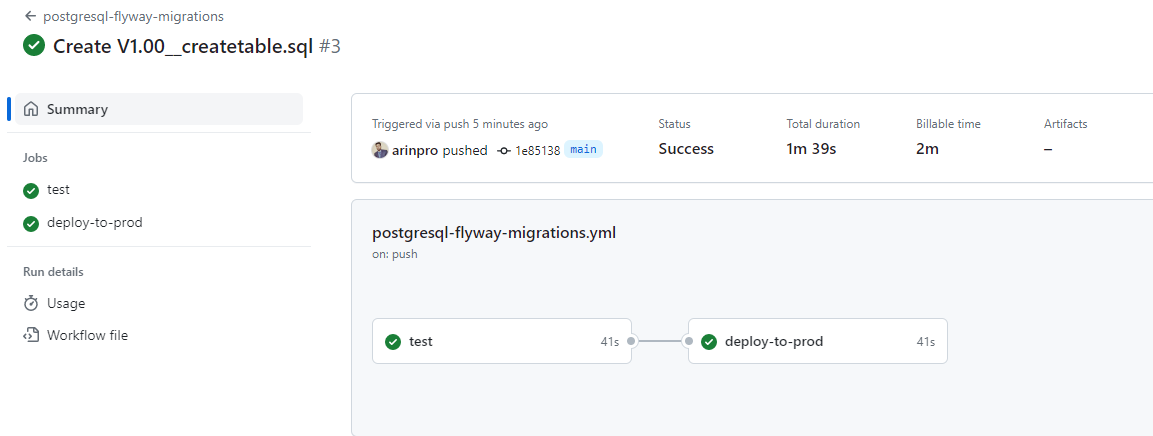
Pushed the V1.00__createtable.sql script to migrations folder in main branch.

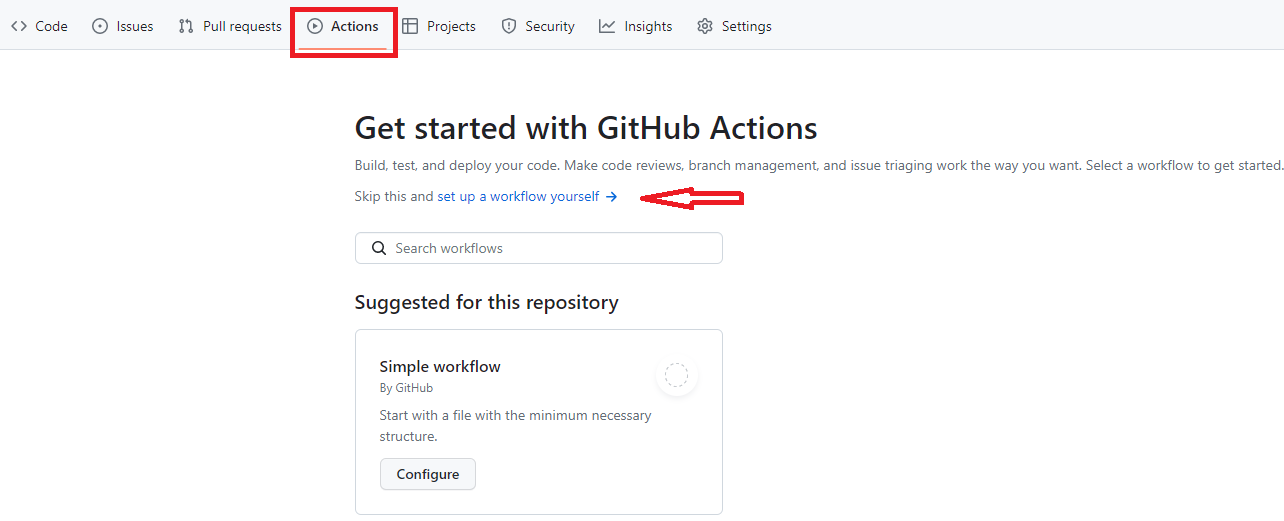
Let's monitor 💻 the progress and status of the workflow by going to Actions tab and clicking on the postgresql-flyway-migrations workflow. See the workflow ran and both the steps - test & deploy-to-prod succeeded ✅.

Let's verify if the table gets created inside the database. And we see 🤩 the table customers got created with id column.
I am using the default
postgresdatabase for demo purposes. You should use your respective application databases to configure the workflow.

⚙️ ▶️ Add a column to the table - V1.01__addcolumn.sql
ALTER TABLE customers
  ADD COLUMN name VARCHAR(10) NOT NULL;
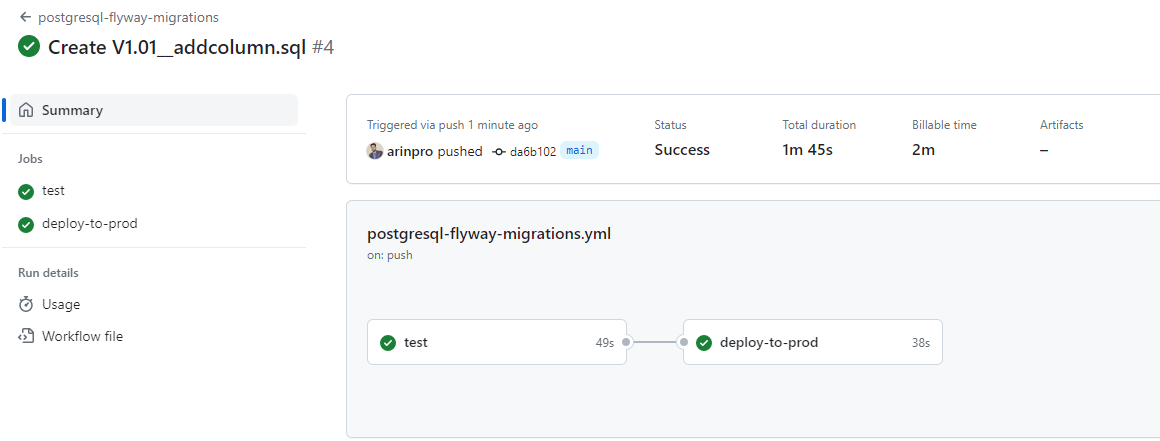
Next, push the 👆 code to add a column name to the customers table.

The workflow triggered automatically and both steps succeeded ✅.

And, we see the name column added 👇 to the customers table.

Additionally, Flyway creates and maintains a flyway_schema_history table in the database to keep track of the applied migrations. The schema history table stores metadata 📋 about each applied migration, such as the version, description, type, and execution time of the migration.

Please refer to these 👇 resources for more information:
Flyway 👉 https://flywaydb.org/documentation/
GitHub Actions 👉 https://docs.github.com/en/actions
The code 📜 can also be found at GitHub 👉 https://github.com/arinpro/postgresql-flyway-demo
That's it! 🚀 You have successfully set up a database CI/CD pipeline ♾️ using Flyway and GitHub Actions. You can now enjoy 🤩 the benefits of automated database deployments and migrations across different environments.
Happy Learning 🙌
Subscribe to my newsletter
Read articles from Arindam Ghosh directly inside your inbox. Subscribe to the newsletter, and don't miss out.
Written by

Arindam Ghosh
Arindam Ghosh
Database reliability engineer 👨💻 with expertise in designing, implementing, and maintaining highly available and scalable database systems 💻 Enjoy automating various database tasks ⚙️ and implementing database DevOps 🚀 🙏