Introducing Full Control To Your APIs Using Serverless Framework
 CodeOps Technologies
Working in an organization that runs on Serverless Architectures for development does not expect you to take up things manually. These organizations rely on IAAC which is Infrastructure as a Code. As a software developer, you are expected to possess knowledge of this. These organizations use high-level frameworks like Serverless Framework, SAM, Zappa, etc. The most widely used framework is Serverless Framework.
In my previous article about providing controlled access to APIs, I took a deep dive into creating API, creating API keys, creating Usage Plans, etc from the AWS Console. In this article, I will show how to do the same activity using Serverless Framework.
This tutorial will be very straightforward and easier to understand. If you don’t know how to deploy a lambda function using Serverless Framework, you can refer to my blog: A Complete Guide on Deploying AWS Lambda using Serverless Framework.
The above article does not cover how to deploy an API using Serverless Framework, but worry not! I will walk you through the simple process of creating an API!
Creating An API Using Serverless Framework
At this point, I assume that you have read through my previous blog on creating a lambda function and deploying it using Serverless Framework. We will now convert that function to an API.
I have written the below code for my handler.py
I have added 2 records inside the dictionary to simulate the database. Creating an API is very simple using Serverless Framework. All we need is to add the below-shown properties to the functions we declared in serverless.yml
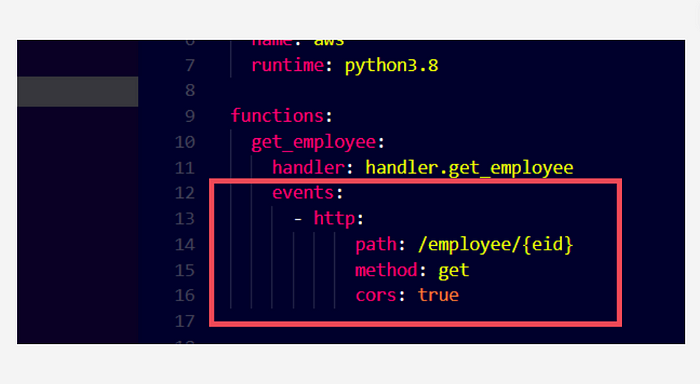
serverless.yml
That’s it! This is how simple it is to create an API using Serverless Framework, just by adding an HTTP event object to the functions in the serverless.yml file.
All we need to do now is typesls deploy in our terminal and press enter. The API will be deployed. We will also get the endpoint for this API in the outputs shown in the terminal. We can use it to test it on Postman. There are more properties to it for having more controls like defining params for POST PUT or DELETE APIs, providing authentication, adding headers, etc. However, for our use case, this is enough for a GET API. You can refer to this documentation for more detailed information.
Protecting The API With API Keys
Once our API is created, its time to add more control to it, for this we need to add some more properties to the serverless.yml
Add
apiGatewayproperty to theproviderobject and then add the API key names toprovider.apiGateway.apiKeysarray.Specify
privateproperty as true inside the HTTP event object of functions. Only add this to the APIs you want to secure.
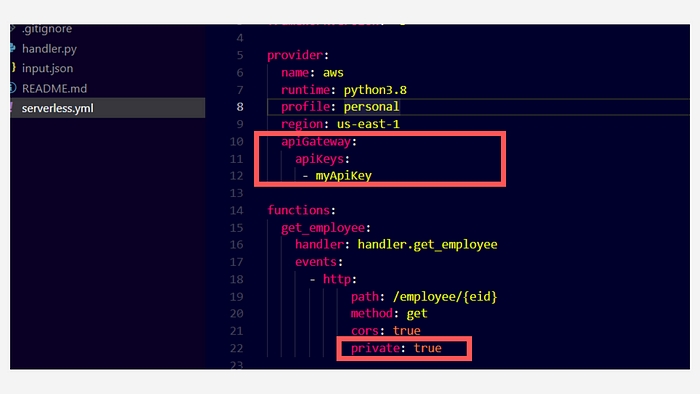
Adding API keys to our APIs
Once we do this, we have to type sls deploy in the terminal and it’s done! In the terminal, we will be able to see the following outputs:
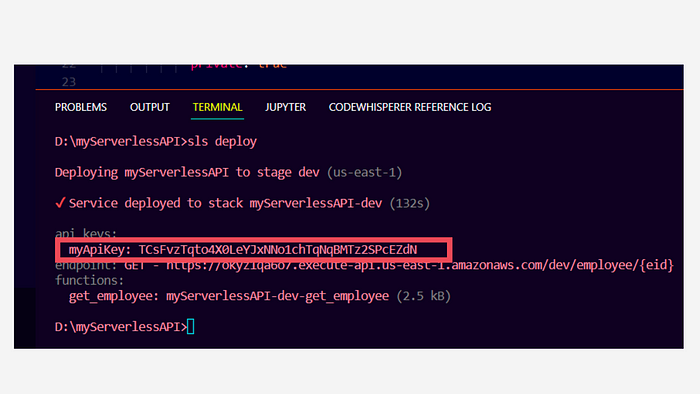
We can find the API key that is generated for the key name that we specified in the serverless.ymlfile.
We can now test this through Postman.
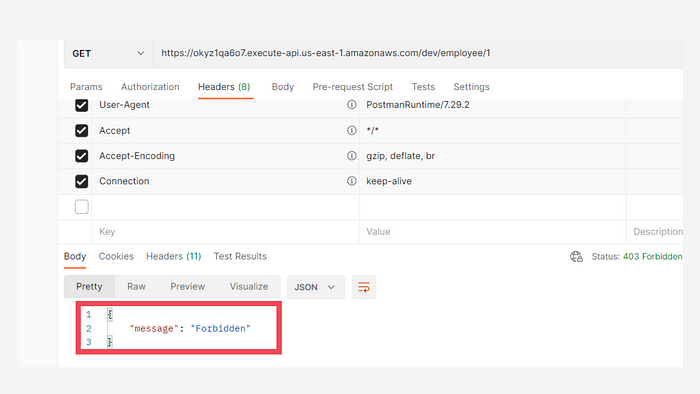
Making the API call through Postman
As you can see, if we run this API from the endpoint we received in the outputs, we get a 403 response with a message which specifies that it is forbidden.
Now we need to add an attribute named x-api-key in the header section of Postman and specify the API key that we received in outputs. Once we do this and run, we get the following response:
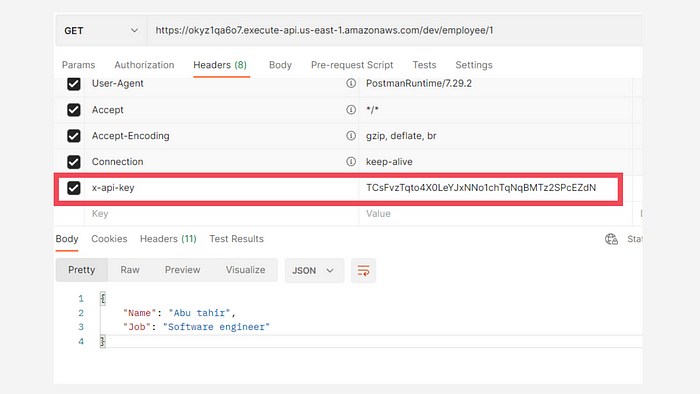
Calling the API by providing the API key
As you can see, we have got a 200 response with the data in the console.
Creating Custom API Keys
We have created an API key successfully, but the one that we created is generated by AWS, we can also create our own API keys. To do it we need to explicitly specify the name and value properties in the apiKeys object. However, please make sure that the minimum number of characters for the custom key is 20.

As you can see, I have provided name as myCustomKey and the value is a random string.
Now if you use this API key in the Postman, you will get a 200 success response.
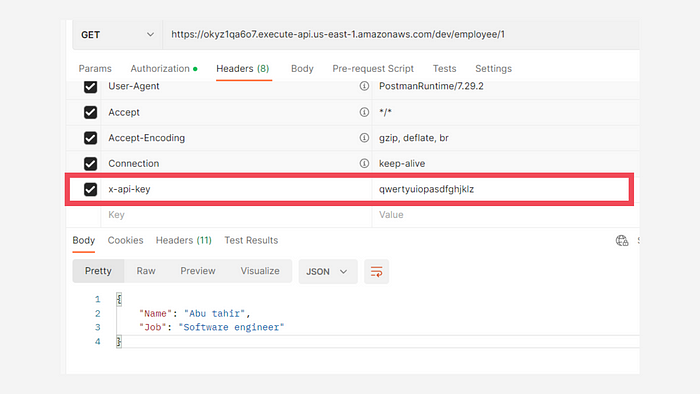
Using the custom API key
Adding More Control To The API Keys
We know how to create the APIs and their keys. To have more control over different customers, we have to create Usage Plans, Throttling limits, etc. Let’s take an example where a company wants to provide APIs to its customers with different usage plans, we generally see this on any platform. The platforms provide plans such as basic, standard, premium, etc.
If you don’t know what usage plans are from the AWS perspective, you can refer to my previous blog where I explained all of this process in detail using the AWS console.
To get this control using Serverless Framework, we must first create groups in the apiKeys object, so I will be making a small change in the serverless.ymlfile.
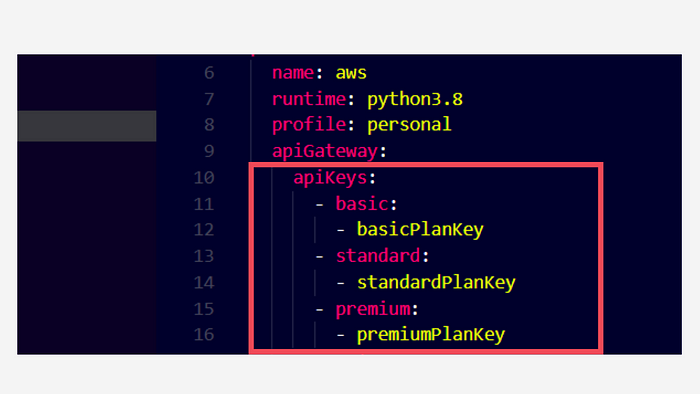
Creating groups for API keys
In the above image, Instead of putting the API key names directly under apiKeys array, I created groups namely basic, standard and premium. These are custom names defined by me. We can add any number of keys under every group.
After creating the groups, we must specify the usage plans for every group. We do this by adding usagePlans object under apiGateway object. Make sure the indentation is proper.
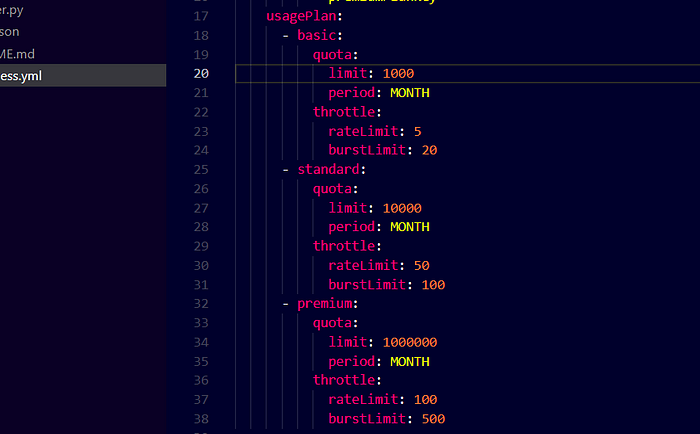
Creating usage plans for every API key
We have now added the usage plans for every group. We must use the same group name to create the usage plans. Under every usage plan, we have a quota and throttle. Under quota, we specify the limit to the number of requests we allow for each customer and this is a limit per month. In case you don’t have any group, you can put the quota and throttle objects directly under usagePlan object instead of specifying the group name. You can also make your plans unlimited by not specifying the quota object under your usage plan.
Under throttle, we specify the rateLimit and burstLimit . The rate limit is the number of requests per second and the burst limit is the number of concurrent requests you want your API to handle per second. This will help us to protect our APIs from DoS attacks.
When we deploy this setup we can now see all the API keys that got generated in the console.
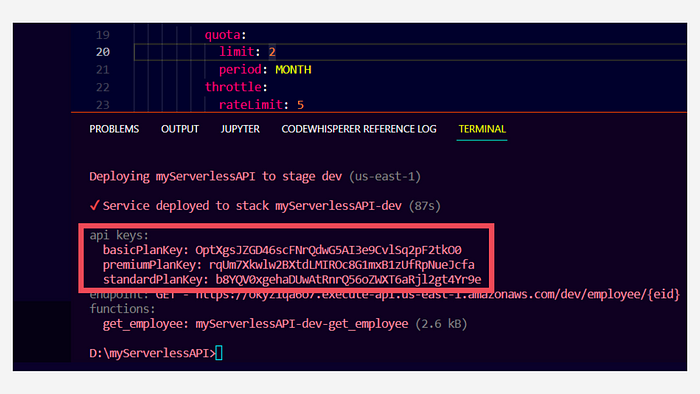
If you wish to hide these API keys from the outputs you can use--conceal in the deploy command.
sls deploy --conceal
Your outputs will now look like these:
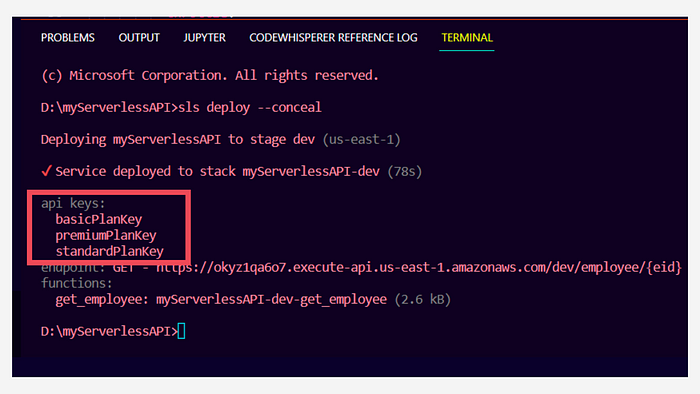
Hiding the API keys in outputs
Now let’s assume our customer’s limit got exhausted. Your API will block the requests from that user. To check this I set the limit to two and made two requests from Postman and on third request, you can see we have got 429 statusCode with the response message as Limit Exceeded.
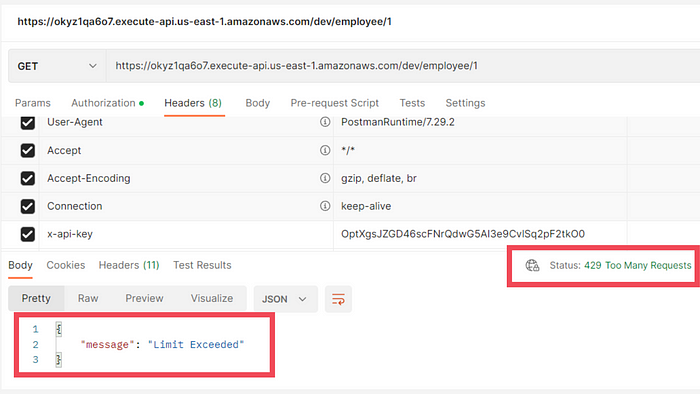
Limit exceeded response
Here is the completeserverless.yml you can use:
Conclusion
Alright! That was all about setting up the API keys, usage plans, throttling limits, etc. The only thing that I don’t like is setting up different keys for different users. I will be glad if someone can address this issue and provide a solution in the comments. With that said, Thank you for spending your valuable time. Have a great day!
Subscribe to my newsletter
Read articles from CodeOps Technologies directly inside your inbox. Subscribe to the newsletter, and don't miss out.
Written by
