Simplify Your React Development: A React Hooks Guide
 Vishrut Agarwalla
Introduction
As promised in my last blog! In this article, we will explore the essential React Hooks you need to learn to elevate your React development skills. We will discuss the importance of these hooks and provide examples to help you understand their usage in real-world applications. Get ready to master the power of React Hooks and enhance your coding abilities!
So, before moving forward in the blog. Let's try to understand first what are "HOOKS" in React.
What are Hooks in React? Approaches to Developing Components in React.
So, To answer this question of what are Hooks. Let's first see basically, why Hooks came into the picture. There are two approaches to writing Components in React i.e. Function-Based Components and Class-Based Components
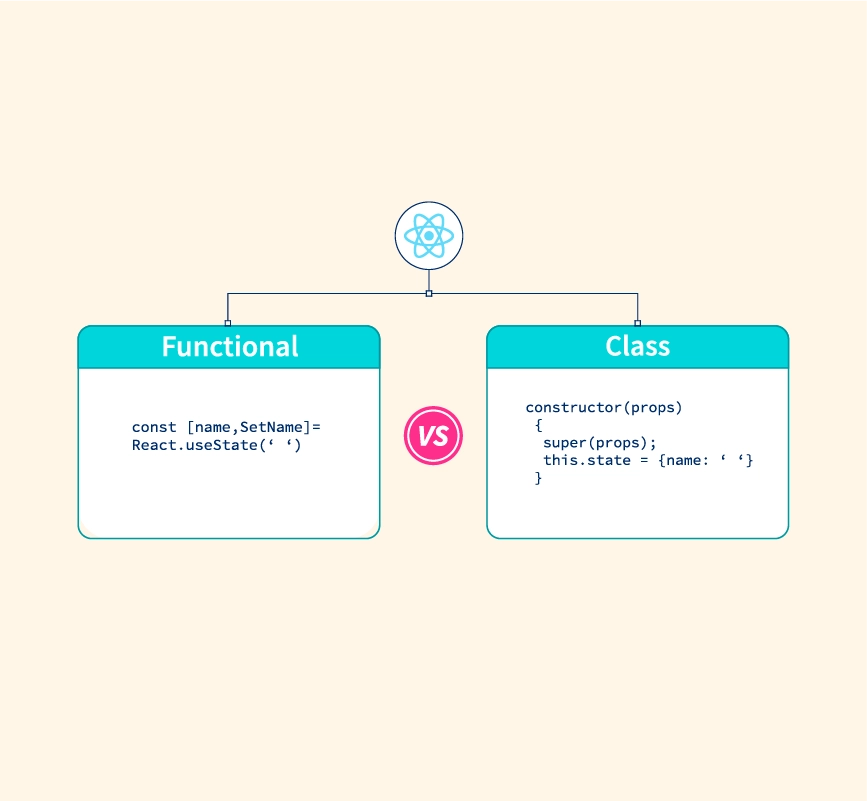
Let's first examine both approaches of writing components in brief then we will move forward and understand HOOKS.
Function Based Components
Function Based Components aka Functional Components are the easiest way to define a component.
Functional components are means to create components in React that do not have their state and just return a JSX. They are JavaScript functions that might or might not contain parameters that contain data. We can write a function that accepts the props(properties) argument and outputs the displayed result.
Example :
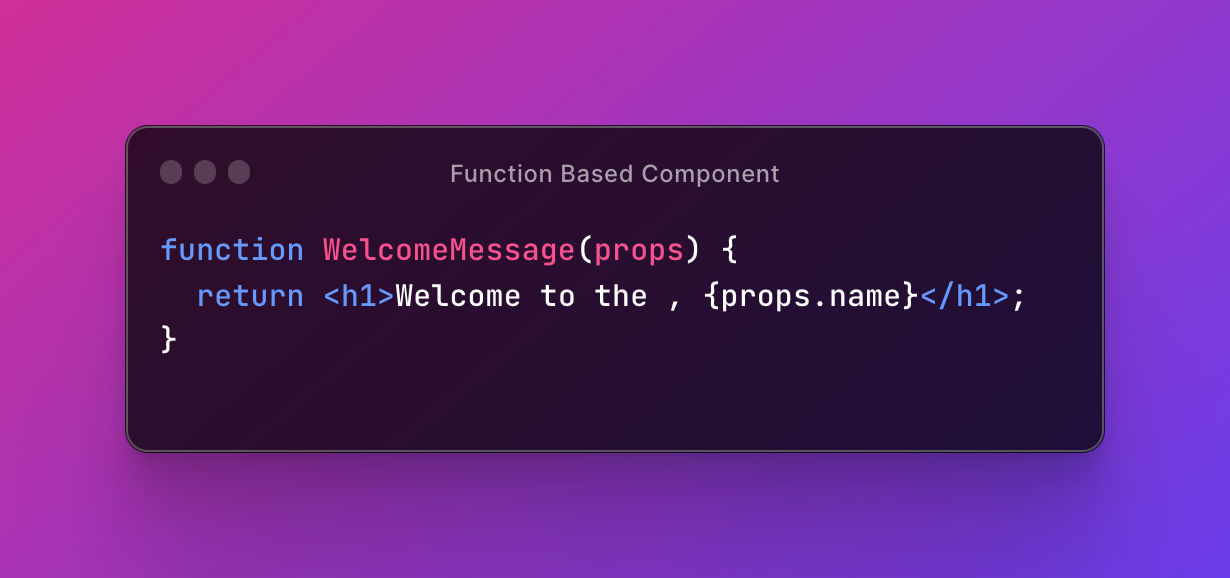
Functional Components do not store or handle the states. So, they are called generally called stateless components.
Hooks can only be used with Function-Based Components and Class-Based Components do not use Hooks.
Class-Based Components
Class-Based Components are more complex than Functional Components. To develop class-based components in React, we can use JavaScript ES6 classes. To define a React component class, we need to extend React.Component.You must develop a render method that returns a React element by extending from React.Component. Data can be passed between classes and between class components.
Example:
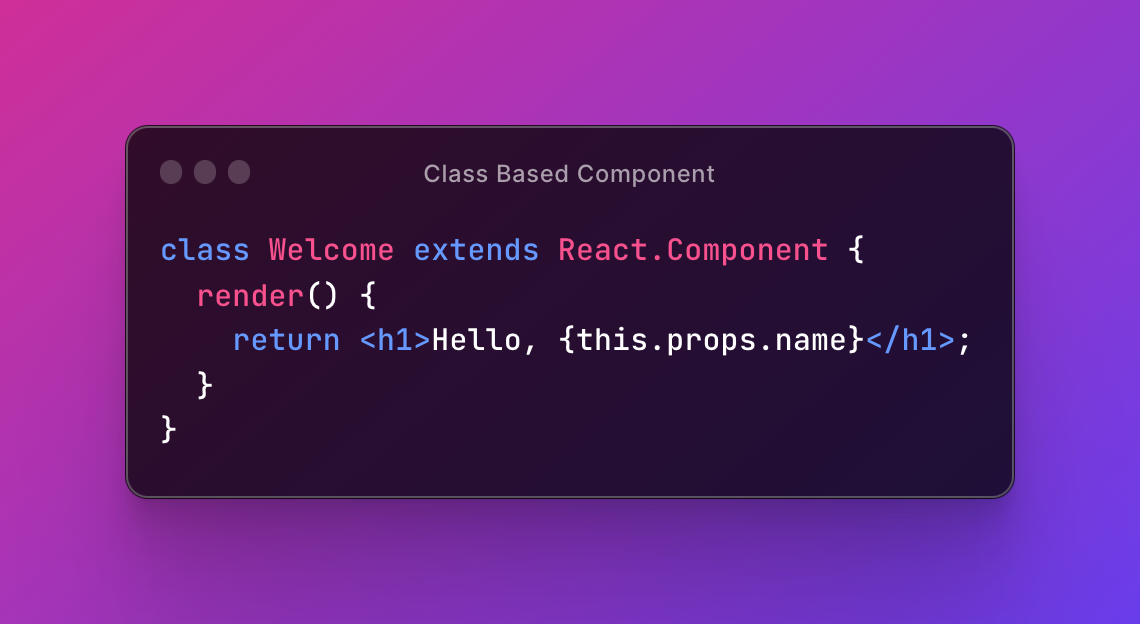
Due to their ability to contain or manage local states, class components are also called Stateful components. Hooks cannot be used in class components.
So, you should now have an understanding of what are Function Components and Class Components.
Now, let's discuss the essential Hooks required for a React Developer and explore how they are used.
Essential Hooks 🪝
Here is a curated list of essential Hooks for a React Developer:
useState
The React
useStatehook, allows us to track the state in a function component. The state generally refers to data or properties that need to be tracked in an application.We initialize our state by calling
useStatein our function component.useStateaccepts an initial state and returns two values:The current state.
A function that updates the state.
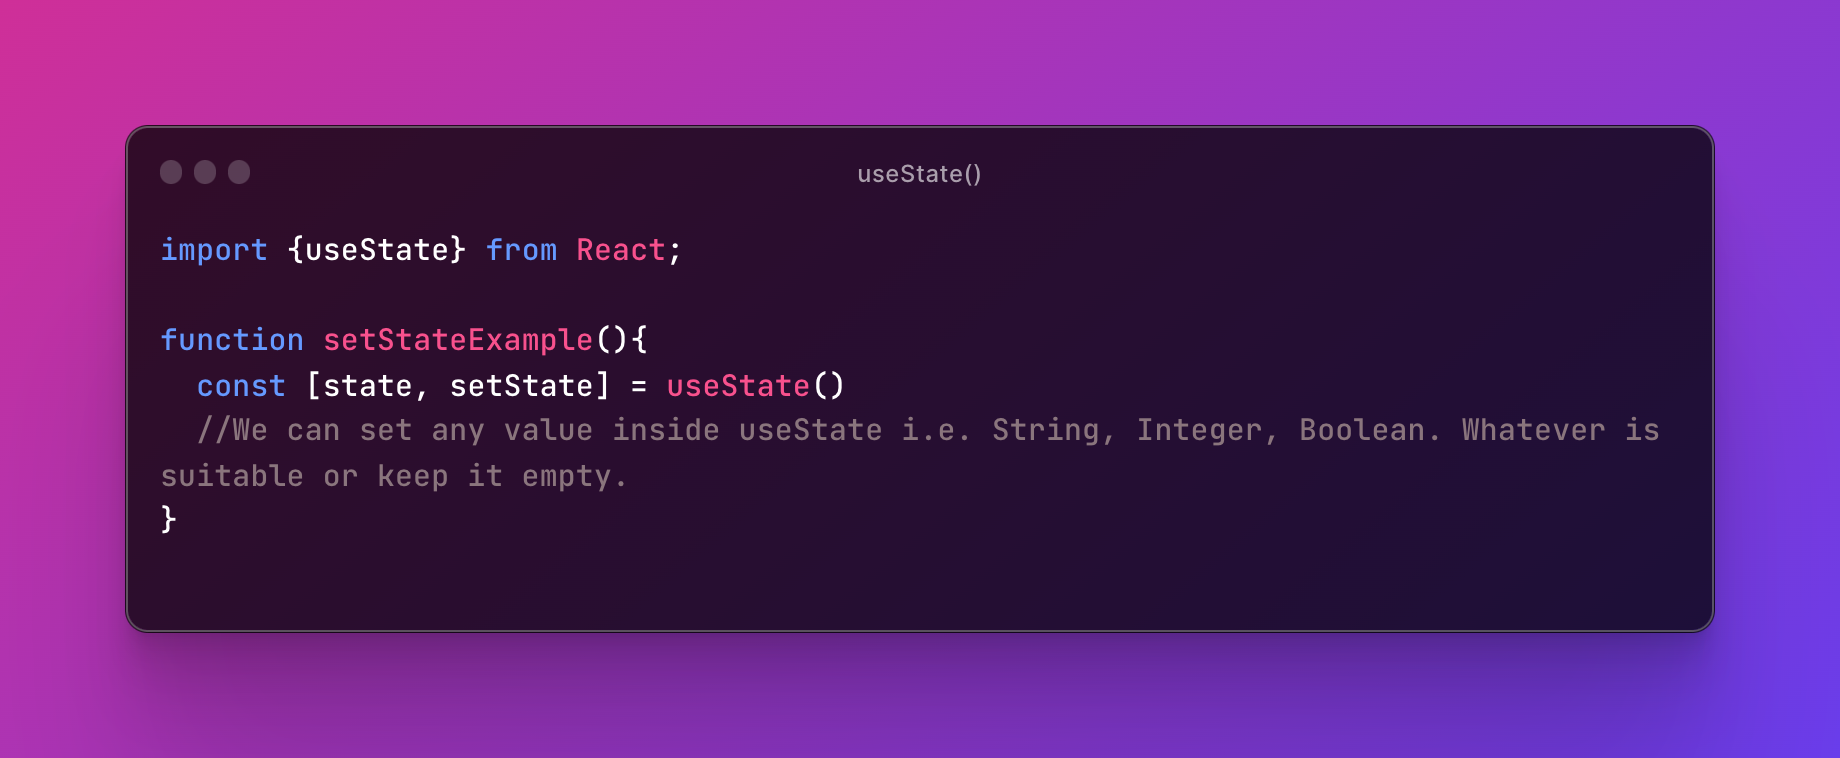
Here, in the above example: We have first import
useStatefrom React and then, we have defined two state variables i.e. current state and another variable that should be called whenever we update the state.After that, I have written
useState()function, this function defines the default state of the application. It can consist of values such as String, Integer, Boolean, Float or anything that the user wants or it can remain empty as an Empty State.
useReducer
useReducer()hook is another Hook in React which is like an advanced version ofuseState()Hook.This Hook allows use to set custom state logic.
If you find yourself keeping track of multiple pieces of state that rely on complex logic,
useReducermay be useful.The
useReducerhook has 2 argument :
The
reducerfunction contains your custom state logic and theinitialStatecan be a simple value but generally will contain an object.The
useReducerHook returns the currentstateand adispatchmethod.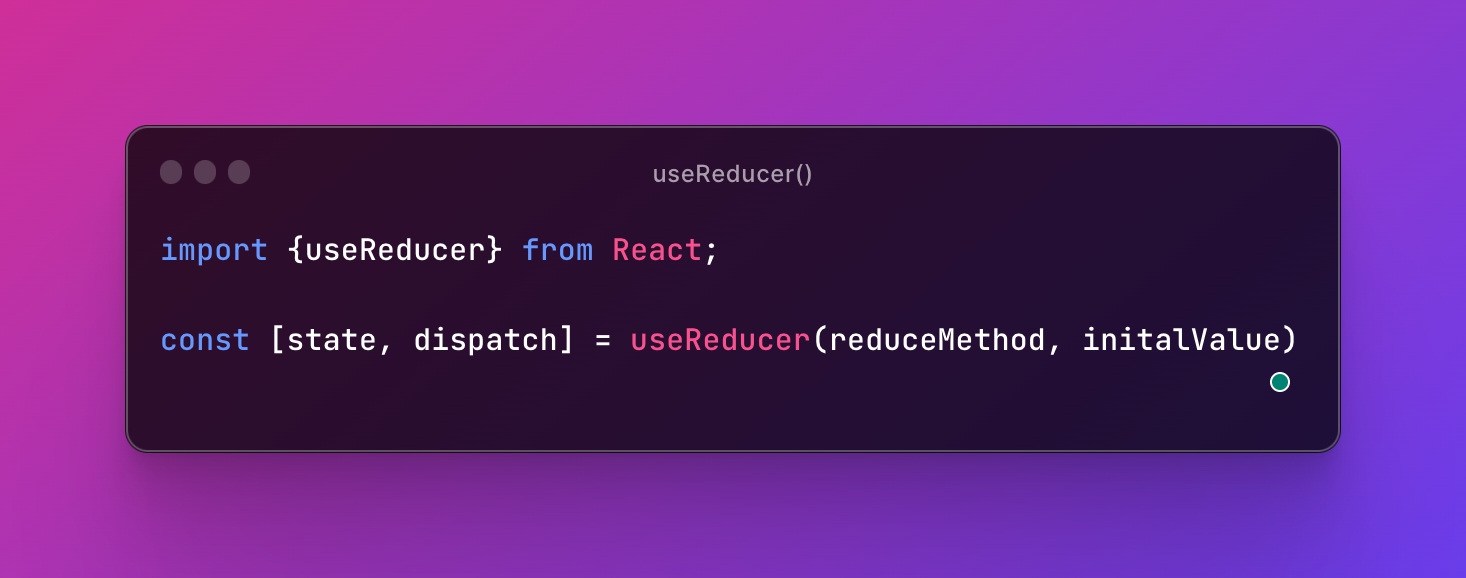
The reducer method contains your state logic. You can choose which state logic to call using the dispatch method. The state can also have some initial value similar to the useState hook.
useEffect
useEffect()Hook allows you to perform side effects in your components.Now, you might think what is a side effect? So, a side effects are basically - fetching data, directly updating the DOM (Document Object Model) and using timers.
useEffectusually accepts 2 arguments out of which the second argument is optional.
Now, we will see an example that demonstrates how to use
useEffecthook.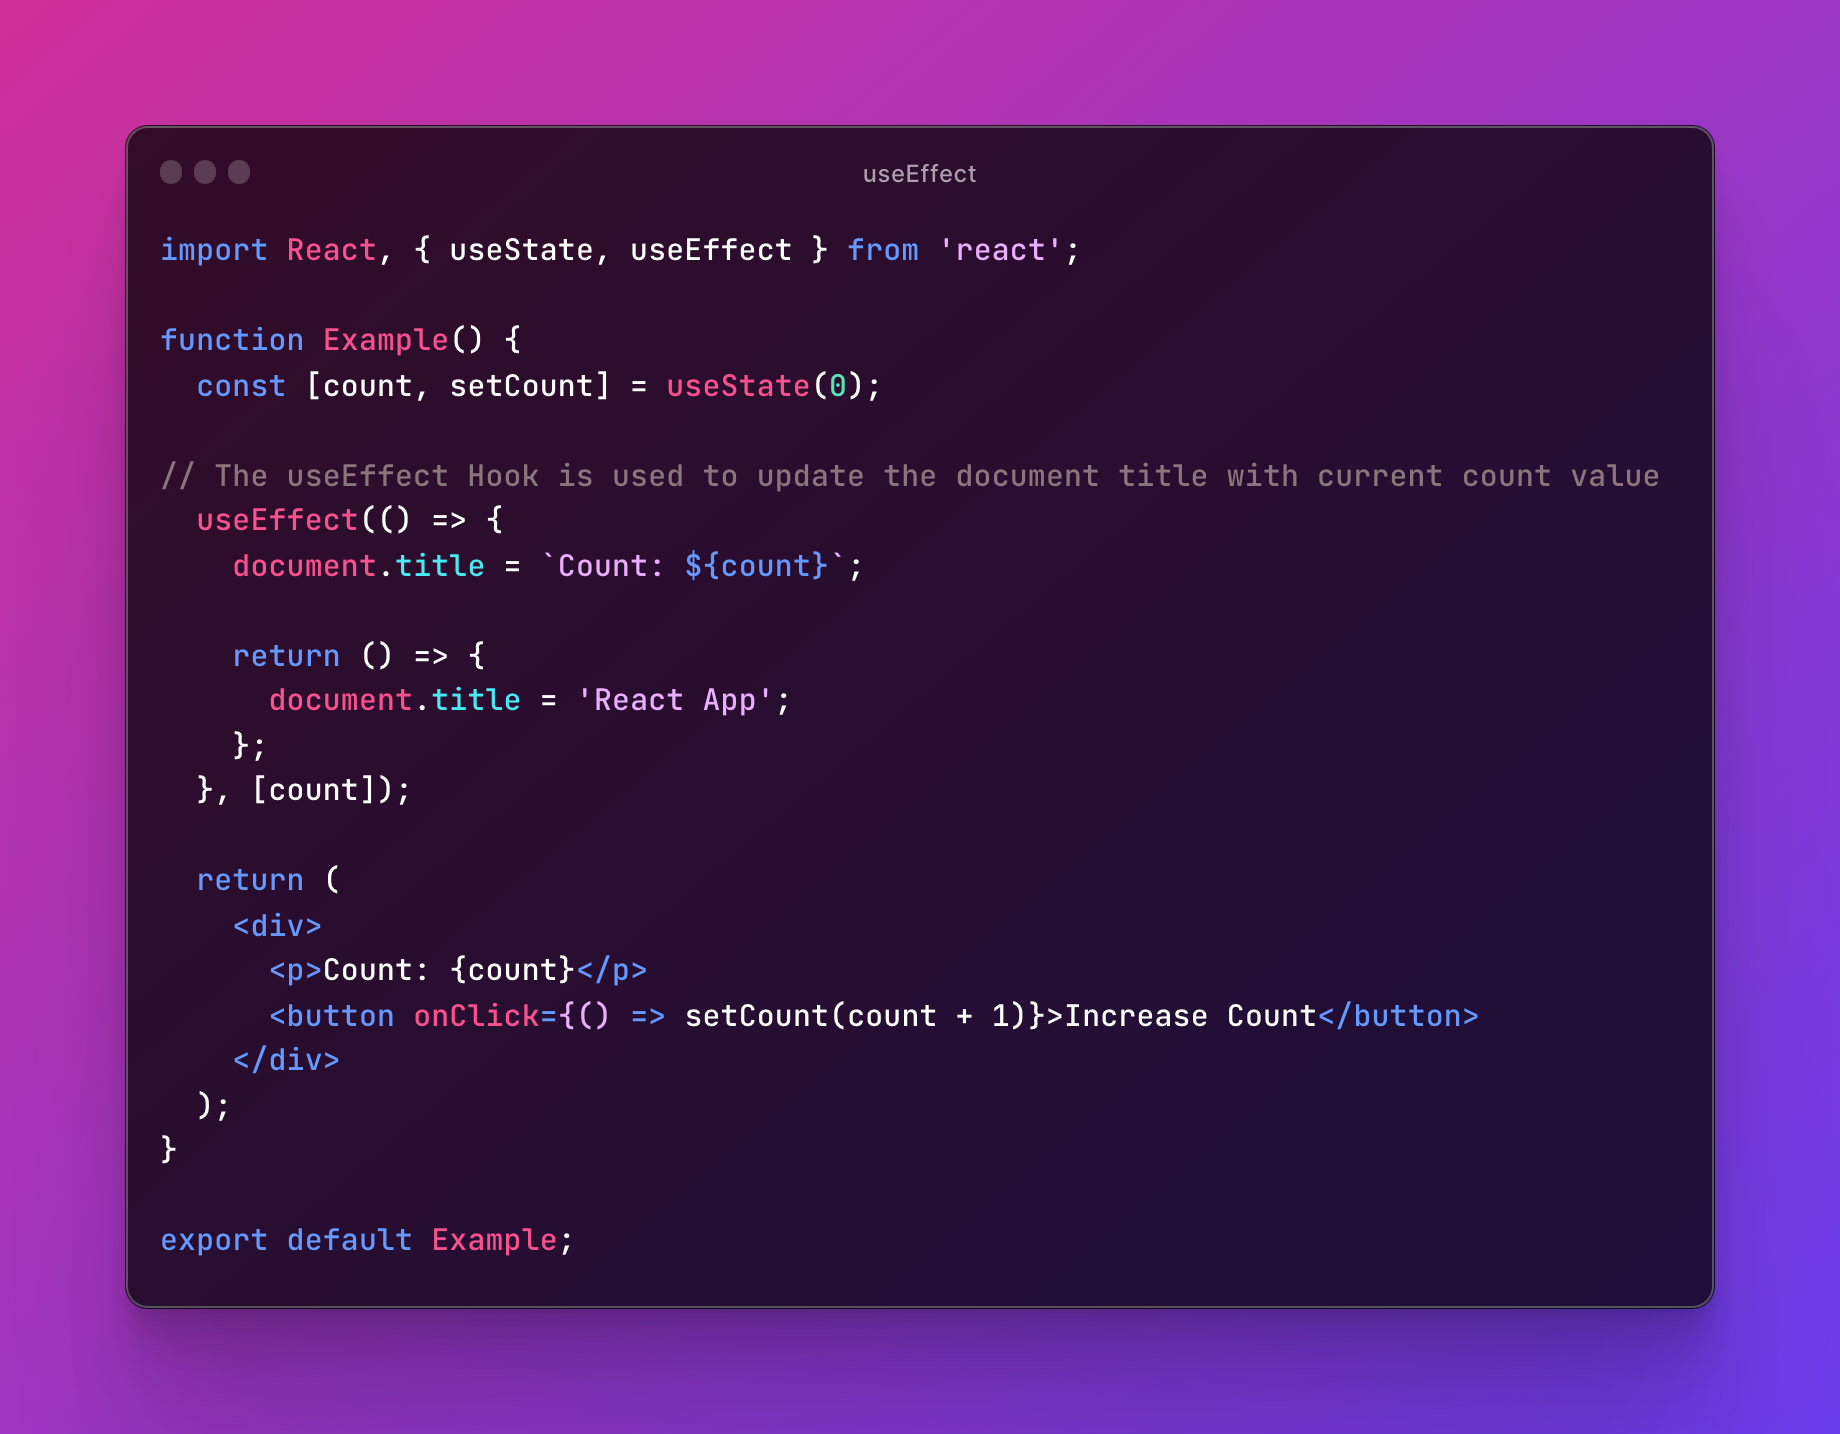
The above example demonstrates the use of
useEffecthook.In this example
useStatemanages a state variable called 'count'. The 'count' starts at 0 and increments by 1 each time the button is clicked. TheuseEffecthook is used to update the document title with the current count value. When the component is unmounted, the document title is reset to 'React App'.
useTransition
When building interactive user interfaces, performance is a crucial aspect to consider.
One way to improve the performance of a React application is by using the
useTransitionhook but how? WhyuseTransitionHook? What is the reason behind it?So, to answer these questions we need to know about
useTransitionhook.useTransitionhook enables us to specify which state changes are critical or urgent and which are not.But you will say that all the changes are necessary for React but tbh there are some changes that are really urgent or necessary to be done like selecting a value from a dropdown menu, it should be given more precedence over other UI updates or list filtering, which might slow down their execution.
So, basically
useTransitionhook allows us to specify what state changes should run with a lower priority to increase the performance of our application.Syntax :
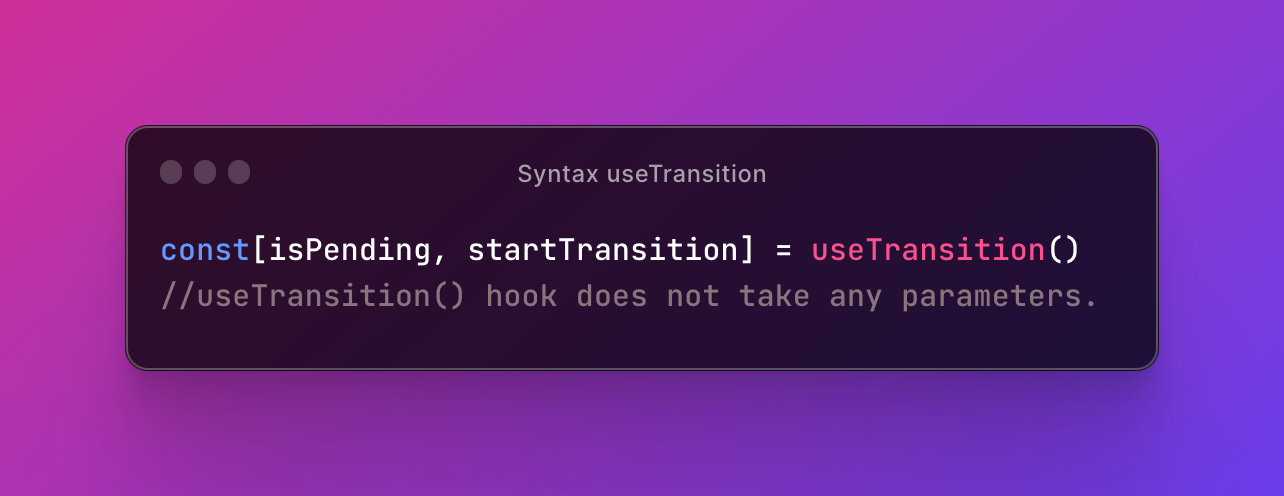
isPending: A boolean indicating whether the transition is currently in progress or not.
startTransition: A function that is used to start the transition.
Now, you might think that this is all good like what is
useTransitionand other stuff related to it but how really does it work in real-life scenario: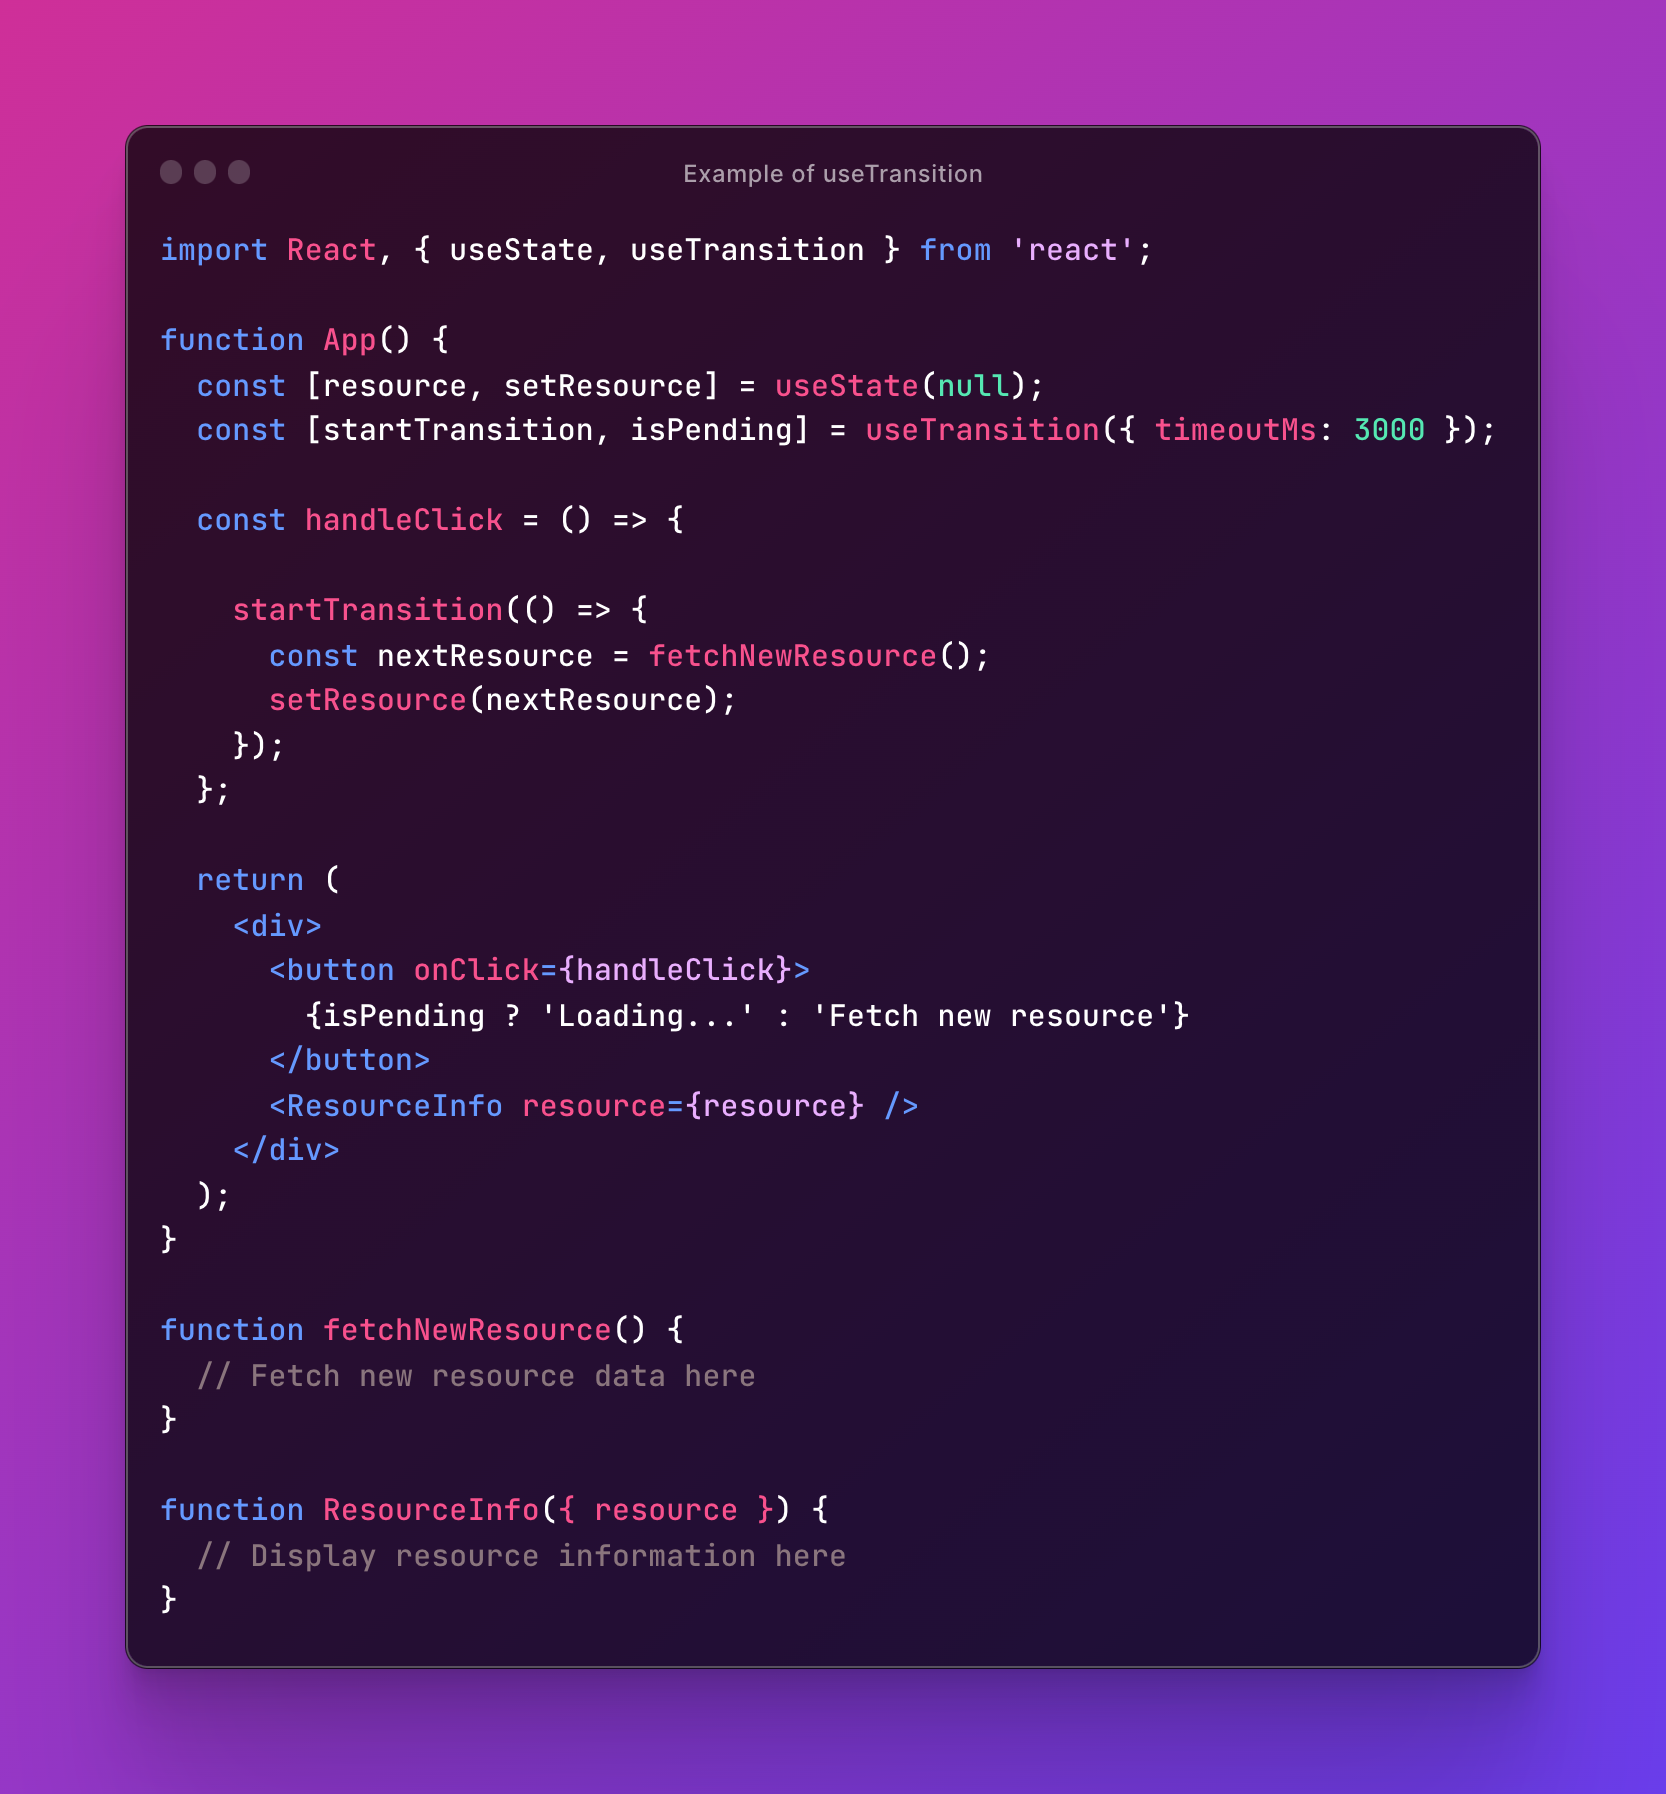
The above example demonstrates the use of the
useTransitionhook in a React application. TheAppcomponent has aresourcestate that can be updated by clicking a button. When the button is clicked, thehandleClickfunction is called, which starts a transition using thestartTransitionfunction. ThefetchNewResourcefunction is responsible for fetching new resource data. TheResourceInfocomponent displays the fetched resource information. While the transition is in progress, the button displays 'Loading...' and switches back to 'Fetch new resource' when the transition is complete. That's all foruseTransitionhook, now let's move forward to another hook.
useId
useIdhook is relatively a new hook introduced in React 18.useIdhook is used to generate a unique Id on both the client-side and server-side as well.useIdis a React Hook for generating unique IDs that can be passed to accessibility attributes.Syntax :
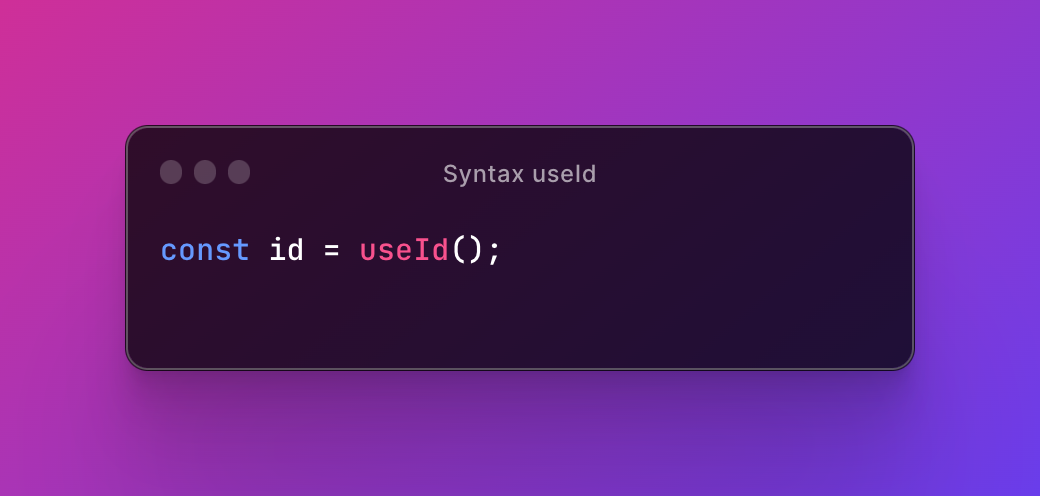
That's it, so now let me show a real-life example of using
useIdhook in React.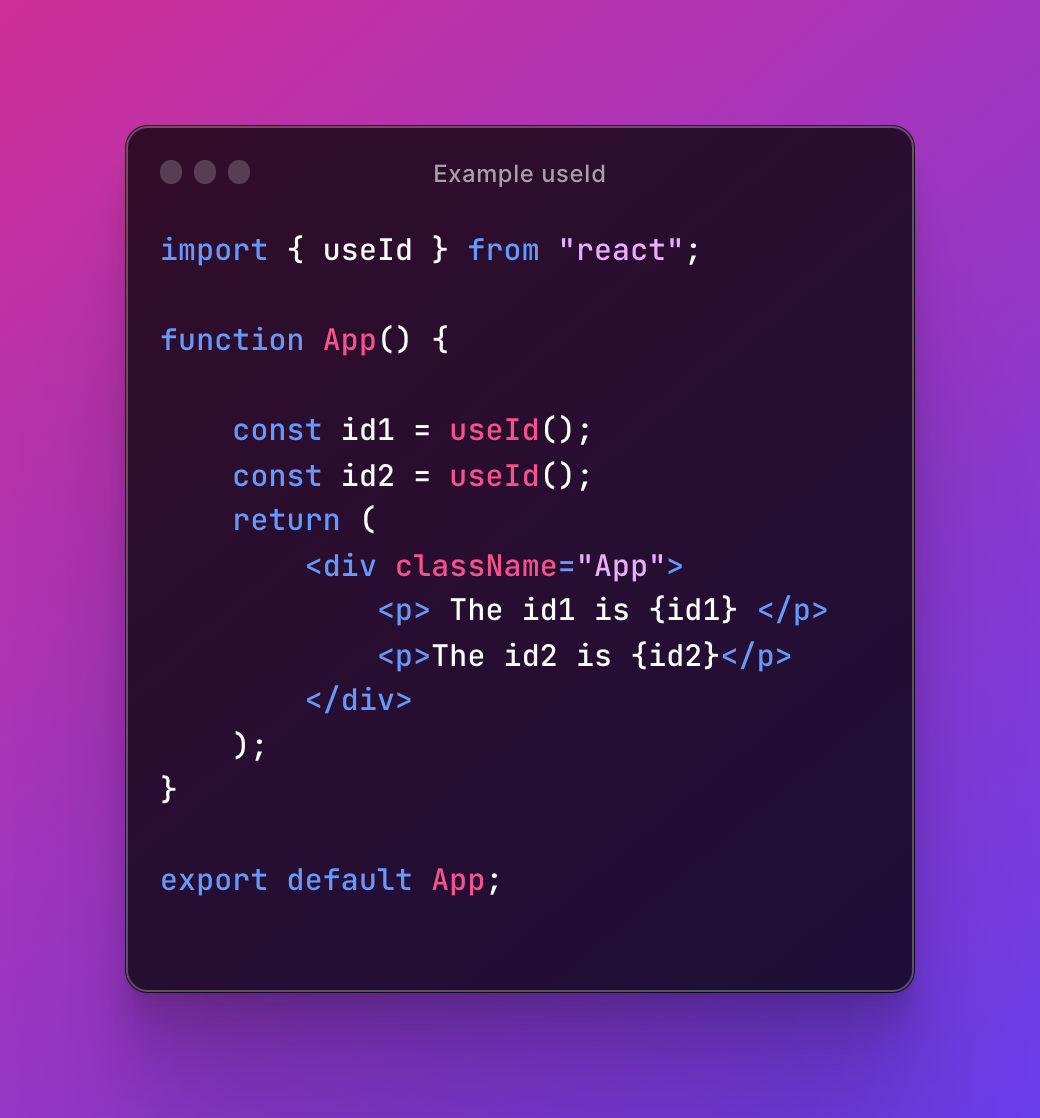
In the above example, we are using
useIdhook in id1 and id2 which means that we are storing unique id values in id1 and id2. We are importinguseIdhook from React.By using
<p>tag we will display the unique generated ids which we have generated usinguseIdhook.
useContext and Prop Drilling
If you are building some apps with less complexity then you should use
useContexthook rather thanReduxwhich is a state management tool.So, now you will ask what is
useContexthook. Let's talk aboutuseContexthook then, is basically a built-in React hook that is used to manage state globally.You, know there was a problem before the introduction
useContextwhich was, state should be held by the highest parent component in the stack that requires access to the state.To illustrate, we have many nested components. The component at the top and bottom of the stack need access to the state.
To do this without Context, we will need to pass the state as "props" through each nested component. This is called "prop drilling".
This is what it basically looks like :
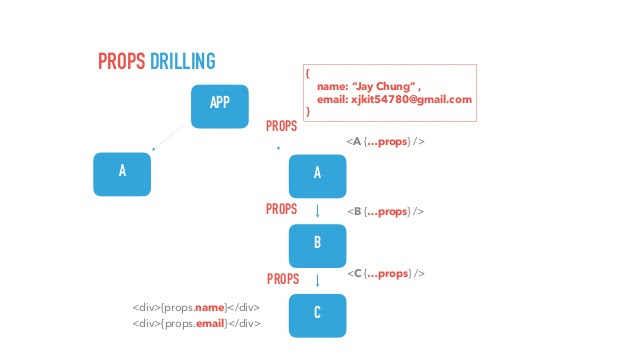
In the above image, data is passed as a prop from parent to child to sub-child and so forth components. So, it is very difficult to pass data from 3 levels or more using props and so React folks came up with a solution and
useContexthook was introduced.I hope that you would have understood about "Prop Drilling" and the reason for the introduction of
useContexthook.Let's see what is
useContexthook in a bit detail with its syntax and real-life example.useContexthook is a way to manage state globally. It can be used together with theuseStateHook to share state between deeply nested components more easily than withuseStatealone.Syntax :
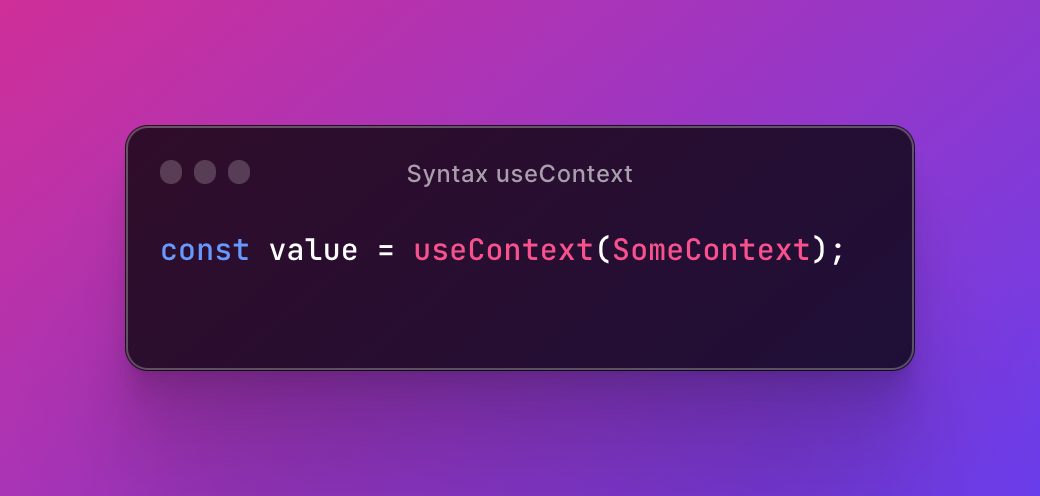
Now, let us see a real life example of
useContexthook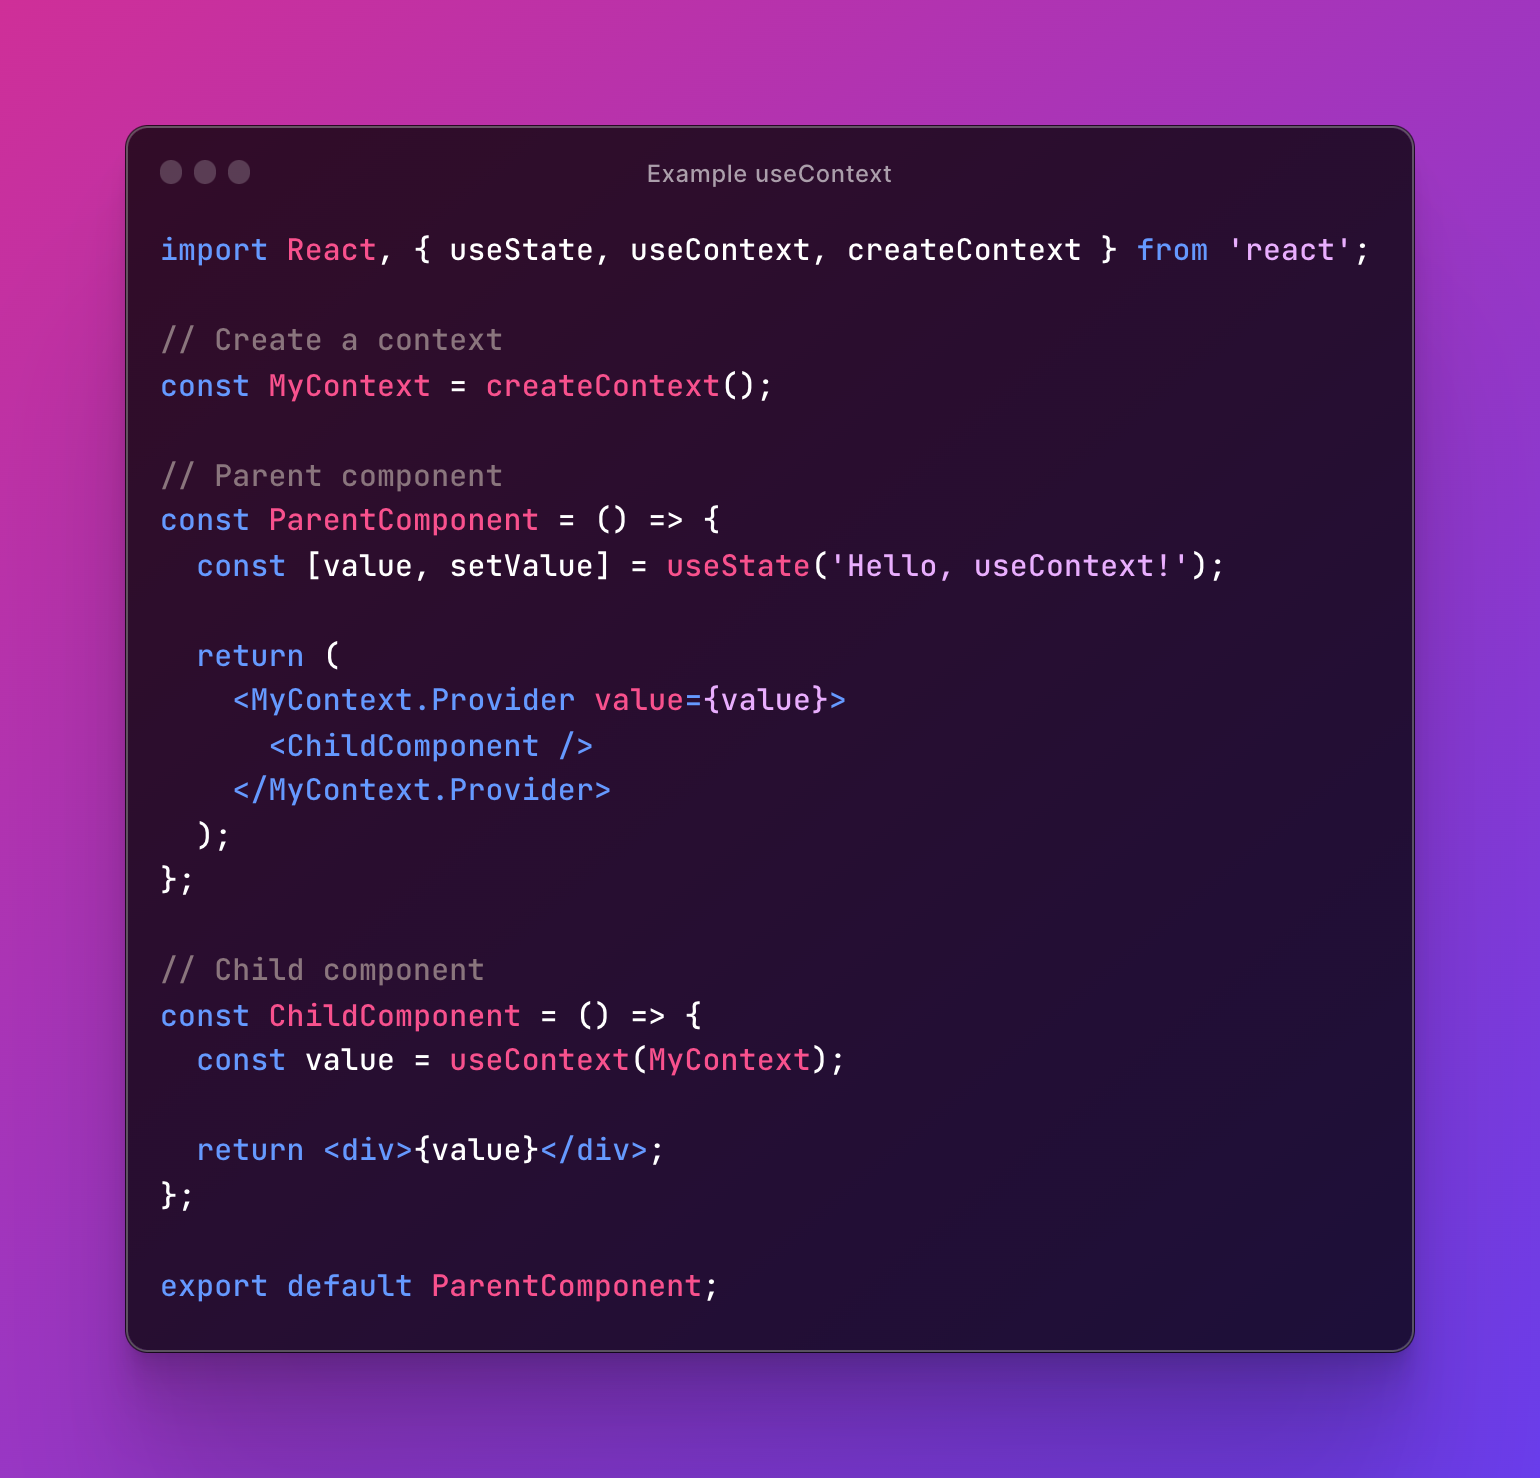
In this example, we create a context using
createContext(), and then use theuseContexthook in theChildComponentto access the value provided by theParentComponentthrough theMyContext.Provider.
Now, let us discuss some of the less-used Hooks (For Beginners)
useMemo
A
useMemohook is a built-in React hook that accepts 2 arguments - a functioncomputethat computes a result, and thedependenciesarray: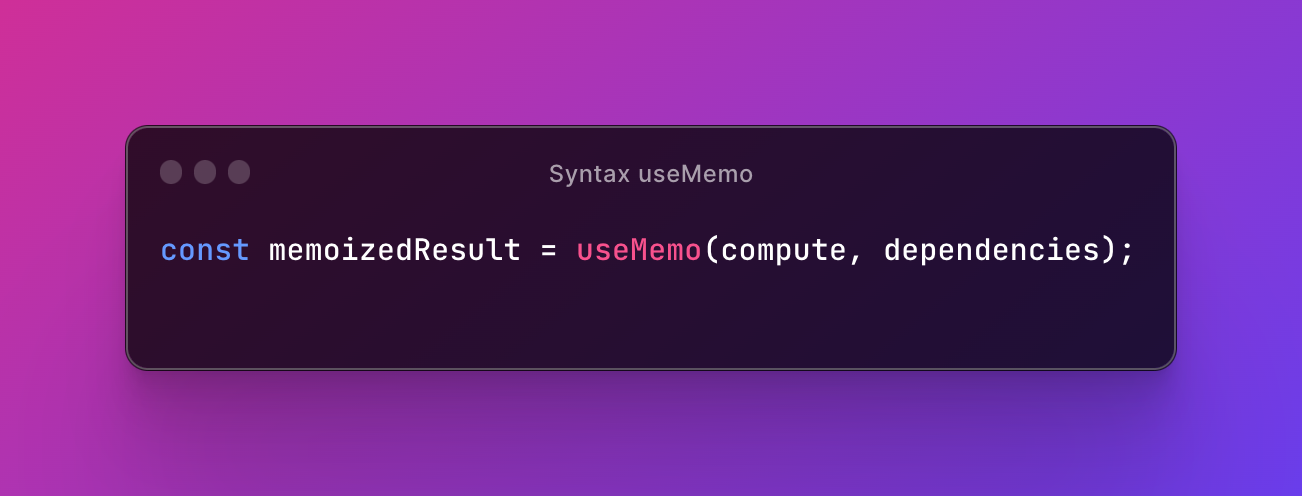
During initial rendering,
useMemo(compute, dependencies)invokescompute, memoizes the calculation result, and returns it to the component.If the dependencies don't change during the next renderings, then
useMemo()doesn't invokecompute, but returns the memoized value.But if the dependencies change during re-rendering, then
useMemo()invokescompute, memoizes the new value, and returns it.That's the essence ofuseMemo()hook.Let us understand
useMemohook now with a real-life example:
The code demonstrates the use of the
useMemohook in a React application. It calculates the product of two state variables,numberandmultiplier, and only updates the result when either of these values changes. This is achieved by wrapping the calculation in theuseMemohook, which takes a function and an array of dependencies. By doing so, it optimizes performance by preventing unnecessary recalculations.
Now, let us move forward and discuss about the last hook of this blog.
useCallback
The
useCallbackhook is used when you have a component in which the child is rerendering again and again without need.By passing an inline callback and an array of dependencies.
useCallbackwill return a memoized version of the callback that only changes if one of the dependencies has changed. This is useful when passing callbacks to optimized child components that rely on reference equality to prevent unnecessary renders.Syntax :
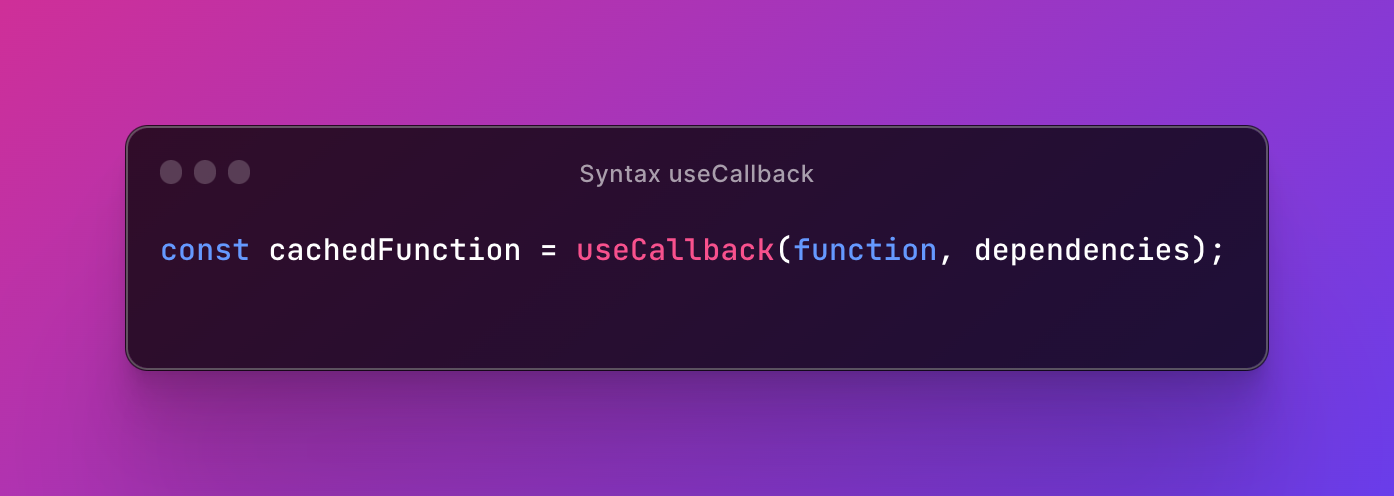
So, now let us see what I am trying to talk about with a real-life example.
In this example, we will create a counter. Firstly, we will do it without using
useCallbackhook and try to understand the problem that we will be facing and then later we will make a counter usinguseCallbackhook.So, let us try it without
useCallbackhook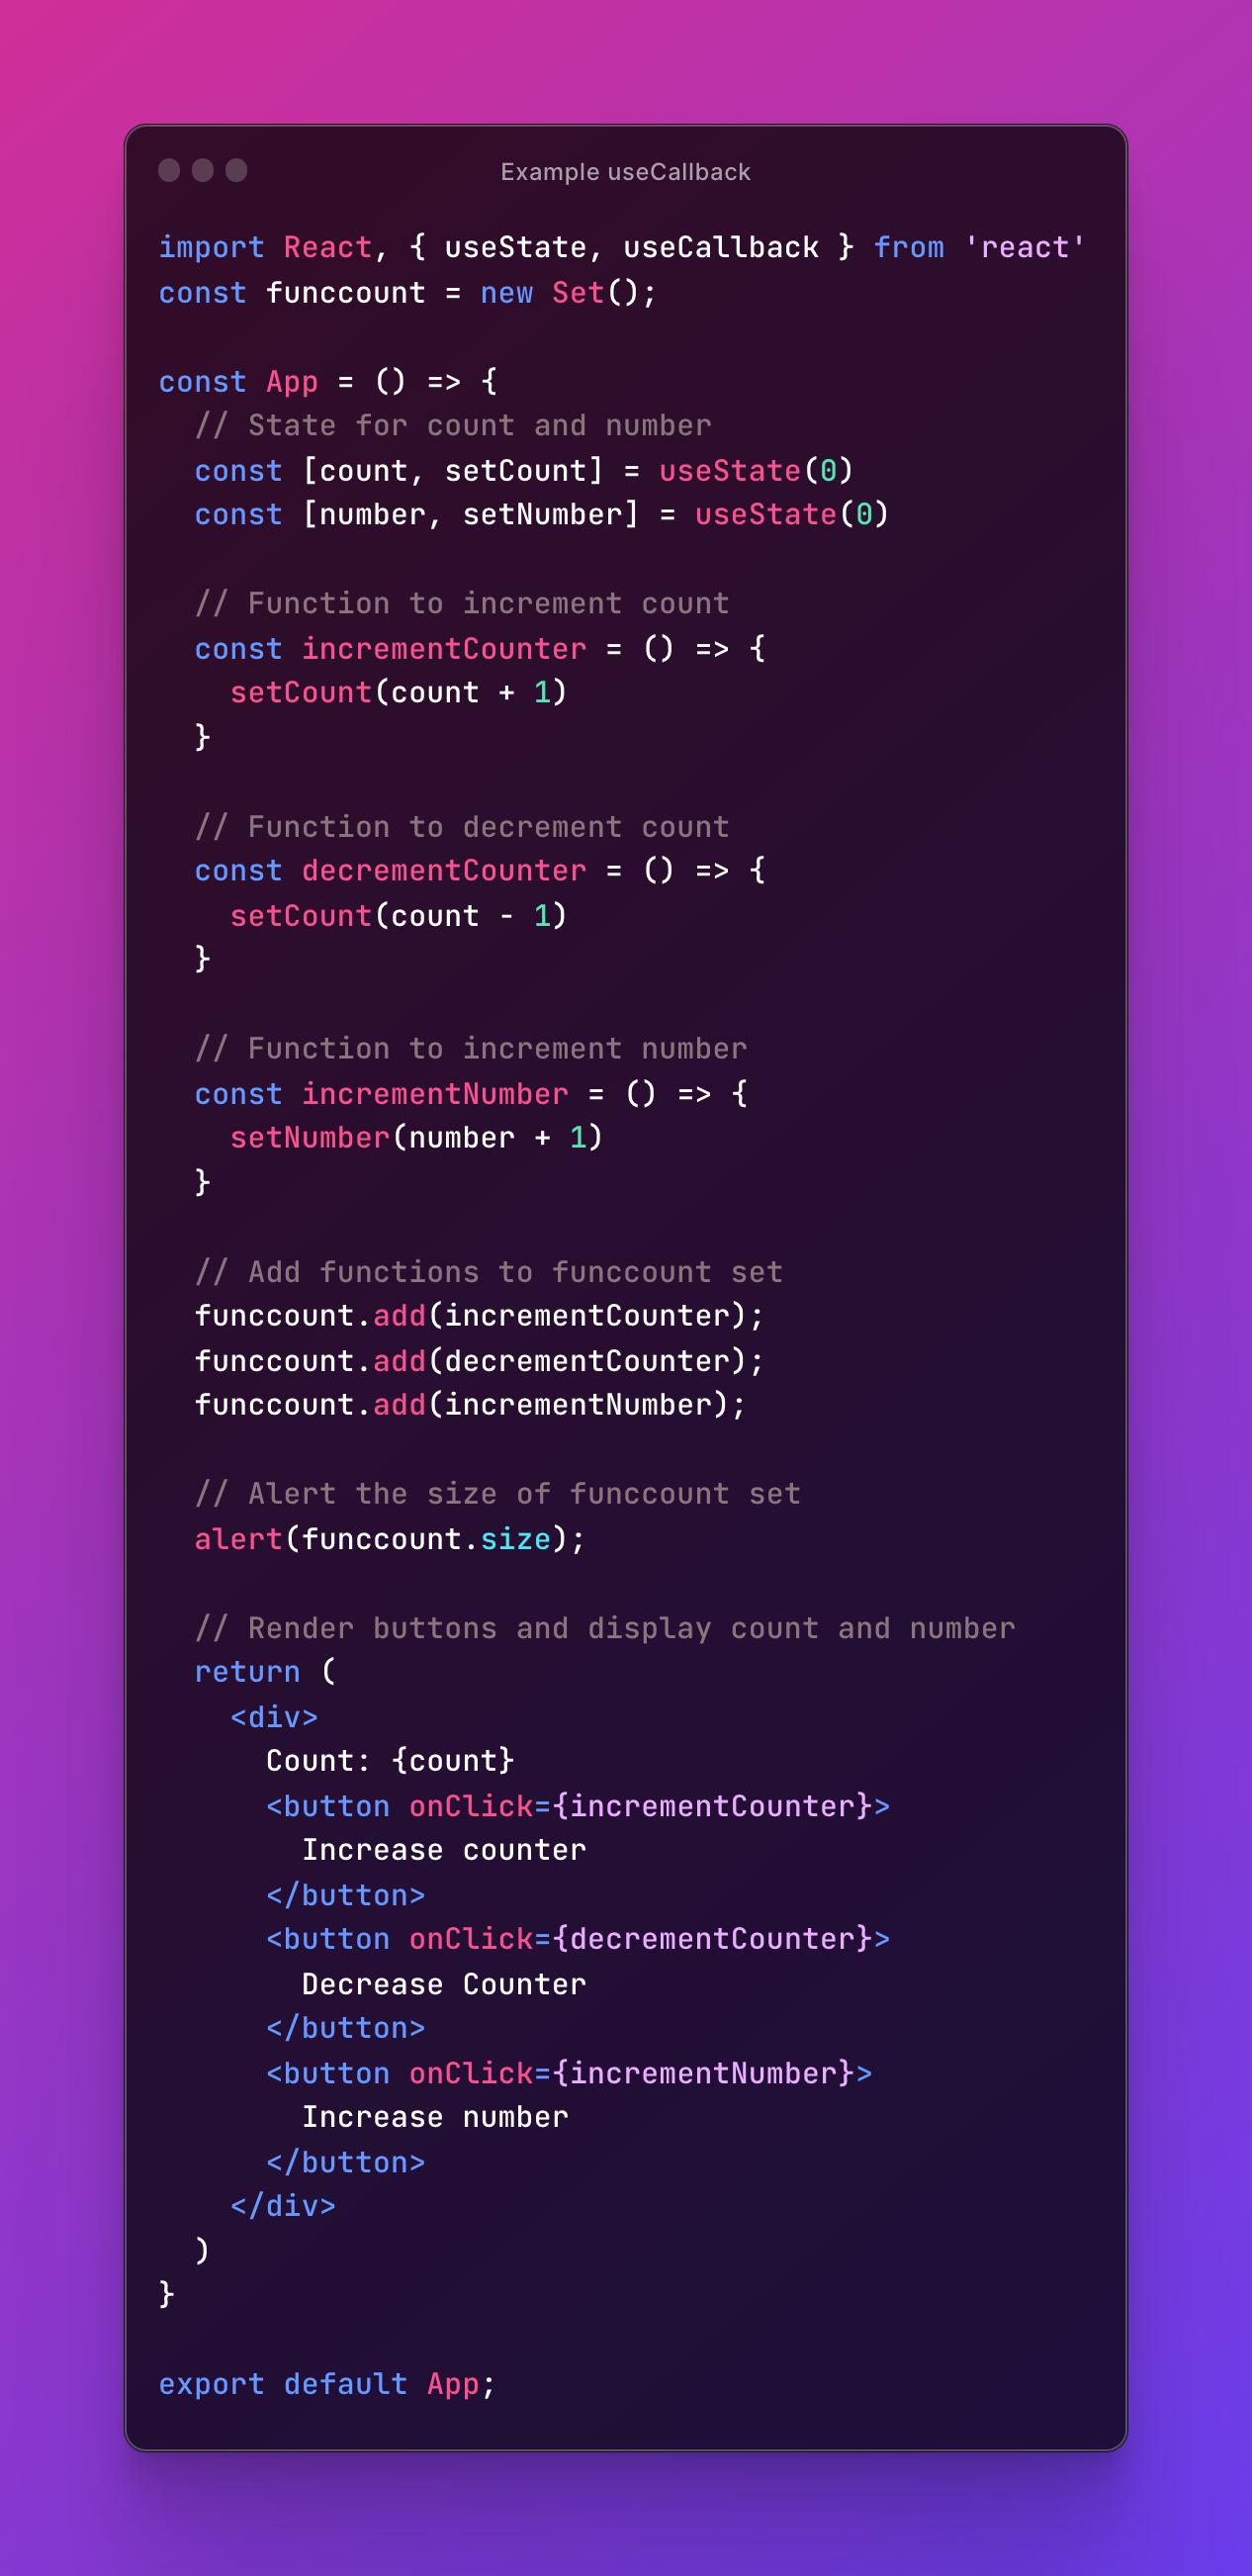
The code is a simple React app that maintains two state variables,
countandnumber. It has three buttons to increment thecount, decrement thecount, and increment thenumber. The functions responsible for these operations are added to a set calledfunccount, and the size of the set is alerted.So, you might be thinking what is the problem with the code? Let me explain what is the problem first and then tell you why we are using
useCallbackhook.So, the problem is that once the counter is updated, all three functions are recreated again. The alert increases by three at a time but if we update some states all the functions related to that states should only re-instantiated. If another state value is unchanged, it should not be touched. This affects the performance of the React Application.
So, to solve this issue we are using
useCallbackhook.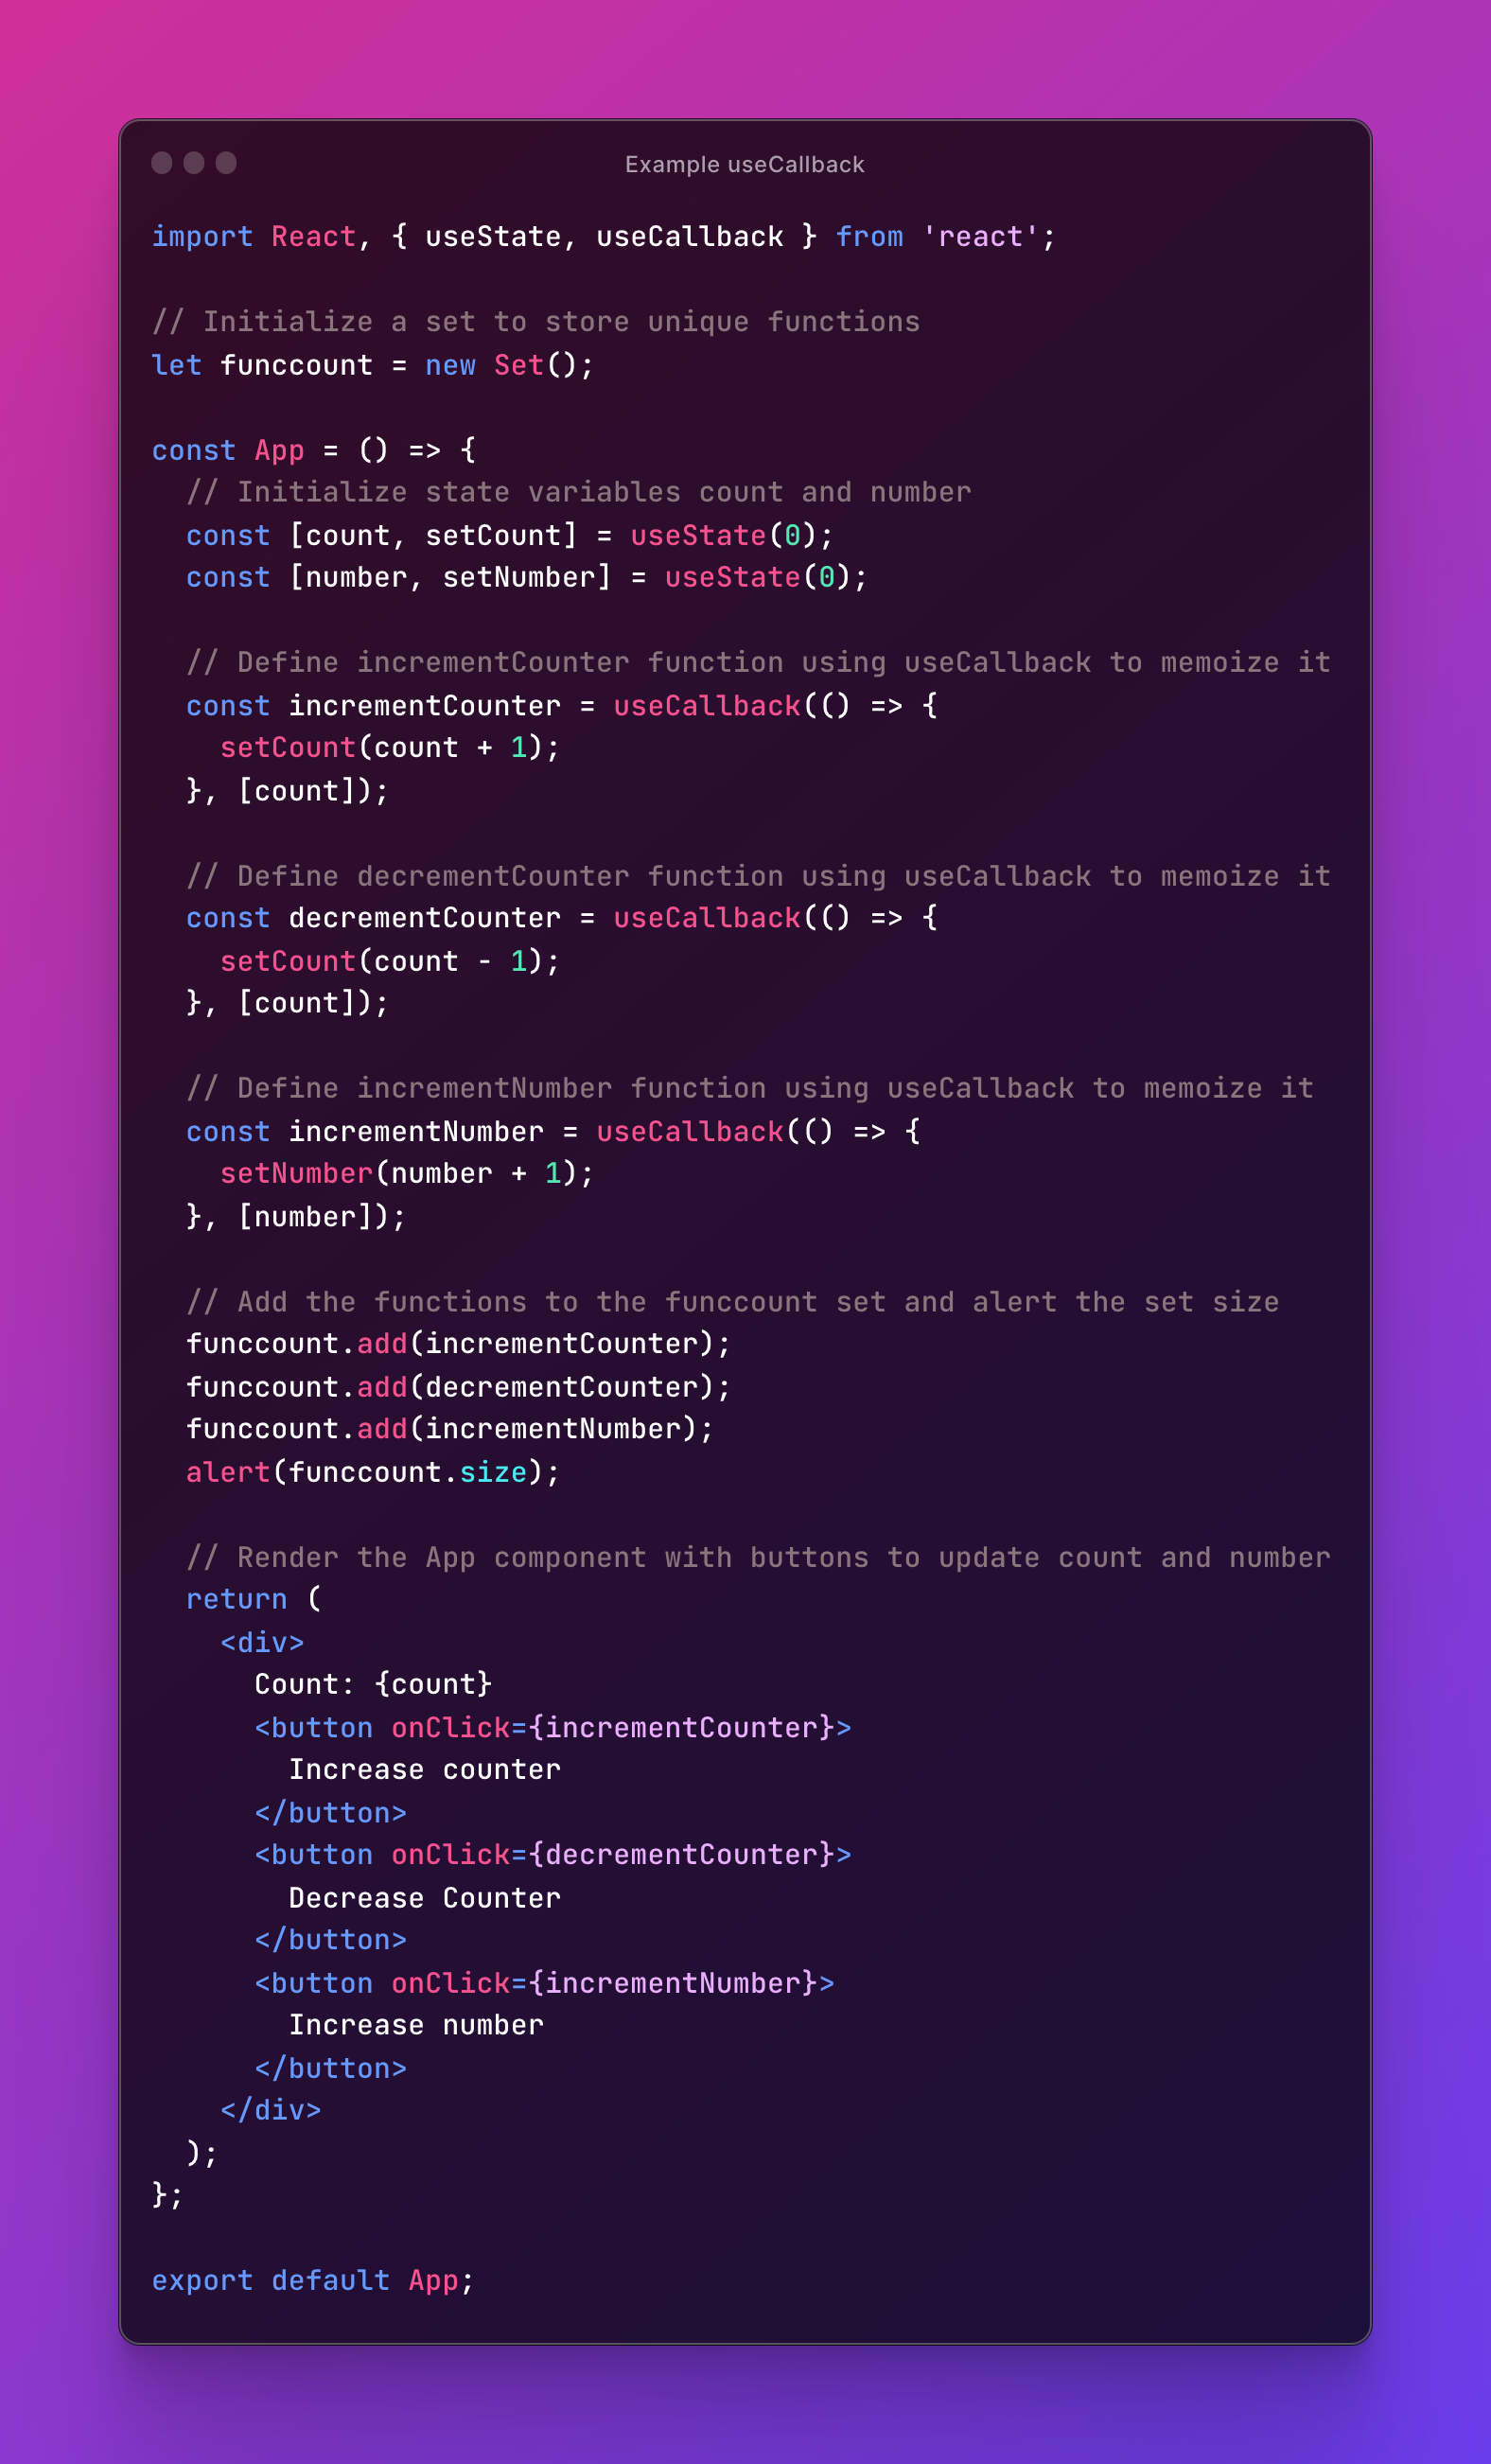
The above code has two state variables,
countandnumber. It has three buttons to increment thecount, decrement thecount, and increment thenumber. The functions responsible for these operations are memoized using theuseCallbackhook to prevent unnecessary re-rendering and improve performance. The unique functions are added to thefunccountset, and the set size is alerted to indicate the number of unique functions.So, this is the reason, why we should use
useCallbackhook.
The two hooks that we discussed above i.e. useMemo and useCallback are more of performance enhancement hooks than essential hooks like useState , useEffect , useReducer , useTransition , useId and useContext hooks. These are all the essential hooks that a beginner in React should learn and know when and how to apply it when building a React Application.
Conclusion
In conclusion, React Hooks are crucial for simplifying and enhancing the development process for React applications. By mastering essential hooks like useState, useEffect, useReducer, useTransition, useId and useContext, you can create more efficient and maintainable applications. Additionally, performance enhancement hooks like useMemo and useCallback can further optimize your projects, ensuring a smooth user experience. Invest time in learning and practising these hooks to elevate your React development skills.
That concludes this article!
**Hope this blog was helpful, interesting and insightful. See you in the next one!**😁
Bye 👋 and Stay Happy 😄!
Subscribe to my newsletter
Read articles from Vishrut Agarwalla directly inside your inbox. Subscribe to the newsletter, and don't miss out.
Written by

Vishrut Agarwalla
Vishrut Agarwalla
Focused and goal-oriented Engineer with some Experience (0.5 months) in the tech industry with a keen interest in Web Development and Design. Actively seeking an entry-level opportunity to hone my existing skills and learn new ones in the field of work.