Deploy Static Website in Azure
 Ritul Gupta
2 min read
Table of contents
- Step-1 In the Azure portal, click the "Create a resource" button and search for "ASP.NET Core Web App."
- Step-2 Search for "App Services."
- Step-3 In the "Basics" tab of the "Create web app" dialog, specify the app name, subscription, resource group, and runtime stack. For a static website, you can choose the "ASP.NET" stack.
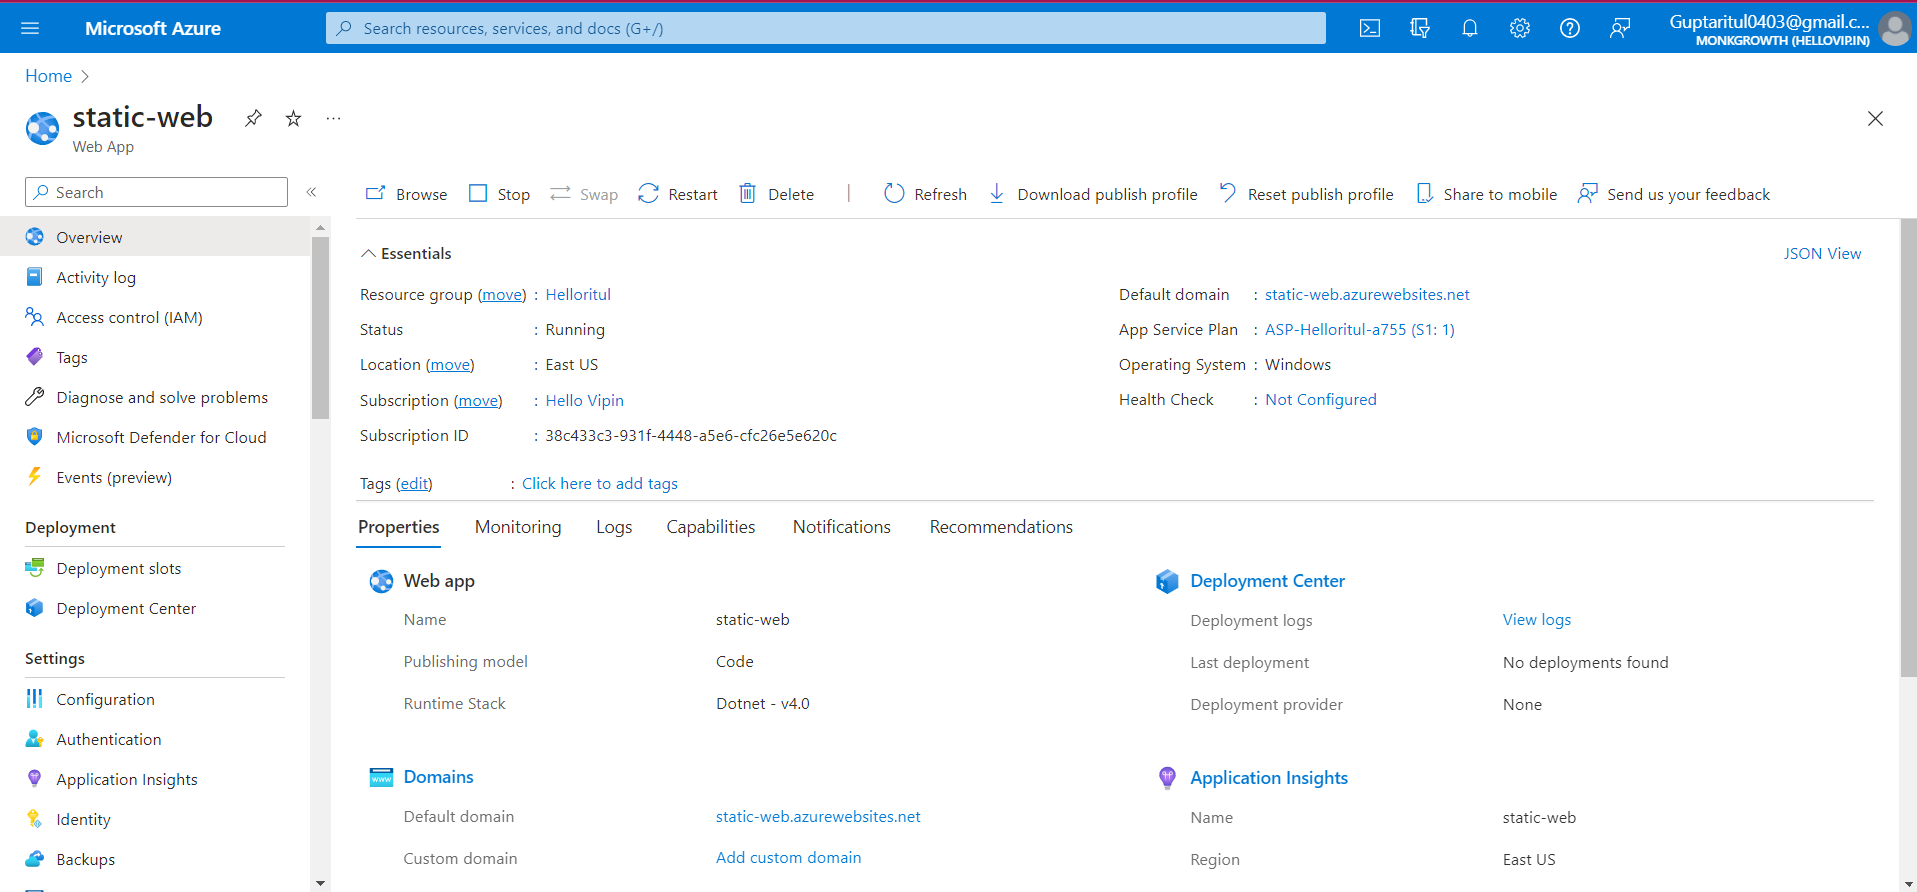
- Step-4 Once the "web app" is created copy the "Default domain"
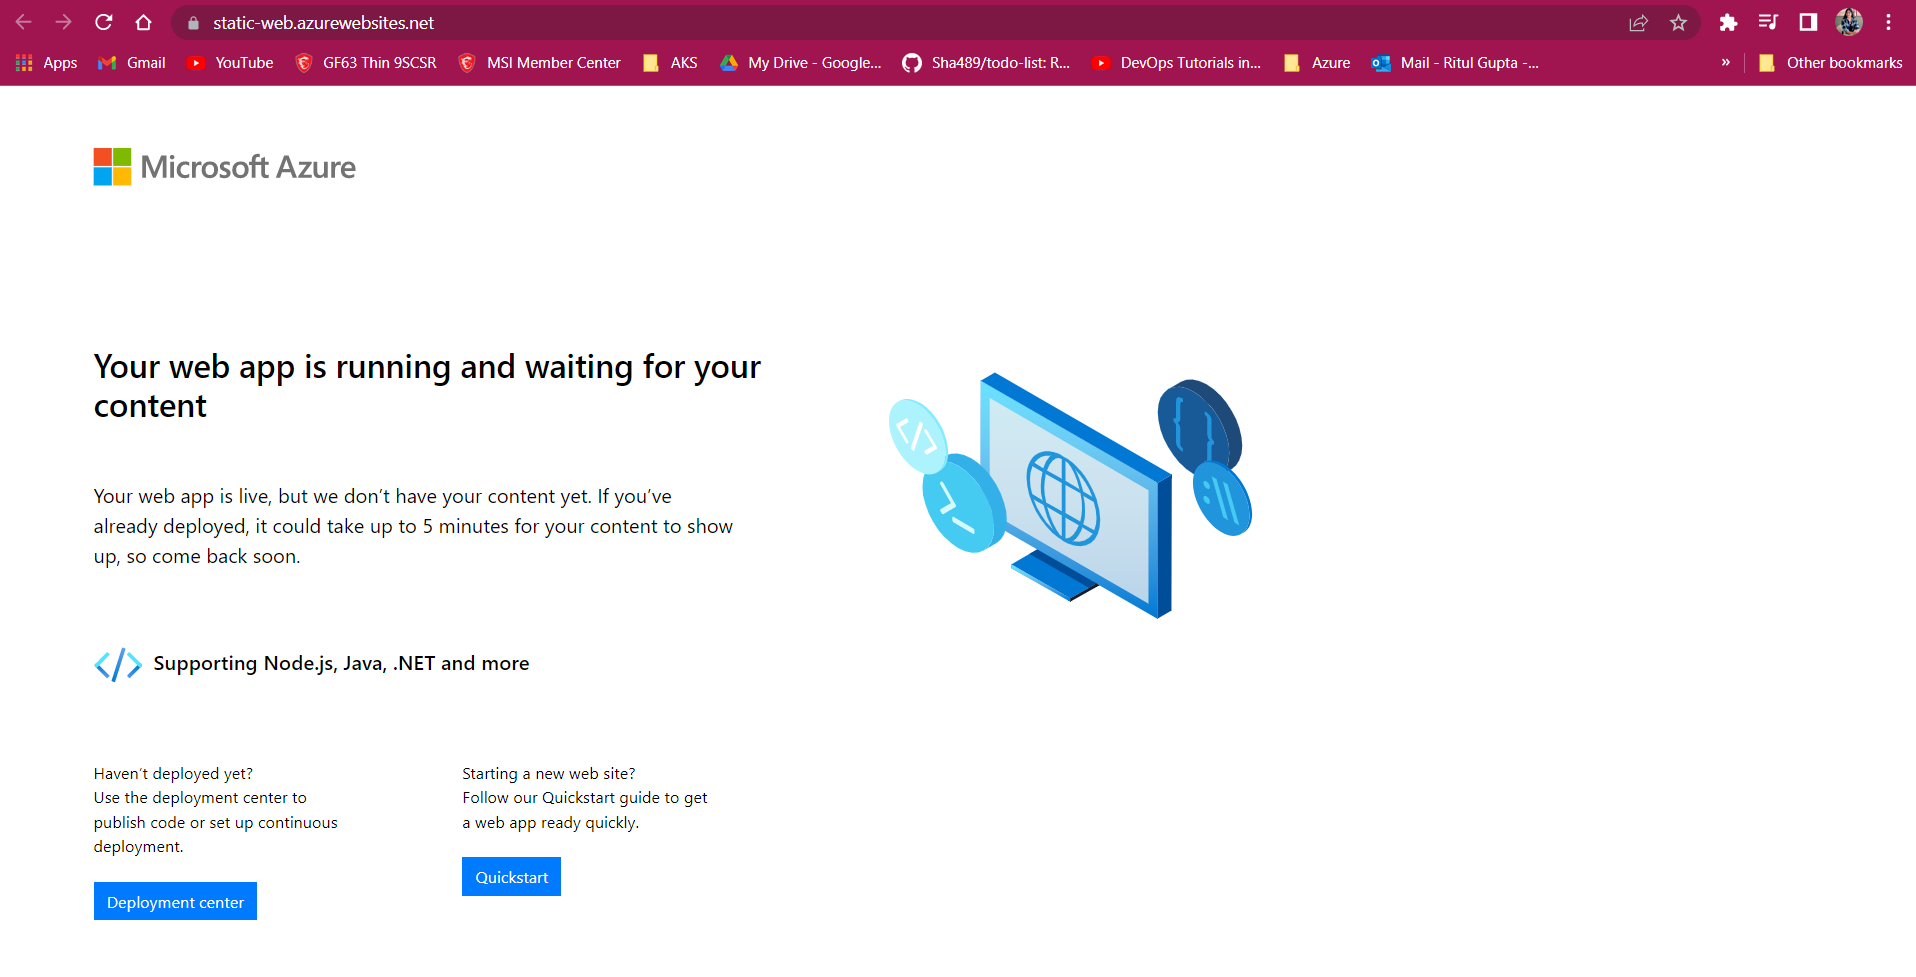
- Step-5 And Paste in the browser.
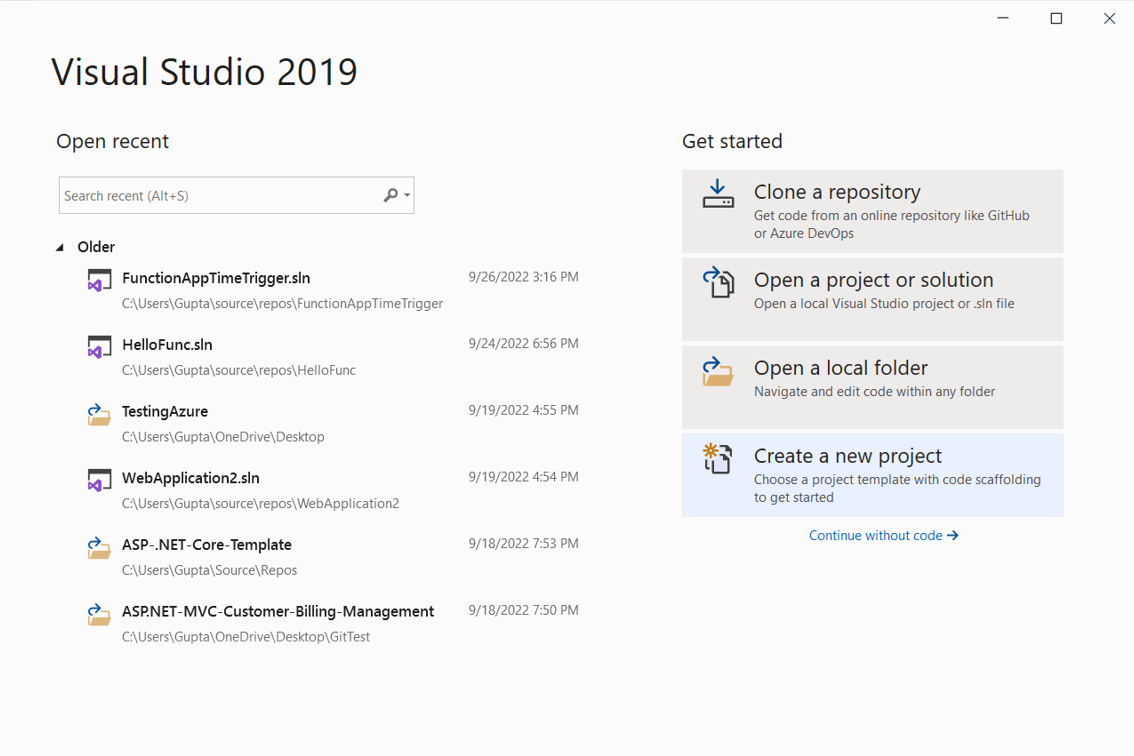
- Step-6 Go to "Visual Studio" and create a new project.
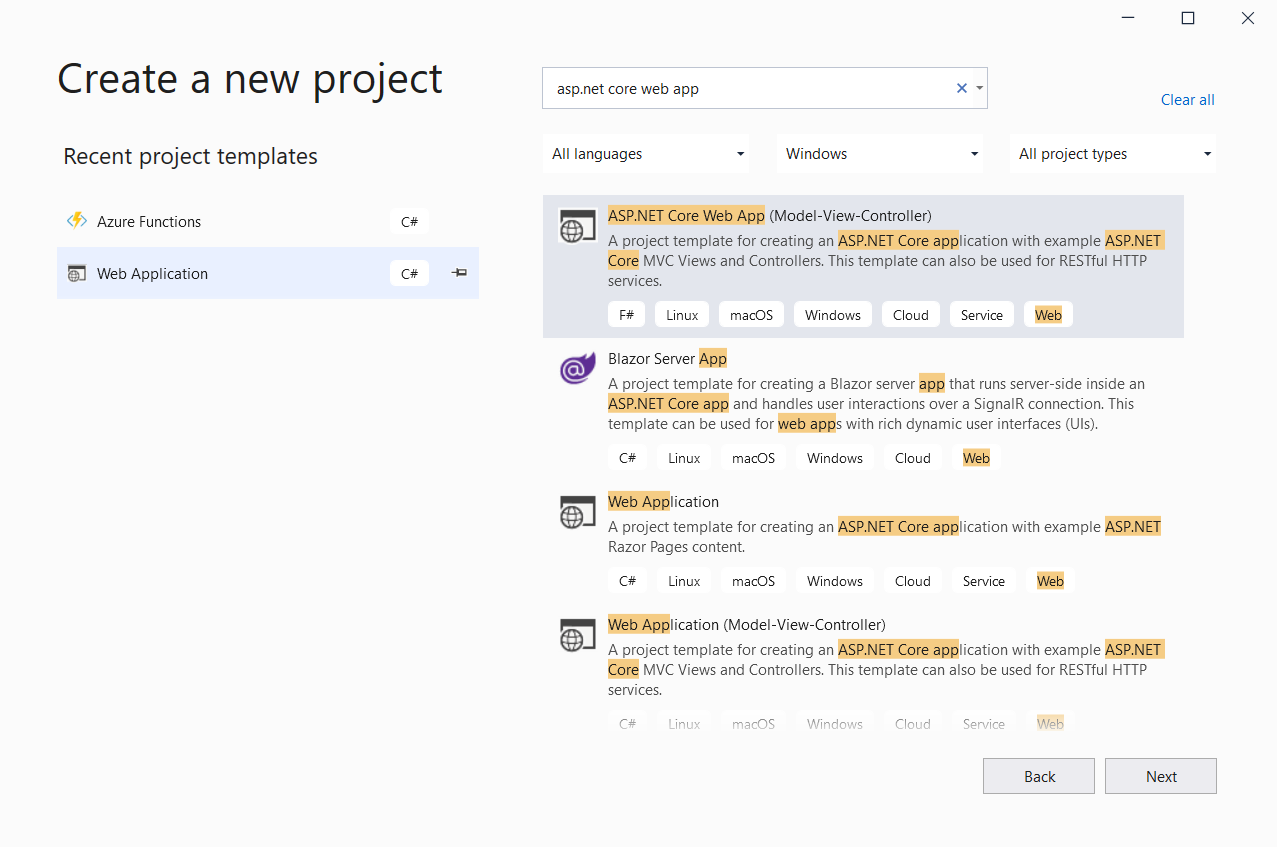
- Step-7 Create a new ASP.NET Core Web Application project in Visual Studio. Choose the "Static Web Site" template from the project templates list.
- Step-8 Follow the instructions for publishing.
- Note:- The version of .NET and the target framework version should be the same.
- Step-9 "IIS Express" should be clicked to run the code locally.
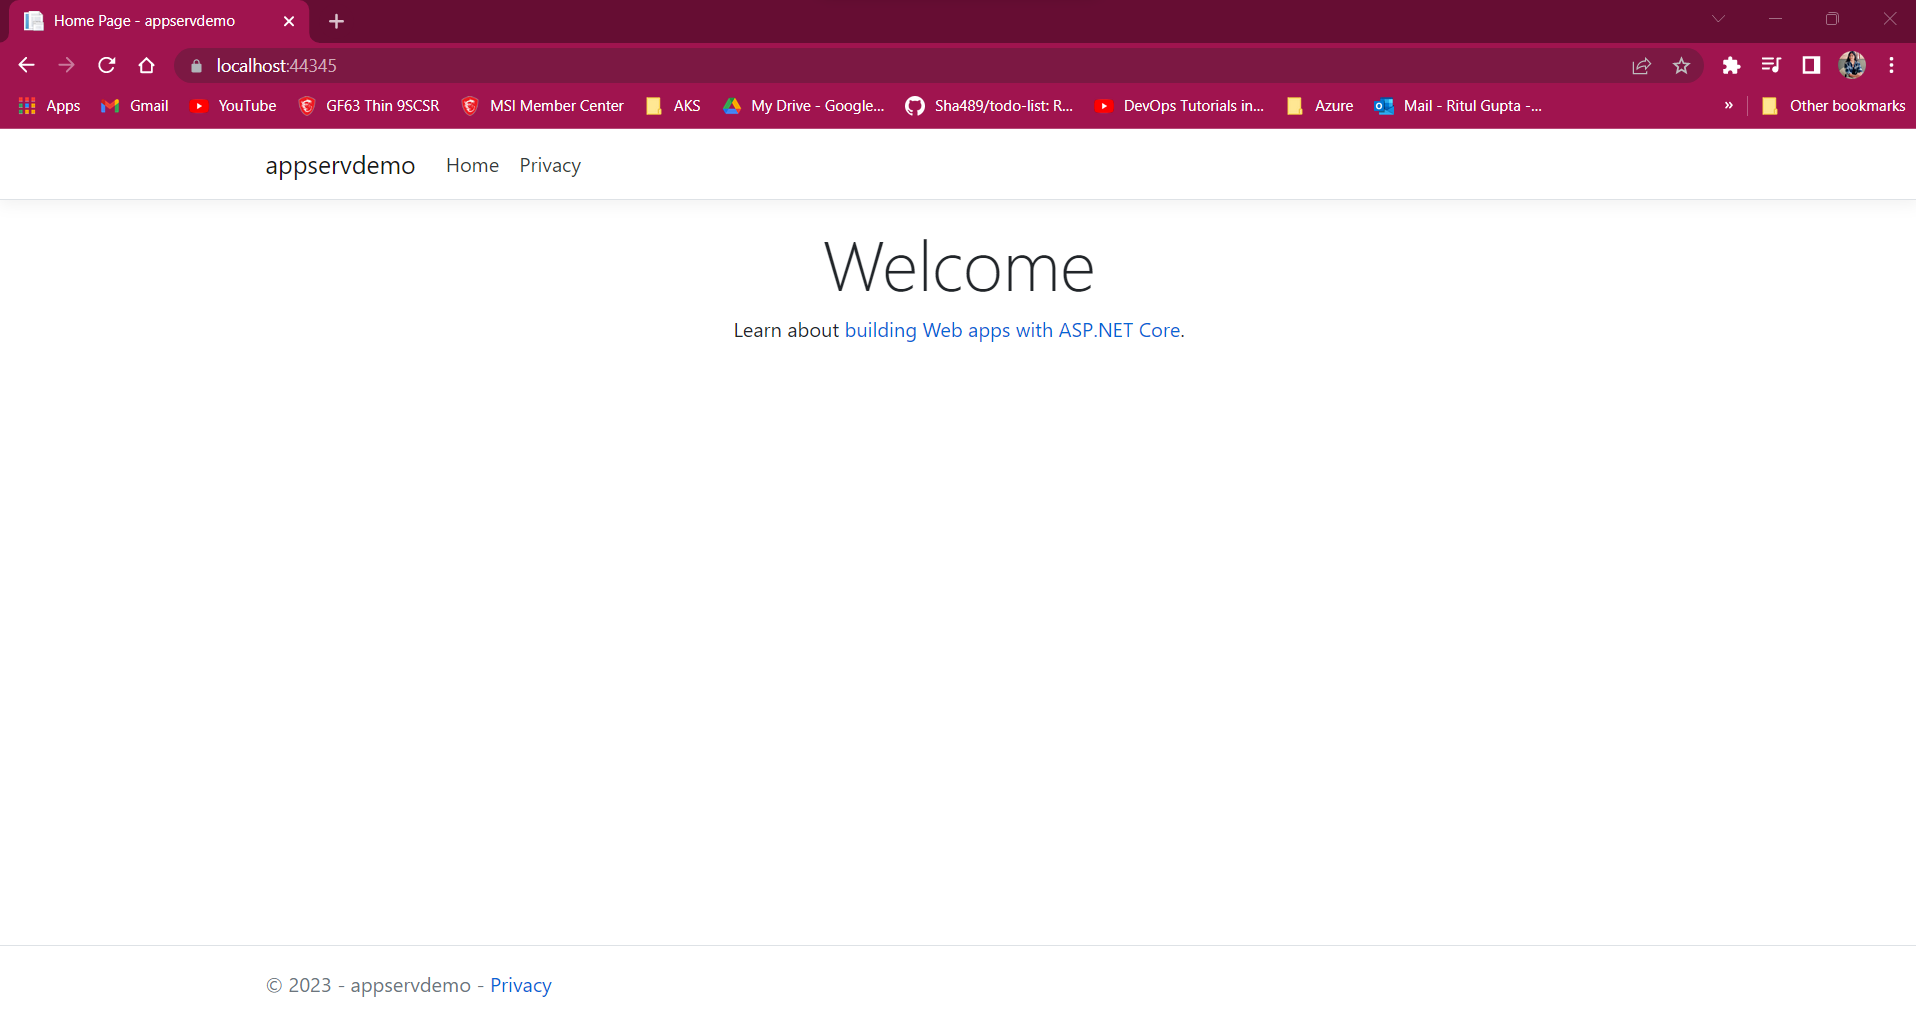
- Step-10 Copy the URL "localhost:44345" to access our code running locally.
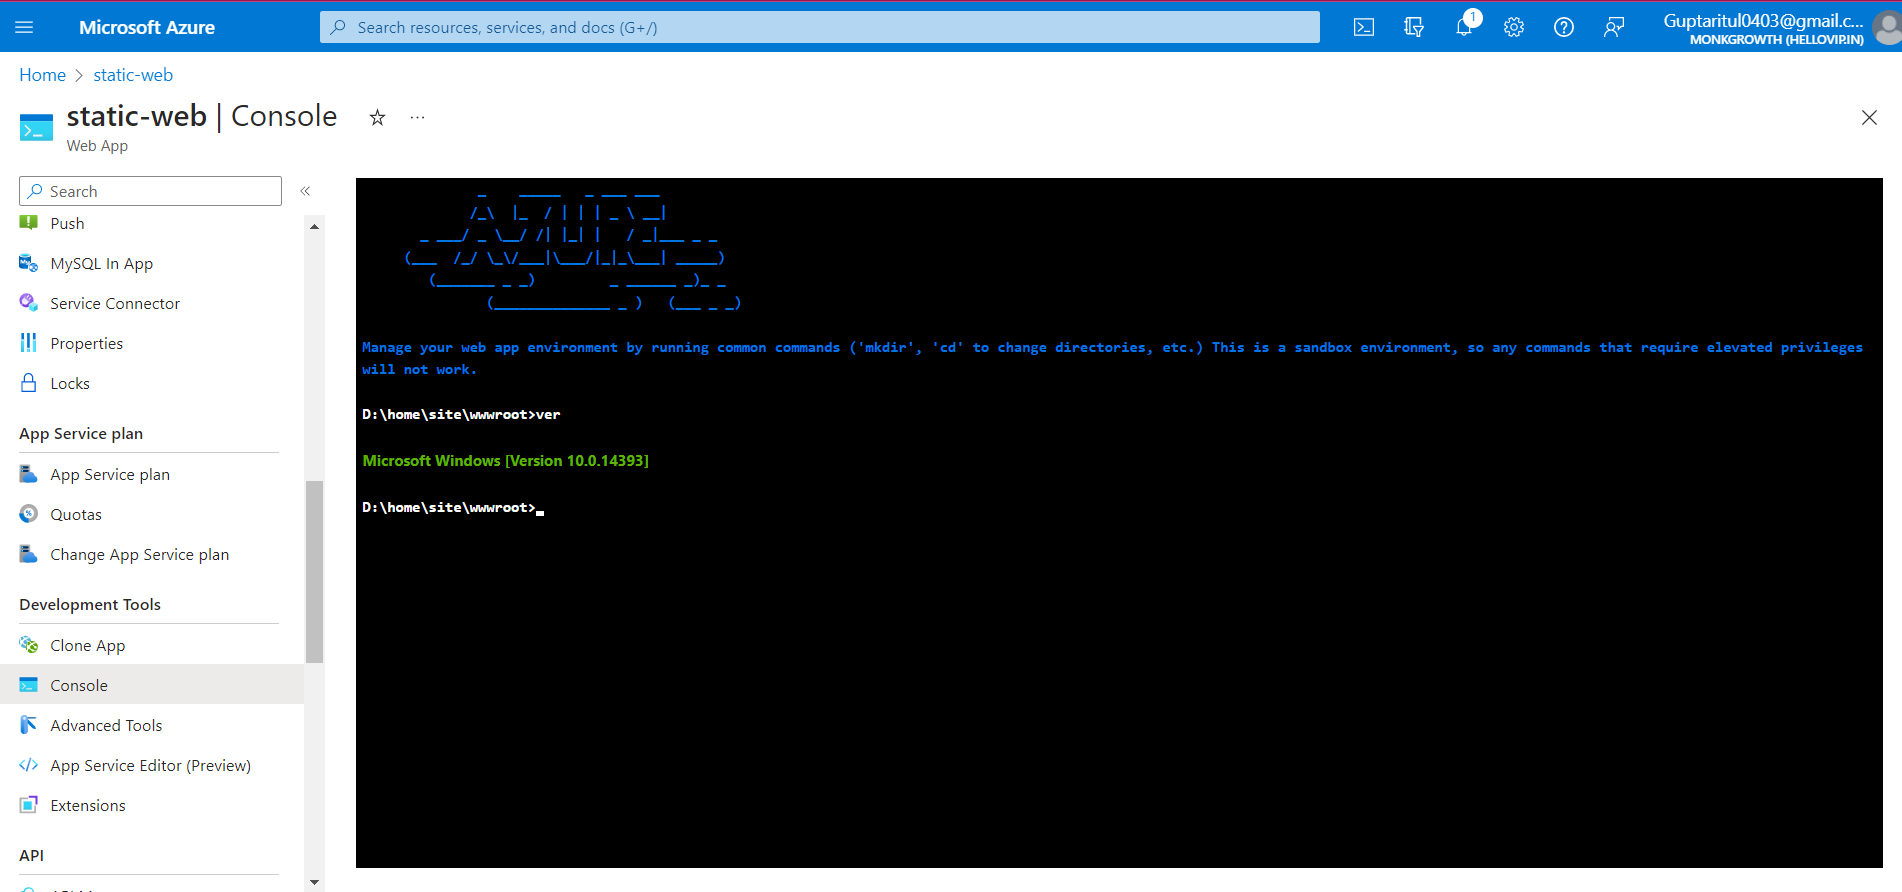
- Step-11 Once the project is created, right-click on the project in the Solution Explorer and select "Publish."
- Step-12 Checked the version of the Static Web App in the Azure portal console
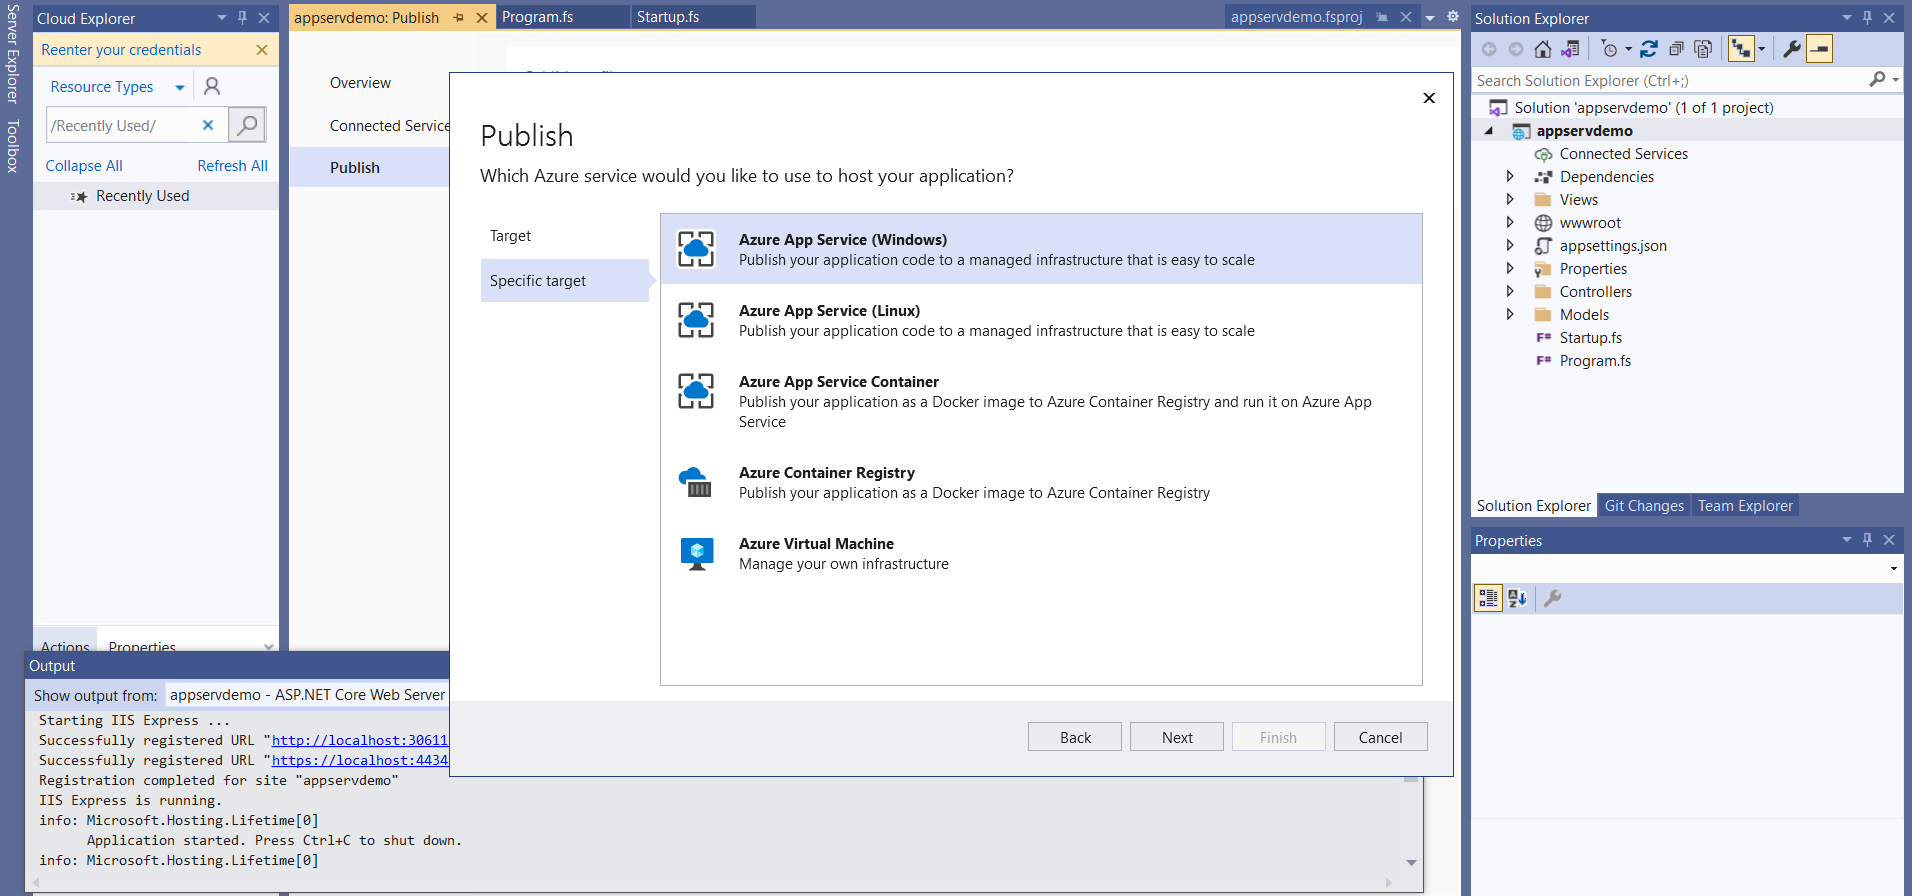
- Step-13 We will be deploying to a Windows platform, we need to select the Windows option.
- Step-14 In the Create Static Web App dialog, you'll need to specify a name for your app, choose the subscription you want to use, and select the resource group you want to deploy to.
- Step-15 After you've specified all the settings, click "Publish" to deploy your static website to Azure.
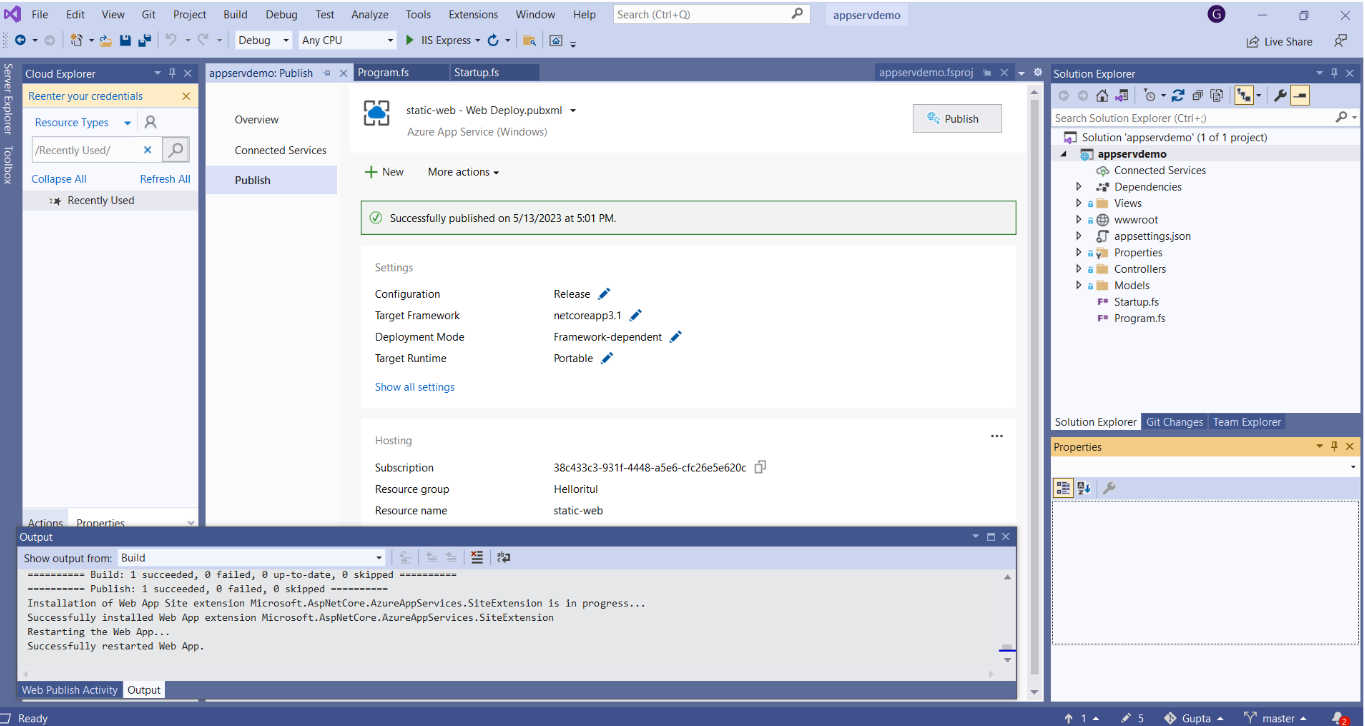
- Step-16 If the deployment process completes without any errors and the website is accessible, we can say that the deployment has been successfully published.
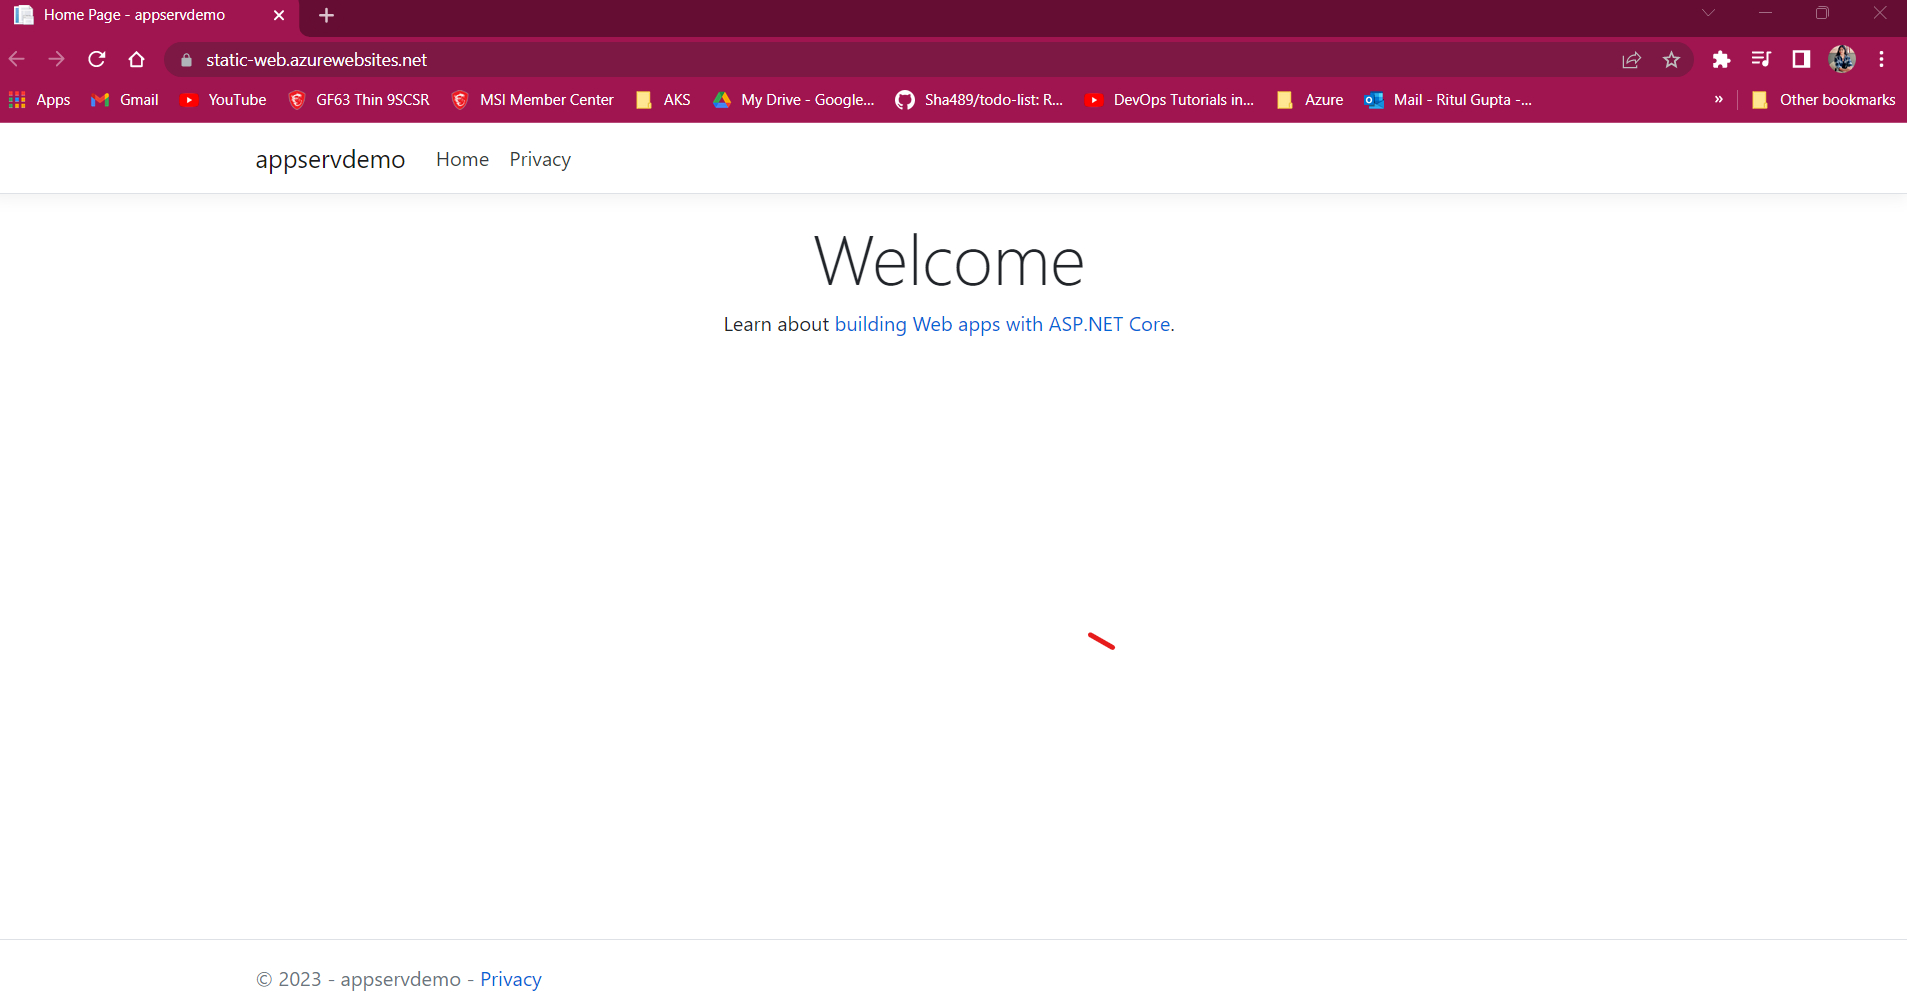
- Step-17 You can browse your website by clicking on the URL link in the Azure portal.
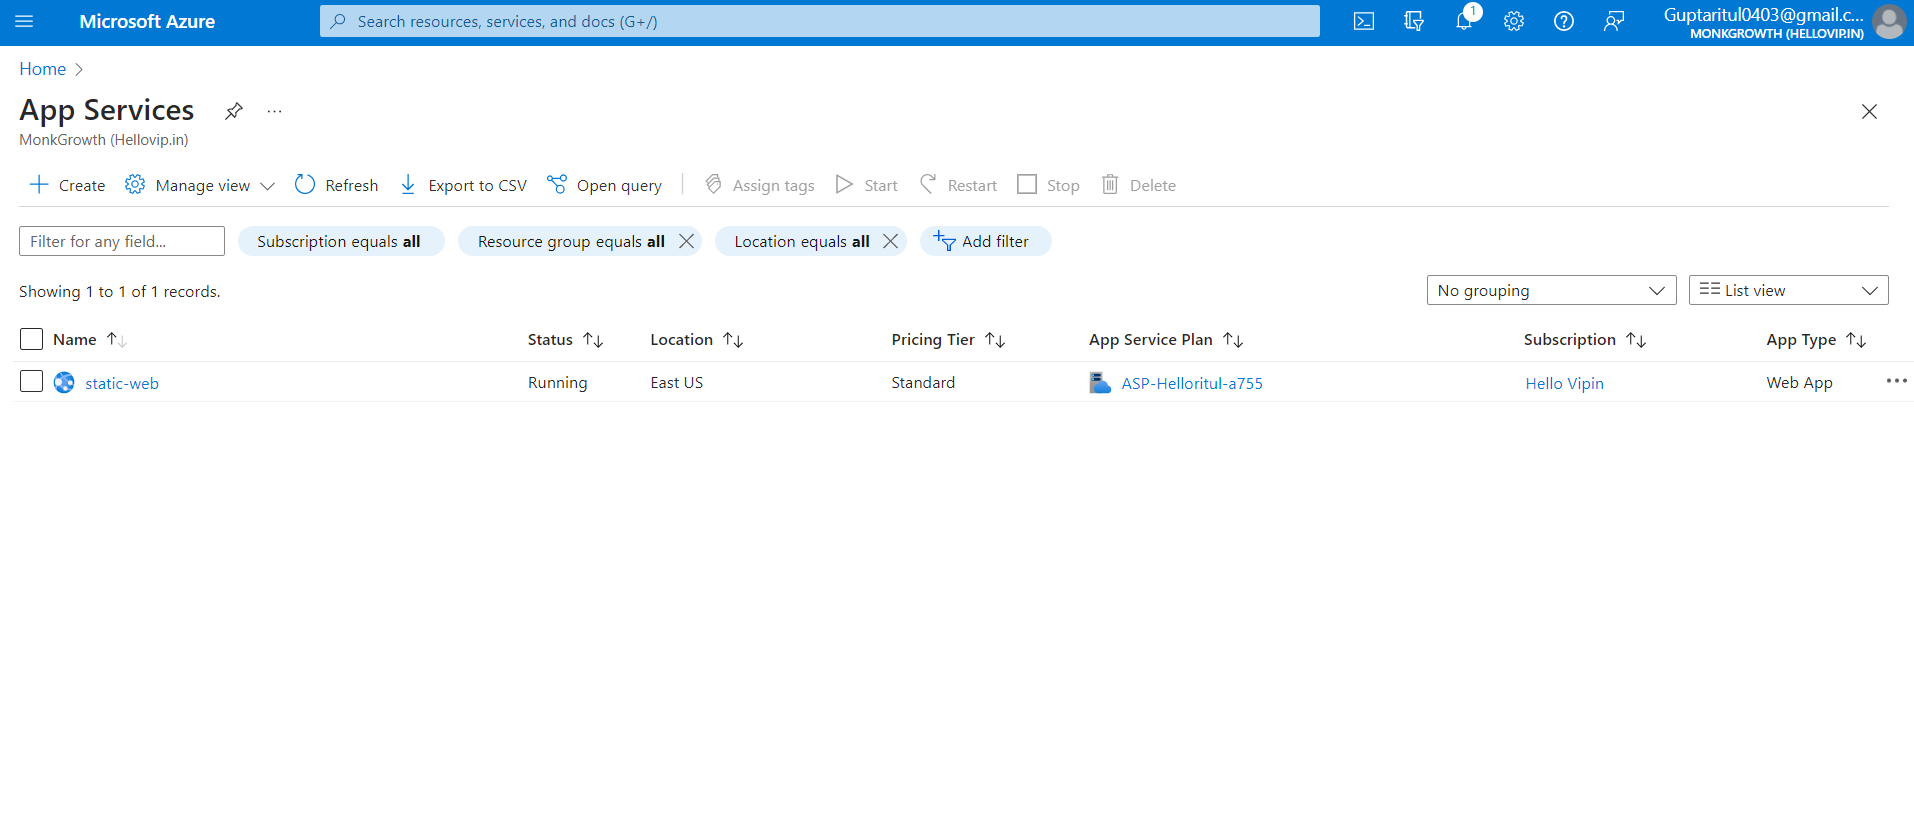
Step-1 In the Azure portal, click the "Create a resource" button and search for "ASP.NET Core Web App."
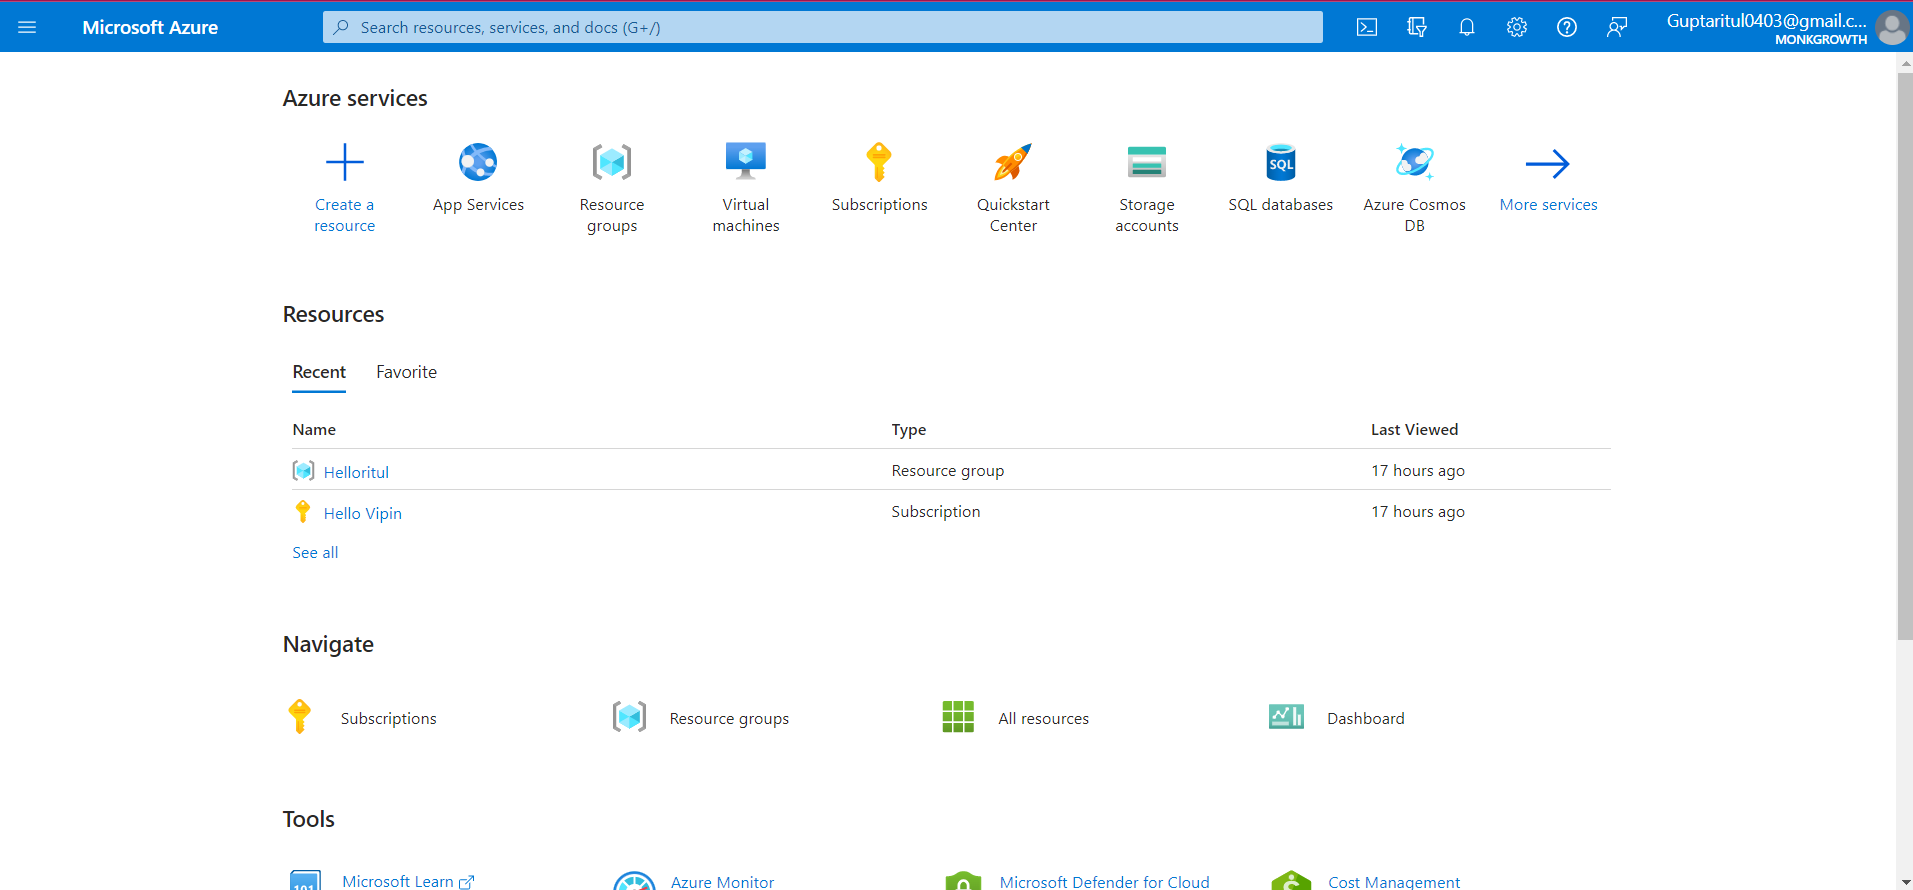
Step-2 Search for "App Services."
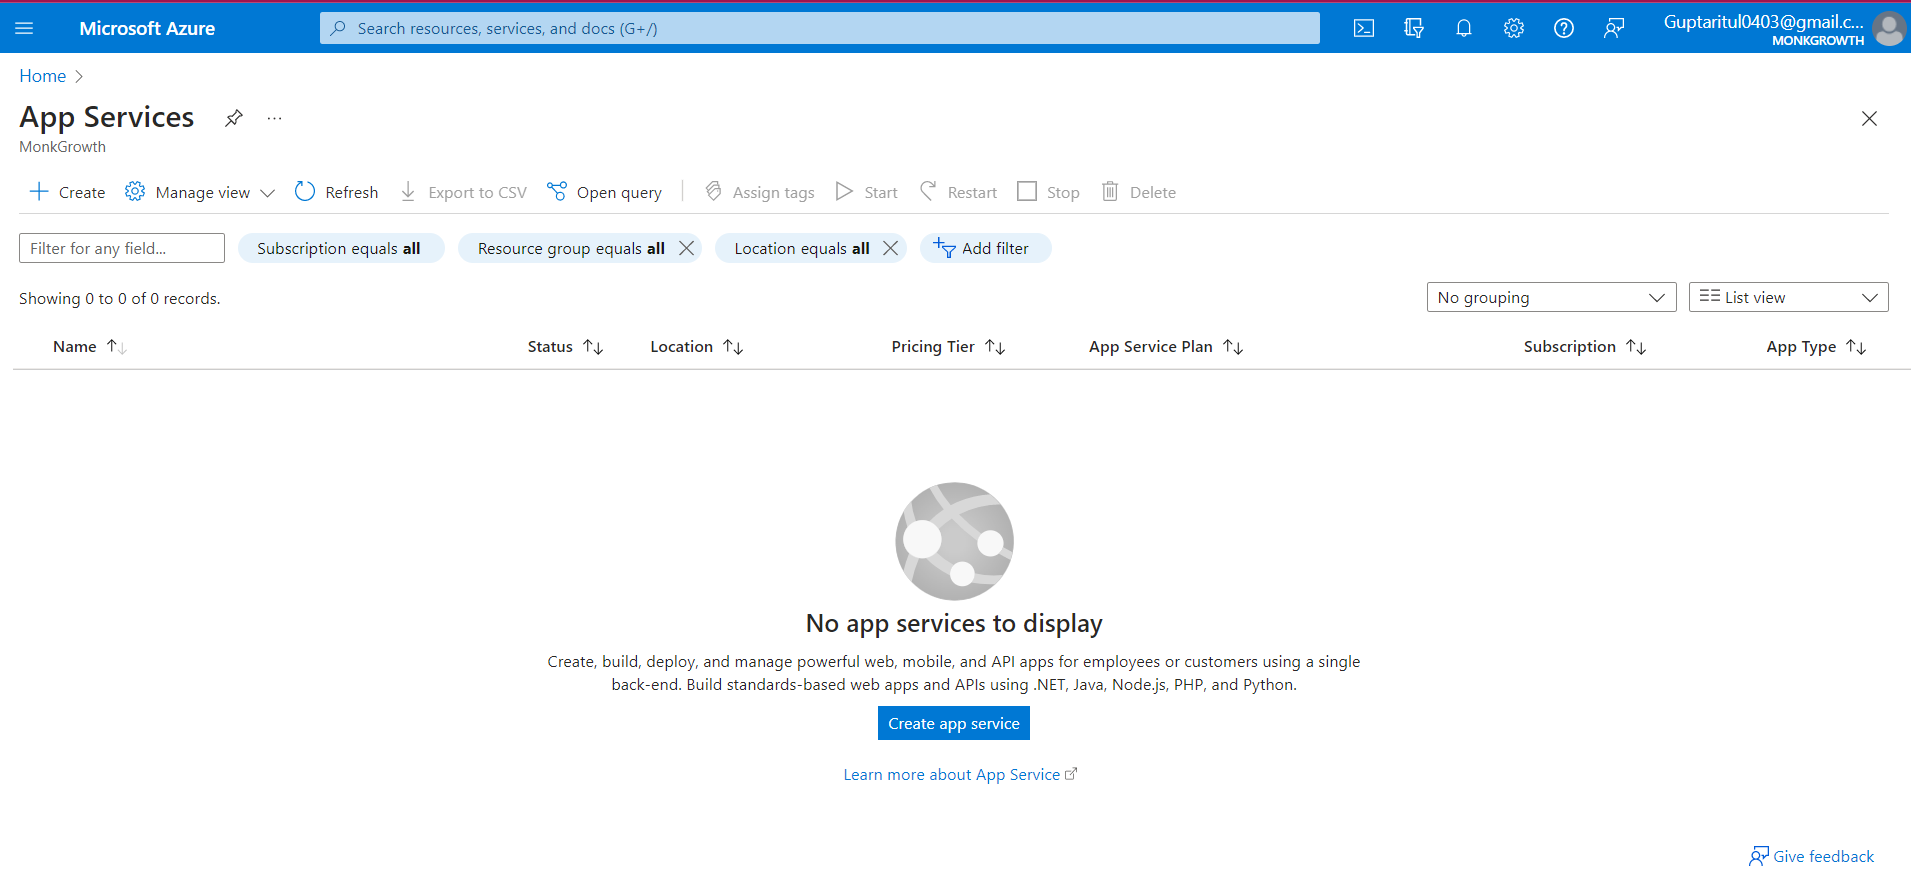
Step-3 In the "Basics" tab of the "Create web app" dialog, specify the app name, subscription, resource group, and runtime stack. For a static website, you can choose the "ASP.NET" stack.
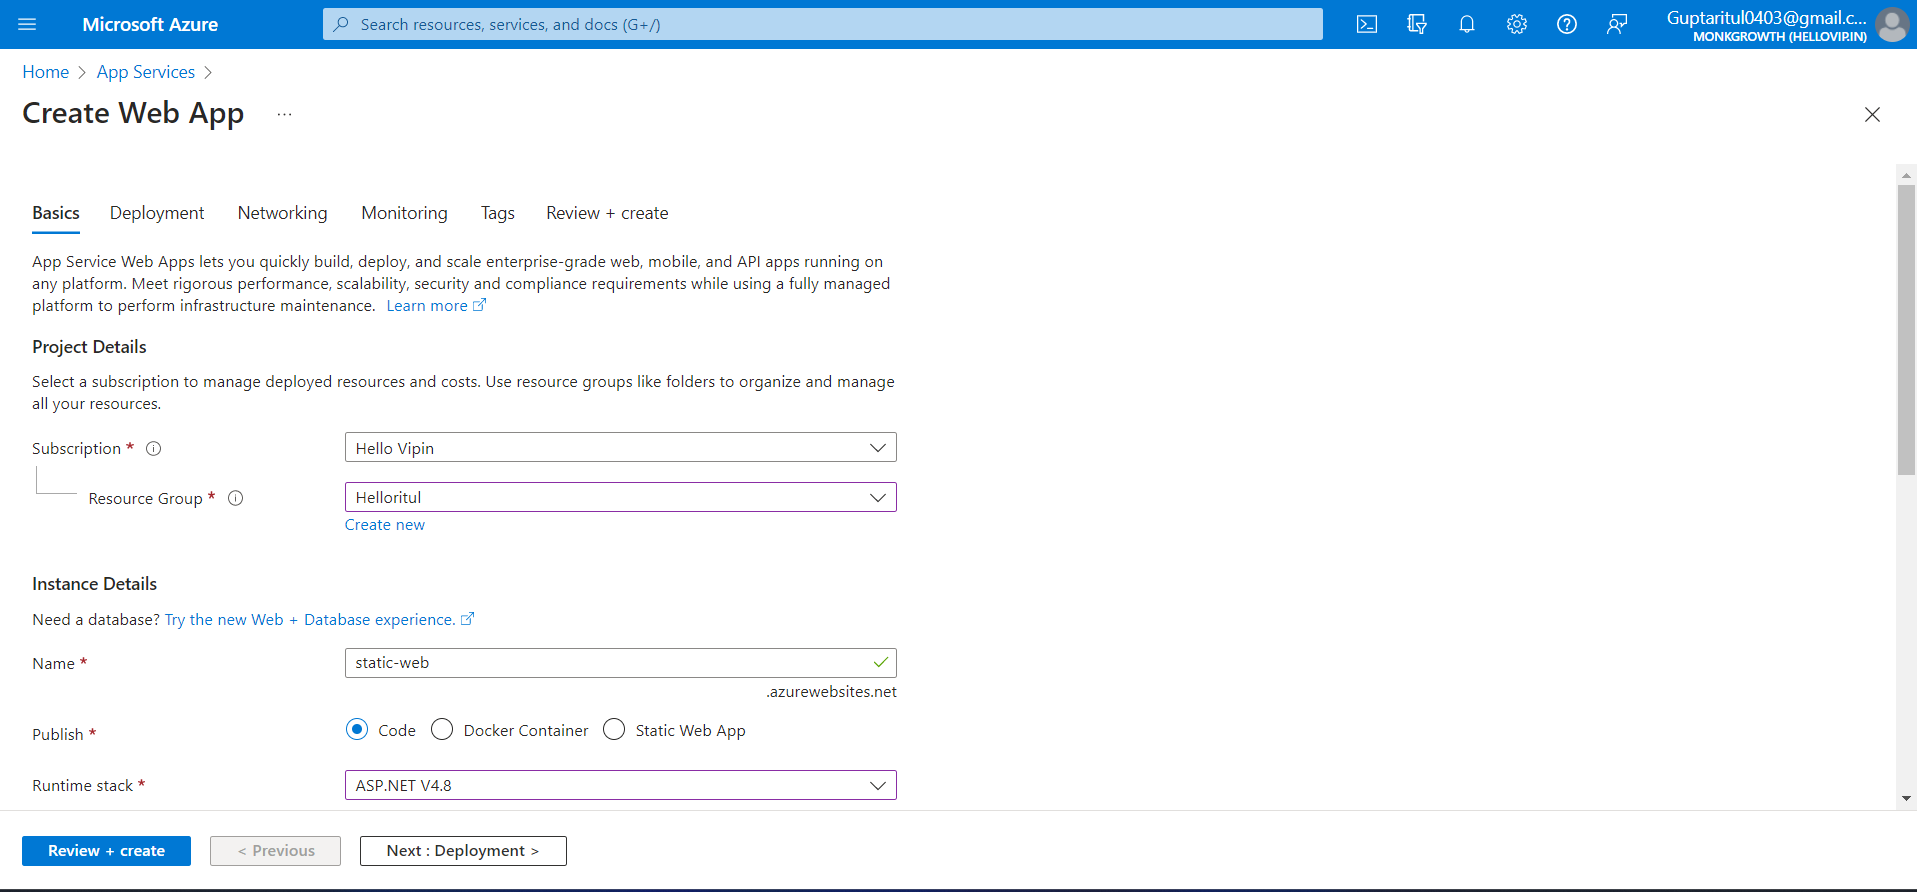
Step-4 Once the "web app" is created copy the "Default domain"
Step-5 And Paste in the browser.
Step-6 Go to "Visual Studio" and create a new project.
Step-7 Create a new ASP.NET Core Web Application project in Visual Studio. Choose the "Static Web Site" template from the project templates list.
Step-8 Follow the instructions for publishing.
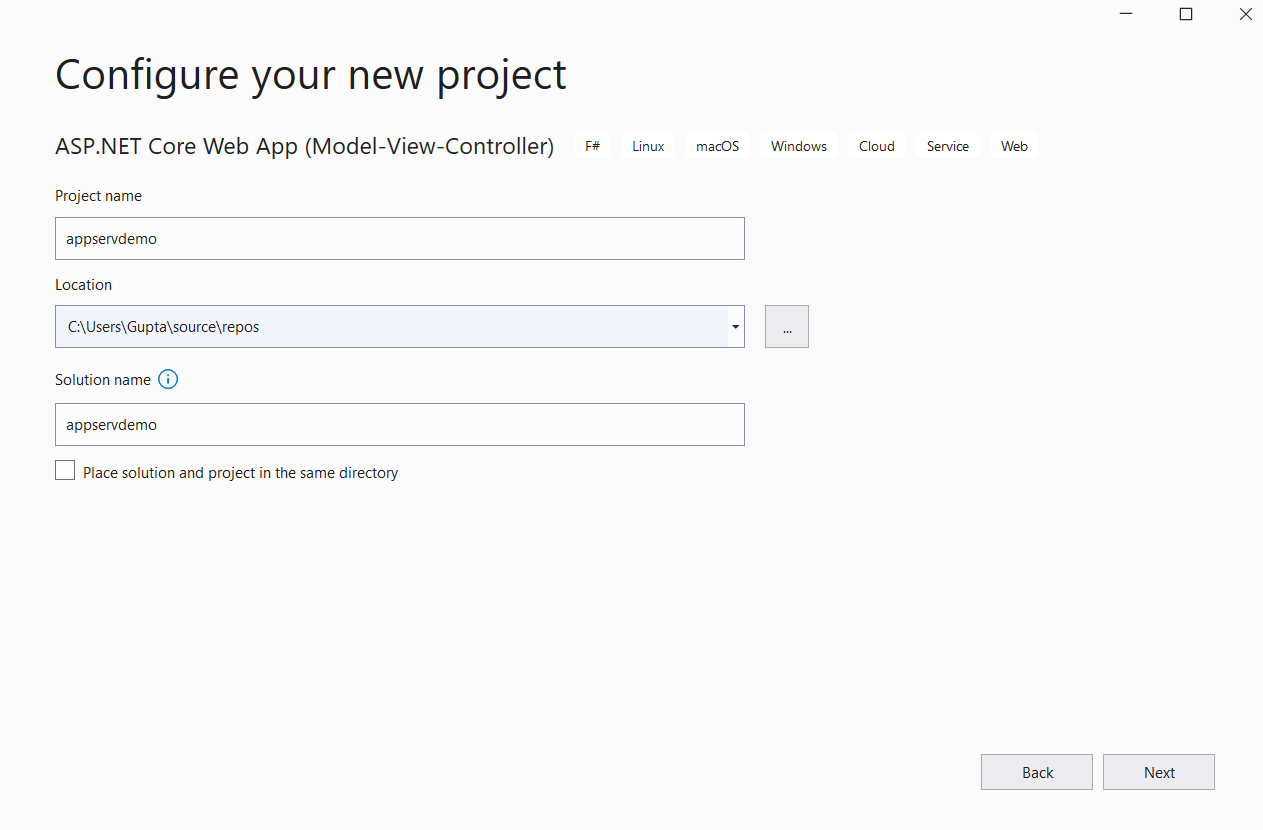
Note:- The version of .NET and the target framework version should be the same.
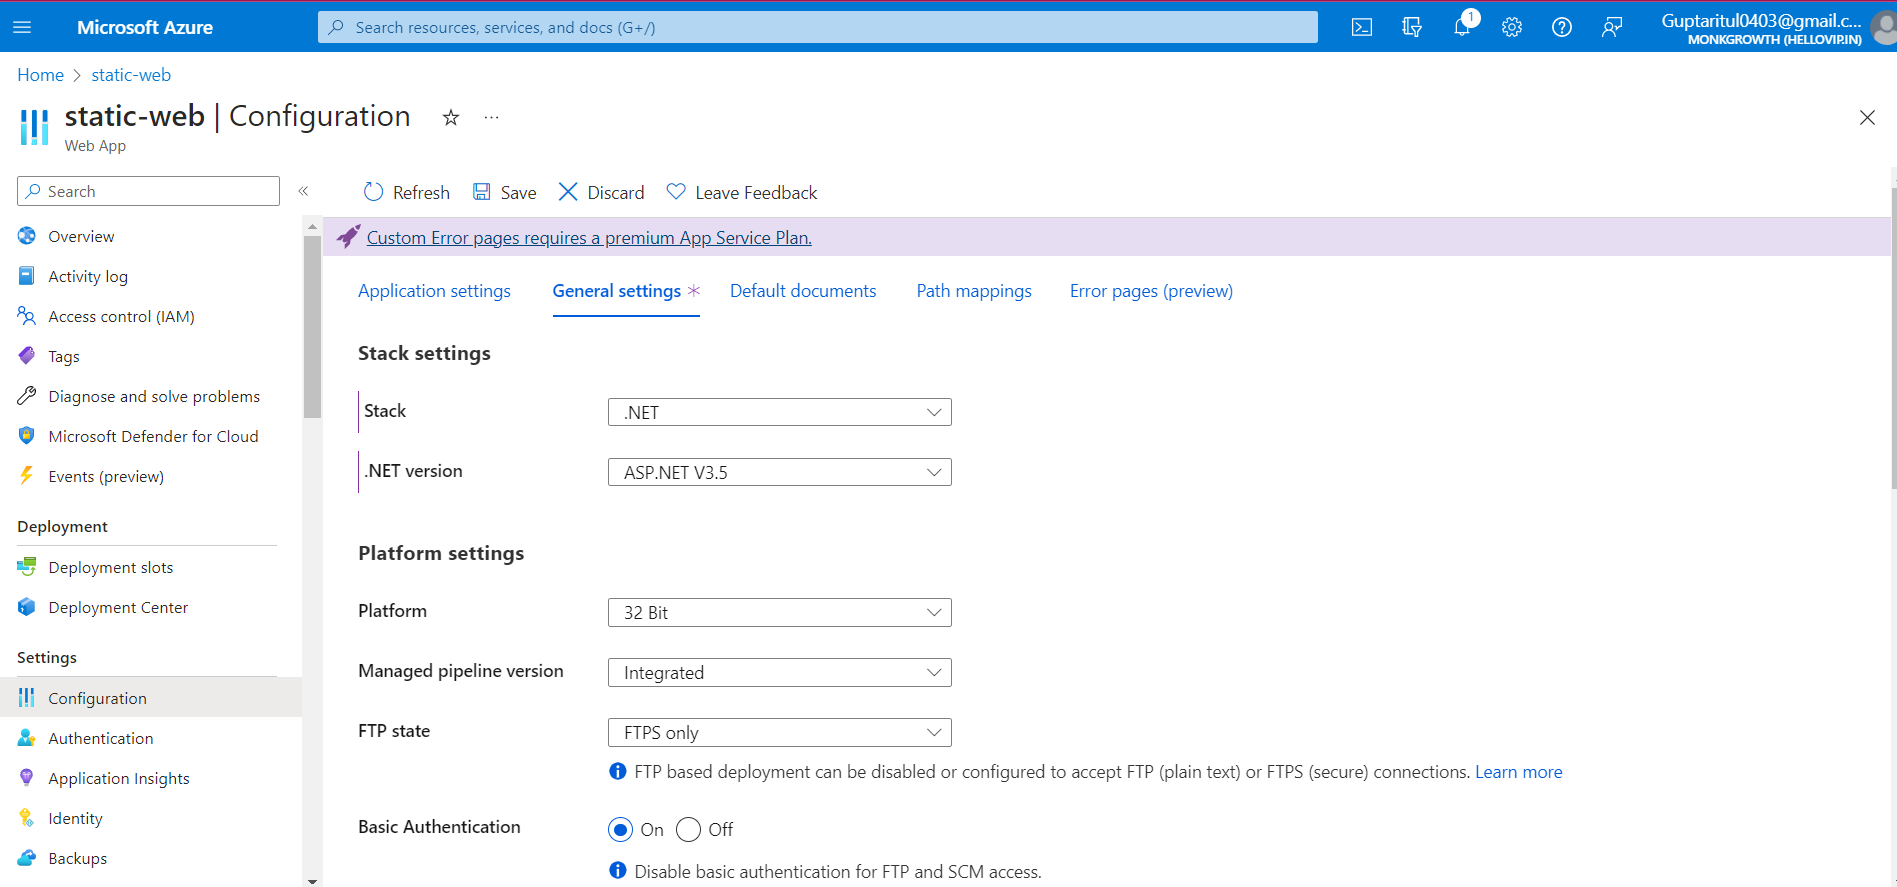
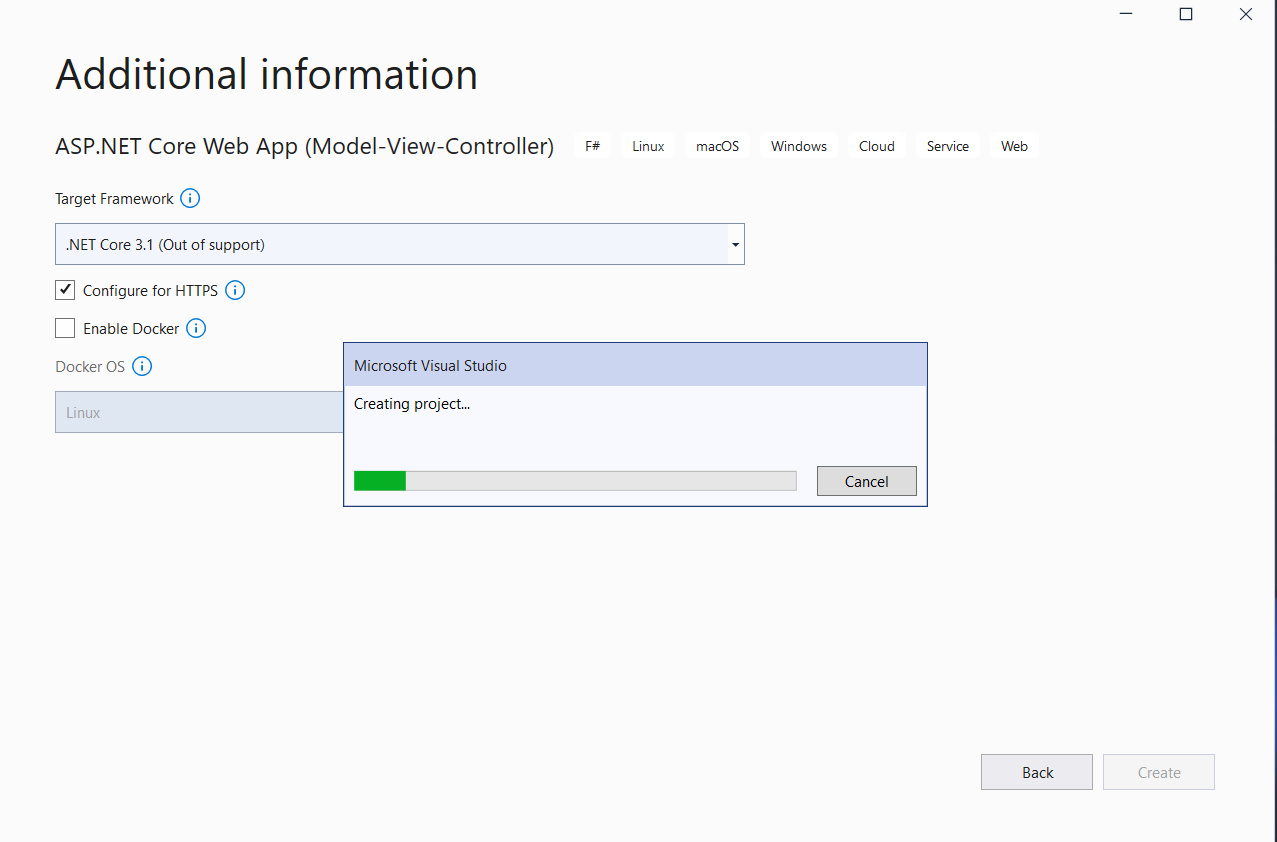
Step-9 "IIS Express" should be clicked to run the code locally.
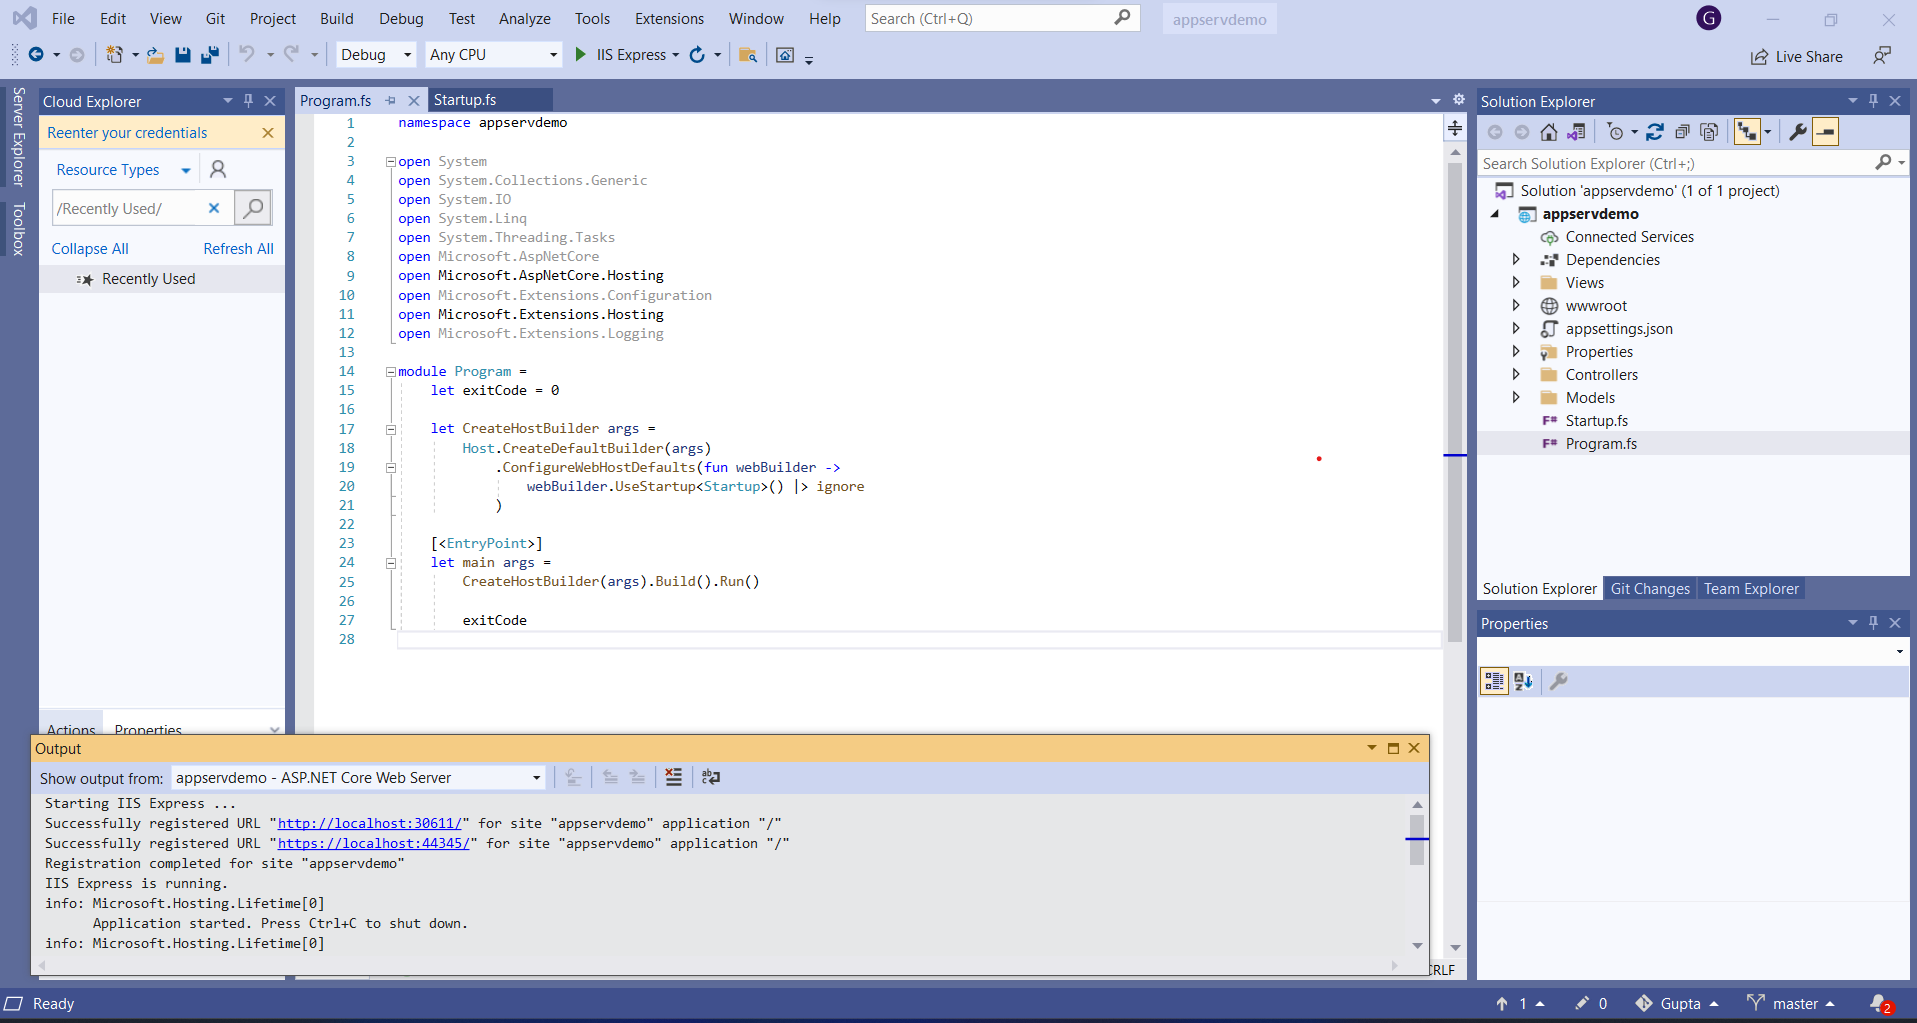
Step-10 Copy the URL "localhost:44345" to access our code running locally.
Step-11 Once the project is created, right-click on the project in the Solution Explorer and select "Publish."
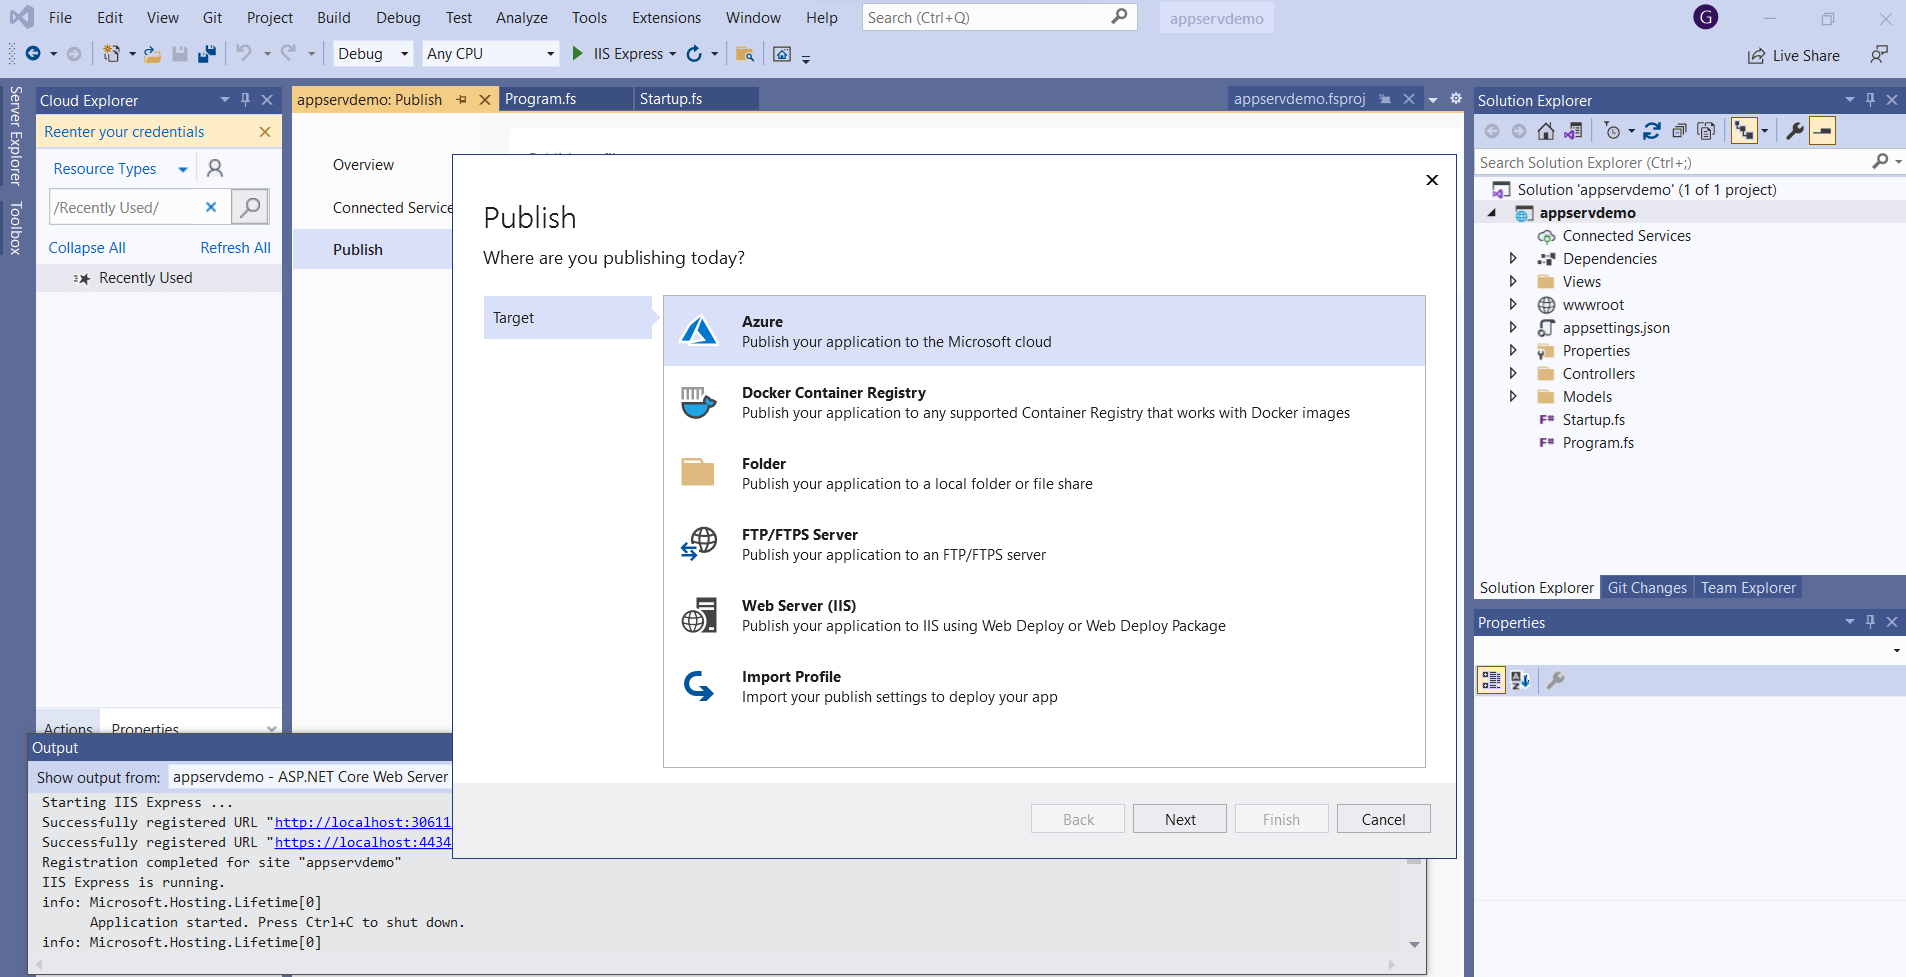
Step-12 Checked the version of the Static Web App in the Azure portal console
Step-13 We will be deploying to a Windows platform, we need to select the Windows option.
Step-14 In the Create Static Web App dialog, you'll need to specify a name for your app, choose the subscription you want to use, and select the resource group you want to deploy to.
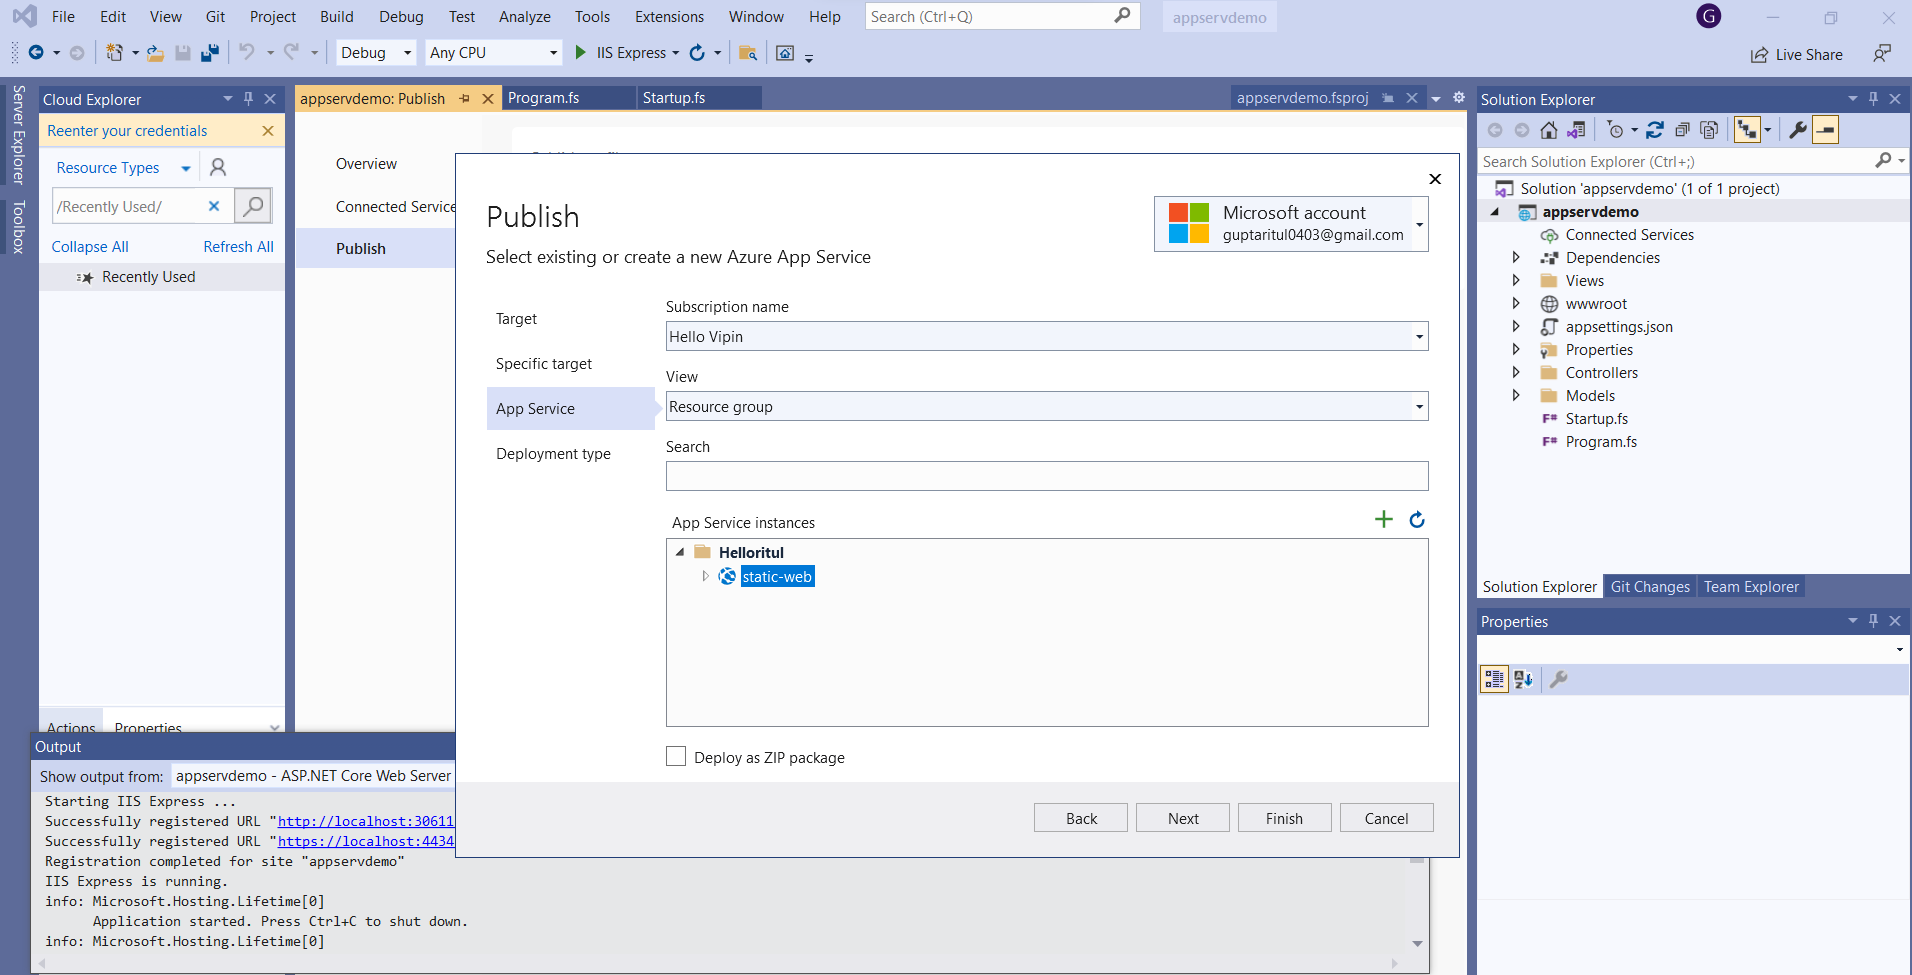
Step-15 After you've specified all the settings, click "Publish" to deploy your static website to Azure.
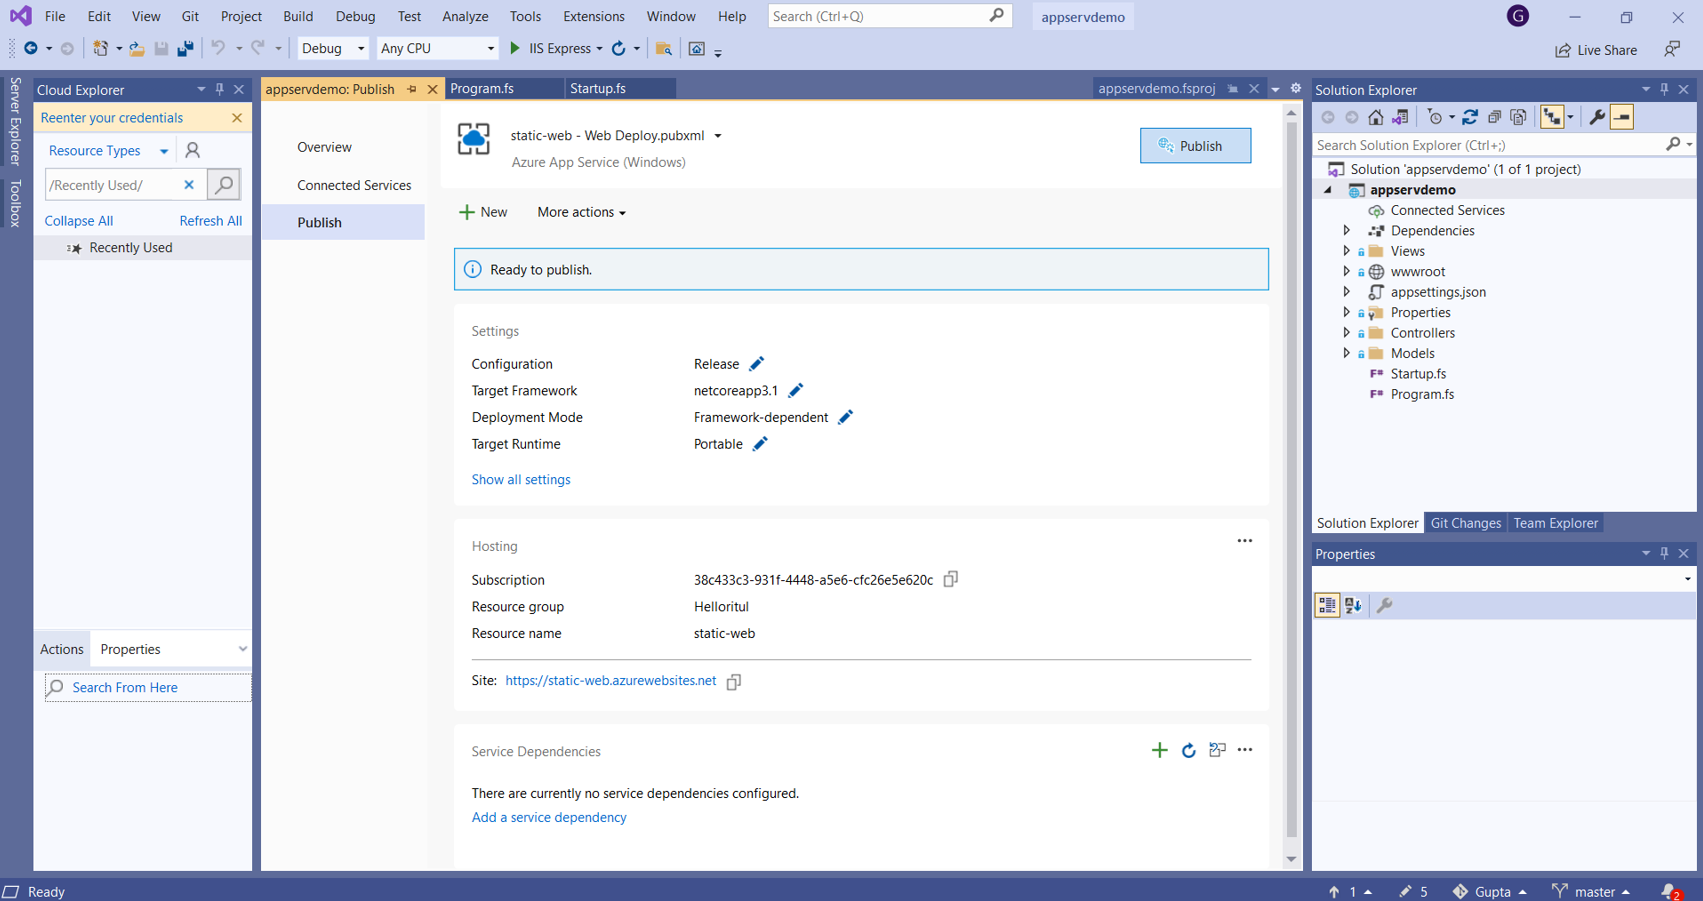
Step-16 If the deployment process completes without any errors and the website is accessible, we can say that the deployment has been successfully published.
Step-17 You can browse your website by clicking on the URL link in the Azure portal.
I hope this project was helpful to you!
Thanks
21
Subscribe to my newsletter
Read articles from Ritul Gupta directly inside your inbox. Subscribe to the newsletter, and don't miss out.
Written by

Ritul Gupta
Ritul Gupta
Packaged App Development Associate @ Accenture | Infrastructure Engineering | Exploring Cloud & Security