App-wide Theming with Riverpod Generator.
 Unimke Adie
This article assumes you are familiar with Riverpod 2.0 and code generation (like Freezed) and want to use them in your app. For an in-depth explanation of Riverpod generators and the new Riverpod syntax, check out this and this by Andrea.
What we'll cover
Riverpod architecture with a controller and service class for keeping code organised (inspired by Andrea Bizzotto).
Auto-generated providers using Riverpod Generator.
Asynchronous initialization with Provider overrides.
Theme settings persistence using Shared Preferences.
Architecture
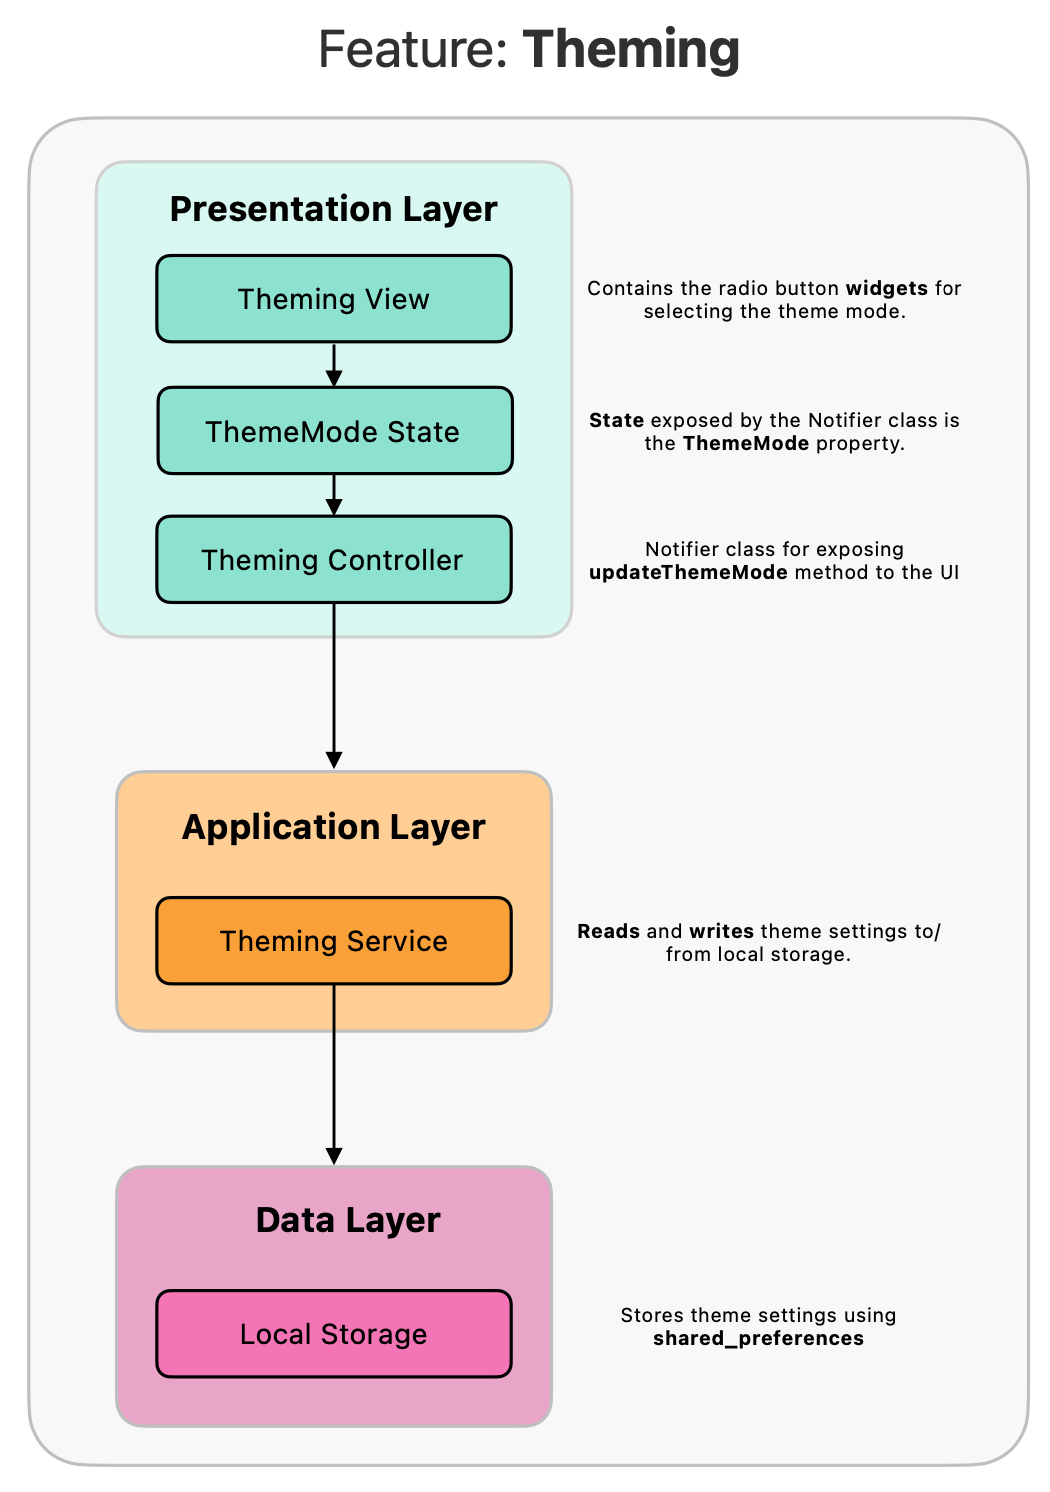
Things to note about this architecture:
Theming Viewreceives user inputs from the UI to change theThemeModevia theTheming Controller.The
Theming Controllermanipulates theThemeModevia public methods in its Notifier class.The
Theming Servicereads the current theme from theTheming Controllerand stores it locally using theshared_preferencespackage.

Setting up the codebase
Using the Flutter skeleton app template, we run this on the terminal.
flutter create -t skeleton riverpod_theme_app
Next, we add the relevant packages we would need.
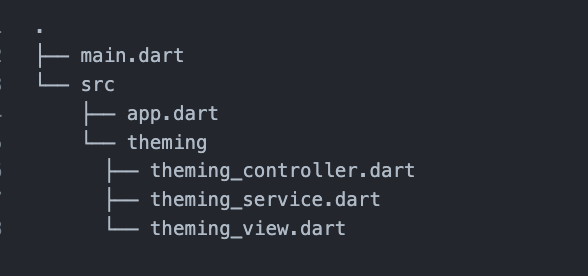
And here's our folder structure to keep things organised.

Implementing the application layer
Following our architecture, we start by implementing the application layer since the presentation layer depends on it.
ThemingService stores and retrieves user theming settings. This class depends on the shared_preferences package (data layer) for persisting settings locally.
Things to note: The theme value is stored as an int locally. We can translate this value back to ThemeMode type by calling ThemeMode.values[themeValue] because ThemeMode is an Enum.
Still in this file, we create 2 providers: one for the ThemingService and the other for SharedPreferences. Notice that the SharedPreferences provider is not implemented at this stage. More on this in a bit.
This is the new Riverpod syntax for creating providers using the @riverpod annotation. For this to work, you must run dart run build_runner watch -d in your terminal and have the part 'theming_service.g.dart;` next to your imports. This is necessary for the Riverpod generator to generate the file containing the various provider implementation.
Next up we build the widgets and controllers in the presentation layer.
Creating the Theme Settings UI
The ThemingView displays the various theme settings. When a user changes a theme, the ThemeMode state is updated and this view is rebuilt. We use a RadioListTile<T> widget for the theme selection. I've also added a little bit of Dart 3 with switch expressions and pattern matching to keep things fancy.
The UI interacts with the state via public methods in the Notifier class. In this case, we used ref.watch(themingControllerProvider.notifier).updateThemeMode to tell the controller to change the theme state. Notice I use a function tear-off since the signature and return type of the onChanged callback matches the updateThemeMode function.
I also broke down the ThemingView widget into smaller components for readability.
Reading theme settings from the local storage
Using shared_preferences in the app requires creating an instance variable using SharedPreferences.getInstane(). This loads and parses the SharedPreferences from disk. This method returns a future which you need to await before the app runs.
So how do we access the
SharedPreferencesobject synchronously in the app?
A neat way of accessing an asynchronous provider synchronously is by overriding the provider in your main method before the app runs.
In our case, we have a provider that returns a SharedPreferences object but the method for creating this object is SharedPreferences.getInstance(), and this is asynchronous.
To solve this, we would wait for the future to be resolved, then pass this value to our prefsProvider by "overriding" it.
Here's how:
By doing this, the app would always have a value for the prefsProvider and would never throw an error.
Now we use this in MyApp widget like so.
All together now
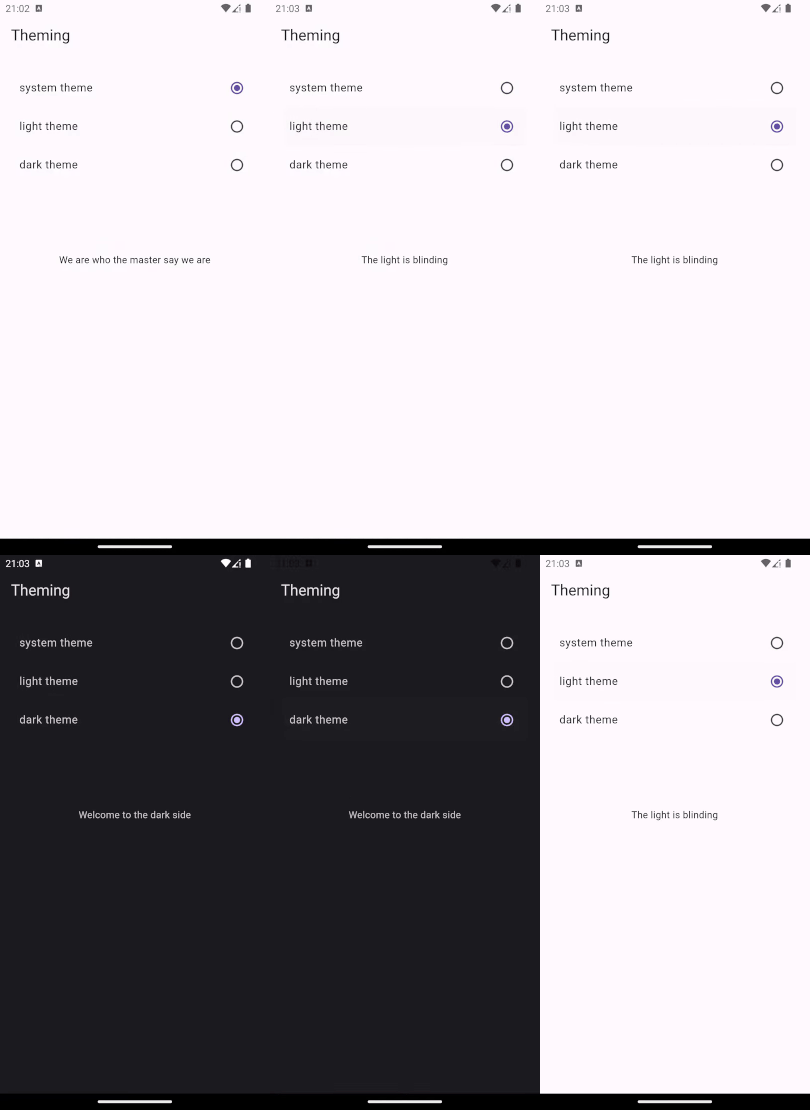
Here's the resulting app in action with system settings set to Light mode.

Thanks for reading. Happy coding.
Subscribe to my newsletter
Read articles from Unimke Adie directly inside your inbox. Subscribe to the newsletter, and don't miss out.
Written by

Unimke Adie
Unimke Adie
Writing about things I learn helps me understand better, and I hope reading them will help you too! 🙂