Create 2048-Game using Docker and Deploy to Amazon elastic beanstalk.
 Suraj Joshi
TABLE OF CONTENTS
launch an Amazon EC2 instance.
Install Docker on Amazon EC2 instance.
Create Dockerfile.
Insight command.
Run the docker file.
Deploying Application on Amazon elastic beanstalk
In this article, you can learn about Docker concepts, such as what a Dockerfile is, how to create Docker files, the commands required to create Docker images and Docker containers. You can also learn how to deploy a Docker containerized application on AWS cloud in an enjoyable way by creating a 2048 game.
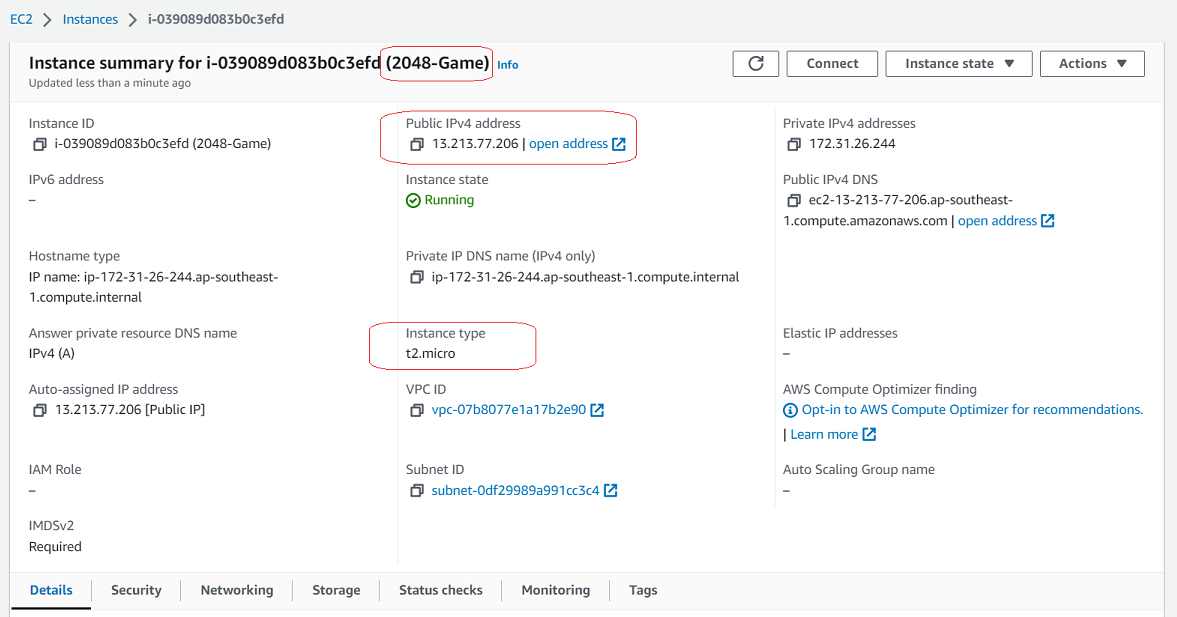
Launch an Amazon Linux EC2 instance:
Note: Select instance type t2.micro as it's available free
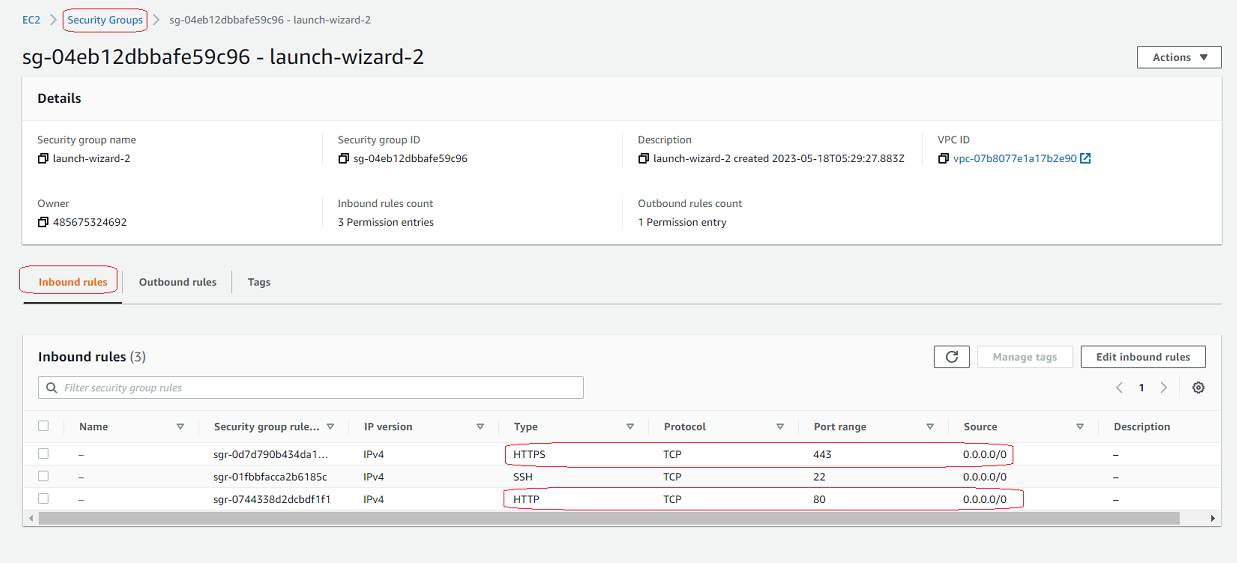
Edit Security Group to allow HTTPS & HTTP traffic.
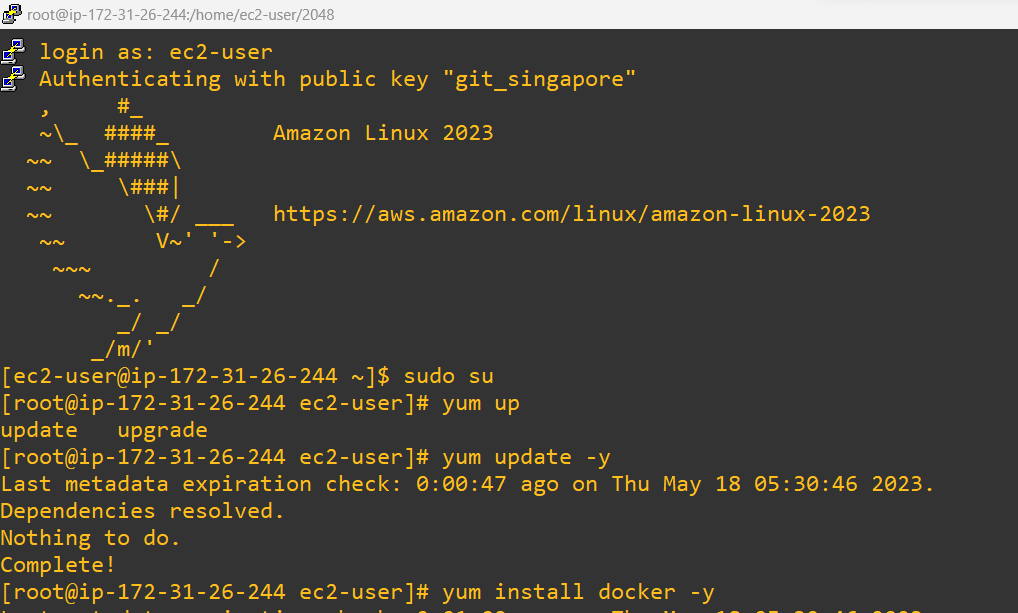
Install Docker on Amazon EC2 instance:
Login your EC2 instance using Putty -
Install Docker #yum install docker -y
Start Docker Service #Sevice docker start

Create Dockerfile:
Create a folder which will hold the configuration and code
in our case folder name is 2048

Create a docker file # vi dockerfile
FROM ubuntu:22.04

RUN apt-get update
RUN apt-get install -y nginx zip curl
RUN echo "daemon off;" >>/etc/nginx/nginx.conf
RUN curl -o /var/www/html/master.zip -L https://github.com/gabrielecirulli/2048/archive/refs/heads/master.zip
RUN cd /var/www/html/ && unzip master.zip && mv 2048-master/* . && rm -rf 2048-master master.zip

EXPOSE 80

CMD ["/usr/sbin/nginx","-c", "/etc/nginx/nginx.conf"]
Here's an explanation for each line in the given Dockerfile:
FROM ubuntu:22.04: This line sets the base image for the Dockerfile as Ubuntu 22.04. It means that the subsequent instructions will be executed on top of this base image.RUN apt-get update: This line updates the package lists on the Ubuntu image, ensuring that the package manager has the latest information about available packages.RUN apt-get install -y nginx zip curl: This line installs the packages 'nginx', 'zip', and 'curl' on the Ubuntu image. The-yflag automatically confirms any prompts during the installation process.RUN echo "daemon off;" >>/etc/nginx/nginx.conf: This line appends the text "daemon off;" to the nginx.conf file located at/etc/nginx/nginx.conf. It's a configuration setting that prevents Nginx from running in the background as a daemon.RUN curl -o /var/www/html/master.zip -Lhttps://github.com/gabrielecirulli/2048/archive/refs/heads/master.zip: This line uses curl to download the 2048 game's source code zip file from the specified GitHub repository. It saves the downloaded file as 'master.zip' in the '/var/www/html/' directory.RUN cd /var/www/html/ && unzipmaster.zip&& mv 2048-master/* . && rm -rf 2048-mastermaster.zip: This line changes the current directory to '/var/www/html/', then unzips the 'master.zip' file, moves the contents of the '2048-master' directory to the current directory ('/var/www/html/'), and finally removes the '2048-master' directory and the 'master.zip' file.EXPOSE 80: This line specifies that the container will listen on port 80. It informs Docker that the container will accept incoming connections on this port.CMD ["/usr/sbin/nginx","-c", "/etc/nginx/nginx.conf"]: This line sets the command to run when the container starts. It launches the Nginx web server with the specified configuration file '/etc/nginx/nginx.conf' using the absolute path '/usr/sbin/nginx'.
These instructions collectively define the steps to build a Docker image that installs Nginx, downloads the 2048 game source code, and configures Nginx to serve the game. The resulting image can be used to create Docker containers running the 2048 game on port 80.
Run the docker file.

The command docker build -t 2048 . is used to build a Docker image based on the Dockerfile located in the current directory (.)

The docker images command is used to list the Docker images that are currently available on your system.

The command docker run -d -p 80:80 296c88ffd15f is used to run a Docker container based on the specified image with the ID 296c88ffd15f. Here's what each part of the command means:
docker run: This command is used to run a Docker container.-d: The-dflag stands for "detached" mode. It runs the container in the background, allowing you to continue using the command prompt.-p 80:80: The-pflag is used to publish and map ports between the host and the container. In this case, it maps port 80 of the host machine to port 80 of the container. This is necessary to access the web server running inside the container.296c88ffd15f: This is the ID of the Docker image you want to run as a container.
Now enter in your browser the Public IP address that was assigned to your EC2 instance.
In our case - http://13.213.77.206/

Deploying Application on Amazon elastic beanstalk :
Before moving on with the deployment of the application on Amazon Elastic Beanstalk, you must download the dockerfile to your local machine from an EC2 instance.
open CMD on your local computer and enter the following command:
"C:\Users\suraj\Downloads\git_singapore.ppk" ec2-user@ec2-13-213-77-206.ap-southeast-1.compute.amazonaws.com:/home/ec2-user/2048/dockerfile "C:\Users\suraj\Desktop"

scp utility to copy a file named "dockerfile" from your local machine to an EC2 instance in AWS.
"C:\Users\suraj\Downloads\git_singapore.ppk": This is the source file path on your local machine. It seems to be a private key file ("ppk") used for SSH authentication.ec2-user@ec2-13-213-77-206.ap-southeast-1.compute.amazonaws.com: This is the remote server address you are connecting to. It follows the formatusername@hostname.:/home/ec2-user/2048/dockerfile: This is the destination path on the remote server where you want to copy the file. It specifies the username (ec2-user), the path (/home/ec2-user/2048/), and the filename (dockerfile)."C:\Users\suraj\Desktop": This is the destination directory on your local machine where you want to save the copied file.
Now open AWS console & search for elastic beanstalk:
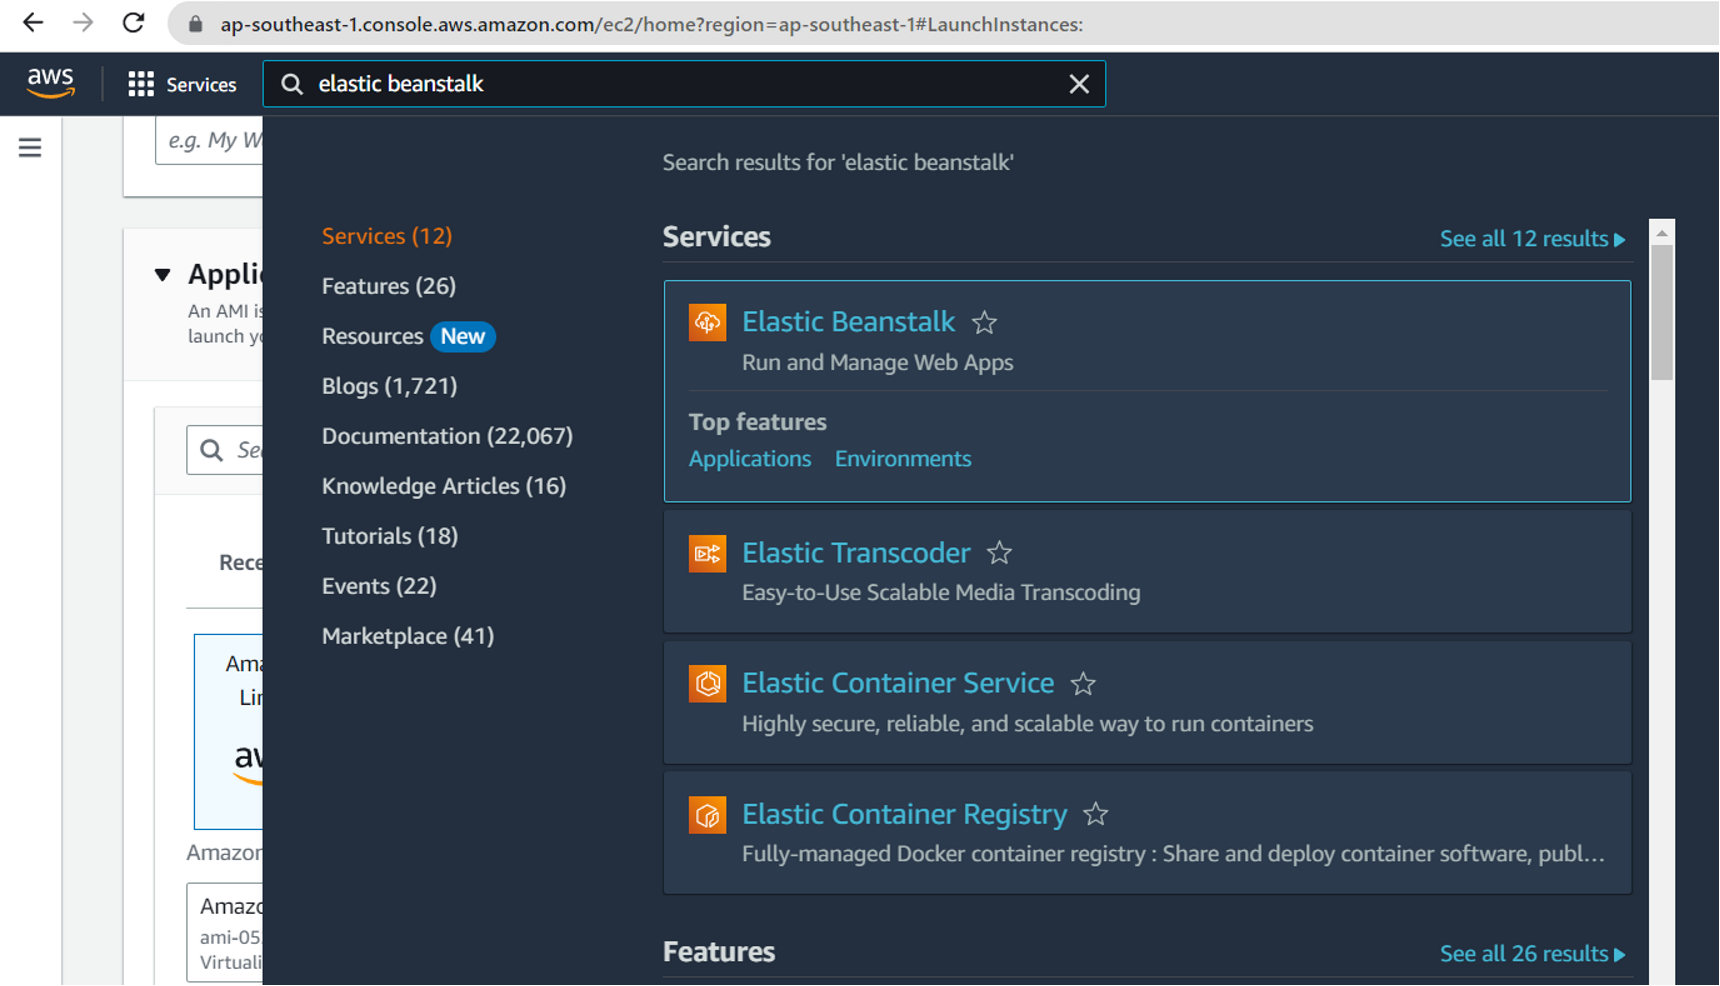
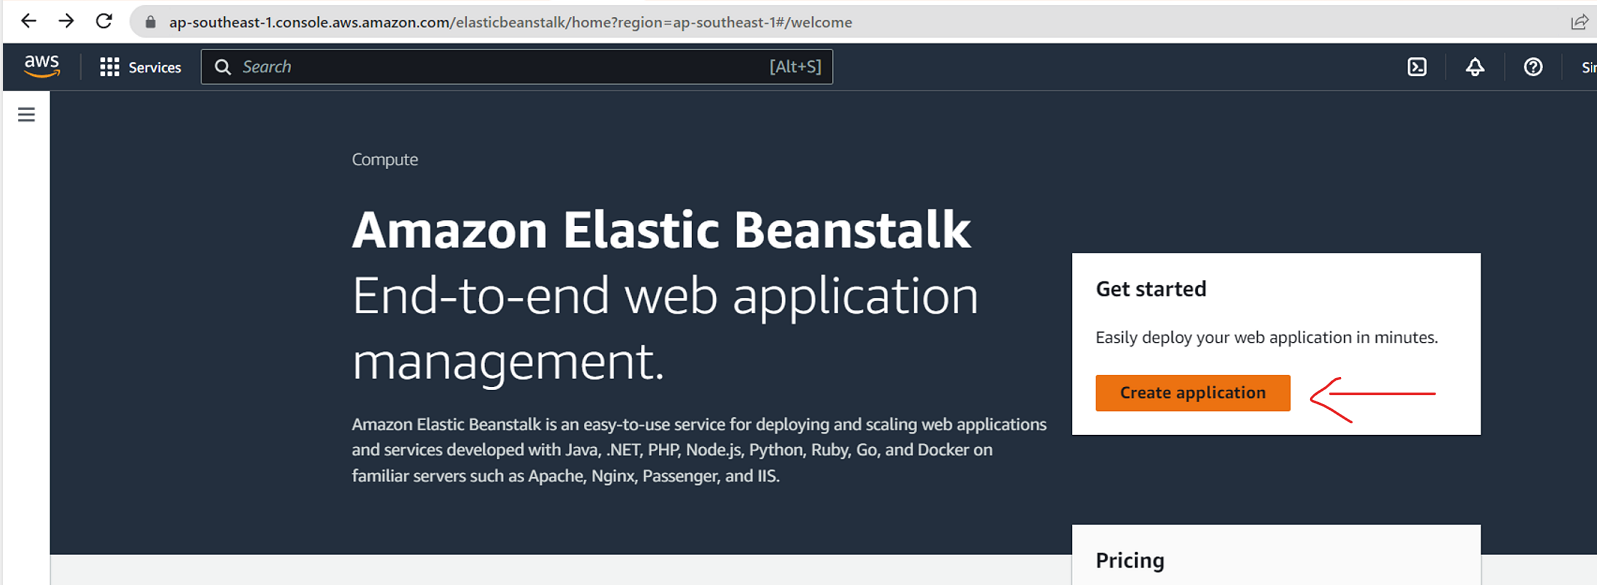
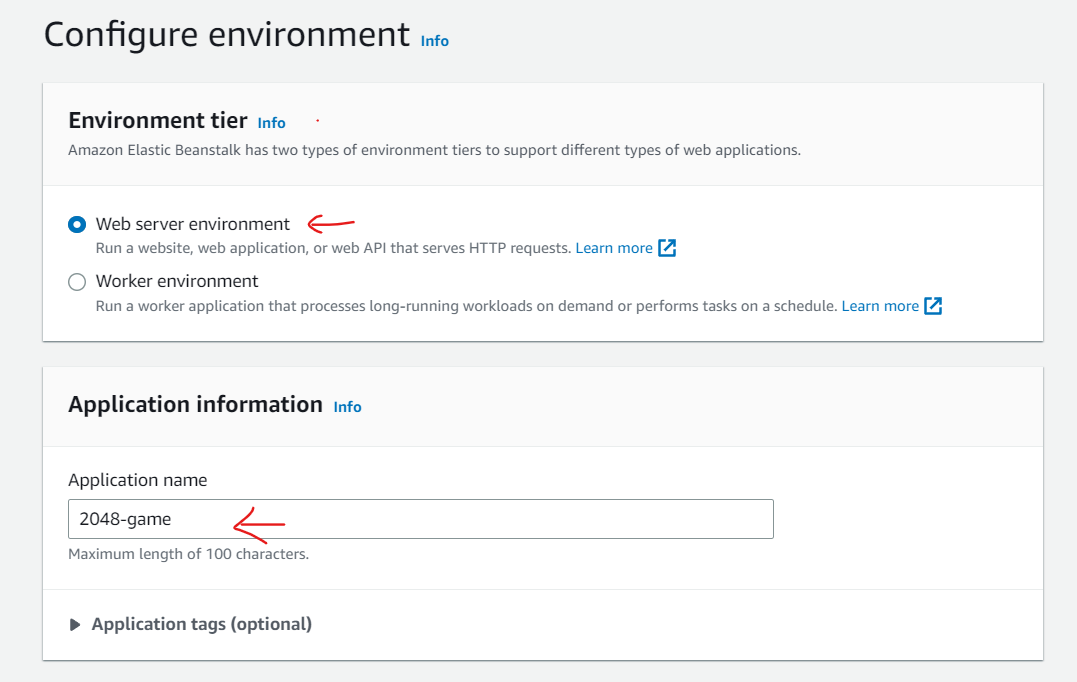
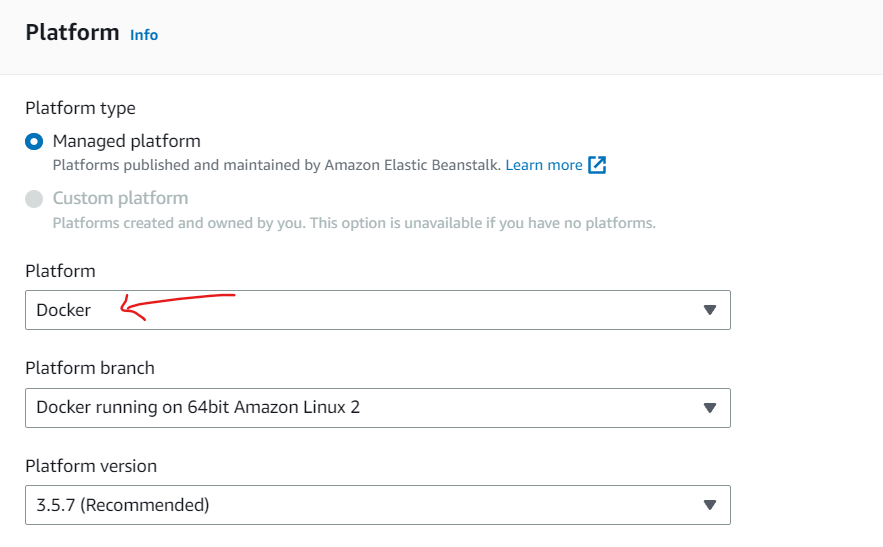
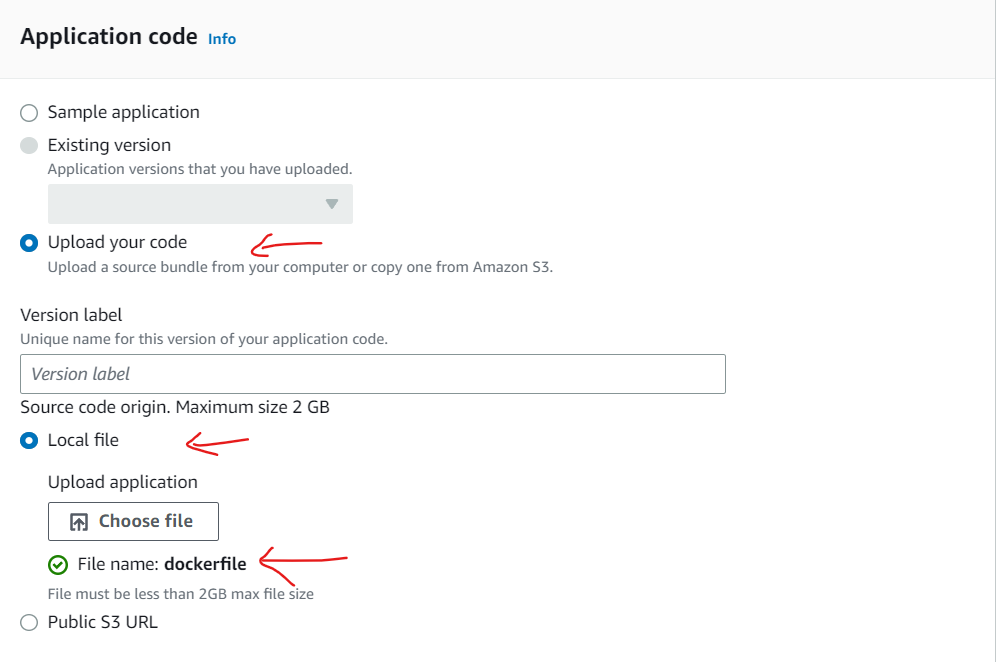
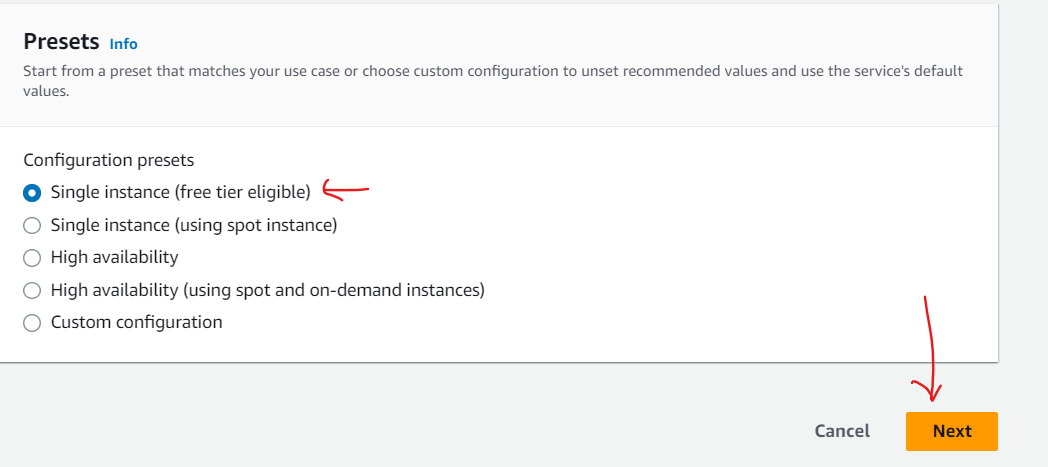
Keep everything set to default, choose your key (or create one), keep everything default, and hit next so that you can make any necessary configuration adjustments.
Review and build your elastic beanstalk environment, then wait for it to launch.
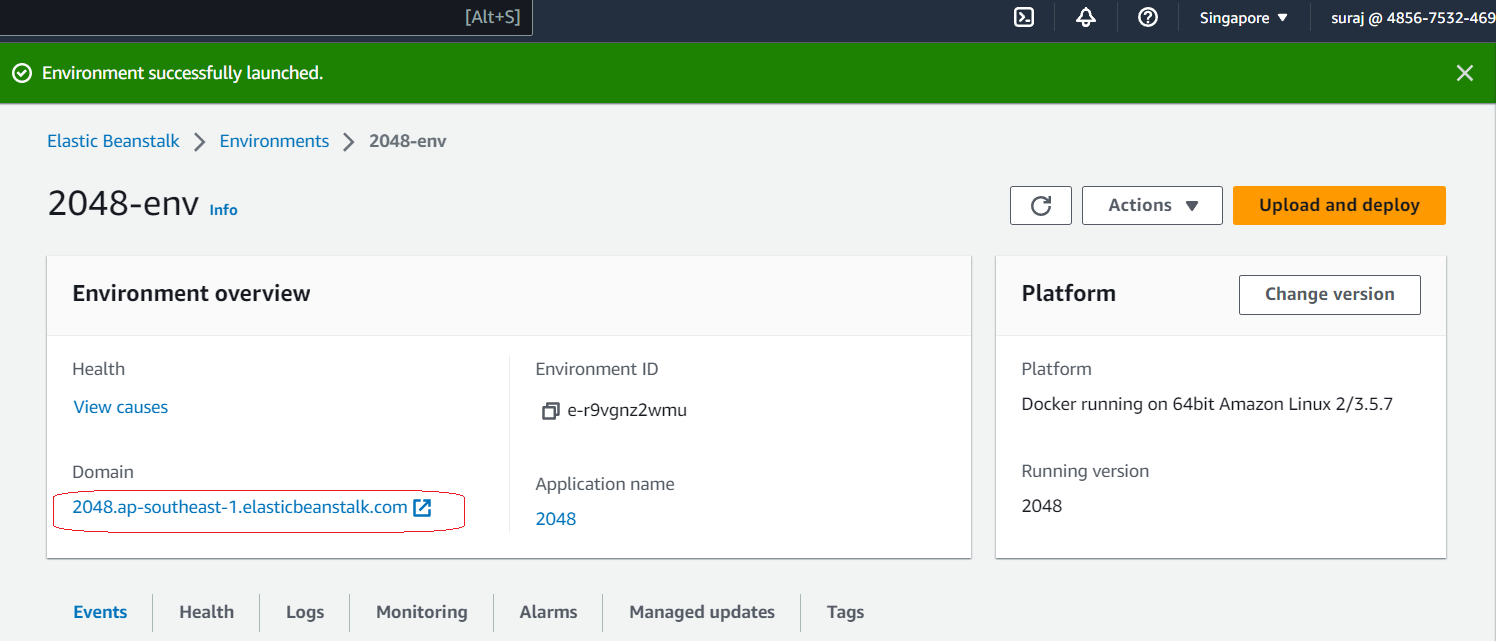
Copy the URL above it and load it in your browser and you will see your application running successfully in elastic beanstalk environment.

We successfully deployed a gaming application utilising docker and AWS EBS, and we have seen and understood all of the setup and docker commands in detail for the same. We have also shown how to configure and deploy apps on the EBS environment in order to account for all failures and fault tolerance.
Subscribe to my newsletter
Read articles from Suraj Joshi directly inside your inbox. Subscribe to the newsletter, and don't miss out.
Written by
