How To Setup Ansible AWX ON Azure using ubuntu 22.04
 Techlatest.net
Introduction
Ansible AWX is the open-source freely available project . It was the foundation on which Ansible Tower was created. Ansible AWX is the upstream project of Ansible Automation Controller (formerly Ansible Tower), providing a modern web-UI and API interface to manage Ansible Playbooks, inventories, Credentials, and Vaults between your team in your organization. The AWX source code is available under Apache License 2.0.
In this article, we will introduce three topics
Ansible AWX — Ansible AWX is an open-source web-based GUI and automation tool for managing Ansible playbooks, inventories, and scheduling jobs.
Step by Step guide — Guide on how to set up Ansible AWX ON Azure using ubuntu 22.04.
Why do we need Ansible AWX — Ansible AWX provides a centralized and user-friendly interface for managing Ansible automation, making it easier to scale and automate infrastructure deployments, application management, and IT operations. It also allows for collaboration, version control, and job scheduling, making it easier to manage and monitor Ansible automation workflows.
Note
If you want to save time to setting up an Ansible AWX ON Azure using ubuntu 22.04 with out of the box environment, you can opt for Techlatest’s Ansible AWX (Opensource Ansible Tower alternative), available on the Azure marketplace.
If you are looking to quickly setup and explore AWX , Techlatest.net provides out of the box setup for latest AWX version on AWS, Azure and GCP. Please follow below links for the step by step guide to setup AWX on your choice of cloud platform.
Step by Step Guide to install, setup Ansible AWX ON Azure using ubuntu 22.04
This step-by-step guide describes how to launch and connect to Techlatest’s Ansible AWX on Azure.
- Step 1
First, create a Azure account if you don’t have one already.
- Step 2
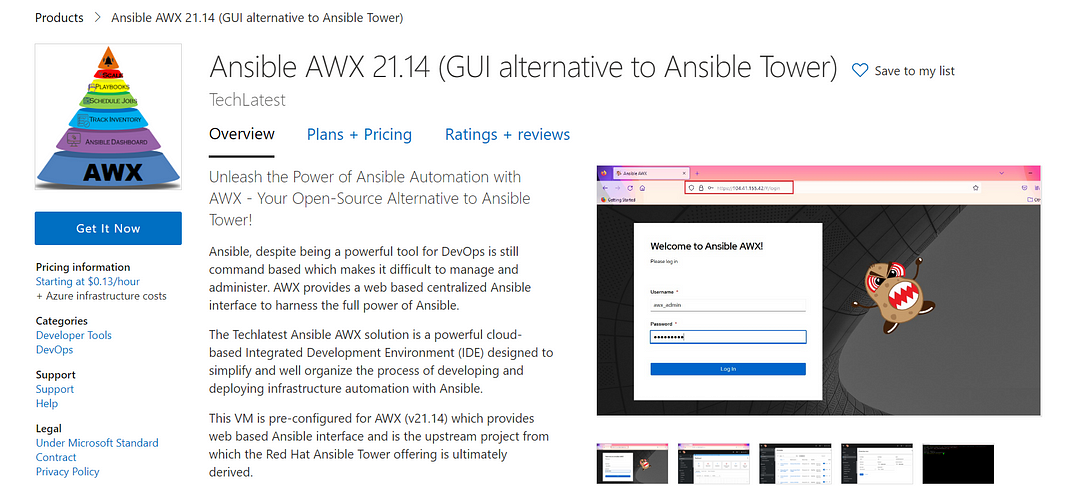
Open Ansible AWX (Opensource Ansible Tower alternative) VM listing on Azure marketplace.
- Step 3
Click on Get It Now.
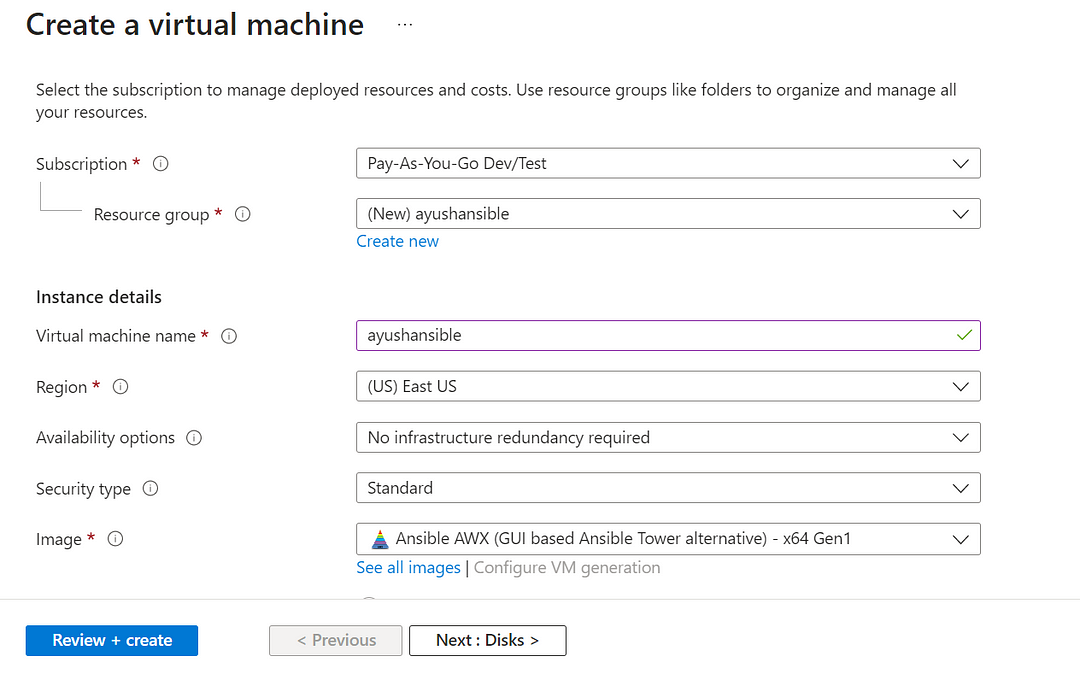
Select a Resource group for your virtual machine.
Select a Region where you want to launch the VM(such as East US).
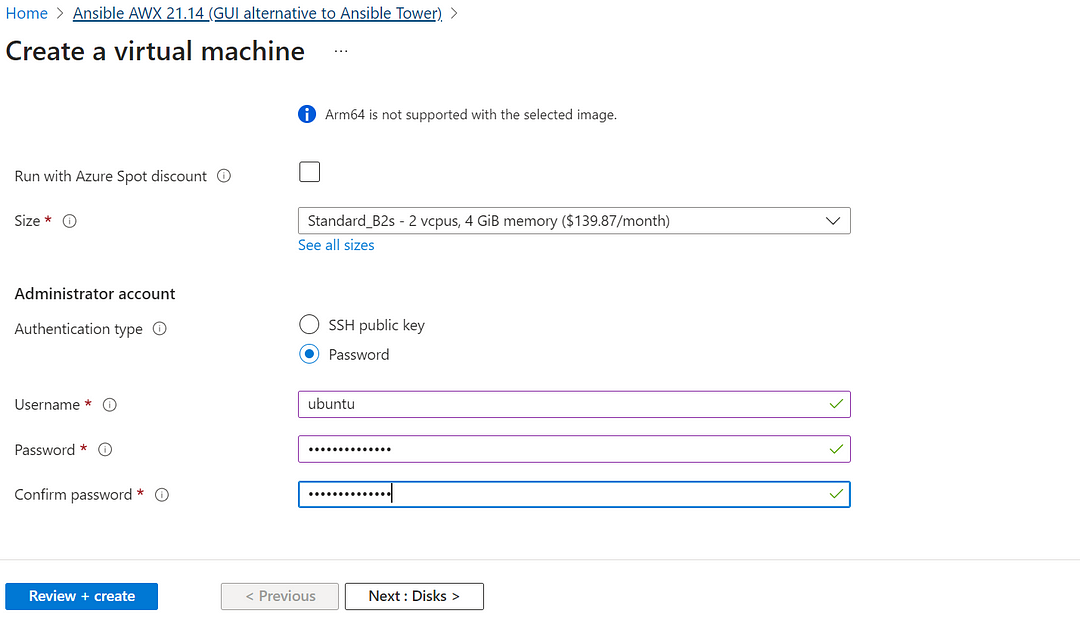
Optionally change the number of cores and amount of memory.
Select the Authentication type as Password and enter Username as ubuntu and Password of your choice.
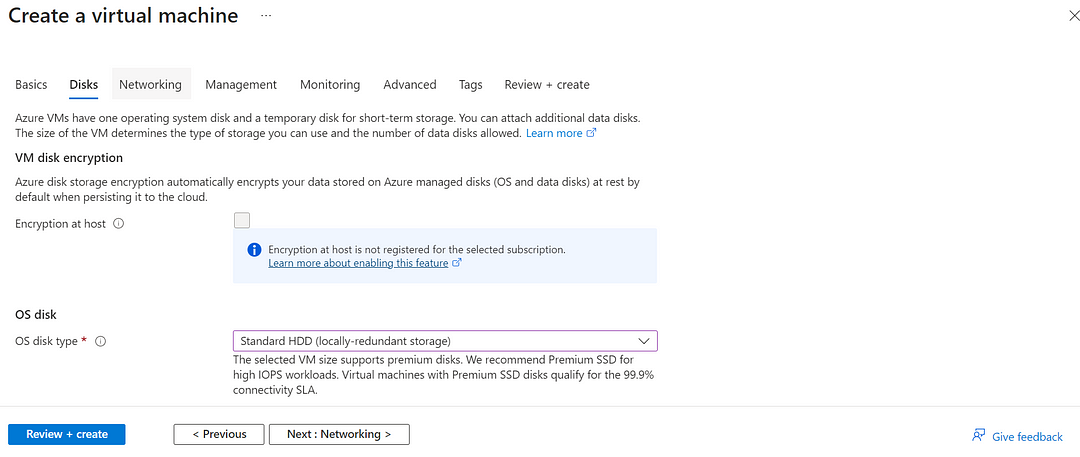
Optionally change the OS disk type.
Optionally change the network and subnetwork names. Be sure that whichever network you specify has ports 22 (for SSH), 3389 (for RDP) and 443 (for HTTPS) exposed.
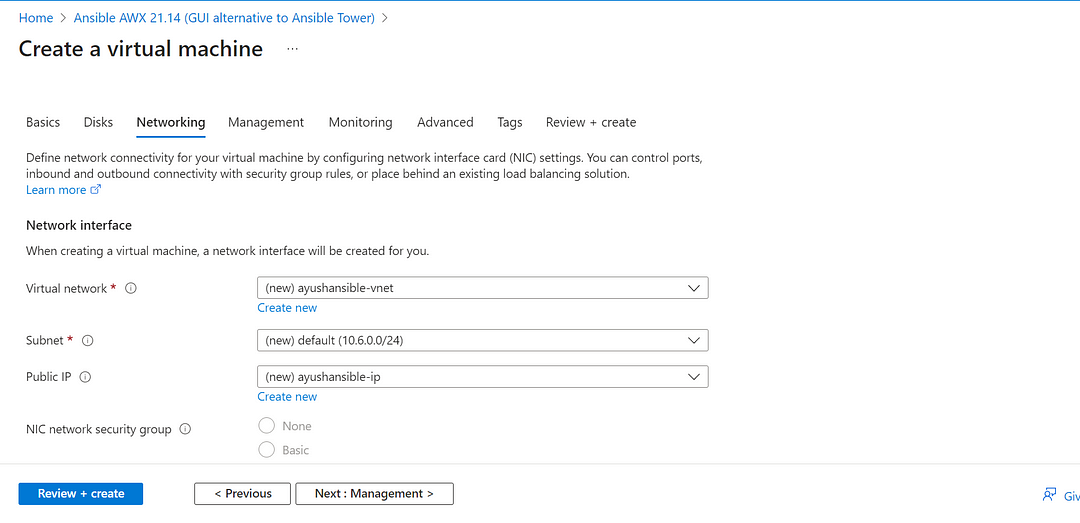
Optionally go to the Management, Advanced and Tags tabs for any advance settings you want for the VM.
Click on Review + create and then click on Create when you are done.
Virtual Machine will begin deploying.
- Step 4
A summary page displays when the virtual machine is successfully created. Click on Go to resource link to go to the resource page. It will open an overview page of virtual machine.
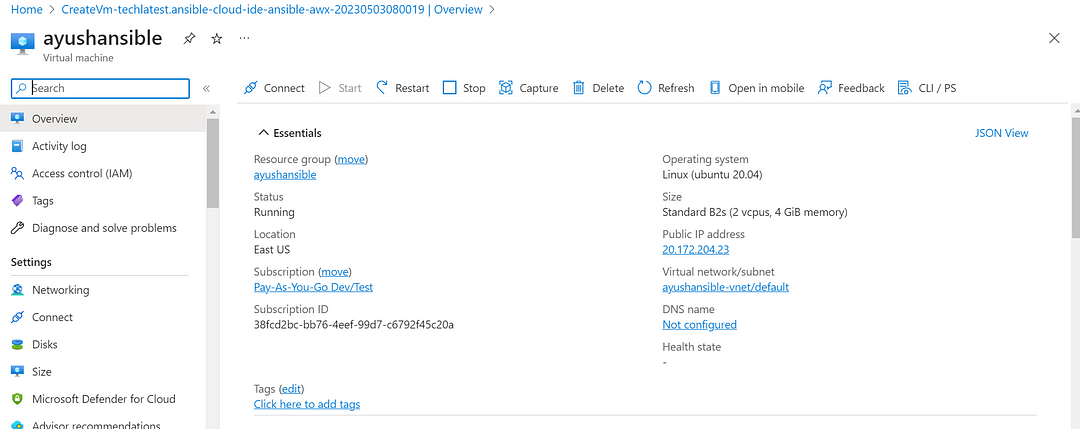
- Step 5
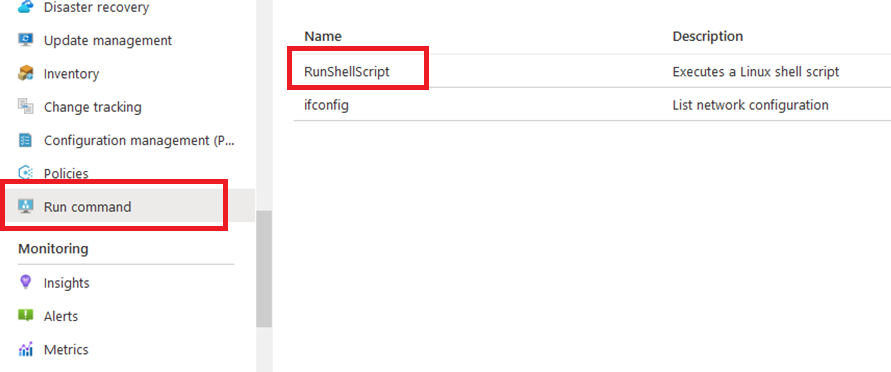
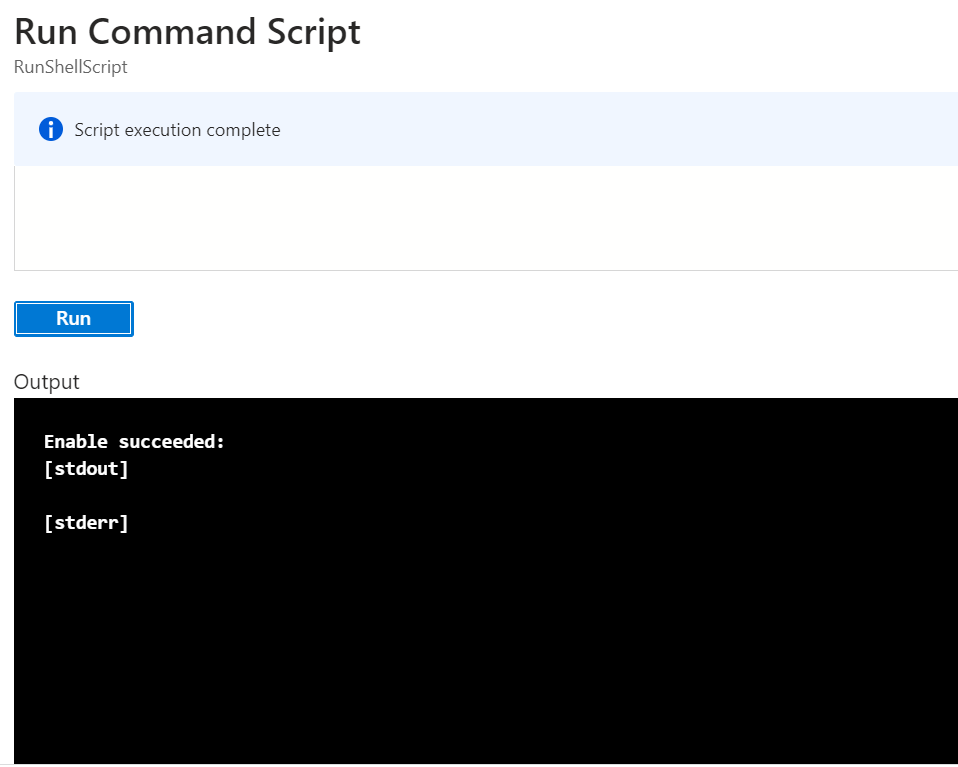
In the left navigation pane, select Run command , select RunShellScript and enter following command to change the password of the VM.
sudo echo ubuntu:yourpassword | chpasswd
- Step 6
Now the password for ubuntu user is set, you can connect to the VM’s desktop environment from any local windows machine using RDP protocol or local linux machine using Remmina.
- Step 7
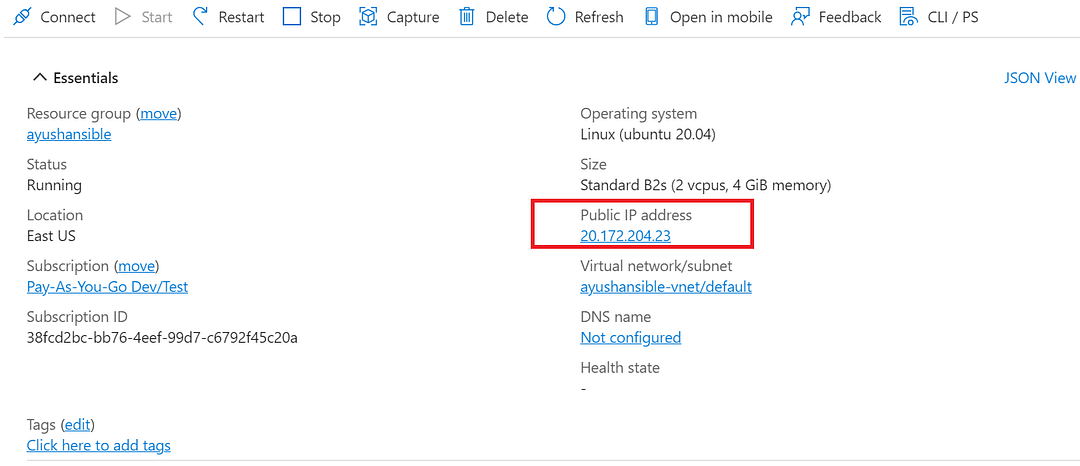
To connect using RDP via Windows Machine, first note the public IP address of the VM from VM details page as highlighted below.
- Step 8
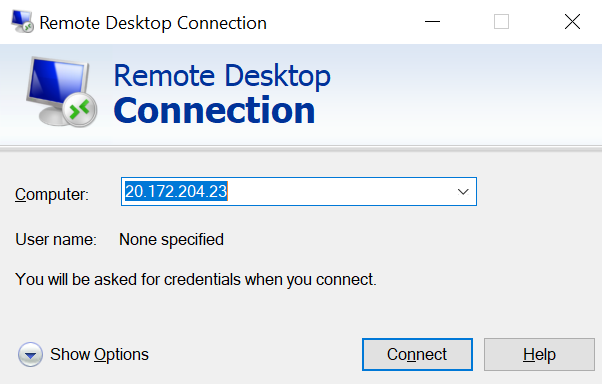
Then From you local windows machine, goto “start” menu , in the search box type and select “Remote desktop connection”.
In the “Remote Desktop connection” wizard, copy the public IP address and click connect
- Step 9
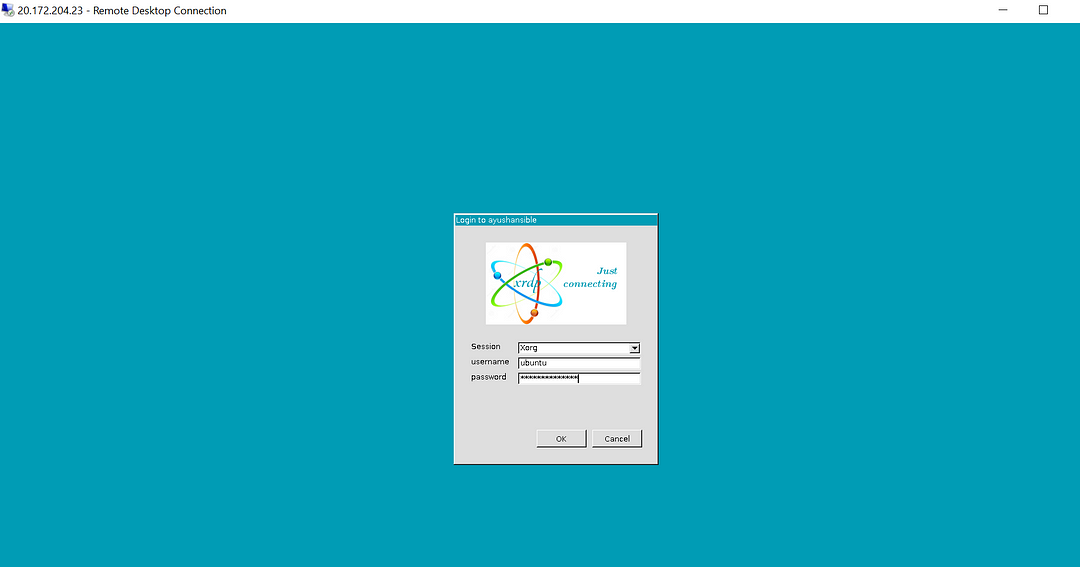
This will connect you to the VM’s desktop environment. Provide the username (e.g “ubuntu”) and the password set in the step4 to authenticate. Click on the OK button.
- Step 10
Now you are connected to the out of box Ansible AWX(alternative to Ansible Tower) environment via Windows Machine.

- Step 11
For connecting via Web Interface, SSH to the VM as shown in Step 5 and run below command-
sudo docker logs tools_awx_1 | grep 'Admin password'
Note down the password for admin user.

- Step 12
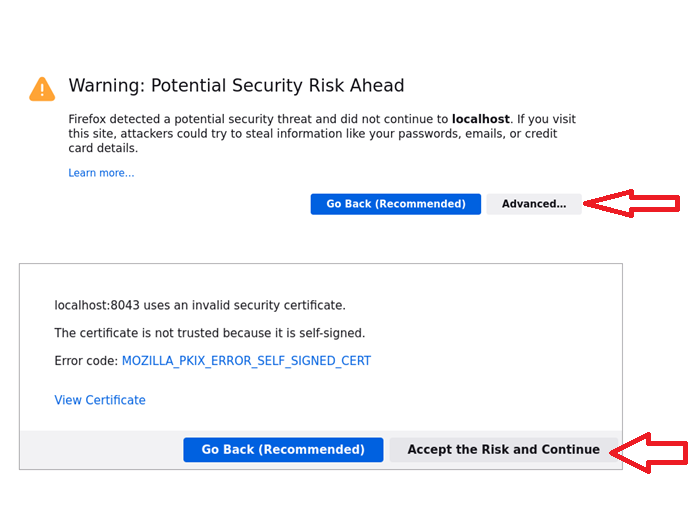
Login to the web interface by opening the URL https://your-external-ip in your browser.
Accept the certificate warning message.
- Step 13
Use admin as username and auto-generated password.
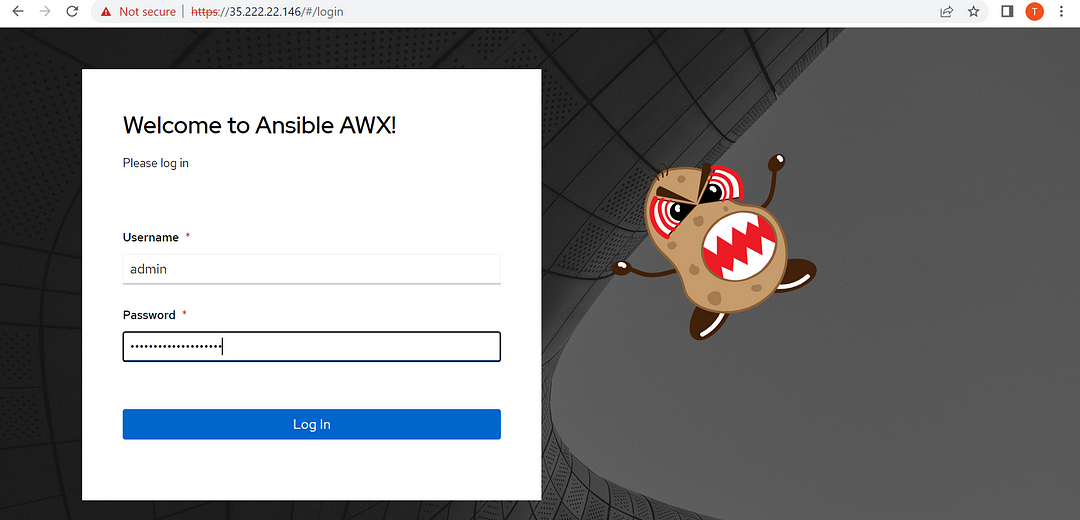
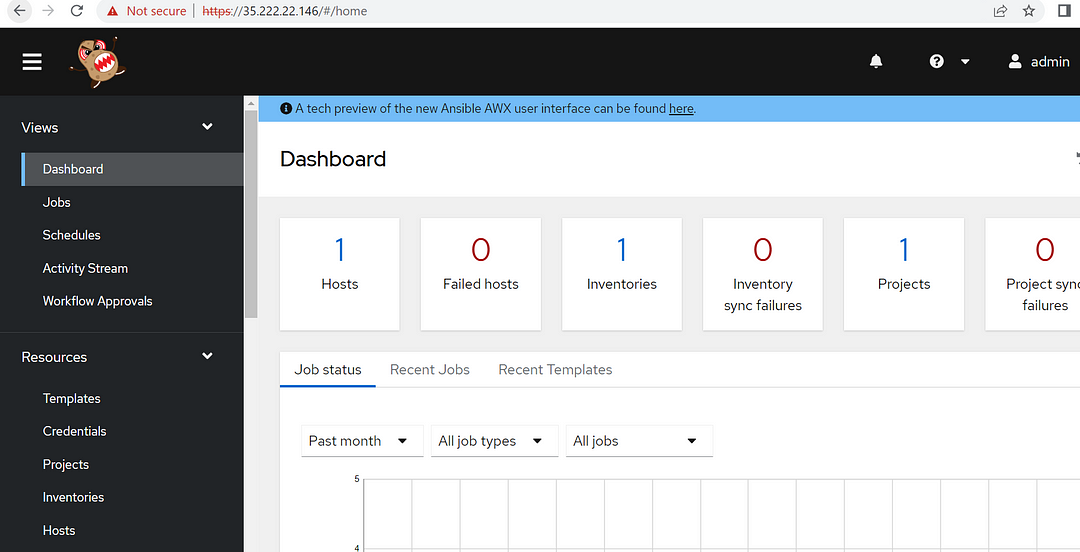
- Step 14
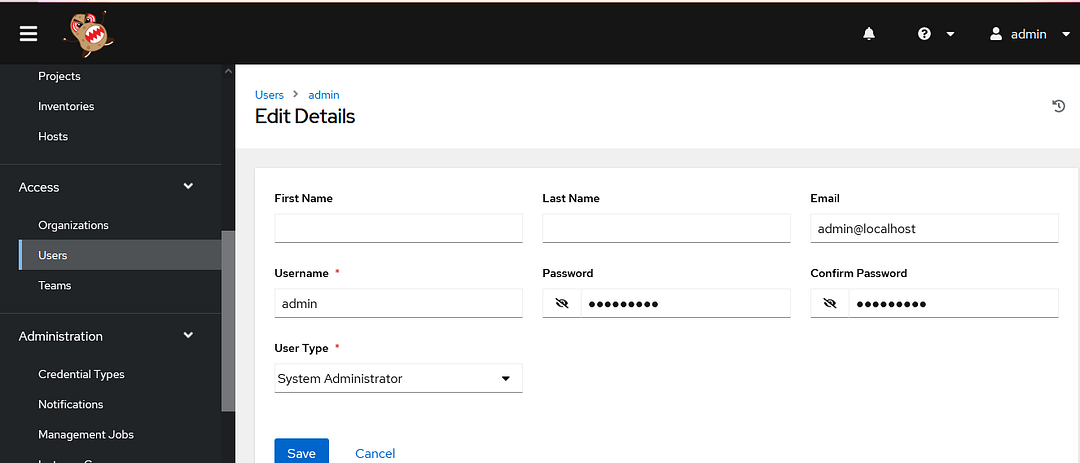
You must change the default password for admin user as security measures by going to admin profile page and entering new password.
- Step 15
To change the admin password, In left pane click on Users as shown below.
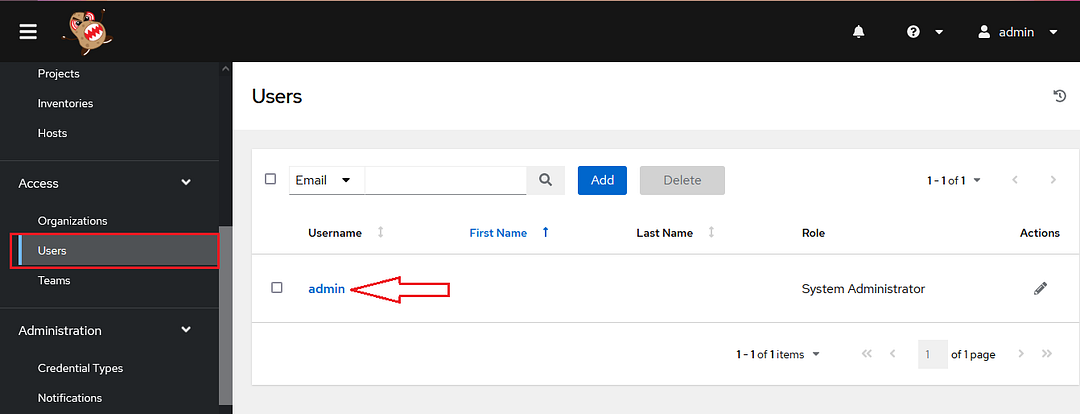
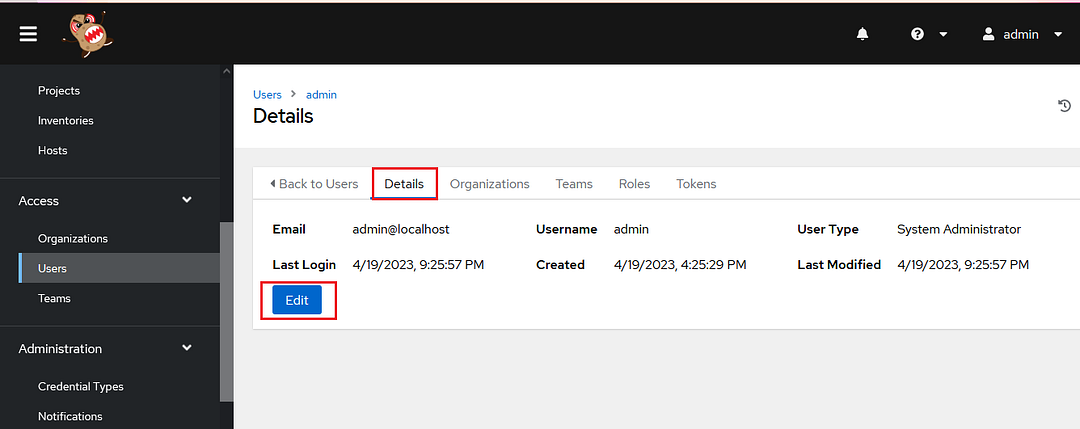
- Step 16
Click on admin user, click on edit and enter the new password and save the changes.
Conclusion
In conclusion, Ansible AWX is a powerful open-source automation tool that provides a modern web-based GUI and API interface to manage and schedule Ansible Playbooks. It offers a centralized and user-friendly interface for managing infrastructure deployments, application management, and IT operations. With Ansible AWX, users can collaborate, version control, and schedule jobs to manage and monitor Ansible automation workflows. In this article, we have provided a step-by-step guide on how to set up Ansible AWX on Azure using Ubuntu 22.04. By following these instructions, users can quickly set up an Ansible AWX environment on Azure, allowing them to automate tasks and manage IT infrastructure effectively. Additionally, users who prefer an out-of-the-box environment can consider using Techlatest’s Ansible AWX, a pre-built offering available on the Azure Marketplace.

Subscribe to my newsletter
Read articles from Techlatest.net directly inside your inbox. Subscribe to the newsletter, and don't miss out.
Written by

Techlatest.net
Techlatest.net
Bringing the latest tech to grow your business. AWS, GCP & Azure registered partner and cloud solution provider on latest tech.