AWS and IAM Basics☁
 Dhwarika Jha
Table of contents
AWS
Amazon Web Services is one of the most popular Cloud Providers that has a free tier too for students and Cloud enthusiasts for their
User Data in AWS
When you launch an instance in Amazon EC2, you have the option of passing user data to the instance that can be used to perform common automated configuration tasks and even run scripts after the instance starts. You can pass two types of user data to Amazon EC2: shell scripts and cloud-init directives.
You can also pass this data into the launch instance wizard as plain text, as a file (this is useful for launching instances using the command line tools), or as base64-encoded text (for API calls).
This will save time and manual effort every time you launch an instance and want to install any application on it like Apache, docker, Jenkins etc.
IAM
AWS Identity and Access Management (IAM) is a web service that helps you securely control access to AWS resources. With IAM, you can centrally manage permissions that control which AWS resources users can access. You use IAM to control who is authenticated (signed in) and authorized (has permissions) to use resources.
Task1
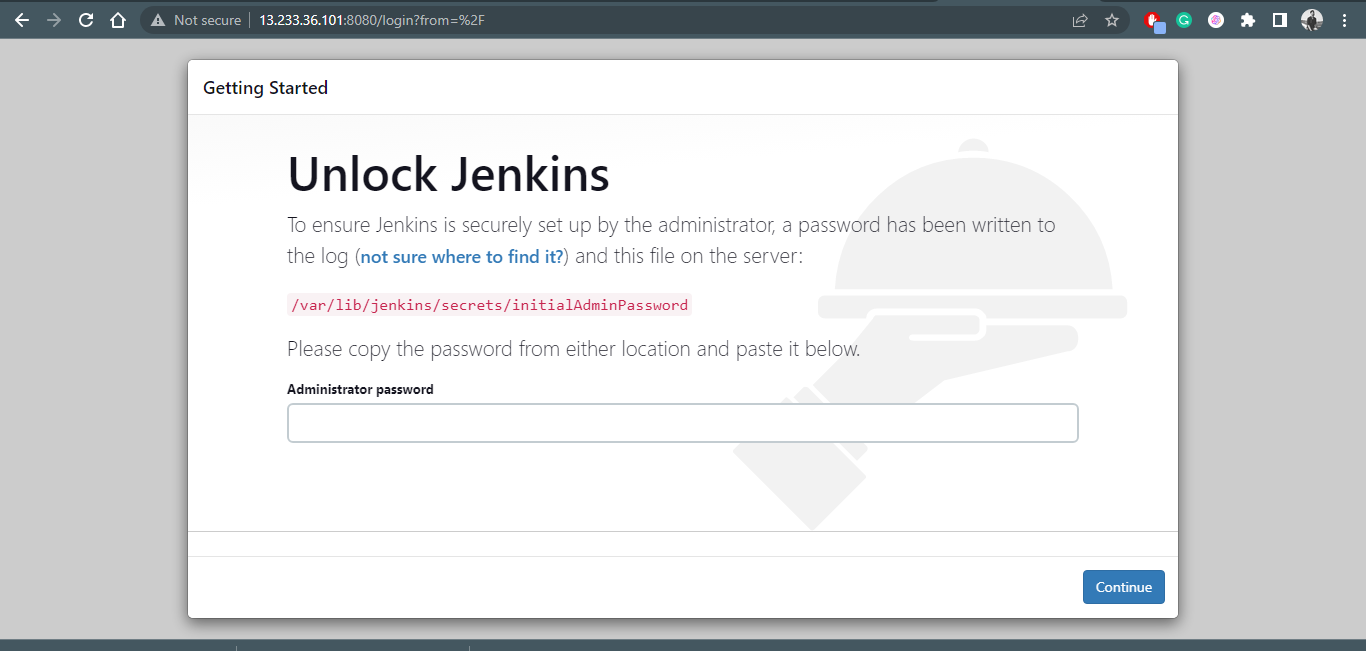
Launch the EC2 instance with already installed Jenkins on it. Once the server shows up in the console, hit the IP address in the browser and your Jenkins page should be visible.
Take a screenshot of the Userdata and Jenkins page, this will verify the task completion.
Go to the AWS Management Console (https://console.aws.amazon.com/) and sign in to your AWS account.
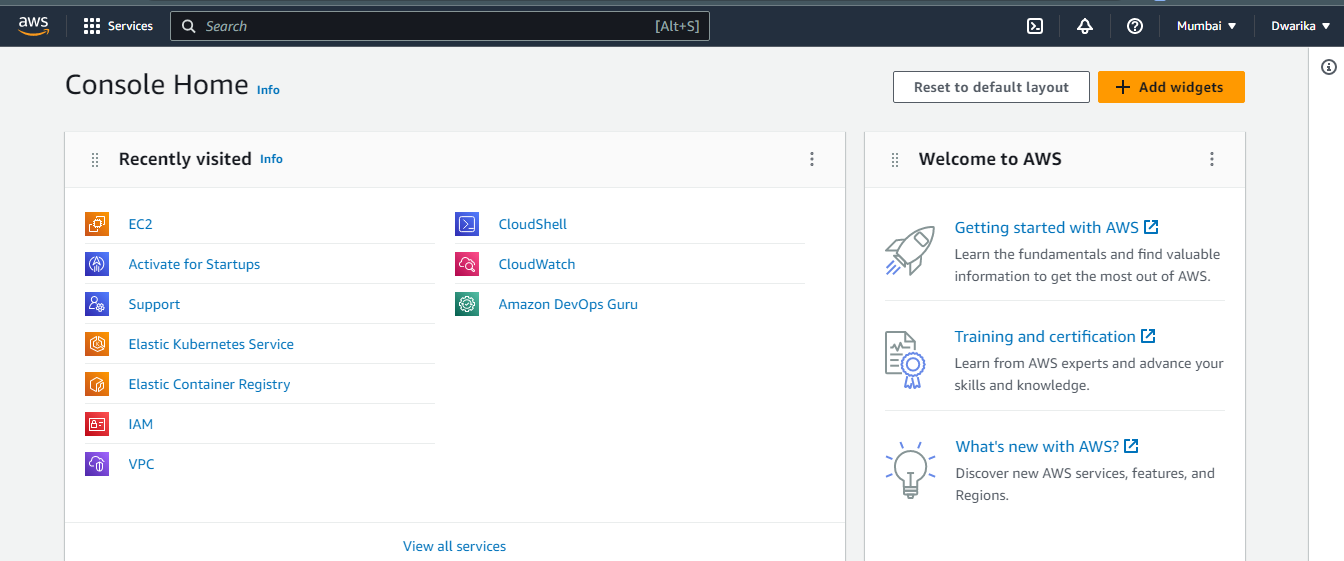
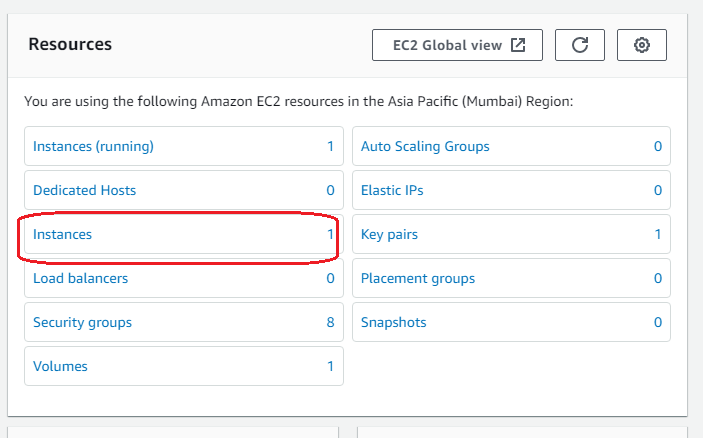
Open the EC2 service, and Click Instance.
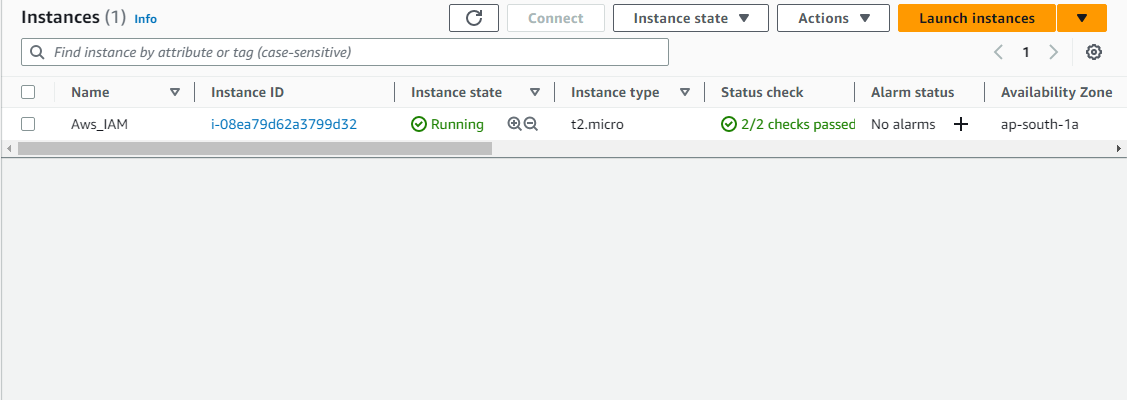
Click on the "Launch Instance" button.
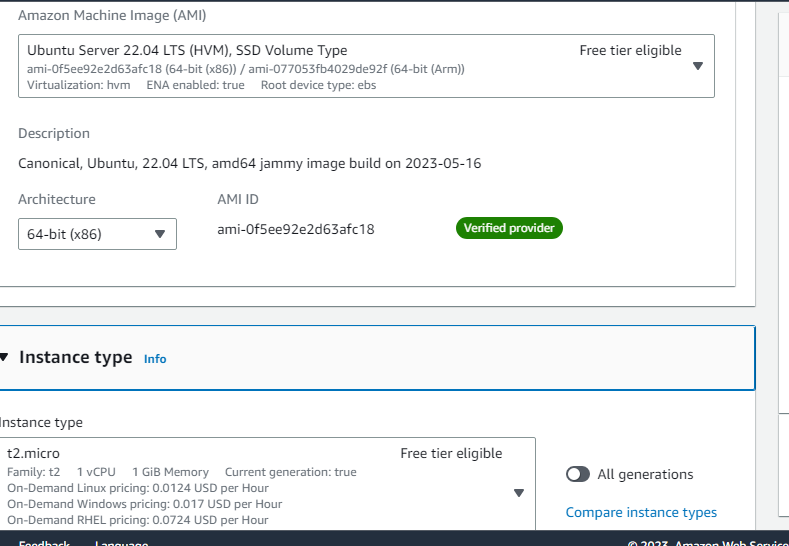
Choose an Amazon Machine Image (AMI)
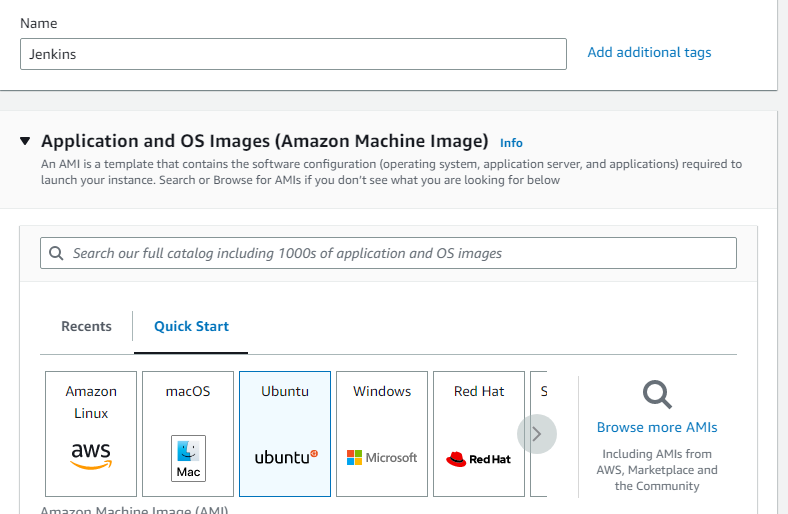
Select the instance type that meets your requirements. For example, you can choose an instance type like t2.micro if you're just testing or a larger instance type for production use.
Go to advanced details. Give commands of docker, java and Jenkins installations in User-data and Lunch Instance
 #!/bin/bash

 #Installation of Java
 sudo apt update -y
 sudo apt install openjdk-11-jre -y

 # Install Jenkins
 curl -fsSL https://pkg.jenkins.io/debian-stable/jenkins.io-2023.key | sudo tee \
   /usr/share/keyrings/jenkins-keyring.asc > /dev/null
 echo deb [signed-by=/usr/share/keyrings/jenkins-keyring.asc] \
   https://pkg.jenkins.io/debian-stable binary/ | sudo tee \
   /etc/apt/sources.list.d/jenkins.list > /dev/null
 sudo apt-get update -y
 sudo apt-get install jenkins -y

 # Install Docker
 sudo apt-get install docker.io -y
 sudo usermod -aG docker $USER

 # (Optional) Add Jenkins user to the docker group
 sudo usermod -aG docker jenkins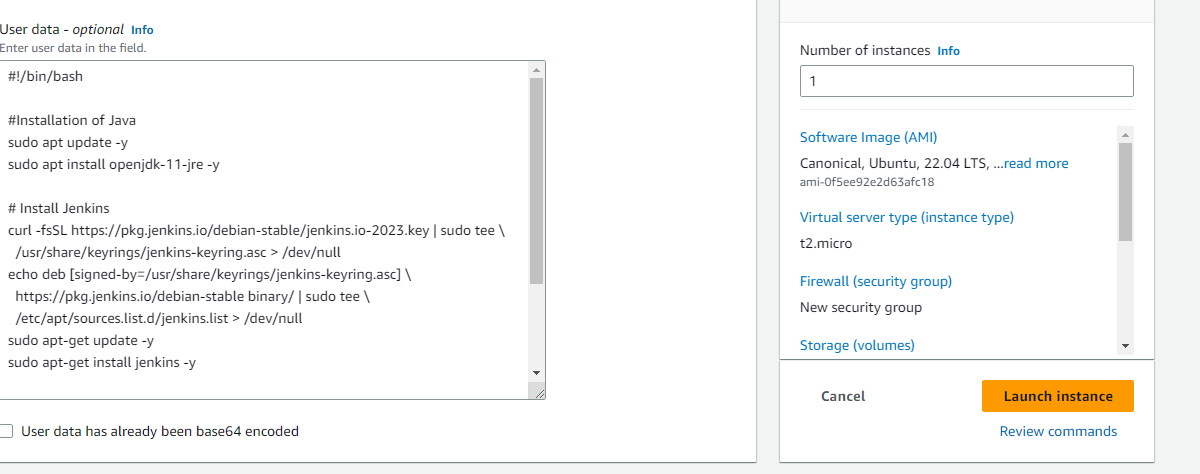
Create a security group that allows inbound traffic on port 8080 for Jenkins.
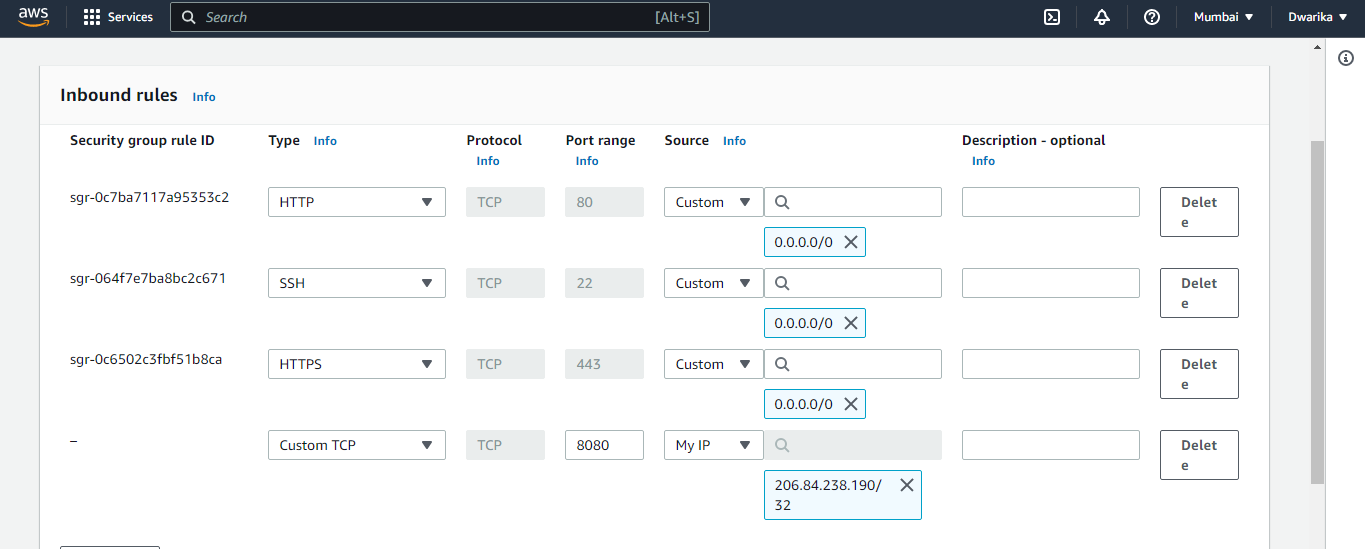
Open your web browser and enter the IP address of the instance followed by port number 8080 (e.g., http://<public-ip>:8080). This will take you to the Jenkins login page
Task2:
Read more on IAM Roles and explain the IAM Users, Groups and Roles in your own terms.
IAM (Identity and Access Management) is an AWS service that allows you to manage users, groups, and roles in your AWS environment. These three components work together to provide granular access control and permissions for your AWS resources.
IAM Users: IAM users are individual AWS accounts that you create for the people or applications that require access to your AWS resources. Each user has a unique set of security credentials, including a username and password, access keys, and permissions. You can create, modify, and delete users as needed, and grant them specific permissions to access or manage AWS resources.
IAM Groups: IAM groups are collections of IAM users. You can use groups to simplify permissions management, by assigning permissions to a group instead of individual users. For example, you can create a group for developers and assign permissions to access development resources. When you add a user to the group, they automatically inherit the group's permissions.
IAM Roles: IAM roles are another way to manage access to AWS resources. Roles are similar to users, but they are not associated with a specific person or account. Instead, roles are assumed by trusted entities, such as EC2 instances, Lambda functions, or other AWS services. Roles can have permissions policies attached to them, which define the specific permissions that the role is allowed to use.
Create three Roles named: DevOps-User, Test-User and Admin.
Log in to the AWS Management Console and navigate to the IAM dashboard.
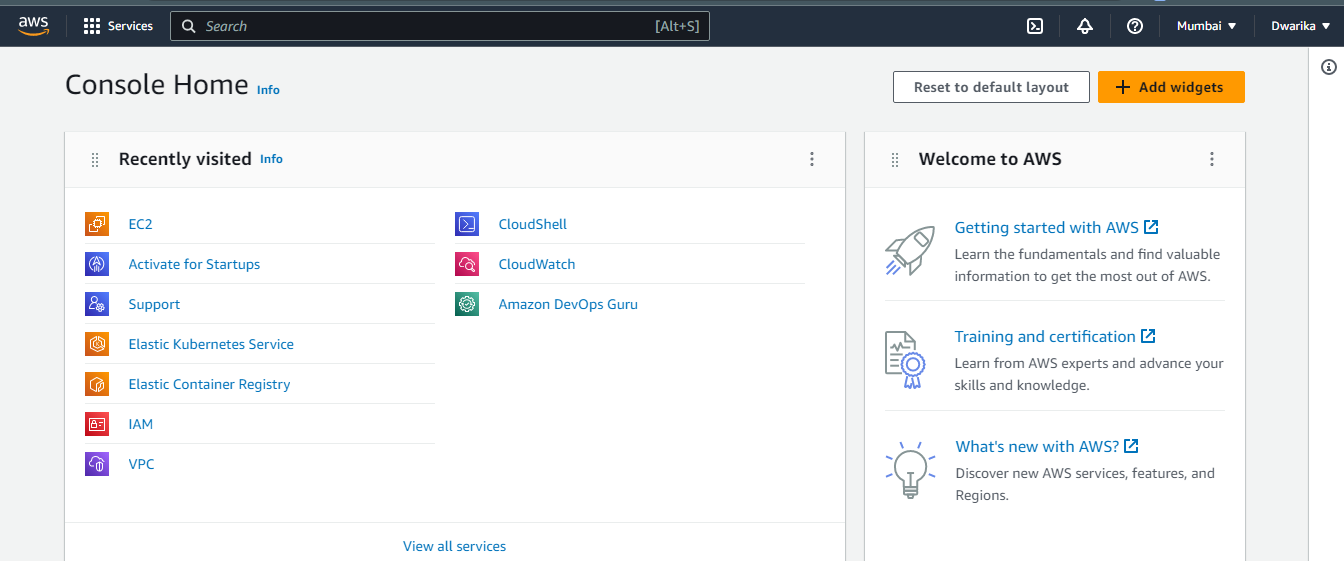

Click on "Roles" in the left-hand menu and then click on the "Create role" button.

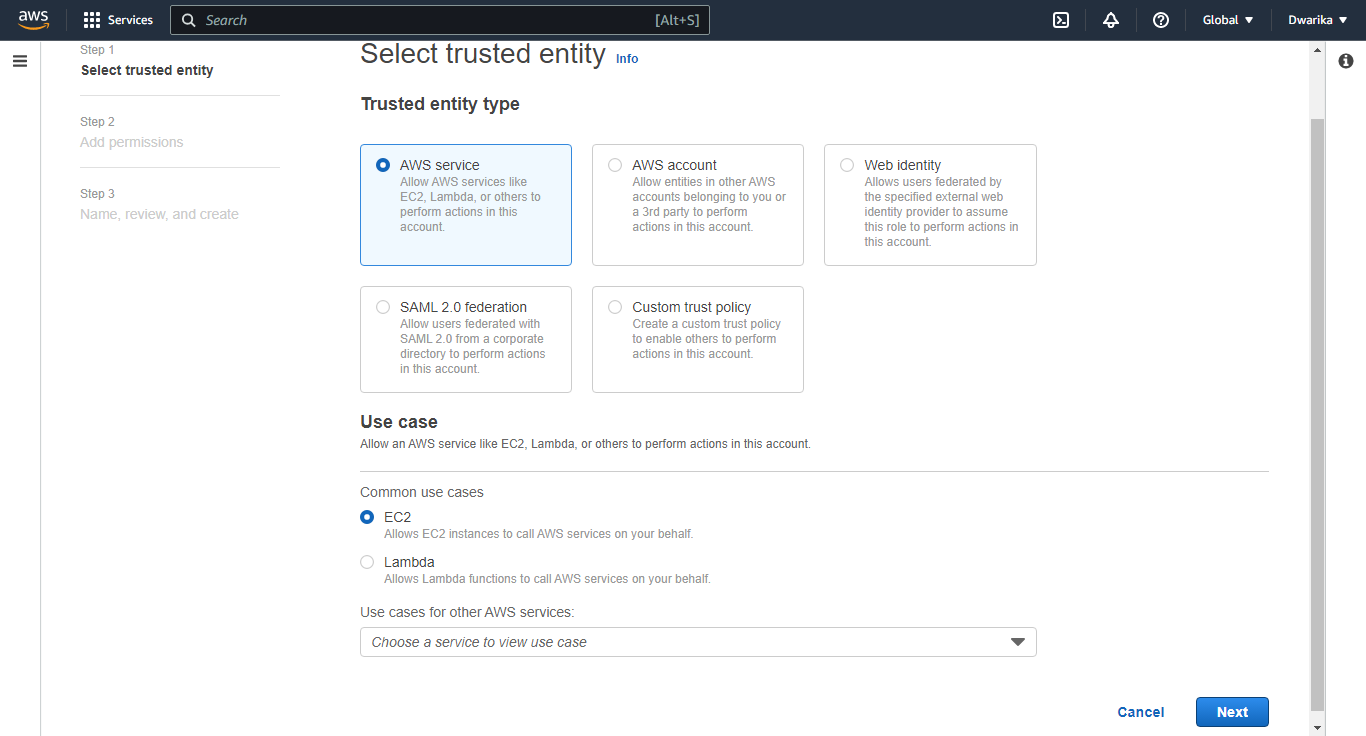
Choose the appropriate use case for the role. For example, if you want to create a role for an EC2 instance, choose "AWS service" and then "EC2".
Select the appropriate permissions policies for the role. You can choose from existing policies or create a custom policy.
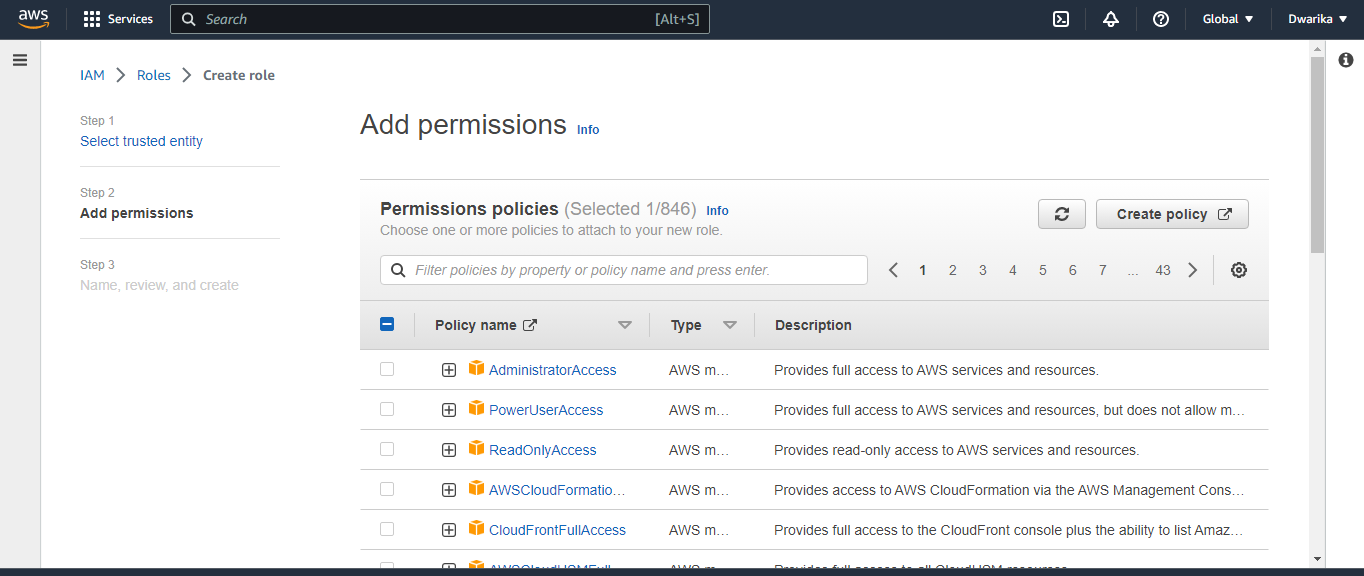
Choose the policy that defines the permissions for the role. For the DevOps-User role, you might choose the “AmazonEC2FullAccess” policy. For the Test-User role, you might choose the “AmazonEC2ReadOnlyAccess” policy. For the Admin role, you might choose the “AdministratorAccess” policy. Enter a name for the role and click "Create role".
Repeat the above steps for each role you want to create: DevOps-User, Test-User, and Admin.
Once the roles are created, you can assign them to individual IAM users or groups as needed, and control their access to AWS resources.
Subscribe to my newsletter
Read articles from Dhwarika Jha directly inside your inbox. Subscribe to the newsletter, and don't miss out.
Written by
