How to Setup Blackarch Linux On GCP (Google Cloud Platform)
 Techlatest.net
Introduction
BlackArch Linux is an Arch Linux-based security distribution designed for penetration testing, digital forensics and software security testing. It has a large collection of tools for ethical hacking, computer forensic investigation, penetration testing, exploitation, network analysis, and security auditing. The distribution is maintained by an international community of security researchers and contributors. BlackArch Linux also supports the Arch User Repository (AUR), enabling users to install additional BlackArch tools and keep them updated. With its pre-installed security tools, BlackArch Linux provides a comprehensive and customizable platform for security testing professionals and enthusiasts.
In this article, we will introduce three topics
Blackarch Linux — The BlackArch is an Arch Linux-based, open-source penetration testing distribution tool. It is used by the people and officials interested in cyber security and penetration testing that provides a large number of cyber security tools. It is built specifically for security researchers and penetration testers.
Features of Blackarch which is provided by Techlatest.net
Step by Step guide — Guide on how to set up Blackarch Linux Environment on GCP(Google Cloud Platform).
Features of ParrotOS provided by Techlatest.net
Easy Setup: Setting up Blackarch is incredibly easy, making it an attractive choice for both beginners and experienced users. The installation process is straightforward and user-friendly, ensuring a smooth experience for those new to the operating system. And You can set up the OS in a few clicks.
Preinstalled tools: Blackarch which is provided by Techlatest comes with infinite Preinstalled packages.
Step by Step Guide to install, setup, and run Black Arch Linux On GCP (Google Cloud Platform)
Note
If you want to save time to set up a Blackarch on GCP with out of a box environment, you can opt for Techlatest’s BlackArch Linux, available on the GCP marketplace.
If you are looking to quickly set up and explore Blackarch, Techlatest.net provides out-of-the-box setup for Blackarch on AWS, Azure and GCP. Please follow the below links for the step-by-step guide to set up Blackarch on your choice of cloud platform.
For Blackarch Linux: AWS, GCP & Azure.
- Step 1
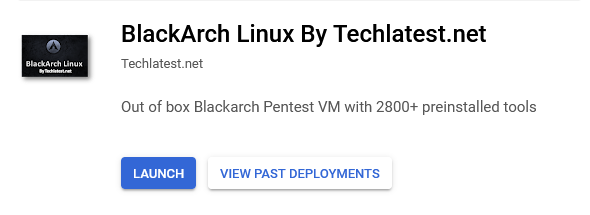
Open BlackArch Linux marketplace listing on GCP Marketplace.
- Step 2
Click on the Launch Button.
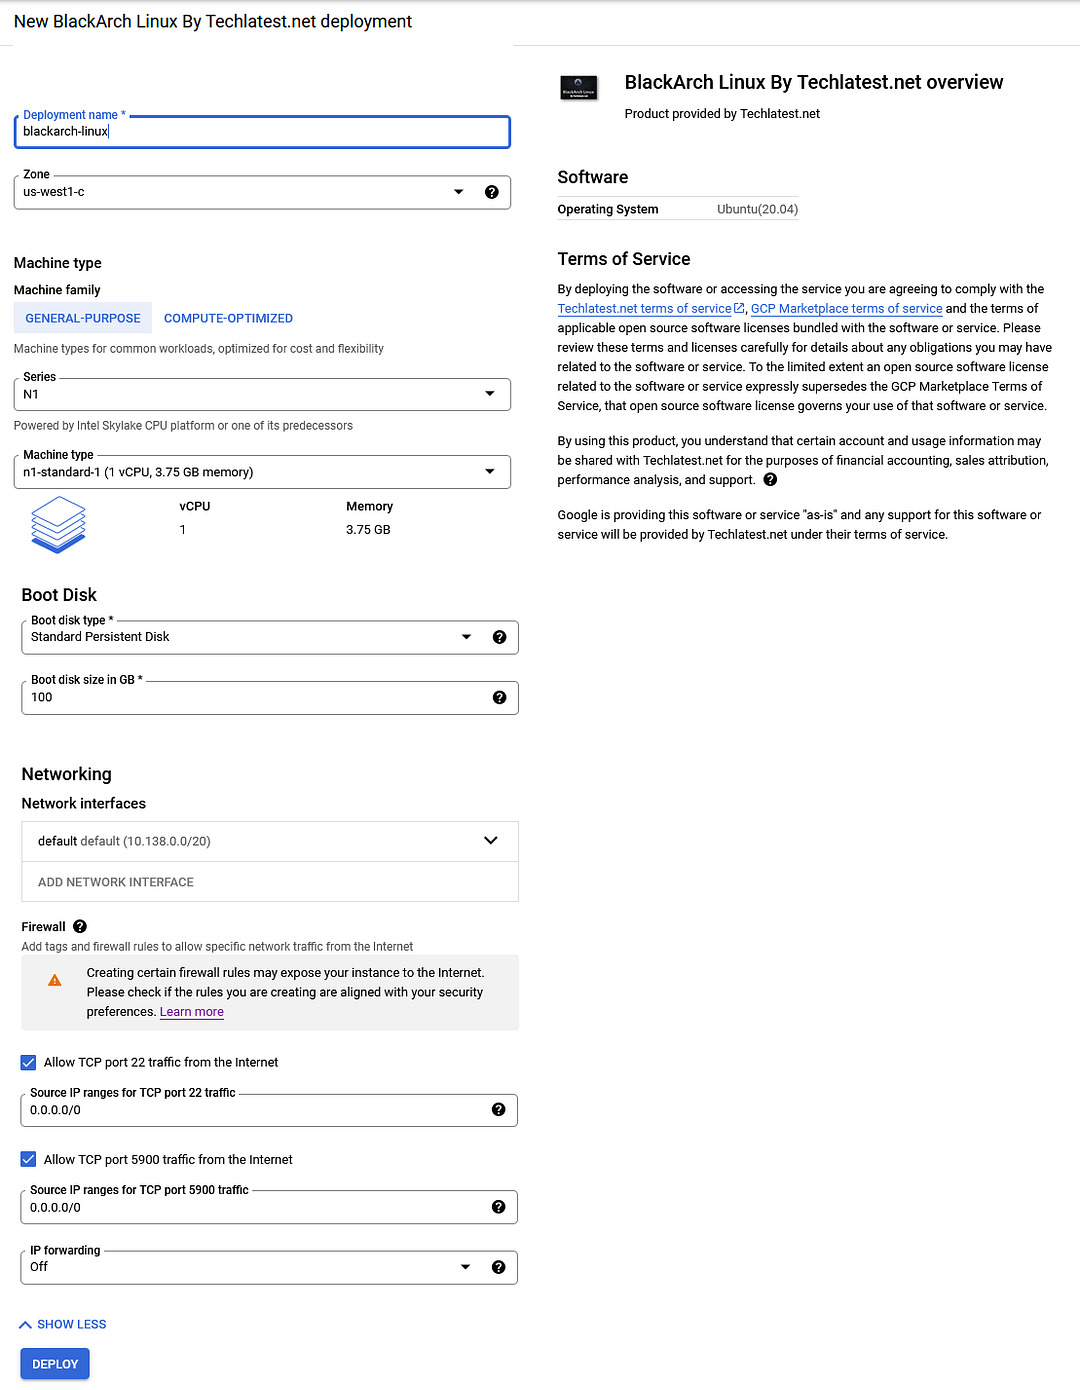
Select a zone where you want to launch the VM(such as us-east1-)
Optionally change the number of cores and amount of memory. (This defaults to 1 vCPUs and 3.75GB ram.)
Optionally change the boot disk type and size. (This defaults to “Standard Persistent Disk” and 100 GB respectively)
Optionally change the network name and subnetwork names. Be sure that whichever network you specify has ports 22 (for SSH) and 5900 (for RDP) exposed.
Click Deploy when you are done. BlackArch Linux VM will start deploying.
- Step 3
A summary page displays when the compute engine is successfully deployed. Click on the Instance link to go to the instance page.
- Step 4
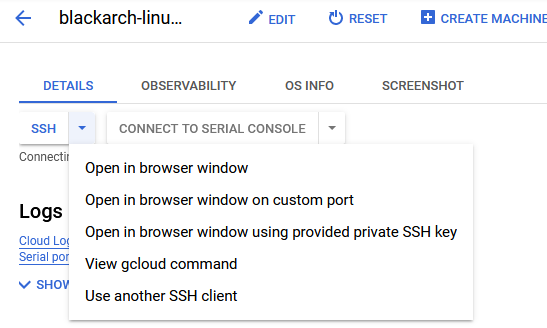
On the instance page, click on the “SSH” button, and select the “Open in browser window option”.
- Step 5
This will open the SSH window in a browser.
To connect to the BlackArch Linux command line, run the below command.
sudo docker exec -it blackarch /bin/bash

If the above command returns an “Error response from daemon:” error, then run the below command to start the BlackArch container and then run the above command again.
sudo docker start blackarch

- Step 6
Then From your local Windows machine, go to the “start” menu, in the search box type and select “VNC”.
Note: If you don’t have VNC installed on your Windows machine, first Install VNC Viewer as per your device.
- Step 7
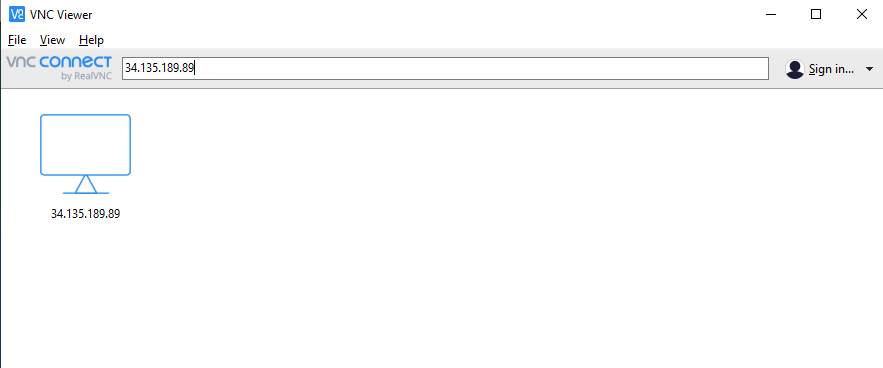
In the “VNC Viewer” wizard, copy the external IP and click on the connect Button. And Accept the encryption warning.
- Step 8
Now you are connected to of box BlackArch Linux environment via Windows Machine with root user.
- Step 9
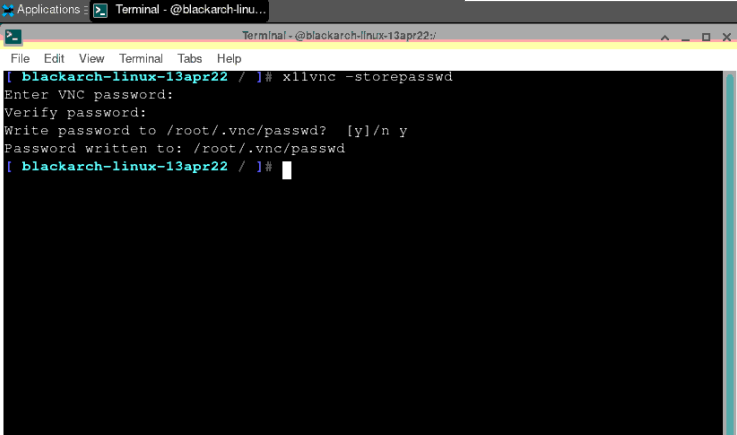
After your first login, Open the terminal and run the below command to change the root user password.
x11vnc -storepasswd
- Step 10
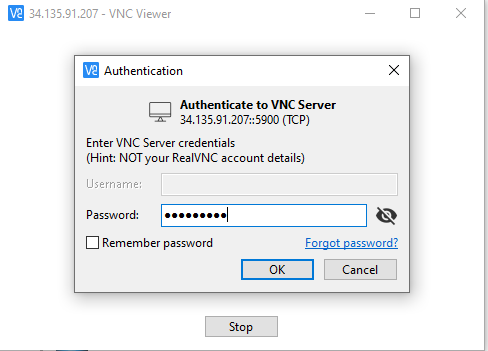
Once the password for the root user is set, re-login with the root user and new password.
- Step 11
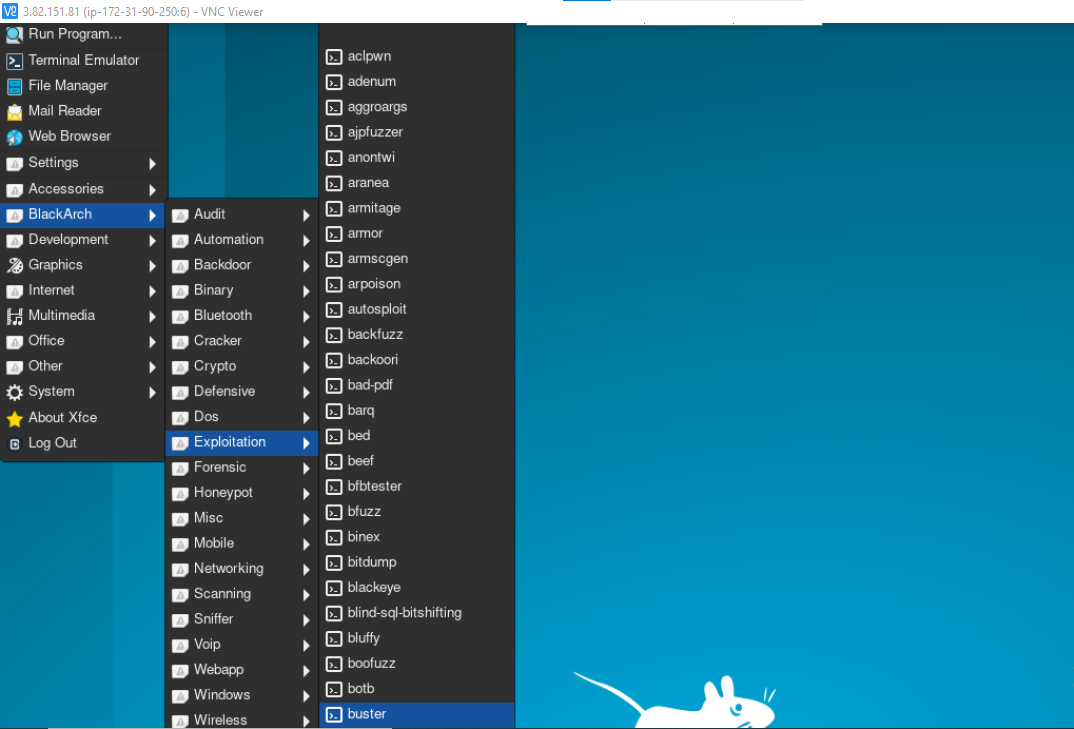
Now you are connected to of box BlackArch Linux environment which comes with preinstalled Blackarch programs.
Conclusion
The above blog provides a step-by-step guide to launching BlackArch Linux Available on GCP Marketplace provided by Techlatest.net and accessing it through a Windows machine. It covers the process of deploying a compute engine, connecting to the command line, setting up the VNC viewer, and changing the root user’s password. By following these steps, users can access a pre-installed BlackArch Linux environment with various security testing tools. This guide is useful for security testing professionals and anyone interested in learning more about BlackArch Linux. The blog makes it easy for users to get started with the BlackArch Linux environment on GCP Marketplace and begin testing and debugging for security purposes.

Subscribe to my newsletter
Read articles from Techlatest.net directly inside your inbox. Subscribe to the newsletter, and don't miss out.
Written by

Techlatest.net
Techlatest.net
Bringing the latest tech to grow your business. AWS, GCP & Azure registered partner and cloud solution provider on latest tech.