Connecting to an AWS EC2 Instance Using Session Manager
 Parikshit Kudalkar
Table of contents
Introduction: In the world of cloud computing, Amazon Web Services (AWS) offers a wide range of powerful services that enable businesses to scale their infrastructure efficiently. One of these services is Amazon EC2 (Elastic Compute Cloud), which provides scalable virtual servers in the cloud. Traditionally, connecting to an EC2 instance required configuring SSH access and managing security keys. However, AWS has introduced a more secure and convenient method called Session Manager. In this blog post, we will explore how to connect to an AWS EC2 instance using Session Manager.
What is AWS Session Manager?
AWS Session Manager is a fully managed service that allows you to manage your EC2 instances securely, without the need for SSH access or opening inbound ports in your security groups. It provides a browser-based interactive shell and an integrated experience with the AWS Management Console, making it easier to troubleshoot and manage your instances.
2. Session Manager Features and Benefits:
Session Manager offers several features and benefits that make it a preferred method for managing EC2 instances:
No need to manage SSH keys: With Session Manager, you don’t need to generate, distribute, or rotate SSH keys. Access to instances is controlled through IAM policies.
Enhanced security: By leveraging AWS Identity and Access Management (IAM), you can apply fine-grained permissions to control who can access the instances.
Auditing and logging: Session Manager provides detailed audit logs, allowing you to track user activity and commands executed on the instances.
Port forwarding: Session Manager supports port forwarding, enabling you to securely access services running on your EC2 instance without opening inbound ports.
3. Configuring Session Manager: To use Session Manager, follow these steps:
1. To create an IAM role and attach the required policy for EC2 instances to be accessed through SSM, please follow these step-by-step instructions.

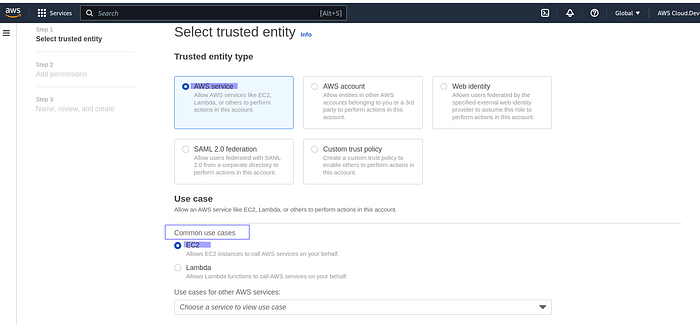
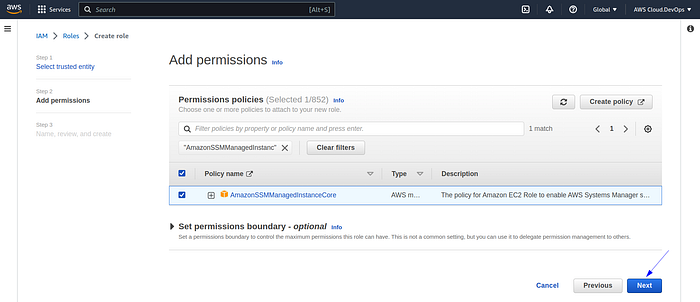
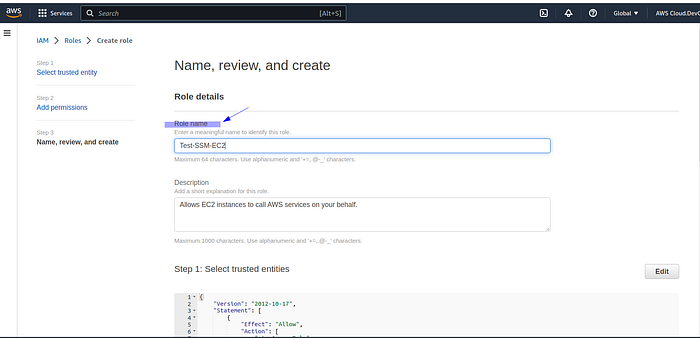
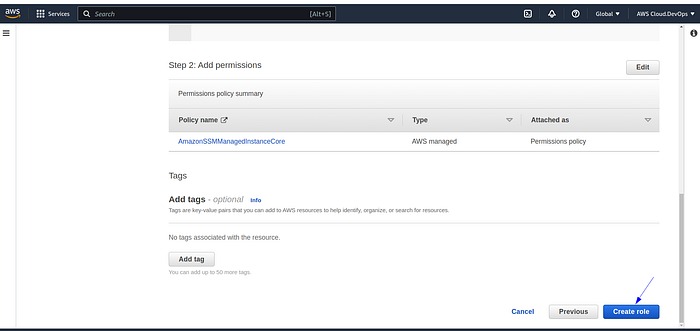
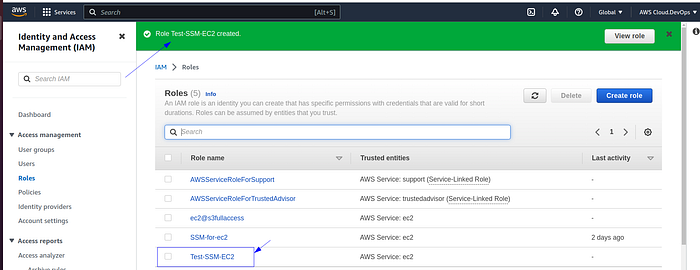
We have created this role with the intention of attaching it to multiple EC2 instances in the future. This approach allows for consistent and efficient management across multiple instances.
2. Launch an EC2 instance, In our case, we have installed an Amazon Linux machine, but you can choose to install any Linux distribution or Windows machine according to your specific requirements.

3. To attach the created role (EC2_With_SSM)to the instance, follow these step-by-step instructions.
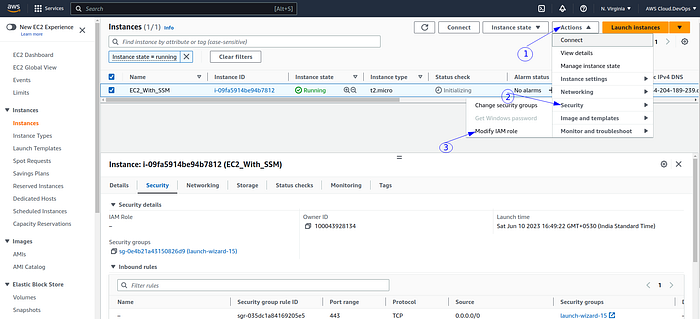
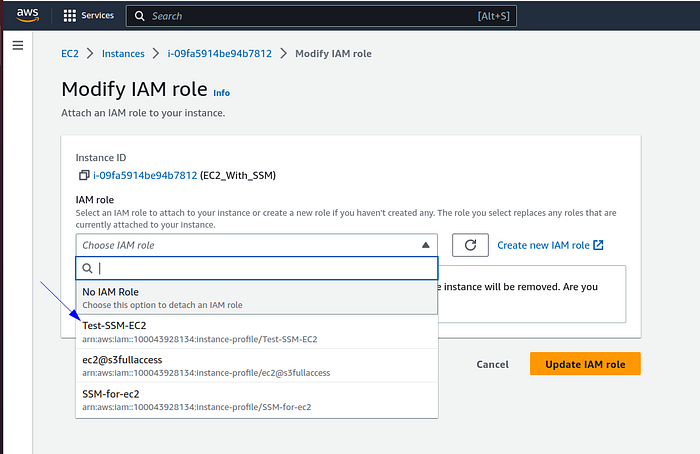
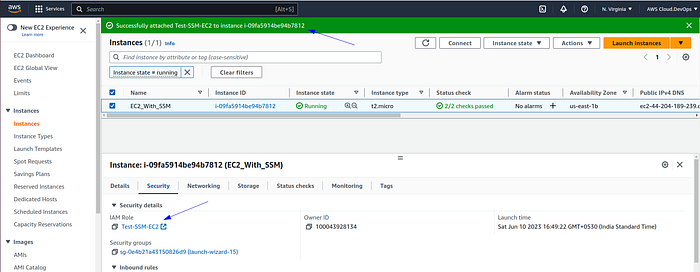
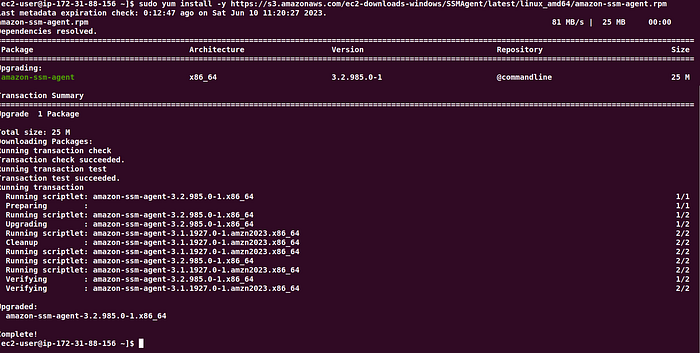
4. Now, SSH into the instance and install the SSM package using the following command.
(You can refer AWS official page: https://docs.aws.amazon.com/systems-manager/latest/userguide/agent-install-al2.html)
. sudo yum install -y https://s3.amazonaws.com/ec2-downloads-windows/SSMAgent/latest/linux_amd64/amazon-ssm-agent.rpm

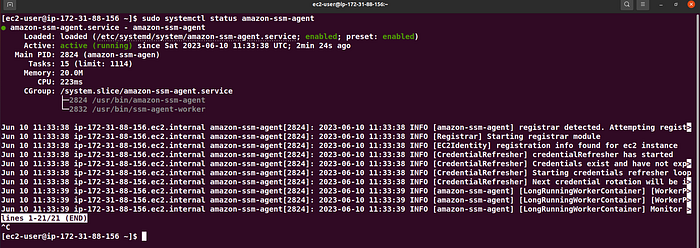
First, check the status of the SSM agent and start it if it is in a stopped state
5. Now, navigate to the AWS Management Console and connect to the instance using the SSM option.
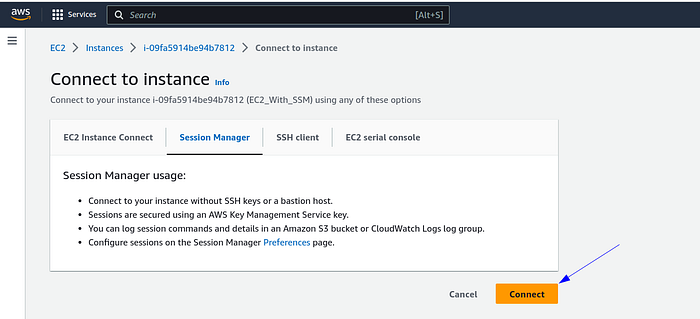

Now, the instance can be accessed by multiple users simultaneously without the need for SSH keys.
I hope this blog has provided valuable insights and guidance on leveraging Session Manager in your AWS environment. Feel free to leave any comments or questions below.
Thank you for reading! 🧡
- Parikshit Kudalkar. 🌻🌟
Subscribe to my newsletter
Read articles from Parikshit Kudalkar directly inside your inbox. Subscribe to the newsletter, and don't miss out.
Written by

Parikshit Kudalkar
Parikshit Kudalkar
Cloud DevOps Engineer and Technical Blogger: Exploring AWS Services and DevOps Tools with Real-World Industrial Use Cases and Lab Exercises.