Crafting 3D Experiences with React Three Fiber: Core Concepts and Scene Creation
 ruchita
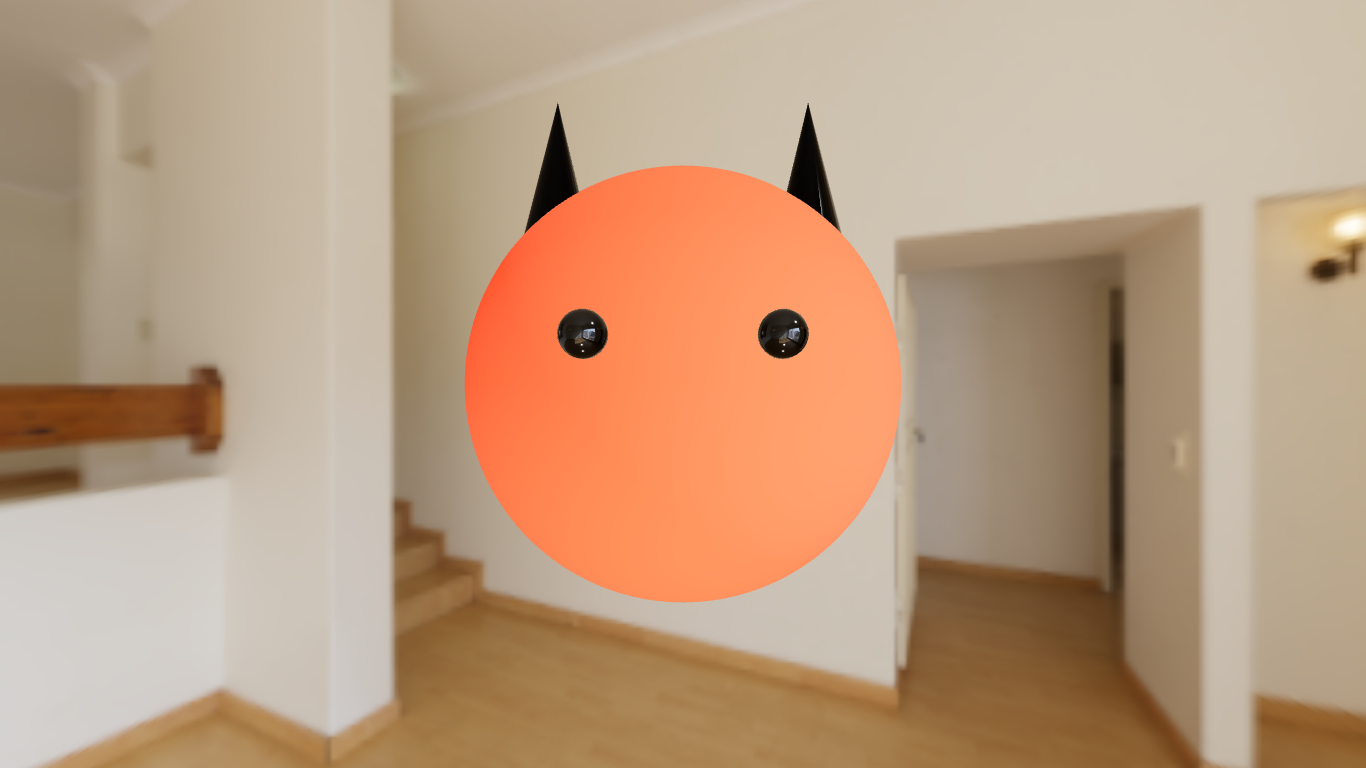
If you've ever thought of creating those amazing Three.js websites but with the simplicity and familiarity of React, then you're in for a treat. React Three Fiber lets you do just that!
What is React Three Fiber?
React Three Fiber is a powerful library that combines the declarative nature of React with the capabilities of the popular WebGL library, Three.js. With React Three Fiber, we can build immersive and interactive 3D web experiences using familiar React patterns.
In this blog post, we will go through the core concepts necessary for building 3D scenes. Building upon this knowledge, we will create a scene featuring a cute monster using React Three Fiber. We will arrange some 3D shapes to create an illusion of a 3D creature. All you need is a basic understanding of React to follow along!
You can try it out here
Core Concepts
Scene
A Scene is like a container holding all the things like objects, cameras, and lights. Similar to a movie scene where we have the actors, cameras, and lights.
Camera
The camera represents the viewpoint from which the scene is rendered. It is what sees the scene.
Renderer
The renderer is responsible for rendering the scene onto a canvas. It renders the scene from the camera's point of view.
Light
Light is what lights up the scene. It makes objects visible.
Geometry
Geometry defines the shape and structure of an object.
Material
The material determines the appearance of an object. It defines the surface of an object.
Mesh
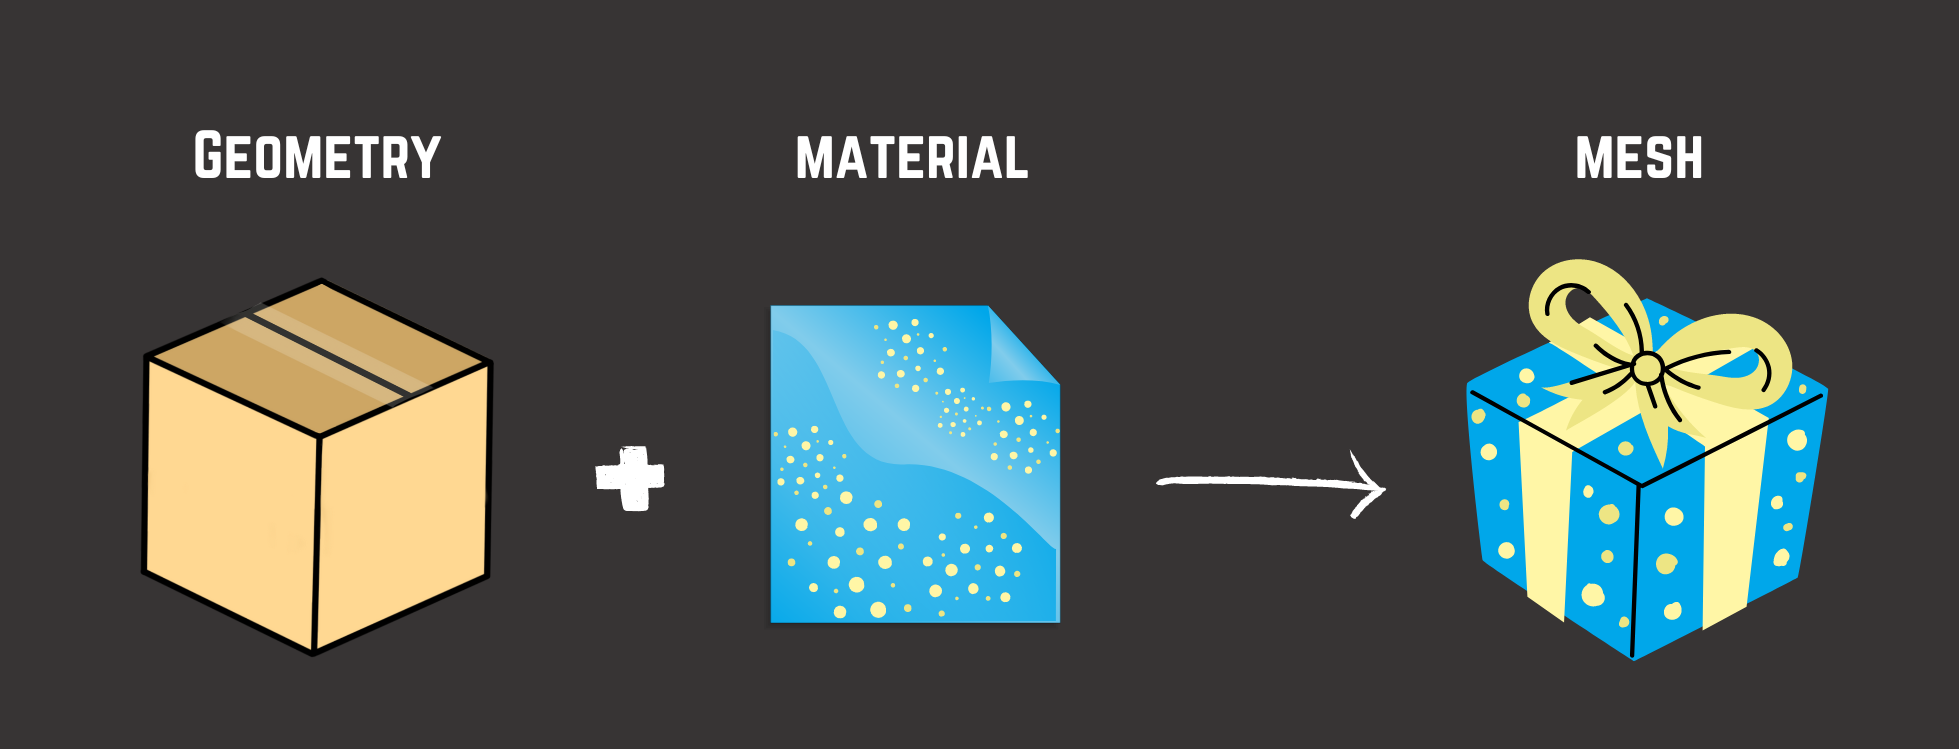
A mesh is a combination of geometry and material. It is any 3D object.
The concepts weren't too challenging, were they?
Moving forward, we will refer to React Three Fiber as R3F for convenience and brevity. Well then, let's get to coding!
Creating the 3D Scene
Project Set-Up
We'll start by initializing the project using Vite and installing the necessary dependencies.
# Create app
npm create vite@latest monster-3d

# Select React as the framework and JavaScript as the variant

cd monster-3d

# Install dependencies
npm install three @react-three/fiber @react-three/drei

# Start the development server
npm run dev
Remove the boilerplate code. As with any other React project, create a new folder called components inside the src folder. Within the components folder, create a file named Monster.jsx (you can choose a different name if you want). Here's the updated folder structure:

Creating the Canvas
In App.jsx, we will create a div and assign it an id. We'll add the Canvas component from R3F inside this div. Canvas is where our scene will be rendered. According to the documentation
The Canvas component does some important setup work behind the scenes:
It sets up a Scene and a Camera, the basic building blocks necessary for rendering
It renders our scene every frame, you do not need a traditional render-loop
import { Canvas } from '@react-three/fiber';
import './App.css';

const App = () => {
  return (
    <div id="canvas-container">
      <Canvas></Canvas>
    </div>
  );
};

export default App;
By default, the canvas is transparent, so we won't be able to see it in the browser but it is there. You can add a background color using CSS or use developer tools to view the canvas. If you do that, you'll notice that the canvas doesn't occupy the entire space. So, let's add some basic styling to make the canvas span the full height of the webpage and remove the default margin on the body. Note that the Canvas is responsive to fit the parent node, so we can control its size by changing the height and width of the #canvas-container div.
/* takes care of the default margin and padding */
* {
  margin: 0;
  padding: 0;
  box-sizing: border-box;
}

#canvas-container {
  height: 100vh;
  background-color: #1b1b1b;
}
Adding the 3D Object
As we've learned in the core concepts, a 3D object is basically a combination of two things: geometry and material. Three.js provides a lot of built-in geometries and materials. We can also create our own custom geometry and material.
The entire Three.js library consists of classes that you can create instances of. But R3F does it the component way! For example, in Three.js, we have the BoxGeometry and MeshBasicMaterial classes. In R3F, the corresponding components would be boxGeometry and meshBasicMaterial. According to the R3F docs,
The general rule is that Fiber components are available under the camel-case version of their name in three.js.
The classes in Three.js can receive constructor arguments and properties. In R3F, we do that using props. In R3F, constructor arguments are always passed as an array via the args prop.

Before we proceed further, I want to let you know that we won't be diving into the details of every geometry or light and the arguments they take. Explaining each one in detail would make this blog post quite lengthy. Instead, I recommend keeping the Three.js docs open in another tab. This way, you can quickly refer to it whenever you need more information on specific geometries or lights we'll be using.
With that aside, it's time to create our monster! We'll start by creating its face using a built-in sphereGeometry as we want our monster to have a round face and meshStandardMaterial with red color for the material. We will pass three arguments to the sphereGeometry: radius, widthSegments, and heightSegments as an array via the args prop.
// Monster.jsx
 const Face = () => {
  return (
    <mesh>
      <sphereGeometry args={[2, 100, 100]} />
      <meshStandardMaterial color="red" />
    </mesh>
  );
};

export const Monster = () => {
  return <Face />;
};
Now, let's add it to the App component and make sure it is imported at the top!
const App = () => {
  return (
    <div id="canvas-container">
      <Canvas>
        <Monster />
      </Canvas>
    </div>
  );
};
And in the browser, we can now see the...black sphere?! Hold on, shouldn't it be red? Well, there's a catch!
Okay, so I want you to imagine the canvas as a dark room with you inside it. You have an object in your hand and you place it in front of you. Hmm, will you be able to see it? Of course not! You need a source of light for the object to become visible. The light needs to hit the object and reflect back to your eyes for you to see it.
(I purposefully set the background color of the canvas to a black shade to help you understand better. If you wish, you can set it to pure black, giving you much more sense of a room with no light. )
So, let's add a light source. Again, there are many different types of lights to choose from but for now, we'll use an ambientLight. This light evenly illuminates all objects in the scene. We will add light to our scene by putting the component into our Canvas. We will also set the intensity, which defaults to 1.
<Canvas>
  <ambientLight intensity={0.65} />
  <Monster />
</Canvas>
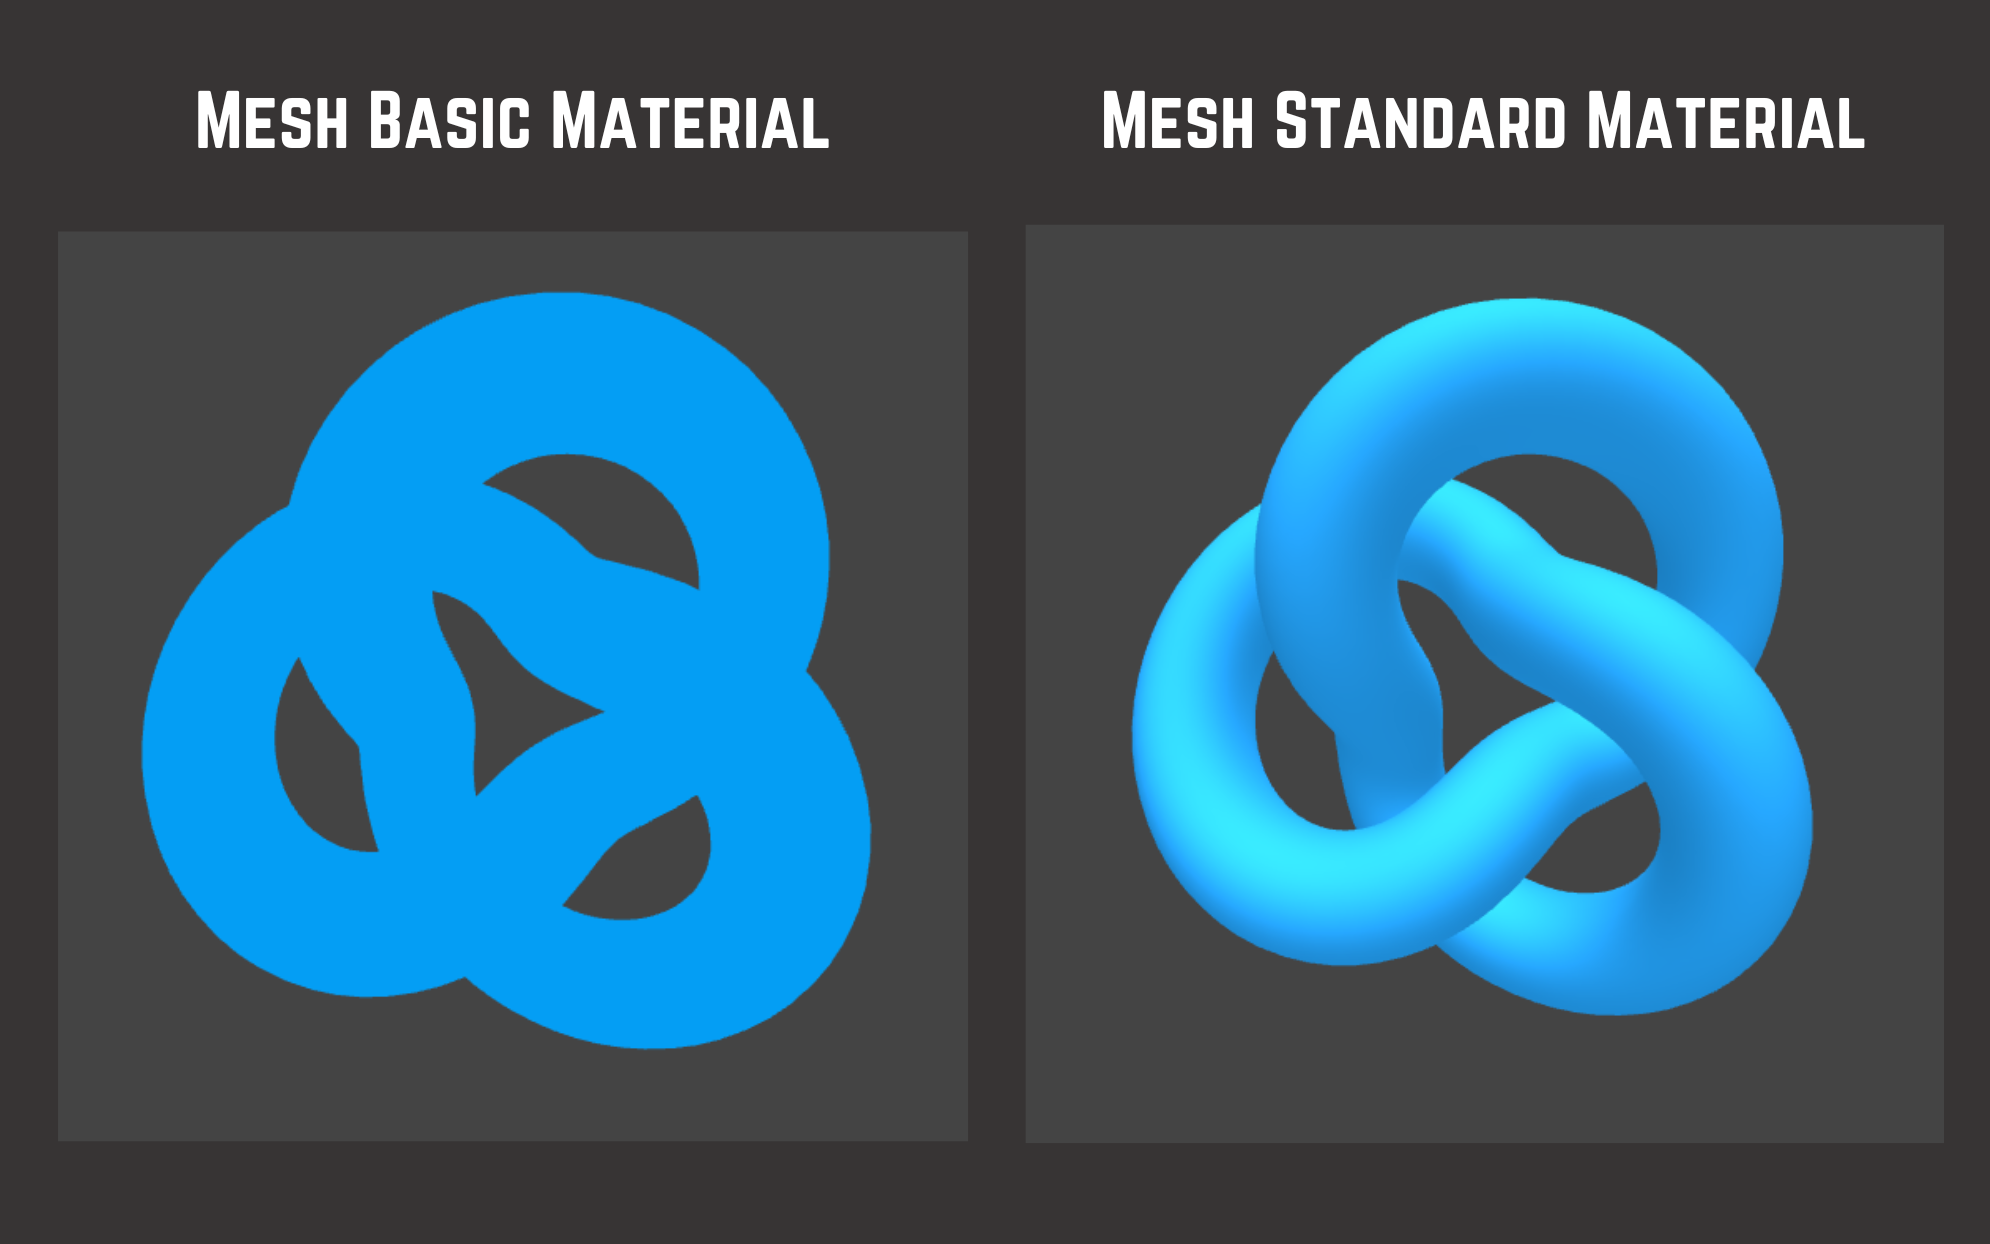
There, it is! We can now see the sphere...red sphere. You can use any material as long as it reflects light. Note some materials like the meshBasicMaterial does not reflect light. Light does not affect this material.
Now, let's also add the horns and eyes.
const Eyes = () => {
  return (
    <mesh>
      <sphereGeometry args={[0.1]} />
      <meshStandardMaterial color="black" />
    </mesh>
  );
};

const Horns = () => {
  return (
    <mesh>
      <coneGeometry args={[1.2, 5]} />
      <meshStandardMaterial color="black" />
    </mesh>
  );
};

export const Monster = () => {
  return (
    <>
      <Face />
      <Horns />
      <Horns />
      <Eyes />
      <Eyes />
    </>
  );
};
Okay so things are not gonna move around on their own, there's no prompt engineering here :). Remember, any object you add will always be placed at the position (0,0,0) by default. So, we need to position it as we need around the three axes x, y, and z.
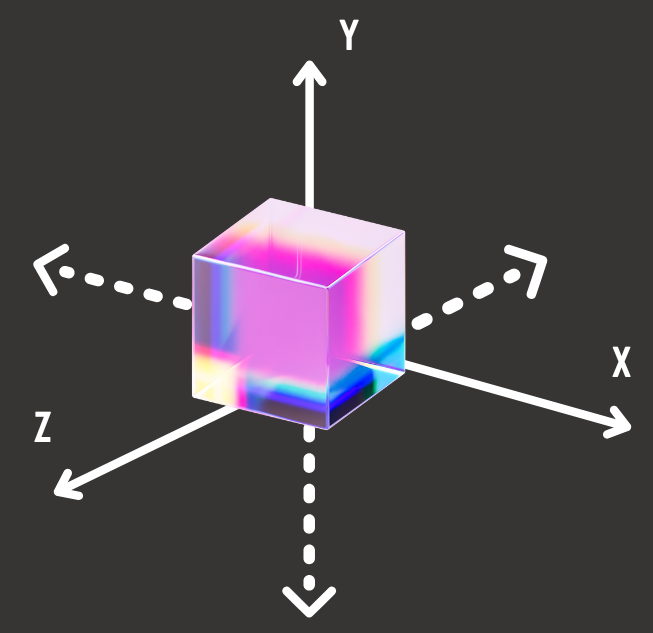
We will position the Eyes and Horns in a way that they will create an illusion of a monster face when viewed from the front. We can do that by setting the position prop on the mesh. In our components, we will pass the desired position value through the pos prop. It's important to note that the position prop on the mesh component directly sets the position in the canvas, while the pos prop is a regular React prop used to pass the value to our components. I have chosen to name pos for clarity, but you can use position if you prefer. We need to play around with the values to position the components as we want.
const Eyes = ({ pos }) =>  {
  return (
    <mesh position={pos}>
      <sphereGeometry args={[0.1]} />
      <meshStandardMaterial color="black" roughness={0} />
    </mesh>
  );
}

const Horns = ({ pos }) => {
  return (
    <mesh position={pos}>
      <coneGeometry args={[1.2, 5]} />
      <meshStandardMaterial color="black" metalness={1} roughness={0} />
    </mesh>
  );
}

export const Monster = () => {
  return (
    <>
      <Face />
      <Horns pos={[-2, 2, -3]} />
      <Horns pos={[2, 2, -3]} />
      <Eyes pos={[-0.4, 0.2, 3]} />
      <Eyes pos={[0.4, 0.2, 3]} />
    </>
  );
};
High five! We got our monster 🎉 But it still doesn't look quite 3D! It kind of lacks a sense of depth. Let's do that by adding some more lights. Lights play a crucial role in creating realistic and immersive 3D environments.
<Canvas>
  <ambientLight intensity={0.65} />
  <spotLight position={[60, 60, 30]} />
  <pointLight position={[0, -10, 10]} intensity={0.5} />
  <directionalLight position={[0, -7, 0]} intensity={0.5} />
  <Monster />
</Canvas>
The lights we have used in our scene have intuitive names that give a good sense of their functionality, but you can learn more about each of them in the Three.js docs (quick take a look at the docs 👀)
Now, let's add some more life to it by changing the roughness prop. This property controls the roughness of the material's surface. A value of 0 results in a perfectly smooth surface, whereas a value of 1 results in a fully rough surface. We will set it to 0 for a smooth surface. Additionally, we'll make the horns appear metallic. By setting the metalness prop to 1, we will give them a metallic shine.
// Monster.jsx
const Eyes = ({ pos }) => {
  return (
    <mesh position={pos}>
      <sphereGeometry args={[0.1]} />
      <meshStandardMaterial color="black" roughness={0} />
    </mesh>
  );
}

const Horns = ({ pos }) => {
  return (
    <mesh position={pos}>
      <coneGeometry args={[1.2, 5]} />
      <meshStandardMaterial color="black" metalness={1} roughness={0} />
    </mesh>
  );
}
While our monster is looking great, there's one small concern - it's currently static in the 3D space. Without any interactivity or movement, one might not realize that it's actually composed of carefully arranged 3D shapes. We need to address this to make the 3D nature of our creation more apparent. Moreover, let's enhance the environment for our cute monster. After all, it won't be right to keep our adorable monster in a dark room.
OrbitControls and Environments
Here, we will be using Drei. Drei is a growing collection of useful helpers and abstractions for R3F. Among the various controls available, we'll use OrbitControls to add interactivity and enable movement in our scene. Let's add the OrbitControls component in Canvas and limit the zoom-out using the maxDistance prop. There, we can pan around with our mouse! We can see the complete placement of our objects.
<Canvas>
  <ambientLight intensity={0.65} />
  <spotLight position={[60, 60, 30]} />
  <pointLight position={[0, -10, 10]} intensity={0.5} />
  <directionalLight position={[0, -7, 0]} intensity={0.5} />
  <Monster />
  <OrbitControls maxDistance={5} />
</Canvas>
Now, the final thing...Environment. Environment in Drei lets us create our own environments. The Environment component uses a pre-generated HDR environment map, which is essentially a 360-degree image that captures the lighting information from the real world or a virtual environment. This map is then used to create realistic reflections and lighting effects on the objects in our scene. We can use it as a background for our scene too. Drei offers some presets that we can straightaway use in our scene using the preset prop. Let's go with the "apartment" preset.
<Canvas>
  <ambientLight intensity={0.65} />
  <spotLight position={[60, 60, 30]} />
  <pointLight position={[0, -10, 10]} intensity={0.5} />
  <directionalLight position={[0, -7, 0]} intensity={0.5} />
  <Monster />
  <OrbitControls maxDistance={5} />
  <Environment preset="apartment" />
</Canvas>
Our monster is still in the dark room, huh? But take a closer look into the eyes or the horns. Zoom in a little, there we go...the reflection of the apartment map. As mentioned earlier, the environment map is reflected in the objects in our scene. Okay then, why can't we see the reflection on the Face... the sphere? The reason is quite simple – for a reflection to be visible, the surface needs to be smooth, just like in the physical world. And as Eyes and Horns have smooth surfaces, we can see the reflection on them. We also need it as the background for our scene. We can do that by simply adding the background prop.
<Canvas>
  <ambientLight intensity={0.65} />
  <spotLight position={[60, 60, 30]} />
  <pointLight position={[0, -10, 10]} intensity={0.5} />
  <directionalLight position={[0, -7, 0]} intensity={0.5} />
  <Monster />
  <OrbitControls maxDistance={5} />
  <Environment preset="apartment" background />
</Canvas>
And voila! we made it. We created a scene featuring a cute monster using just a handful of 3D shapes ^^
Wrapping Up
We learn about some core concepts that are important to understand for creating basically any 3D stuff and then we used most of them to create a scene with a cute monster. There are a lot of things; explore them. Play around with the code and maybe create a different monster or just anything using some shapes! If you do, I would love to see it. Feel free to tag me in the posts on Twitter or LinkedIn :D
Subscribe to my newsletter
Read articles from ruchita directly inside your inbox. Subscribe to the newsletter, and don't miss out.
Written by

ruchita
ruchita
loves to build stuff | currently into web dev | open source💜